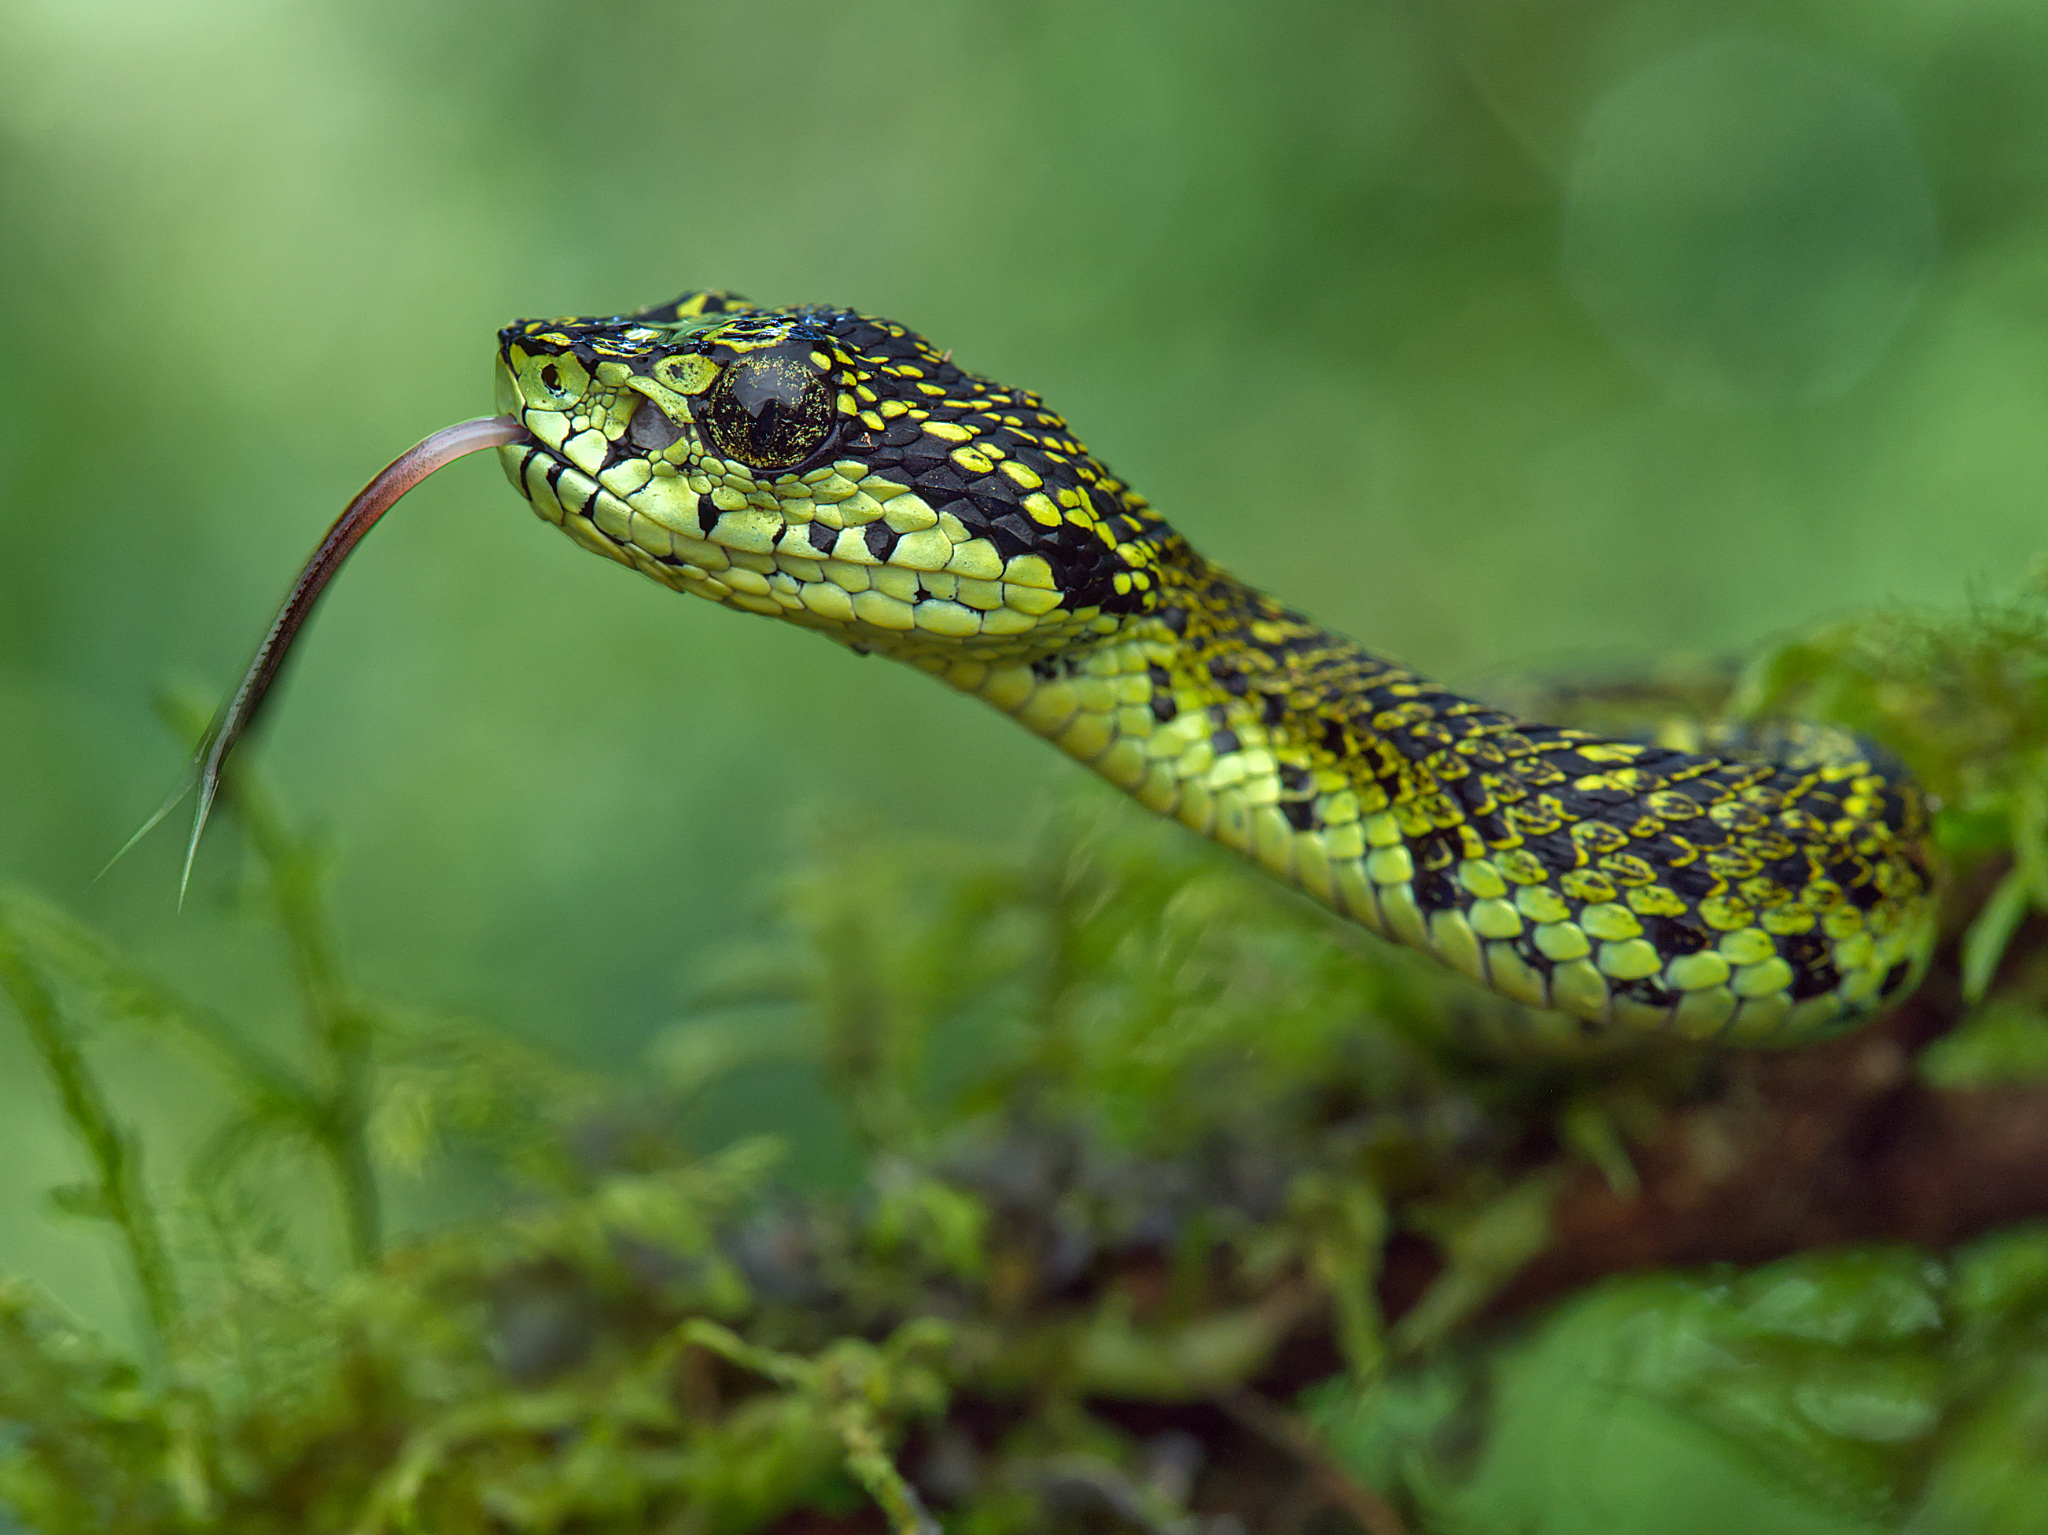
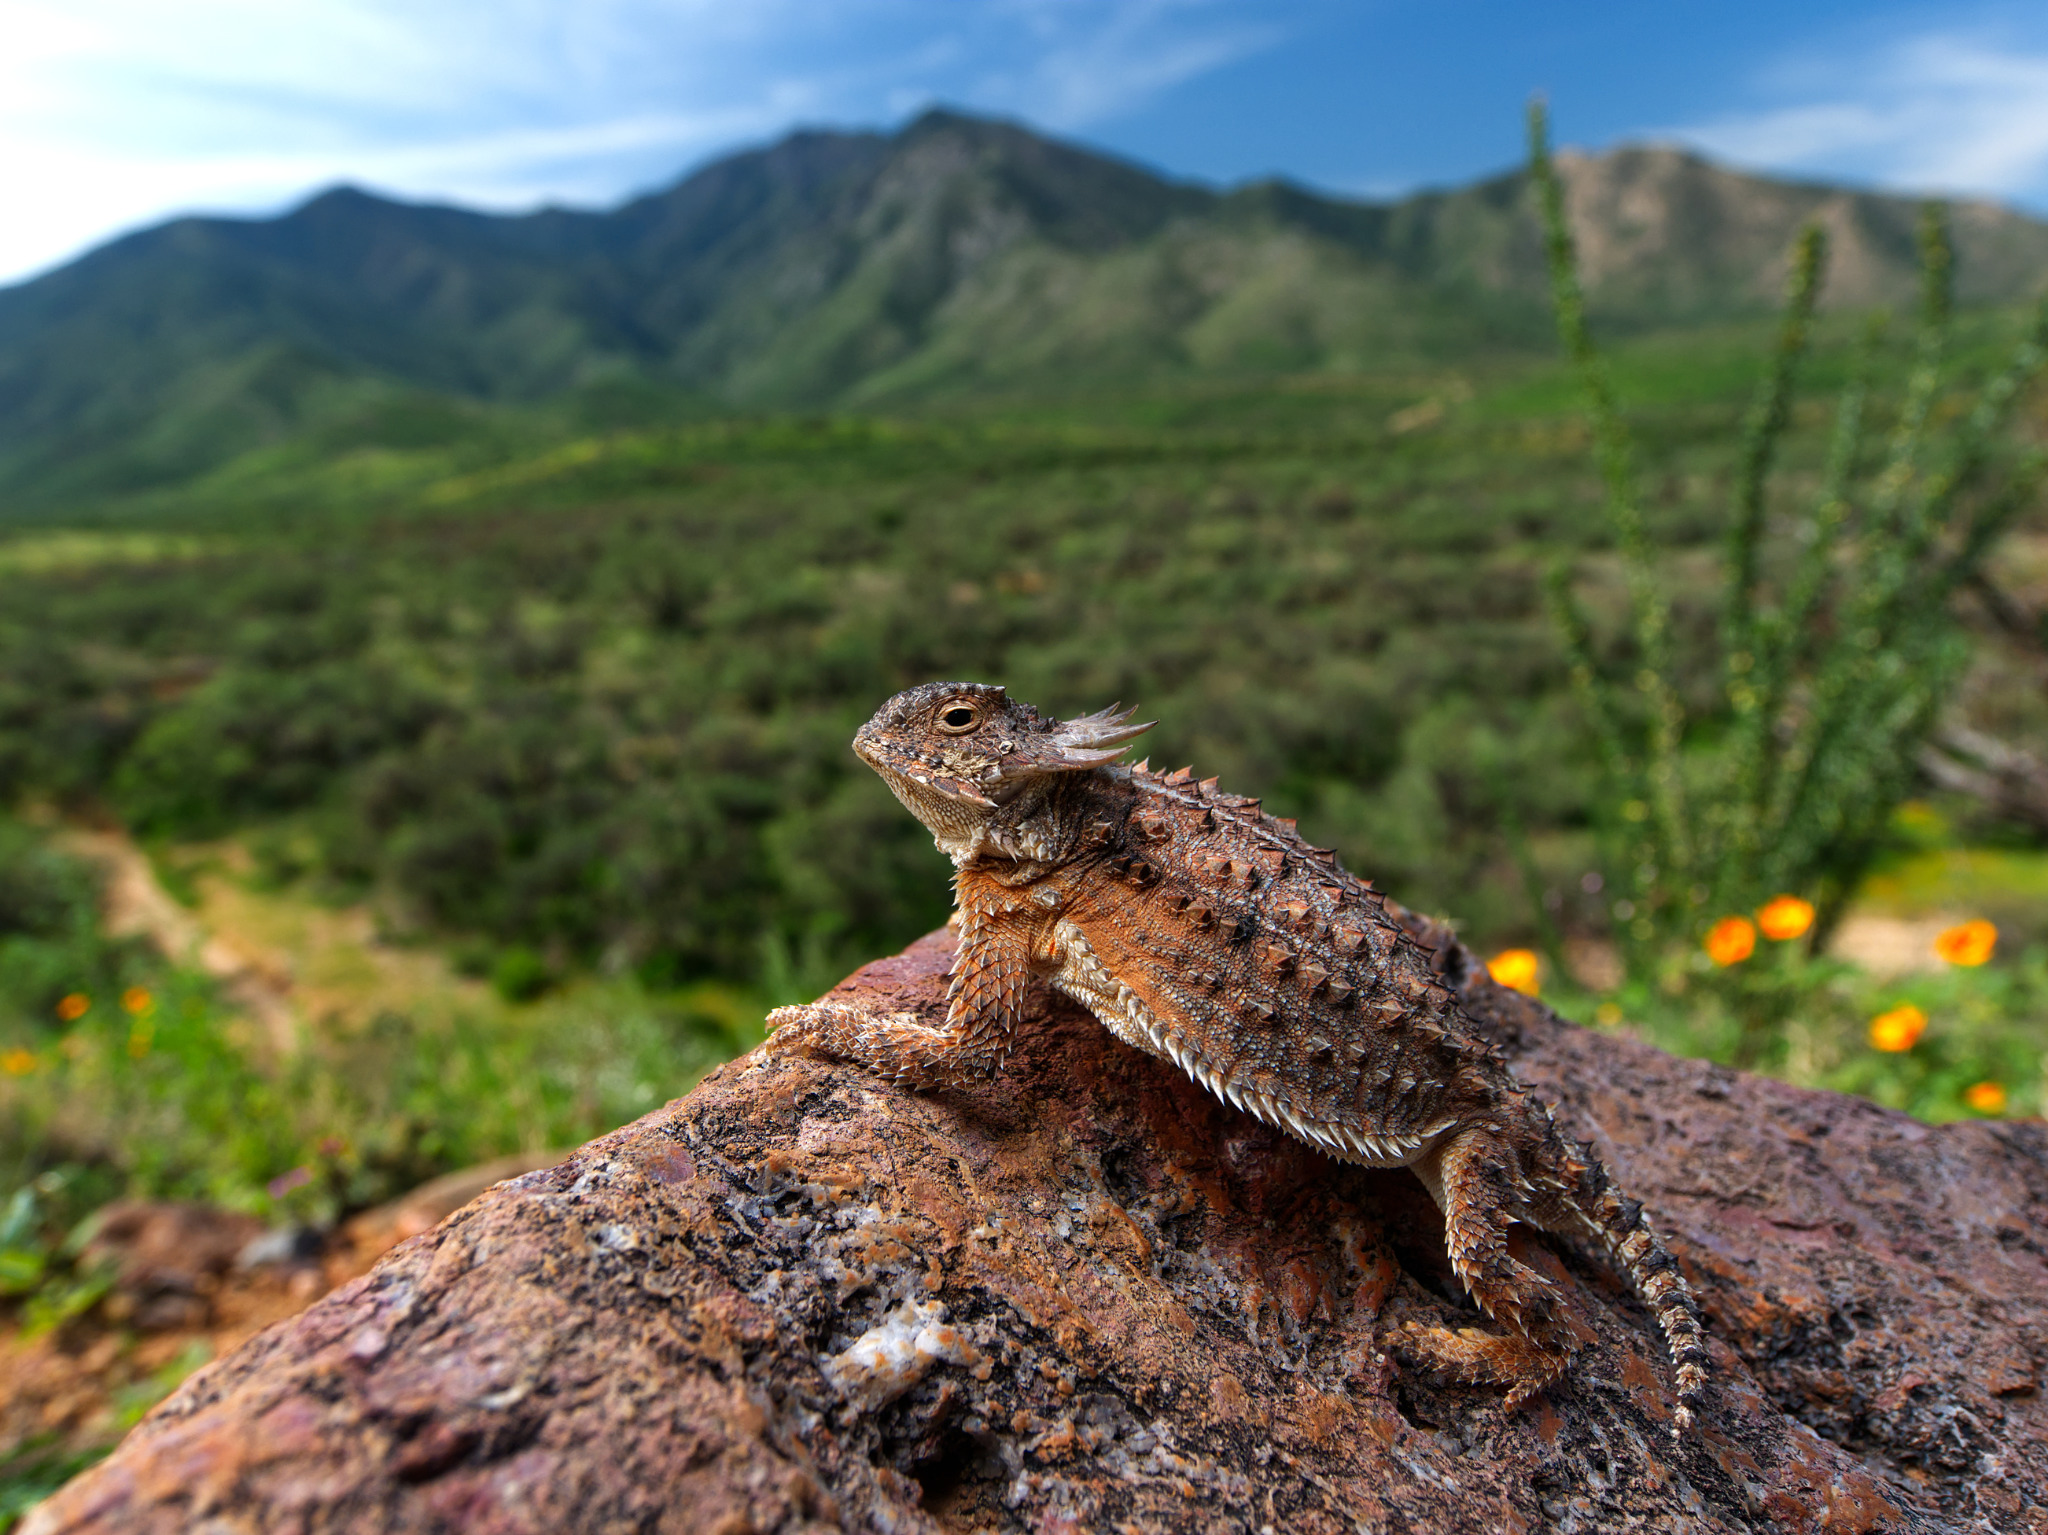
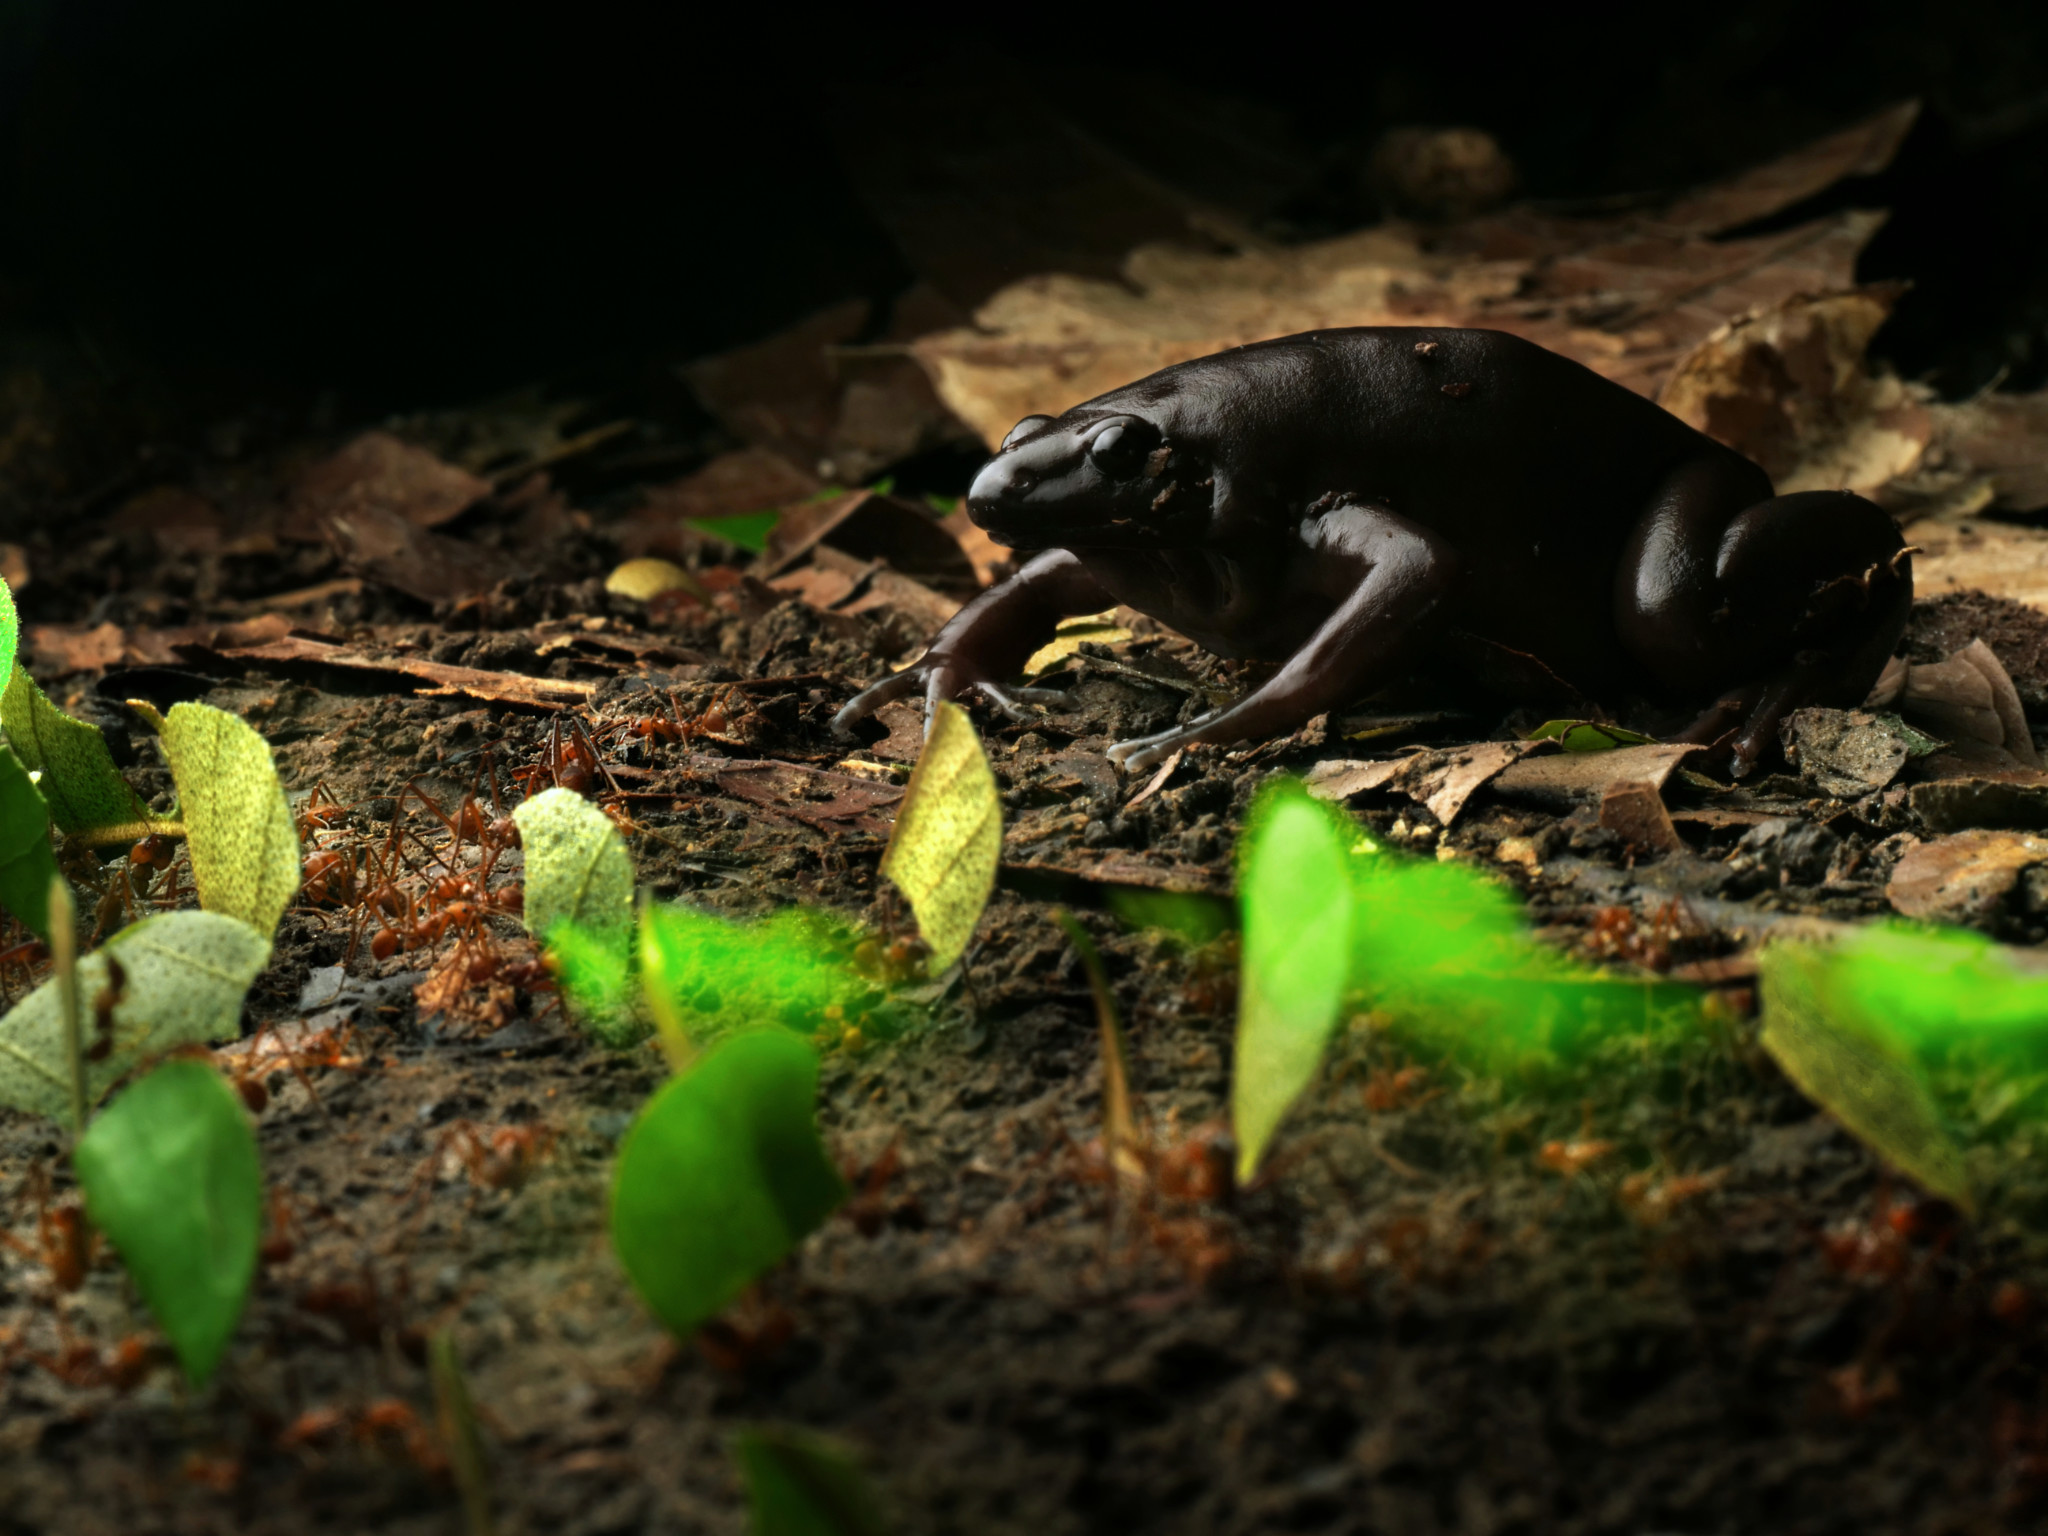
What piece of equipment is the unsung hero of my wildlife photography? It’s not the camera or even the lens, but my flash. A flash opens the door to many possibilities as a wildlife photographer. It can take your work to the next level, especially for smaller subjects like reptiles, amphibians, and macro photography.
There is, however, a big learning curve to use flash for wildlife photography. Without the proper technique, flash photos can turn out quite badly. Even experts are constantly finding new ways to improve their artificial lighting setups to get the best possible light.
Part of the challenge is the endless number of options with flash photography. You can adjust the flash’s position and intensity, add a diffuser, reflect light, use two flashes, and so on. In this tutorial, I’ll try to simplify things. My goal is to share both basic and advanced techniques to help you master flash for wildlife photography.
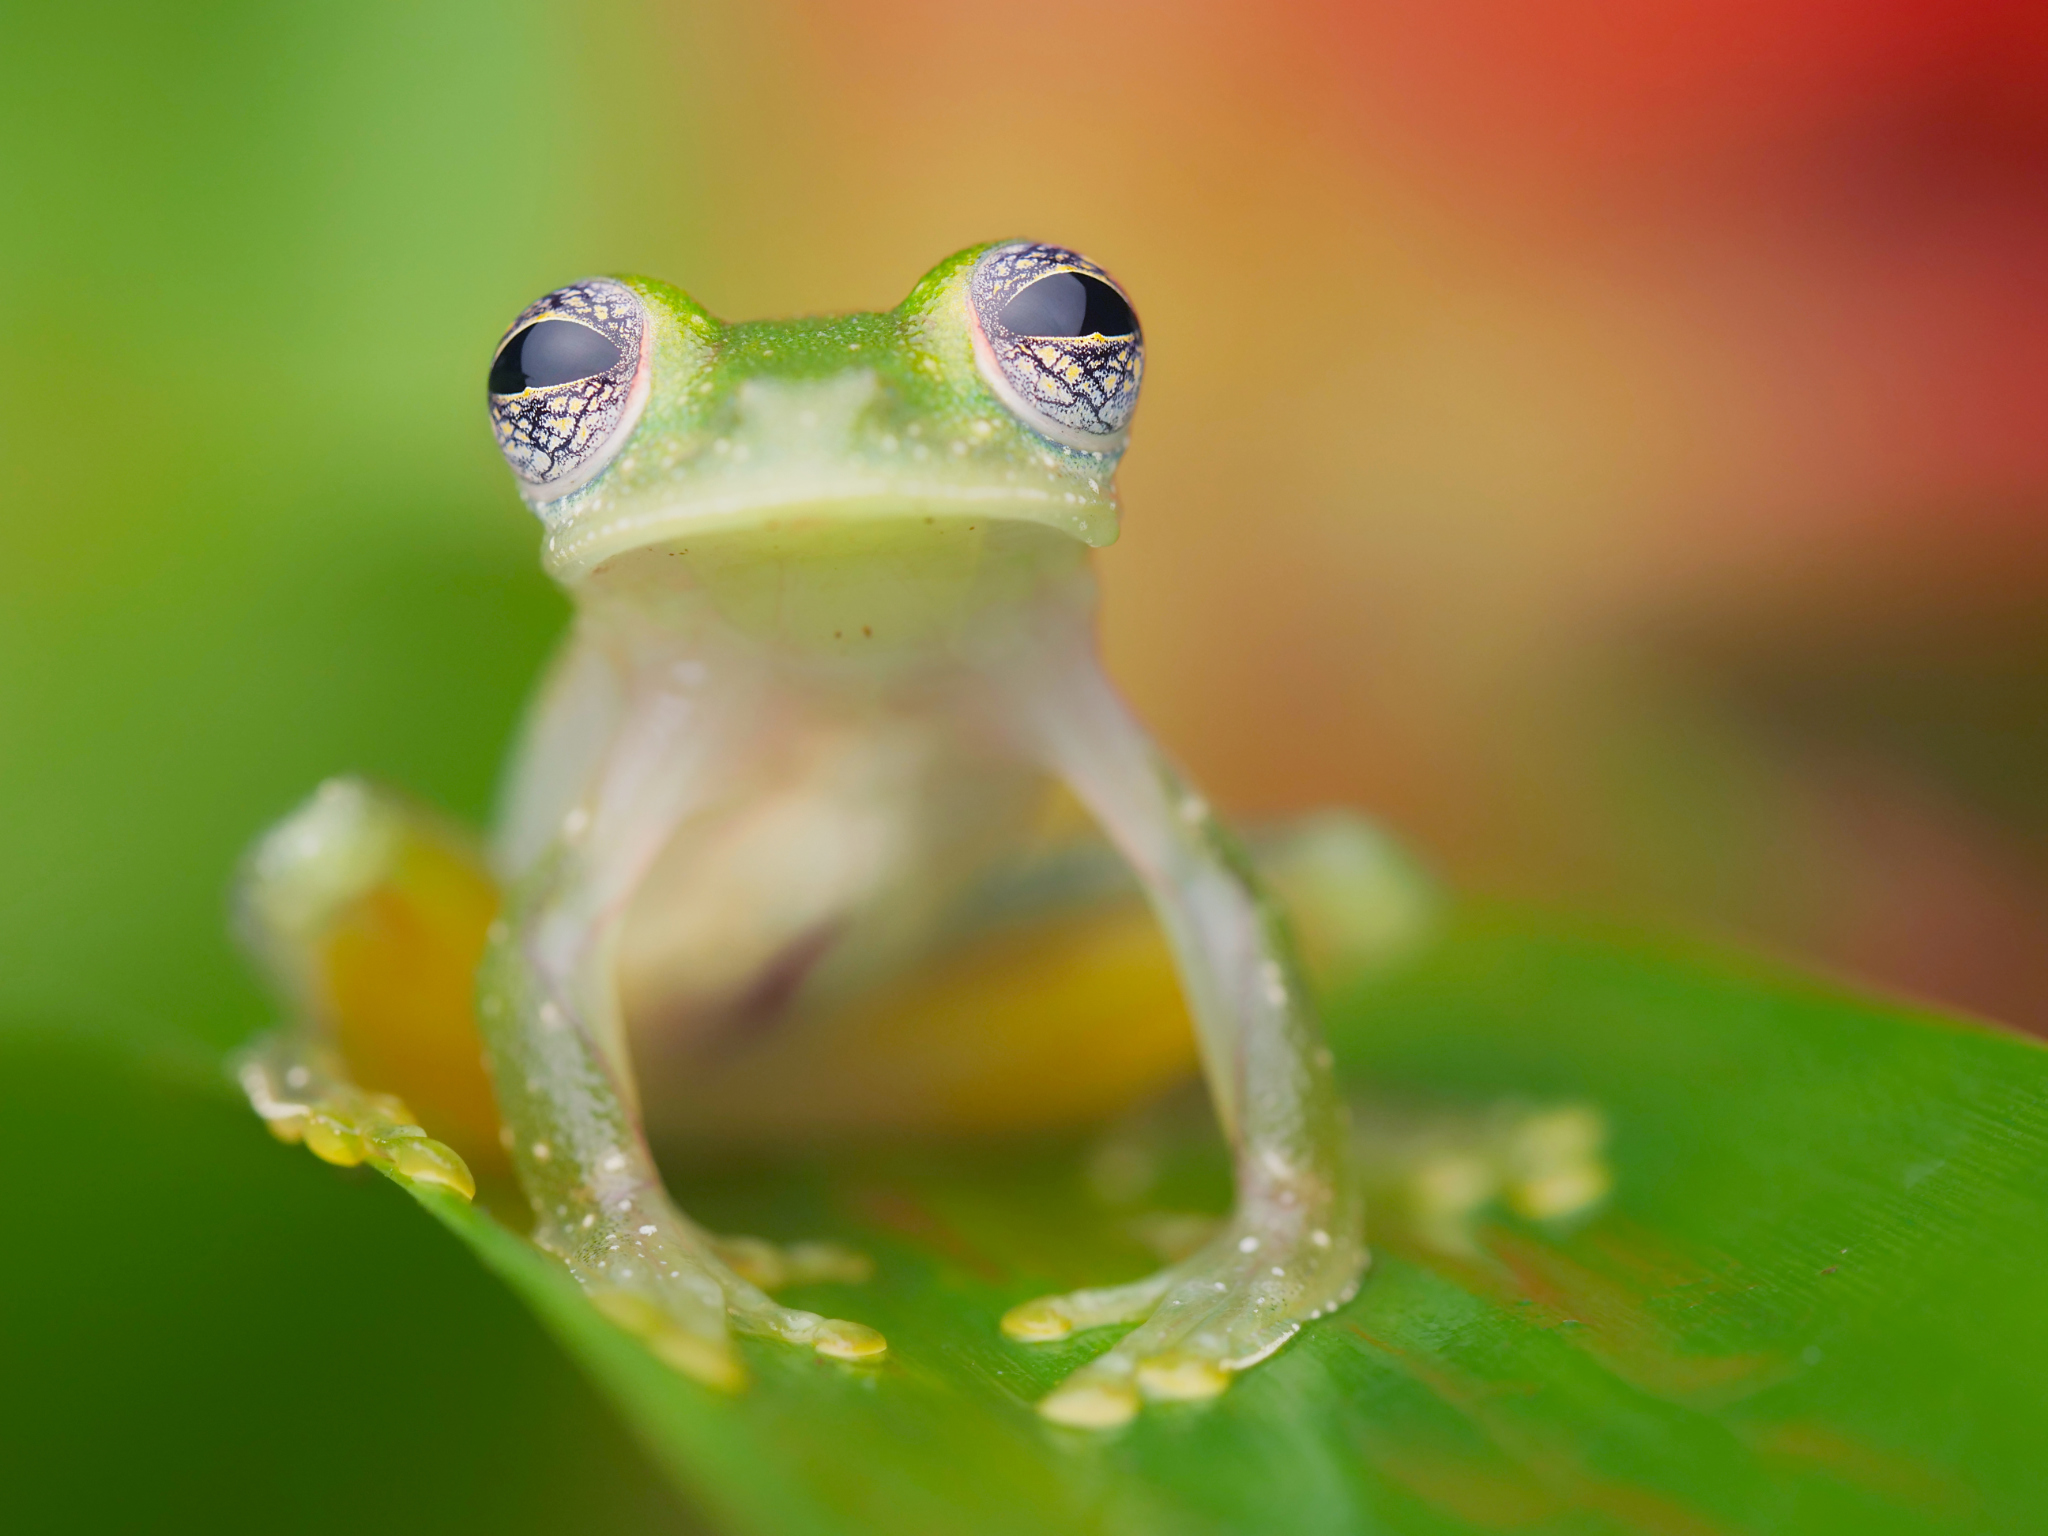
Table of Contents
Why Use Flash for Wildlife Photography?
There are many reasons to use a flash for wildlife photography. One reason is simply to add more light to the scene. Ambient light is often too dim for sharp photos, requiring longer shutter speeds or higher ISOs. Even daytime in the shade can be pushing it. Flash photography, on the other hand, freezes your subject and allows you to be more flexible in your camera settings.
Likewise, flash photography allows you the opportunity to photograph wildlife at night. Nighttime is great for photographing unusual animals or behavior that you would never witness during the day. And compared to a flashlight, the light from a dedicated flash is many times better.
I even like to use a flash on sunny days, in order to fill in the harsh shadows cast on my subject. With flash photography, you have extraordinary control over how your subject is lit, and you can reveal the fascinating details of the animal you’re photographing.
I’ll mention here that using a flash on a wild animal might not be for everyone. Although there is no scientific data to suggest that flash photography negatively affects the wellbeing of animals any more than it affects people, respecting your subject is important. I always emphasize that you shouldn’t stress out an animal for a photo. If you intend to avoid flash photography for this reason, that’s reasonable and totally up to you.
Necessary Camera Equipment
Unlike a lens or camera, a flash can be bought pretty cheaply, some under $100, and even a basic flash will immediately improve your photography.
For wildlife photographers, I recommend a flash that has both a TTL (automatic) and manual mode. Also, the quicker the recharge time, the better, so that you can take a sequence of photos without the flash waiting to cool down. Third-party flashes like this one from Godox tend to be a better value.
Aside from the flash itself, there are a few inexpensive accessories that are also useful for wildlife photography. I’ll go through the three of them (a diffuser, an off-camera trigger, and a flash extender) below.
1. Diffuser
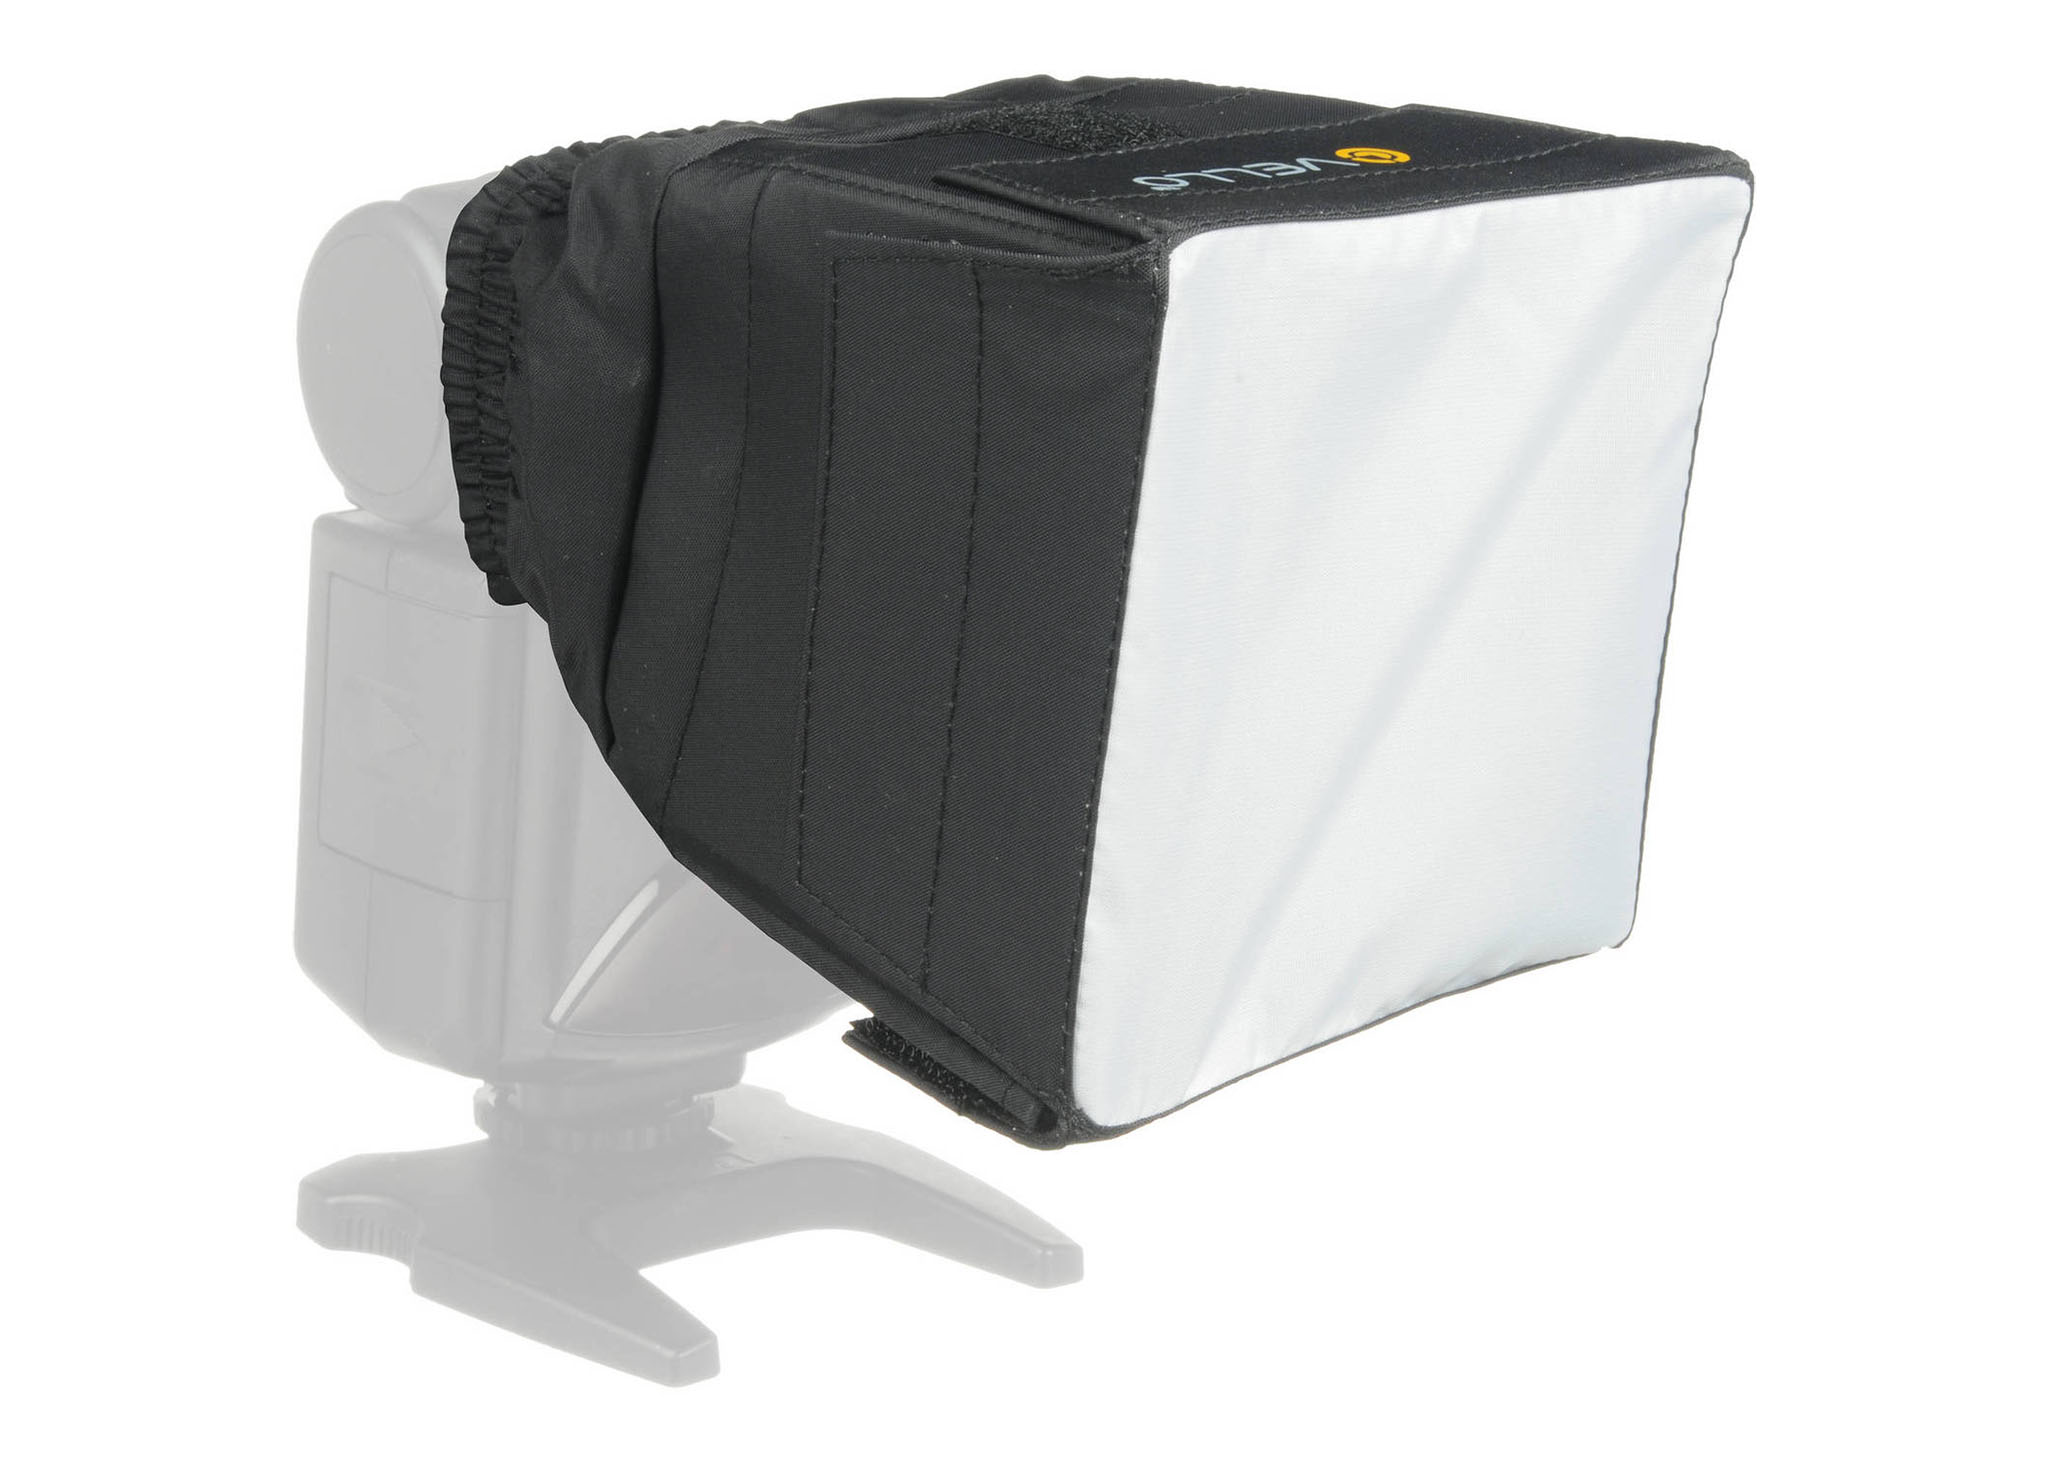
The purpose of a diffuser is to “soften” the light. In other words, a diffuser tamps down the brightest specular highlights in the photo, while turning harsh shadows from the flash into a gentle gradient. It’s like the difference between midday sunlight and a cloudy day (where the clouds function like a diffuser for the sun).
A diffuser works by spreading out the light source so that the light is not emitted from a single point, but rather across the area of the diffusing material. The larger the diffuser, and closer to the subject, the more diffused the lighting will be. A really cheap but effective example of a diffuser is the Vello Mini Softbox shown below.
Photographers usually prefer soft lighting, like the type from a diffuser, so that details of small subjects are not lost in harsh shadows. Diffusers also prevent distracting specular highlights if your subject is shiny. Both wildlife and macro photographers should definitely have a diffuser on hand for flash photography.
A diffuser doesn’t have to be expensive. In fact, some of the best diffusers are often homemade and can be made out of completely recycled materials and duct tape. Even a lot of diffusers that you’d buy online are under $30.
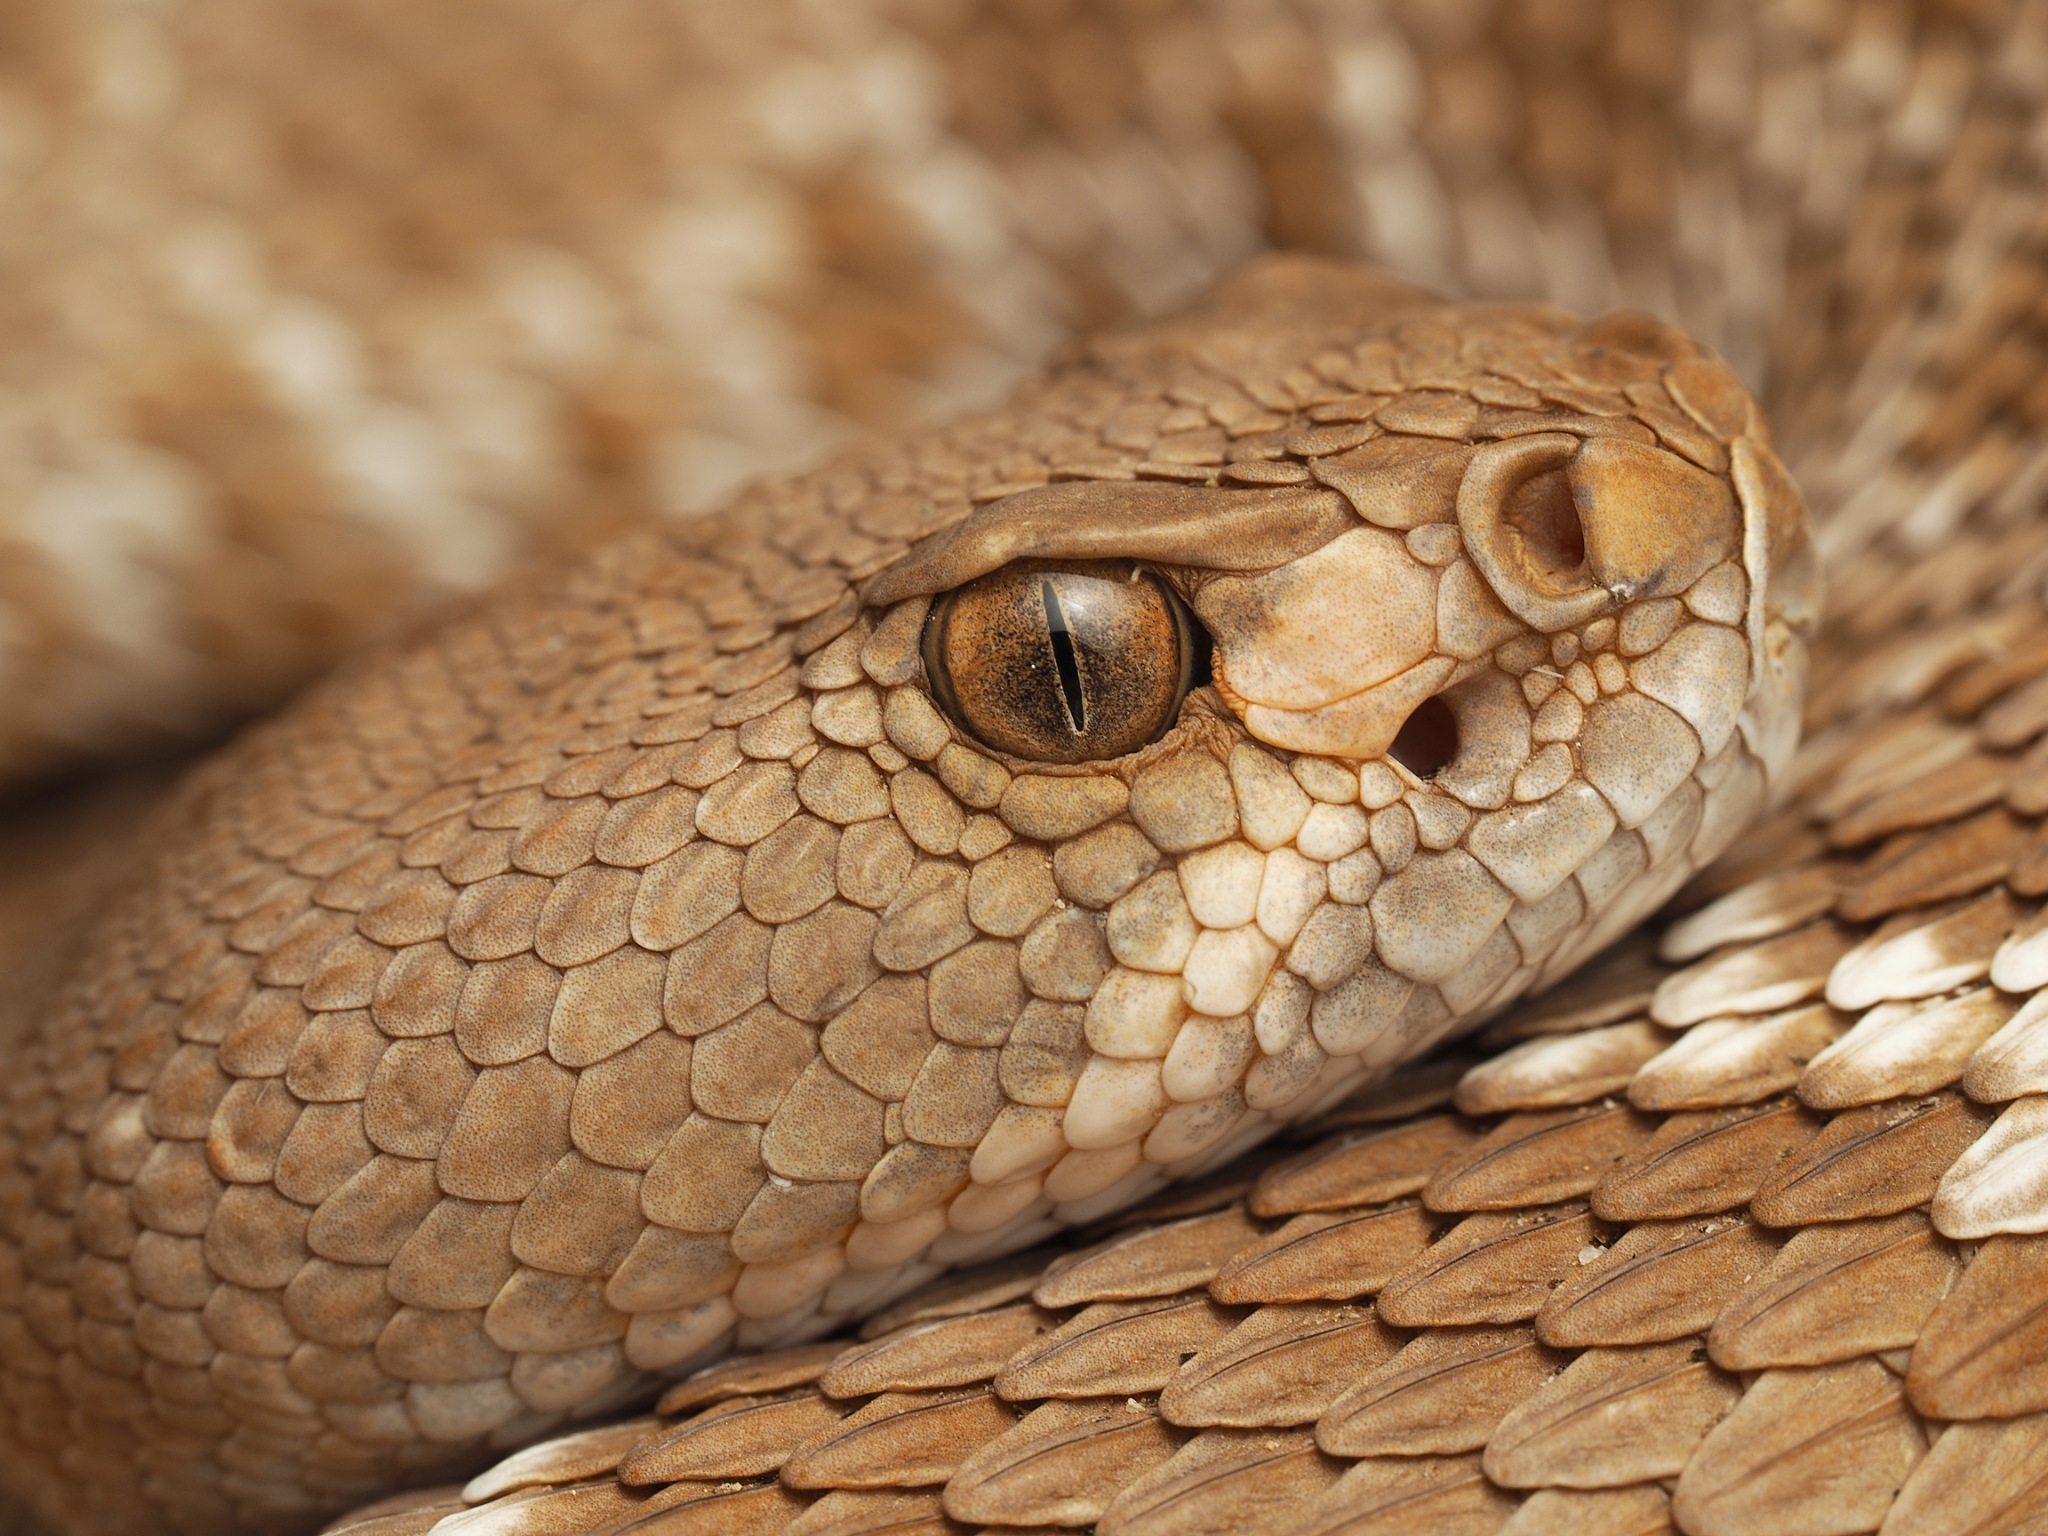
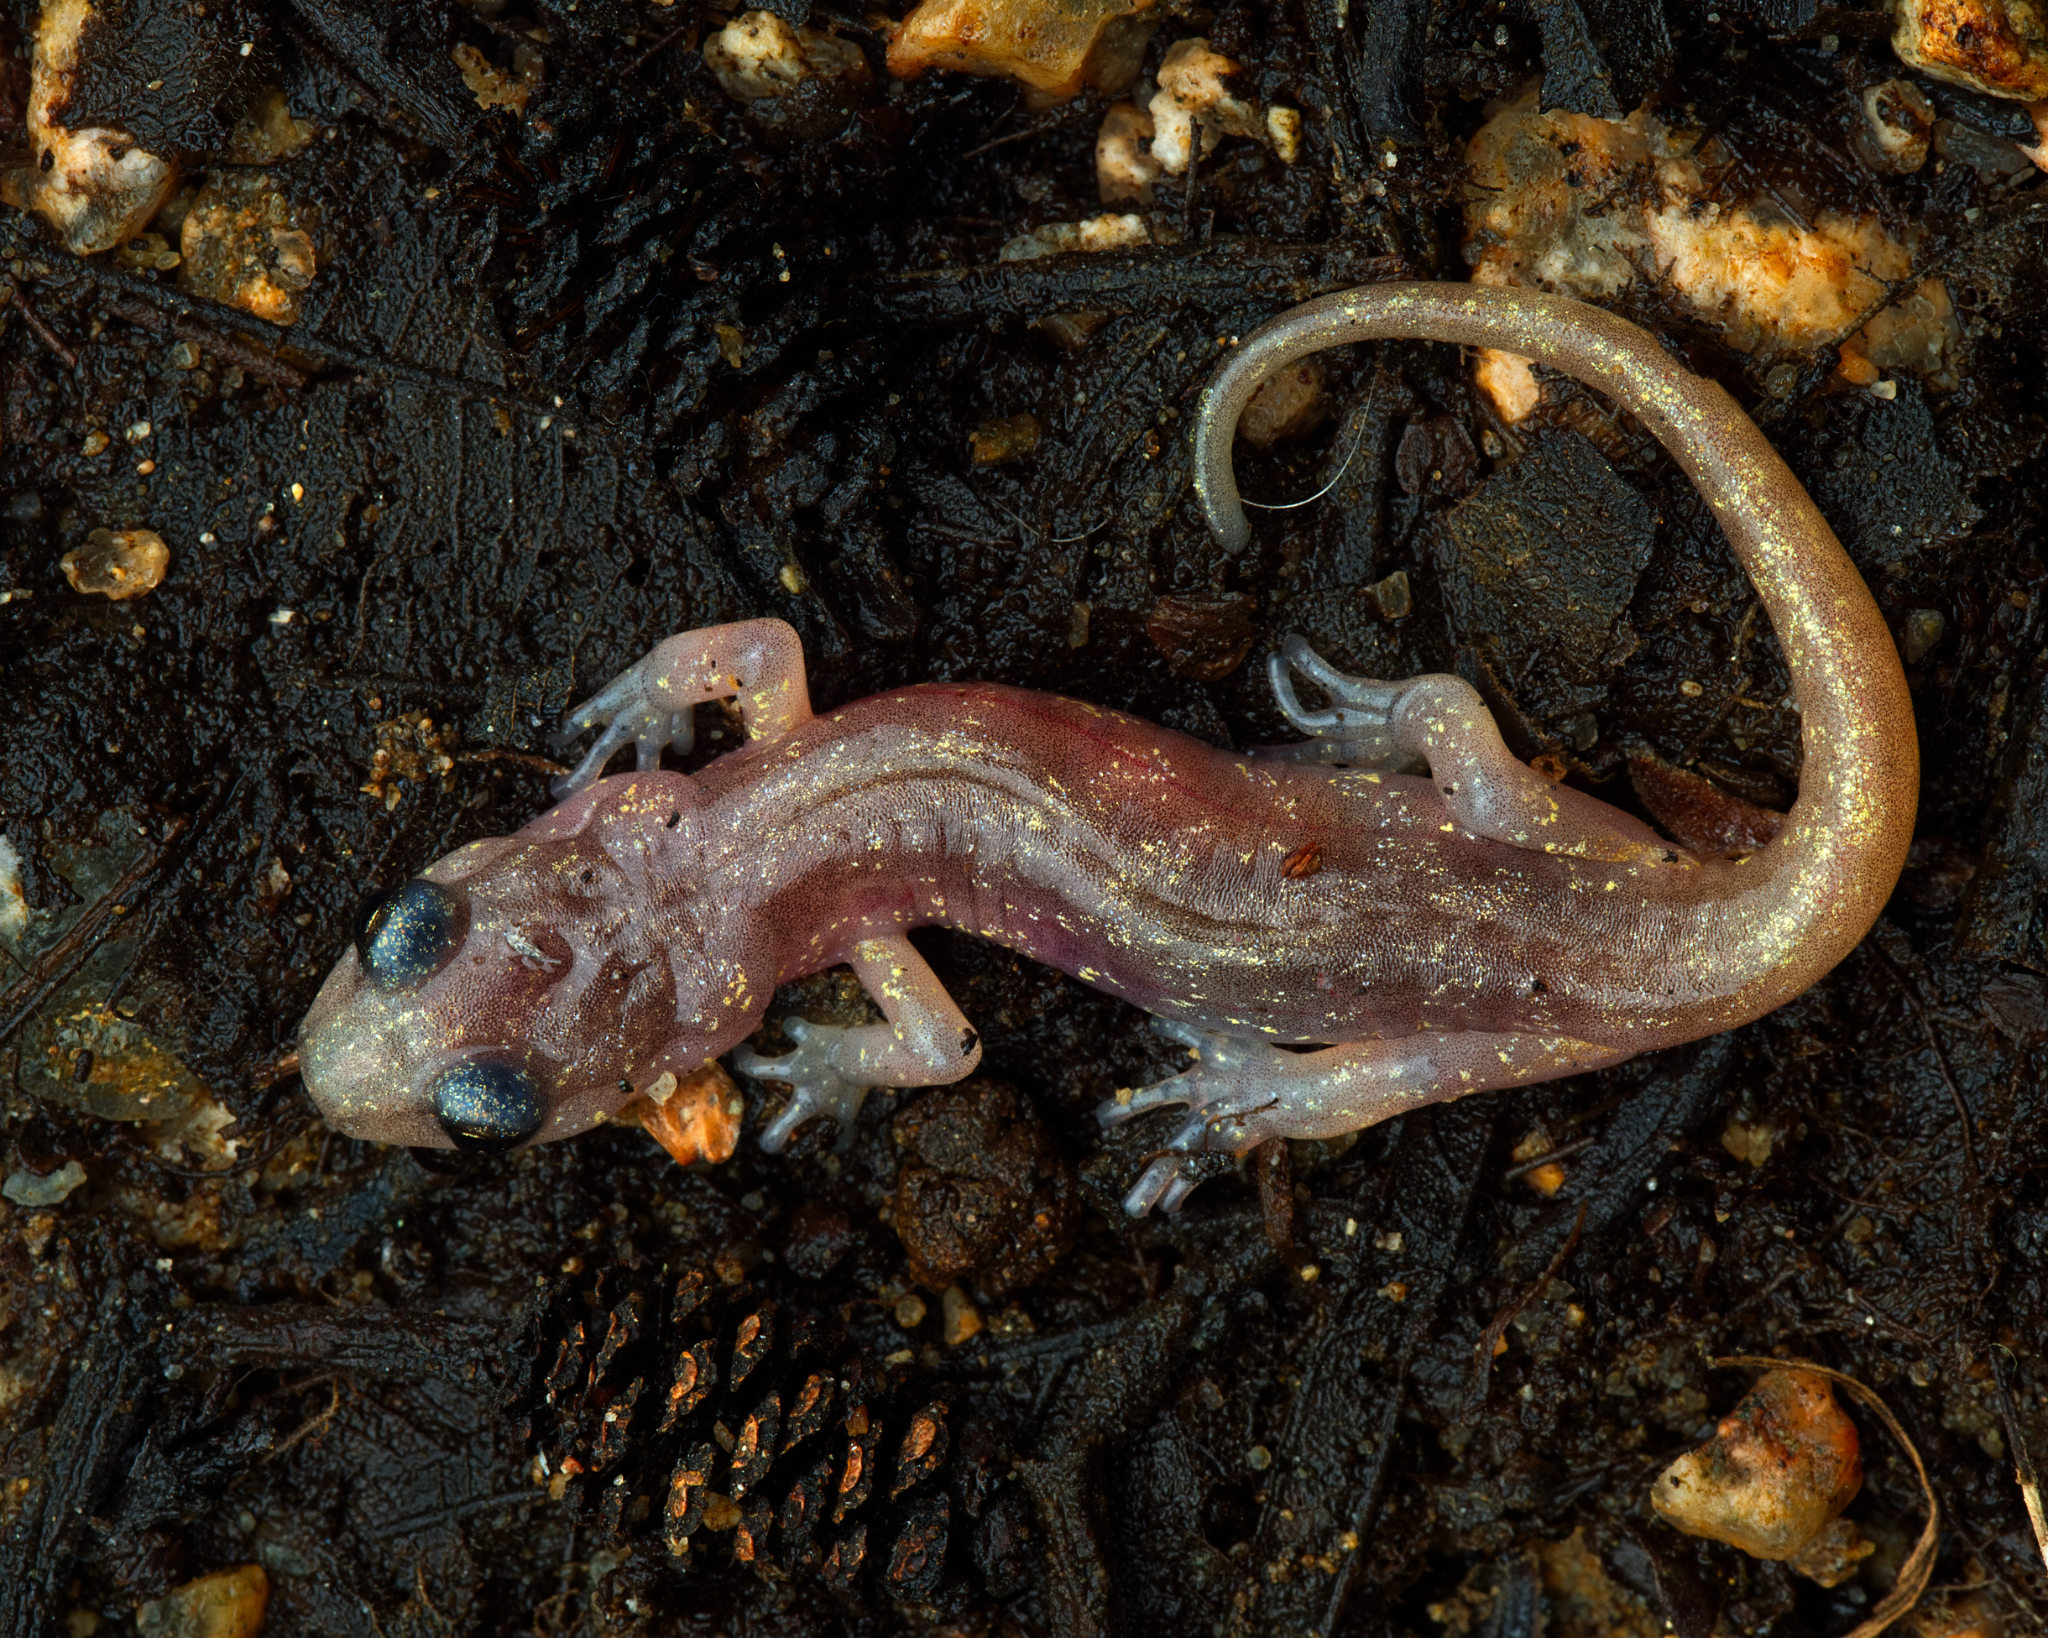
Here are some guidelines to keep in mind when choosing a diffuser. First, the bigger the diffuser, the more diffused the light will be, so you could say bigger is better in this case. (If your subject is especially small, like an insect, the diffuser doesn’t need to be so big.) Beyond that, the shape of the diffuser will reflect in the eye of your subject, which is called a catchlight. So, keep in mind the shape of the diffuser. I’m not a fan of square diffusers because you can see sharp corners in the catchlight.
Lastly, it is important that the diffuser is placed as close as you can to the subject. Even a massive diffuser won’t create diffused light if it is far away.
2. Off-Camera Flash Trigger or Cord
Another crucial part of flash photography – both for wildlife and just in general – is the ability to use the flash off camera. Once you have the flexibility to position the flash wherever you want, and not just on top of the camera, you’ll have much more control over the lighting.
There are two good ways to trigger the flash externally. The first is with a remote trigger, which sends a signal to the flash to fire when the shot is taken. Remote triggers are completely wireless. They’re convenient and allow the flash to fire from huge distances, but they’re more expensive, tend to require batteries, and can be less reliable.
The other option is an off-camera flash cord. These cords are inexpensive and reliable, although they can get in the way, and they limit the distance that you can put the flash. I don’t think that these issues are very important for most wildlife photography, so I use a cord. But it’s really up to you.
An example of a remote trigger (one that works with the Godox flash from earlier) is this one. Meanwhile, an example of an off-camera flash cord that works with any flash is this one.
3. Flash Extenders
So far I have mostly talked about flash photography for nearby subjects, where you have the luxury of using off-camera flash setups, diffusers, and other lighting modifiers. But it’s also possible to use a flash even for distant wildlife photography with a telephoto lens, if you forego some flexibility.
In particular, there is a whole range of flash extenders available from different companies. A flash extender attaches to your existing flash head, and it works by greatly narrowing the beam of light.
Ultimately, a flash extender can cast some fill-light on a distant subject that might be in shadow. It’s useful for something like bird photography if the bird is in a tree or any other dark area. Here’s one that’s meant for 300mm lenses and longer.

4. Other Flash Accessories
Lighting setups can become very extravagant. You can use a dual flash setup (or a multi flash setup) to cast light from more than one direction at once. Massive diffusers, reflectors, and other lighting modifiers are also options to change the quality of the light.
However, make sure that your lighting setup for wildlife photography remains practical. A complex, studio-type setup might work if you’re setting camera traps (like Vladimír Čech Jr., who Libor interviewed) but is impractical otherwise. A five-piece lighting setup is useless if the frog has hopped away before everything is set up.
So, for now, I recommend sticking to the equipment that I mentioned above: one flash, a diffuser, and a way to trigger the flash off-camera. You may also want to buy a bracket to hold the flash at various angles, if you don’t want to hold it off-camera yourself. There’s always time later to add more complex flash accessories.
The Best Flash Settings and Camera Settings
Flash photography can be challenging at the beginning because it adds another major setting to adjust when you’re exposing an image.
Personally, I recommend putting your camera in manual mode any time you do flash photography. Set your aperture to the desired value for depth of field (I usually pick f/11 for close-up wildlife photography). The shutter speed determines how much ambient light is in your photo. Set it to the fastest option (like 1/200 second) if you want to minimize ambient light, and set it longer if you want ambient light. Your ISO can probably be kept at the base value of ISO 100, since the flash is usually providing plenty of light.
As for the flash, I like to keep mine on manual mode and simply increase or decrease the flash power based on my subject. However, TTL (automatic) flash is also an option. With TTL flash, the camera will automatically determine the flash strength that illuminates your subject “properly.” I find that it fails pretty often, but it’s convenient when it works, so it’s your call.
A final challenge is focusing. Focusing is easy during the day, but in dim light (otherwise a great time for flash photography!) it can be a serious challenge. You may need to focus using a separate, external light.
My strong recommendation is to use a dim light for this purpose. If you focus using a bright light source like a flashlight at full power, the light will end up in the photo and can cause lots of problems. But if you use a much dimmer light, your flash will easily overpower it, and it won’t appear in the photo at all. I know of some photographers who attach dim LEDs to their camera for exactly this purpose.
Otherwise, you may be able to use the AF illuminator light that’s built into most cameras (or the flash’s own AF illuminator on applicable flashes/cameras).
Settings for Fill Flash
For a lot of daytime wildlife photography, you’ll want to expose the image like normal but simply use the flash to brighten up any shadows on the subject – AKA fill flash. The challenge here is that the artificial light in the foreground and the ambient light in the background must be balanced so that one is not overexposed or underexposed compared to the other.
Fear not, I have a trick to make this easy. First, keep using manual mode on your camera. Start by taking some photos with the flash turned off, until you get a photo that looks as good as possible without flash (i.e., the right shutter speed, aperture, and ISO). Then it’s just a matter of finding the proper flash power that fills in the shadows on your subject. As you get more experienced, it will hardly take any trial and error.
This way, you ensure proper exposure both of the background and the subject.
Now What? It’s All About the Angles!
If the scene calls for a flash extender, that isn’t so hard, so I won’t spend any more time on that topic. But for closer subjects, your flash setup and diffuser can take some effort to figure out. Much of it comes down to positioning the flash properly.
In general, we want the subject’s face to be lit up. I like to get the diffuser as close to the subject as possible, so I pay particular attention to the direction the subject is facing. I usually do front-lighting (sometimes with the diffuser resting directly on my lens), but if the subject is facing left or right, I’ll position the diffuser on that side of the camera and try to illuminate their face more head-on.
This is also a great time to become creative with your photography, by playing with shadows and exposure. You can change the mood of a photo dramatically just by the position of your flash.


Creativity
Finally, flash photography offers a huge diversity of ways to get creative with your photos. Instead of being restricted to the ambient light, you get to manipulate the light with almost total control.
The possibilities are limitless, and I keep finding new flash techniques to spice up my wildlife photography. You can control shadows (making them either much stronger or filling them in completely); you can use a long shutter speed with your flash to introduce intentional blur; you can play with multiple light sources or multiple flash bursts per exposure. And much more. There are so many ways to produce new images and create your own style with flash photography.
My last tip for using a flash as a wildlife photographer is to stay flexible. Although you may find one setup or technique that proves strong for a lot of shots, keep trying new techniques and finding ways to switch things up! That’s the beauty of flash photography.
Conclusion
I hope this article has helped you understand a lot of the principles behind flash photography, and how they can translate to photographing wildlife (both nearby and distant).
If you’re just getting started, don’t be discouraged by the initial challenge. The tips above should give you a great starting point, and practice will get you the rest of the way. On the other hand, if you have been doing flash photography for a while, don’t forget to keep your techniques evolving. There is always something new to try with a flash for all skill levels.
Let me know in the comments if you have any flash-related questions or comments, and I’ll do what I can to answer!
You didn’t mention ring flash for macro work. Do you not use or like it?
“Although there is no scientific data to suggest that flash photography negatively affects the wellbeing of animals any more than it affects people…” – except tarsiers maybe, who reportedly can be driven to commit suicide (?).
True there are certainly exceptions with nocturnal mammals and birds with exceptionally large eyes. It’s definitely important to use common sense and do some research on your subject first before any interaction.
We were forbidden from using flash in Costa Rica during a night walk when photographing frogs, it we were told it damaged their eyes. We were allowed to use a small flashlight, but one could also see the effect on their eyes after a short while of the light (red veins)..
I’m not surprised to hear that. There are definitely different takes, some people are more cautious than others. I’ve seen that particularly to be the case in Costa Rica, perhaps because of the high frequency of people attending night tours. That being said, I would guess the red veins were there to begin, as it’s not unusual for frog veins to be visible under normal conditions. I’ve also encountered guides who request the use of a diffuser to lessen the effect of the flash on their eyes. I’m not sure that would really make a difference. From my observations, with the exception of a few species like perhaps the tarsier, our interpretation of how flash effects animals is heavily based on guesswork.
We didn’t find many frogs, so they were a popular subject when we did, and as they were then subject to quite a lengthy period under the “spotlight” you could see the eyes looking somewhat worse for wear (the red veins visibly growing and the frog looking less and less happy…) after some minutes and we had to stop. I think a flash might have been less damaging somehow, but obviously more of an instant shock..
Nice photos and useful information.
I’ve tried using and extender for bird photos and would often get the bird version of red eye. I presume I had too much flash power. I will need to experiment more with that option.
Hi Mark,
Thank you! Red eye is caused by the light reflecting directly back to the camera. I avoid on camera flash because of this reason, and because I usually don’t like the way the lighting looks anyways. A flash extender is definitely not a cure-all. It’s more advantageous to position yourself accordingly with the ambient light, as to not shoot against the sun. I wouldn’t make a habit of photographing birds or mammals at night either for the sake of their eyes. A work around with the flash extender would be to use it off camera, but that becomes tricky of course!
Hi Nicholas,
Very nice images. You post a link for a mini softbox and then shortly after that you say, “I’m not a fan of square diffusers because you can see sharp corners in the catchlight.”
So how about some examples of diffusers that you use. Do you make your own? Do diffusers exist that don’t have a square face? If the diffuser is close to the subject, as you suggest, will that prevent the corners of the diffuser from showing in the catch light, seeing as all the subject sees is a portion of the diffuser but not the corners?
Hey,
In an article coming soon, I answer all these questions and more about diffusers. A simple design I like are called flash disc diffusers. They are foldable and universal making them very convenient. I have had luck with rectangular diffusers by holding them extremely close, though I usually push my hexagonal diffuser downwards onto my macro lens to wrap around the lens and illuminate the face of close-up subjects. Hope that helps!
If you do a simple search for round flash diffusers, you will see many options.