When taking a photo, factors like composition, light, color, and subject all play a critical role. In almost all of these areas, one thing you can do to improve your photos is to pay attention to your camera height – and especially, in wildlife photography, to take pictures at the subject’s eye level.
Often, this means lowering the position of the camera to the ground. By doing so, the most notable change is the creation of a pleasing out-of-focus area, both in front and behind the subject, even at narrower apertures. This is especially beneficial when using affordable lenses instead of exotic supertelephotos. Also, it provides more opportunities to make eye contact with your subject, resulting in a more intimate feel to the photo.
In this article, I will explain why taking wildlife photos at eye level is so useful in enhancing the impact of your photos. I will also discuss how to overcome some practical difficulties in taking pictures from such low vantage points.
Let’s start with an example. I took the following two pictures a few minutes apart with the same lens, focal length, and aperture.
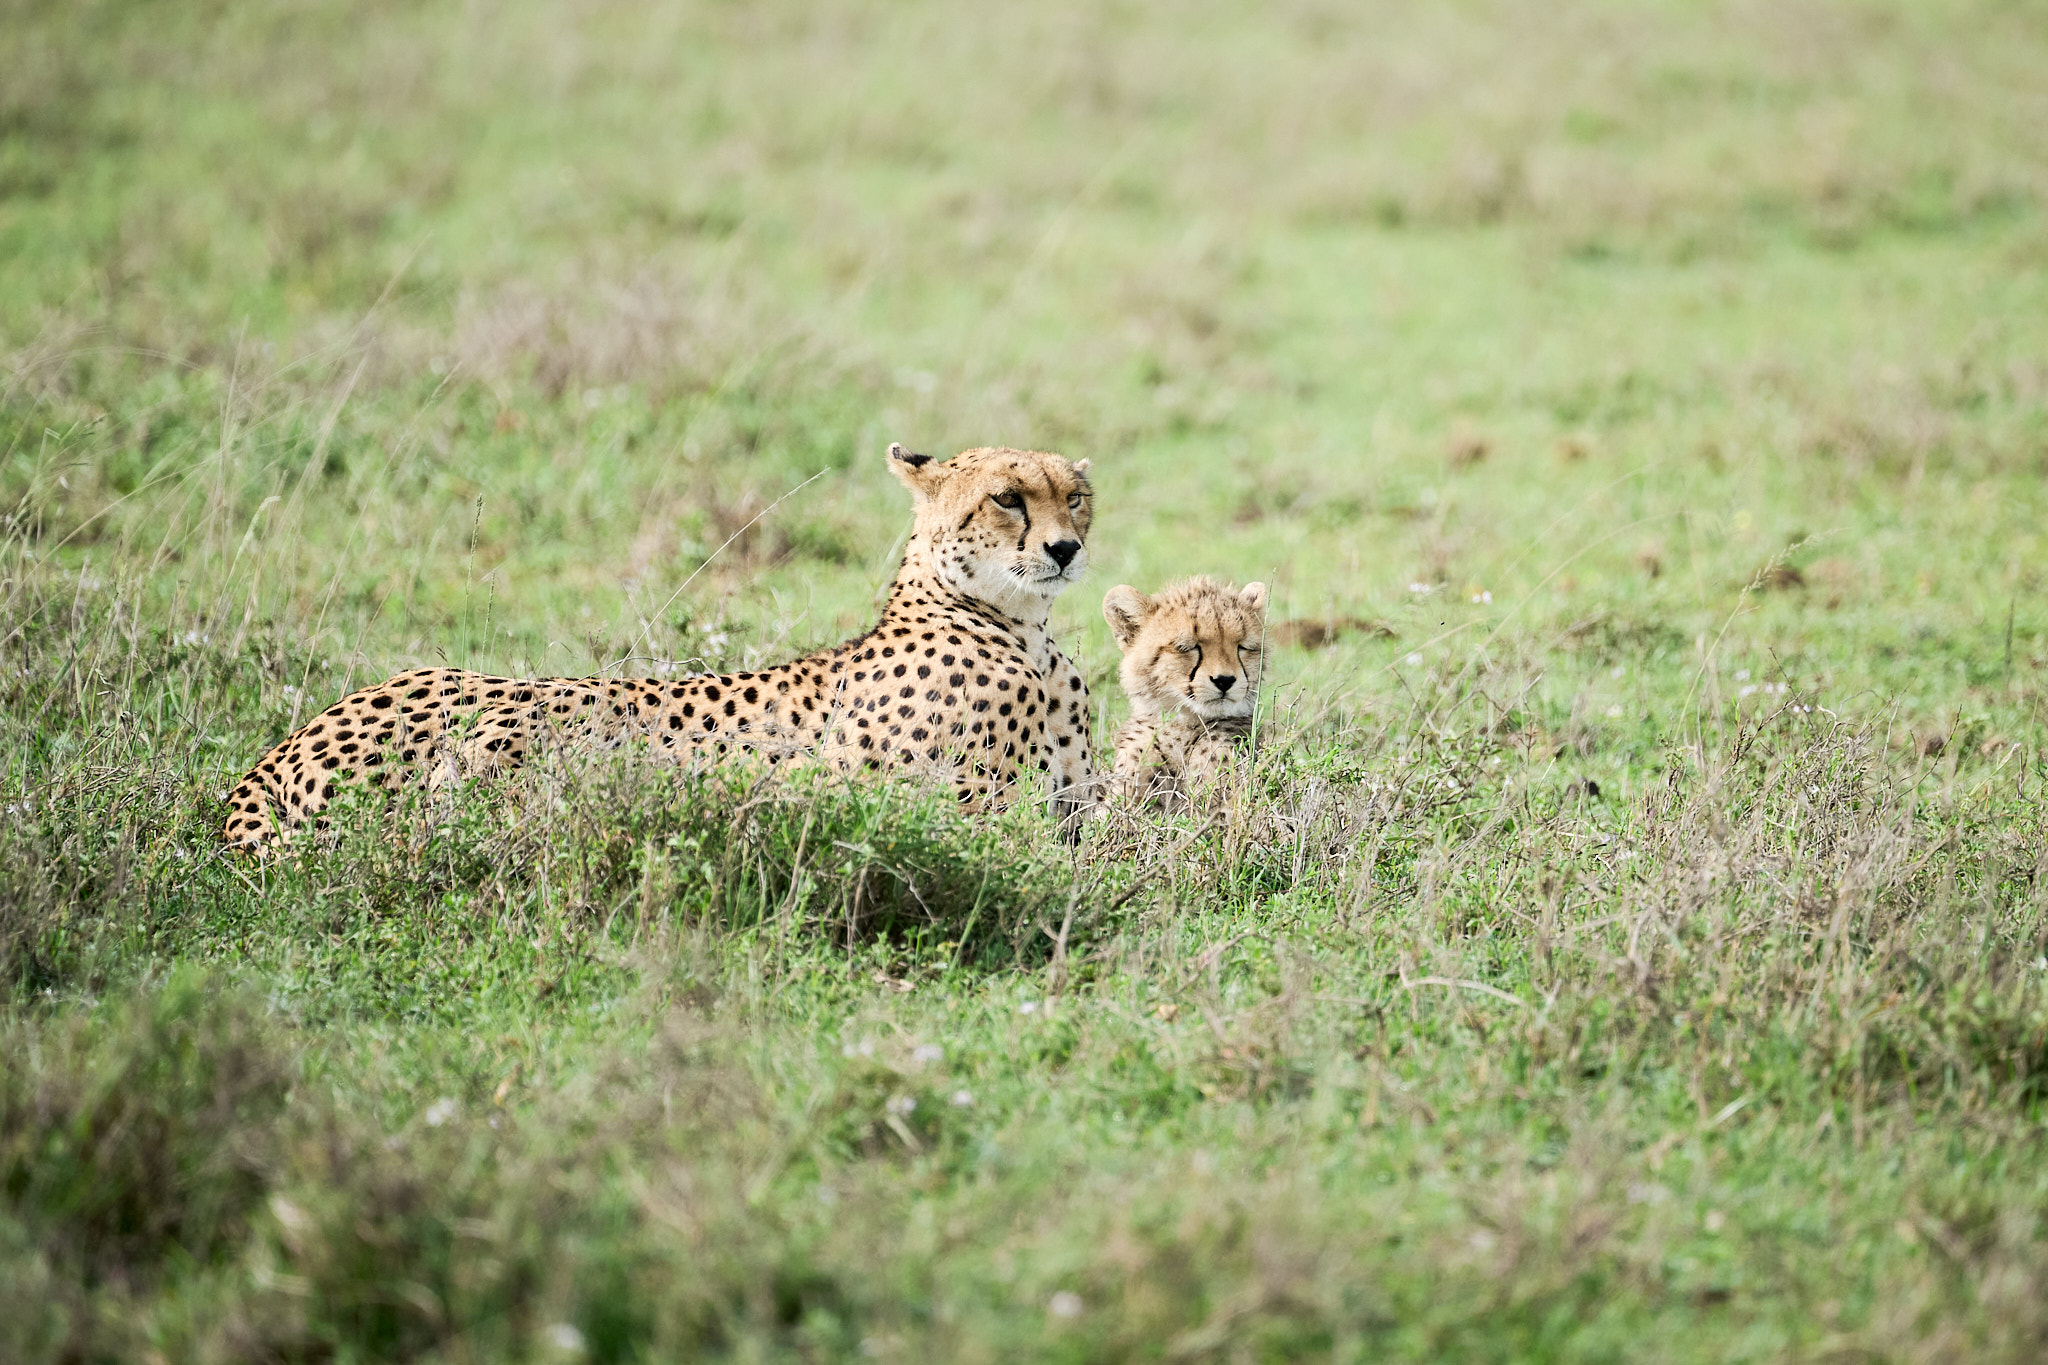
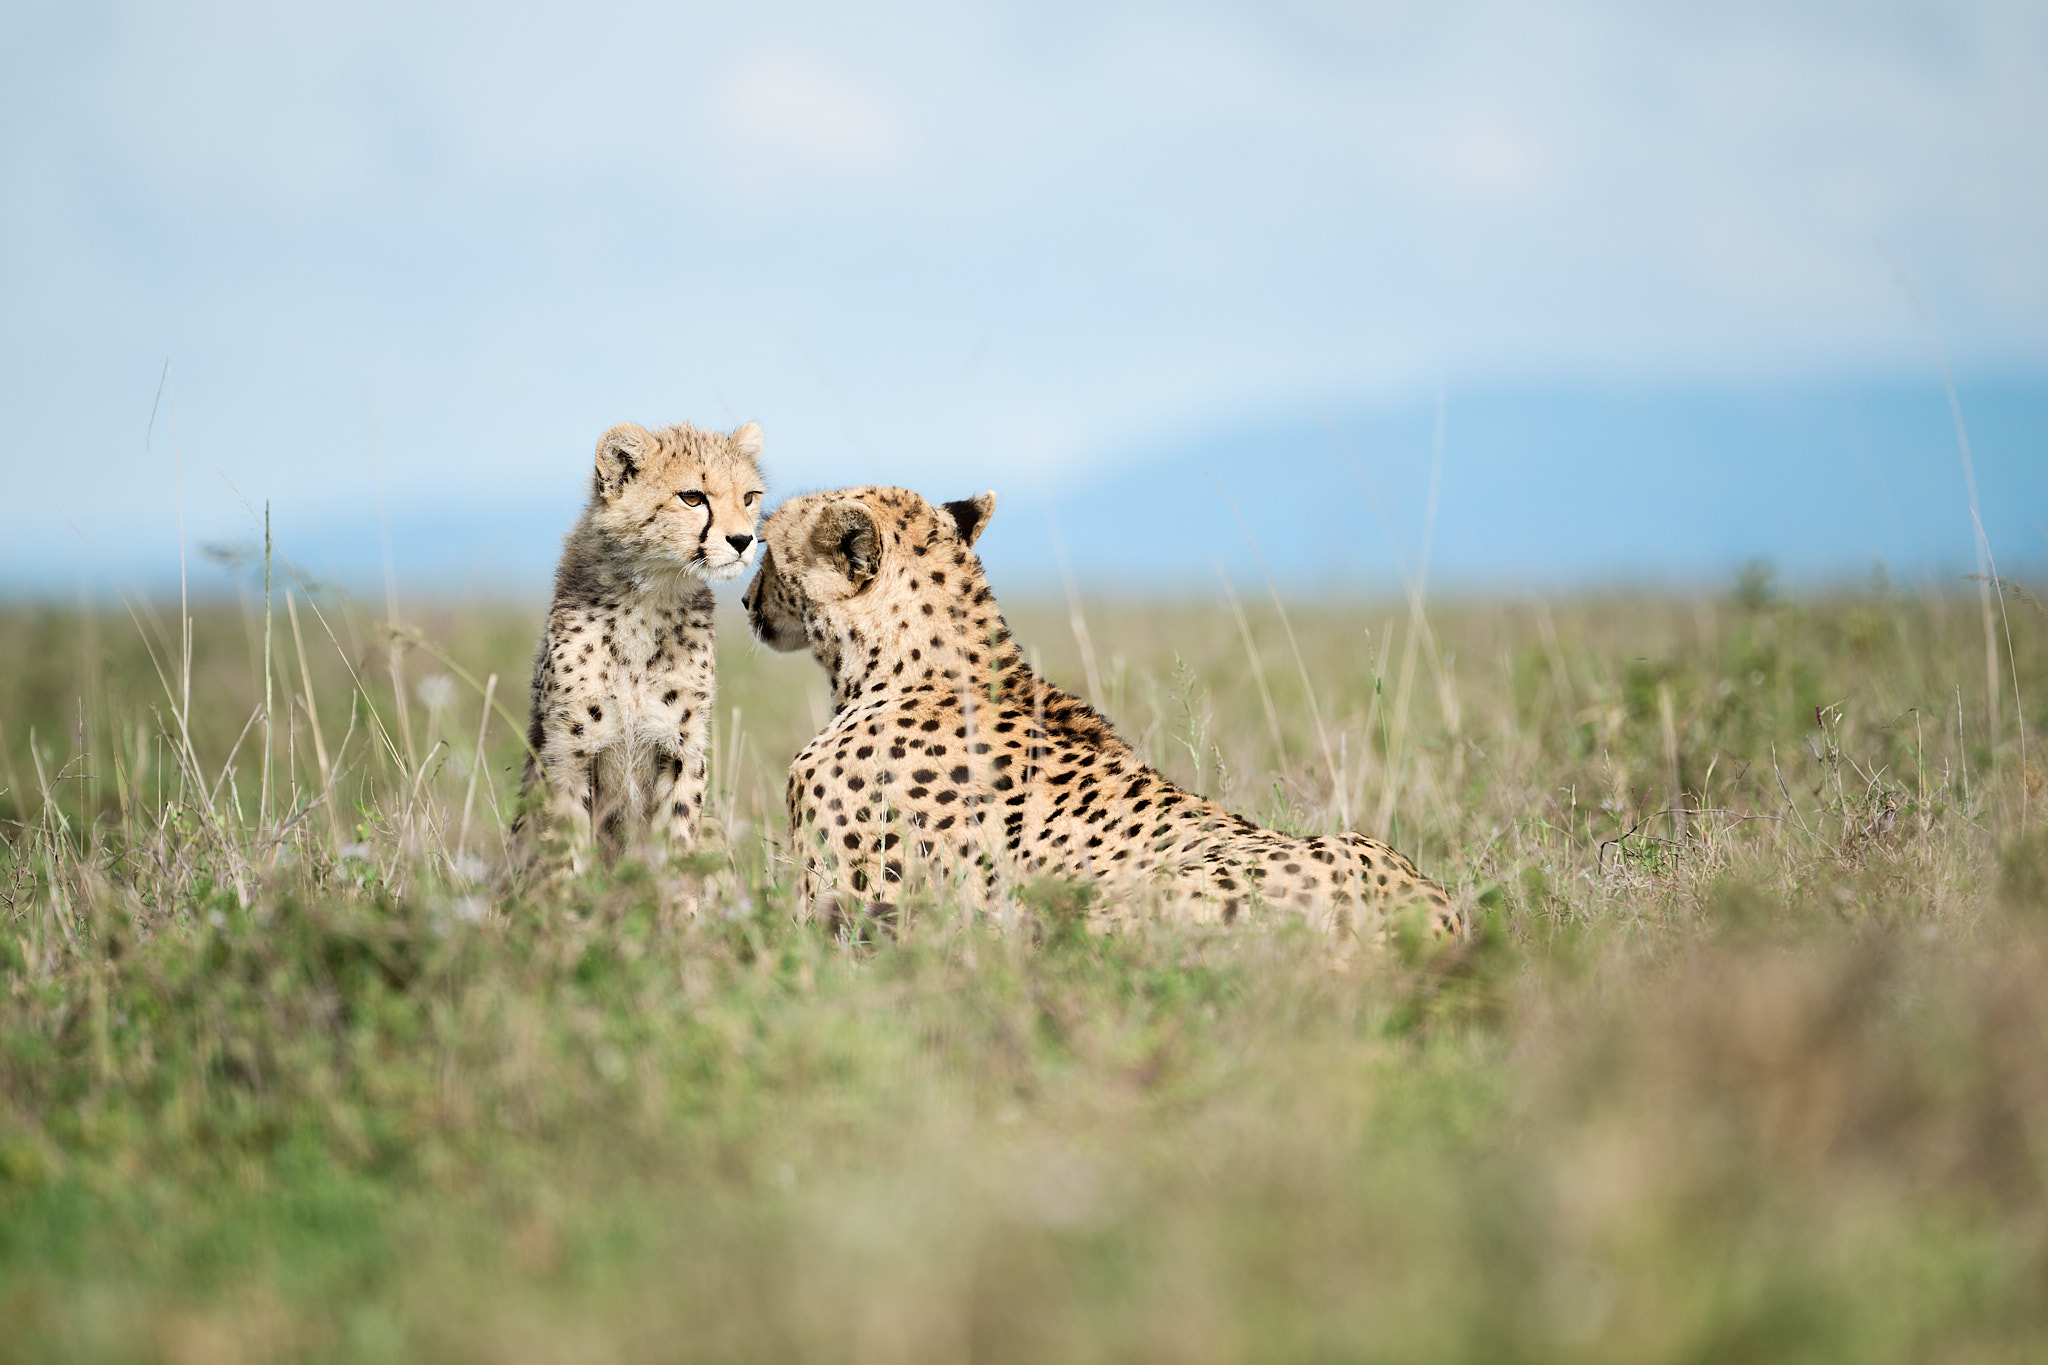
I think these two images above fully illustrate the difference between the classic “safari” shot, taken from the car window, and what you can get by placing the lens close to the ground. The second photo feels more striking to me and helps the subject truly stand out.
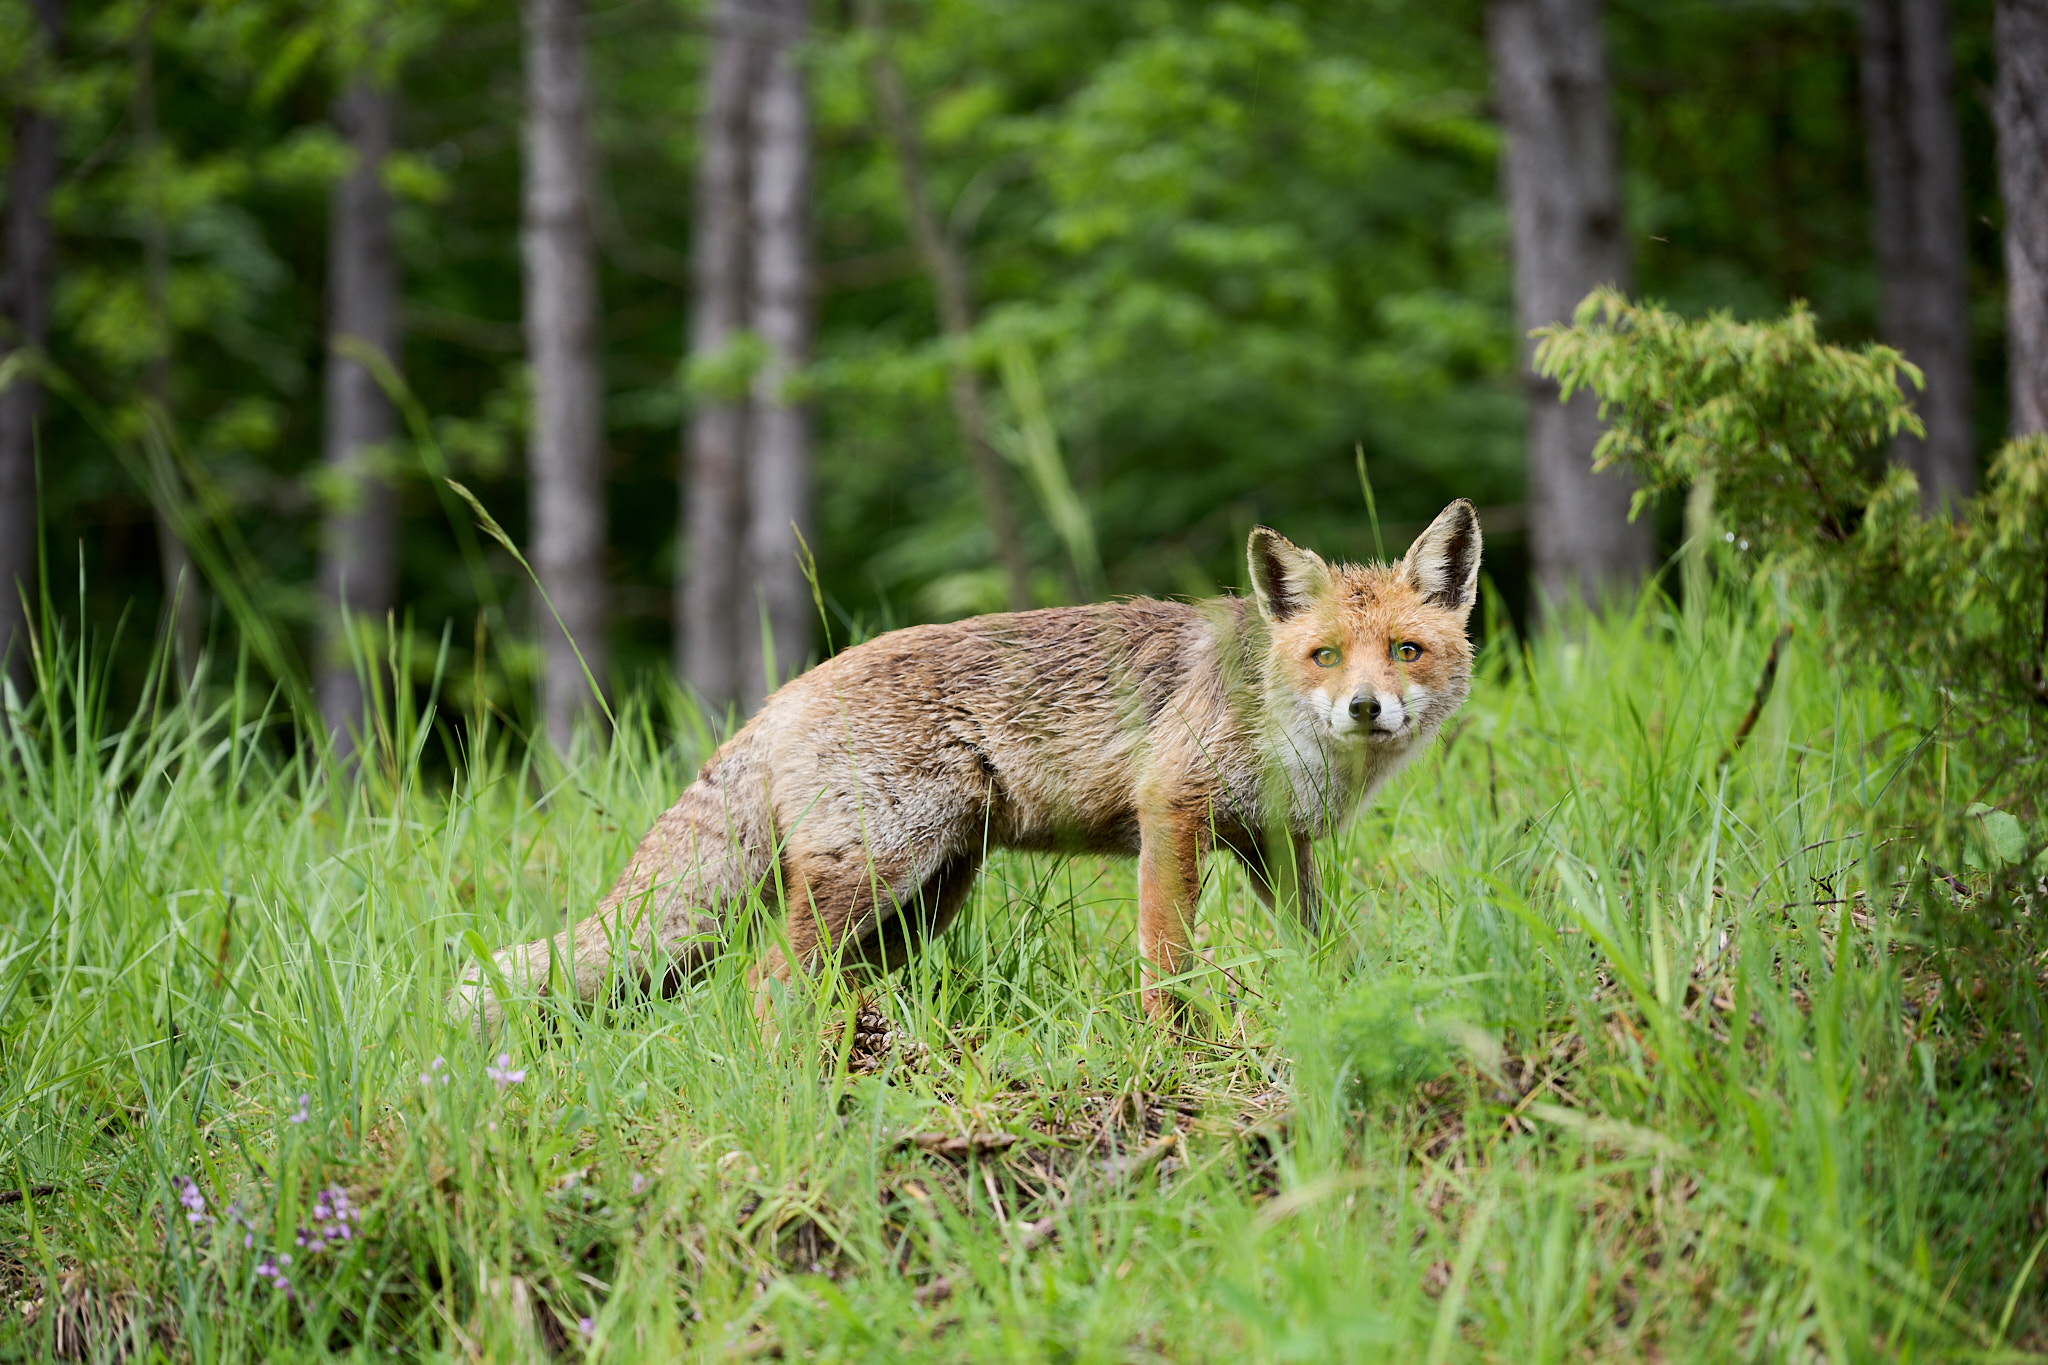
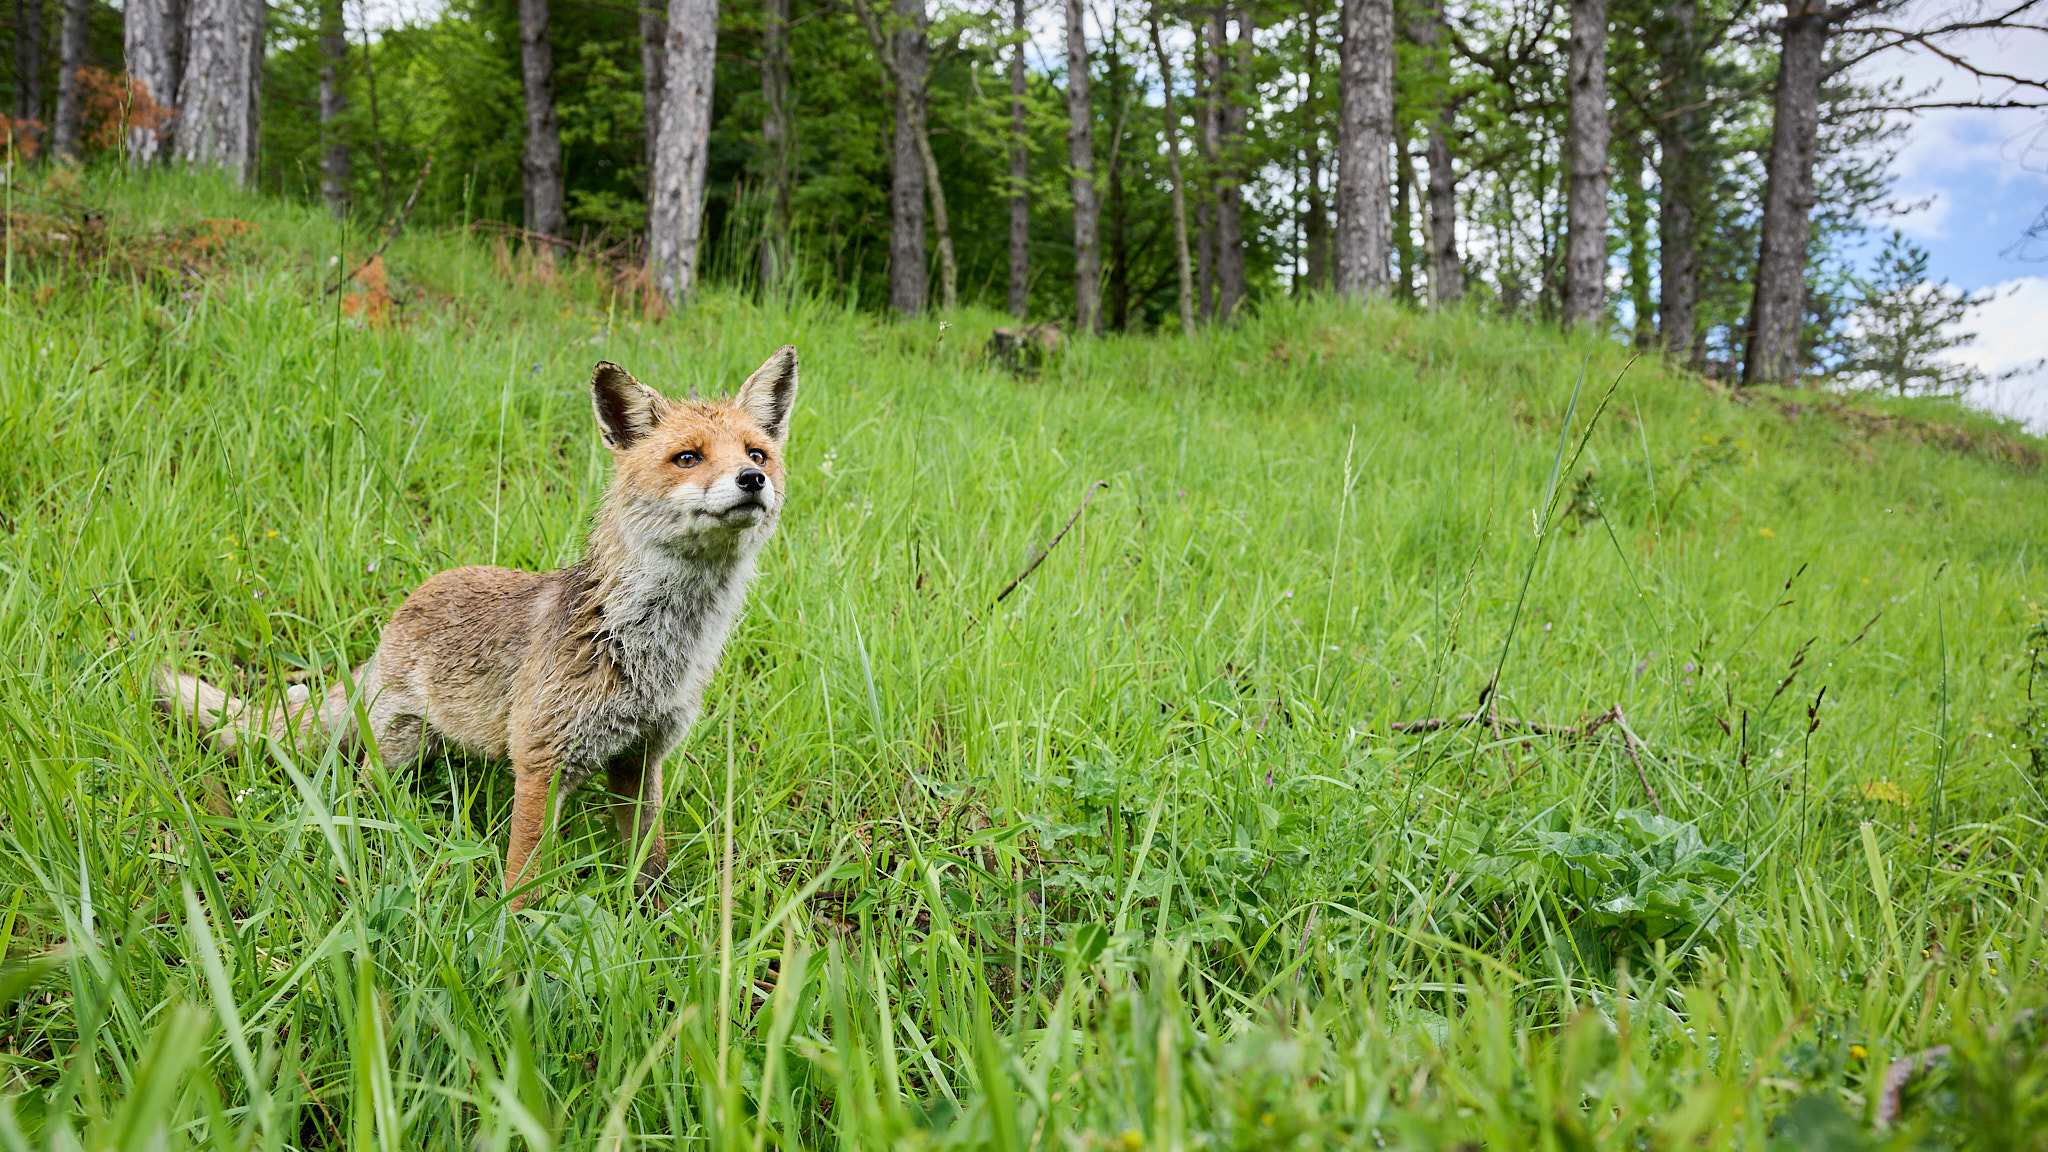
Here’s another example. I have found that lying down or kneeling makes it easier to avoid scaring or stressing animals sensitive to human presence. Perhaps they see us as smaller and less intimidating when we aren’t standing over them.
Taking pictures in this way is often easier for the photographer when using heavy cameras or lenses without a big tripod, or not using a tripod at all. If you plan to do ground-level shots all along, you can bring along a miniature tripod and cut down the amount of weight you carry.
I have a few tips to help make this type of photography easier. First, keep a garbage bag in your backpack to use when sitting down and the land is wet or muddy. Bean bags, small tripods, and special tools such as ground pods are all useful working this way. But don’t underestimate the usefulness of simply using your backpack as a big bean bag.
If lying on the ground or kneeling is uncomfortable for you, a lightweight camping chair or stool can help you get a similar perspective while allowing you to sit comfortably.

If you’re not sure about kneeling or not, consider using knee pads, such as those designed for gardening or sports. They can be a lot more comfortable than the bare ground and allow you to get to an eye-level position more easily. I find it comfortable to kneel with one knee on the ground and the other up, with my elbow resting on my knee and supporting the hand-held lens. But different photographers will find their own ways to get the camera to ground level more comfortably. Try out a few different possibilities at home before you practice it in the field.
When I have the opportunity, I like combining working at the subject’s eye level with the use of a wide angle lens. It is possible only with very confident subjects, but it’s worth trying in the right circumstances. It certainly is better than taking an eye-level wildlife photo looking downward with a wide angle lens.
My advice is to use a zoom such as a 24-120mm, moving slowly and taking the time needed to align the subject and the foreground. If everything comes together, the results can be exceptional providing a very personal and intimate view.
Sometimes technology helps the photographer. I took the following photo of a guillemot by leaning out of the Zodiac boat with my chest resting on the air-filled tube, with the camera a few inches from the water! I used the screen tilted upwards to frame the shot. If you have a camera with a tilting LCD and speedy autofocus capabilities (or bird-eye autofocus) in live view, similar photos may be easier than you would think.
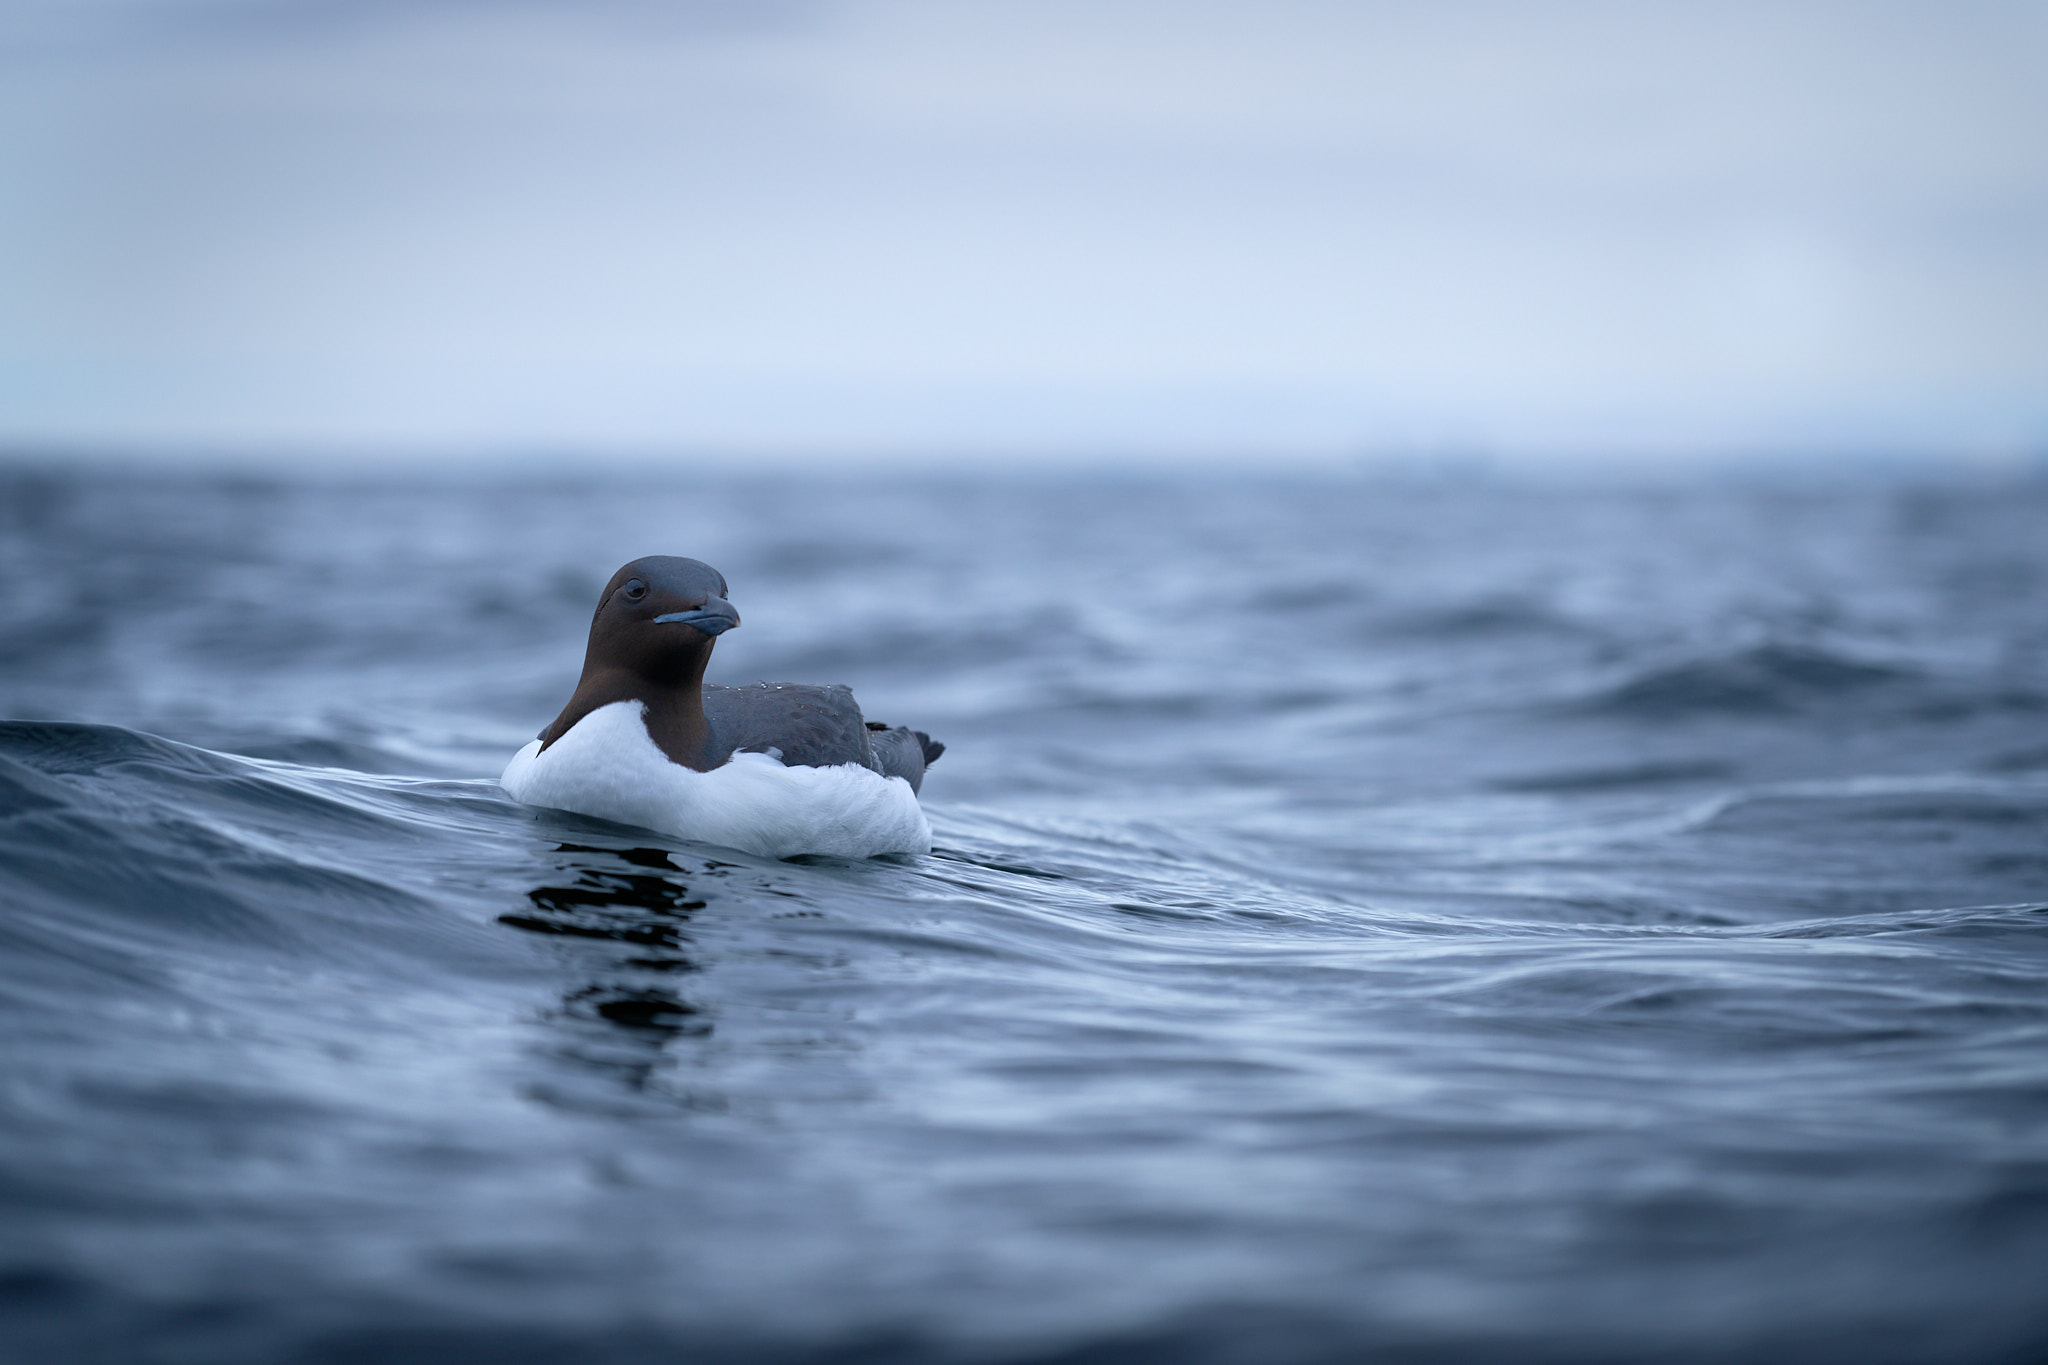
Not that I recommend leaning out of a boat to take a photo, but when I did, I made sure that my camera was not at risk. One hand was under the lens and could feel the water if I got too low. The other was operating the shutter button with my thumb. And the camera was around my neck so that it wasn’t at risk of dropping into the water (at least, as long I didn’t fall in)!
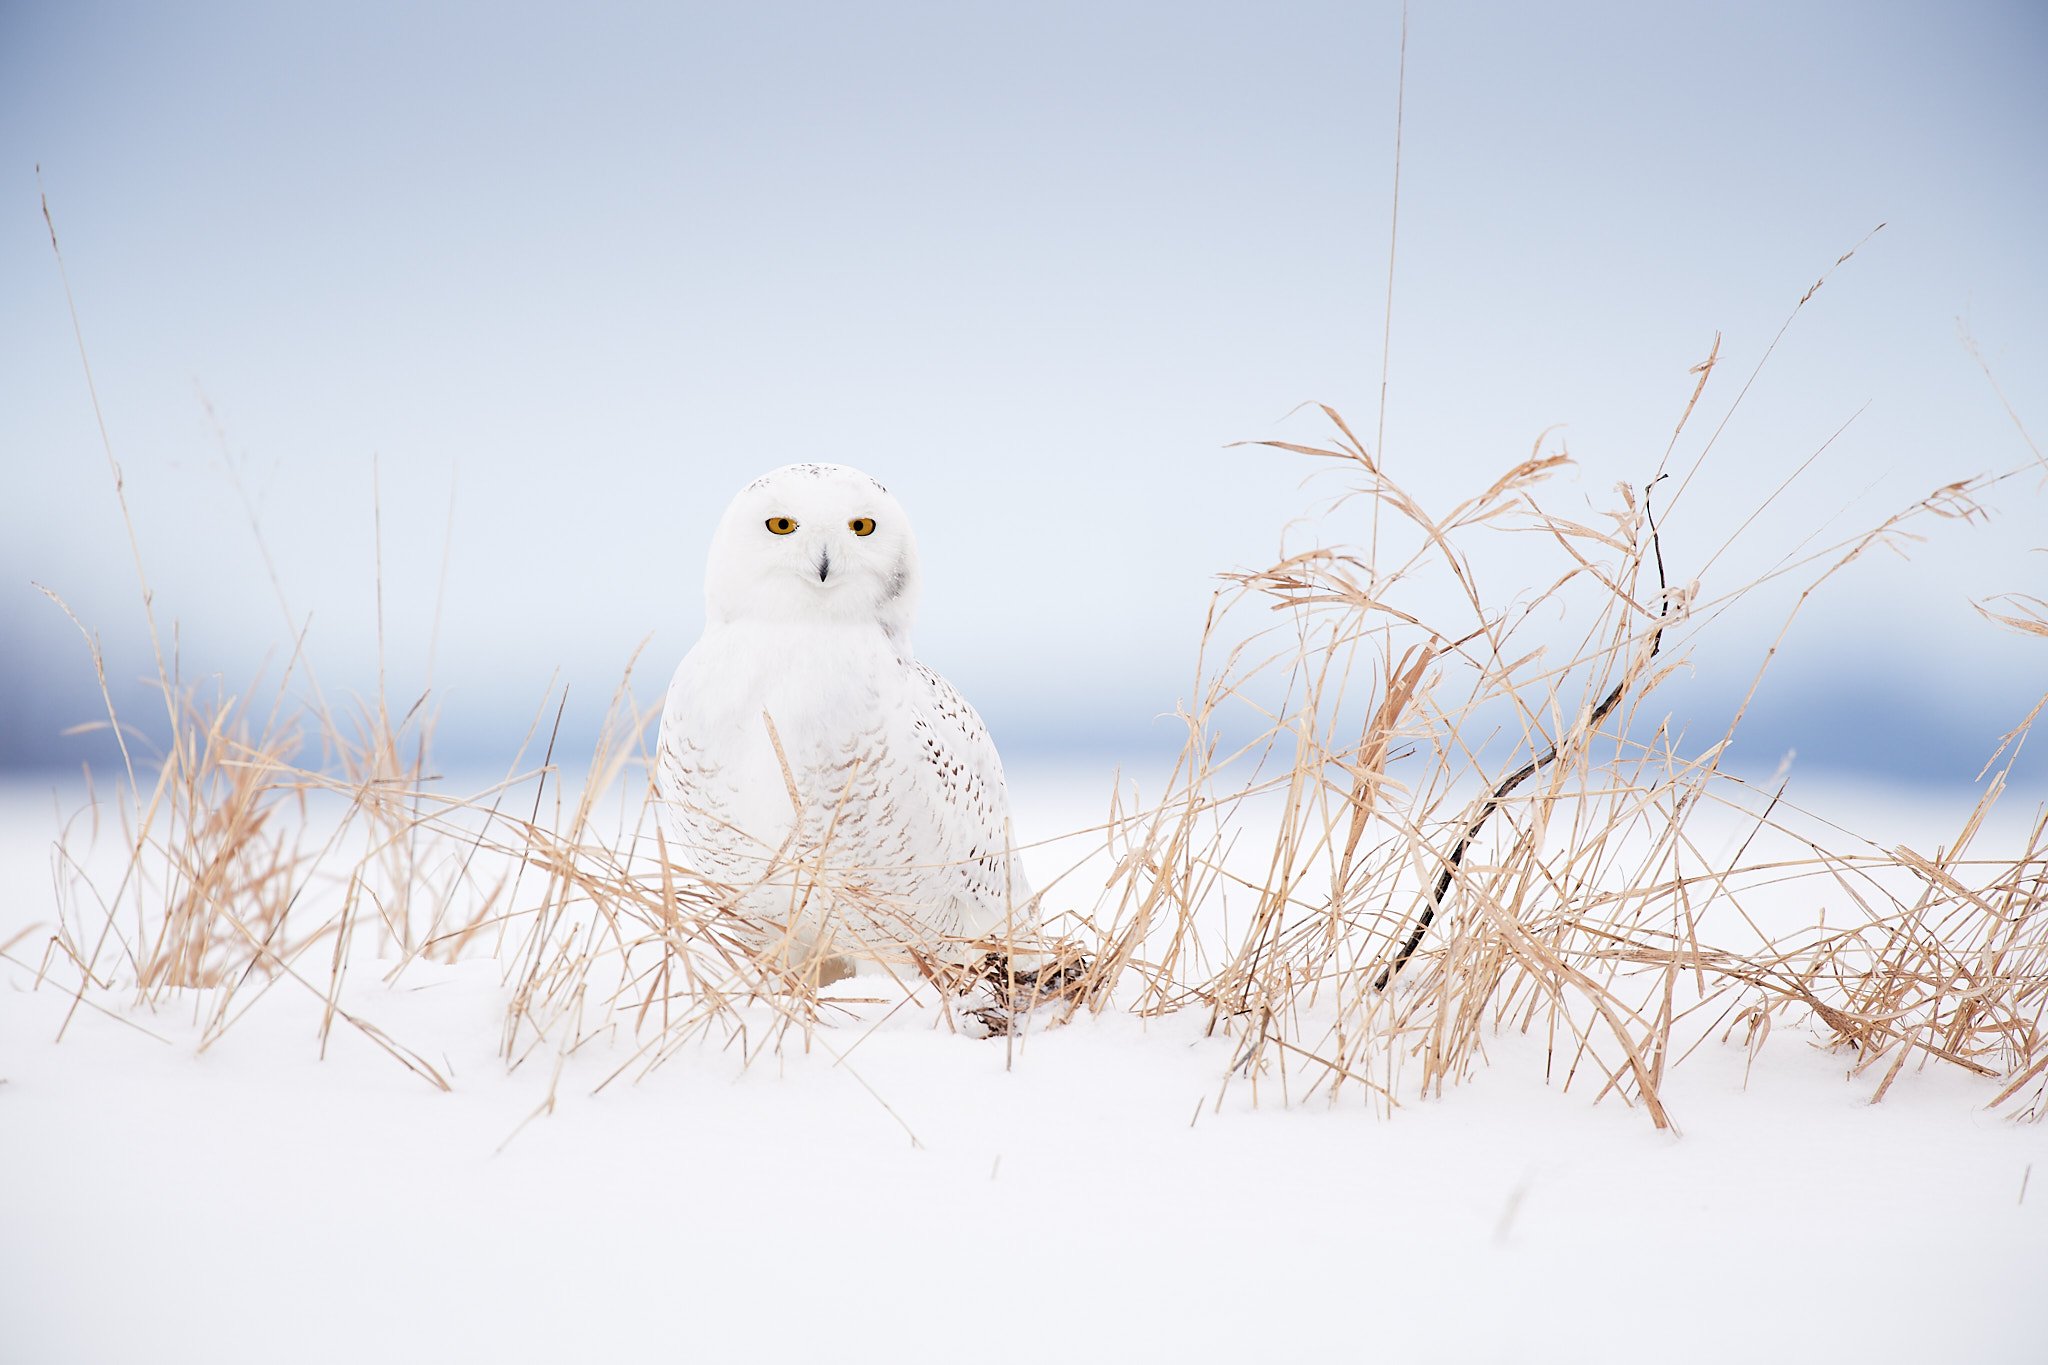
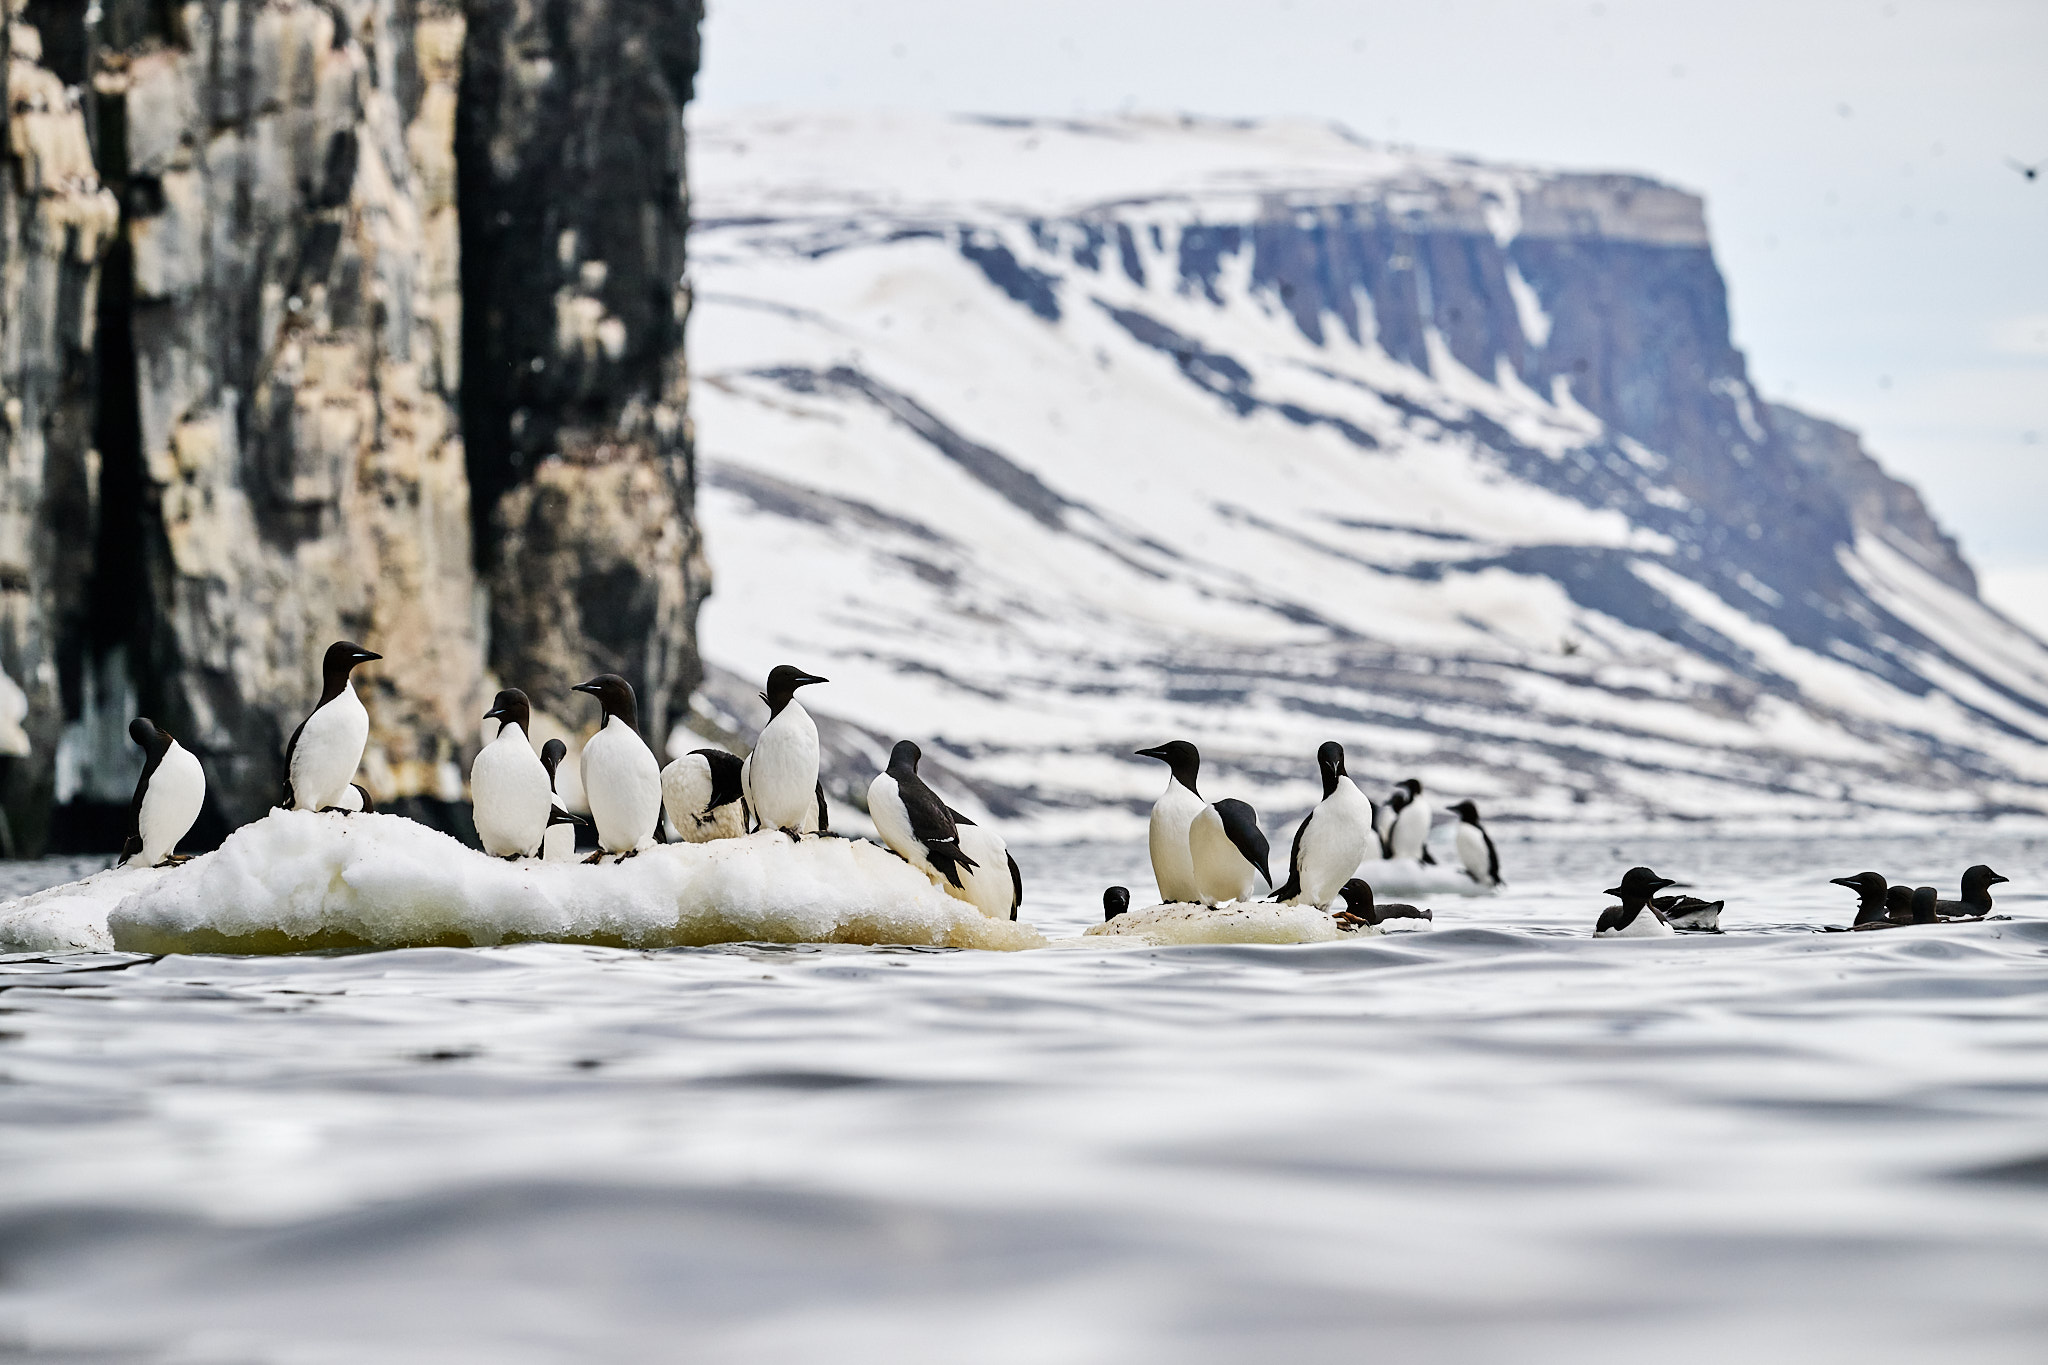
So far, I have shown some examples where a low camera position gives you better out-of-focus backgrounds. But you can also use this technique if you want to make an “animalscape” where you showcase the subjects within their environment. The result will still be an unusual point of view, able to give a fresher look to your images and telling a really interesting story.
Returning to the first two images in this article, of the cheetah pair, I faced a further challenge I didn’t mention yet. I took those photos during a safari in Serengeti from a 4×4 Jeep, and it wasn’t an option to put the camera near the ground. So how did I get such a low perspective? I used a monopod screwed into the lens tripod mount to get the camera out of the window and low to the ground. That’s how important I consider ground-level wildlife photography to be!
Shooting this way was not easy, but using the remote shutter app on my phone allowed me to frame, focus, and shoot. I also relied pretty heavily on my camera’s eye-recognition autofocus system. Finally, if you can enlist someone’s help to hold the smartphone for you while you move the camera, it makes things a lot easier.
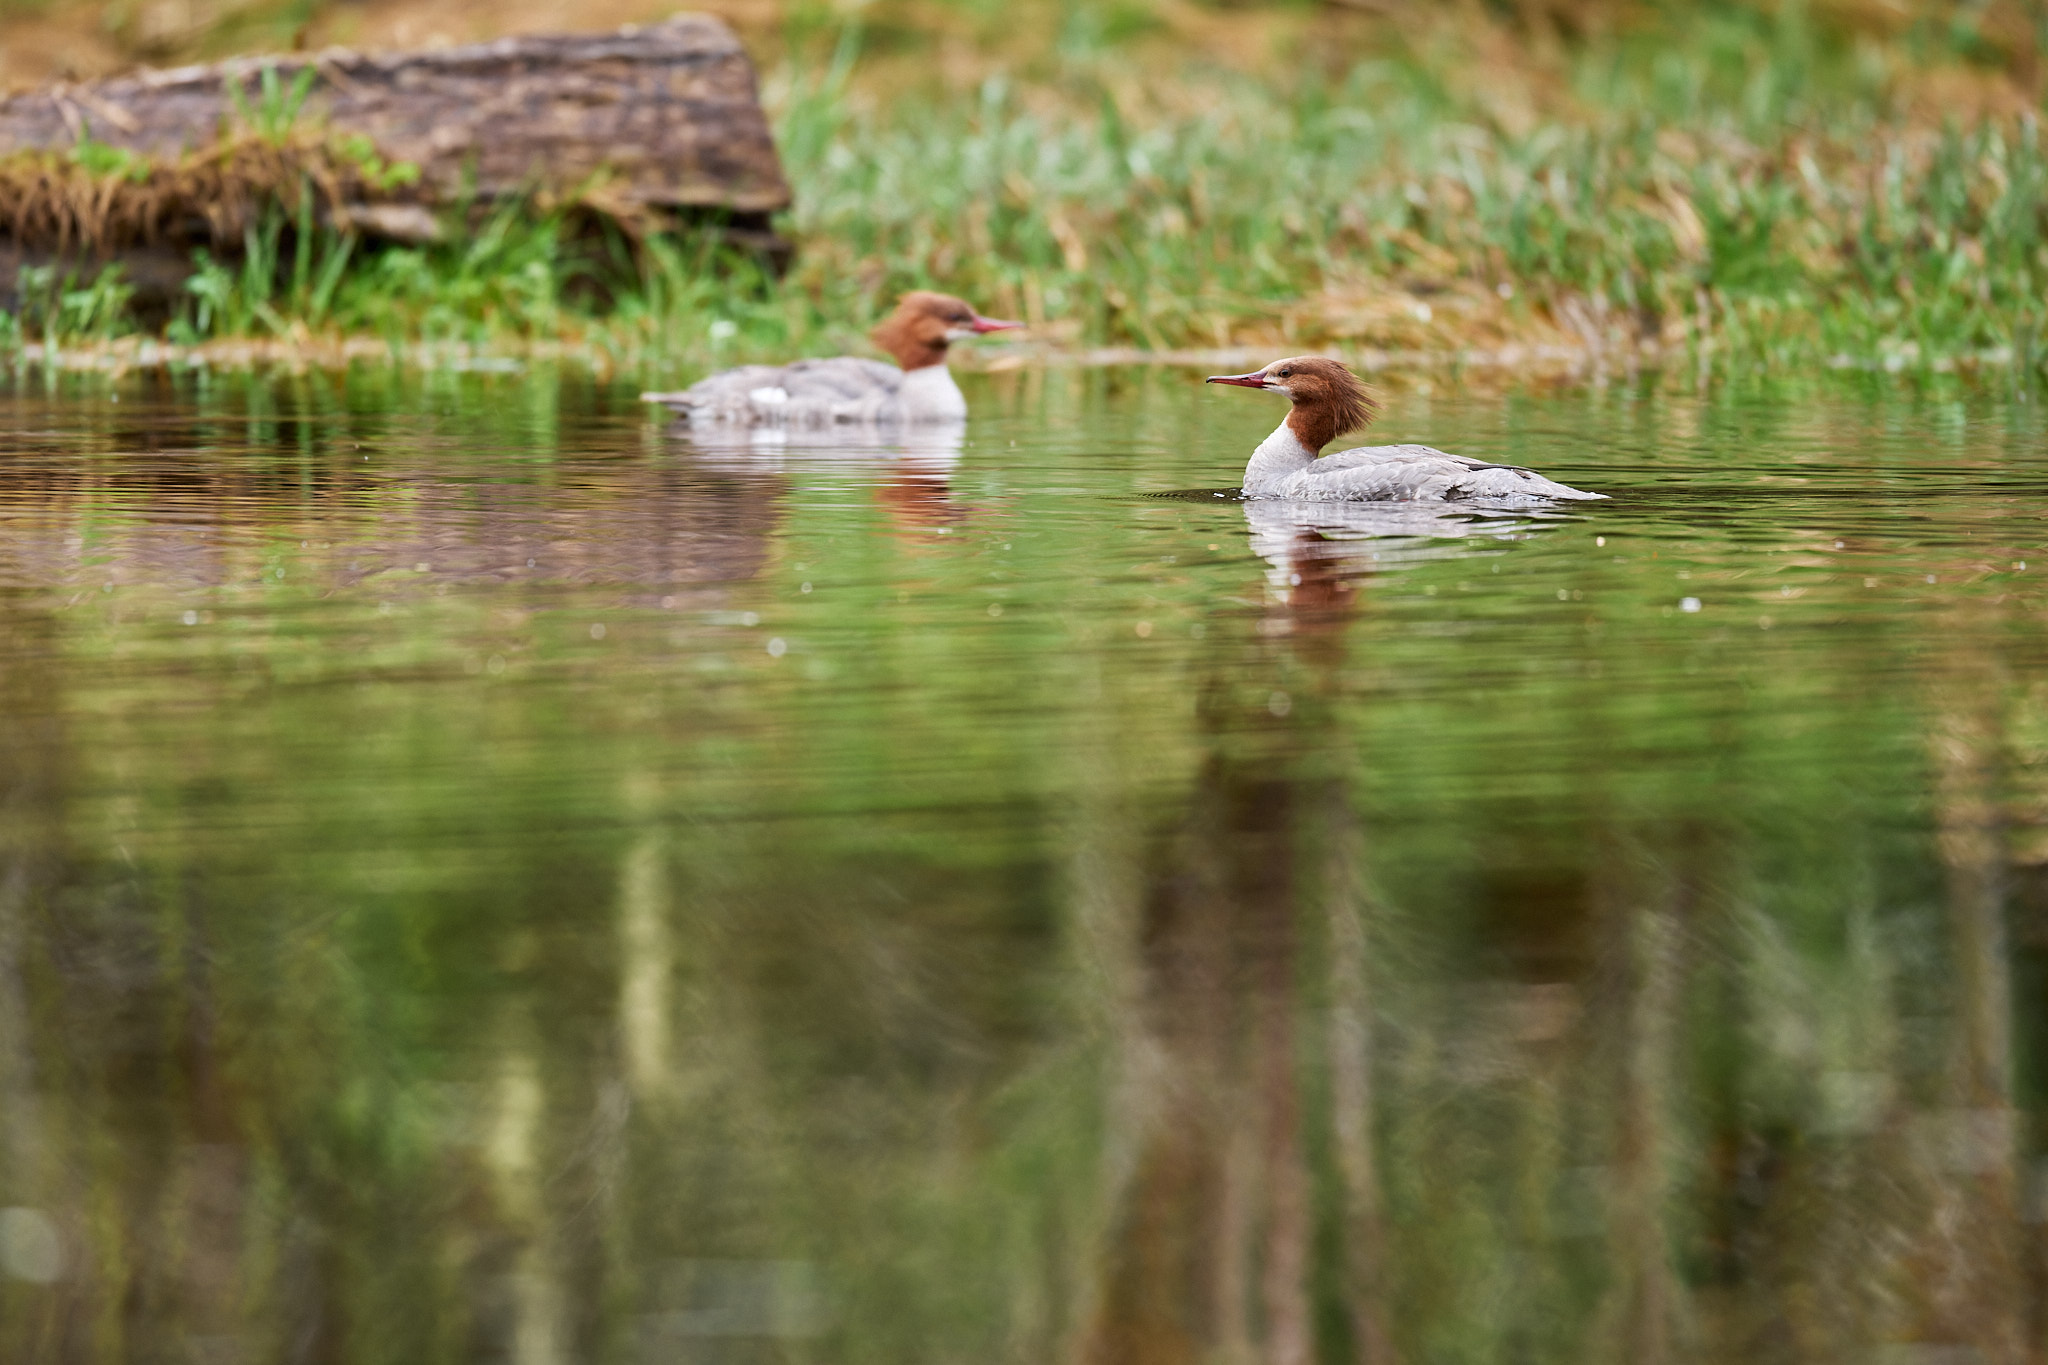
I want to end this article with a final photo that represents a counterexample. Sometimes, getting low isn’t useful. That’s true of the following photo, portraying a couple of Common Merganser. A lower position would have prevented me from capturing the reflection of the trees on the lake, elements that make this photograph more visually compelling.
So, getting down to eye level is not something that always leads to better photos even though it is a good default in wildlife photography. There will also be other cases where your subject is high in a tree or flying above you, and getting to eye level isn’t even possible. But when you can, I think you should. Eye level wildlife photography is very powerful and oftentimes improves the photos you can get.
I hope you enjoyed this article on the importance of getting down to eye level with your subject and how to overcome challenges in doing so. If you have any questions or feedback, please feel free to let me know in the comments section below.
For the individual who does not have the ease of agility to get into the Prone Position to get low for eye level captures, as discussed in this Topic. I can’t see how on a modern obsolete Camera Body the only aide available to assist with capturing images at Eye Level, is the Tilt Screen.
For individuals of nearly all levels of agility, there is the option to mount the Camera on a Short Legged Tripod and set up a seat local to the Camera, enabling the Camera to be Panned and Focused for Shutter Release in a typical way?
For those who would find the above method a discomfort, there are options to have a Tablet Tethered to the Camera Body as an alternate View Finder and use a Remote Shutter Release Device for the Camera? This method will mean the Subject will have to appear in the View Finder before the remote control of the Camera is activated.
If more control is desired, a remote Pan/Tilt Tripod Head can be acquired for not too much money outlaid? This option will enable the option to find the Subject and bring it into focus more successfully.
The above options will allow for the Photographer to decide how concealed from view to the subject they would like to be, and the options will work for a large range of Camera Bodies.
The Latest Range of Camera Bodies, especially MILC, will have additional options in the Camera Settings to assist with such an activity.
Great article Massimo, informative, well written and plenty of stunning images. Looking forward to read next ones!
Thank you so much for the valuable information you have provided in this article. I appreciate your advice and the trash bag to carry always to lying down is a simple thing and handy . Turning a monopod upside down is another great idea . No doubt eye level photography will give a better perspective to an image.
Thank you very much for all the information! I’d like to know how you drink when you’re lying on the ground with your rucksack for support?
Thank you for your appreciation.
Normally I don’t lie down for hours in a row, it is easy to have a break to drink or eat a snack.
But if you don’t want to move and are in a hot environment, you can anticipate the need and put a water bottle or a thermos in the backpack pocket. This is a handy way.
Thanks for the advice, that’s what I do, but as I’m in the middle of a flat area surrounded by rabbits, the only movement I make to drink is a sign of concern for the rabbits aha! Another problem I have is how to leave once I’m in position, because if the animals are still there I don’t want to scare them away, or at least as little as possible. I find that tricky too
Wow, this is exactly the right situation to experiment lying down!
My advice is to avoid the backpack and stay as low as you can going in and going out. Trying to avoid scaring animals after the shooting is important.
OK, thanks for the advice, I’ll try to leave my bag in the shelter of the surrounding trees (3-4m from me). The problem is that there are many clumps of plants in the area that are the height of rabbits, so I have to raise my 200-500mm camera by 20-30cm. I would have tried with my tripod at ground level, the problem being that I have a Manfrotto Advanced Befree and this one has a minimum height of 40-50cm unfortunately.
Apart from that, I think the location is perfect for experimenting because the ground is covered in stones and dead leaves, so noise and discretion are paramount, especially when the rabbits present are victims of hunting. I use a hiking matela so that I don’t feel the stones too much; it’s the only equipment I bring with me in my bag.
It look like you have a lot of opportunities!
If I may, try also shooting through the grass, at least a bit. Balance the height of your lens to get a bit of it in between you and the rabbits. It will add a cream in the foreground and a bit of mystery if just you have out of it the ears or eyes. Experimenting challenging situations is never a waste of time, maybe you trash 99.99% of the pics you take… but the 0.01 could be exceptional!
Thank you a lot for all the informations
Very nice, Massimo! I love the first comparison.
Much appreciated, Spencer. Thank you.
Thank you so much for reminding us that there is a better way. These are the sort of tips that make the best photographs. I really do appreciate your advice and your photographs are beautiful.
Thank you to you, it is a pleasure for me to share some tips and my experience in the field.
You describe it very nicely, Massimo. Getting at eye level is one of the best tools for the wildlife photographer.
Thank you, Jason!
Stunning photos and informative insights on the ‘backstage’ moments! :)
It is a pleasure for me to suggest new ways of taking photos!
My problem is getting back up after kneeling down!
Ha, ha. Me too.
Also, lying down I can’t bend enough in the small of my back to get my eye to the viewfinder.
When you’ve got a body that works, you don’t have the time.
When you’ve got the time, you no longer have a body that works.
If I may, using a mirrorless or a camera that can focus using a tilted screen helps a lot.
For DSLRs, angle viewfinder adapters like the Nikon DR-6 are available. I used one when I was a DSLR user.
Wonderful article, great insight, amazing images. Mi complimenti !
Thank you, Andy, I’m glad you enjoyed it.