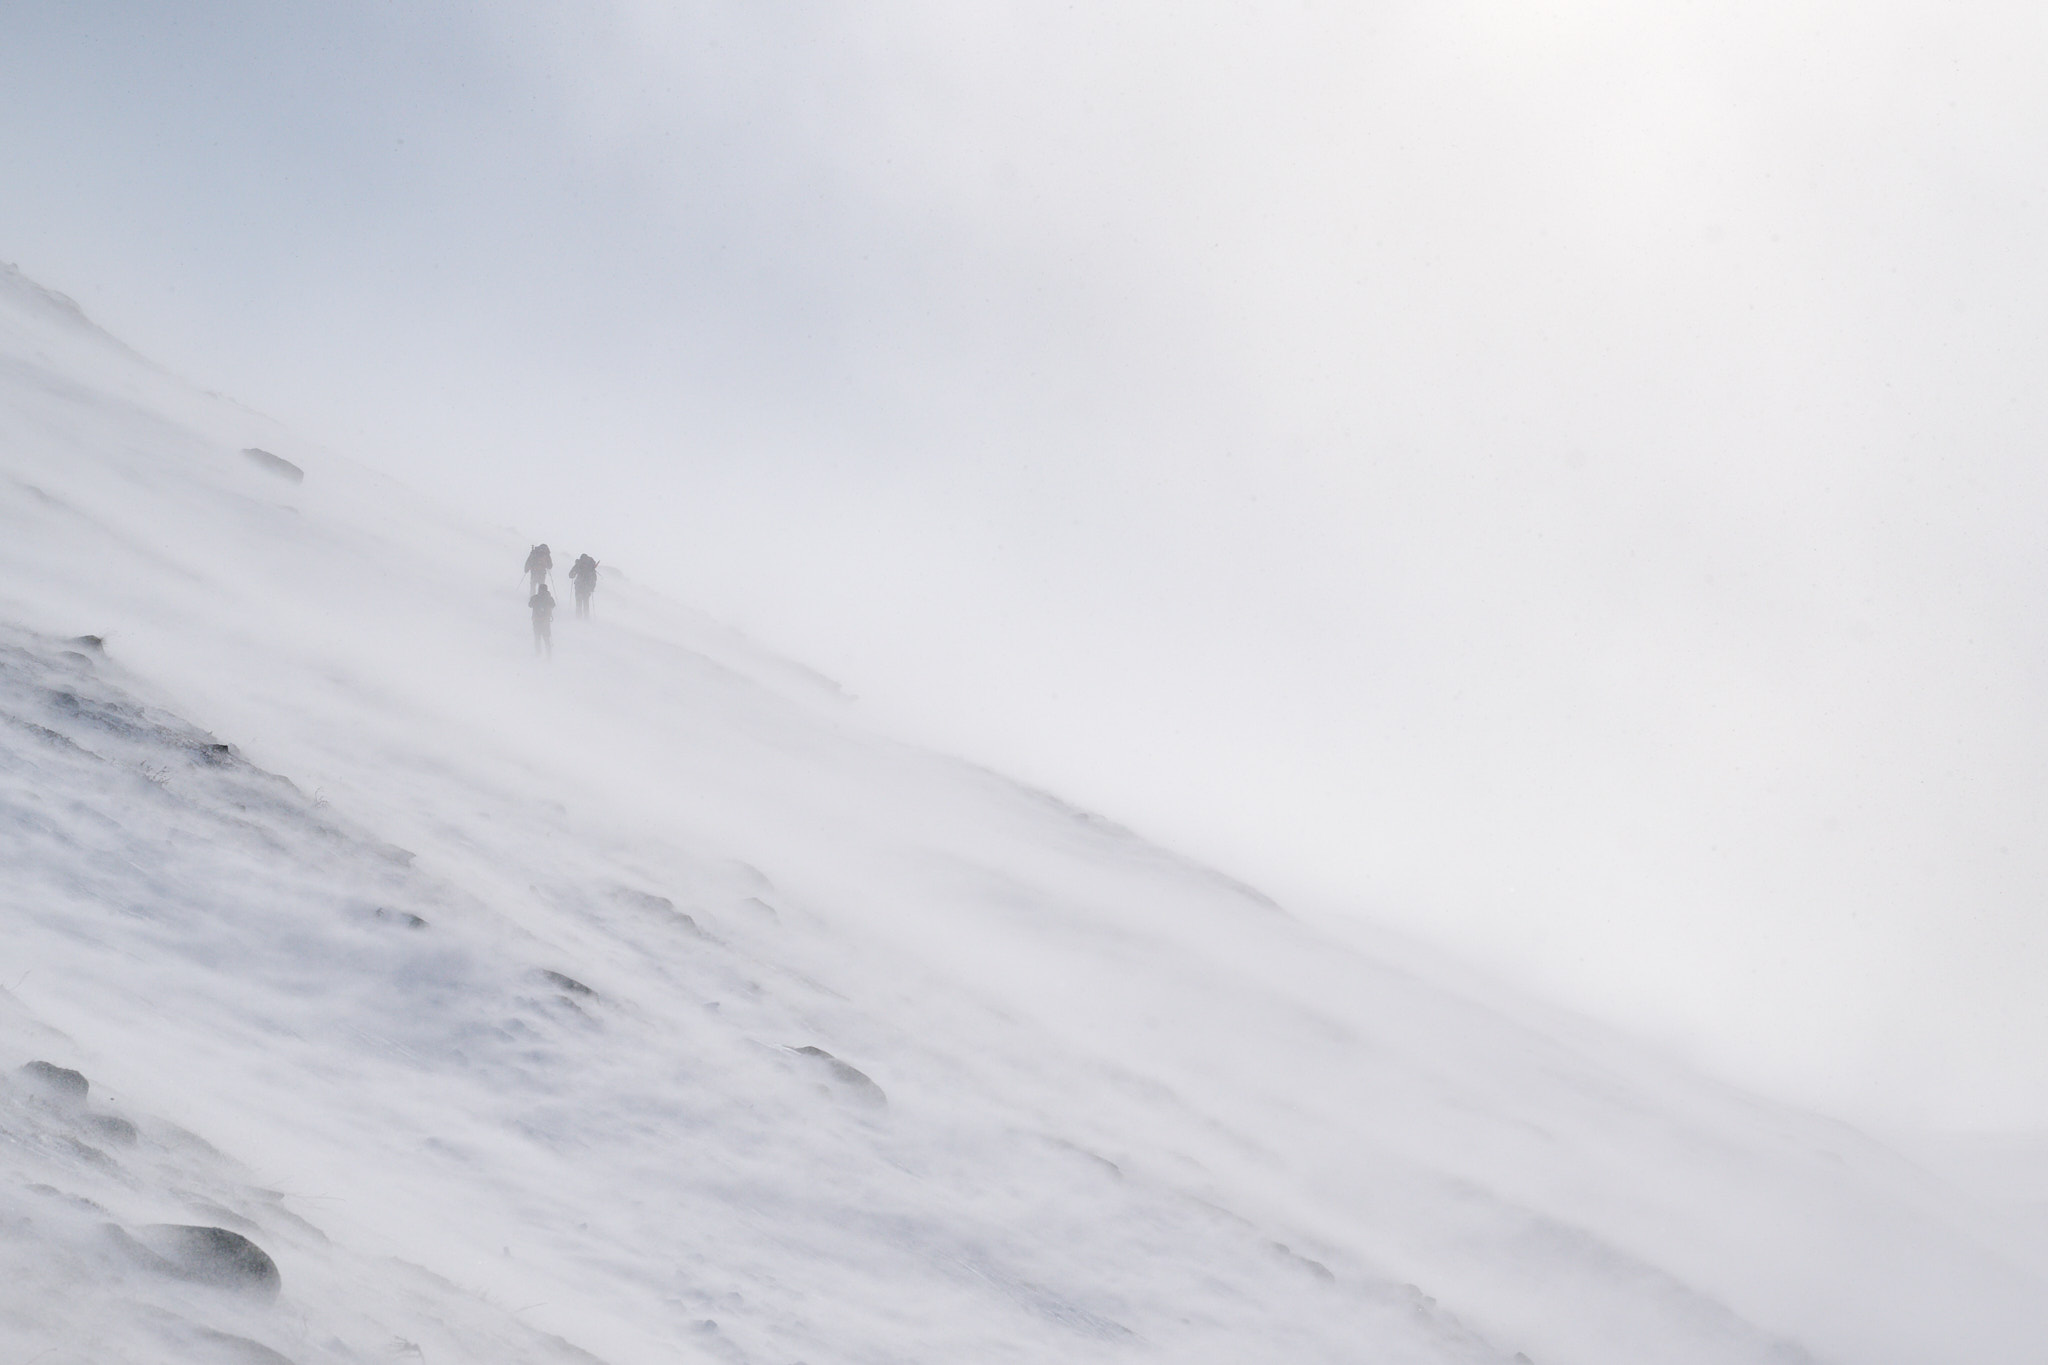
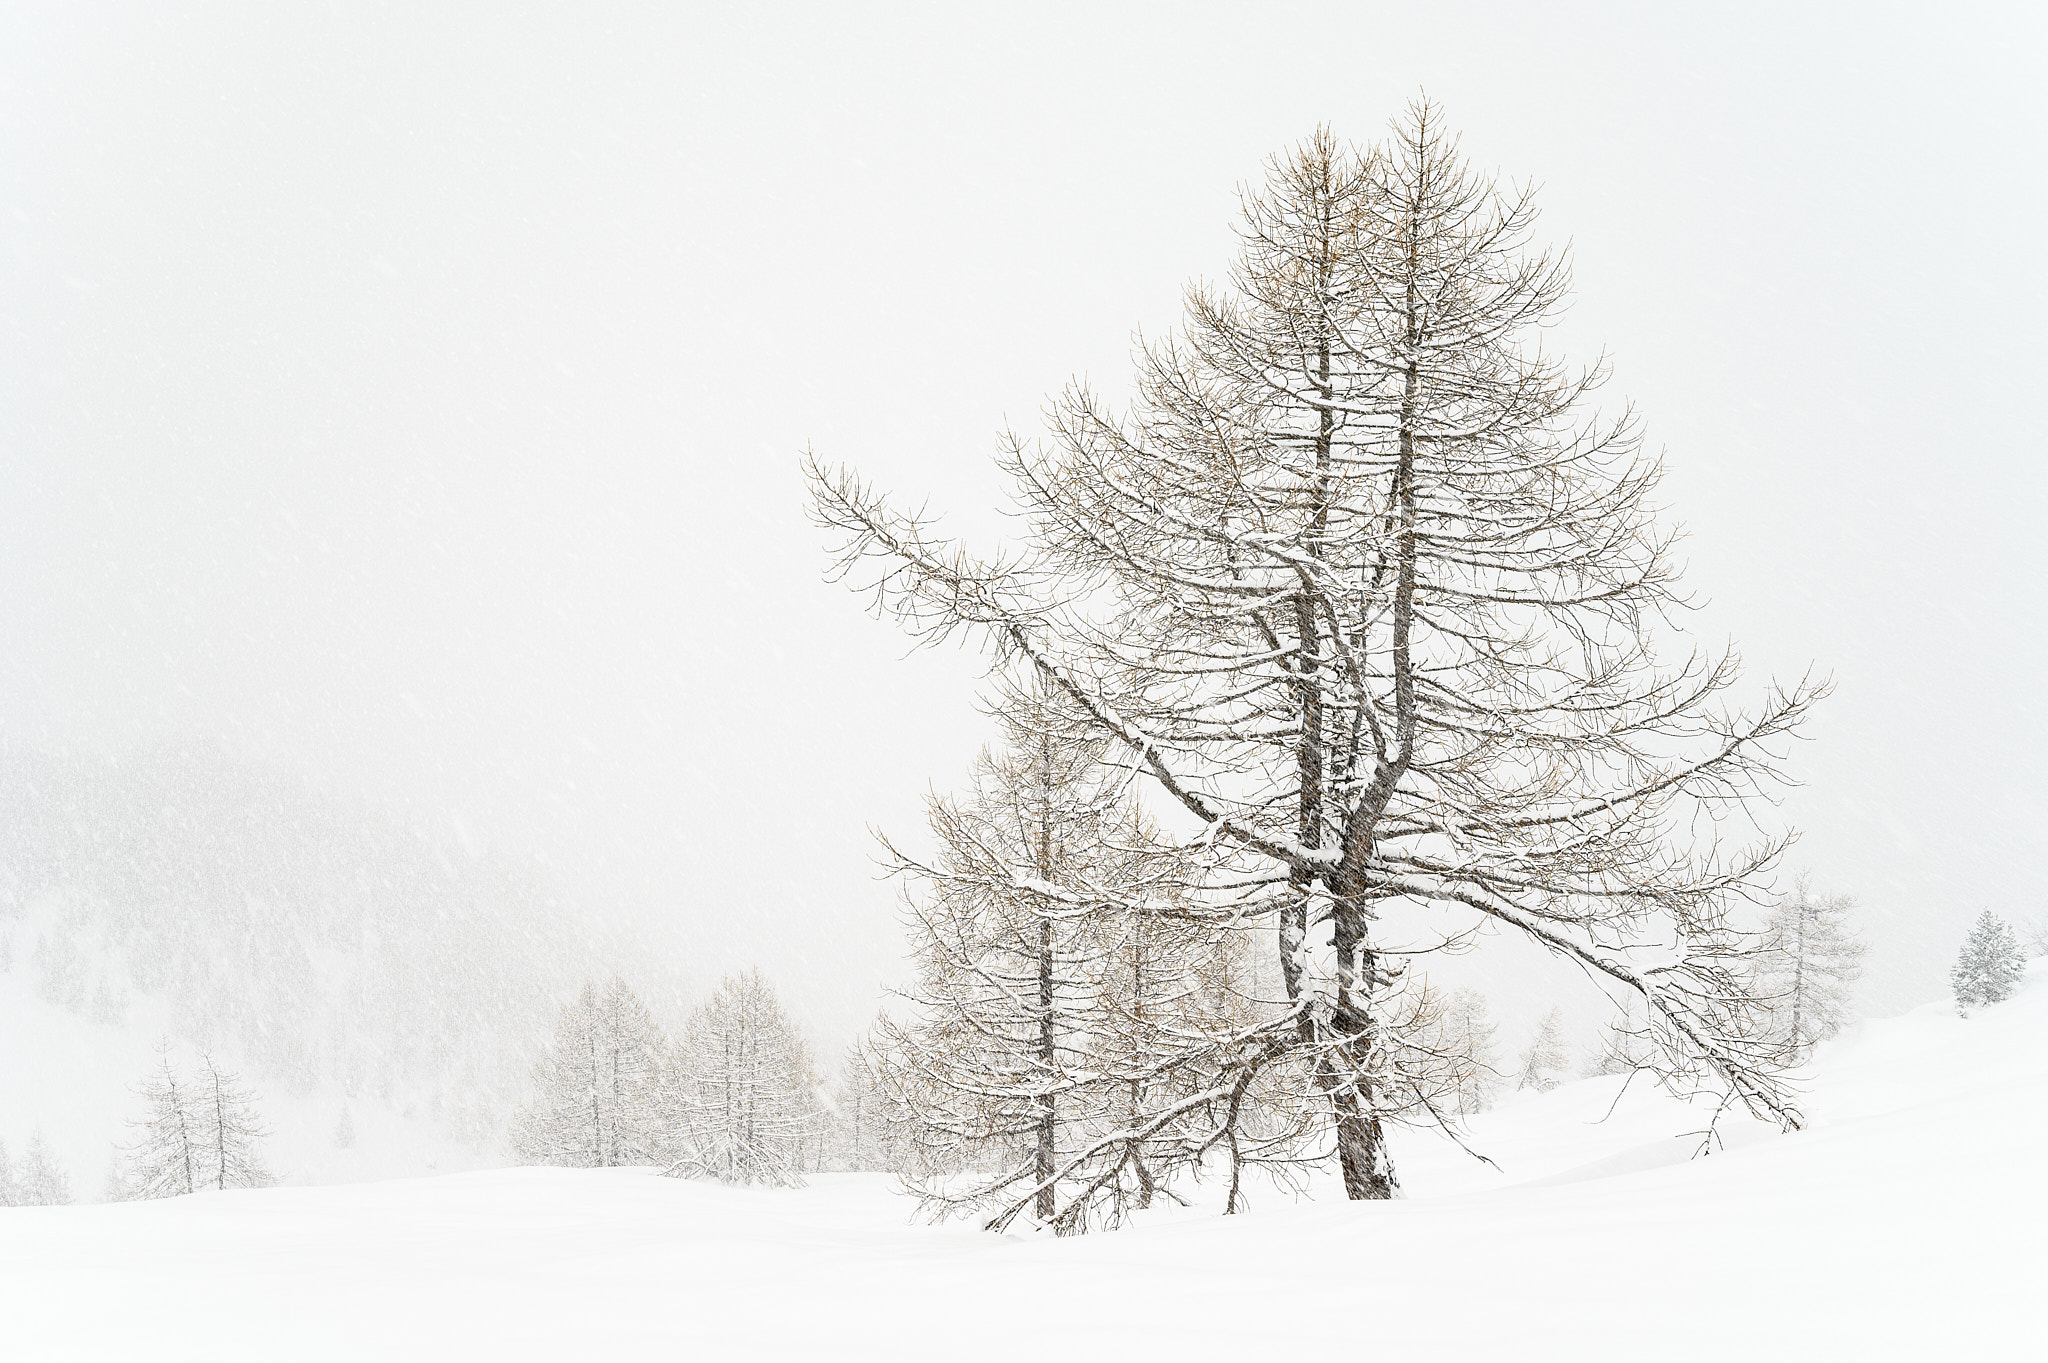
Photographers mostly look for good light, including beautiful sunrises and sunsets on a pleasant day. But what about inverting that perspective and seeking strong winds, snow, and storms in the deep of the winter? This article shows the different results you can get by photographing wildlife in extreme weather conditions, all while keeping yourself safe from the elements.
Why might extreme weather be good for taking wildlife photos? There are a few reasons:
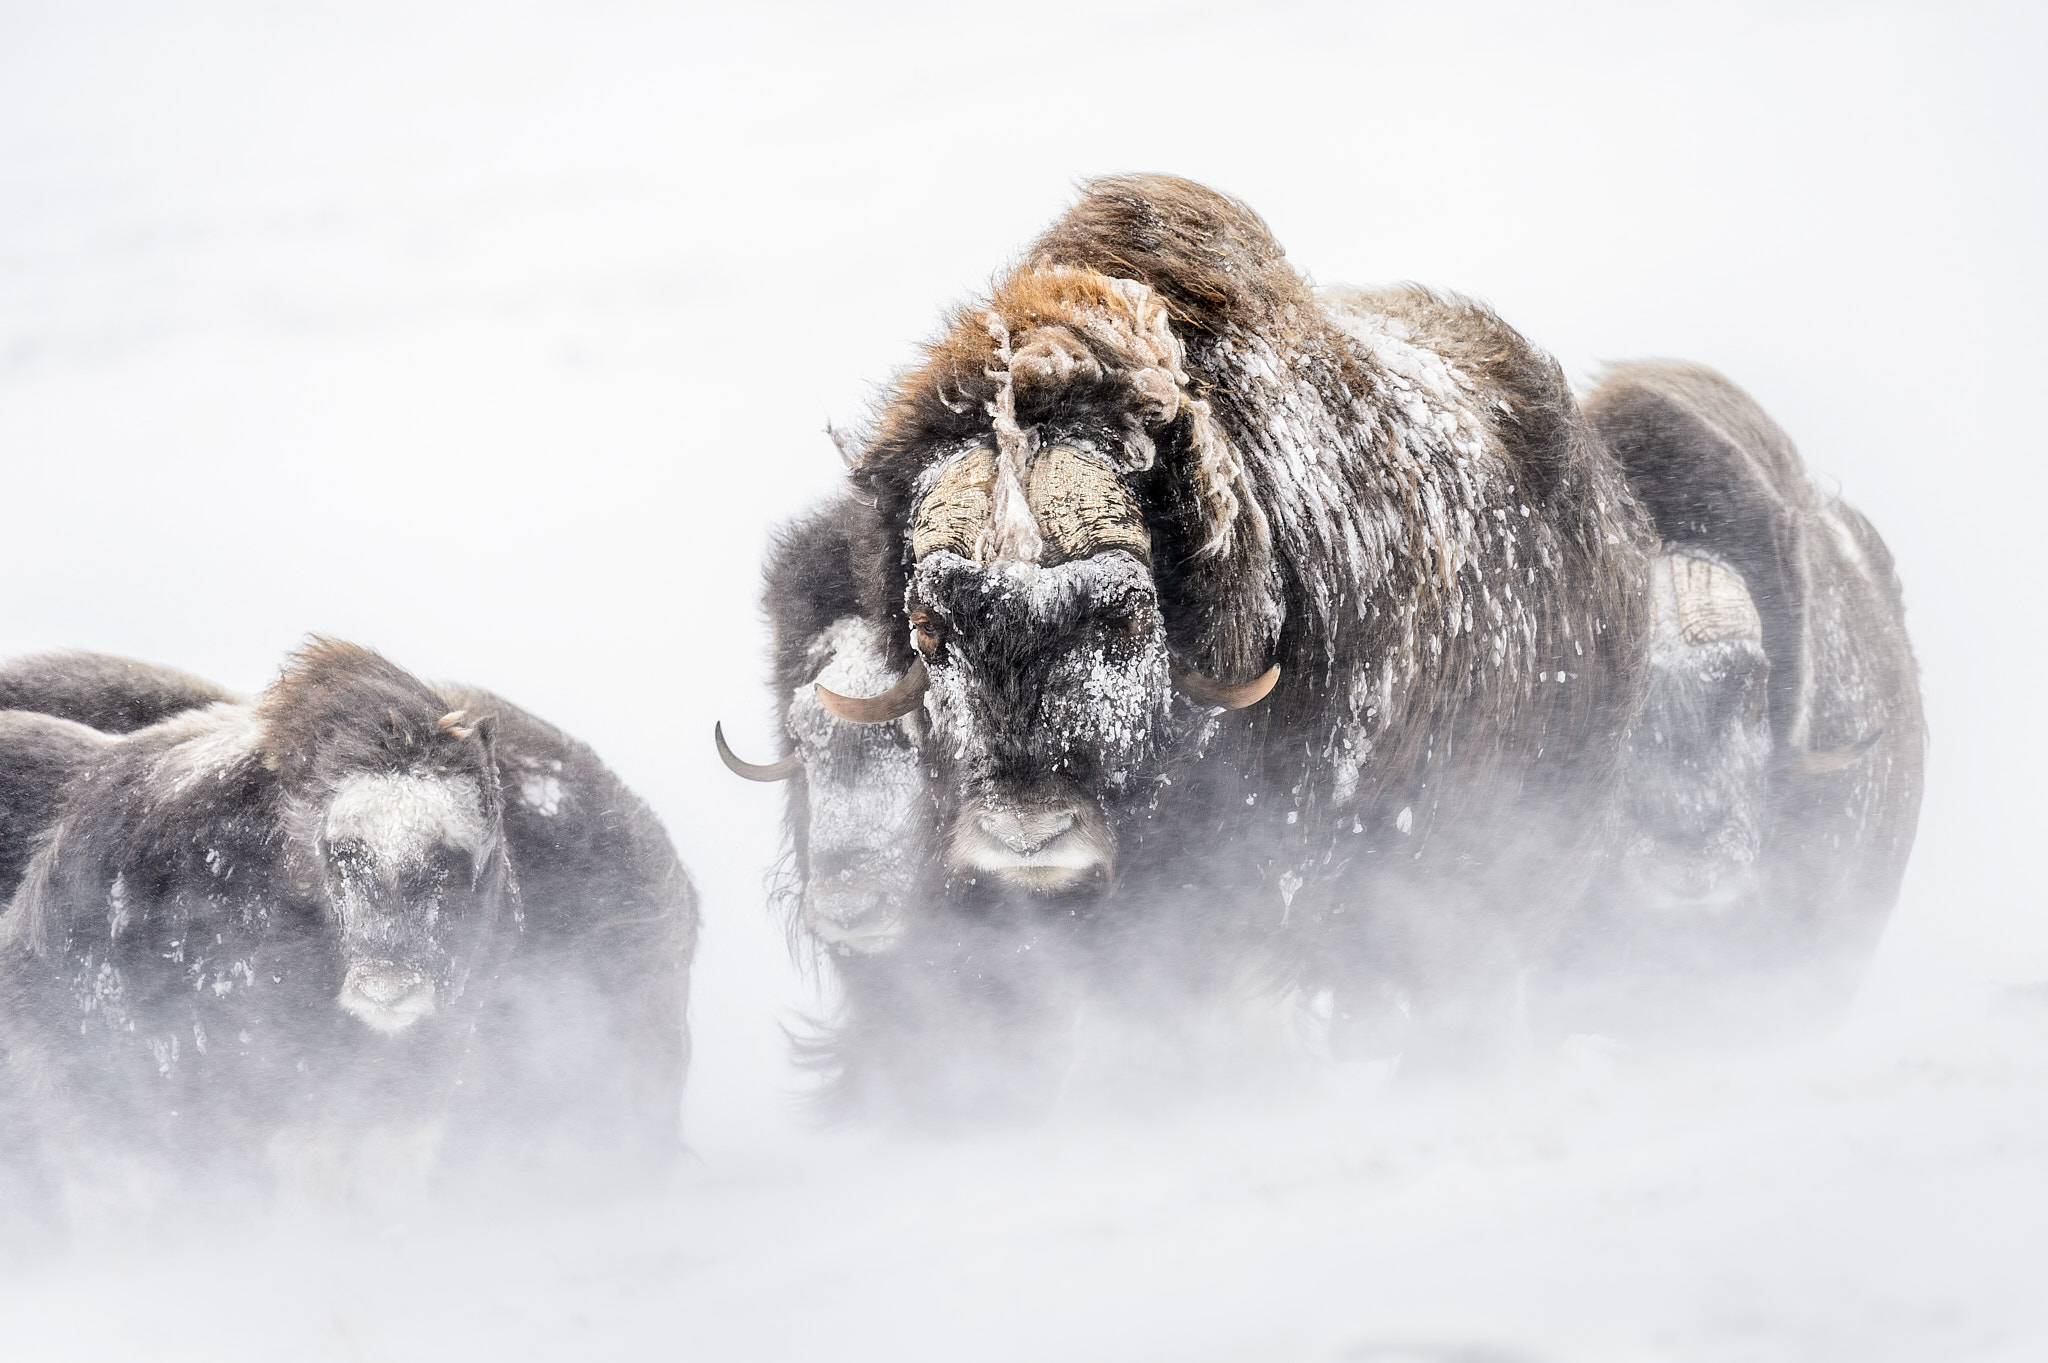
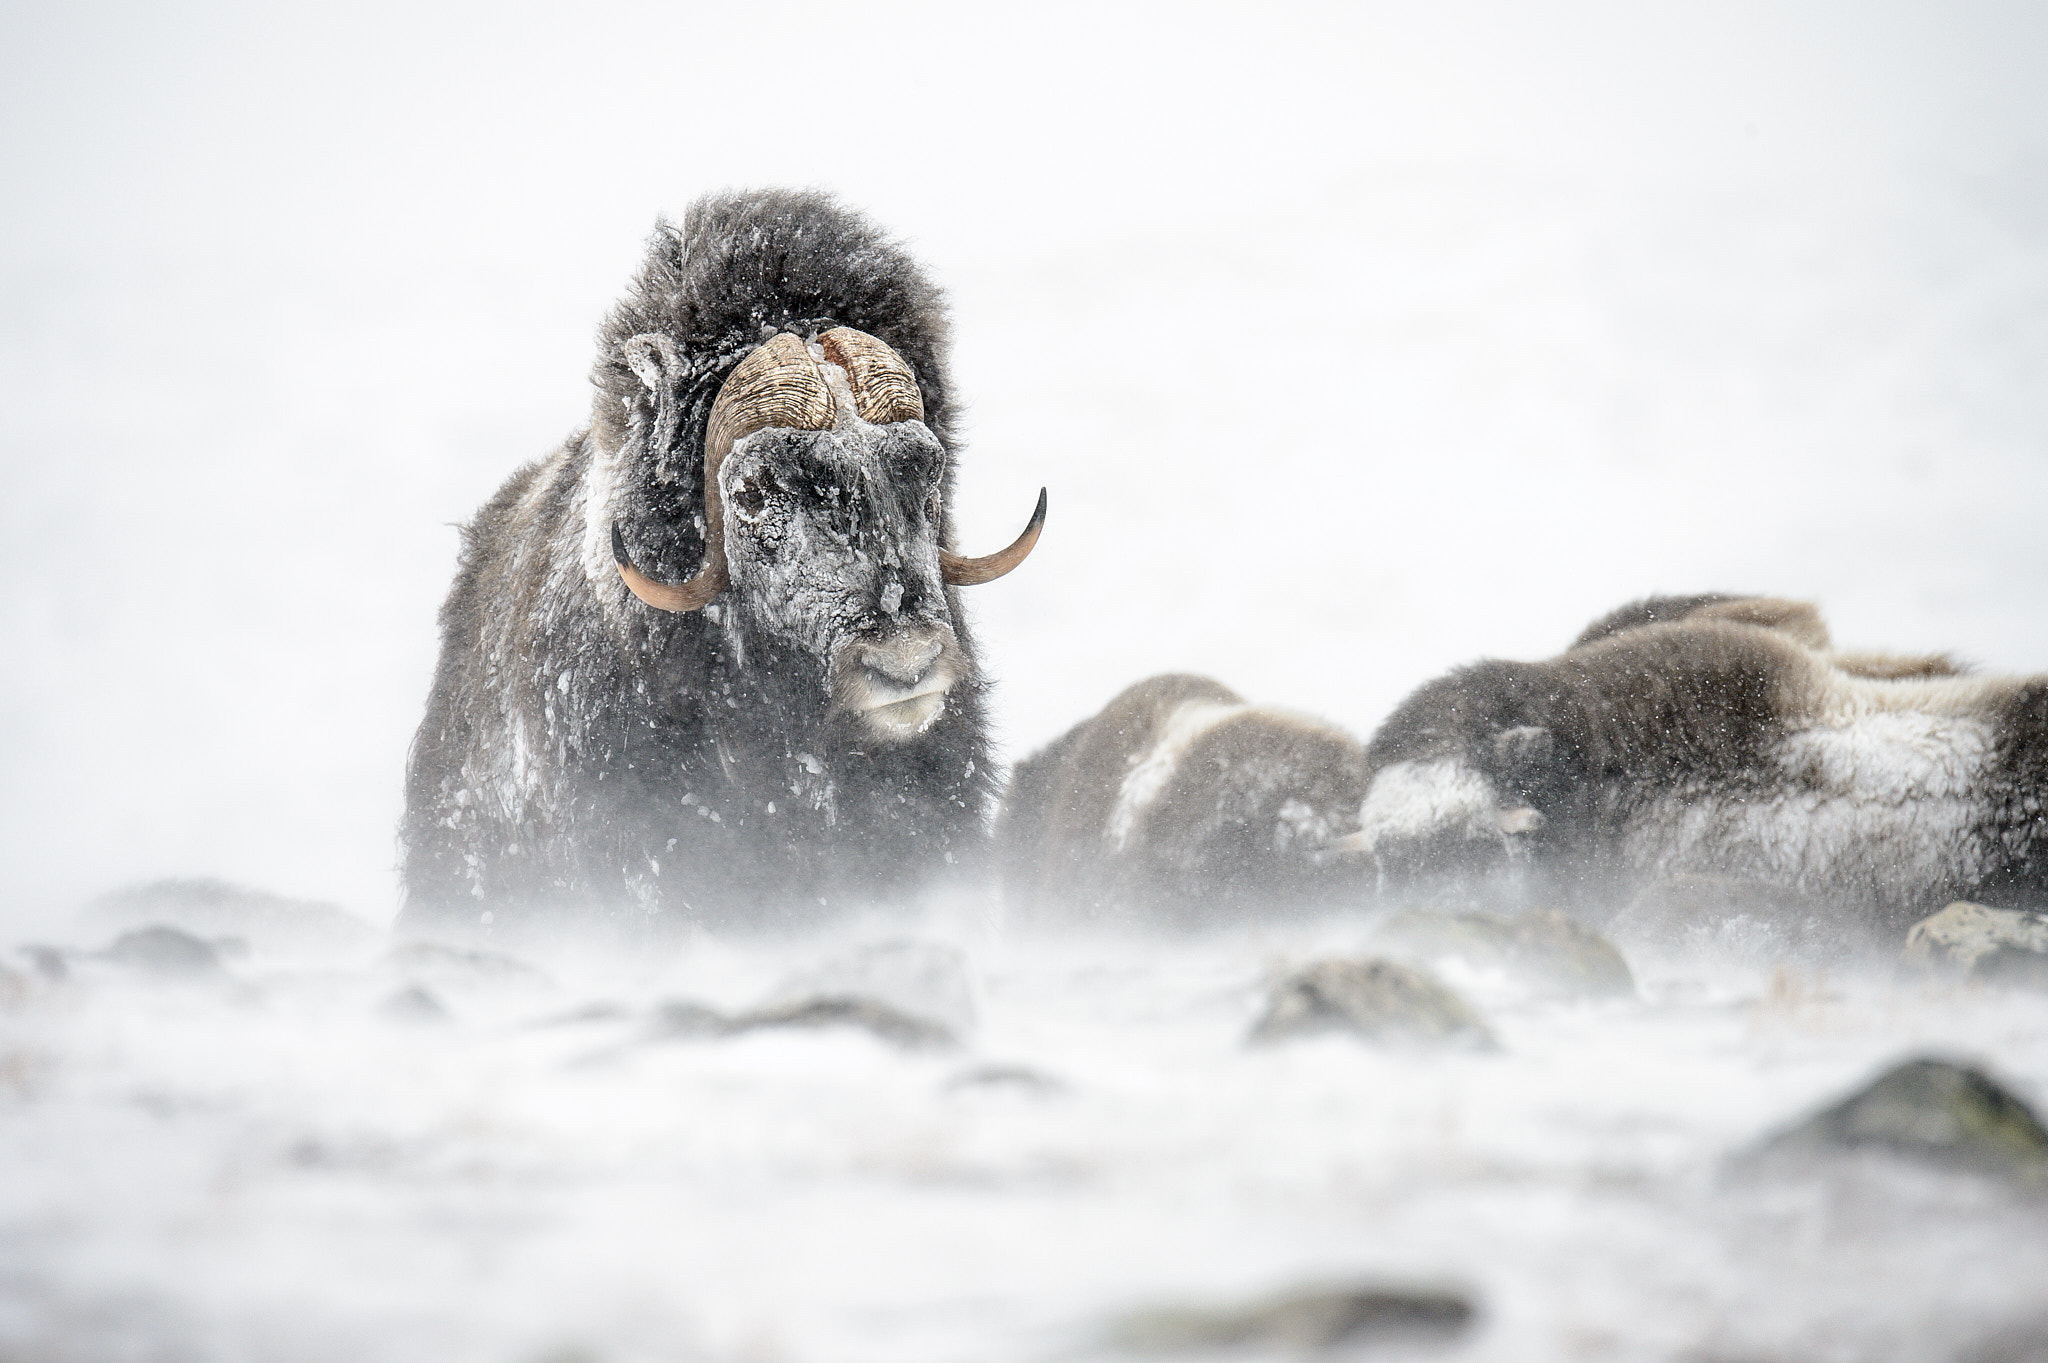
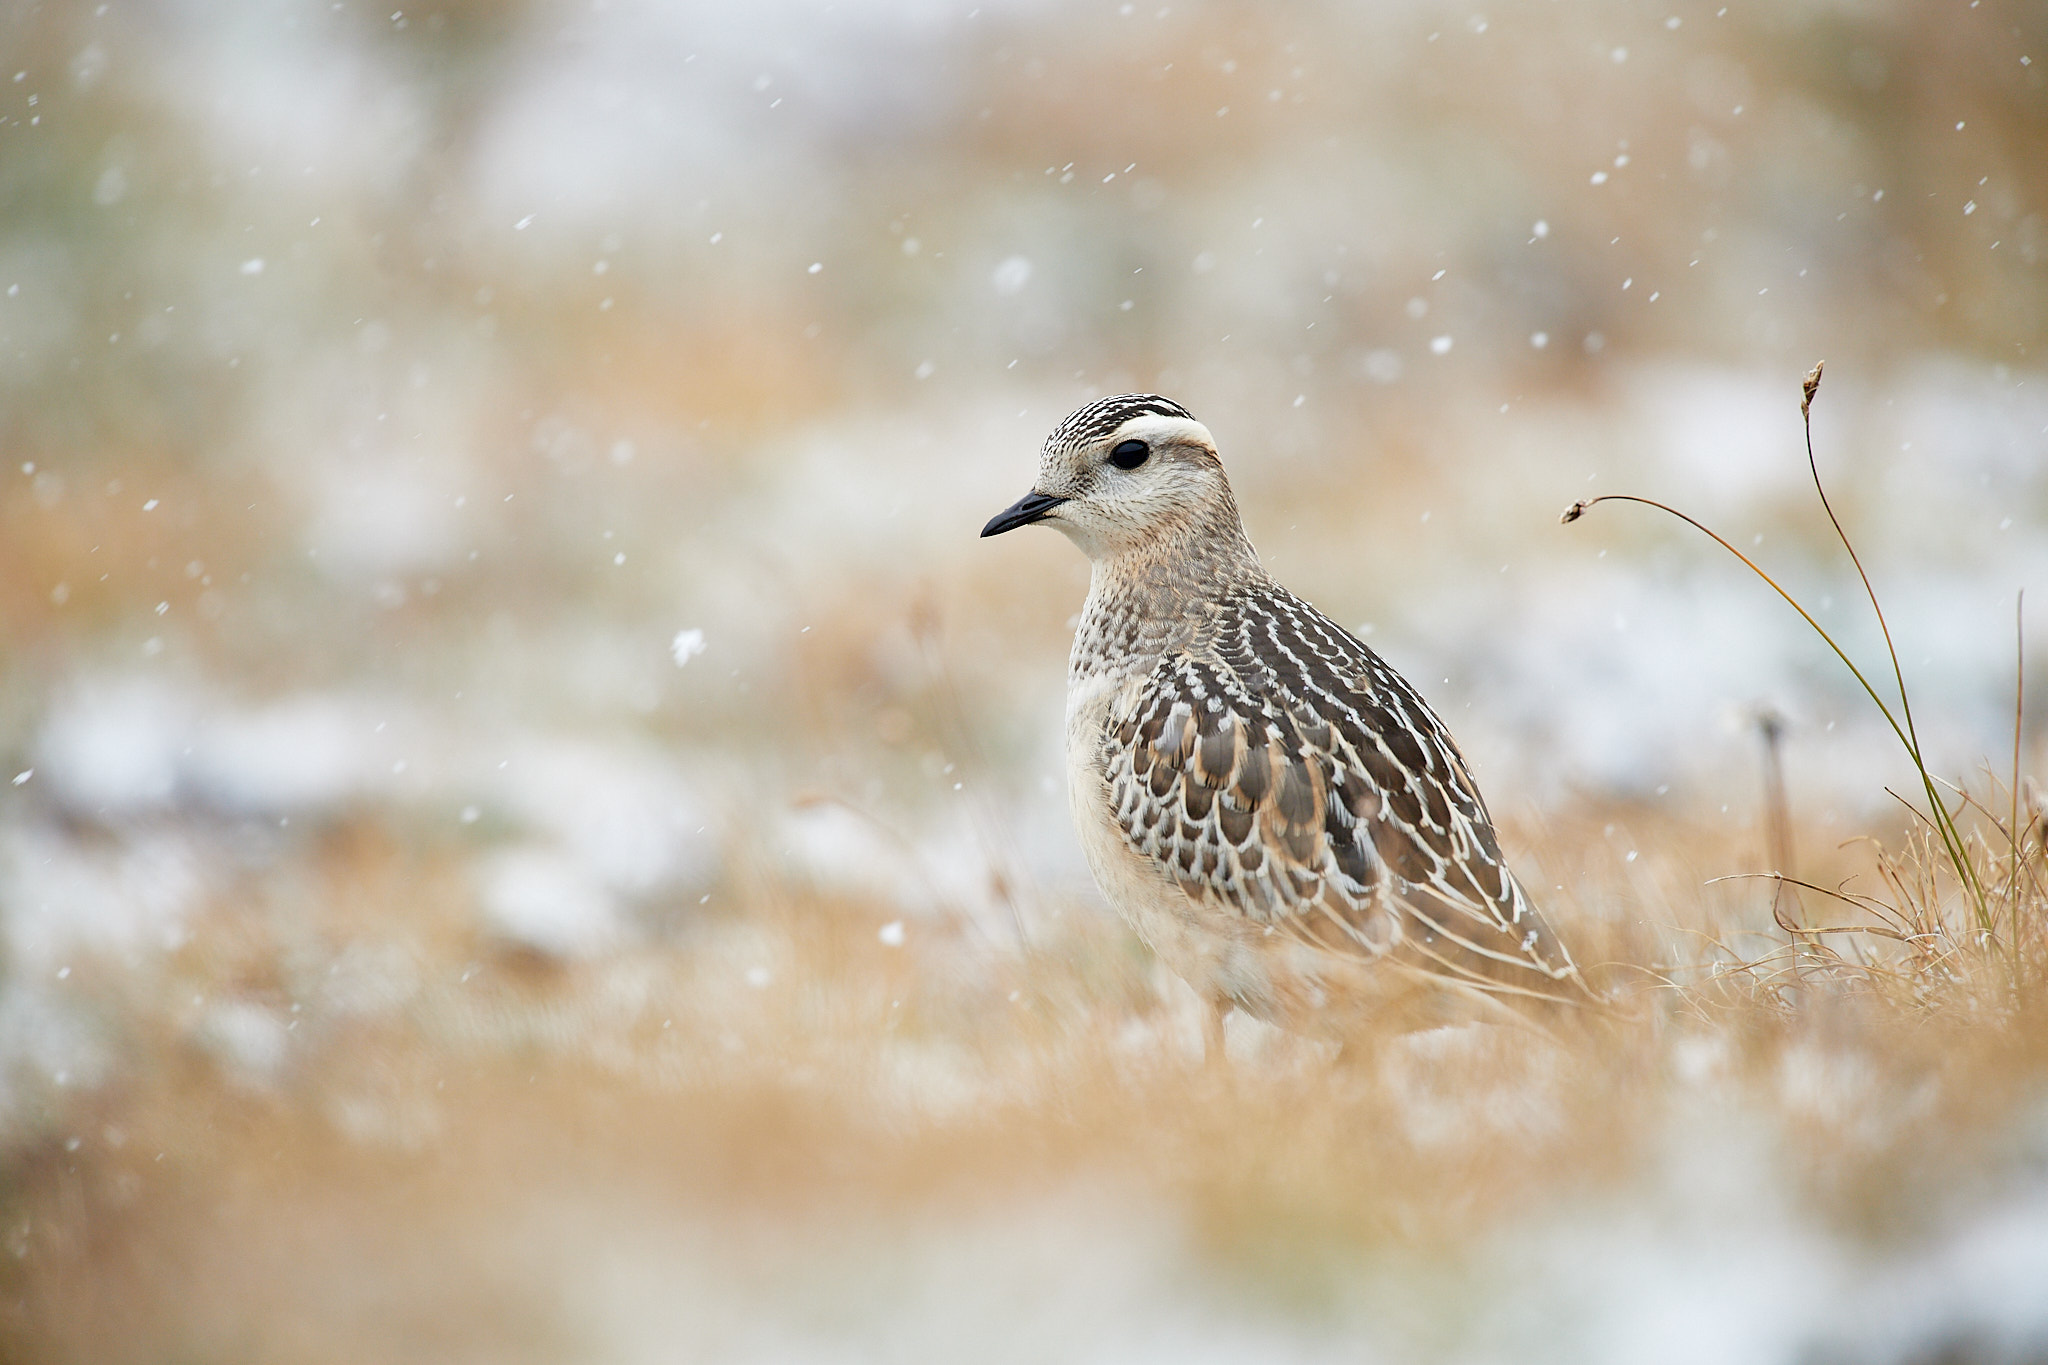
- Gives more context on the environment that your subject lives in
- Tells a story about the resilient character of the wildlife
- Conveys the feeling of adventure in your photos
All of these are good reasons to take wildlife pictures in difficult conditions. But it isn’t easy to do so.
First, safety is paramount. Photographers must honestly assess their experience and knowledge of the location, seeking guidance from experts when they feel unprepared. It’s challenging to be outside in extreme conditions far from a secure place.
Sharing an adventure with a buddy or two can help manage any problems. It might be hard to convince a non-photographer friend to join you on a trip where bad weather is expected, but if you’re friends with other wildlife photographers, they will usually be willing!
The bottom line here is that it is foolish to risk your life, or the lives of rescue teams. Talking to experts beforehand and doing your due diligence – then going with at least one other person – can make a big difference.
Then, you need the right gear. In the far North, they say that there is no such thing as bad weather, just bad gear. It starts with wearing the right clothing, which is not just a matter of surviving the cold, but also avoiding being miserable while trying to create your pictures.
Wool is considered one of the best materials for clothing in weather like this, because it doesn’t get very cold when wet. Consider a warm wool hat and socks. Usually, two pairs of socks are better than one, providing you have the right boot size.
The trick is dressing in layers. In extremely cold weather, I prefer to wear double-layered and long johns with a netted layer on the inside and wool on the outside. The net helps the skin to breathe and creates a warm micro-climate (such as Aclima DoubleWool or Brynje Arctic).
Then I add one or two fleeces, depending on the temperature, and top them with an insulated jacket and/or a Goretex shell (I use mountaineering and high-altitude clothing made by brands like Patagonia, Arc’teryx, Rab, and TNF). The layers could be combined depending on wind, rain, snow, and how intense the effort is.
I use either goose down or synthetic fiber for the insulated jacket. On average, goose down is lighter, warmer, and packs smaller. However, it is more expensive, and its warming power is reduced by humidity. Synthetic fibers are better at keeping you warm in very wet conditions, but on average they are heavier, less warm, and less packable.
Photographers face a specific challenge to protect their hands while keeping enough dexterity to use the camera. My advice is, one more time, to use layers, wearing a thin glove under a thick mitten. If the mitten is designed to be opened so you can use your fingers when needed, that works well.
That said, fingers and toes get cold sooner than other parts of your body. I recommend carrying heat packs with you that can slide into your boots or your gloves if you start to feel your extremities freezing up. They are cheap, light, and effective. If you’re using the layer system, you can put one of these packs inside the mitten and not have to worry about frostbite. (Some gloves and mittens even have dedicated pockets for hand warmers.)

I always add to my kit:
- A GPS to help me find the way easier (but you must know how to use it before starting the trip). In tricky conditions, adding a compass and a map is a good idea (again, you must know how to use it, before starting the trip).
- Spikes for my boots (and/or snowshoes, depending on the ice and steep terrain).
- A baseball cap to put over the wool hat, because I wear glasses and it helps to shelter them from the snow. If stronger winds are forecasted, I add snow goggles.
- A thermos of hot beverages: a cup of hot tea or coffee at hand helps a lot in warding off the cold.
- If the walk is strenuous, I add a water bottle because hydration is critical in environments like this. If you’re in sub-freezing temperatures, pouring warm water into an insulated thermos before the trip ensures that it will not freeze during a one-day hike.
- Something to eat, which should be rich in calories and easy on your stomach. I advise energy bars, nuts, and dried fruits. I avoid fatty food and alcohol.

Coming to the camera stuff, modern batteries don’t suffer as much from the cold these days. I still prefer to stay on the safe side and keep a spare one in a pocket near my body if I’m on an expedition. But it depends on the camera. I took most of the photos in this article using various Nikon flagship cameras, and their big batteries mean that I haven’t had to use my spare in years (as long as I remember to recharge the battery each night).
If it’s cold enough that it’s snowing rather than raining, I don’t bother with rain covers. Since snow doesn’t contain much water, I just use a microfiber towel, and that has always been enough.

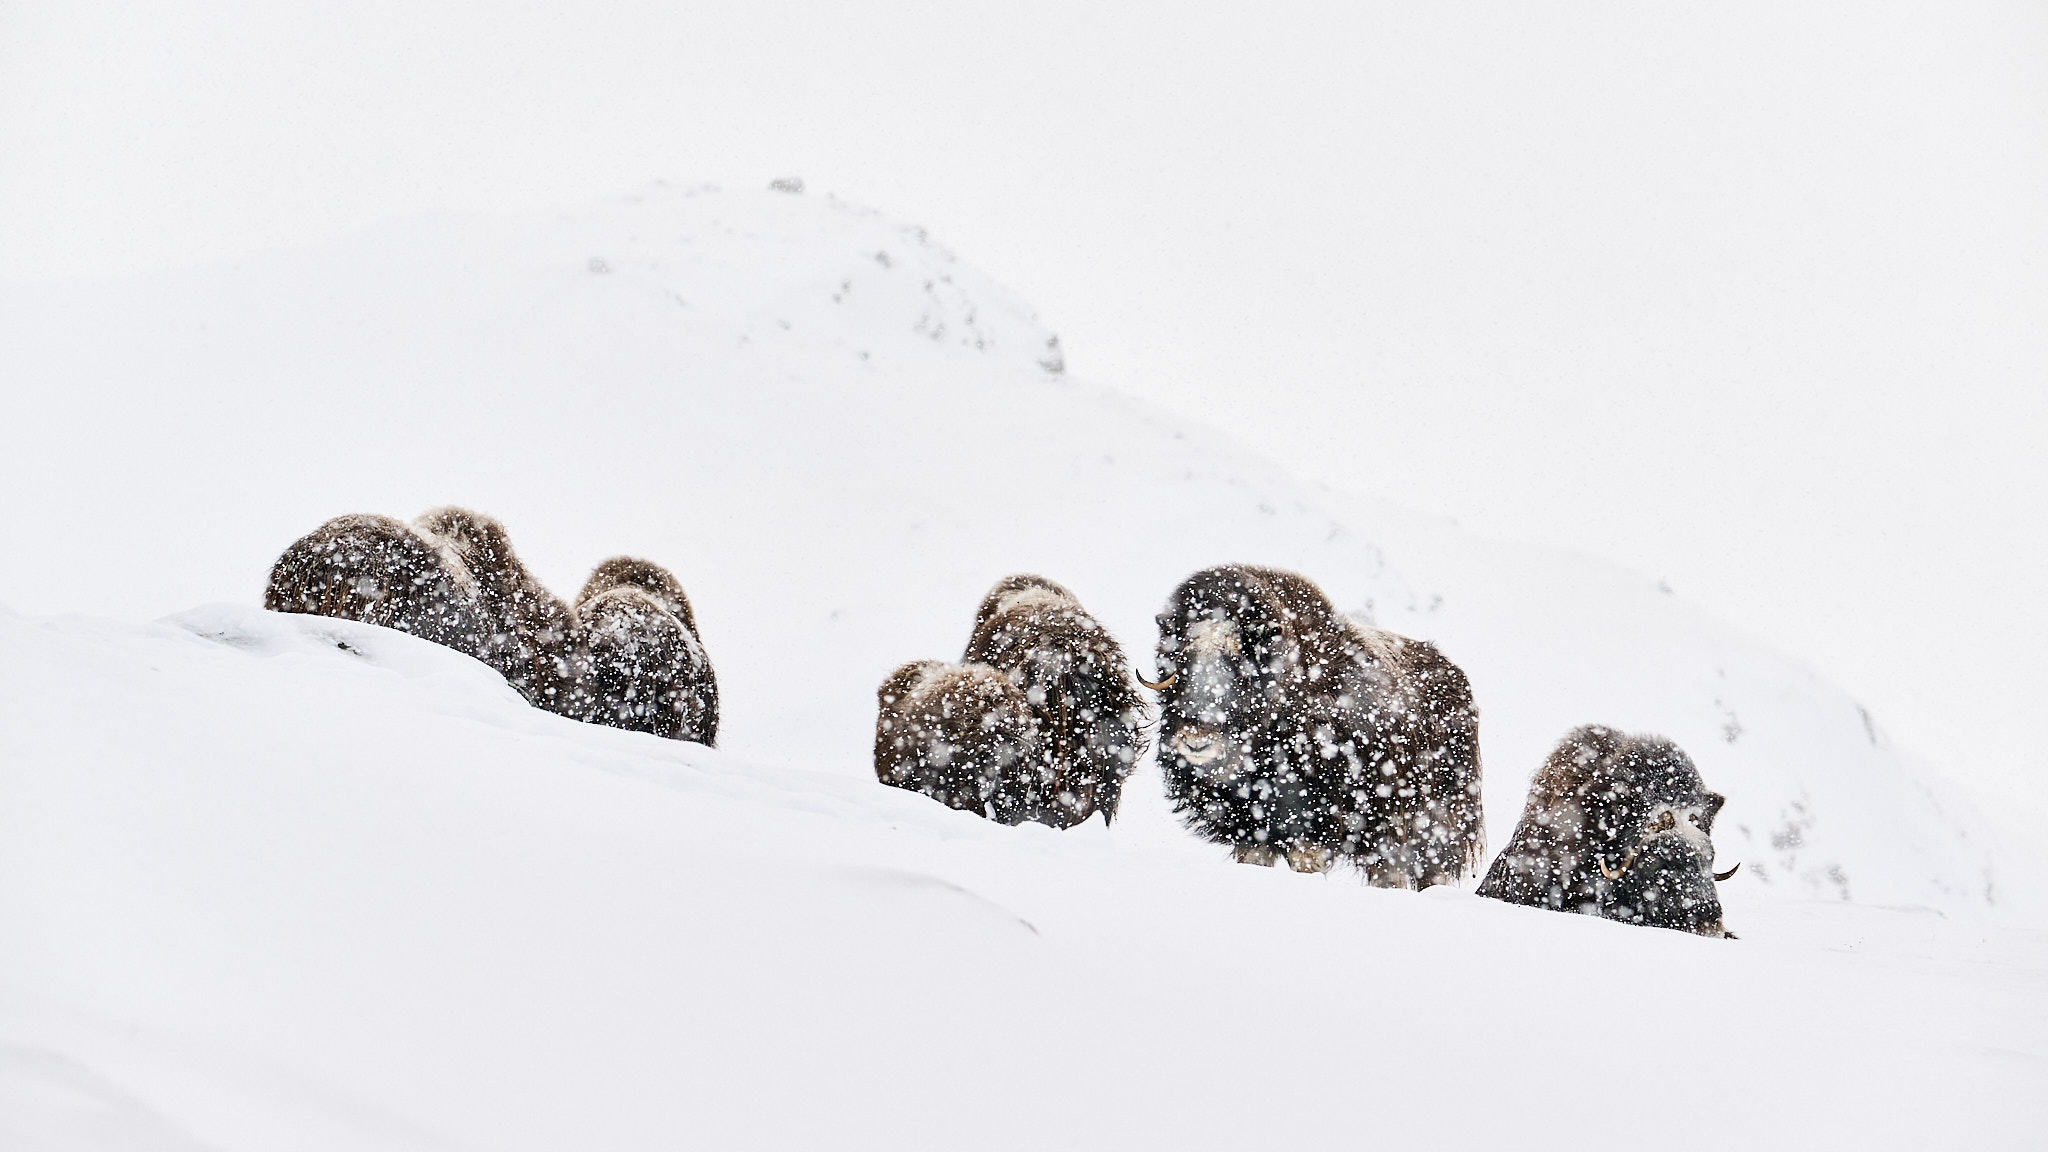
One challenge with taking wildlife photos in the snow is that autofocus doesn’t always work perfectly. In particular, if you use a camera without a subject-recognition autofocus system, it may end up focusing on snowflakes in the air rather than the subject itself. So, don’t be afraid of focusing manually! Especially if the wildlife is standing around, careful manual focus is just as accurate as the best autofocus systems. You can also make good use of the focus save/recall function on your lens if available.
My final tip about taking pictures in extreme weather conditions is about the exposure. Ice and snow are white. Often, it takes +0.7EV (at least using Nikon Matrix exposure mode) to avoid underexposure.
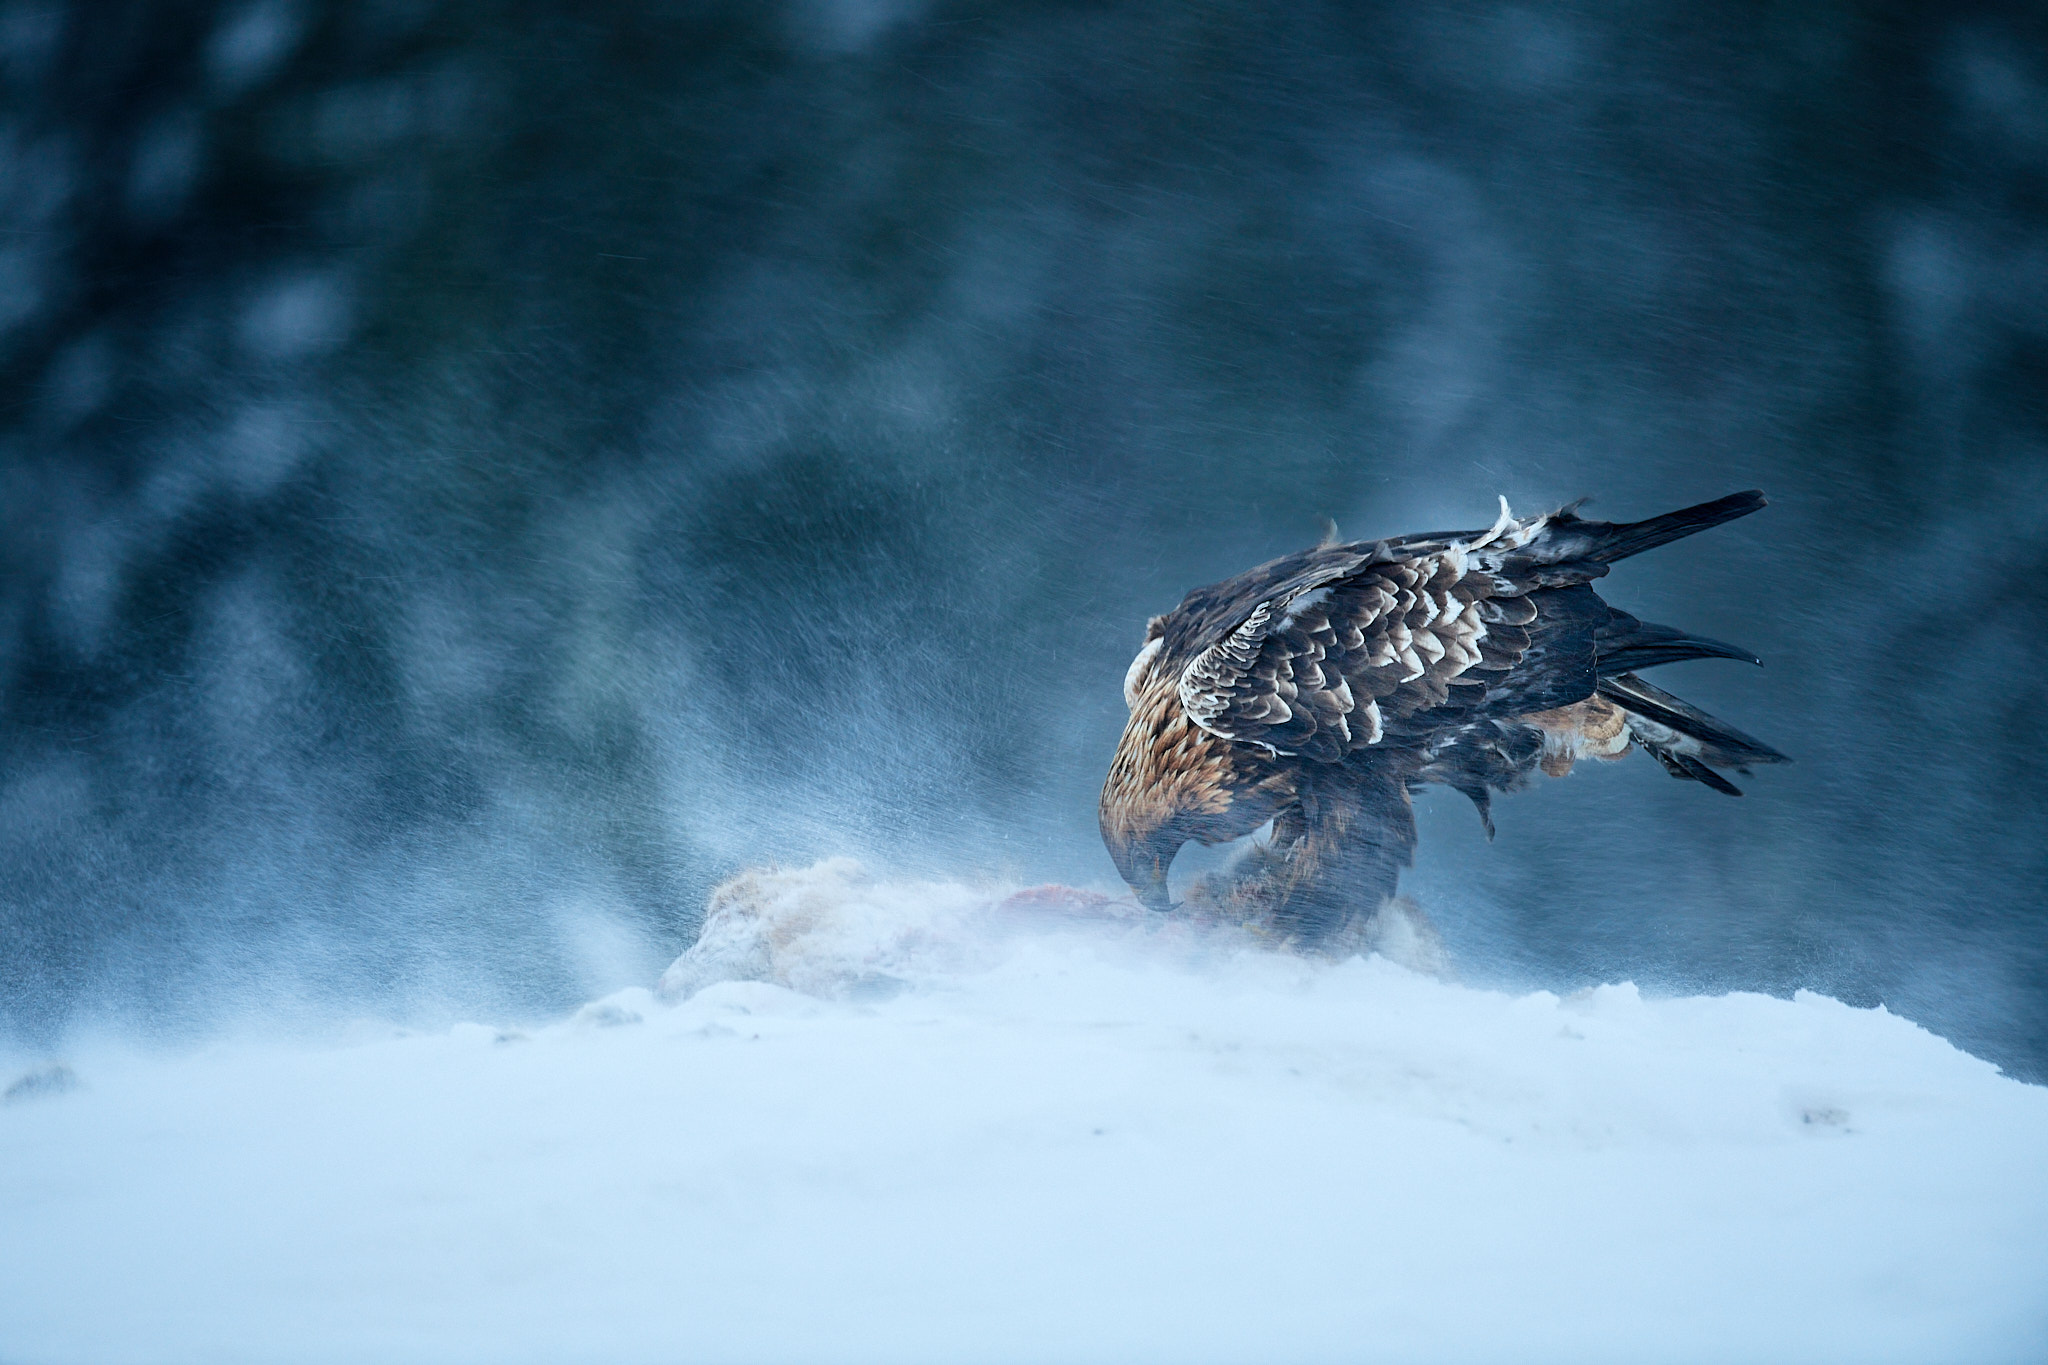
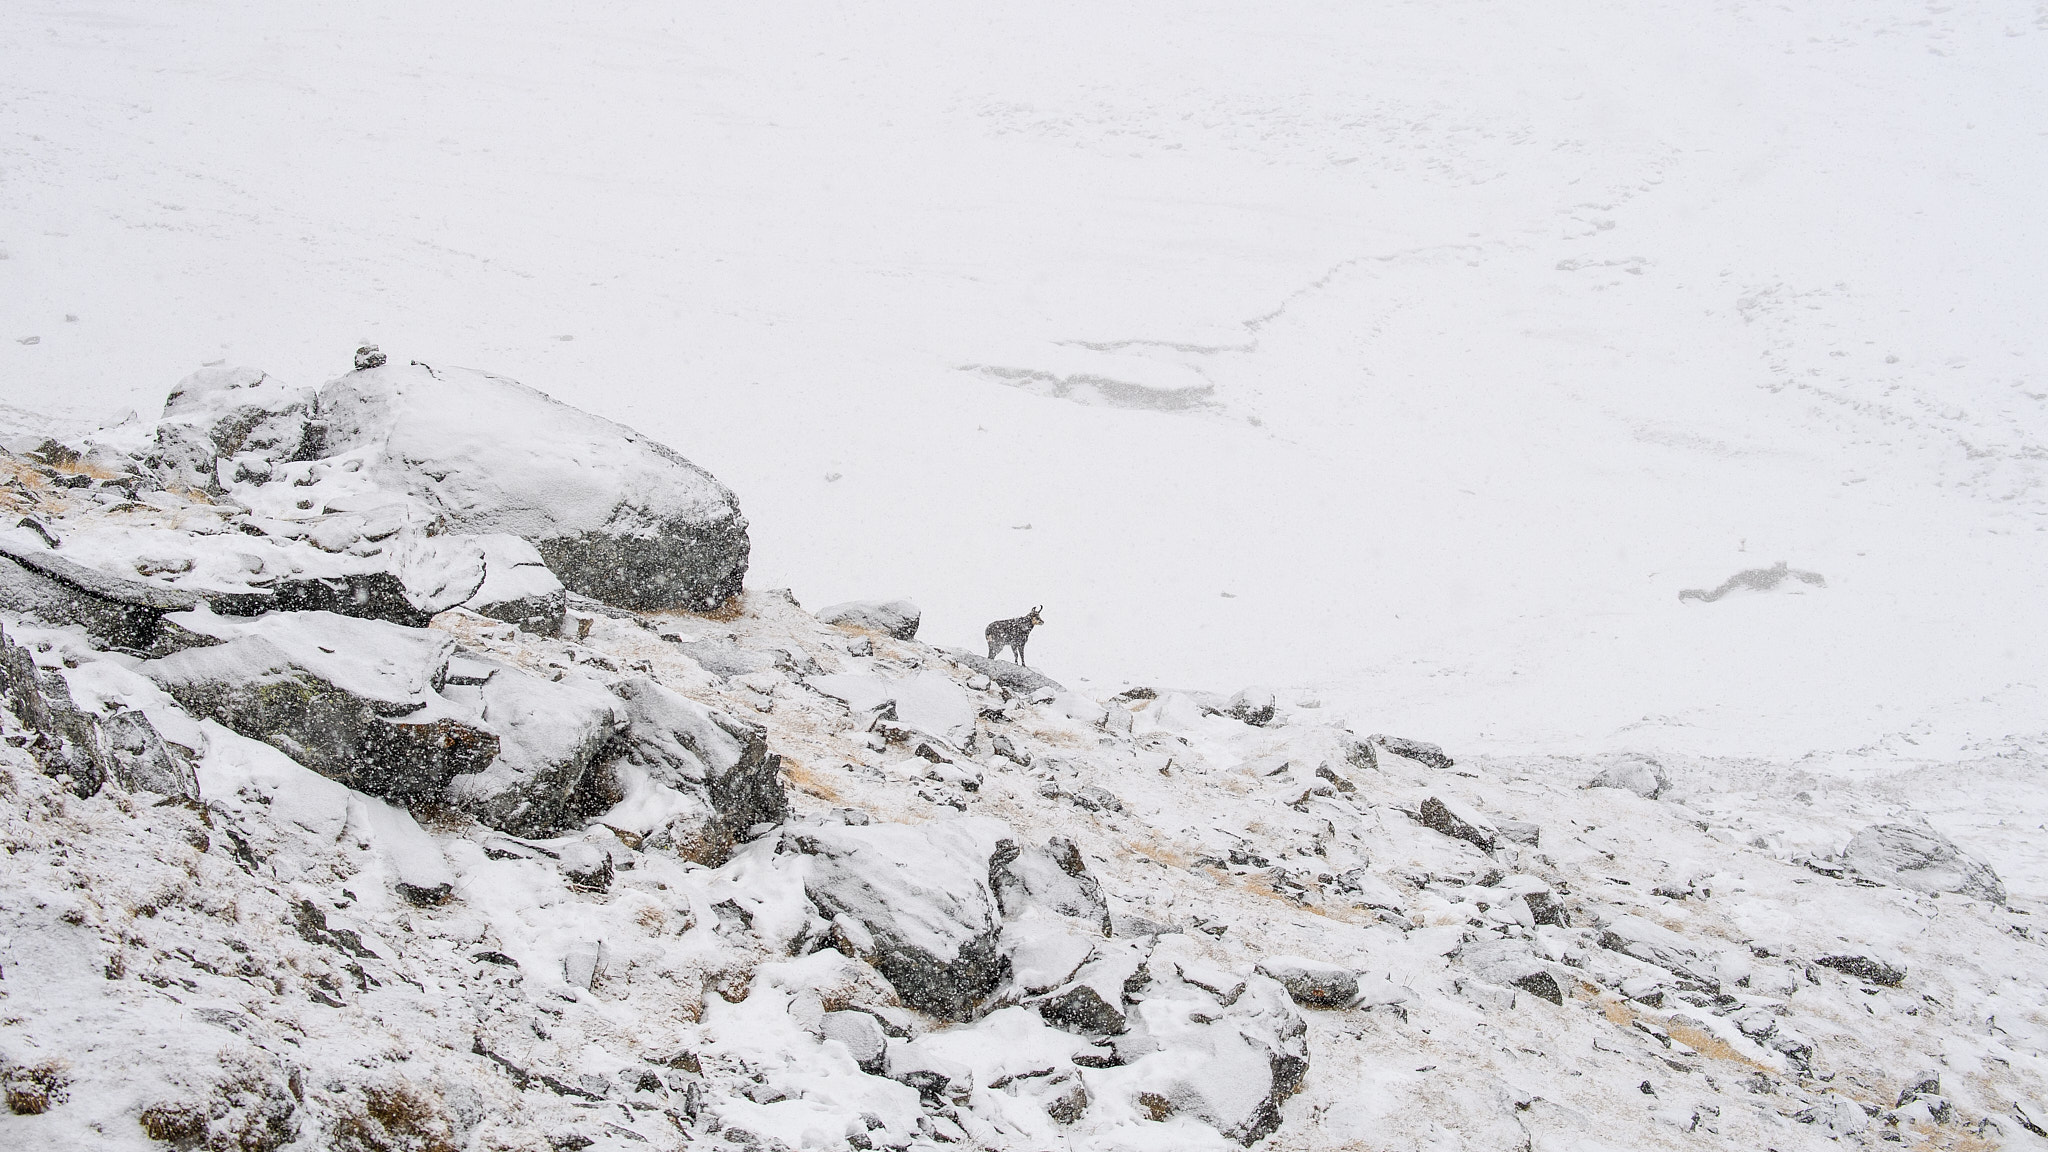
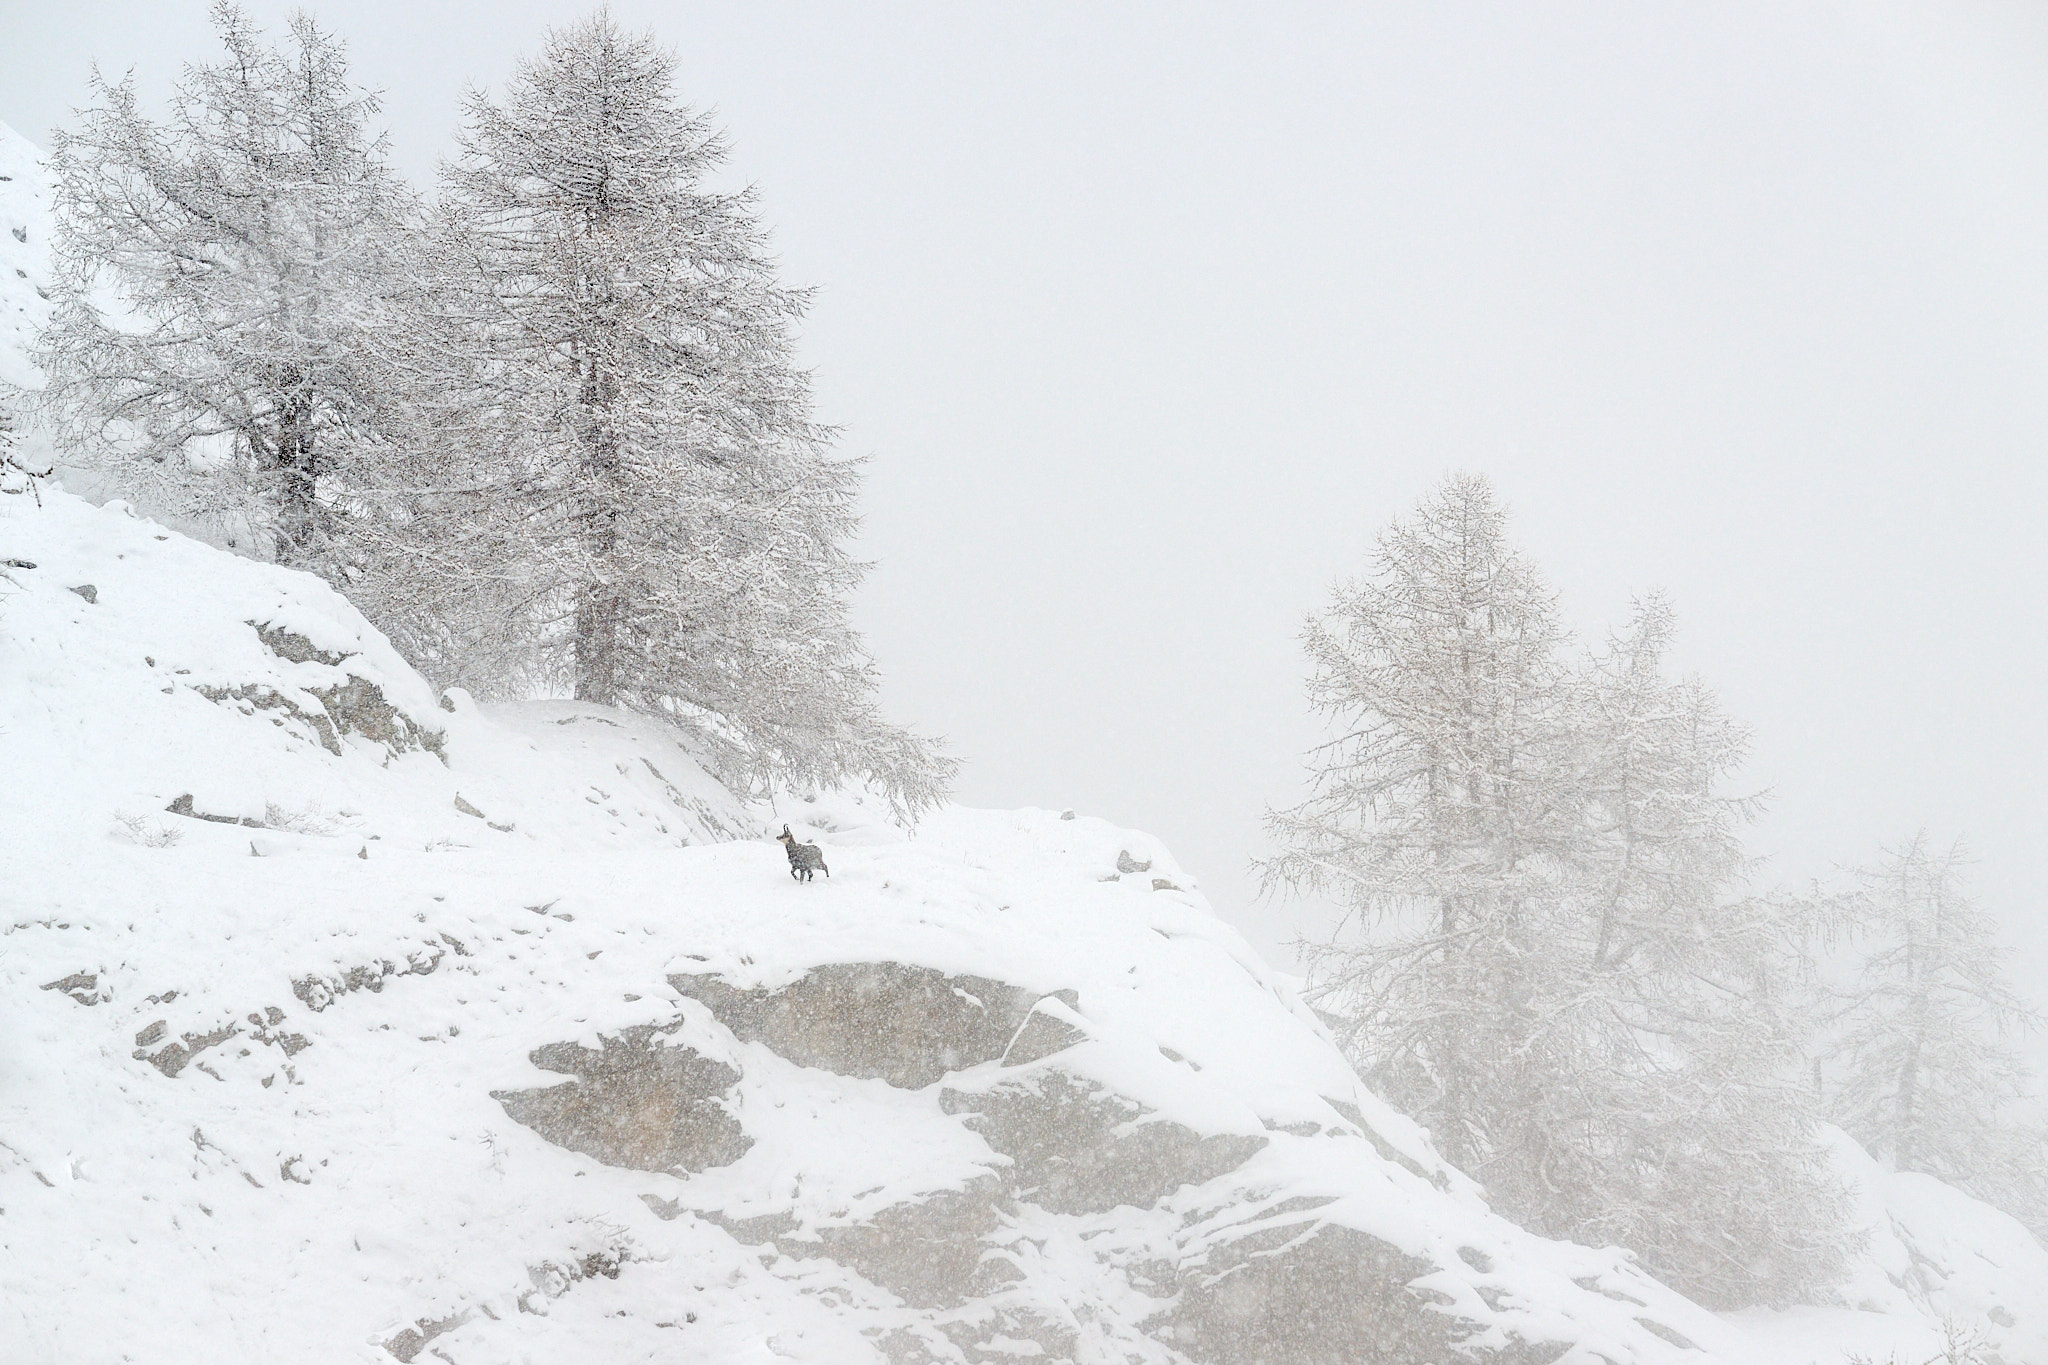
I took the photos in this article in winter in the Italian Alps, Norway, Finland, Canada, and Svalbard, with temperatures as low as -25°C (-13F). Winds were up to 20m/s (45 MPH), and being above the tree line, I was quite exposed. Yet by following the tips in this article, I stayed warm and returned with sharp photos from each of these trips.
I hope you enjoyed this article on how to capture wildlife in extreme weather conditions. If you have any questions or feedback, please feel free to let me know in the comments section below.
Super photos and weather
Ciao Massimo
Heartfelt congratulations on the beautiful photos. As I always tell friends bad weather=good photos in the sense that you have different or special conditions than usual.
Very interesting also your tips.
Dionigi, thanks a ton!
Thank you to share your wonderful pictures and adventure :D
Beautiful photos. Not sure if I want to follow your footsteps in terms of weather preference, but I like the results. ;)
I’m happy you like my photos, and I like the sun too!
Great pictures and good advice. Thank you Massimo.
Thanks Tibor
I live in Canada so experience these conditions frequently! This advice is spot on. One other thing probably worth mentioning is to protect your gear from condensation on your return to a warm inside place. Either leave your gear outside (after taking the batteries and cards) or, if taking inside, place in a dry bag or bin bag, or leave in your sealed camera bag to bring to room temperature.
Dave, as an expert Canadian, I’m happy you agree with my advice.
You are right about the condensation, a topic I forgot in my article. In severe cold in the Arctic, I also experienced something the opposite: moving a lens from a warm place to a very cold outside makes a lens not sharp for a while. Maybe a matter of different dilatation of its components/lenses.
Steve Perry did a great you tube video on this. He put it down to thermal distortion inside the hood, similar that to when shooting from a warm car into the cold.
Link here; www.youtube.com/watch…42nXgYUwyo
Thanks Dave, a very informative video.
It is something to be aware of but, in my experience, it isn’t just a matter of warm air in the hood. Also, the overall temperature of the lens plays a role if you are moving for example from +18°C inside an icebreaker to -25°C outside of it, on the deck. It needs a long time to regain the lens’s sharpness you are used to.
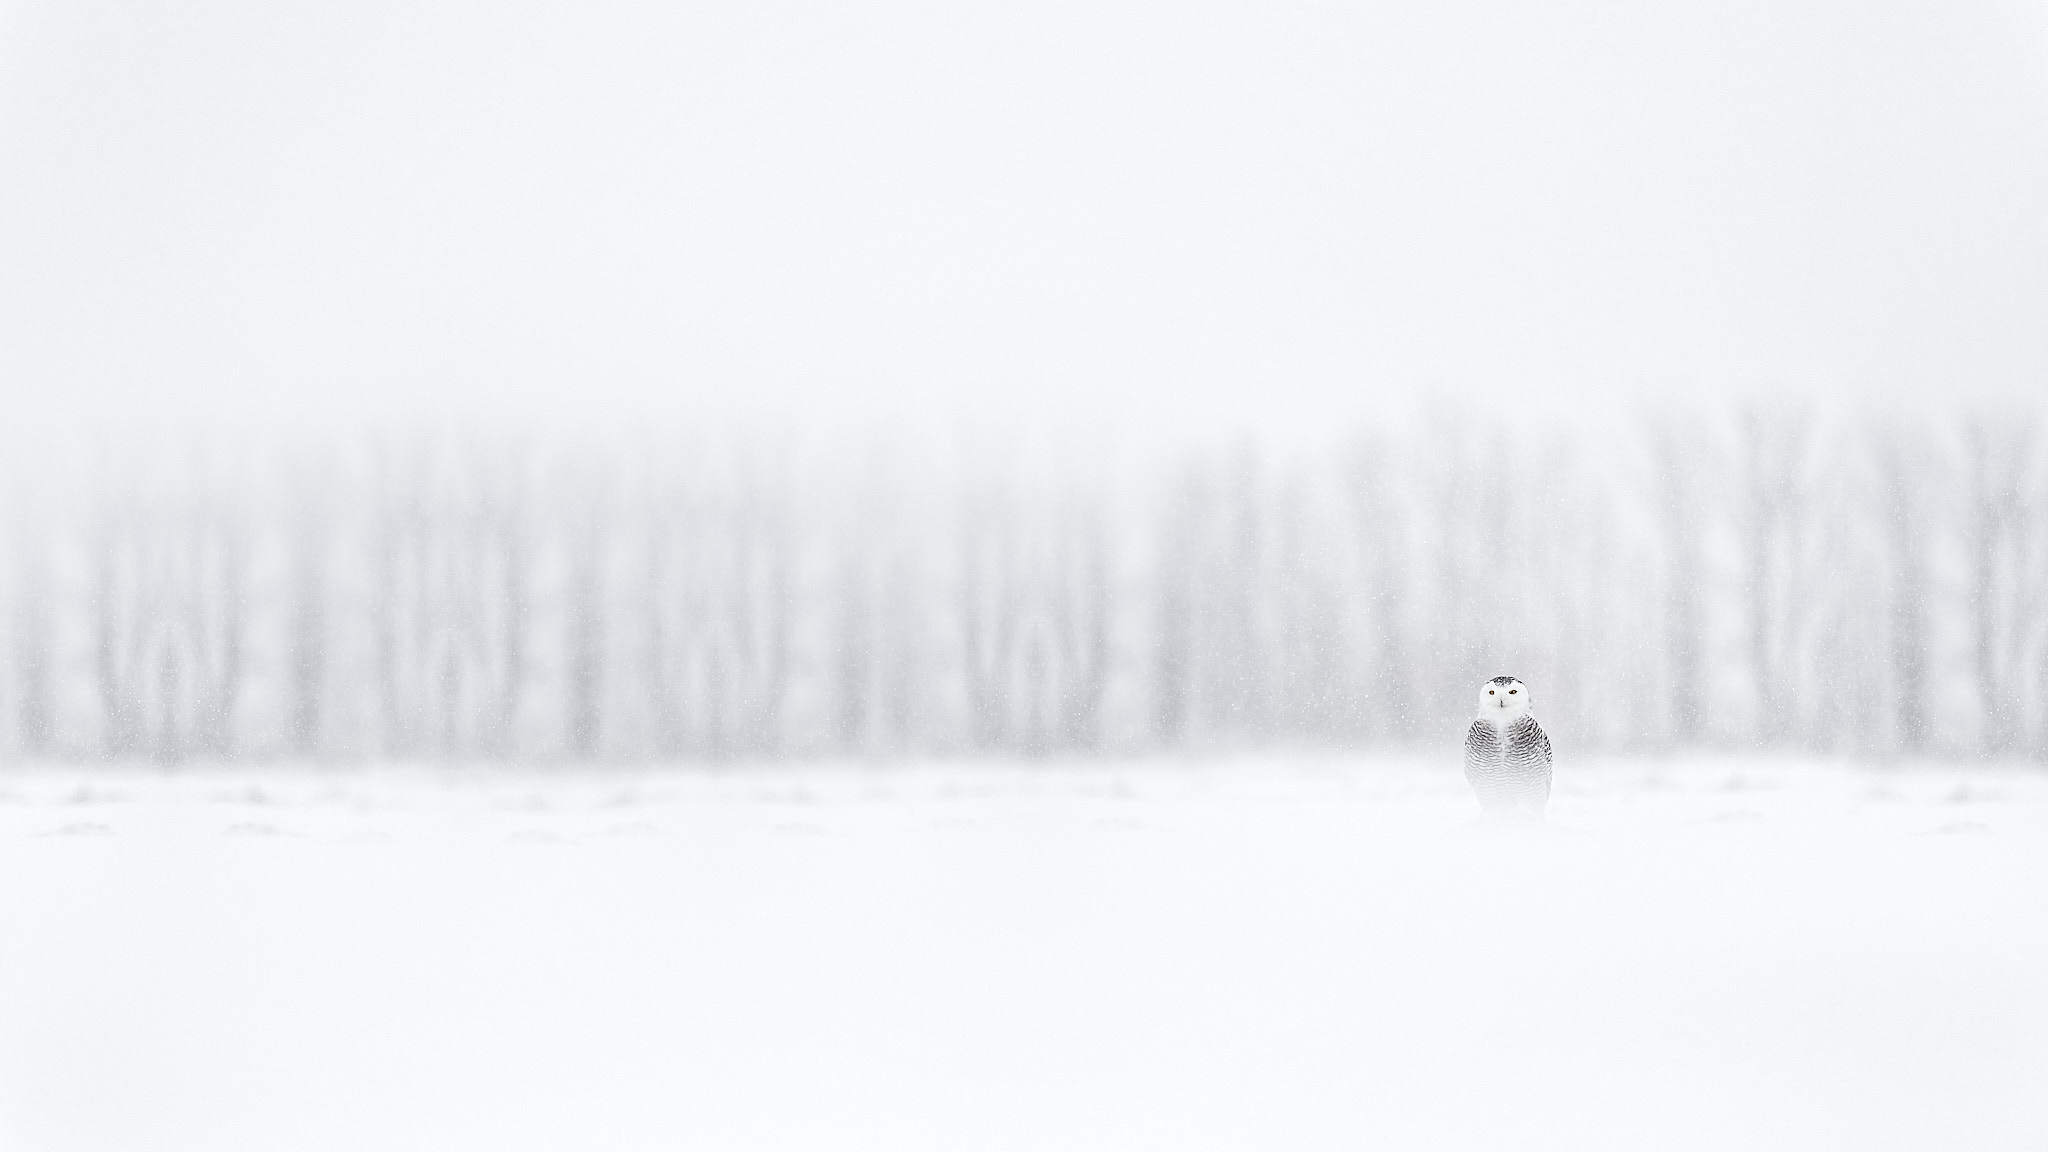
Well, these are great pictures! I’m an owl fan, so I particularly like the owl images. I really admire your courage and stamina to get out in these conditions to take them. I wouldn’t, for sure :-)
Thank you for your kind words!
The Snowy Owl is from Canada. It is an amazing bird to portray, I like it so much too.
Thank you Massimo for this very informative guide to face the extremes of Winter. For all the amazing chances you got, you have to be there, whatever gear you bring. Very nice indeed for you to have a pool of friends to bring with you in such nice adventures! Great all!
Please continue to give us your field perspective, thank you.
Thanks!
Yes, I’m lucky to have friends who share my projects and expeditions. Nature is where I would love to live. Unfortunately, I have to work in an office, but it could be a lot worse.
Excellent photographs capturing the extreme weather very well as much as the animals.
and many thanks for the interesting article!
Thank you Pieter.
Very helpful article, Massimo. It is always a pleasure to read about your advice supported by amazing photos.
Thanks Marco!