Overexposure is usually considered a bad result in photography – something to be avoided at all costs. The same is true of blown-out backgrounds and overcast skies. But sometimes, this “high-key” look can be exactly what a photo needs. In this article, I will explain how to use the tool of high-key photography to your advantage to take better pictures in tricky lighting conditions.
Among the biggest challenges in wildlife and landscape photography is an overcast sky. You might even hesitate to pull out your gear in the first place on cloudy days.
I find this can be particularly true for bird photography, where an overcast background either looks dull and gray (with your subject underexposed) or extremely bright (with your subject more normal).
Instead of putting away your camera in these situations, I recommend seeing if you can use the bright, overexposed background to your advantage and end up with a powerful photo.
Table of Contents
What is High-Key Photography?
In short, high-key images are those that have few shadows and have the subject set against a very bright background. High-key images are often set against over-exposed backdrops. In high-key photos, the average of all the pixels in the image is very bright. High-key is the opposite of low-key images that are defined by their darker tones.
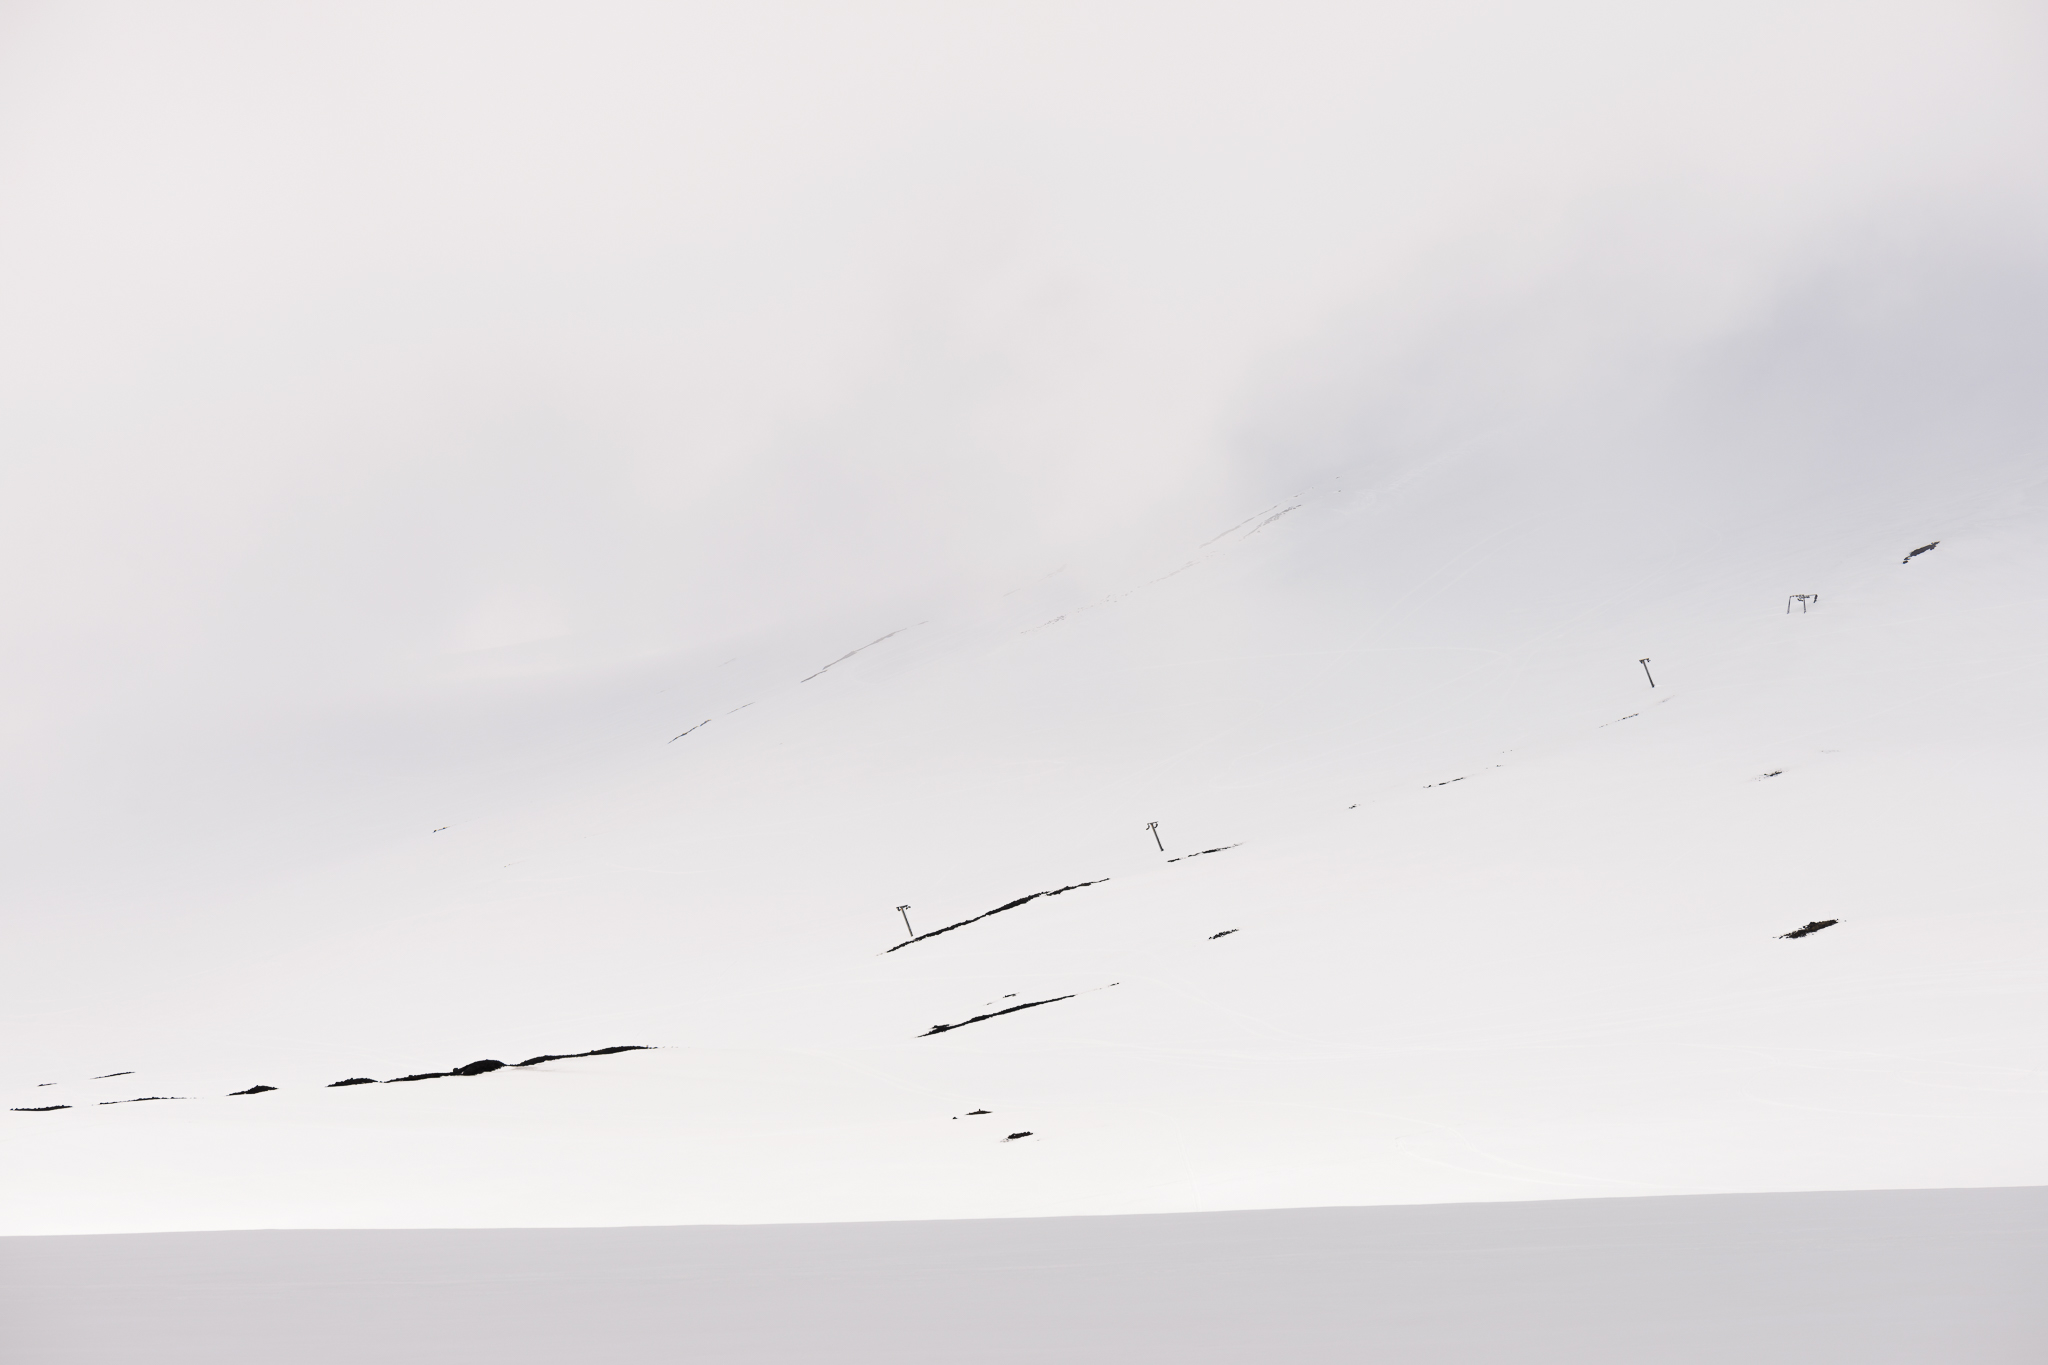
For landscape photography, snowy scenes are some of the best ways to take high-key photos. High-key images also work well in foggy conditions. There will only be a few shadow details in such a photo, while the rest can be bright or even completely white.
Meanwhile, in wildlife photography, a typical high-key photo involves an overcast sky that has been brightly exposed, often to the point of looking completely blown-out. Below is a typical example:
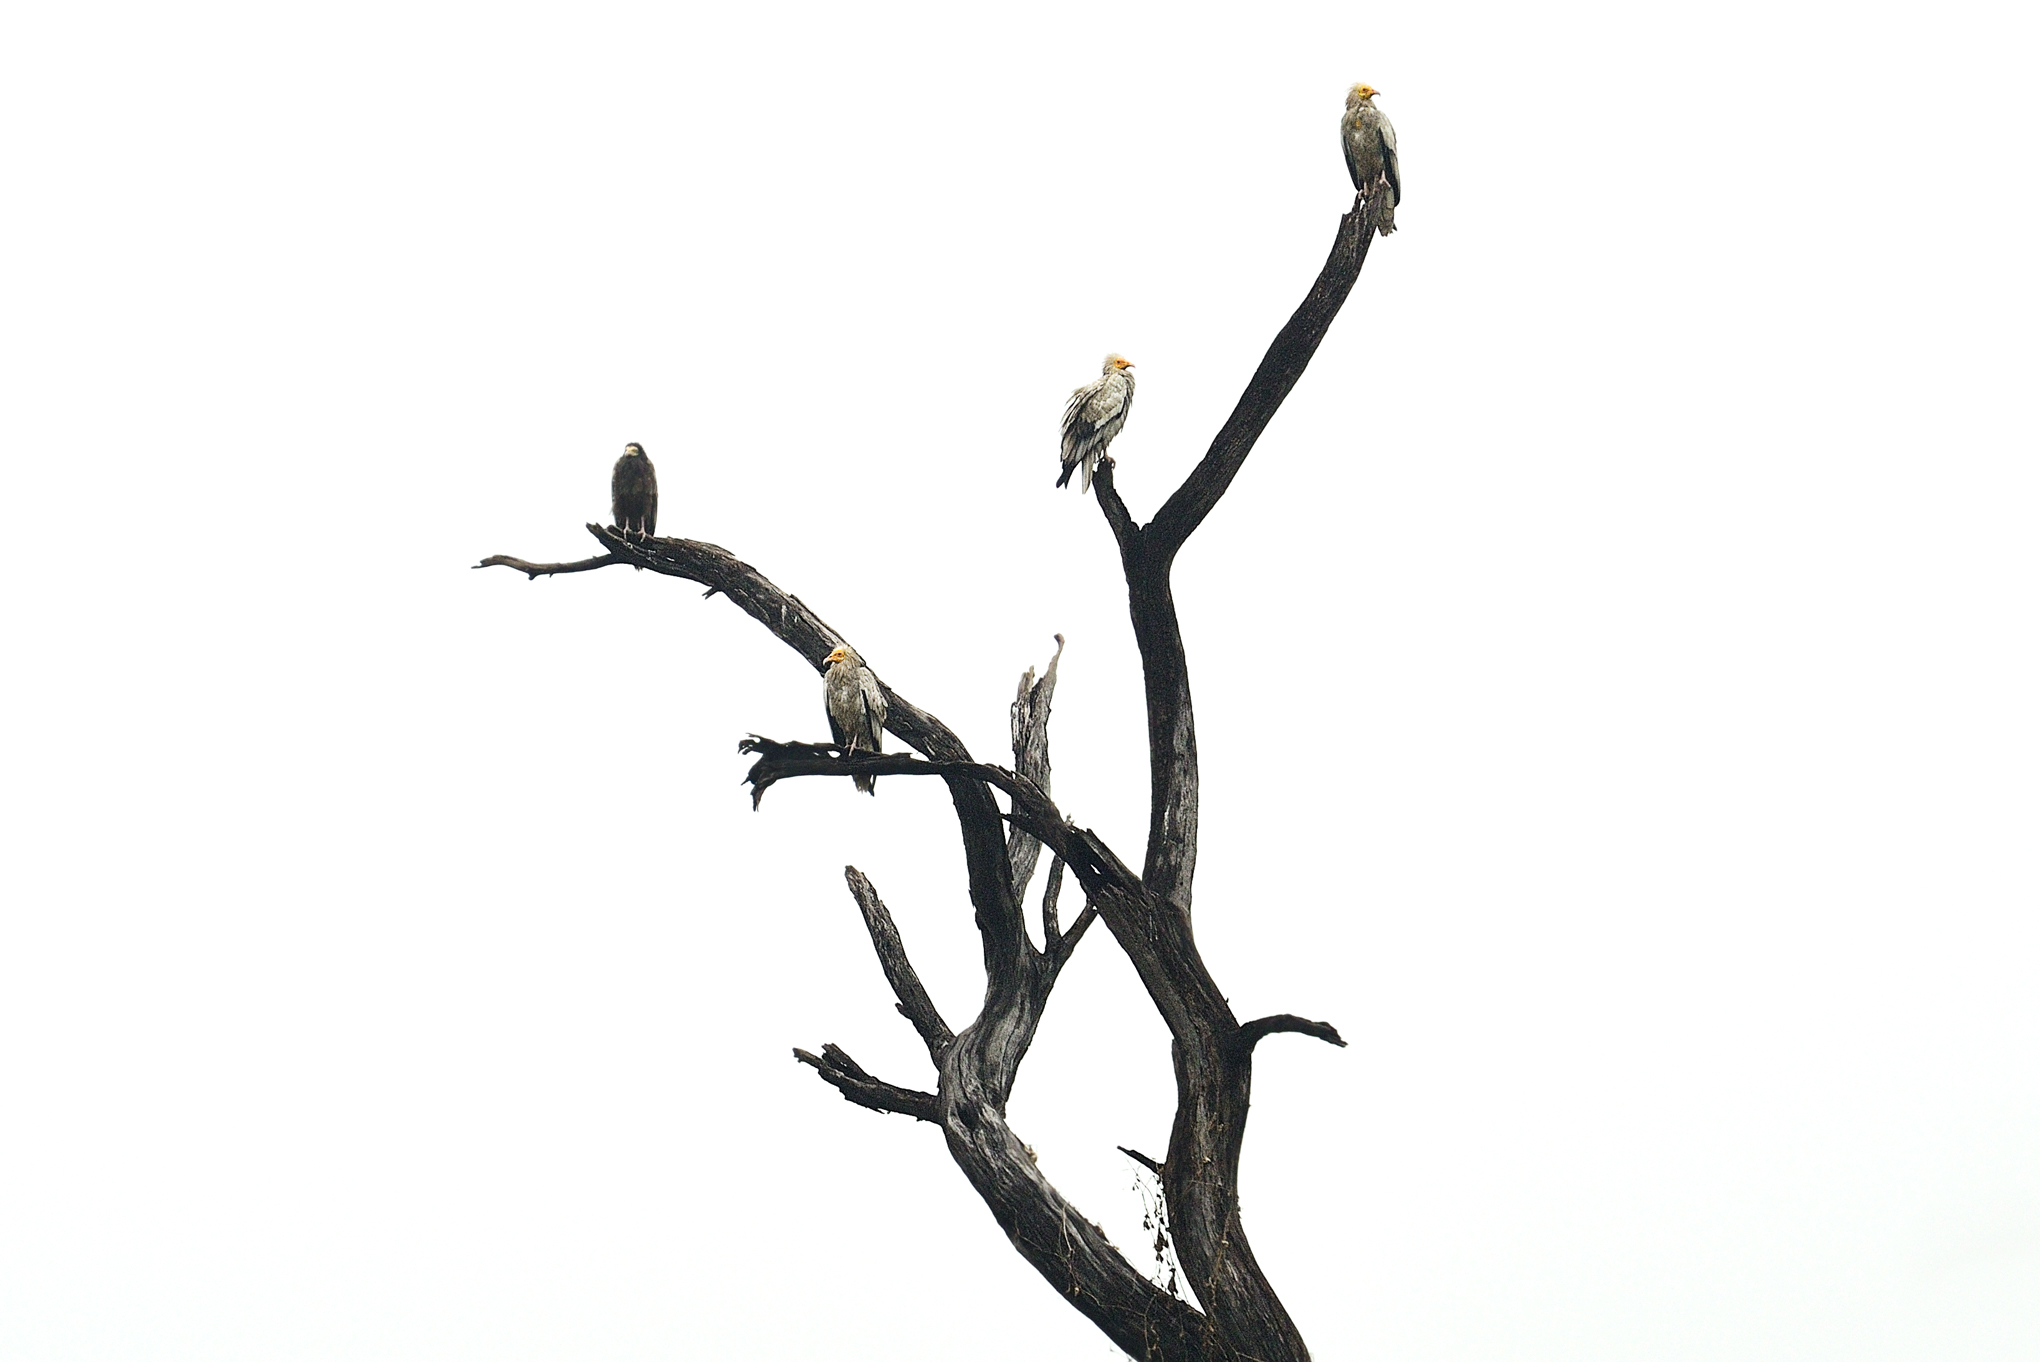
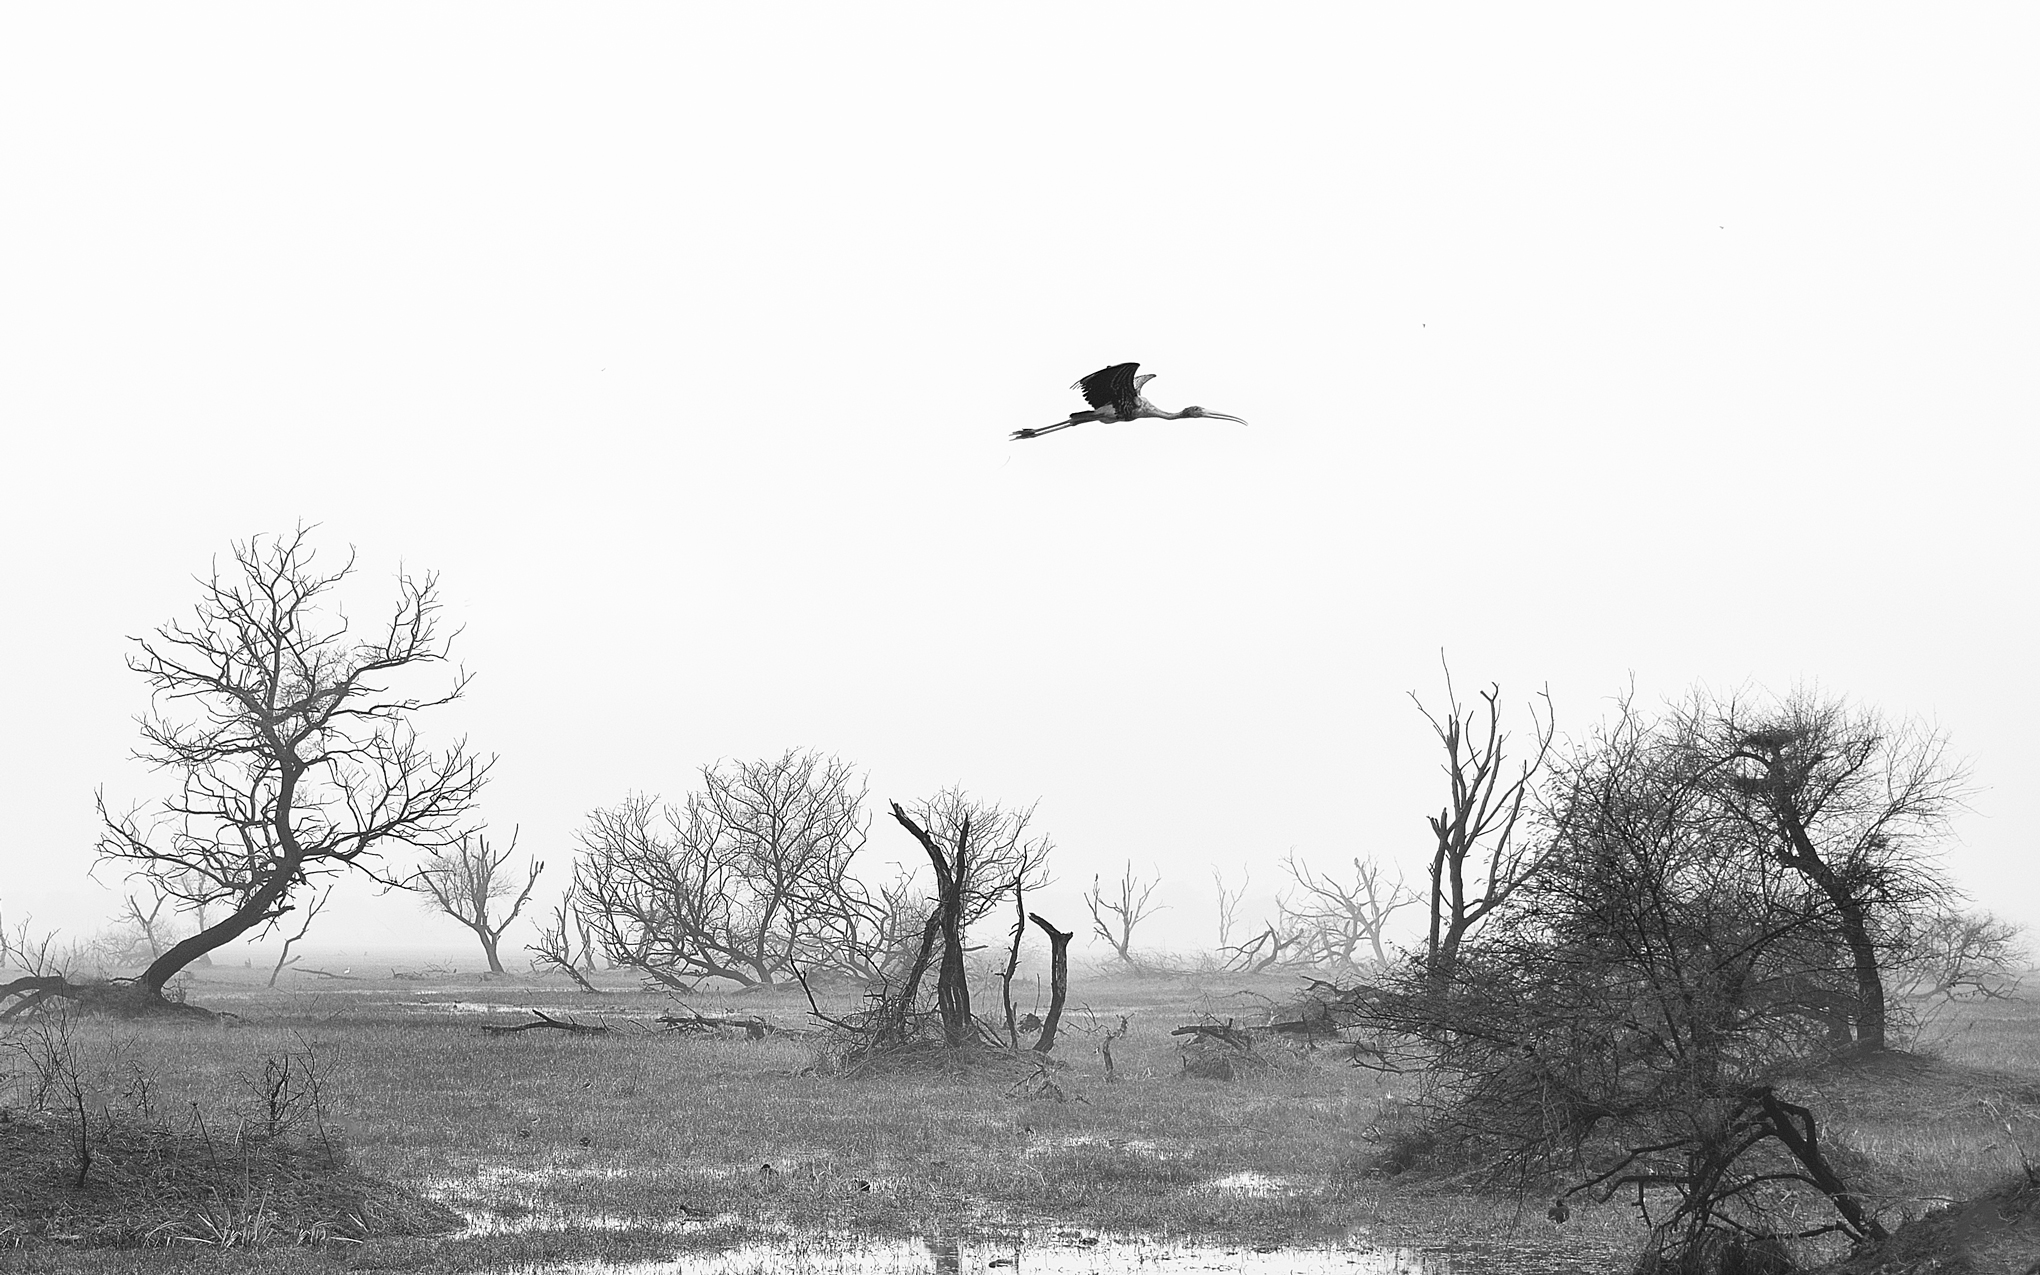
A high-key photo has a bright, positive feel compared to a dramatic and moody low-key image. Some high-key images, like the one above, can be quite high in contrast. In other cases, like the photo below, high-key photography is used to brighten the entire photo and give a low-contrast, etherial emotion to the photo. This look is common in portraiture, but also works in other situations like snowy landscapes and sand dunes.

Recommended Camera Settings
Spot Metering
The first thing I do when making a high-key image is change the metering mode to spot metering. I do this because matrix/evaluative metering mode – my usual preference – tends to look at the entire scene, which turns overcast clouds, snow, and fog close to middle gray.
Admittedly, your subject needs to be big enough that the spot meter doesn’t pick up on the background behind it. Correspondingly, you may still need to use some positive exposure compensation if the images are turning out too dark (or brighten them in post-processing).
But at least for larger subjects, like many wildlife photos, spot metering will allow you to get a properly exposed subject set against a much brighter background.

Some might argue that you can use matrix metering with positive exposure compensation. The problem with such an approach is that it is hard to guess the necessary exposure compensation to expose the subject correctly.
For instance, if you are shooting against the sun, even compensations of +2 or +3 might not expose the shadows properly. But with spot metering, you can get the proper exposure with relatively few tries.
Be Accurate with White Balance
Many high-keys are black and white, but for color photography, you often want to ensure that the white areas of your photo have minimal color tint. In other words, you need to pay even more attention than usual to your white balance. Thankfully, this is easy to correct in post-processing if you shoot RAW rather than JPEG.

Challenges with High-Key Photography
1. Subject Selection
Most high-key images are set against a white background, or at least a brighter background than the subject. Even though your subject is usually not going to be a silhouette in high-key photos, the effect is similar: It stands out from its surroundings.
The subject in a high-key photo often works best if it has a defined shape and clear shadows. This helps it contrast against the background and allow a viewer’s eye to hone in on the subject.
In the image above, even though the bird fills a tiny area of the frame draped in highlights all around it, that’s where a viewer’s eye will go, thanks to the high contrast.
2. Autofocus Accuracy
With a bright background, autofocus can hunt and suffer in terms of accuracy. The brighter the background relative to the subject, the more of an issue this can be.
After taking a high-key photo, I recommend zooming in or chimping the image if you have time to do so. If the focus isn’t accurate, you may need to switch to a mode like single-servo rather than continuous-servo autofocus, or zoom in on live view to 100% to nail the focus.
3. Chromatic Aberration
A dark subject with an overexposed background is an ideal recipe for chromatic aberration.
Correcting chromatic aberrations in post-production is not difficult. Most RAW editors can correct for chromatic aberration both automatically and manually. I’ll briefly go through those processes for Photoshop users.
3.1. In Photoshop: Auto-Correct
To fix chromatic aberration in Photoshop, first convert the layer into a smart object. Then, with that layer selected, go to the menu option Filter > Lens correction. Alternatively, press the shortcut Shift+Control+R to pop up the Lens correction window.
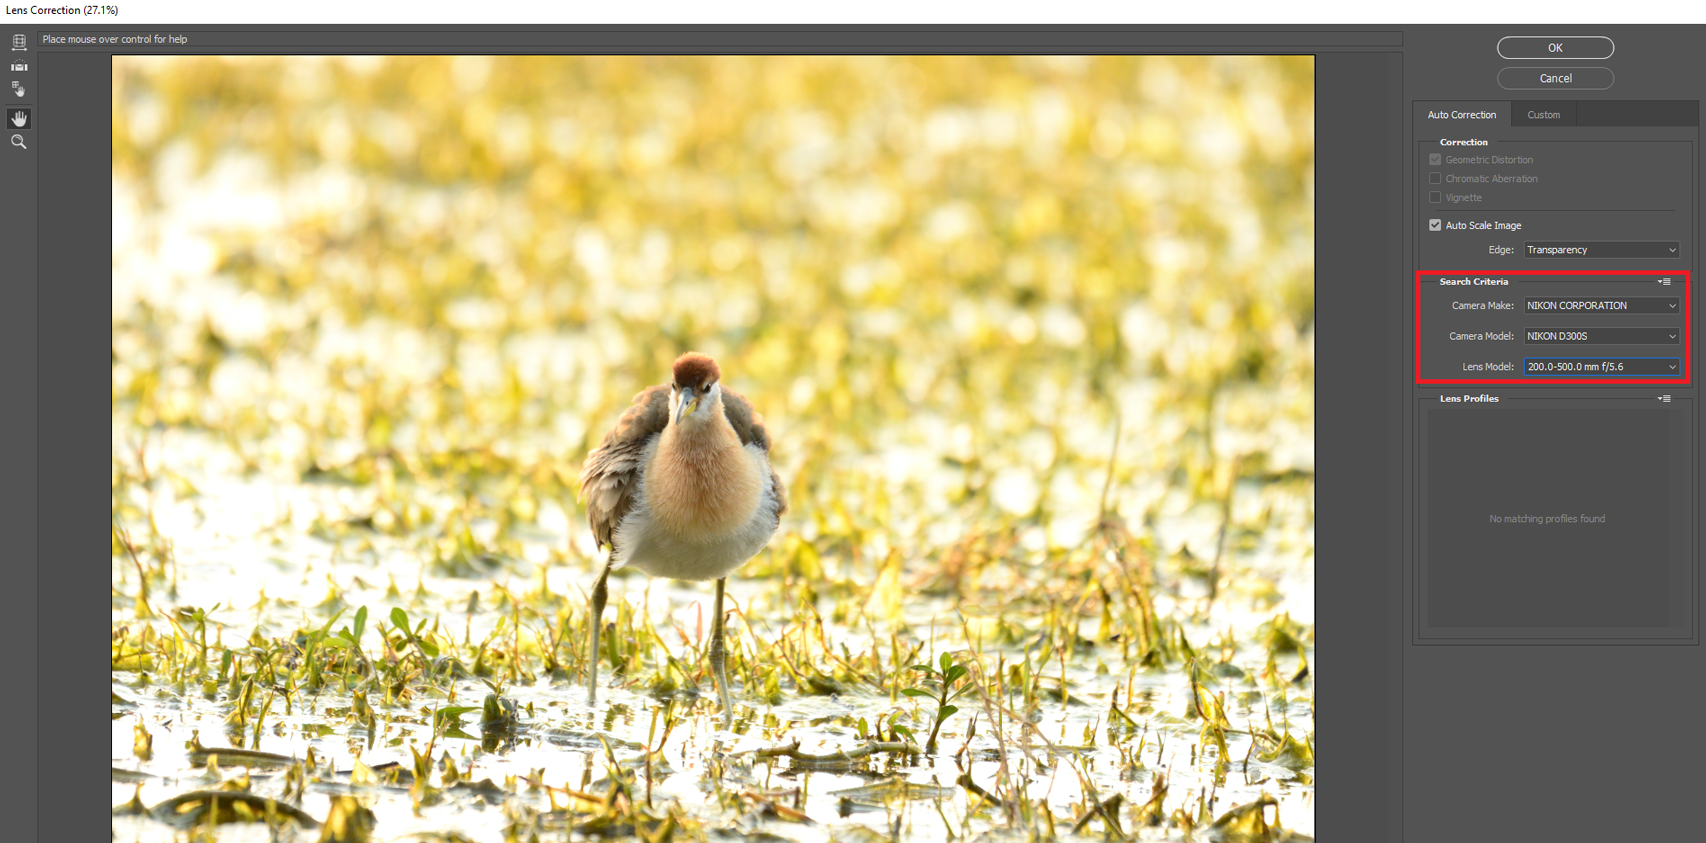
It is as simple as it looks. Along with other lens corrections like distortion and vignetting, you have to select your camera model and the lens model. Not all camera models are included. You possibly can choose an older version of your camera if your specific make is not on the list.
Lens selection is more important than selecting the camera model. The newer versions of Photoshop and Lightroom cover many lenses from most manufacturers including third-party vendors. The automatic mode works most of the time. When it doesn’t, you have the option of going manual.
3.2. In Photoshop: Manual Correction
To handle chromatic aberration manually, click on the Custom tab next to the Auto-Correction tab in the Lens correction window. Take a look at the image below. You can see the dreaded “purple fringe” (even though it’s more blue here) where the subject meets the sky:

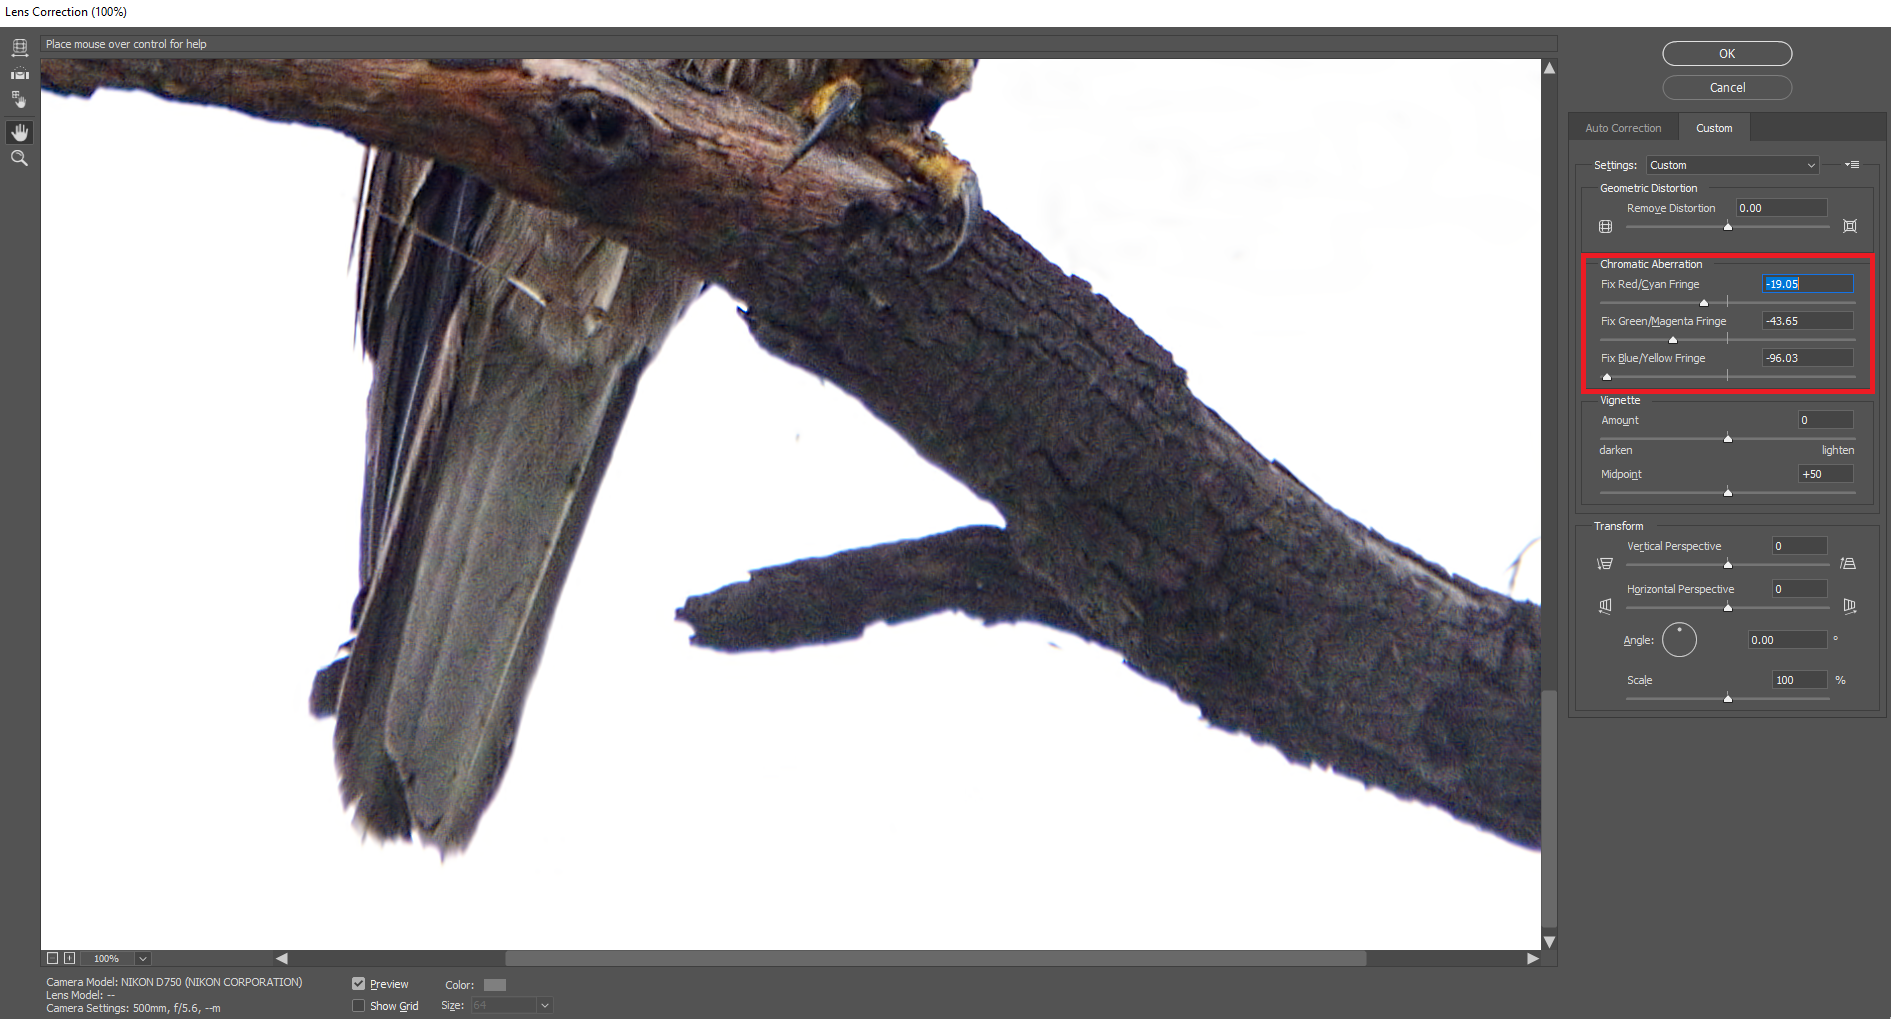
As you can see in the illustration above, to remove these fringes, pull the Blue/Yellow fringe slider to the left, reducing the blue fringe around the corners. The most common fringes are blue, green and magenta. Take care not to pull it too much or all the way. It will end up adding more fringing.
When you adjust the slider, you will notice that the fringing gets to its minimum at a particular point, after which the complementary colour starts appearing. That is where you need to stop. In the above illustration, you can notice that the fringe has been almost completely removed.
4. Blown Highlights on the Subject
Small blown highlights on the subject may not bother you all the time, but sometimes, they can be distracting (and easy to miss in the field). Even with the “blinkies” warning turned on, you may not notice small, specular highlights that are blown out on your subject.
For that reason, you may want to take a slightly darker exposure and then brighten it in post-processing, instead of going for the high-key look entirely in-camera. Alternatively, if your subject is static, you can bracket your exposures and take one that’s darker by about one stop of light. You may end up using the brighter photo after all, but at least then you’ll have a backup.
Conclusion
I hope you now have a clear understanding of how to take advantage of challenging light conditions by making high-key images. Perhaps now you won’t put your camera away if the light does not seem ideal! If you have any questions or wish to add your own tips, please do so in the comments.
Thank you for the article. I have to differ with one point.
“Some might argue that you can use matrix metering with positive exposure compensation. The problem with such an approach is that it is hard to guess the necessary exposure compensation to expose the subject correctly.”
You can evaluate the necessary exposure compensation by viewing (you can zoom here too) the exposure of your subject. If you can’t view in real-time, take test shot(s) and evaluate them in the viewfinder.
Thanks to this article, I’ve discovered manual correction of colour fringing in ACR 10. Very useful to know. One thing we often see in Australia is Koalas resting against the sky, a perfect opportunity to put this into practice. Regards
I love spotlight or direct bright light from the side on the subject. I got a Snowy Egret sitting atop an electrical box and the sun hitting the bird, the background went to near pure black and the white/yellow bird just jumps off the page/screen. I love it! Interesting weather or light can definitely make or break an image and often you can get an amazing image even in bad conditions! My favorite image of mine of all time is a similar interesting lighting situation on a Flamingo and the pink/white bird just jumps off the black background. I shot it in the nastiest water and next to trash/polluted waters. So never think it’s too ugly or bad until you’ve tried and failed. I never would’ve won money or awards if I’d missed that opportunity!