Did you know that most modern digital cameras have the ability to set ISO automatically? Back in the film days, you would drop a roll of film into your camera and your ISO, or ASA as it was known back then, would be fixed for the entire roll. With digital, not only can you change your ISO on the fly, but you can also set your camera to adjust it automatically. In this article, we will explore Auto ISO in detail and learn how to you use it with different shooting modes of your camera. In addition, we will discuss scenarios where it is advantageous and situations when setting ISO manually is more appropriate.
Table of Contents
1) The Exposure Triangle
 Before we talk about Auto ISO, let’s do a bit of review. The exposure triangle relates the three variables which are responsible for how your camera collects and records the exposure: shutter speed, aperture, and ISO. Shutter speed is the length of time the sensor is exposed to light. Faster shutter speeds let less light in, and longer ones let in more. Aperture is the size of the opening in the lens. A big opening lets more light pass through to the sensor. And lastly, ISO can be thought of as the sensitivity of the sensor (though that is a bit of a simplification). For any given lighting condition, the higher the ISO, the less light is needed by the sensor to record the image. If any one of these variables changes, the others (either one or both) have to adjust to capture the scene correctly.
2) Shooting Modes
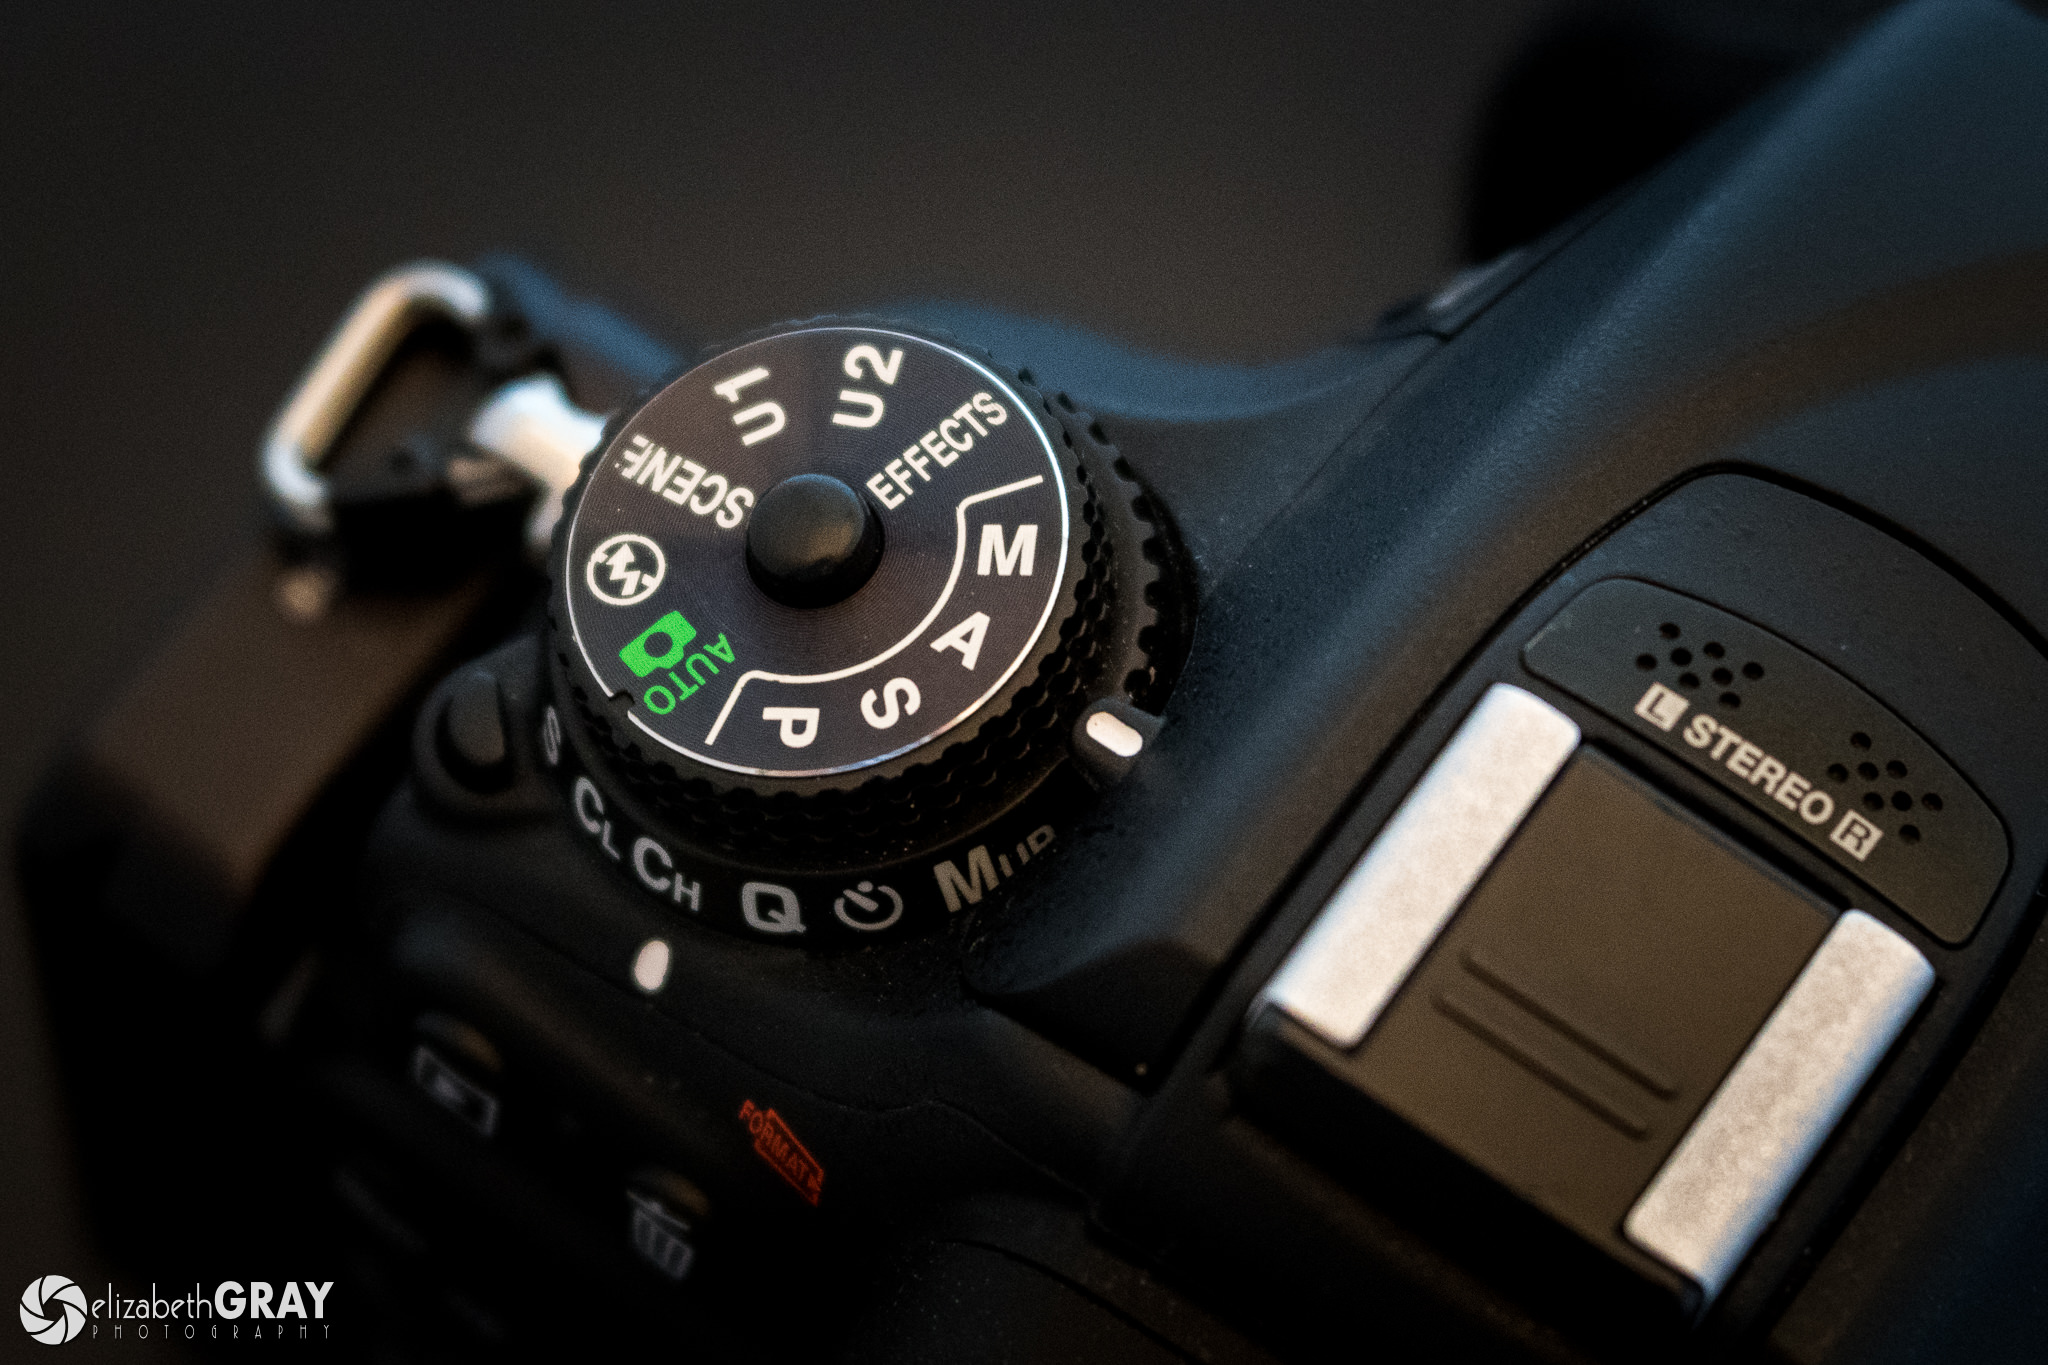
I’m sure you have heard of the four main shooting modes found on DSLR’s and mirrorless cameras. In Automatic Program Mode (P) the camera chooses both the aperture and the shutter speed. In Aperture Priority (A or Av for Canon shooters) you select an aperture, and the camera’s computer chooses the correct shutter speed. In Shutter Priority (S or Tv for Canon shooters) you pick a shutter speed, and the camera sets the proper aperture. In Manual Mode (M), you set both the aperture and the shutter speed. But wait, you said there were three variables! What happened to ISO?
When you are not using Auto ISO, the shooting modes above assume that you have already selected an appropriate ISO for the lighting conditions. In other words, ISO is taken out of the equation because it has already been chosen and fixed by you. If the light is bright, you have probably set a low ISO somewhere around 100-200. To achieve faster shutter speeds or at lower light levels, you will most likely set your ISO between 400-1600. In some instances, you may even need to go higher. I am very comfortable using an ISO up to 6400 with my Fujifilm gear, and 3200 with my Nikon D500.
In summary, in Program Mode, the user only sets the ISO, the camera is responsible for selecting the other two. In Aperture and Shutter Priority, the user is responsible for setting two of the three exposure variables (aperture and ISO, or shutter speed and ISO), the camera sets the third. In Manual Mode, the user sets all three variables.
3) What is Auto ISO?
When your camera is set to Auto ISO, you still shoot using one of the four modes that I mentioned above. However, rather than you pre-selecting an ISO value, the camera selects it for you. The camera does this based on several criteria that you choose when you configure Auto ISO.
4) Setting Up Auto ISO
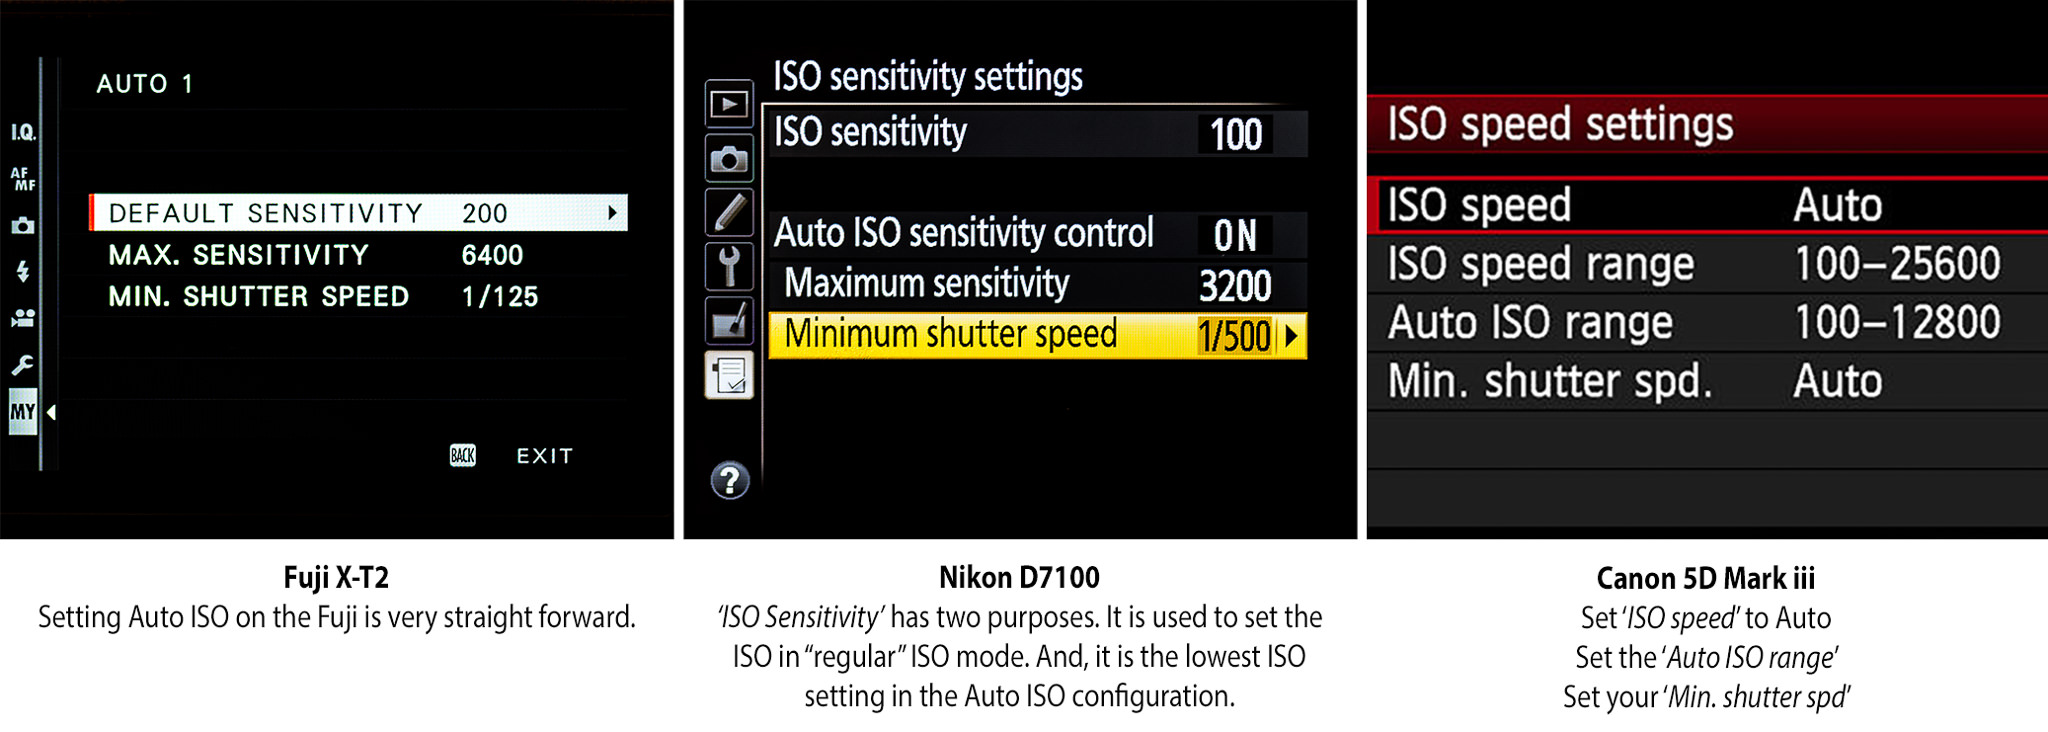
So let’s take a look at how to configure Auto ISO on your camera. Each camera manufacturer does things a bit differently, and even within the same brand, the features may differ slightly by camera model. Make sure you refer to your user manual for detailed instructions on where to find the Auto ISO configuration settings in your camera’s menu system.
To configure Auto ISO, you need to set three variables. Firstly, you will need to tell the camera what the maximum ISO is that you are willing to tolerate. Selecting the maximum ISO is highly subjective. What one person sees as OK, another may find unacceptable. Remember, higher ISO’s are not a miracle cure for achieving faster shutter speeds in low light. There are trade-offs, such as increased noise and reduced image quality. For an in-depth discussion of noise and ISO, see Spencer’s excellent article on ISO Invariance. In his article, he discusses what causes noise and how dynamic range is affected at higher ISO’s.
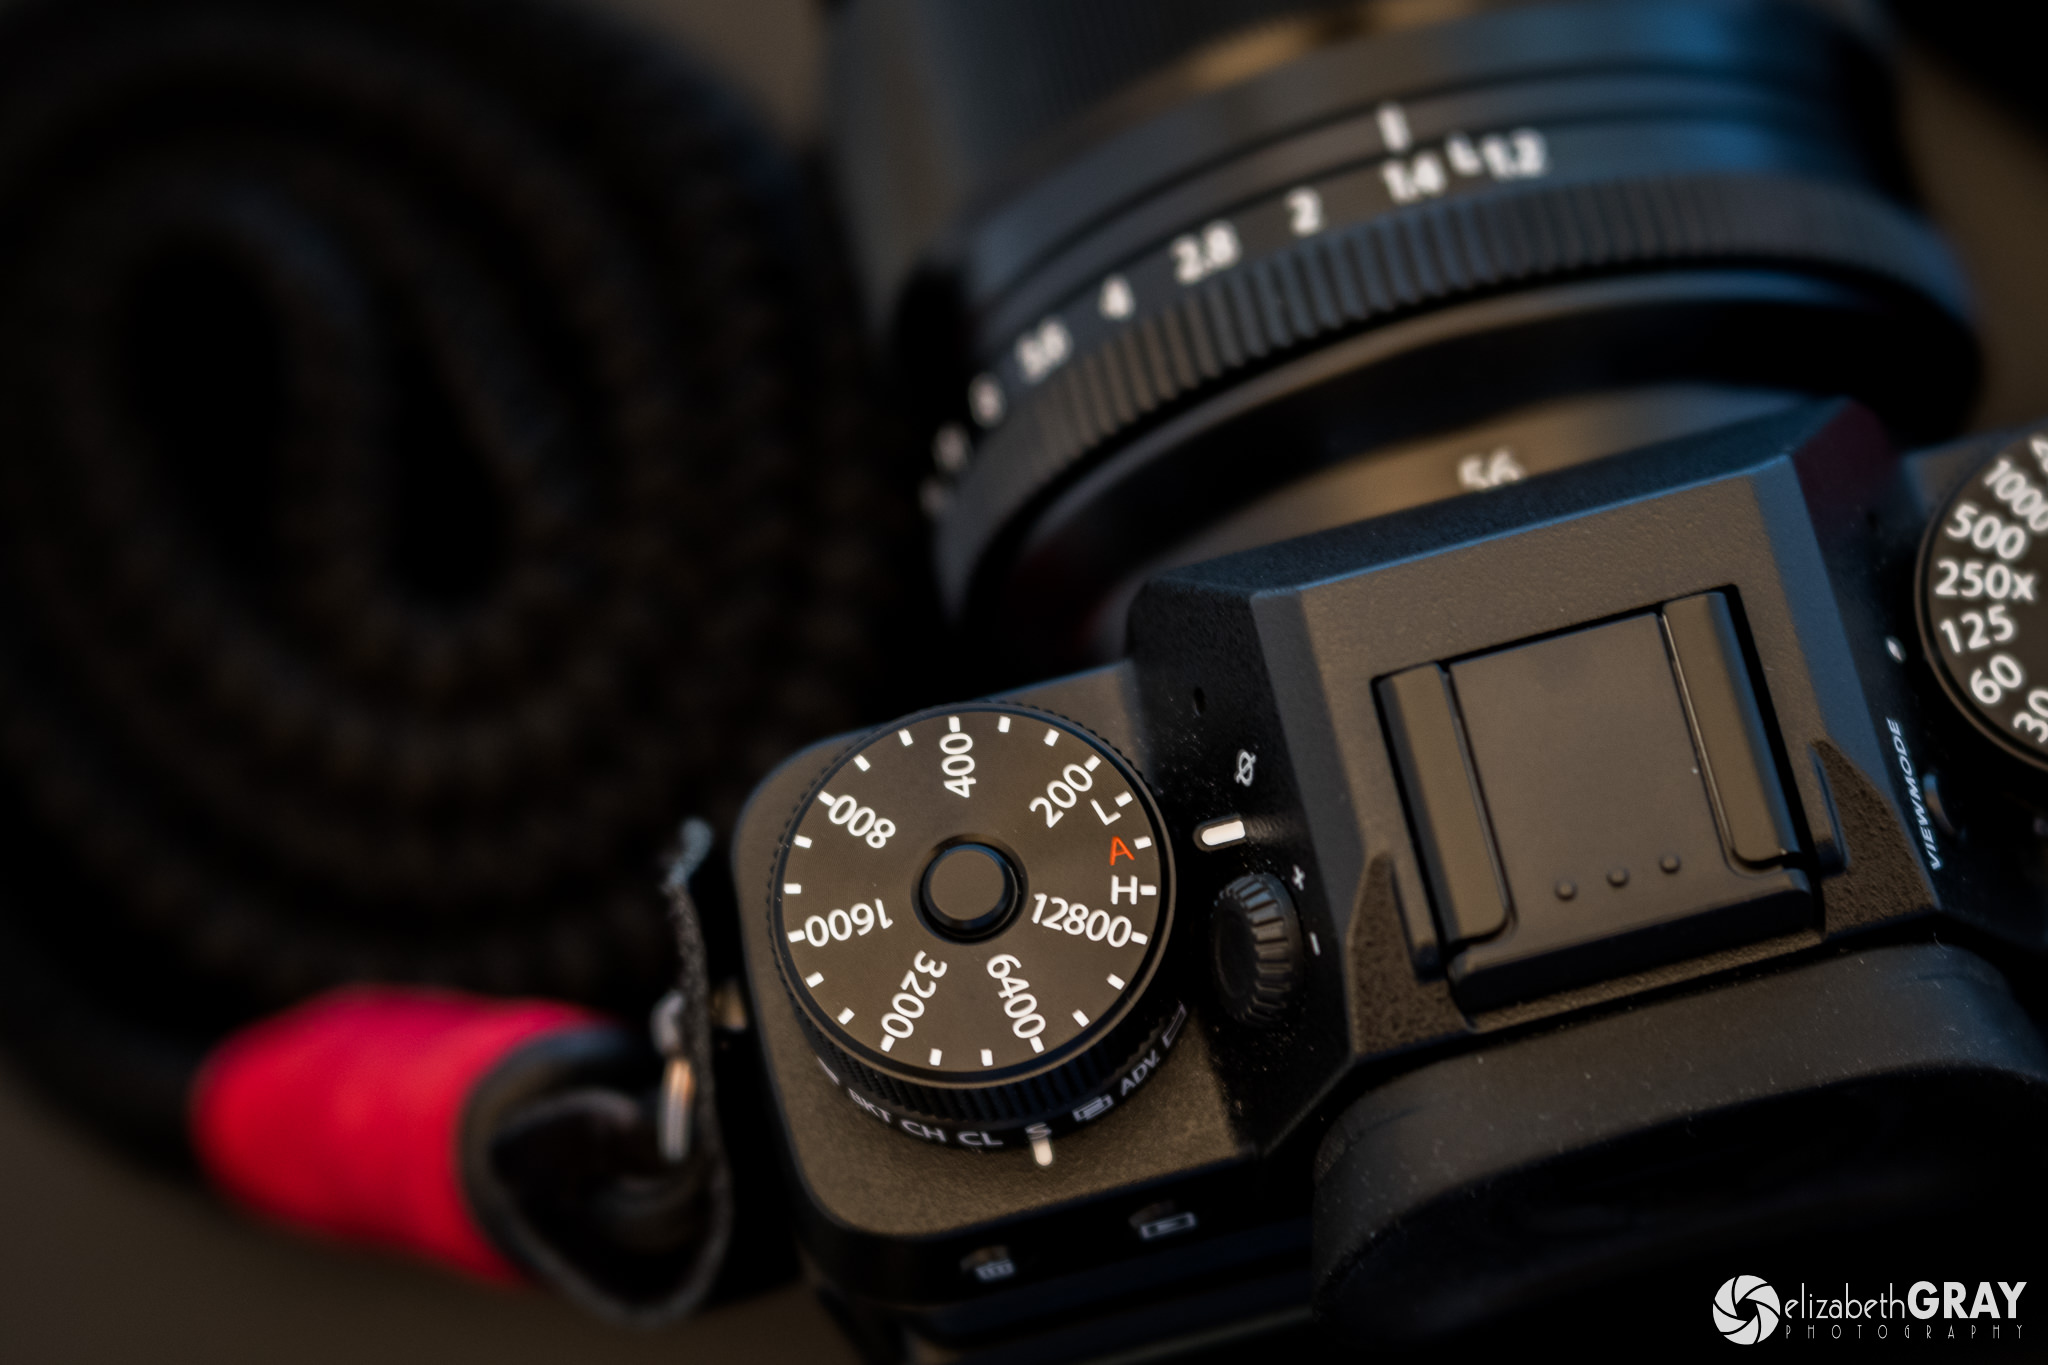
Secondly, you need to tell the camera what ISO it should use on the lower end. I always select the lowest native ISO available. On my Nikon camera that is ISO 100, and on my Fuji’s the base ISO is 200. On Canon and Fujifilm cameras, setting the maximum and minimum ISO is fairly straightforward. However on a Nikon, the minimum ISO is entered in the same field used for setting ISO manually. If you are a Nikon shooter and are using Auto ISO, make sure you set your ISO sensitivity back to 100. Otherwise, the camera will not take advantage of ISO’s below the level you set manually.
Lastly, you need to set the minimum shutter speed that you want the camera to stay above. For example, if you are shooting sports you might need to keep your shutter speed faster than 1/1000s to prevent motion blur of the athletes. On the other hand, if your subjects are moving slowly, maybe 1/125s is fast enough.
Some cameras allow you to set the minimum shutter speed automatically based on the focal length of your lens. The camera uses the reciprocal rule to do this. The reciprocal rule says that you should use a shutter speed faster than one over the focal length of your lens (based on the full frame equivalent focal length). If you are using a 100mm lens, then a minimum shutter speed of 1/100s is needed. The camera also adds a safety factor of somewhere in the neighborhood of 1.5 to 2, depending on camera brand. So if the camera recognizes that you are using a 100 mm lens, it would set the minimum shutter speed to 1/150s or 1/200s. This minimum speed is fine if you are only worried about motion blur due to handheld camera shake. However, for most camera brands, this feature does not take into account lenses that have image stabilization. Image stabilization allows you to shoot at slower shutter speeds than one over the focal length. Additionally, the camera can’t determine if you need to freeze subject movement, as opposed to just camera movement. If that is the case, the reciprocal rule won’t help you! For these reasons, I always set my minimum shutter speed based on what I am shooting, and I do not let the camera select it automatically.
5) Using Shooting Modes with Auto ISO
You’ve activated Auto ISO and are ready to take some pictures. Let’s look at how the various shooting modes are affected when Auto ISO is turned on. I’m not going to discuss the Automatic Program Mode (P) because I am hoping that you are taking some creative control over your images. Letting your camera have free range over aperture, shutter speed, and ISO gives you no say in how your images will look! Review my past article on Choosing a Creative Exposure – A Beginner’s Guide to see how to use aperture and shutter speed artistically.
To help illustrate how each shooting mode works in combination with Auto ISO, I’m going to use some sample exposure data. For each case I am going to make the following assumptions:
- The lens has apertures between f/2.8 and f/22.
- The Auto ISO range is set to 200 (min) and 3200(max).
- The camera has a native ISO range between 200 to 6400.
- The minimum shutter speed in Auto ISO has been set to 1/125s.
- The fastest possible shutter speed on the camera is 1/8000s.
5.1) Aperture Priority with Auto ISO
In Aperture Priority, you select an aperture based on how much depth of field you want in your image. The camera then selects the correct shutter speed. If the calculated shutter speed is slower than the minimum speed, then the camera will increase the ISO.
In this first example, let’s suppose that an aperture of f/8 gives a correct exposure at the minimum shutter speed of 1/125s and the lowest ISO of 200. We will use this as our starting point and assume the light does not change as we adjust the aperture.
If you want to set faster apertures (f/5.6, f/4 or f/2.8) the camera will increase the shutter speed and maintain the minimum ISO.
However, if you choose smaller apertures, such as f/11, f/16 or f/22, the camera will have to increase your ISO to keep the shutter speed above the minimum value.
| Aperture | Shutter Speed | ISO | Comments |
|---|---|---|---|
| 1Aperture Priority – User sets aperture based on the required depth of field. | |||
| 2.8 | 1/1000 | 200 | Shutter speed increases and min ISO is maintained. |
| 4 | 1/500 | 200 | Shutter speed increases and min ISO is maintained. |
| 5.6 | 1/250 | 200 | Shutter speed increases and min ISO is maintained. |
| 8 | 1/125 | 200 | Starting Point |
| 11 | 1/125 | 400 | To maintain min shutter speed ISO is increased. |
| 16 | 1/125 | 800 | To maintain min shutter speed ISO is increased. |
| 22 | 1/125 | 1600 | To maintain min shutter speed ISO is increased. |
Make sure you are paying careful attention to the display in your viewfinder. In most camera models, if the camera reaches the maximum ISO and still cannot achieve a correct exposure, it sacrifices your minimum shutter speed. In other words, the camera will not change your aperture (that is the definition of Aperture Priority), and it will never go above the maximum ISO you set in the configuration. Therefore, it must use a slower shutter speed to expose the image correctly.
You can see an example of when this happens here. This time the lighting is a bit darker. An aperture of f/4 , at 1/125s and ISO 200 produces a correct exposure (our starting point). Say you want to set an aperture of f/22 to achieve a large DOF. Since there is not enough light at the highest ISO, the camera drops the shutter speed a stop, to 1/60s.
| Aperture | Shutter Speed | ISO | Comments |
|---|---|---|---|
| 1Aperture Priority – User sets aperture based on the required depth of field. | |||
| 2.8 | 1/250 | 200 | Shutter speed increases and min ISO is maintained. |
| 4 | 1/125 | 200 | Starting Point. |
| 5.6 | 1/125 | 400 | To maintain min shutter speed ISO is increased. |
| 8 | 1/125 | 800 | To maintain min shutter speed ISO is increased. |
| 11 | 1/125 | 1600 | To maintain min shutter speed ISO is increased. |
| 16 | 1/125 | 3200 | To maintain min shutter speed ISO is increased. Now at max ISO. |
| 22 | 1/60 | 3200 | Sacrifices min shutter speed to achieve correct exposure and not exceed max ISO. |
It is highly unlikely that you will ever get an underexposed image using Aperture Priority and Auto ISO. This is because the camera will always override the minimum shutter speed (like in the last example). Most cameras can automatically expose up to 30s, which is usually more than ample time to collect enough light. However, this is not very practical! If you notice the camera is dropping below your set minimum shutter speed, you will need to open up your aperture.
It is possible to get an overexposed shot in this mode, though. Say for example you are using a fast lens and want to achieve a very shallow DOF, so you set your aperture to f/2.8. If the camera is already using the lowest ISO, and a faster shutter speed than is mechanically possible on your camera is needed, then your image will be overexposed. The only way around this is to close down your aperture.
5.2) Shutter Priority and Auto ISO
In Shutter Priority, you select a shutter speed based on how you want to record motion. Do you want to freeze action with a fast shutter speed, or create a sense of movement using a slow shutter speed? With Auto ISO activated, the camera then determines the aperture necessary for the correct exposure using the lowest ISO. Because you are setting the shutter speed, the camera ignores the minimum shutter speed set in the Auto ISO configuration. If the maximum aperture does not let in enough light, then the camera increases ISO.
Let’s say that you choose a shutter speed of 1/125s and the camera determines that an aperture of f/11 is required to capture the correct amount of light at the minimum ISO of 200, (our starting point). If you decide to slow your shutter speed down to blur the motion to 1/60s or 1/30s the camera stops down the aperture using ISO 200.
However, be careful not to overexpose your shot. If you decide that you need an even slower shutter speed for artistic reasons (1/15s or slower) the image will be overexposed. This is because the lens we chose cannot stop down smaller than f/22. Since the ISO is as low as it can get, the resulting image will be too bright.
On the other hand, if you decide to use a faster shutter speed, the camera will increase your aperture. At 1/2000s it determines that an aperture of f/2.8 is required. Any shutter speeds above 1/2000s will cause an increase in the ISO.
| Aperture | Shutter Speed | ISO | Comments |
|---|---|---|---|
| 1Shutter Priority – The user sets the shutter speed based on how motion is to be captured. | |||
| 2.8 | 1/4000 | 400 | Since the aperture is already wide open, ISO is increased. |
| 2.8 | 1/2000 | 200 | Aperture increase while min ISO is maintained. Now at the widest aperture. |
| 4 | 1/1000 | 200 | Aperture increase while min ISO is maintained. |
| 5.6 | 1/500 | 200 | Aperture increase while min ISO is maintained. |
| 8 | 1/250 | 200 | Aperture increase while min ISO is maintained. |
| 11 | 1/125 | 200 | Starting Point. |
| 16 | 1/60 | 200 | Aperture decreases while min ISO is maintained. |
| 22 | 1/30 | 200 | Aperture decreases while min ISO is maintained. Now at the narrowest aperture. |
| 22 | 1/15 | 200 | Overexposed since aperture is as small as possible and ISO as low as possible. |
Let’s look at one more example using Shutter Priority and Auto ISO. This time you decide to set a shutter speed of 1/125 of a second. The camera determines an aperture of f/2.8 is required at the minimum ISO. If you decide to increase your shutter speed, the camera will increase the ISO. At a shutter speed of 1/2000s, the camera has now reached the maximum ISO.
If you decide that you need an even faster shutter speed, say 1/4000s, the camera will underexpose your image. The camera has reached its maximum ISO and the aperture is wide open. Bottom line, unless you increase the maximum allowable ISO, you will not be able to capture enough light to expose the scene properly!
| Aperture | Shutter Speed | ISO | Comments |
|---|---|---|---|
| 1Shutter Priority – The user sets the shutter speed based on how motion is to be captured. | |||
| 2.8 | 1/4000 | 3200 | Underexposes image. |
| 2.8 | 1/2000 | 3200 | Increases ISO because the aperture is wide open. Maximum ISO reached. |
| 2.8 | 1/1000 | 1600 | Increases ISO because the aperture is wide open. |
| 2.8 | 1/500 | 800 | Increases ISO because the aperture is wide open. |
| 2.8 | 1/250 | 400 | Increases ISO because the aperture is wide open. |
| 2.8 | 1/125 | 200 | Starting Point. |
| 4 | 1/60 | 200 | Aperture decreases while min ISO is maintained. |
5.3) Manual Mode and Auto ISO
In Manual Mode, you have the most control. Once you select both the aperture and the shutter speed, the camera determines the ISO for a correct exposure. This mode allows you to fix your depth of field and shutter speed, putting you in complete creative command.
Manual Mode works particularly well in situations where the minimum shutter speed level varies. Say you are photographing your child’s soccer game. When the action is happening, you will want a fast minimum shutter speed so that you don’t end up with blurry soccer players. In this case, a higher ISO is acceptable. However, when the coach calls the team in for a pep talk, or you want to take shots of the bench or sidelines, a fast shutter speed is not needed. Why not drop your shutter speed to make use of lower ISO’s? In Manual Mode, you can do this quickly without having to go back into the menus to find the Auto ISO settings.
You do need to pay very close attention to your viewfinder display, though. It is easy to end up with overexposed and underexposed images.
Looking at one last example. Let us say that you are photographing birds. You decided to set a shutter speed of 1/1000s to try and freeze their flight and set an aperture of f/8 to make sure the bird is sharp from wingtip to wingtip. At these settings, the camera determines that an ISO of 1600 is required.
| Aperture | Shutter Speed | ISO | Comments |
|---|---|---|---|
| 1Manual Mode – The user sets both the shutter speed and aperture. | |||
| 4 | 1/250 | 200 | Overexposed. |
| 5.6 | 1/250 | 200 | ISO decreased by three stops. |
| 8 | 1/1000 | 1600 | Starting point. |
| 8 | 1/2000 | 3200 | Increases ISO. |
| 8 | 1/4000 | 3200 | Underexposed since the ISO is not high enough to capture the correct exposure. |
After taking a look at your images, you decide that your shutter speed just isn’t fast enough to freeze the bird’s movement, so you increase it to 1/2000s. You are happy with the aperture, so you keep it at f/8. The camera calculates an ISO of 3200.
These birds are moving very quickly and your images are still blurry! You increase the shutter speed to 1/4000s while maintaining an aperture of f/8. However, since a higher ISO is needed for the correct exposure, the image is now underexposed!
Now the birds have landed. You want to take advantage of the fact that you no longer need a fast shutter speed. Referring to your original settings of 1/1000s, f/8 and ISO 1600, you decide to drop your shutter speed to 1/250s. This change is an increase of two stops (1/1000s to 1/500s, then 1/500s to 1/250s). You also want to try and isolate the birds from the background, so you open up the aperture to f/5.6 (an additional one stop increase in the exposure relative to the original images taken at f/8). Since the camera must compensate for three stops, it drops the ISO down to 200 (1600 to 800, then 800 to 400, and then 400 to 200 is three stops).
At this point, you should be happy. But no! You want to make sure that you have a beautifully creamy bokeh in the background! You opt for an even wider depth of field using an aperture of f/4. However, this time the camera has reached the bottom end of its ISO capabilities and the image is over exposed!
So take heed. If you are not paying attention to the camera display, it is easy to overlook settings that will cause underexposed or overexposed images. On a mirrorless camera, you have the advantage of seeing what your exposure will look like in the viewfinder or on the LCD before you take the picture. So hopefully you will realize when you run into this situation and make the necessary changes to your aperture or shutter speed. However, on a DSLR the warnings are subtle. Your exposure compensation scale may say your exposure is wrong, or your ISO may be displayed in red or flash. It is important to know how your camera behaves so you don’t discover incorrectly exposed images when you get home.
6) A Few Words about Using Exposure Compensation with Auto ISO
On most newer cameras it is possible to use exposure compensation in Aperture Priority and Shutter Priority with Auto ISO configured. It is best to experiment with your camera to make sure you understand what the camera adjusts when compensation is applied.
There are a few camera models now that also allow you to use exposure compensation in Manual Mode. Remember that in Manual Mode, both the shutter speed and aperture are fixed by the user, so the camera can only vary the ISO to adjust for the compensation. However, the amount your ISO can change will be limited by the range you set in the Auto ISO configuration. There is only a six stop difference between ISO 100 and ISO 6400 (100 to 200, 200 to 400, 400 to 800, 800 to 1600, 1600 to 3200, 3200 to 6400). If your camera’s meter has set an ISO near the top or bottom of this range without any compensation, you will be limited in how much compensation you can add or subtract.
7) When to Use Auto ISO
If you find yourself in situations where the light is changing, and you need to shoot quickly to capture the action, then Auto ISO can save the day. Taking photos of wildlife, where your subject is moving between bright light and shadows or the clouds are rolling in and out, is a perfect opportunity to give Auto ISO a try. Shooting at a wedding, where the happy couple is moving from a dark church to the bright outdoors, is another example. Photographing a sports match at an outdoor stadium, where part of the field is in the shade and part is in the sun, is another situation where Auto ISO would be an advantage. These are all examples of when enabling Auto ISO can increase your chances of not missing a shot.
8) When to Avoid Auto ISO
Although Auto ISO is a great feature to have. There are situations when manually setting your ISO is a better option. When working from a tripod, shutter speed is not an issue. In this instance, set your aperture manually to the lowest native ISO. This will give you the best image quality. For studio shoots, where you are in control of the lighting, Auto ISO will be of no benefit.
Another consideration is whether or not you can adjust the exposure compensation when Auto ISO is turned on. If this is not a feature of your camera, you will not be able to adjust for backlighting or other lighting conditions that tend to fool the meter.
9) Conclusion
In situations when I decide to use Auto ISO, I prefer to use Manual Mode. I do not want to give up creative control to my camera. I select my aperture based on the depth of field I need. And I choose my shutter speed depending on how fast my subject is moving. I allow the camera to select the appropriate ISO. However, I keep careful track of the settings in the viewfinder to make sure I’m not overexposing or underexposing my images.
In Aperture and Shutter Priority with Auto ISO, the camera has control over two quantities, ISO and either the shutter speed or aperture. Since the camera is choosing two of the three variables, the exposure settings can sometimes seem unpredictable. This is another reason why I defer to Manual Mode with Auto ISO.
With advancements in camera technology and with high ISO performance improving in leaps and bounds, Auto ISO is a great feature to consider. If you have not given it a try, take some time to understand how it works. Try different shooting modes and see how the exposure settings change as the light changes. Play with the configuration settings to see how your minimum shutter speed and maximum ISO affect your exposure.
Hopefully you have a better understanding of what Auto ISO is now, and how to use it. If you have any questions, be sure to leave a comment below.
Do you have Auto-ISO recommendations specific to the Nikon D850? I’m new to the D850 and a non-auto camera. Coming from a Nikon D7500 that stayed in Auto.
Thanks in advance.
The best brief treatment I’ve found. Great work.
Amazing explanation as usual in your articles. This on understanding AUTO ISO taught me something I had not thought about having to set shutter speed. Great piece to digest!
Hi. Greetings from Singapore. I read your article “Understanding Auto ISO in Photography” and I must say I am happy I found your article which delved in great length about the subject matter. Your very detailed article has helped me understand and will definitely help me improve my photography.
Lastly, I wish to enquire whether your goodself offers online photography courses including eBooks please?
Appreciate your prompt response please.
Thank You and Best Regards,
Stephen
excellent article
I noticed that whith Auto ISO turned ON you often get those weird crazy values, like e.g. ISO 140 or ISO 720 which are neither full stops (obviously) nor thirds of a stop (like, say, ISO 125, 160 ot 500). In my particular camera (D3500) when setting ISO manually, I can only pick full stops hence my suspicion: is the camera actually able to set such ISO values, or is it some marketing fraud? Because if the former is true, why don’t manufacturers enable such specific values (fourths perhaps?) to be set manually by the user?
so amazing conclusion description and discussion
thanks so much on the explanation
Really and Actually a detailed explanation about the ISO, thanks so much to Elizabeth We are grateful to you
BTW Elizabeth, the article is very helpful and well written. My previous comments just went through due to the debate and other commence posted. Overall I think this type of discussions are great to learn,
Cheers,
apy
Well I just arrived a little late for this interesting discussion. Betty, the anchor of this debate, and others are right, and from my point of view, specially for those who teaches, it is important to convey the proper concept. As an educator you may use all set of analogies and resources, but not changing the foundations, concepts and/or theories. The article is well written and I do not have any problem if you would have used the common triangle after you have made a clear explanation of the ISO effects on a photo. Also a concept can not be modified for its complexity, that is why resources and the capacity to abstract play a crucial role in teaching strategies.
I am contributing with this simple youtube video, not to explain the entire concept but to add another resource to the discussion
www.youtube.com/watch…EApLA-YNko
Respectfully,
apy