A diffuser is a critical piece of equipment for flash photography. In terms of the quality of light, I’d even say that using a diffuser is more important than the flash you choose! In this article, I’ll answer all of your questions about using diffusers for flash photography and artificial light.
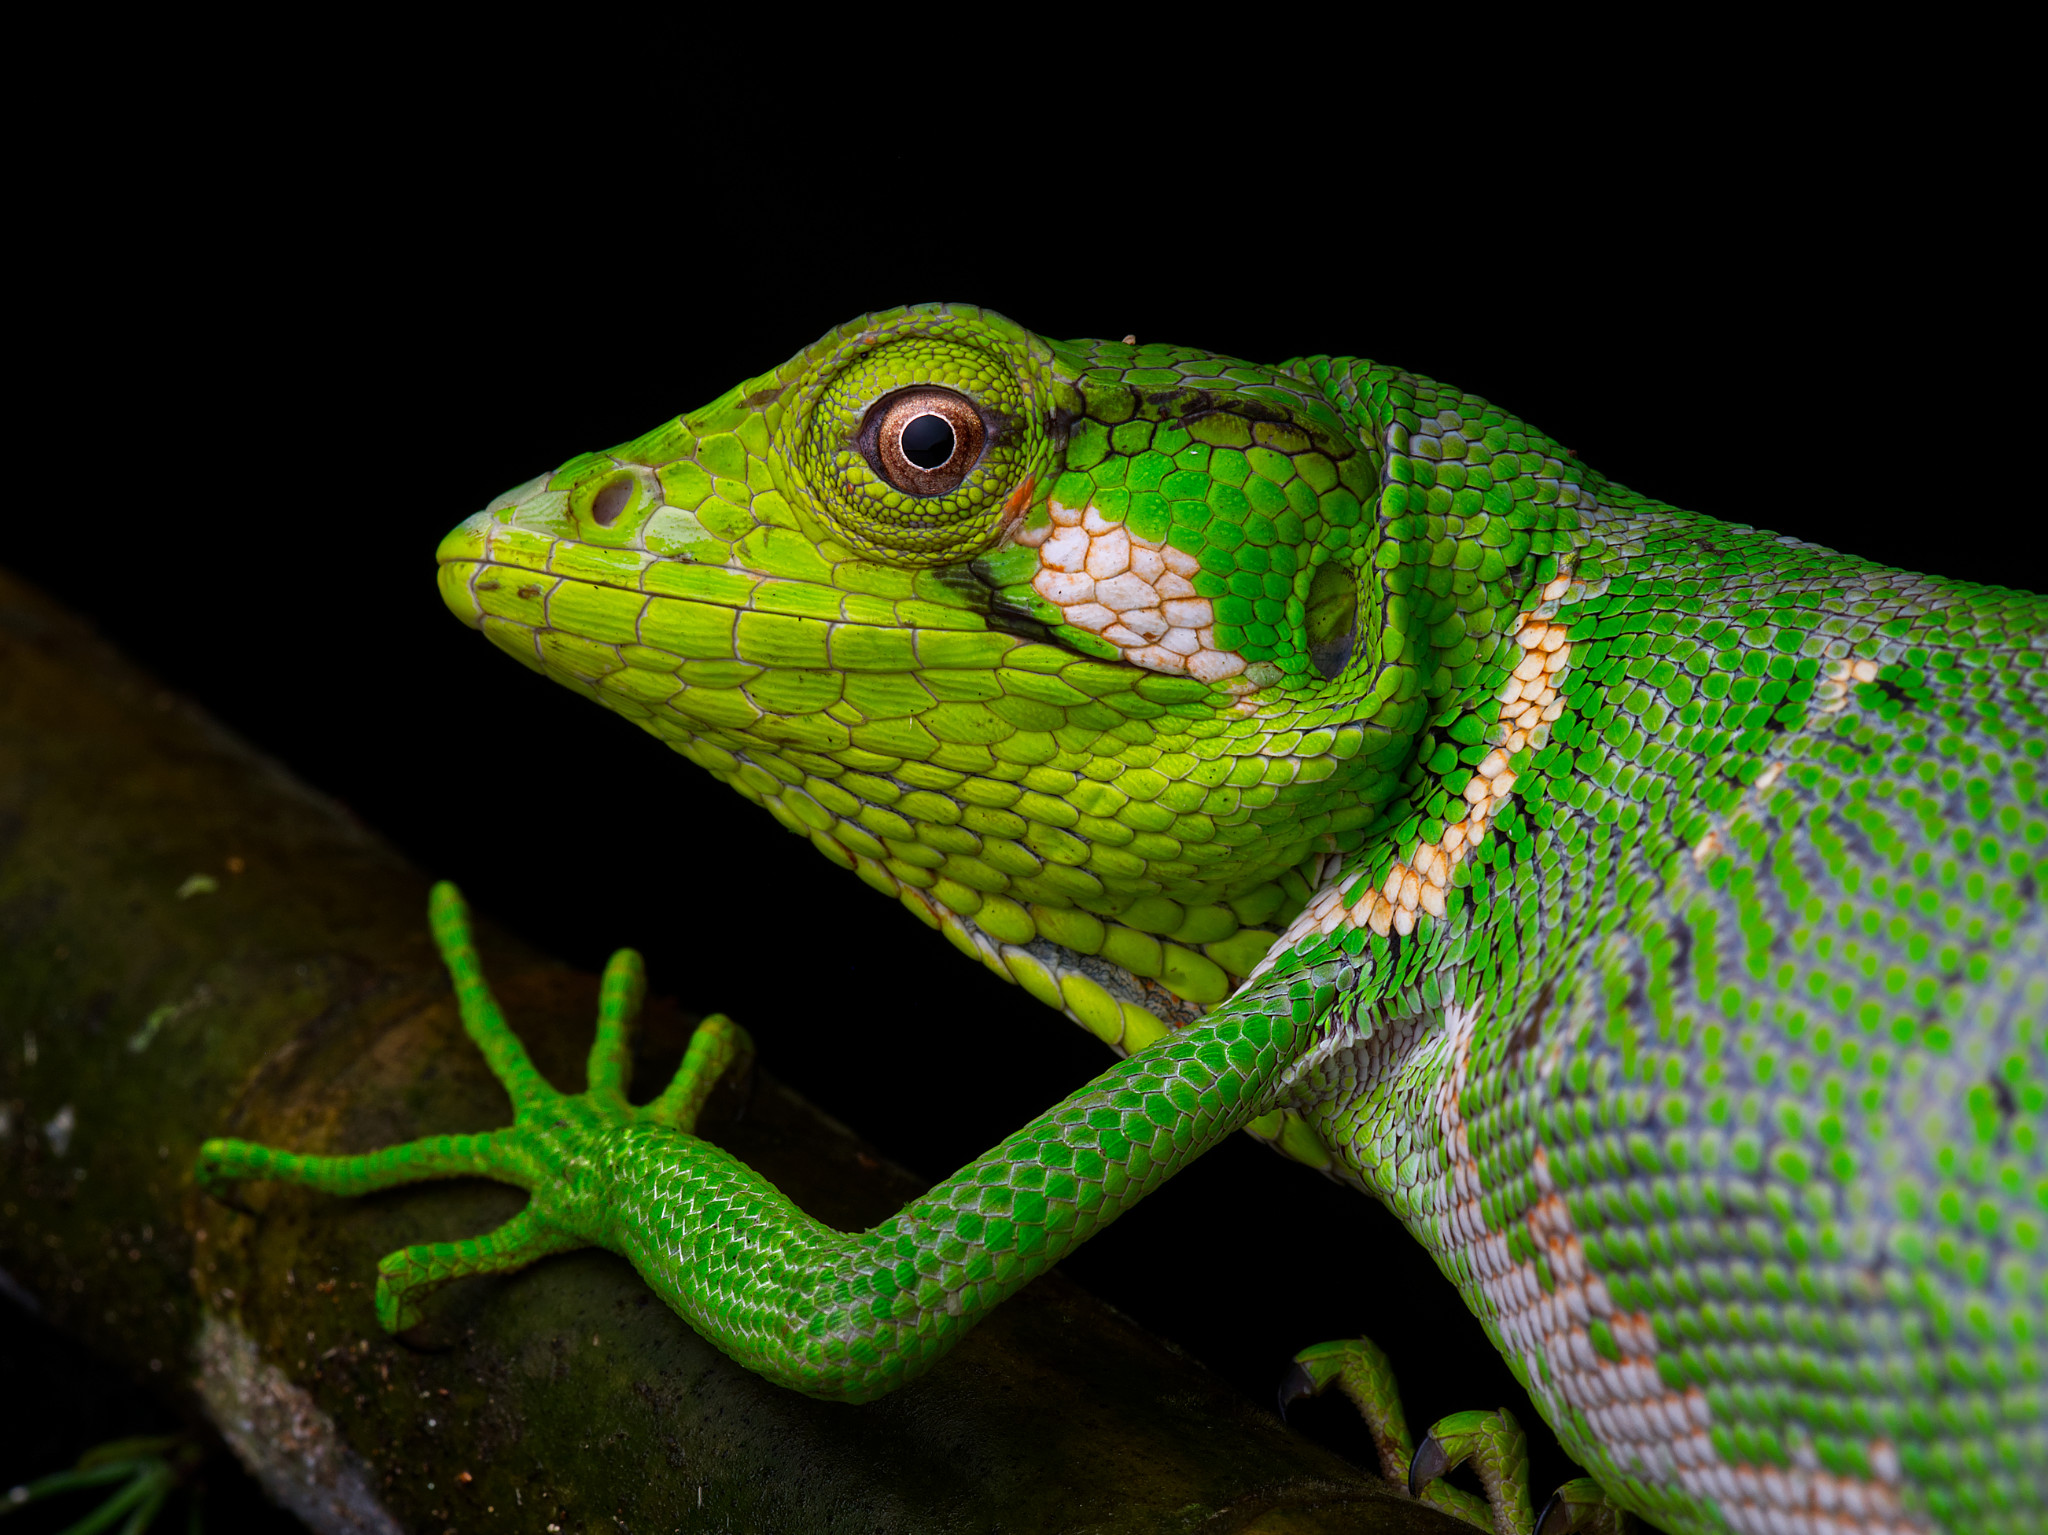
Table of Contents
What Is a Diffuser?
A diffuser in photography is simply something that disperses light from a light source. In other words, it increases the area of the light source.
Before we go much further, though, we need to be on the same page about exactly what a diffuser is in photography. Usually, diffusers look something like this:
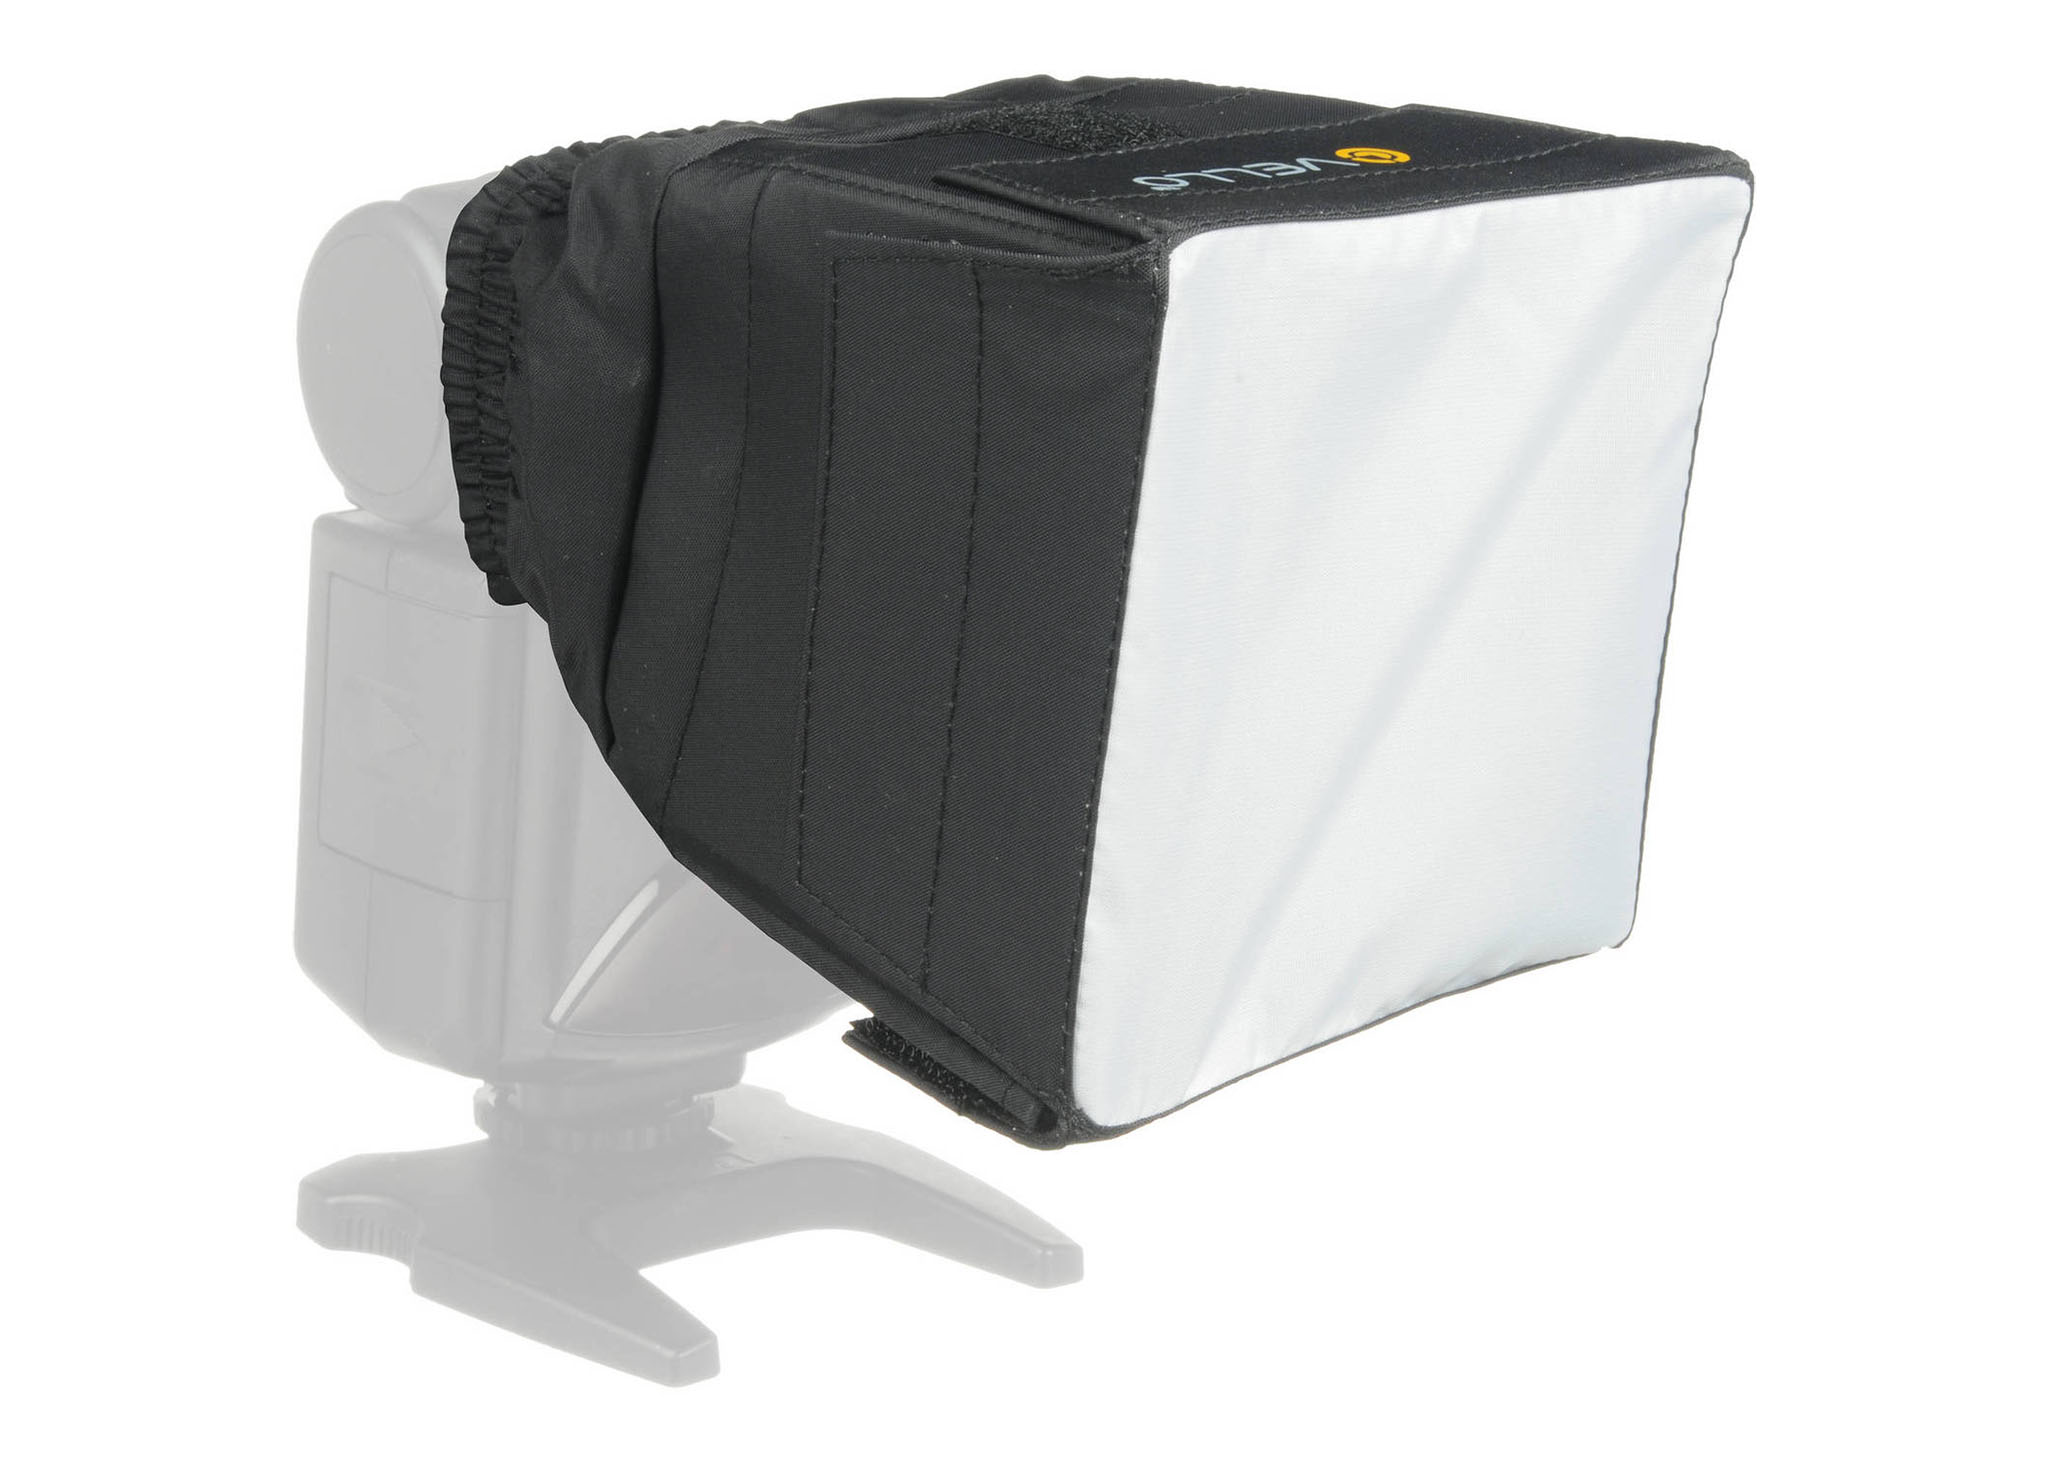
As you can see, the simple diffuser above attaches directly to the flash. But that’s not the only shape a diffuser can take. Have you ever seen an umbrella lighting attachment in a photography studio? Those stray a bit into the realm of reflectors, but they’re also diffusers, since they’re designed to spread out the light from your light source.
Diffusers aren’t just meant for flashes, either. Many diffusers are designed to attach to larger, constant lights. The purpose is the same, though – “softening” the light.
What Is “Soft” and “Hard” Light?
If you’re not already familiar with flash photography, my usage of the word “softening” a moment ago may seem a bit out of place. But the word “soft” is frequently used to refer to highly diffused light. Because I’ll be throwing this term around a lot in this article, it’s important to understand exactly what the word means.
It might be easier to first understand what “hard” or “harsh” lighting is. When light on the subject in a photo is harsh, there’s an abundance of dark, defined shadows, and bright pin-pointed reflections. This results in a high contrast image. The light at noon on a sunny day can be considered hard/harsh.
The best way to describe soft lighting is the opposite of harsh lighting. Indicators of soft lighting are gradual shadows and subdued reflections. There is more even lighting across the subject, and there’s less dramatic contrast. To give one example of soft light, it’s what you’ll see on an overcast day.
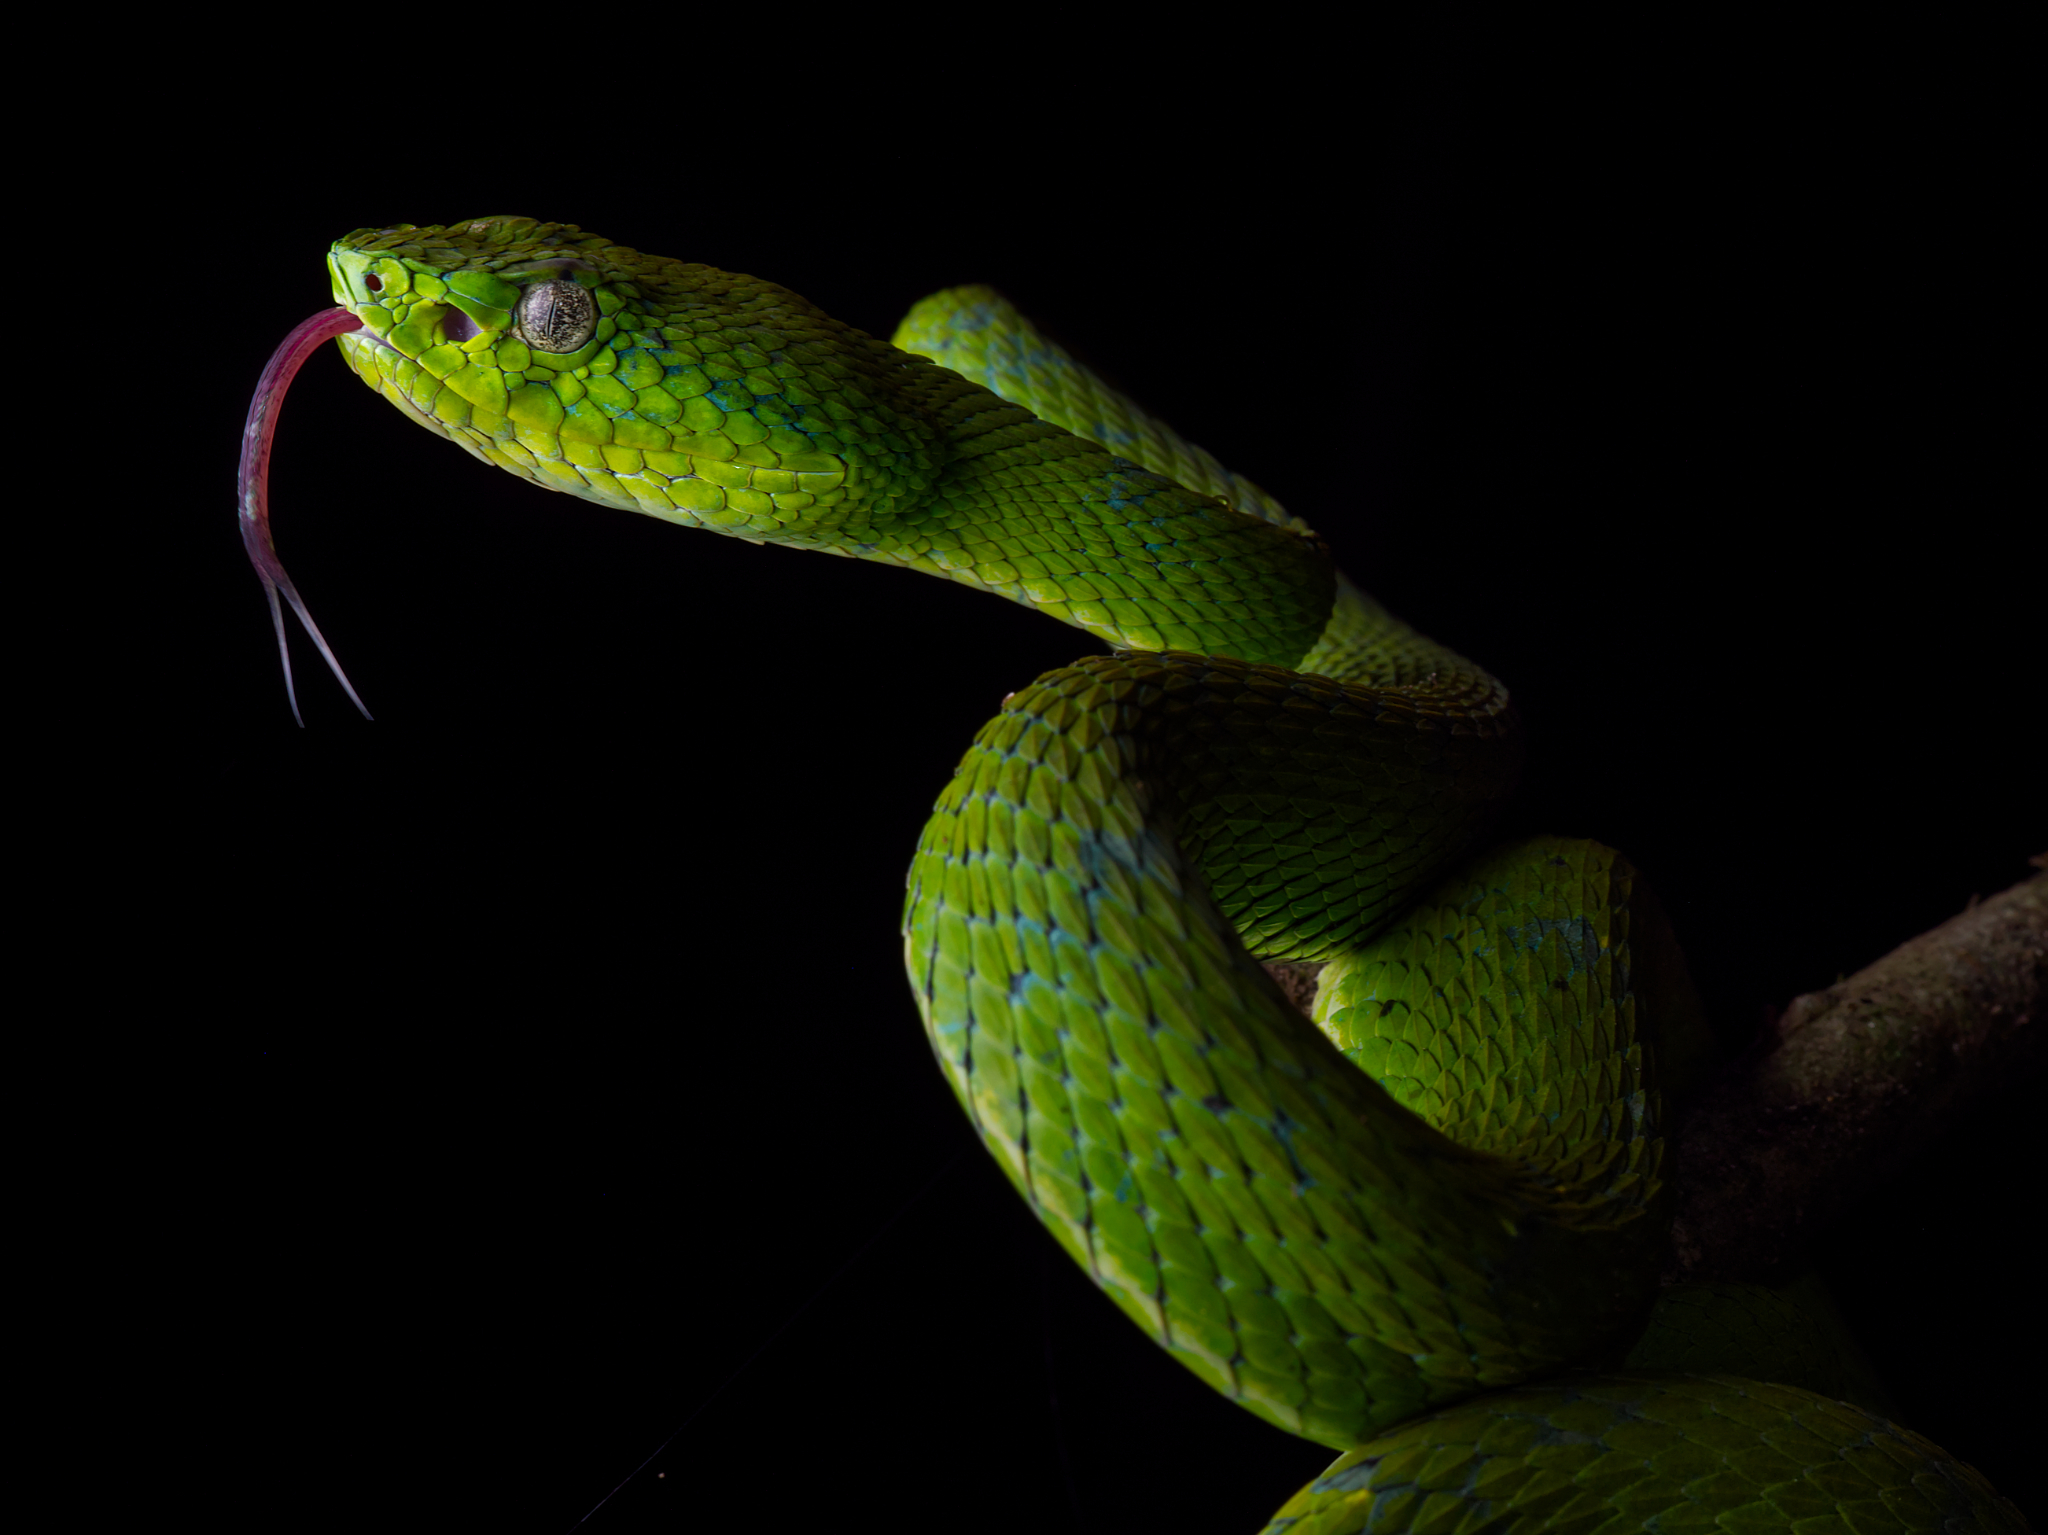
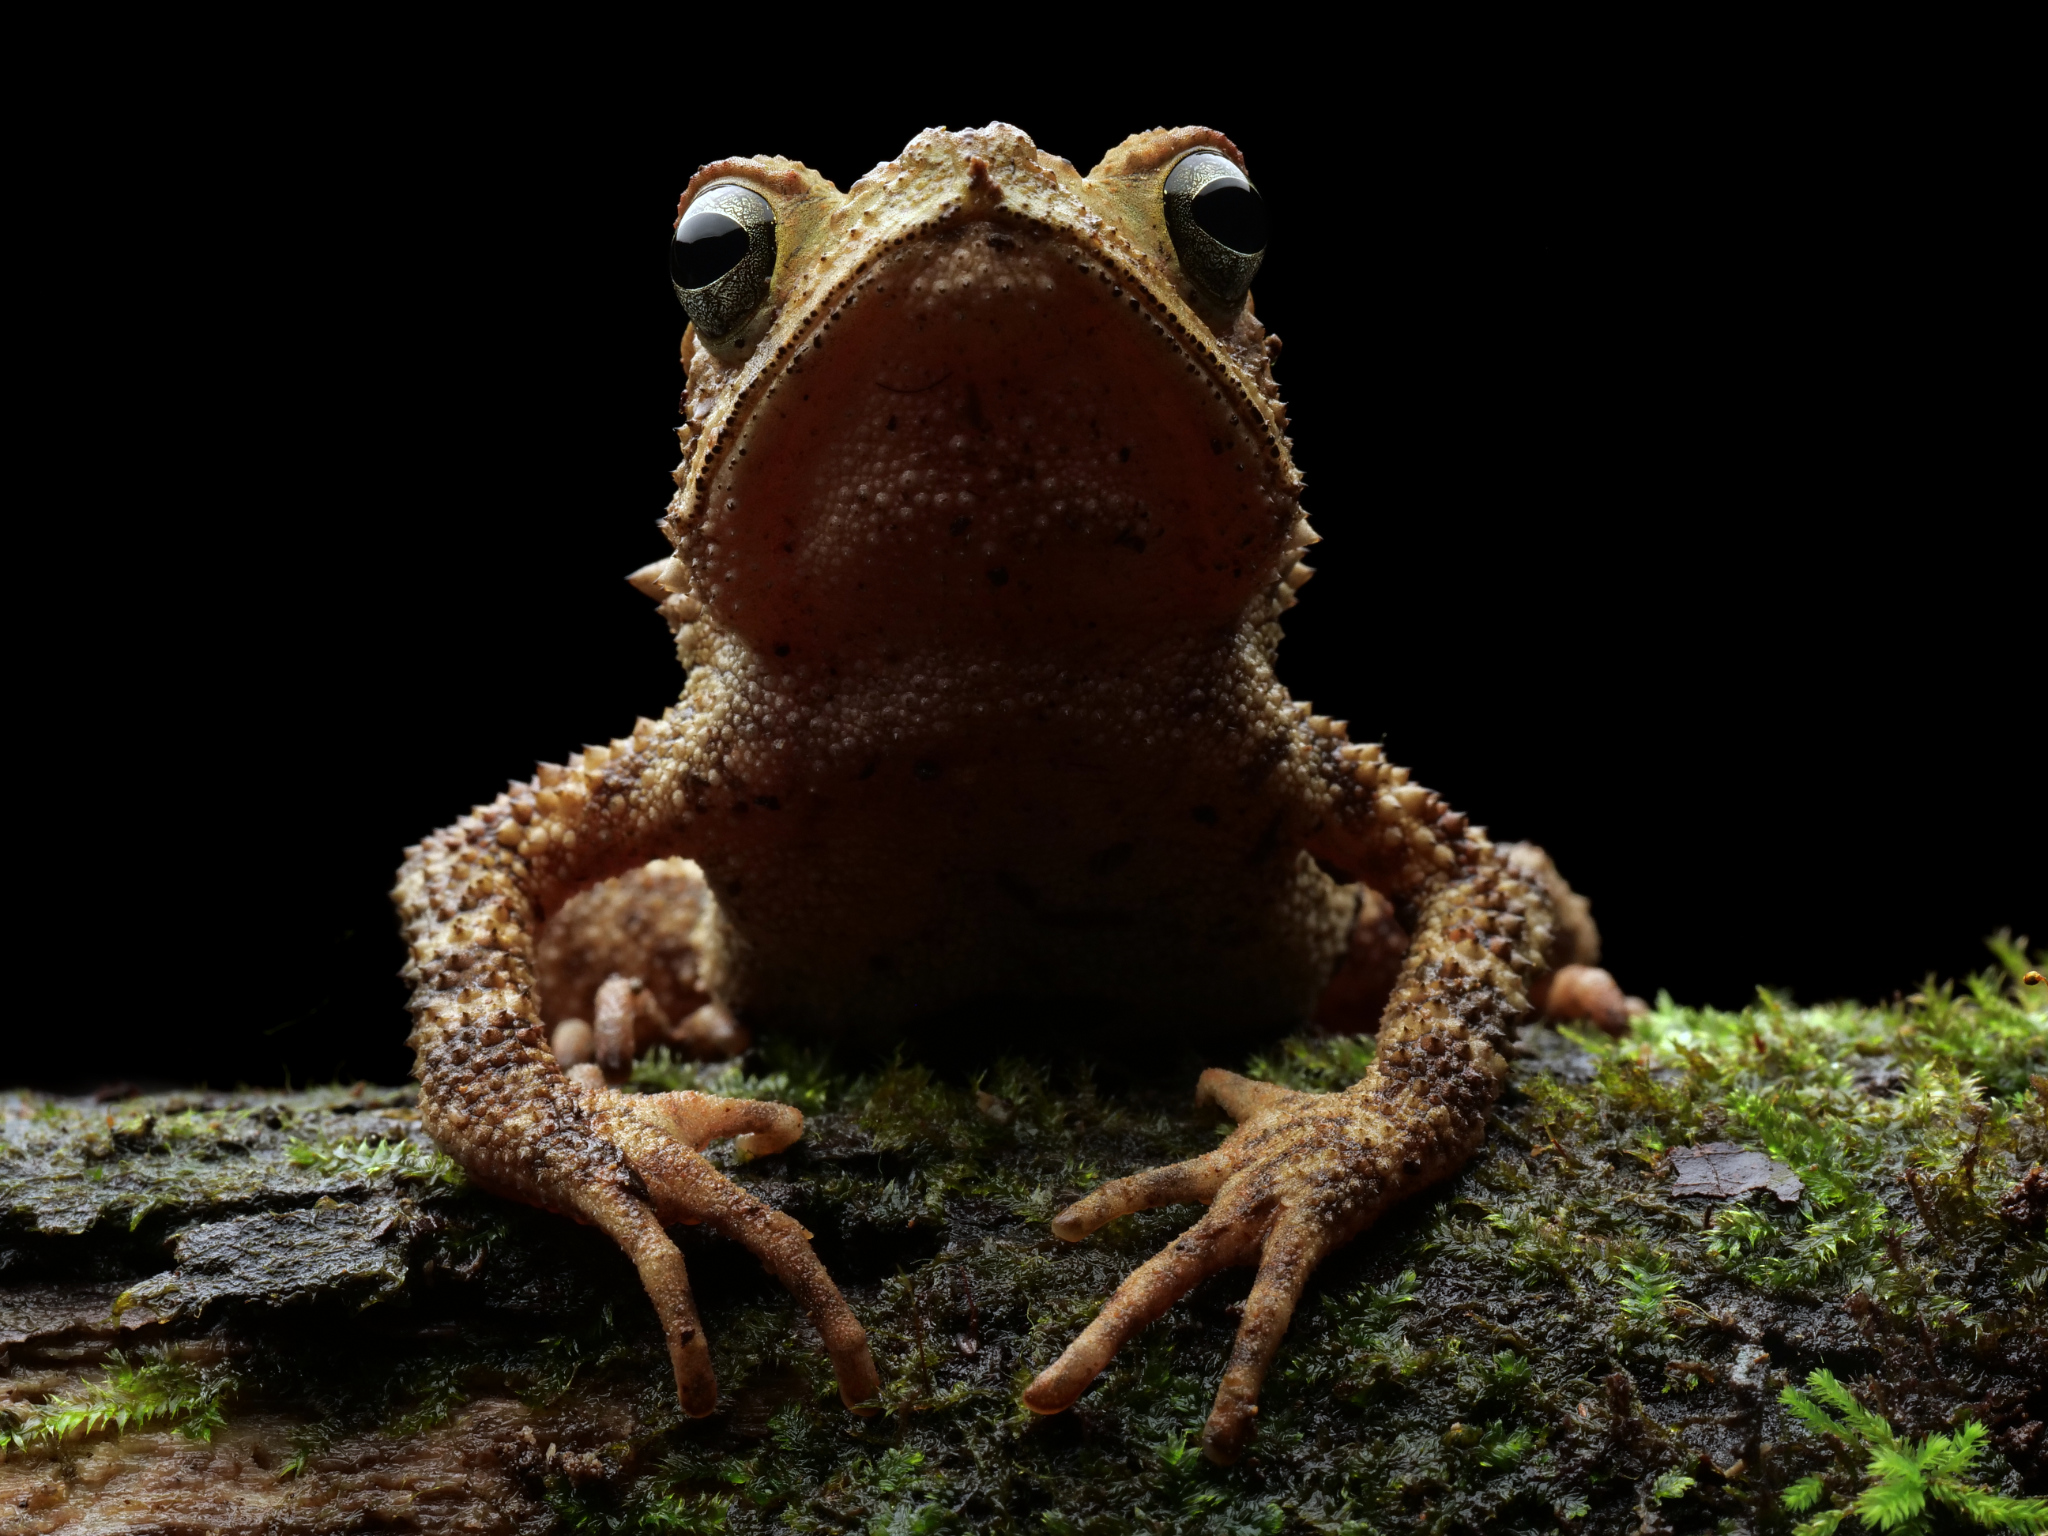
Soft lighting is generally preferred when you’re shooting with artificial light. There are always exceptions in photography, but the images below of an Amblypygi species should give you an example of why soft light tends to look better. On the left is without a flash diffuser, while on the right is with a flash diffuser.


You can see how the second image has shadows with gentler edges – AKA soft light. The highlights are also much less glaring. To me, it’s easily the better of the two photos. The hard light in the first image just looks distracting.
Now that you know what I mean by soft and hard light, let’s jump back into the details of diffusers.
How Does a Diffuser work?
The basic principle behind a diffuser is that it spreads out the light so that it’s emitted from a larger area. By spreading out the light source, the light hits the subject from more angles at once. The result is soft light!
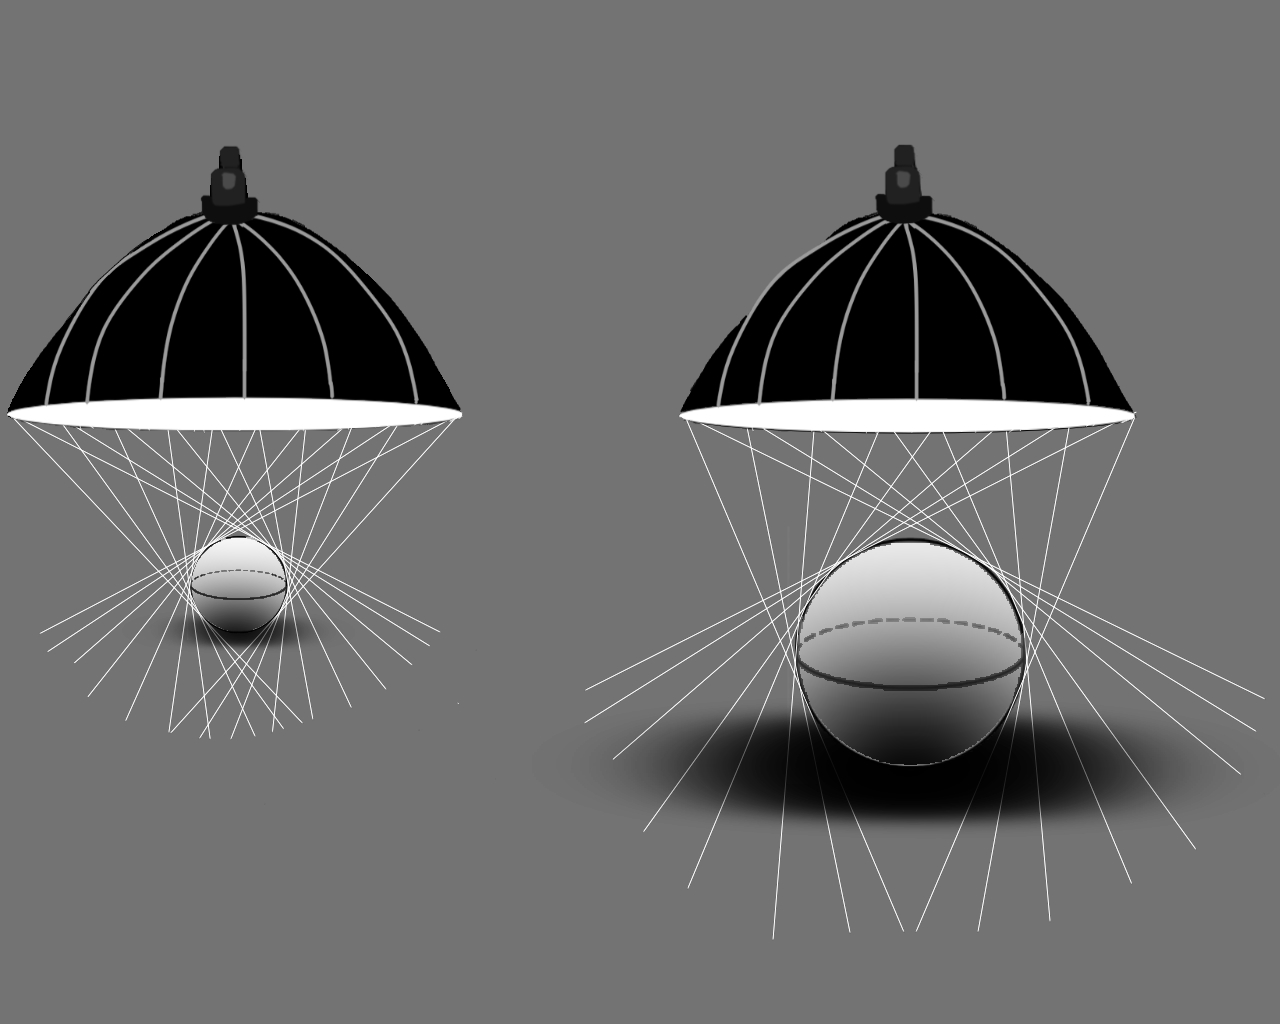
This diagram may explain the concept better than words can:

As you can see from the graphic, the light is much harsher when the source of light is small and distant (like a single flash). By comparison, a diffuser spreads out the flash so that it can illuminate the sphere from more angles. The result is a much softer shadow.
You might be realizing that the size of the flash diffuser plays a big role here. A large diffuser will cast softer light than a small diffuser, given the same distance to the subject. You can see how that works here:
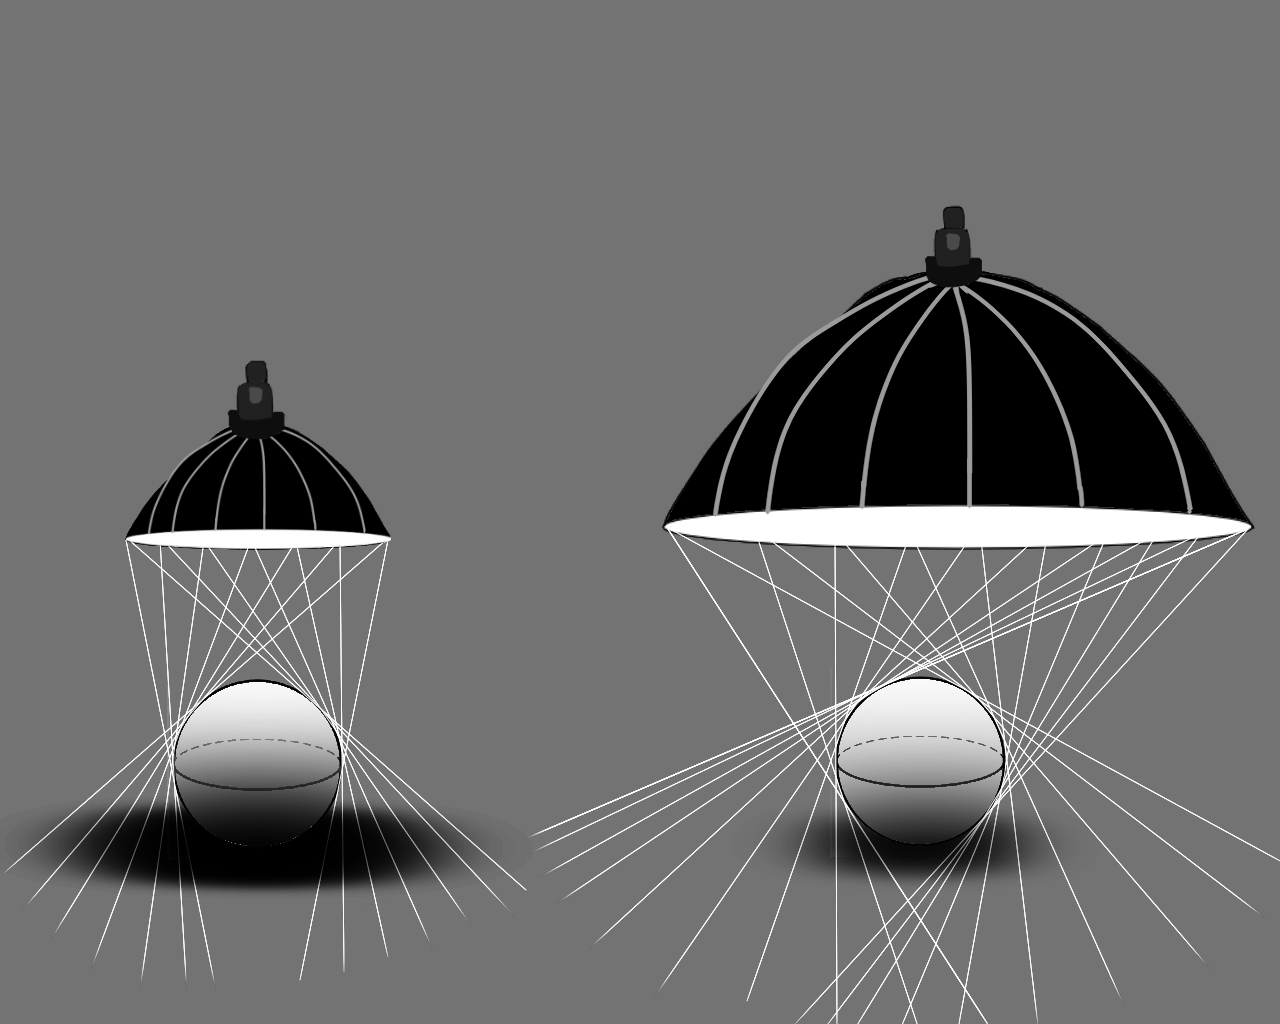
But it’s not just the diffuser’s size that matters. Just as important is the distance between the front of the diffuser and your subject! The closer the diffuser, the softer the light. A diffuser that’s far away will cast light from a narrow angle – not very different from an unmodified flash. That’s demonstrated here:
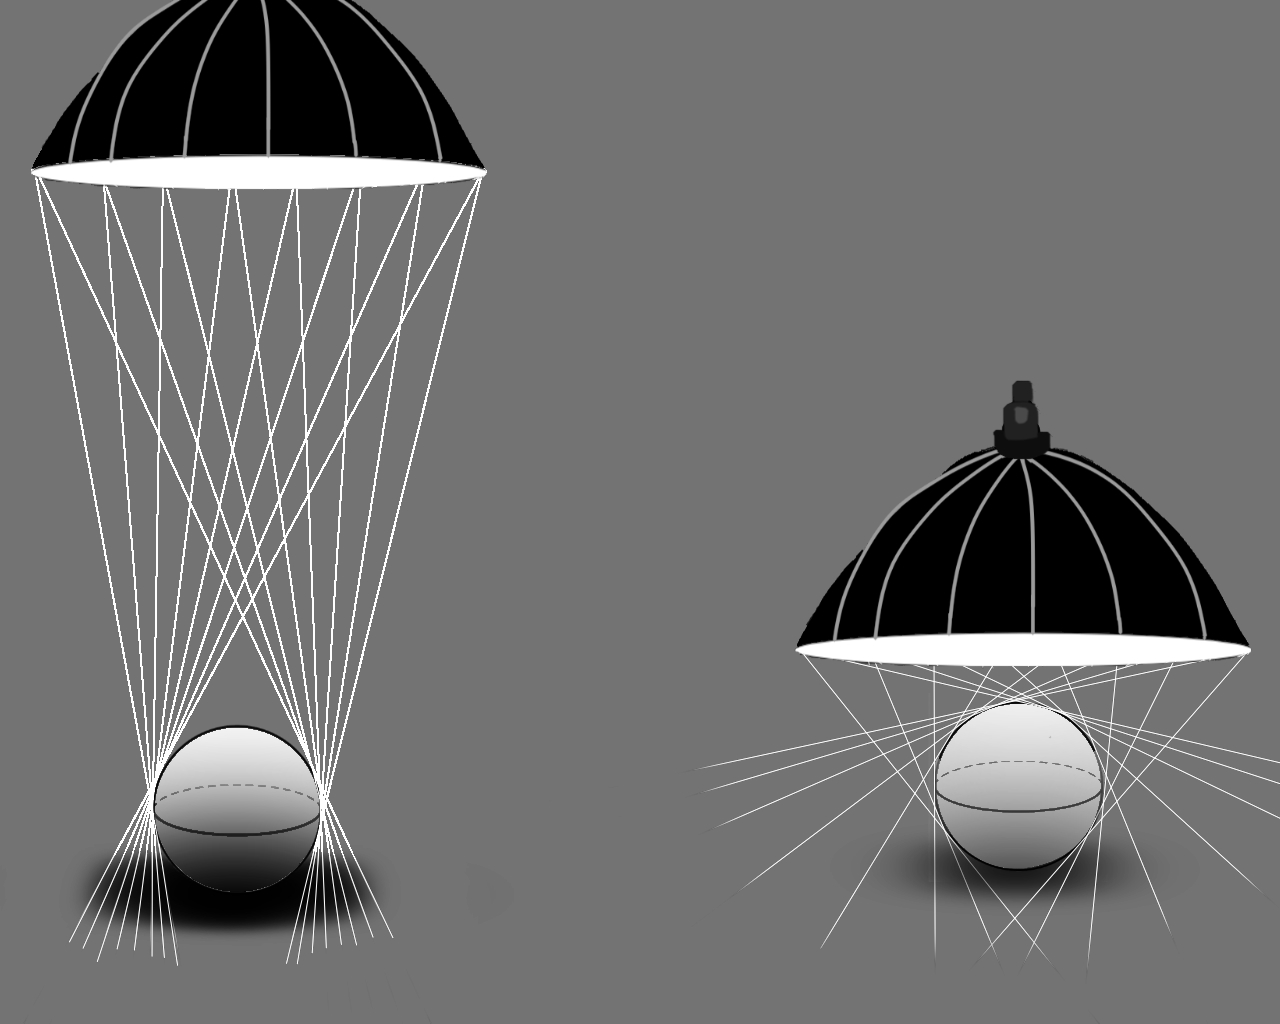
Really, it is not the objective size of the diffuser that matters to create softer light, but the relative size of the diffuser from the perspective of the subject. A small, close diffuser might cast softer light than a big diffuser that’s far away.
Finally, the size of your subject itself plays a role. Once again, I have a diagram for your perusal:
Notice how the larger subject prevents the diffuser from shining light from extreme angles. Meanwhile, the smaller subject is surrounded by light practically wrapping around it.
In practice, this means that macro photographers can get by with smaller diffusers, whereas portrait photographers will need a larger diffuser for equally soft light.
To sum up how diffusers work, you’ll get softer light as your diffuser gets larger and closer to your subject (and as the subject gets smaller). This is why it’s so rare to see photographers fire an unmodified flash directly at their subject. Instead, professional photographers almost always diffuse their flash in one way or another – whether that’s a dedicated diffuser, an umbrella, bounce flash, or something else.
When and How to Use a Diffuser
When should you use a diffuser? Personally, I recommend using a diffuser practically any time that you’re doing flash photography, or artificial light photography in general. This isn’t saying that harsh light is always a bad idea, but I find that 99% of the time, soft light is the way to go. It’s one of the easiest ways to improve your photos, and the best part is that it hardly costs anything at all!
As for how to use a diffuser, that can be a bit more complex. I’ll go through some of my favorite tips throughout this part of the article.
1. Get Close
The best way to create soft light is by investing in a large diffuser and positioning it as close to the subject as possible. This is a big reason to use the flash off-camera.
Diffused on-camera flashes can create nice light if your subject is very close, like for macro photography. But the moment you need to back up and photograph something like a portrait, the light will get harsher and harsher.
When I can, I position my off-camera flash at the closest possible point to my subject – right outside my photo’s composition. For macro photography, I sometimes push the diffuser down so much that it literally wraps around the lens.
2. It’s All About the Angles
The shadows and highlights in your photo are dictated by the angle that the light hits your subject, relative to your camera.
With wildlife, I generally try to make sure the face of the subject is illuminated fully. But there are many other ways to position the diffuser to create interesting results. For example, you can create dramatic sidelight by positioning the diffuser to the left or right of the subject.
In any event, the same principle applies: Put the diffuser close to your subject! Just out of frame is ideal. And make sure that the diffuser is large enough to illuminate your entire subject even when positioned that close.
3. Get Off-Camera
If you haven’t gotten the message yet, putting your flash off-camera is really helpful when you’re trying to soften the light with a diffuser.
With an off-camera flash, you can position the diffuser closer to your subject and experiment with different angles. Small changes in the angle of light can have a big effect on the photo.
Typical flashes are easy to fire off-camera with a flash cable or a remote trigger. The bigger challenge is holding the flash in the right place! I generally hold my flash and diffuser in my left hand, while holding the camera in my right. This can become really tricky, and I often find myself playing Twister trying to hold each element at the perfect angle.
Stands, flash arms, and friends can be a great help in these situations. I prefer to hold the flash (or have a friend do it) so that I can make small adjustments on the fly. But keep in mind that I’m the type of person who likes taking photos of squiggly snakes at night. If you’re shooting a static subject in the studio, a flash stand is probably the way to go.
4. One Size Does Not Fit All
It’s important to keep an arsenal of lighting techniques in your toolbox. No single lighting setup is the best for every situation. As I mentioned, larger subjects require larger diffusers, or you won’t illuminate the whole subject in the first place. Other times, you may want slightly harsher light (even if you still diffuse it some) because the subject warrants a bit more texture.
I keep about five different lighting techniques on rotation depending on the situation I’m facing. An important skill is to evaluate the scene in front of you and determine what type of light you want to cast. Switching it up keeps your work dynamic, and it encourages improvement!

5. Pay Attention to Catchlights
My last tip is to keep in mind the “catchlights” on your subject, especially the subject’s eyes. Catchlights are the reflection of the flash itself. If your diffuser has a strange shape or sharp edges, it may show up as tiny reflections in your subject’s eyes.
This is why I sometimes avoid diffusers with sharp edges and corners. Sure, they’ll still cast soft light, but I don’t want to create distracting catchlights in my subjects’ eyes. 90 degree angles are rare in nature, so they definitely qualify as distracting. It may sound like a small issue, but it’s still important to me.
Can You Use Multiple Flashes Instead of a Diffuser?
There is a common misconception that soft light is the same as an absence of shadows. Sometimes, photographers slap on an additional flash (or buy a dual-flash setup) thinking they’ll get soft light this way.
Although dual flashes can get rid of shadows, they still cast harsh lights with bright reflections on your subjects. The same goes for ring lights. There’s a difference between soft shadows and no shadows! Diffusers are great because they soften up the highlight/shadow transitions, while retaining some shadows that give your subject depth and dimension.
In short, even if you have a dual flash system, you need to use diffusers.
What Diffuser Should You Get?
The right diffuser for you depends on your subject’s size. As I mentioned earlier, larger subjects require much larger diffusers. Ideally, you want the diffuser to be several times larger than the subject. If it’s not, you’ll need to place the diffuser further from your subject (because at least then you’ll illuminate the whole subject), which makes the light harsher.
It’s also important that there’s enough distance between the flash itself and the diffusing material. That way, the flash is properly dispersed across the entire area of the diffuser. Way too many diffusers sold online have the flash places mere inches away from the diffusing material, which hardly does anything. The deeper the softbox, the more diffused the light will be.
Other criteria include convenience (can the diffuser be collapsed for easy carrying?) and shape. As I mentioned a moment ago, I have a preference for rounded diffusers in order to improve the catchlights on my subject.
Here are just a few of the diffusers I recommend, with some pros and cons.
SMDV 24 inch Speedbox
I like this large softbox because it is easily collapsible and packs tightly in a camera bag. For the past couple years, I have used the 50cm version of this diffuser (about 4 inches smaller than this one in diameter) but they’ve sadly discontinued it.
The popup design is extremely convenient for the size and effectiveness of the diffuser! This diffuser is so large that it cannot be used on-camera. It’s also overkill for extreme macro photography of small bugs and flowers. This diffuser is fairly expensive at $140 – although not bad at the current sale price of $99 – but considering everything, I consider it one of the best values of any photography gear I’ve bought.
Pop-Up Diffusers
There are many similar designs on the market for pop-up flash disc diffusers. These are a great cheap option. They are universal in that they can be placed over any flash head. The light is shot upwards and reflected outwards. The discs do a surprisingly good job at dispersing the light. These are also very convenient because they can be used when the flash is mounted on-camera.
Vello 8 x 12 Inch Softbox
This is a rectangular softbox. I like that it is fairly large, but can still be used on-camera. A downside is that softboxes like these don’t have much rigidity, and often collapse on themselves, becoming a pain to use. I like that it’s universal, however, so it should fit whatever flash you have.
White Umbrella
An umbrella can act as an excellent diffuser. I find white umbrellas to be quite versatile. They can bounce light from a flash back at the subject, casting very diffused light. I also occasionally fire the flash through the umbrella, which is another way to use it as a diffuser. Lastly, an umbrella can actually function as a diffuser for the sun!
Usually, umbrella diffusers are used with a light stand, but you can get a friend to hold one or potentially hold it yourself depending upon the angle of your subject. It’s a huge light source if you get it to work right.
DIY Diffusers
If none of the diffusers you can find online seem like a good match, there’s always the option of building your own diffuser. I find that this can be the best light, oftentimes even better than a paid alternative. I’m working on another article that explains how to build a good, custom diffuser – I’ll post it as soon as possible!
Conclusion
I hope this article has given you a good understanding of how flash diffusers work, why they are crucial to flash photography, and what diffuser is right for you.
One of the biggest steps up in my photography was when I learned how to properly diffuse my flash. I absolutely recommend you invest in a diffuser, or build your own, if you have not already done so. The difference is like night and day and will instantly improve your photography.
Remember to get a diffuser that is as big as possible (within reason), and position it as close as possible to your subject. With that, you’ll be able to capture some beautiful, soft light in your photos. If you have any questions about the process, please don’t hesitate to ask me in the comment section below.
Thanks for the great diagrams and photographs. I am just starting out buying lighting for my studio, so I appreciate anything which helps to clarify the theory and science of lighting*.
I have an octobox 140 and some reflectors. At this stage I am finding that the octobox is very flexible and can provide different looks just by changing angles and positions. I am using just one mains powered flash unit, the octobox and two smallish round reflectors (on stands) to experiment with shadows. Getting used to setting the power manually is a new experience, but worth the effort.
For on camera flash outside the studio I find a silicone dome diffuser works very well indeed as fill in flash.
* There is a great book with that title.
Great article. Clear and concise.
I like the idea of the Vello 8×12 diffuser as well, but also don’t like the fact they aren’t very rigid. I assume, since you don’t mention one, you don’t know of a stiffer alternative!?
I use and recommend Lumiquest Softbox III, exactly what you are looking for.