In the past, photography equipment and videography equipment were very different pieces of kit. Times have changed, however, with the rise of DSLR and mirrorless cameras that can shoot excellent quality video. If you plan to take advantage of these features, what additional equipment do you need? In this roundup of video accessories, I thought I’d highlight some of my favorite equipment for today’s DSLR and mirrorless-based videographers.
For this guide, I’ll continue using the rating scale from our earlier articles, where we recommended gear for landscape photography, astrophotography, and drone photography. Our ratings are:
- 1/4: Rarely worth getting
- 2/4: Can be useful
- 3/4: Very useful
- 4/4: Must buy!
In this guide, I’ll rate each piece of gear based on its value for video usage. But where possible, I’ll also mention how I’ve made use of these accessories for still photography, too.
With that out of the way, let’s get on to the gear!
Table of Contents
Variable ND Filters (4/4)
While neutral-density filters (ND filters) often have a place in photographer’s bags, it’s variable ND filters that videographers prefer. As with a traditional ND filter, variable ND filters reduce the amount of light that reaches your camera sensor. But like the name implies, variable ND filters allow you to change how dark they get, by spinning the front like a polarizer.
Variable ND filters are so useful for videography because they allow you to follow the 180 degree shutter rule, even in bright daylight conditions. The 180 degree shutter rule says that your shutter speed should be “1/(double your frame rate),” or as close to it as possible, to get natural-looking motion in your video. For example, if you’re filming at 24 FPS, the target shutter speed would be 1/48th of a second, which would be rounded to 1/50 second on most cameras.
Maybe you can see why a neutral density filter is so important if you’re trying to achieve this shutter speed! Without one, a bright daylight scene at 1/50 second would be massively overexposed the moment you start using wider apertures like f/2.8 or f/1.8 (even at base ISO).
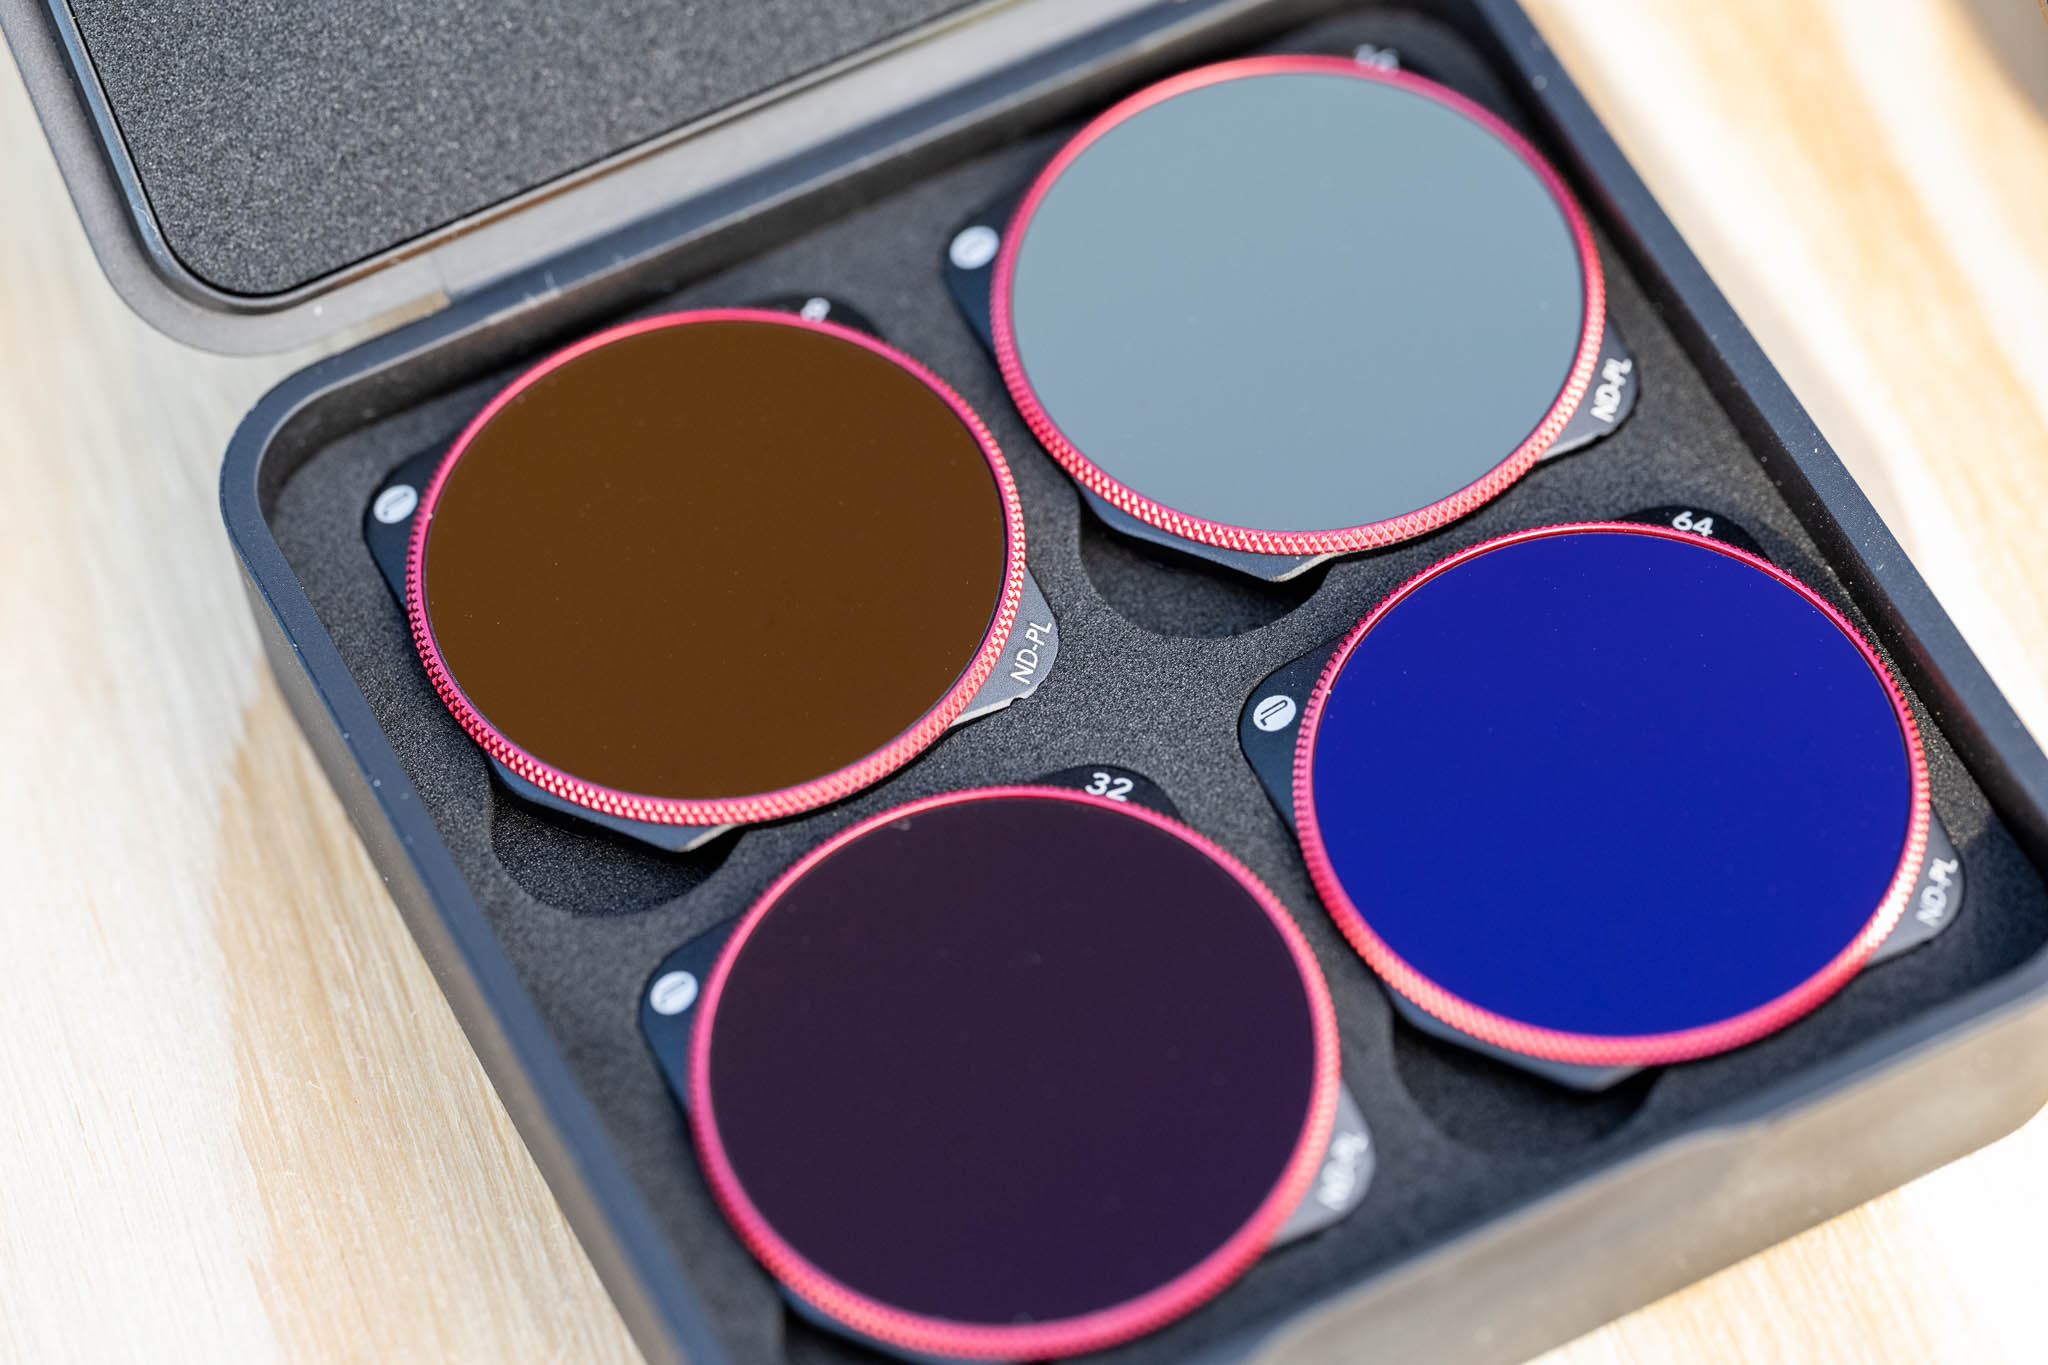
While you could technically use a set of regular ND filters of different strengths, getting just one variable ND filter is much more cost-effective and saves a lot of time in the field. If you need a very strong reduction in ambient light, you can set the variable ND filter very strongly; if clouds roll in and you don’t need as much filtration, you can use a milder setting.
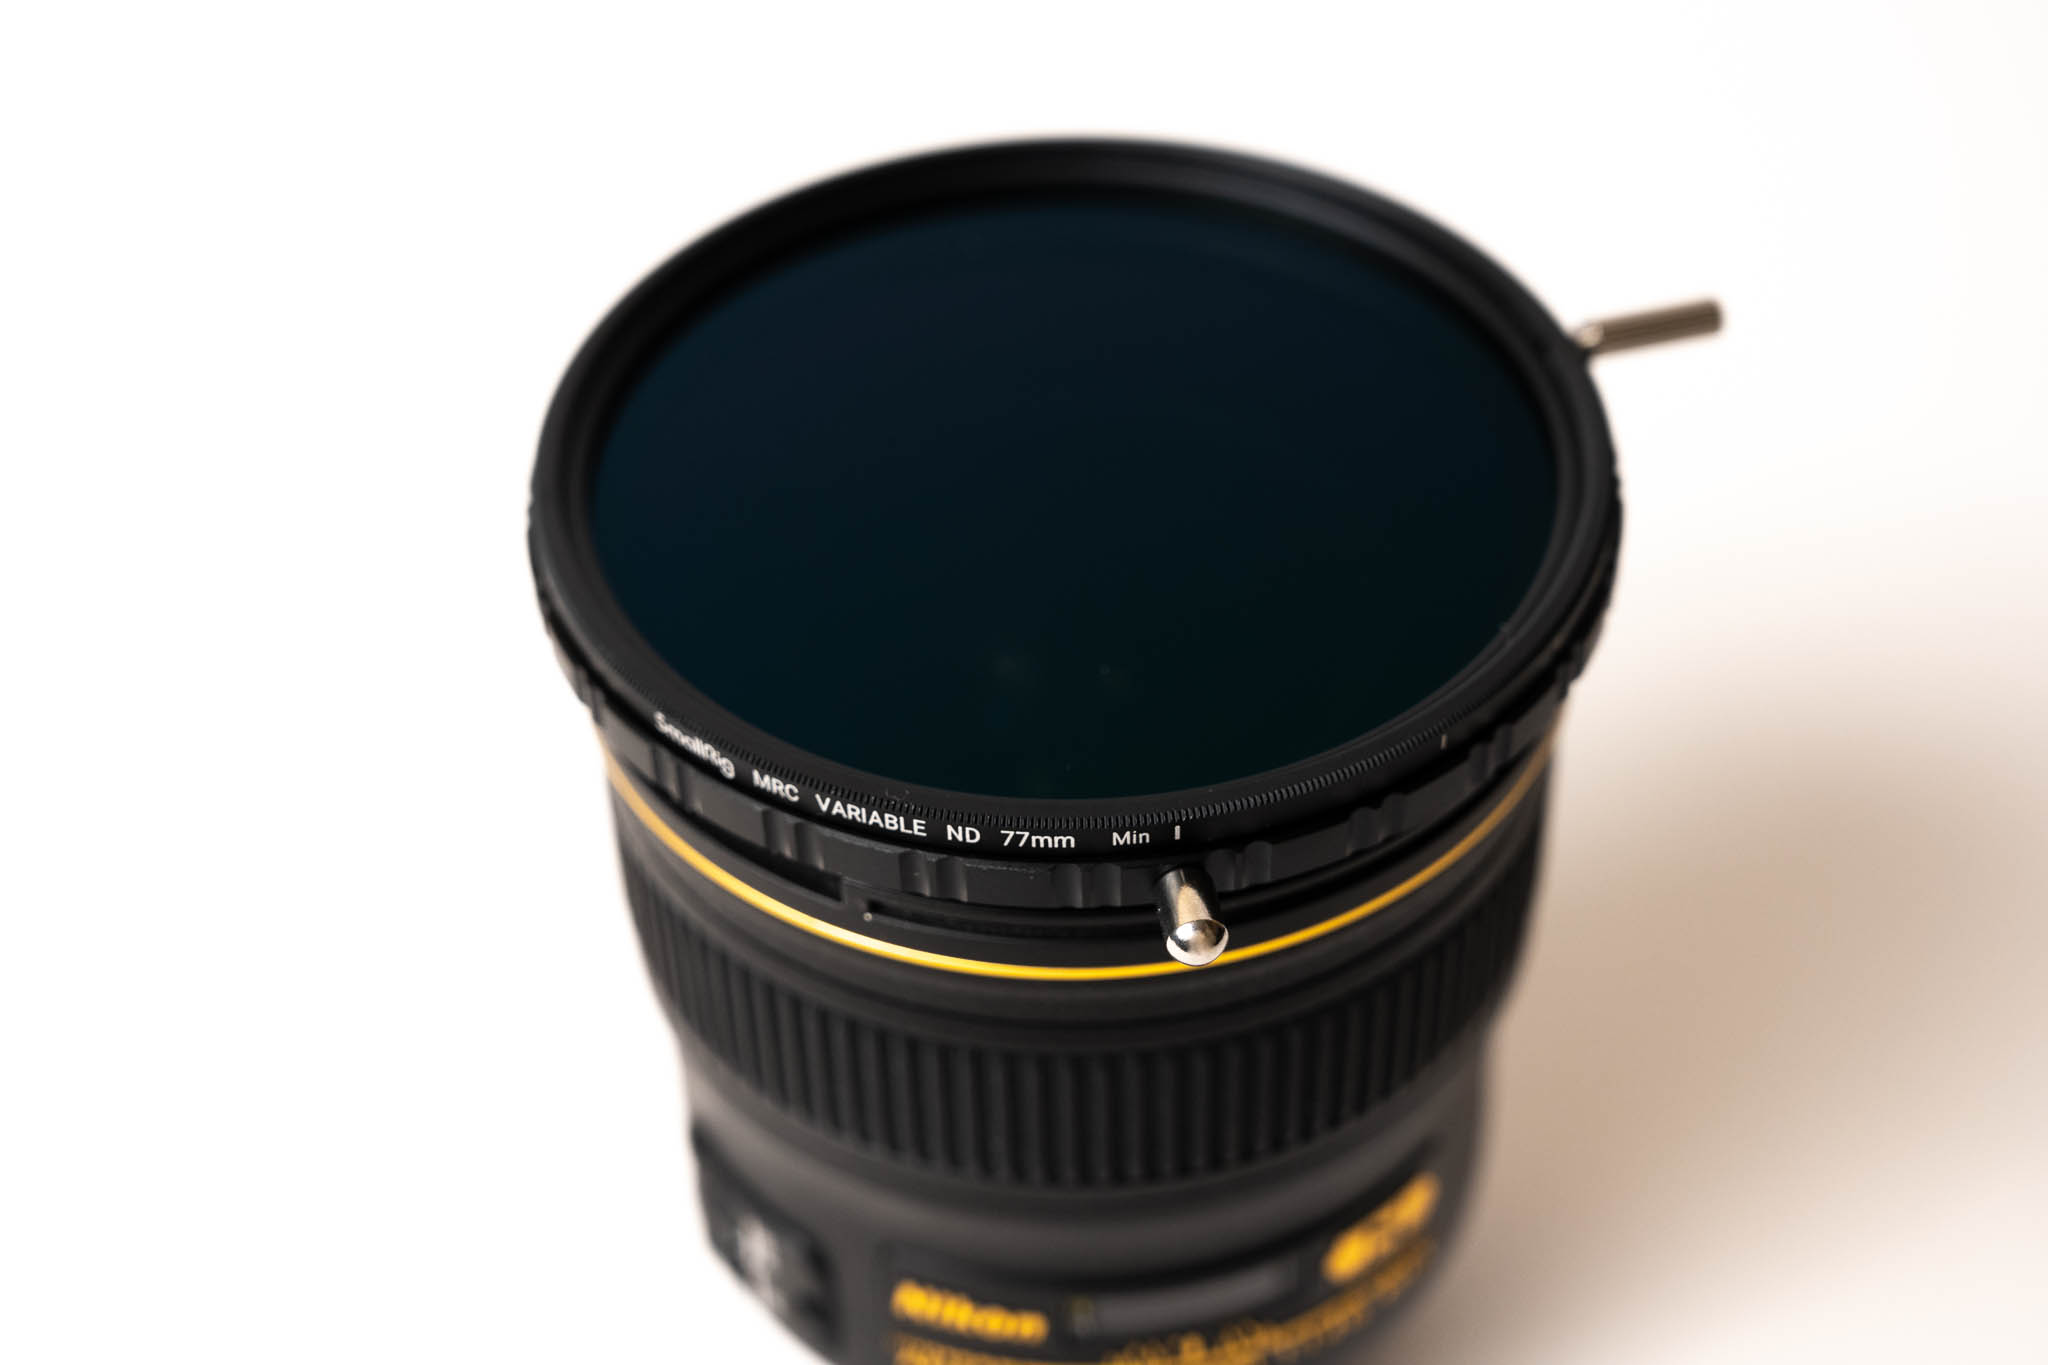
Variable ND filters are basically two polarizing filters on top of each other. Turning the filter ring blocks more or less light, depending on how far you turn it. The result is an impressive range of light-blocking abilities, such as the 0.3 to 9 stops of density offered by the SmallRig MRC Variable ND. The “0.3 stops” setting is the inherent light-blocking of the filter with no reduction applied, while you can ramp up to 9 full stops of reduction for filming in very bright light.
It’s not just video users who benefit from an ND filter, of course. Landscape photographers tend to keep an ND filter in their bag to photograph long exposures during the day. While some aspects of a ND filter’s look can be replicated in post, an ND filter is versatile enough to still count as one of my essential filters even for stills.
Two of the biggest considerations when buying ND filters are the color neutrality and edge performance. Variable ND filters also sometimes produce dark, uneven streaks or blurriness when used near maximum strength. I mentioned the SmallRig MRC filter because that’s the one I use, and I’ve found it performs well in these respects, but I recommend doing your own research before buying, as these are not cheap filters.
Overall, a variable ND filter is a great choice for photographers, and it’s all but essential for videographers. Considering the quality of variable NDs today, I’d think twice before going back to fixed-strength ND filters unless you routinely need 8+ stops of light reduction.
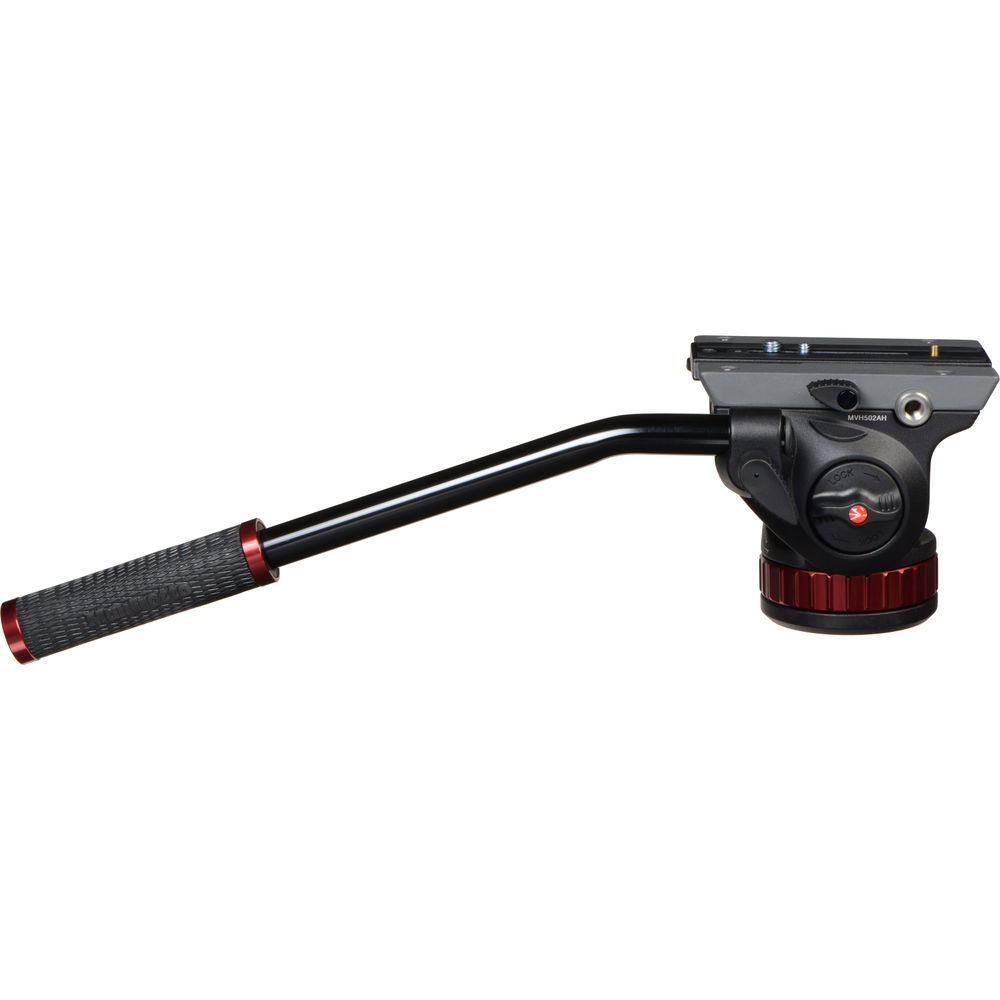
Video Tripod Head (4/4)
While you can use any tripod head for both photos and videos, having the right setup can make a big impact on the quality of your work. A video tripod typically has a bulkier design to support the larger rigs involved in video, and most importantly features a video-friendly head.
A fluid head, like Manfrotto’s 502AH, can deliver far smoother pans and tilts than something like a ballhead (which photographers tend to prefer for non-video work). This makes for smoother, more pleasant shots. In addition, elements like the longer handle, support for counterbalancing, and fine control over the tension are all well-suited to videography.
Video-Specific Tripod (2/4)
You obviously need a tripod to go with the fluid head. But does it need to be a dedicated video tripod? They have some advantages, with a bigger size and weight that easily stabilizes your camera. Some of them have other features for videography, like wheel attachments for usage in a broadcast studio.
But for most DSLR and mirrorless videographers, you’re fine just using a regular photography tripod, so long as it’s on the sturdy side. (I wouldn’t recommend a travel tripod to pair with a bulky fluid head.) The key for video is the tripod head; I recommend spending more of your money there.
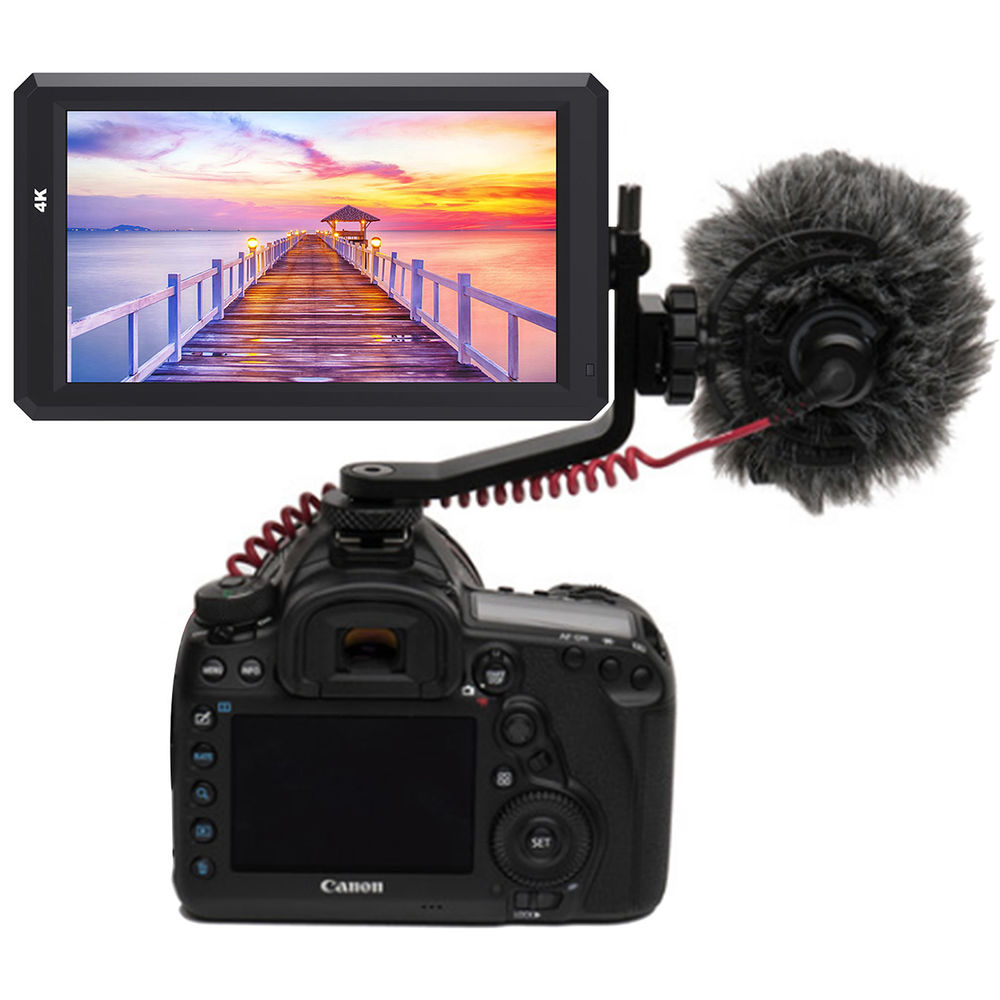
HDMI Monitor (3/4)
An HDMI monitor is essentially a larger version of your camera’s rear screen. More advanced HDMI monitors can have features like LUT conversions, scopes, anamorphic support, and peaking – but even the simplest models offer the most important feature: more screen size. A larger display makes it easier to see framing, check focus, and notice small issues around your composition.
The one I use is FeelWorld’s 5.7” On-Camera Monitor. The Atomos monitors are also very popular if you need more features, especially the higher-end Ninja V (more on that in the next section). I’ve been inseparable from an HDMI monitor since I started using one for my video work. The only downside is that most external monitors also require external power, which can often be supplied by a small battery pack. Some monitors also support passing through power to your camera, interestingly.
External Capture Device (2/4)
External capture devices, like the Atomos Ninja V, are like an HDMI monitor on steroids. They offer all the features of a regular external monitor, but capture devices also support recording and playing back video at higher quality than your camera may be able to capture internally.
Whether this means supporting RAW video, LOG recording, or HDR footage, the external device is capable of recording video at the best quality possible. Support for this functionality depends on your mirrorless/DSLR camera, but on most cameras, an external recorder translates to the pinnacle of image quality in videos captured for that camera.
It does come at a significant cost, however. Both the device itself, and the often-proprietary storage options can be expensive. Also, the quality improvements may not be very significant in practice. Unless you’re heavily grading your footage, your camera’s internal codec may be just fine.
Large External Battery (3/4)
Shooting video drains batteries. But it’s not just your camera that you need to think about. You also need to power your accessories, like external monitors, recording devices, on-camera lights, and gimbals. Managing the power across your rig is a huge consideration.
To address this, picking up a few large batteries and spreading that power around to your various bits of gear can make things a lot easier, compared to managing a dozen small batteries.
With a larger video battery, you’ll often be able to mount it to a battery adapter or power supply plate. These plates then break out the output to D-Tap, USB, dummy battery adapters, 12V, or other power standards, enabling you to power a wide range of gear.
While these batteries can be a bit large and more cumbersome to use, as well as more expensive up front, their long life and flexibility are valuable considerations. For advanced videography, I recommend using one of these batteries instead of separately charging or powering all your accessories individually.
Gimbal for Handheld Videos (4/4)
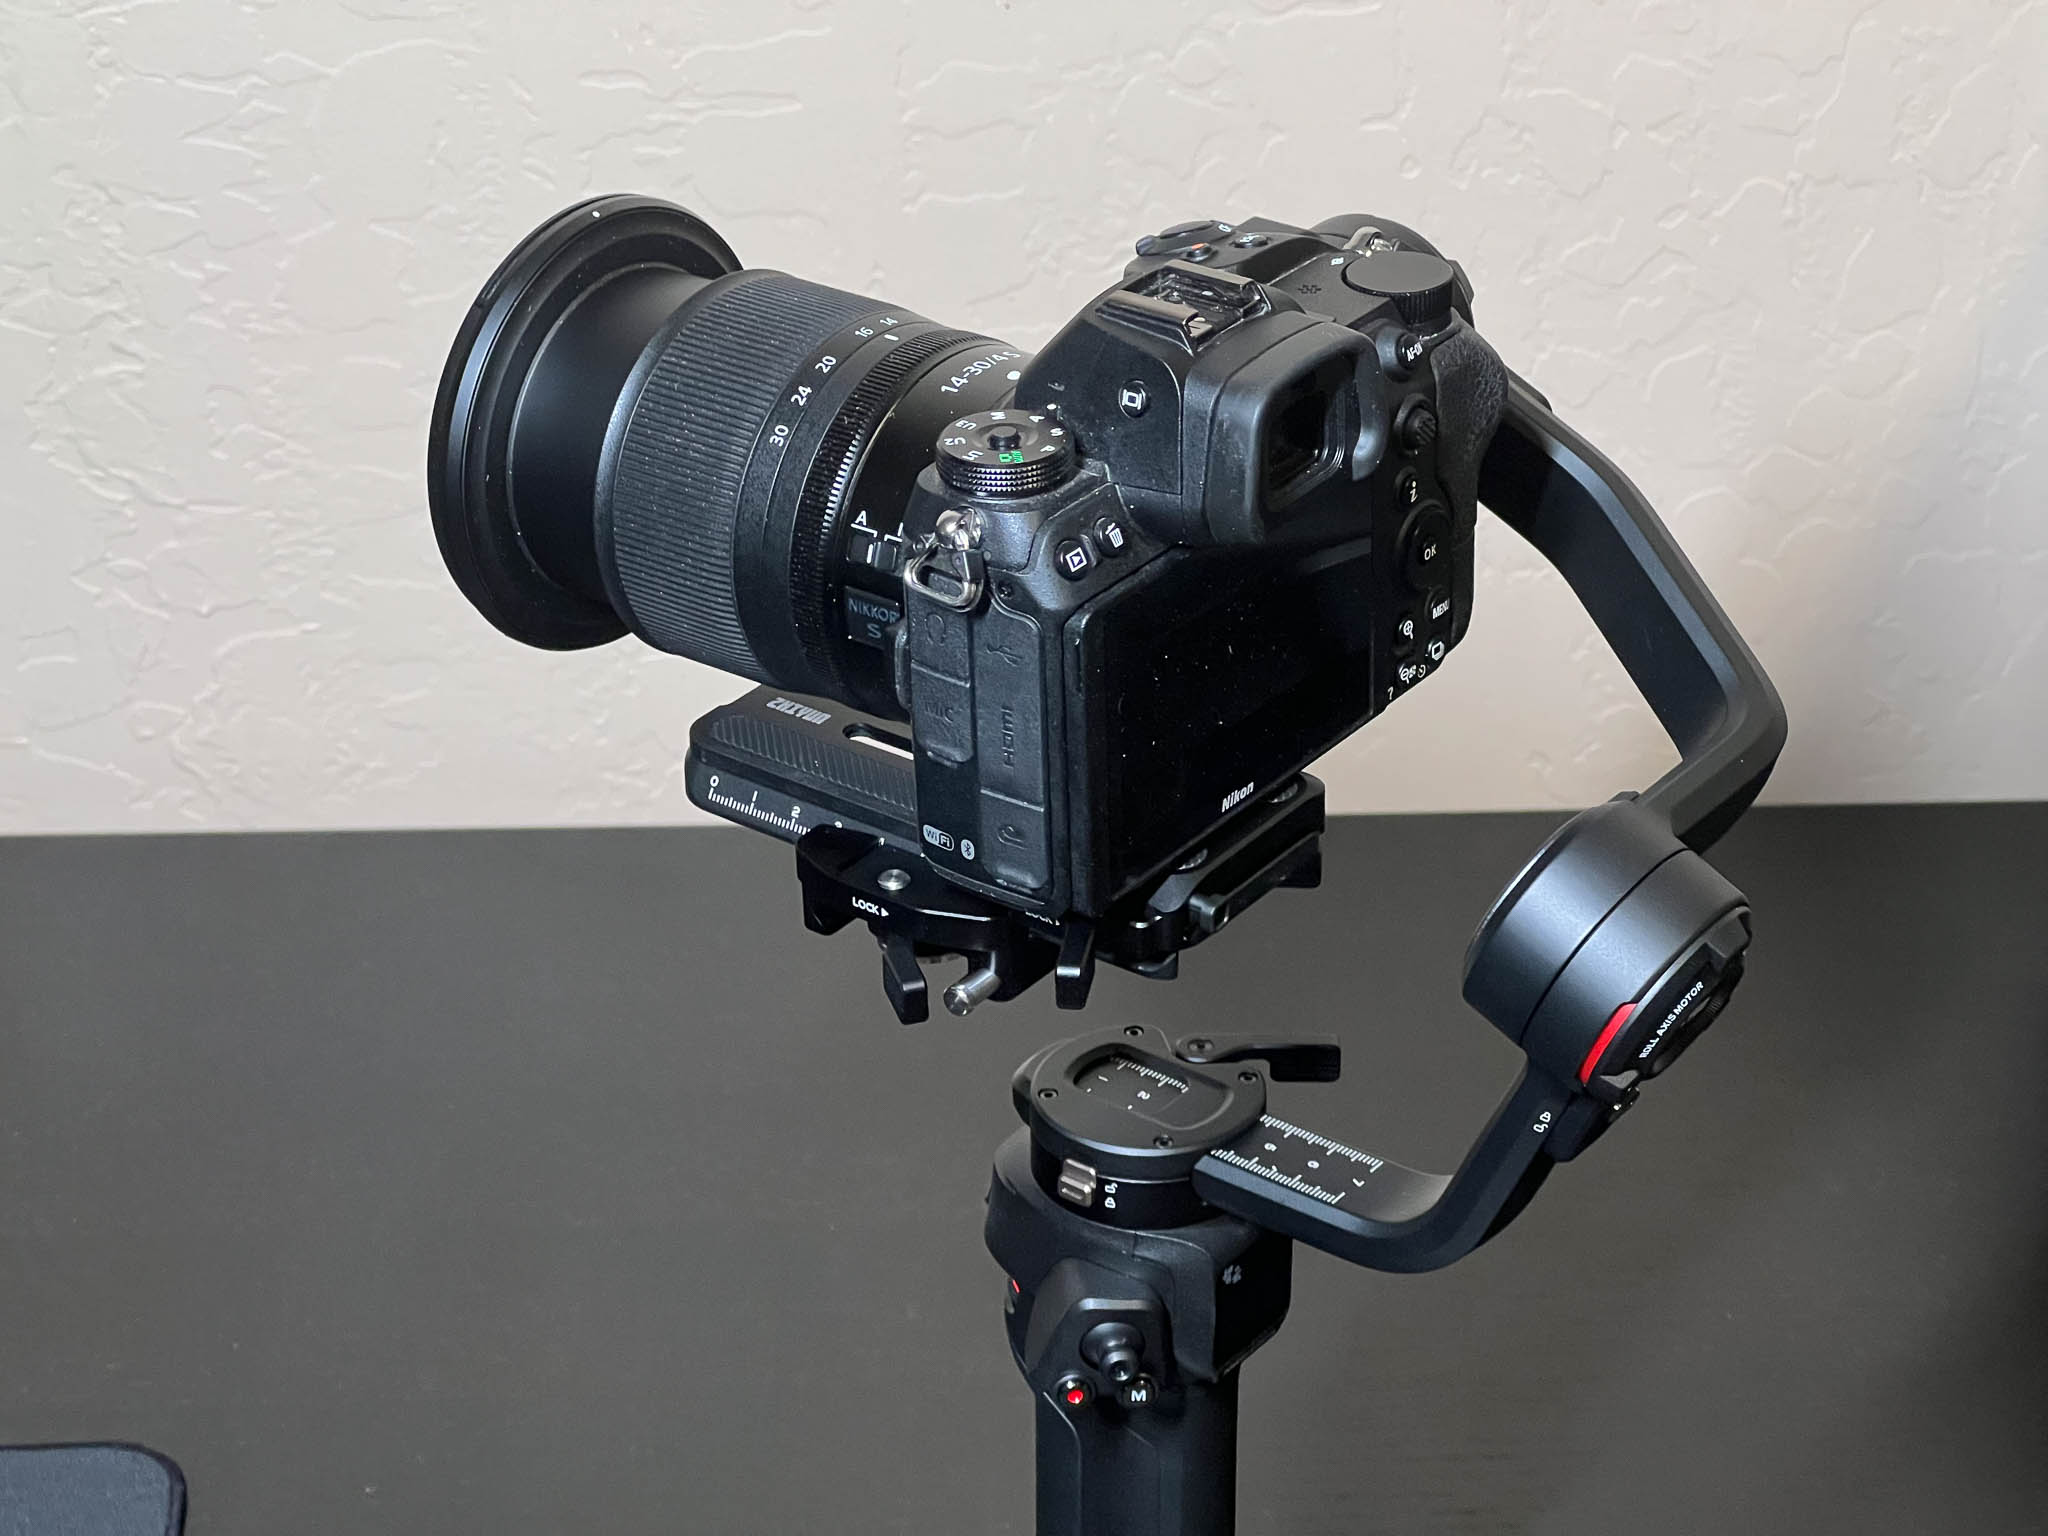
If you read my previous article on the best gimbals available, you’ll know I’m a big fan of them! A gimbal stabilizes your camera with electric motors, enabling you to get smooth movement and minimal camera shake in your handheld video. For many of the videos I shoot, they’re essential tools. Having a gimbal opens up a whole range of possible shots and transitions, and really creates opportunities that couldn’t be captured any other way.
Lavalier Mic (3/4)
Capturing high-quality audio is essential when shooting video, and it’s surprisingly easy. Unfortunately, in-camera mics aren’t up to the task of recording clean audio, as they’re small and will pick up camera noise, wind, and other undesirable clutter.
Lavalier mics – those small mics clipped to the shirts of talent – eliminate all these issues. By moving the mic off-camera (and right next to the speaker’s mouth), lab mics can capture much cleaner audio, without requiring additional work from the crew.
For convenience, I prefer using a small transmission setup like Hollyland’s Lark 150 or DJI’s DJI Mic. These combine a wireless receiver and one or more transmitters into a single kit. Back at the camera, the receiver plugs into the camera’s mic input, passing the audio through to your camera.
On these transmission systems, there are mics already built into the transmitters, or you can attach a separate lavalier mic to the transmitter (the Hollyland kit includes two such lav mics, though the DJI kit doesn’t). If you’re on a budget, the transmission setup isn’t necessary, and you can record external audio from a simple lav mic to a basic audio recorder, then match the audio tracks to your video manually in post.
Shotgun Mic (3/4)
I’ve rated both the lavalier and shotgun mics as 3/4, but this is only because I don’t think you need both. You most certainly need at least one!
In this case, the shotgun mic represents a different approach to recording audio, compared to that of the lav mic. While a lav is great for picking up one or two people’s speech, and is well suited to things like interviews or pieces towards camera, the shotgun mic offers a more flexible approach to recording whatever is in front of you.
The shotgun mic is essentially a long tube with a mic at one end. The tube channels audio in a pickup pattern that can vary by model: longer tubes offer a more narrow pattern, with the longest letting you pickup just a single individual at a distance, rejecting most of the ambient noise. More generalist models, however, offer a bit of side pickup, helping you capture a bit of the ambient feel, while still letting you focus on the talent. Shotgun mics are also preferable if you want to record audio from sources other than people, like birds chirping or trees rustling.

Shotgun microphones are also a bit more flexible than lav mics, as they can be taken off the camera and used via a boom for more isolation. These mics can sometimes be powered by your camera itself, simplifying the videography process if you just want something small and light, like the popular Rode VideoMic Go. But higher-end shotgun mics usually need an external power source of some kind.
Follow Focus (2/4)
A follow focus is a little external dial and mechanism that attaches to your lens, essentially acting as a more precise and repeatable way to set focus manually. They’re perfect for getting the precise focus pulls needed to switch between two focus points smoothly.
I use a follow focus from SmallRig that’s $99. There are also larger, more expensive options for cinema cameras, but I don’t think they’re necessary for basic DSLR/mirrorless videography. On this follow focus (and nearly all others), you can preset two focus positions, and switch between them by turning the dial until you hit your stop. It’s good for filming two people talking if you want to switch focus between them mid-shot.
Using a follow focus offers plenty of benefits for video work, but it’s not without drawbacks. Setting up the rigging, placing the toothed cable around your lens, and generally getting things into place can take a few minutes, making it a deliberate choice to use one.
As an additional downside, some cameras with focus-by-wire lenses don’t work well with a follow focus, as they either don’t have a 1:1 mapping of rotation to focus change, or just arbitrarily reset focus position when turned off. If your lens has those behaviors, a follow focus isn’t going to offer as much benefit.
I don’t consider a follow focus necessary for basic videography these days, since most new cameras, especially on the mirrorless side of things, have good video autofocus anyway. But if you find yourself often changing focus mid-shot, I’d add one to your bag.
Matte Box (3/4)
A matte box is basically a lens hood on steroids. While a lens hood is designed to shield your lens’s front element against incidental light, and therefore protect against lens flare, a matte box can provide much more deliberate protection against incoming, unwanted light. By blocking off more of the area outside your frame, matte boxes help eliminate any source of flare, whether it be the sun or studio lights.
As a bonus, a lot of matte boxes can accommodate larger filters that slot in. I use a Star-Trail matte box specifically for this feature. The larger filters that fit such matte boxes aren’t cheap, but they’re typically very high quality. However, if you get a matte box that mounts to your lens’s filter threads directly (including the one I just mentioned), you could always use standard screw-in filters instead.
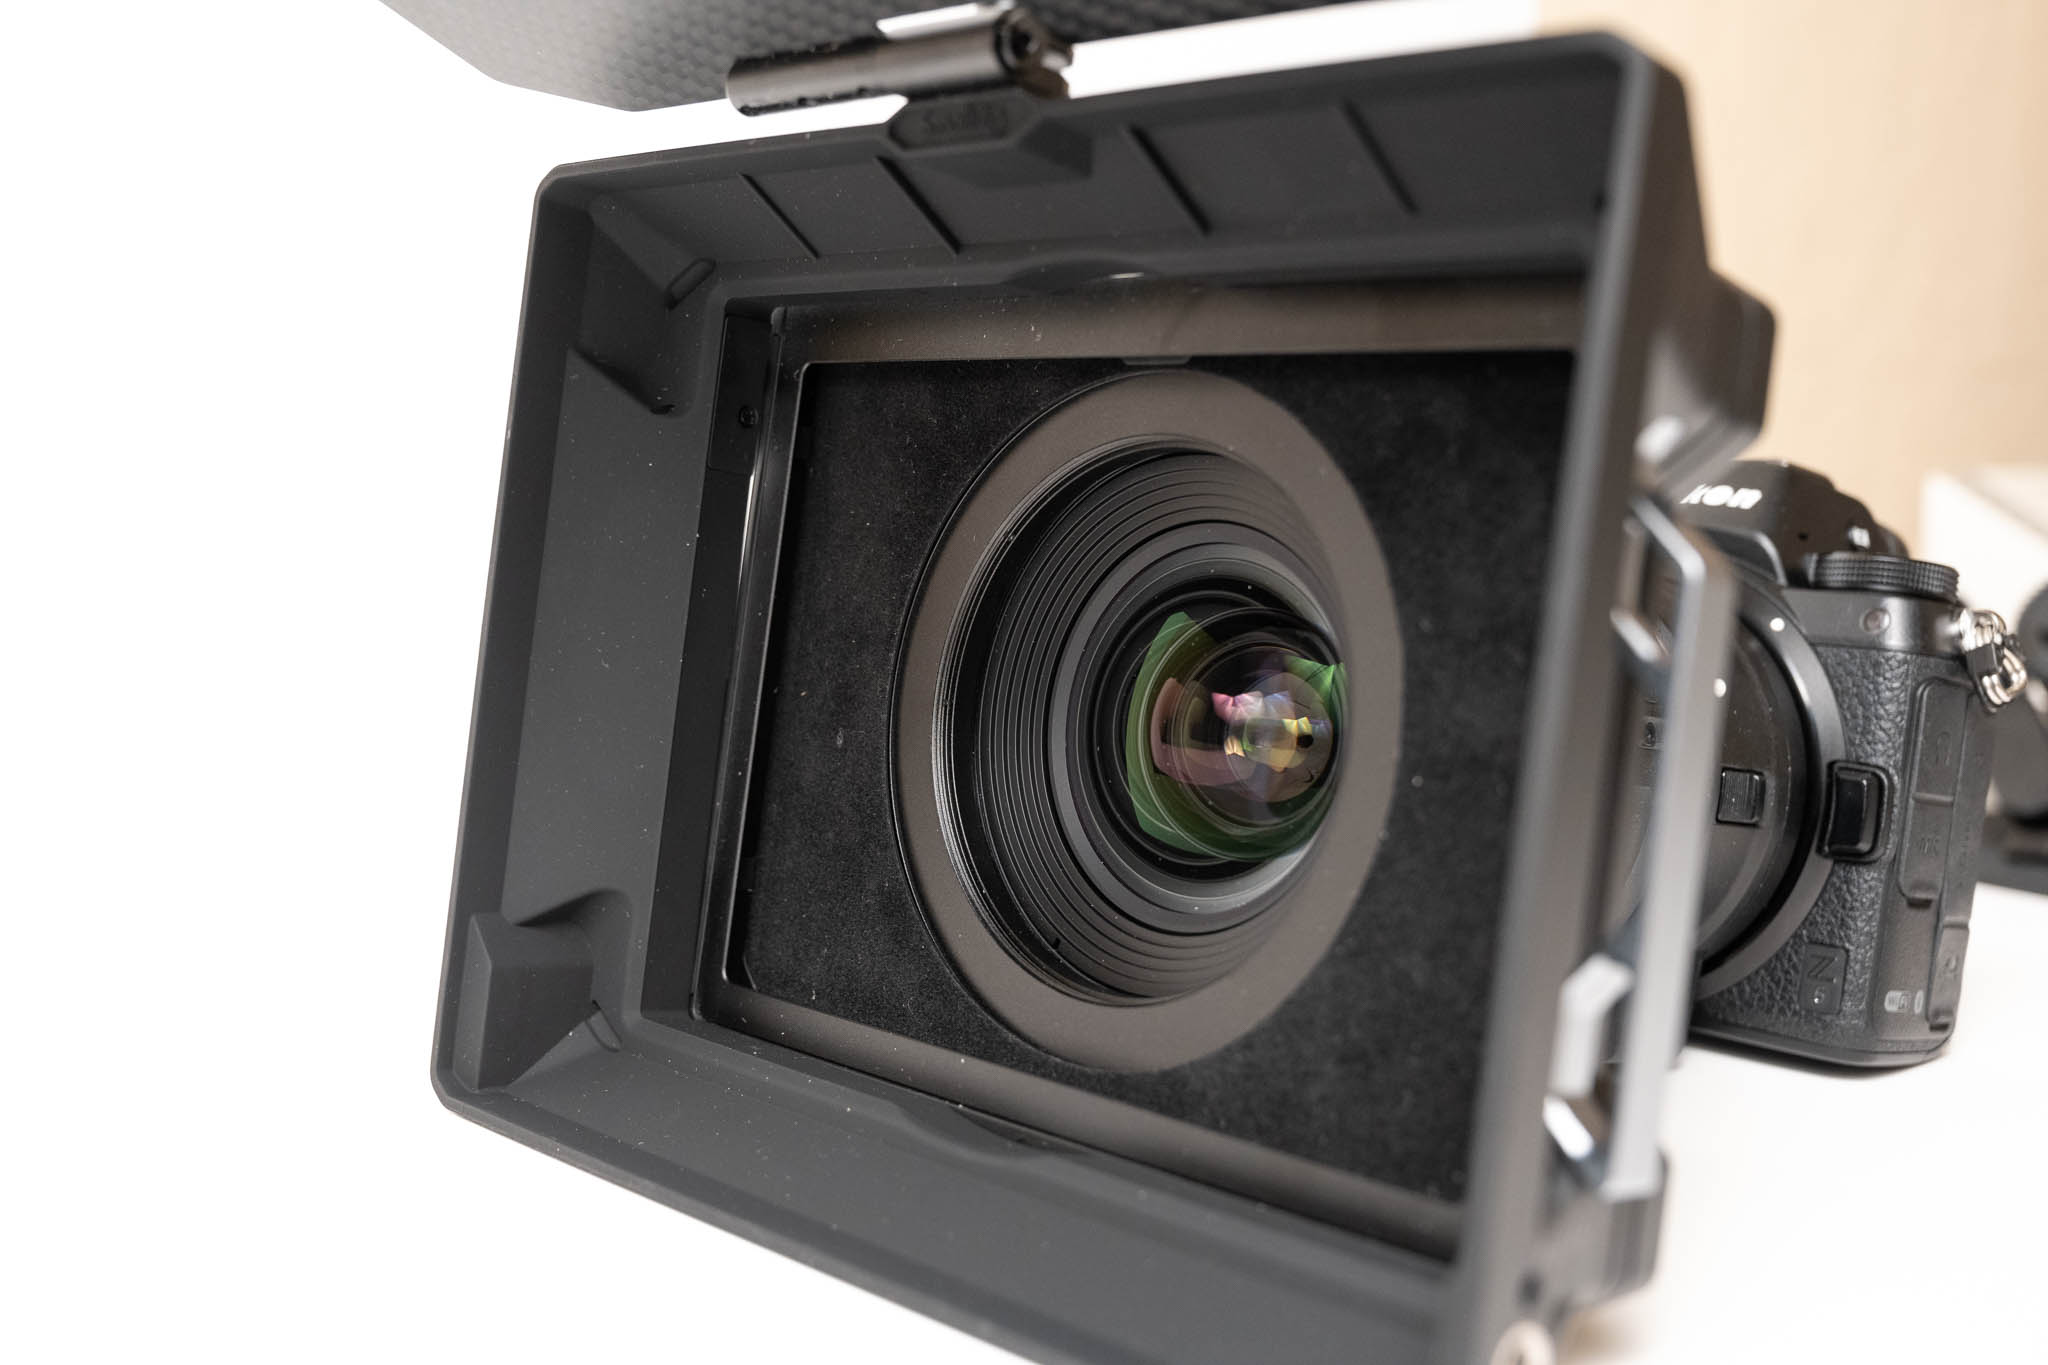
I’ve found the matte box to be most useful in studio settings, where I can make use of the large flag to block any light from studio lights or strobes just outside the frame. But as you can see, matte boxes aren’t small setups, so make sure their size works for your purposes. Also make sure that the matte box fits your lenses: If you have a 14mm lens, for example, or a lens with a large 95mm+ filter thread size, not all matte boxes will be compatible.
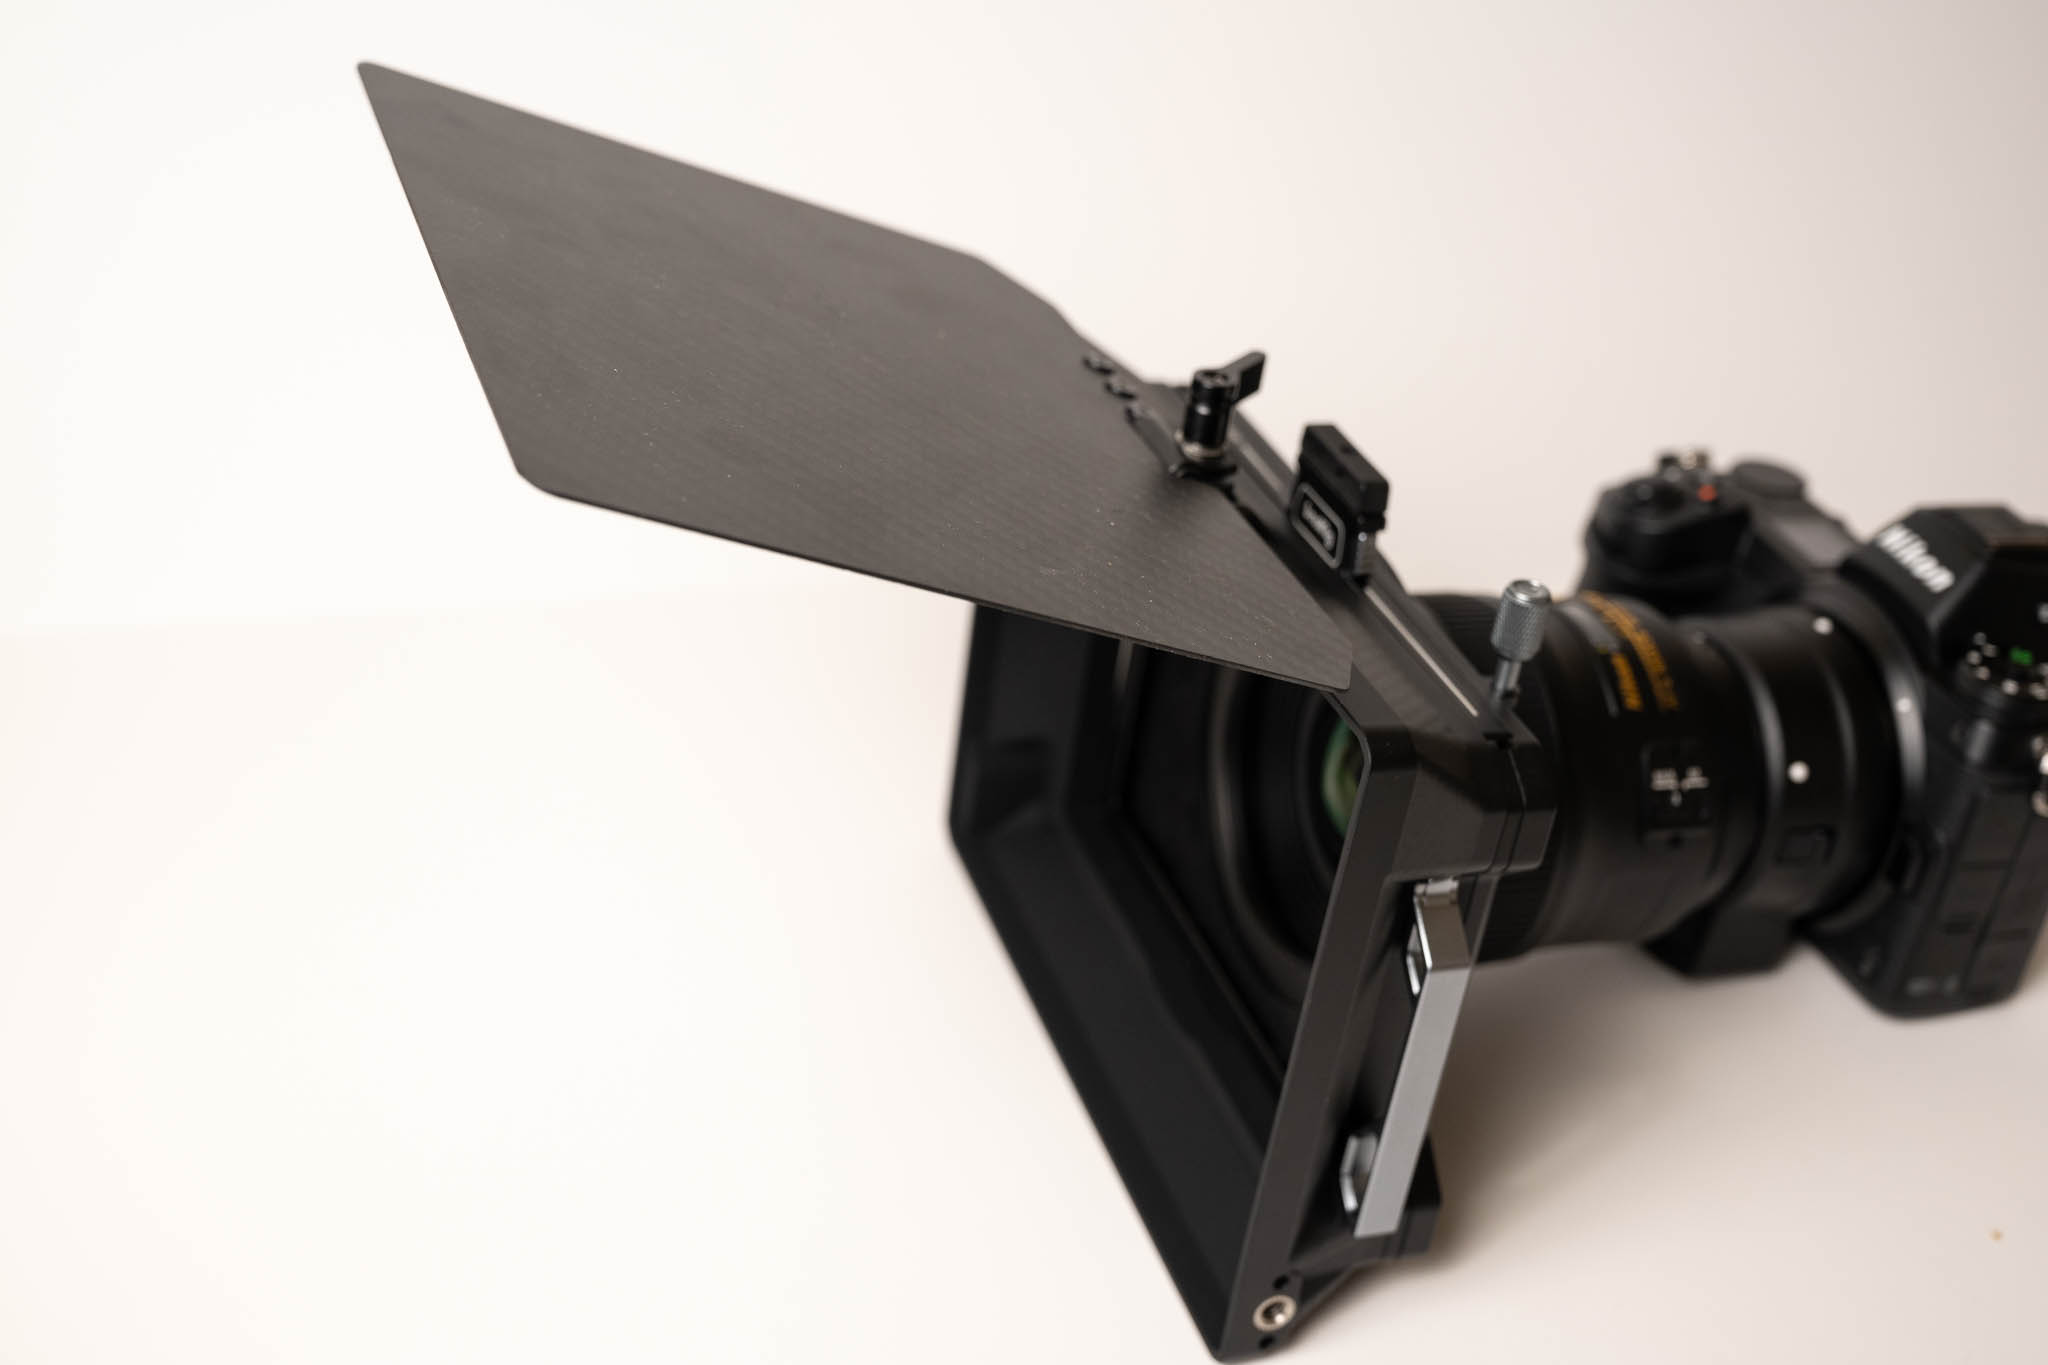
Whatever your choice of matte box, consider getting one large enough for your future lens needs. Oftentimes, there’s a small price difference, just like with filters, between a smaller and larger model. That price difference is a lot less than buying a second, larger filter or box when you upgrade or switch lenses.
I’ve found my matte box to be extremely useful for studio-based videography, so I’ve rated it 3/4, but videographers who want to travel light can get by with lens hoods instead.
Conclusion
I hope this guide gave you a good sense of what equipment and accessories you’ll need for videography work, especially with a DSLR or mirrorless camera. There aren’t any items I rated “1/4” above, because I couldn’t think of any completely useless video accessories – but I’m interested to hear some horror stories if you have them! Let me know in the comments if you have any questions or suggestions regarding the equipment I’ve listed above. Happy filming!
Hello Alex,
Your articles are always very informative, have learnt a lot from them, Thank you 😊
Thanks!
Hi Alex,
Thanks for this article; much appreciated!
I do have a follow-up question regarding Variable ND filters (VND’s). Specifically, I have done some research on various makes & models but have read a fair number of negative feedback & reviews on many of them (usually for the reasons you mentioned: color (non)neutrality [and variance thereof when changing the VND “strength”] as well as weird, dark cross patterns, etc., when used near maximum strength). For that reason I’ve shied away from VNDs and have tried to make do with a couple stacked fixed ND’s… but I know from trying this route that that’s really difficult to do successfully in varying light, as you’ve clearly mentioned. For this reason, I would be really interested in your review & recommendation of a few of the better/best brands/models of VND’s. Thus, I would really like to know why you have chosen the SmallRig VND you’ve cited, compared to competing makes/models.
Thanks for considering these thoughts!
Mark
I think you can view NDs and VNDs as primes and zooms. There’s less quality, but more functionality, and as such, it’s just a question of finding the right tradeoff for you.
I didn’t run into significant image quality issues with Smallrig’s VND, nor have I with other higher end brands like B+W. I think whichever the model, there’s going to be some sample variation, as alignment of the films seems to play a role. For high strength, I still think single ND filters are the best option. At lower stopping levels, VNDs from any brand like B+W, Formatt Hitech, or Heliopan should be fine.
Thanks, Alex.
For over 35 years I was a field soundman, with top audio gears.
In documentaries, with any size of the cameras kit, the audio recording is +55% in importance in video. I’ve seen often few video done without an important care in audio kit quality to save money, the live sound was unusable also the video pictures, they had to put music of no sound at all! So the video scene was scrap.
With the big matt box on the camera, forget the microphone on the camera.
A windscreen on a microphone on outside recording is a must have, even it exist the tiny windscreen for Lavalier microphones. If you don’t have a windscreen, you can make an emergency one’s with a woollen or heavy short sock.
The best way to get a superb sound video is to have a professional soundman fill equipped with mic booms.
Please don’t neglect the sound pick up.
Good sound is a huge element for videography, but also one of the things I find toughest to make suggestions for. I think for most readers, a good shotgun like the MKE 600 and a good wireless lav kit would offer significant upgrades over basic camera sound, while still being simple enough to run as a new entrant to audio.