If you’ve tried shooting video with your phone or DSLR, you’ve probably run into the problem of shaky footage. While recent cameras have made significant advancements with in-camera image stabilization, these systems can only correct low-level movements like shake from your hands. A gimbal, on the other hand, can stabilize your camera even through dramatic pans and big movements, such as walking down a path.
While a gimbal isn’t magic (and still requires good technique), it can yield professional looking footage even in challenging conditions. I consider it one of the best investments you can make in video gear. In this guide, I’ll explain how gimbals work and give you some tips for using them correctly. Then, I’ll break down the gimbal options on the market today and explain how to choose the right gimbal for your needs.
Table of Contents
What is a Gimbal?
While there are many camera stabilizing products on the market, when I say “gimbal,” I’m referring to 3-axis motorized stabilizers that operate on battery power. These devices use gyroscopes and motors to stabilize your camera for pans, tilts, and rolls. They typically have a handle at the bottom and an arm with motors at the top. You mount your camera to the arm, and you use controls on the handle to operate the gimbal (and sometimes even the functions of the camera).
Since a gimbal can control the movement of the camera across all 3 axes, you can use them for creative purposes beyond just stabilizing the camera. For example, you can track a subject, shoot a panorama, or capture time-lapse movements.

Gimbals can come in a wide range of sizes, scaling up from small units that can stabilize just a smartphone through larger units that can stabilize even some cinema cameras. Alongside pure feature variations, these gimbals are typically differentiated by their payload, which refers to all the weight you’re trying to stabilize. Broadly, gimbals can be broken down into phone-only gimbals, small mirrorless gimbals, and large mirrorless/DSLR gimbals.
It’s important to note that payload in this context is a lot like tripod payloads – going to the maximum weight is going to yield poor results and short battery life, as well as requiring meticulous calibration and balancing. You’ll make your day-to-day usage easier if you get a rig with a bit of headroom. This is especially true in terms of how well your gimbal needs to be balanced.
Gimbal vs In-Camera Image Stabilization
Most modern cameras and lenses tend to support some form of image stabilization already. Whether it’s IBIS, OS, VR, or some other term, these systems rely on moving elements in your lens or adjusting the sensor itself to cancel out movement. While the best of these systems can yield more than a five-stop improvement in blur-free photos, they aren’t perfect for use with video.
In-camera image stabilization can do a great job at reducing shake from unsteady hands or that little bit of movement from breathing in and out. What it can’t do, however, is stabilize the camera through major movements, like a sweeping pan or a big tilt. In short, they’re meant for stabilizing different things.
One of the easiest examples is visible when walking. If you walk smoothly and use a good gimbal, the footage can practically look like it was shot on a slider. Camera-based image stabilization simply wouldn’t give the same results.
Additionally, a gimbal offers much more control over the correction of movements. With a gimbal, you can choose to lock onto a specific point, or even actively track a subject, moving the camera in unique ways compared to an IBIS or VR system that’s just trying to reduce all movement. Gimbals also allow you to take the controls and direct the camera’s movement with a joystick, all while avoiding unsteady shakes.
Understanding Payload
Payload is the biggest differentiation between gimbals on the market today. I would consider this the most important factor to consider when you’re buying a gimbal.
Other features like weight, size, foldability, and control layout are important – but first and foremost, your gimbal needs to fully support your intended camera setup. I recommend getting a gimbal that supports at least 50% more weight than your camera setup weighs.
Since the gimbal is stabilizing your camera via torque from an electric motor, going overweight can cause your gimbal to work poorly or not at all. In addition, that gimbal payload figure is assuming you’ve balanced your camera perfectly. An unbalanced load significantly increases the amount of work the motors have to do for the same weight.
Having more power than necessary reduces (but doesn’t remove) the need for balancing your camera precisely, which can be one of the more annoying aspects of gimbal use, particularly with some lens designs. Having more power also prevents you from running into a situation where you suddenly hit a gimbal limit mid-shot. While your setup might be stable at rest, throwing in some dynamic moves can push the torque required over the limit and ruin a shot.
I’d also suggest Googling the gimbal model and your camera setup, as users may report some odd behaviors with certain combos. For instance, my Nikon Z 14-30mm lens has significantly different balance requirements across the range of focal lengths, as the lens significantly telescopes in and out. With that lens, if I don’t want to rebalance the camera for each shot (and I don’t!) I would need to use a gimbal with a higher weight limit.
How to Balance a Gimbal for the Best Performance
If the previous section didn’t drive it home, balancing a gimbal with the payload is crucial. Fortunately, balancing has gotten a bit easier on the newest models. Typically, you’ll lock all the axes, then go through and balance each axis individually. This often involves sliding the camera plate back and forth in each direction until it’s stable. By the end, your camera should be resting steadily in a normal position.
If you’ve gotten good results, you’ll want to mark down the values on the plate (if available) for this camera and lens combo. In the future, you can just immediately set these values and not have to go through the balance process again. Some gimbals also offer a software-based calibration and check process to confirm that you’ve achieved good balance. This is particularly helpful if you’re new to gimbal setup, as it’s both a great pre-check and doesn’t require you to make a judgment call.
Gimbal Models
Phone Gimbals
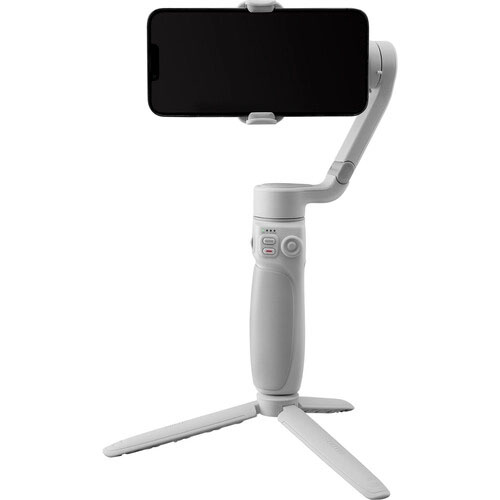
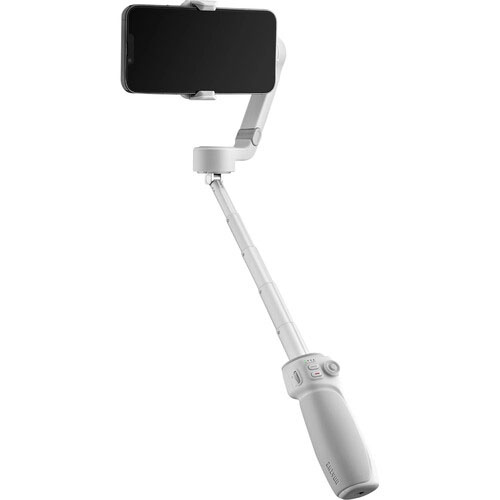
For a phone gimbal, manufacturers have prioritized a compact size and ease of use. The latest models, while still being capable of stabilizing the largest flagship phones, can still fold down to a very compact size. While they won’t have the same level of features as the larger mirrorless and DSLR style gimbals, they can still offer a number of features in both software and hardware.
I’ve been testing out the Zhiyun Smooth Q4, a new release in their line, and I’ve been really satisfied with the performance. The Smooth Q4 features 10 hours of runtime, while being compatible with phones up to 280g in weight. The gimbal also includes a number of interesting quality-of-life features, like an integrated selfie stick, an optional magnetic fill light that’s poweredfrom the gimbal, and both an integrated thumb-pad and control wheel, giving physical control for a variety of gimbal functions.
Meanwhile, there are other gimbal options from different brands, like the popular DJI Osmo line (yes, the same DJI that makes drones) and various options from Moza. The phone gimbals from different brands all run about $100-200, which I consider to be a good value.
In fact, my recommendation is to go with a smartphone gimbal before you jump up to a full-sized gimbal for a DSLR or mirrorless camera. Combined with the 4K video found on most smartphones today – and even flat or log profiles on some – a gimbal + phone combo may be all that many photographers need. (Almost all the handheld shots on the Photography Life YouTube channel are filmed this way, with an iPhone and a DJI gimbal.)
Compact Camera Gimbal
The next step up is a full-sized gimbal meant for mirrorless and lightweight DSLR cameras. These gimbals are substantially less portable than the phone gimbals discussed above.
DJI’s Ronin SC has been my choice for stabilizing compact mirrorless camera payloads, like my Z7. For a full size gimbal, it’s surprisingly packable, thanks to the ability to disconnect the grip from the arm. It’s also light enough to easily operate one handed, while still supporting about 4lbs of payload.
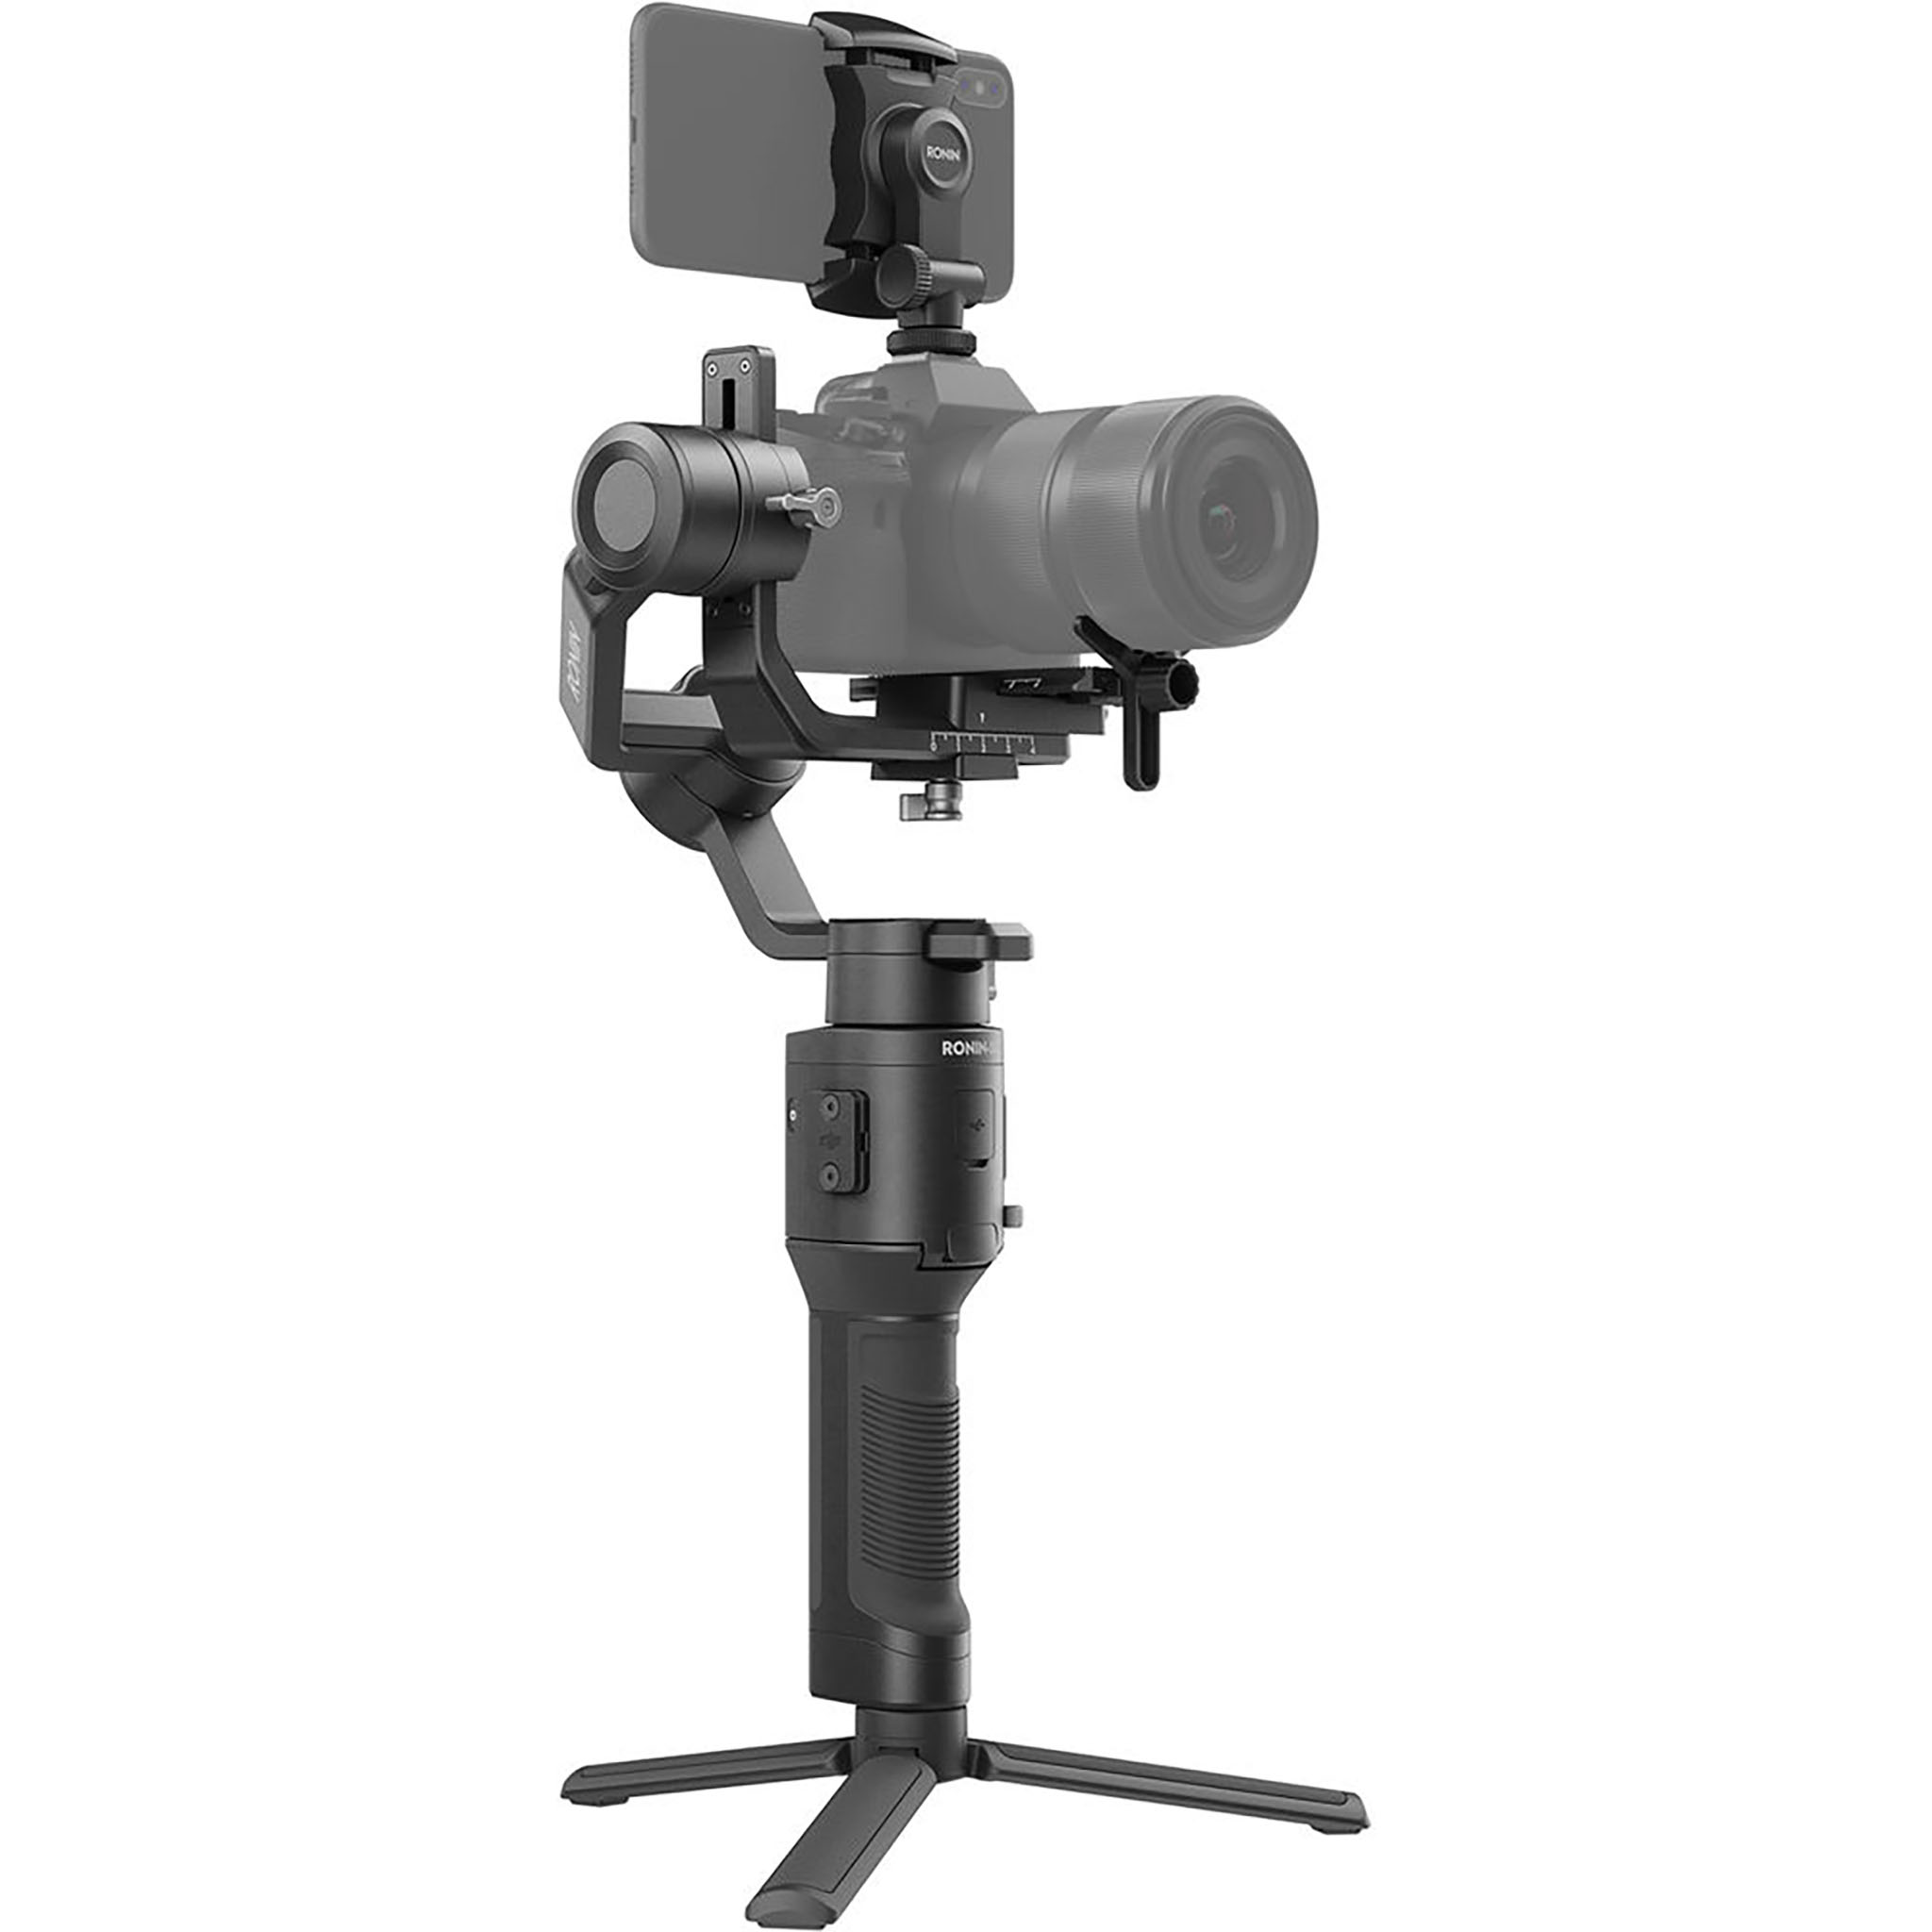
As with before, there are countless different options available, and the feature sets are changing every day. That said, one thing I’ve liked about the Ronin SC is the ability to balance the camera ahead of time. On-site setup only requires you to hook your camera back in, which saves a lot of time, since constantly rebalancing your camera can be annoying in the field. Whatever gimbal you get, I recommend looking for this sort of feature.
Gimbals for relatively light interchangeable-lens cameras like this tend to be more expensive than phone gimbals, although you can still find some good prices. The Ronin SC is $440 (although I’ve seen it on sale as low as $250) and has a higher-end SC 2 version for $500 that has a higher weight limit.
For most people reading this article, a gimbal of this category is as much as you’re likely to need.
High End Gimbals
Gimbals don’t stop there, though. For even larger payloads, there are a number of models available.
Two of the industry standards are the RS 2 and Ronin 2. These are capable of supporting massive rigs, from big DSLRs to dedicated video cameras. Both have a hefty price point to match.
At this level, you’ll need to understand your shooting and rig requirements, and choose a gimbal that aligns with your needs, as these tools become more specific and specialized.
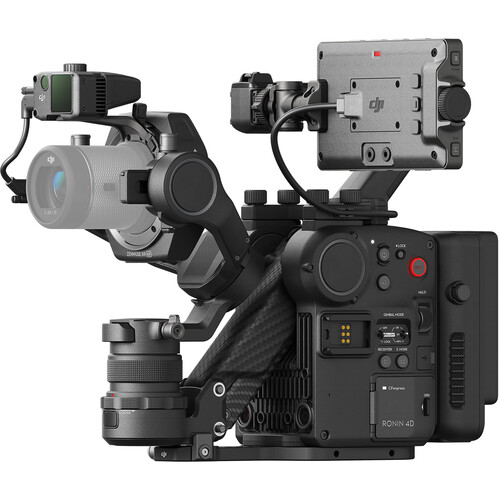
A new entry in this category that has to be mentioned is the Ronin 4D. Unlike other gimbals, which take your existing camera and stabilize it, the Ronin 4D is a cinema-quality camera built into a stabilized body. The 4D, as the name suggests, offers 4 axis stabilization, adding a Z axis to the typical 3 axes of coverage. This drastically reduces vertical shake, enabling dolly style moves and performance. This comes into play when shooting while literally running, or going up stairs, for instance.
That said, anything of this sort is overkill for casual videographers, and even a lot of professionals. If you shoot basic YouTube videos, weddings, or corporate videos, a compact camera gimbal is the most you’re ever likely to need (or even a smartphone gimbal for a lot of people).
Conclusion
Lots of clients today want video services no matter what genre of photography you shoot. Shaky video, however, is not so useful.
That’s why I consider a gimbal to be one of the fundamental gear purchases for anyone who’s interested in video work. No matter what size gimbal you’re considering, I hope the information in this guide helps you find one that’s right for your needs.
Just make sure to get a gimbal with a big enough payload, and take care when balancing your rig. If you do those two things, you’ll be shooting steady video in no time.
There are different kinds of gimbals.www.adorama.com/wiwh200s.html
I use it for long heavy lenses on a tripod.
Hi Alex. Excellent article. Thank you. When using a gimbal with a smart phone would you advise turning off the onboard anti shake feature on the phone? Thanks. Michael
Depends on the lens and camera. With some setups, IS on causes microvibrations, while with others, it’s fine. I think you’ll have to test to see which applies to your case.
Hi Alex, I was actually thinking of getting a gimbal to make more interesting and dynamic environmental video shots. Is there an upper bound to the focal length you can use with a gimbal that you’ve noticed? For example, would 100mm FF fov already be too much for the gimbal to create good footage?
Hey Jason, great question! I think around 100mm is going to be a soft limit for this style of gimbal. At those lengths, you’ll start to run into problems with both balance and micro-movements that aren’t getting neutralized by the gimbal’s algorithm. I saw some testing of the RS3 with an 85mm, and it was good but not flawless.
Like I mentioned in the article, payload is really key – there’s some light, short tele primes that could be a good option if you’re going for that particular look. Think 85 1.8 or 105 2.8, for instance.