One important technique to understand in photography, especially when you’re starting out, is the concept of focus. If you don’t focus properly, you will end up with blurry photos even when all your other camera settings are correct. Focusing can be easy or difficult depending on your subject, like a nonmoving landscape versus a fast-moving bird in flight. This guide covers everything you need to know in order to focus properly and capture sharp images.
What is Focus?
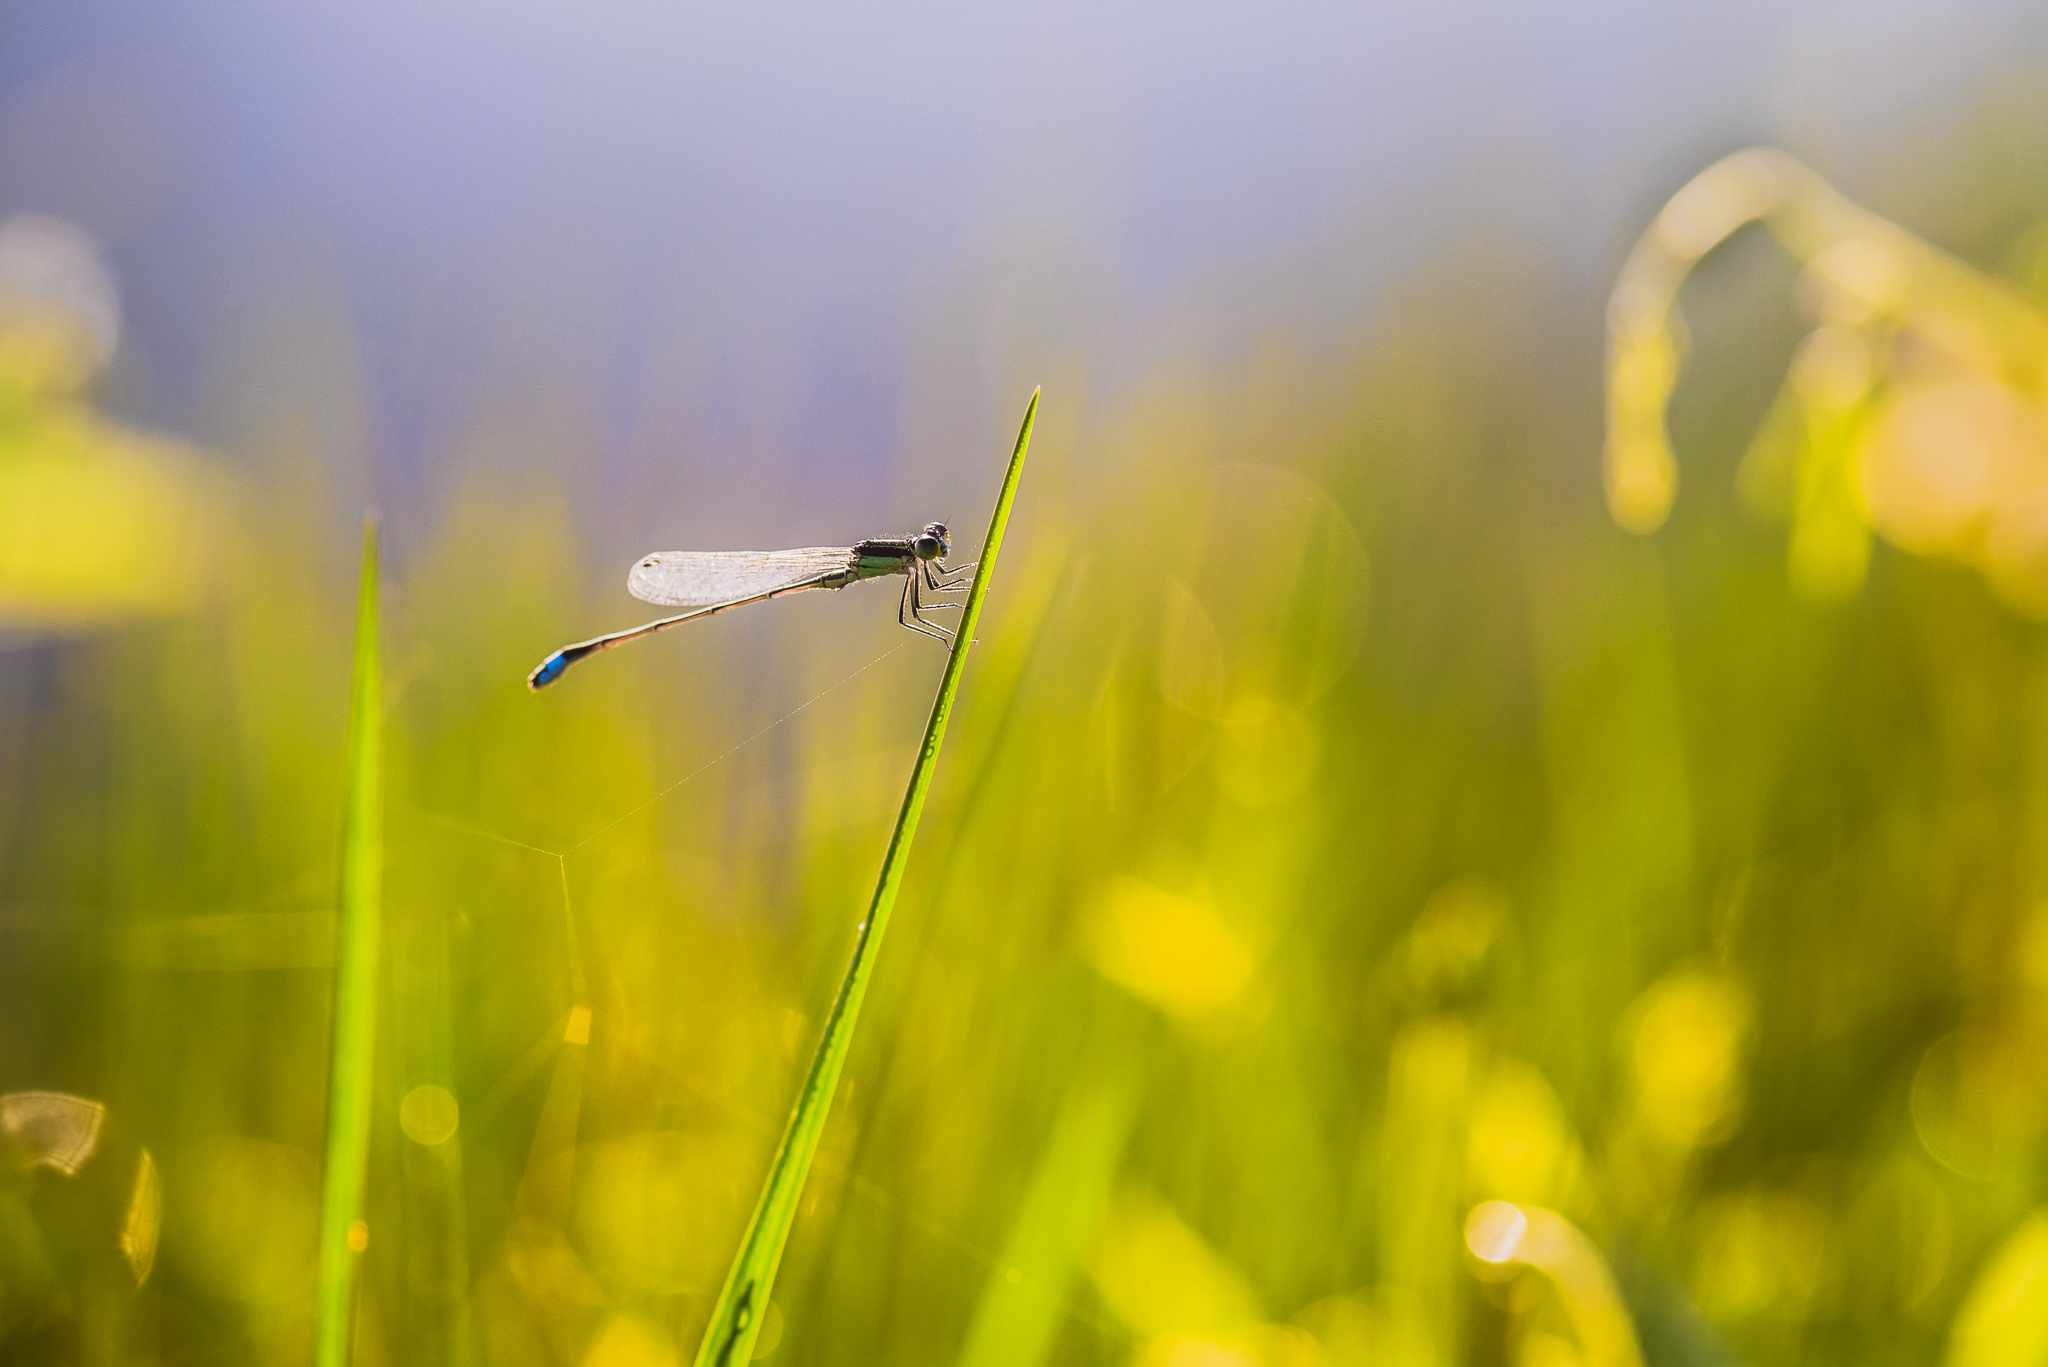
In every photo you take, there will be a plane of focus. This is the region in space with the potential to be as sharp as possible in a photo.
Some people find it useful to think of the plane of focus like a window intersecting with the scene you’re photographing. Any object in your photo that touches this window is said to be “in focus.” When you move the plane forward and backward to achieve your intended image, usually with your subject at maximum sharpness, that’s called focusing.
With modern equipment, focusing typically takes place within your lens, which has glass elements inside that can move forward and backward to change the optical path of light. Along the same lines, if you physically move your lens farther from the camera, you’ll change where the plane of focus is positioned. (This is how extension tubes work for macro photography.)
Focusing happens either automatically or manually. Automatic focus, or autofocus, is when the camera system drives a motor to move elements in your lens to change focus. To focus manually, you need to turn a ring or similar mechanism on the lens instead.
Manual Focus vs Autofocus
In the early days of photography, every single lens was manual focus only (and many lenses today are the same way). Autofocus is a comparatively new invention in the history of photography, first appearing on the market in 1977. Still, it’s an important one.
Autofocus systems use a motor in the camera or lens to focus on a subject you’ve selected manually or automatically. So, just press a button on your camera, and it will focus on your chosen subject – or choose one for you if you prefer. Pretty useful.
Most photographers use autofocus more often than manual focus. The main reason is simply convenience; it’s easier than focusing manually. Autofocus also tends to be faster, and, in many cases, it’s also more accurate (such as tracking focus on a moving subject). This is why sports and wildlife photographers tend to rely on autofocus so heavily.
Still, manual focus stuck around for a reason. If your camera is having trouble focusing, such as in dark conditions, manual focus lets you override any issues, or make precise adjustments that the camera may have missed. And if you set your lens to manual focus, you can lock focus for a series of photos in a row. Although most photographers use autofocus more than manual focus, it’s a good idea to be familiar with both.
As a side note, make sure that either your camera or your lens has an autofocus motor if you’re planning to use autofocus! This may sound obvious, but “autofocus” lenses don’t always have a built-in motor, and neither does every camera on the market. Pay special attention to this if you are adapting a lens from one camera system to another.
Phase Detection vs Contrast Detection
How does autofocus work at a technical level? You don’t need to know the science behind it unless you’re interested, but you still should be familiar with the two main types of autofocus systems today: phase detection and contrast detection. Each one has its own strengths and weaknesses:
- Phase detection is very fast and good at tracking moving subjects, since it doesn’t require much computational work from your camera. However, it is also more prone to errors and internal misalignment issues. Some cameras let you calibrate your phase detection system to minimize errors. (See our detailed explanation of how phase detection autofocus works.)
- Contrast detection requires your camera to process more data, which means it generally takes longer to lock focus. As a result, it isn’t good at tracking moving subjects. However, contrast detection does tend to be more precise, since the autofocus system is directly measuring the data from your camera sensor. This is good when your subject isn’t moving as fast, like landscape photography.
That’s all good to know, but how do you actually set one or the other for a given photo?
It’s actually quite easy. On most DSLR cameras, phase detection occurs any time you autofocus via the viewfinder. Contrast detection occurs any time you autofocus via the rear LCD screen. So, just use viewfinder or live view accordingly. (Most mirrorless cameras only have one system, usually a hybrid, so you can’t switch between them; see DSLR vs mirrorless.)
Keep in mind that there is always an “ideal plane of focus” in a photo – usually, intersecting with your main subject. Both phase detection and contrast detection can get you there. It’s just that phase detection tends to do it more quickly and with better tracking, while contrast detection may do it with more accuracy for nonmoving subjects.
Continuous vs Single-Servo Autofocus
Another important decision you must make when using autofocus is to pick your focusing mode. The two most important and common options are continuous-servo and single-servo autofocus:
- Continuous-servo is also known as AI Servo (Canon) and AF-C (Nikon). Essentially, it means that your camera continuously adjusts focus whenever you hold down the focusing button. This is ideal when you are photographing a moving subject and trying to track its position.
- Single-servo is also known as One-Shot (Canon) and AF-S (Nikon). In this case, once your camera acquires focus, it doesn’t readjust until you let go of the focusing button and try again. This is ideal when your subject and camera are completely still, and there is no need to keep adjusting from moment to moment for proper focus.
Some cameras have a third mode – Auto-Servo Autofocus – that analyzes the scene and automatically picks between these two options. Even if your camera does have this, though, it’s still important to know what each one does, since it’s always possible that the automatic selection will make a mistake.
If you’re using autofocus, we recommend single-servo for typical landscape and architectural photography, and continuous-servo for most other images, such as wildlife or sports.
Autofocus Area Modes
A major part of focusing is choosing the right autofocus area mode. This is where you tell your camera which sort of focusing strategy you want to apply, so that it can make the best decisions on how to track and follow focus on your subject.
We already have an in-depth guide to autofocus modes that covers all this in detail, so check it out if you want a more information on this topic. However, the important thing is that your autofocus system is made up of focusing points, which correspond to regions that your camera can focus on. For example, here are two separate maps of focus points on DSLRs today:
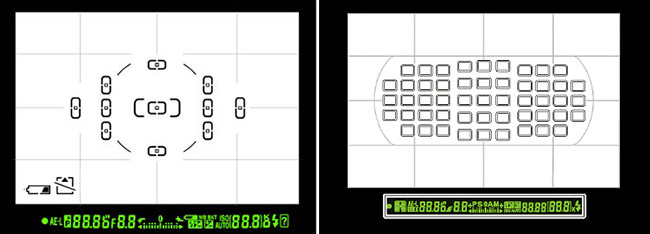
Usually, a greater number of focusing points is better. So is a larger spread (overall coverage area). It’s easier to track a moving subject when your camera has several focusing points covering a large portion of the image. However, you still need to tell your camera how to use those points, or it won’t be particularly helpful. This is where autofocus area modes come into play:
- Single-Point autofocus: The camera uses one focusing point to autofocus – the focusing point you’ve selected. This is good when your camera and subject aren’t moving, and you don’t need any tracking capabilities. It can work with continuous autofocus, but it doesn’t track fast-moving objects across multiple points.
- Custom Area autofocus: This is fundamentally similar to single-point autofocus, except that you are selecting a region rather than a point. Some cameras let you define the size and shape of the area. Others just have options like “Large” and “Small.” The camera analyzes the scene within the custom area, decides on your subject, and focuses. Usually, it selects whatever element within the custom area box is the nearest to the camera.
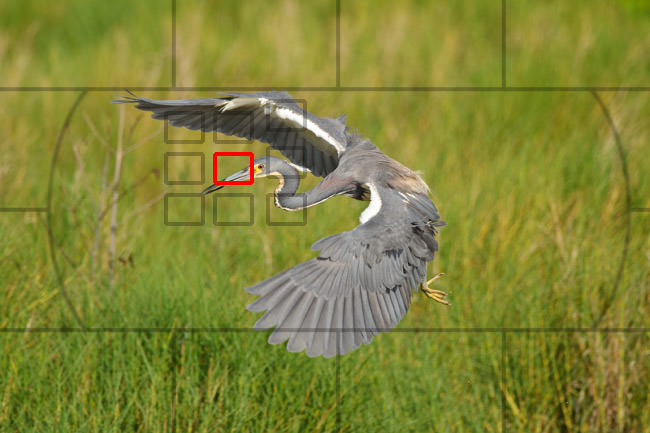
- Dynamic Area autofocus: You select a single focusing point for the camera to use. In this case, though, it can track your subject if it moves into some of the surrounding points (you usually can specify how many the camera pays attention to). This area mode is good for wildlife photography.
- 3D Tracking autofocus: The camera follows your subject as it moves across focusing points. Unlike the standard Dynamic AF-Area mode, you aren’t expected to pan your camera around to keep your subject as close as possible to the original point you selected. This is also good for wildlife photography, although it’s not always as quick or accurate as the simpler Dynamic AF-Area mode.
- Group Area autofocus: The camera uses multiple autofocus points simultaneously, usually five. It gives all of them equal priority, and focuses on the nearest object located on any of the five points. This is useful for tricky autofocus situations, such as a fast-moving bird in flight.
- Auto Area autofocus is when your camera automatically scans the scene and decides on your subject (often the closest object to your camera, or a face). We don’t recommend this mode, since it gives you less control.
Not all cameras have every one of these options, and some may have additional area modes as well, especially for video autofocus. The specific names may also be different depending on your individual camera – but this is the general structure of the options you’ll see.
You’ll learn quickly which area modes you like, and how to get the greatest number of keepers in certain situations. However, fully mastering these modes takes plenty of time and practice, and it isn’t the sort of thing you can learn overnight. (Read more, including specific case studies, here.)
Subject Recognition Features
In many modern cameras, a popular feature is subject-recognition autofocus, where the camera analyzes the scene, figures out your subject, and helps track it across the frame. Usually, this feature is not a dedicated autofocus mode of its own, but rather, something you can use in combination with other autofocus modes.
At a basic level, subject recognition almost always includes people’s faces and eyes. More advanced subject recognition algorithms can also identify animal eyes. Some of today’s cameras can also identify vehicles, insects, and more irregular subjects.
The exact implementation depends upon your camera, but usually, it is a good idea to keep subject recognition turned on if you’re photographing a regular subject like people or birds. For wildlife photography, I tend to use a large Custom Area autofocus box in combination with subject recognition. Then, I just need to position my subject somewhere in the box and usually get sharp results.
The AF-On Button
By default, most cameras will autofocus when you half-press the shutter button. Although this is a nice feature, there are times when you will want the two actions – focusing, and taking a photo – to be separate from one another. Most cameras let you do this by assigning focus to a different button, often called AF-On, and removing it from the shutter release button. This is also called “back button focusing.”
AF-On is exactly like half-pressing the shutter release, but it’s just in a different location. That might not sound like a big deal, but there are plenty of situations where you won’t want the camera to refocus when you press the shutter release, so AF-On is a crucial feature. We recommend that you use it instead of the shutter button if at all possible. There are practically no negatives, and several potential positives.
So, when does AF-On help a photo?
- If you want to lock focus across several photos. You simply press the AF-On button to focus, and then don’t press it again until you’ve captured your desired set of photos. This is quicker than switching your lens to manual focus every time you want to lock things down for a series of images.
- If you want to focus and recompose. Let’s say that you want a composition where your subject is at the extreme edge of the photo. In that case, it’s unlikely that your autofocus points will reach far enough. So, just focus using one of your existing points, then reposition the composition how you want. This is much more natural with the AF-On button – which you can let go of after you’ve focused – compared to half-pressing the shutter button the entire time. (Read more about focus-recompose.)
- If you need to wait a bit before capturing the photo. You might find yourself in situations where you need to focus, and then wait some amount of time before capturing the photo. For example, maybe you’re photographing a fox den, and you’re waiting for the fox to peek out its head. With the AF-On button, you can focus at the right spot and wait, then take the photo as quickly as possible when the right moment arrives – while still being prepared to refocus quickly if necessary.
These reasons, among others, are why we strongly recommend switching your camera from shutter-release focus to AF-On focus. If you’ve always used the shutter button to autofocus, it might be a bit awkward for the first few days after you switch, but it is something you won’t regret in the end. (Some cameras don’t have an AF-On button, but you’ll almost always be able to customize one of the buttons for the same purpose.)
Also see our longer article on back-button focusing.

Where to Focus
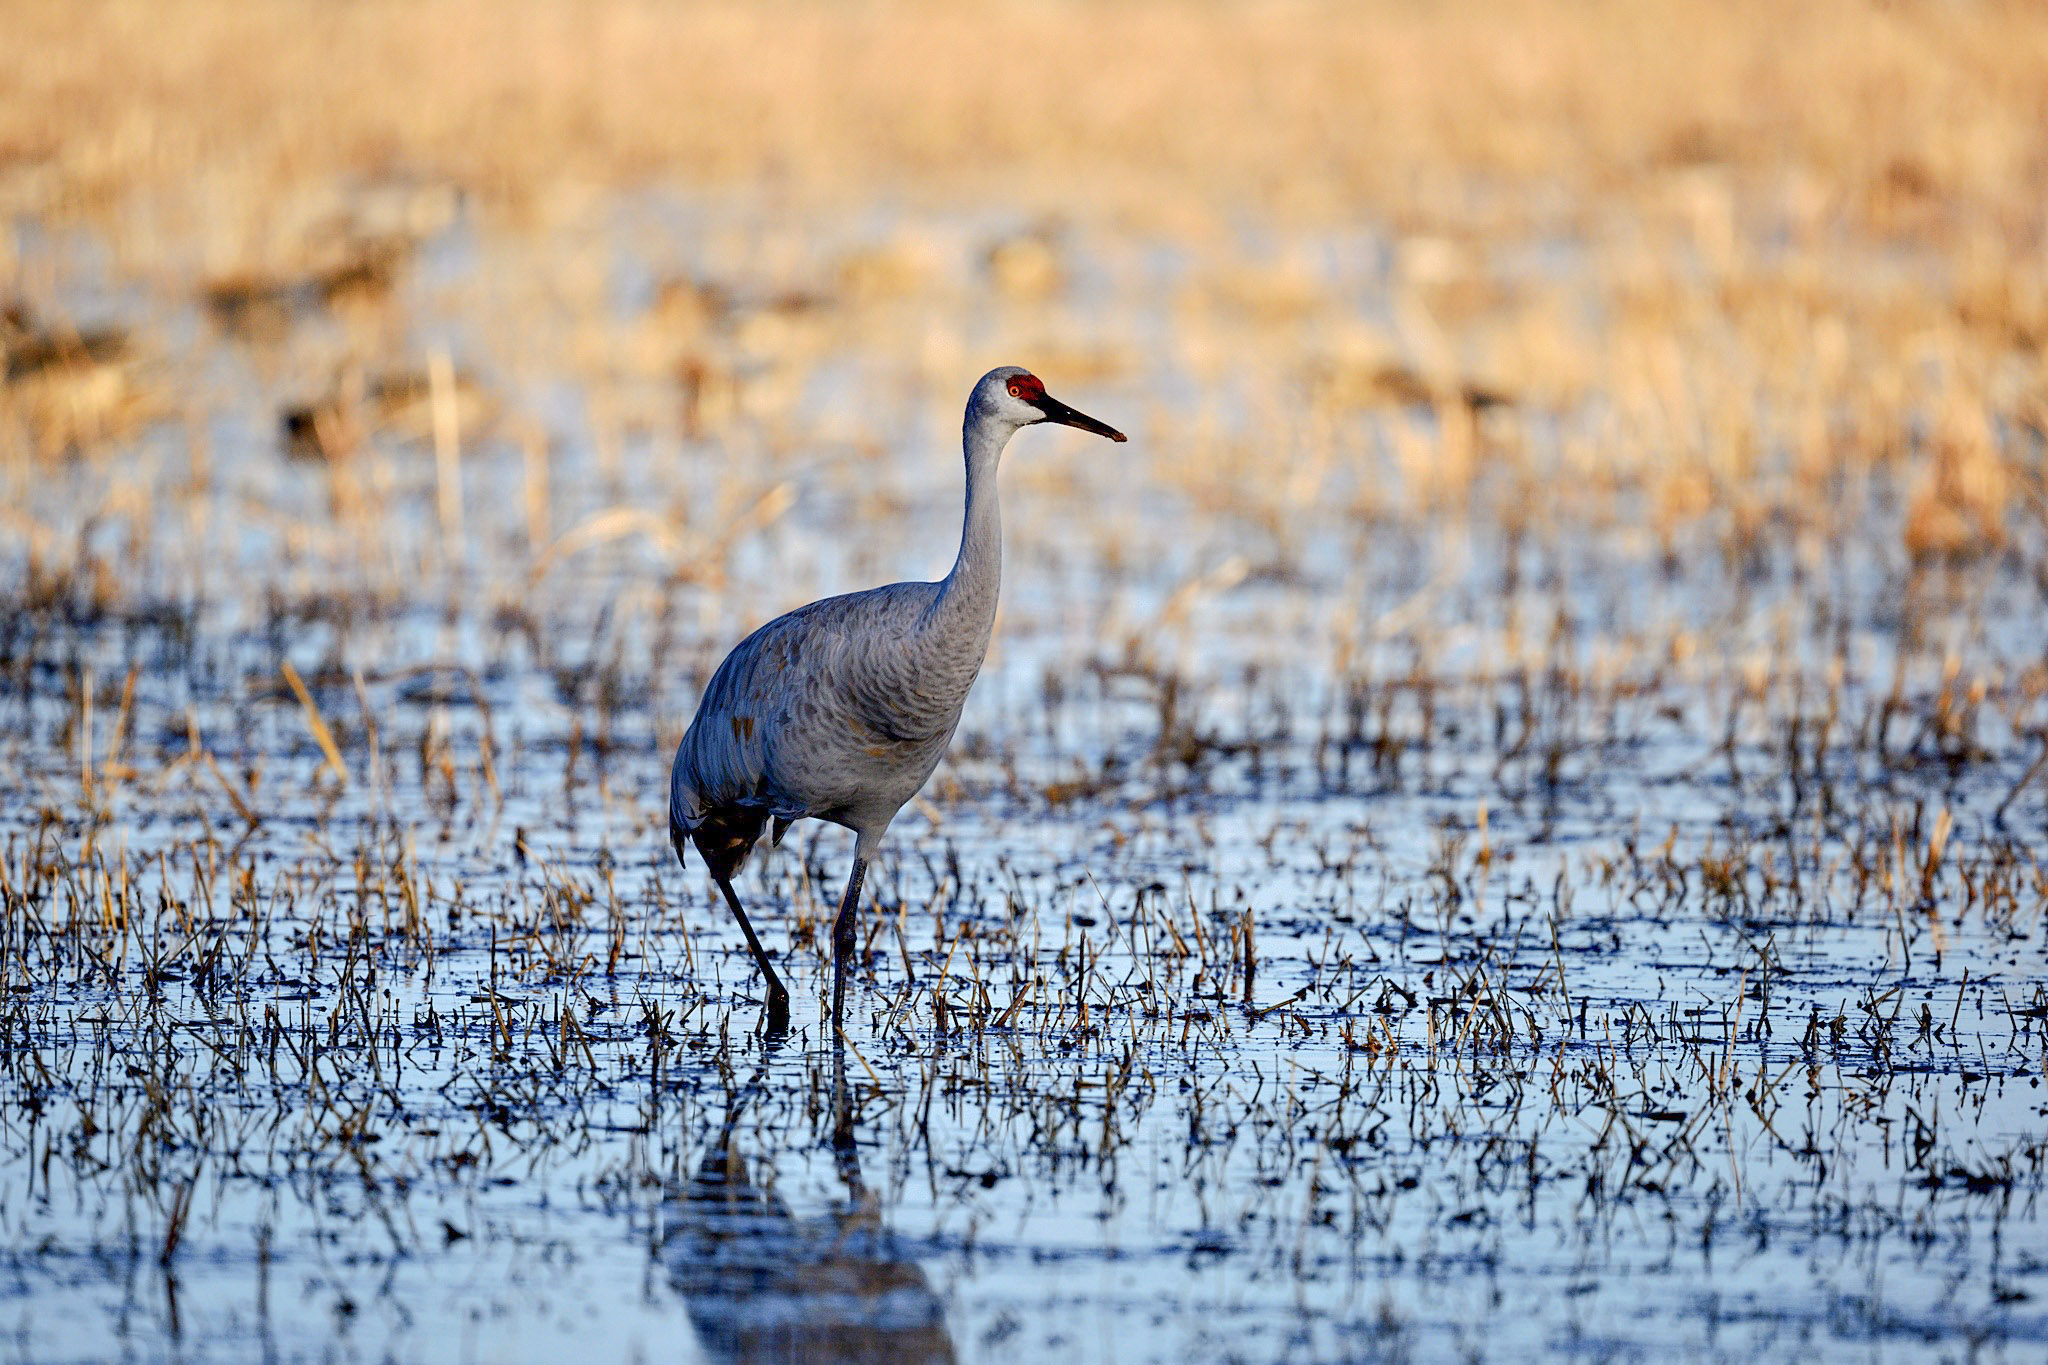
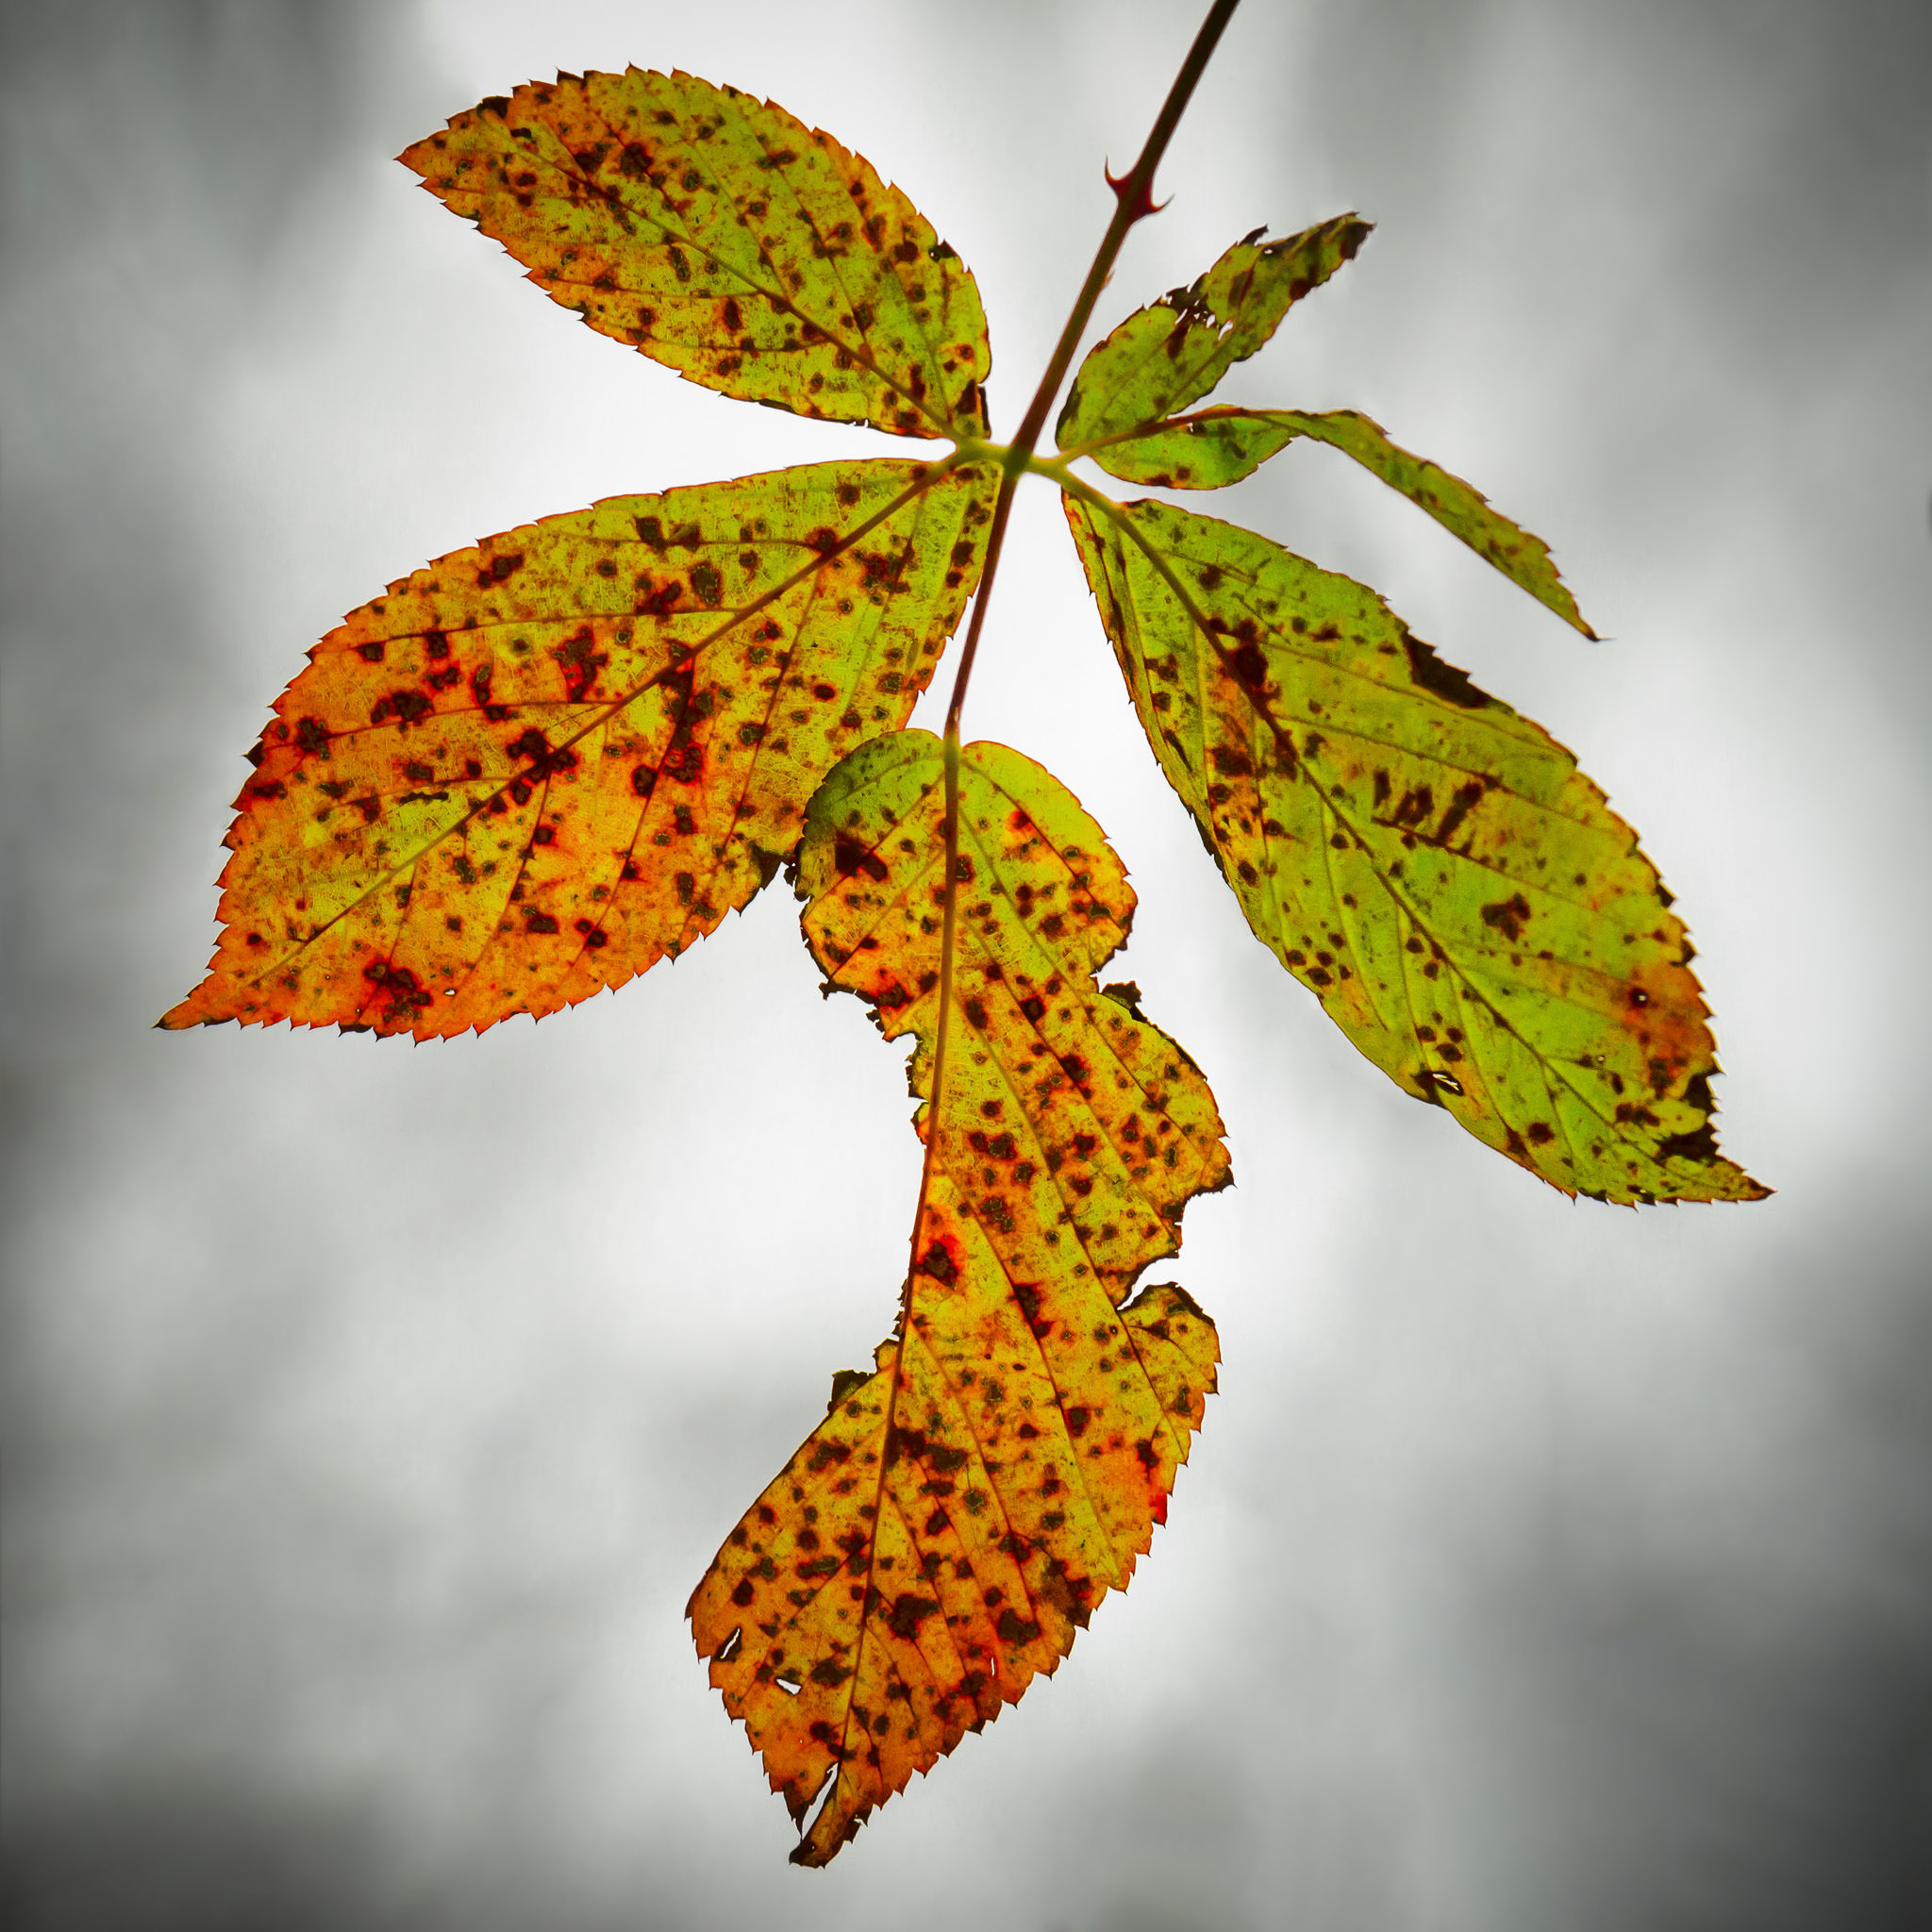
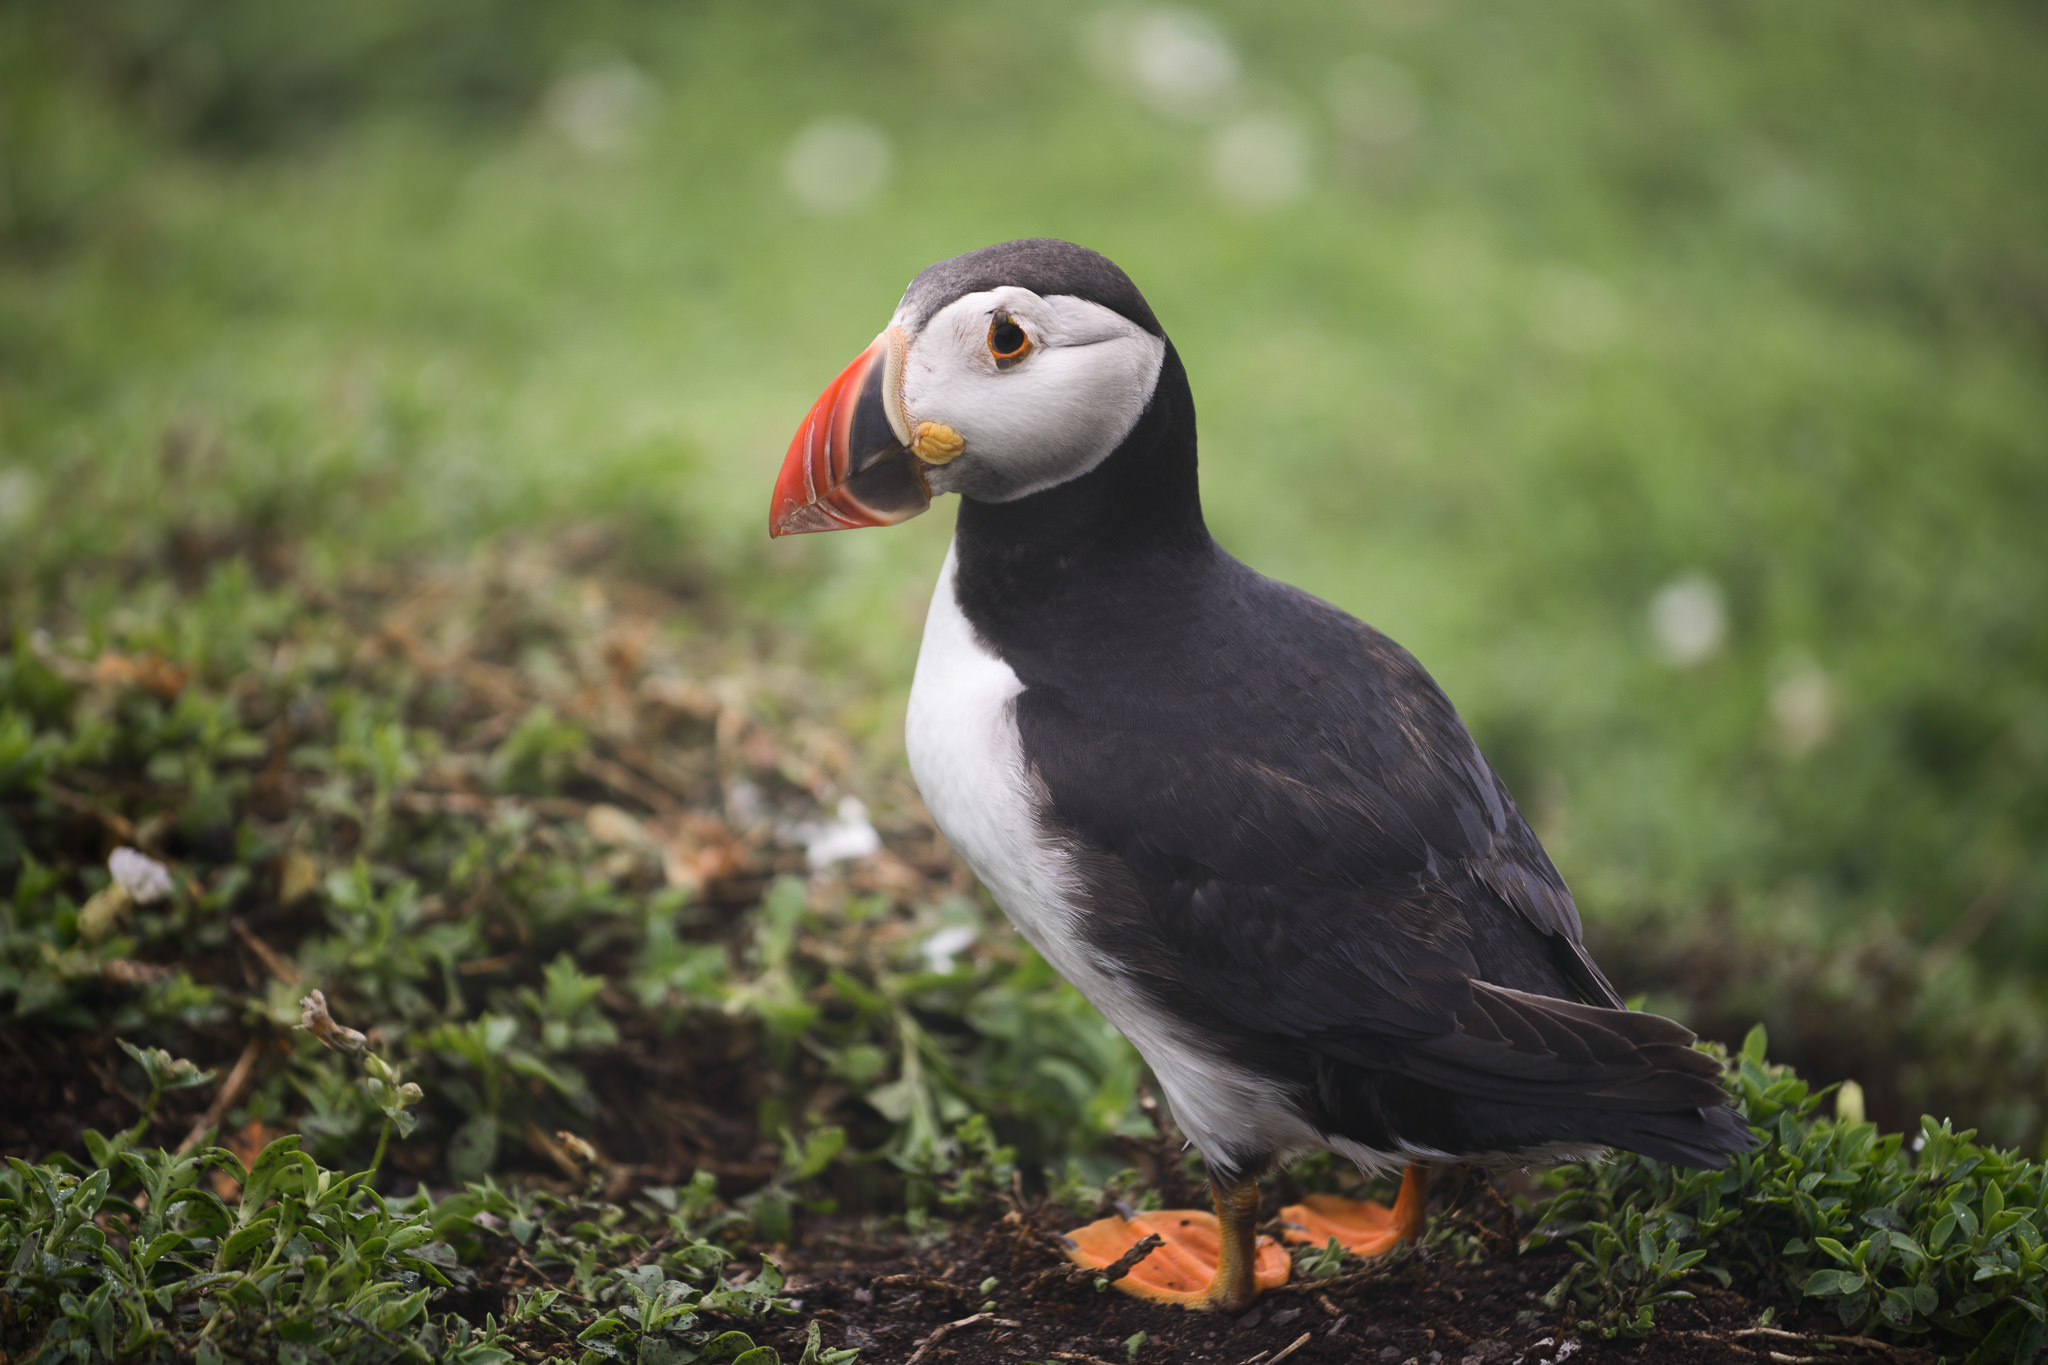
Most of the time, you should simply focus on your main subject. Typically, if you’re photographing a person, focus on one of their eyes. The same goes for wildlife photography, event photography, and so on. However, sometimes, you’ll have a bit of artistic freedom when you focus. Say that you’re photographing a flower. Should you focus on the nearest petal, or on the colorful center? Neither option is wrong. It comes down to the effect you want to convey in an image.
The sharpest objects in your photo stand out. You can use this to your advantage. If you want, you can focus somewhere unexpected to draw attention to a specific part of your photo. For example, take a “portrait” photo where you focus on the person’s hands rather than their eyes, even if their face is visible in your photo. There are no unbreakable rules for where you should focus. It’s a creative, artistic decision.
Focus Stacking
One technique you might hear about from time to time is called focus stacking. With this method, you take several photos focused at different points, and then you combine the sharpest bits of every photo together. In a perfect world, the resulting image will be completely sharp everywhere you want.
Focus stacking can be useful, especially for macro photography and landscape photography, where it can be hard to get enough depth of field with any other method. However, it also has some issues.
If anything in your photo is moving, proper focus stacking can be almost impossible. Even some blades of grass blowing in the wind can make focus stacking a bad idea. I have seen many focus stacks over the years, and almost every single one has some low-level artifacts and weird areas of blur when viewed on a computer at 100%. It is a very, very difficult technique to get perfectly correct.
But sometimes, focus stacking will be the only way to capture enough depth of field in a photo, so keep it in mind for a rainy day. My recommendation is to focus stack at a narrow aperture like f/11 or f/16 and only adjust focus a very small amount in each photo. This still does not always result in perfect images, but it will help minimize blur artifacts.

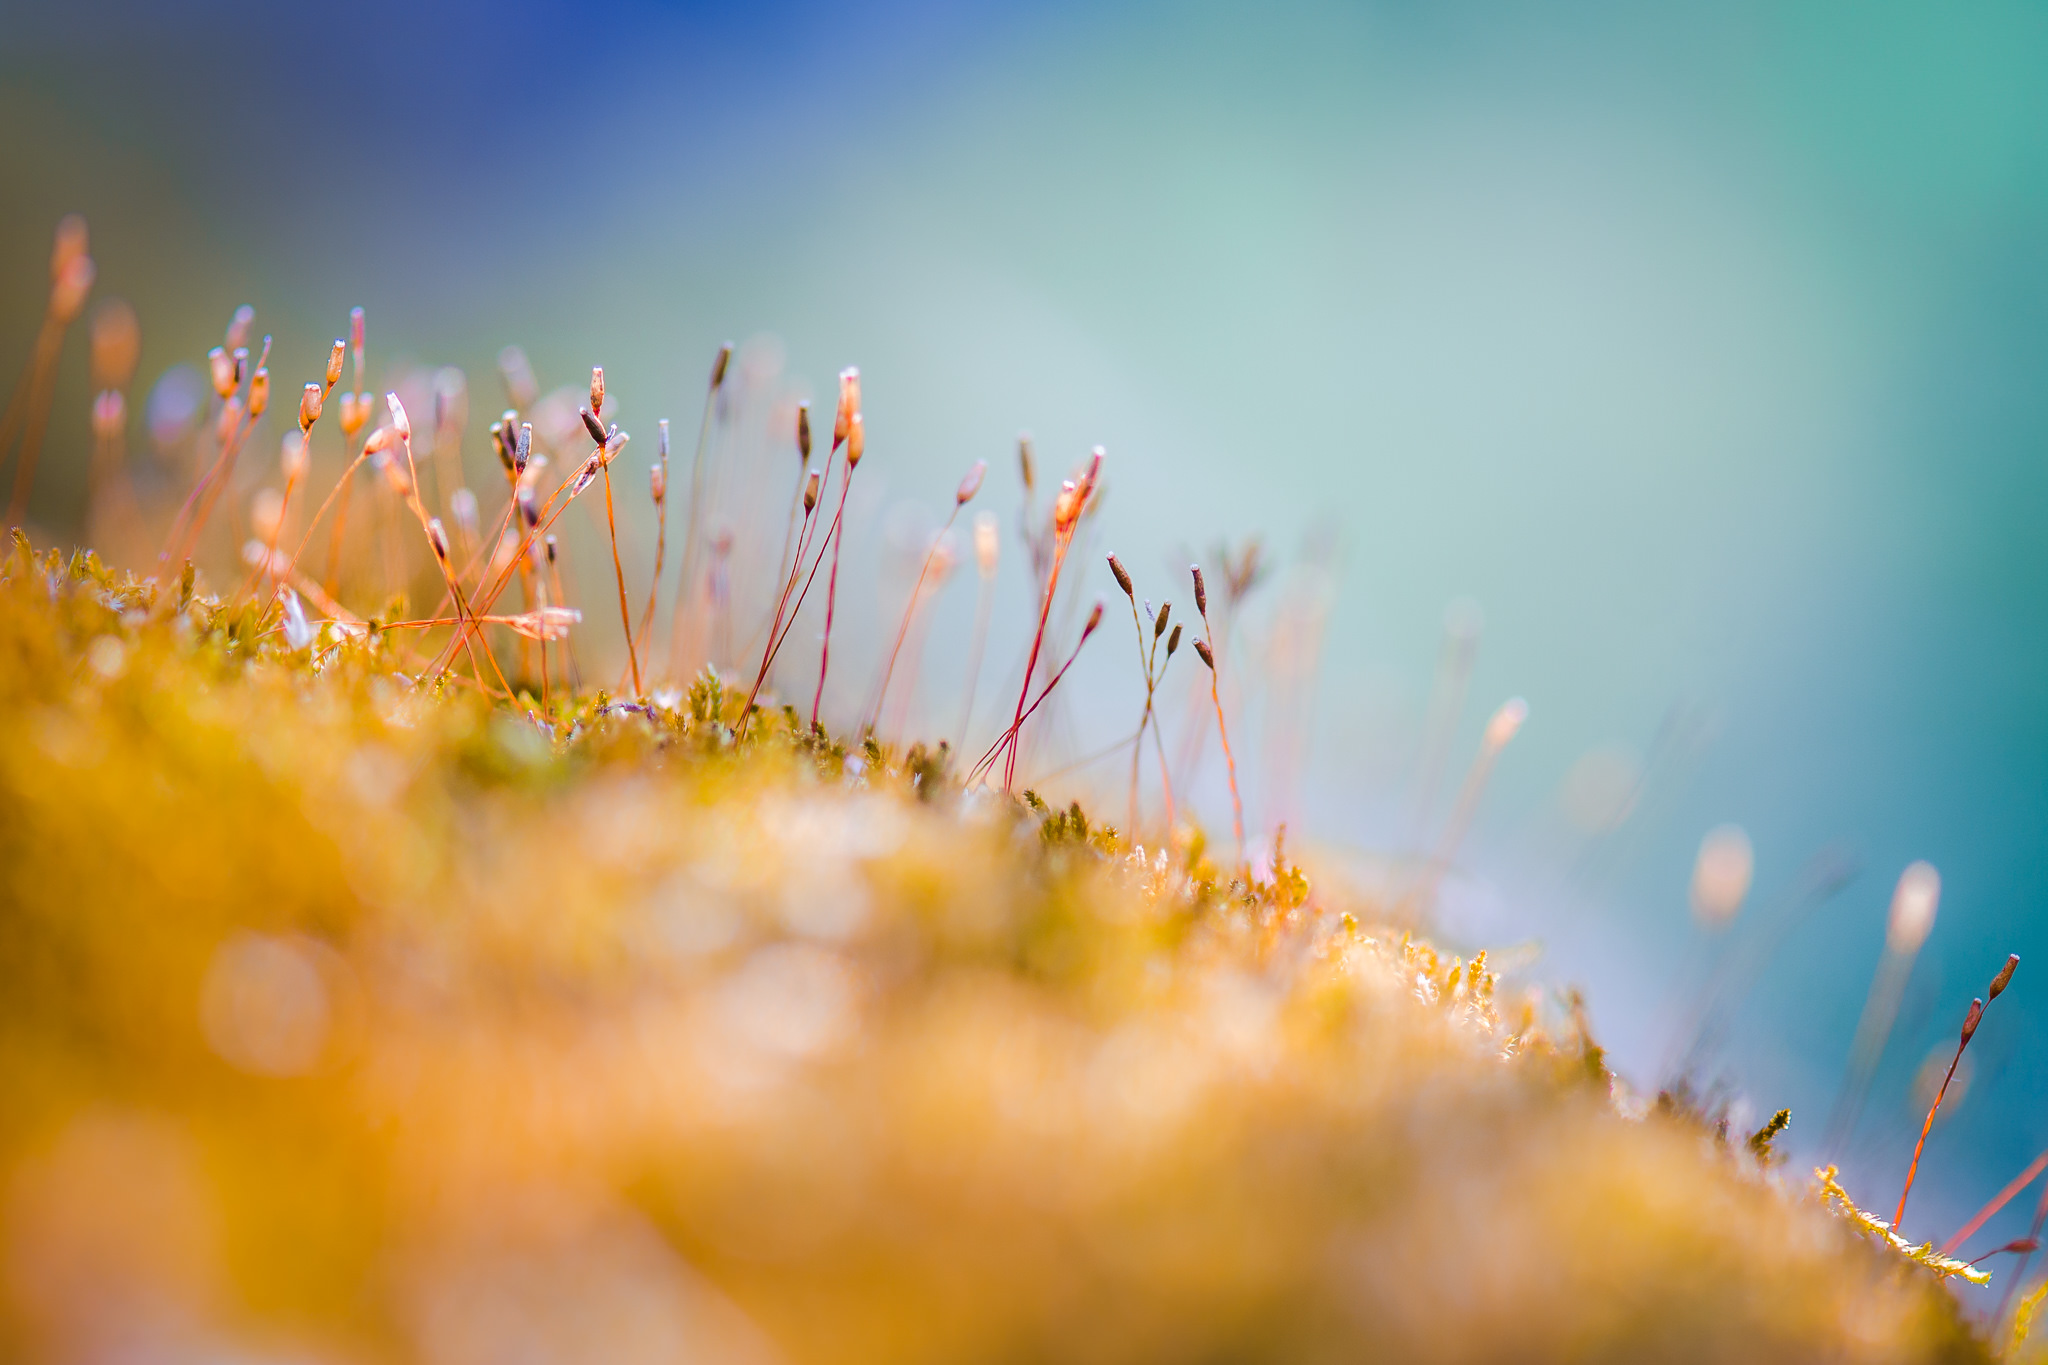
NIKON Z 7 + NIKKOR Z 24-70mm f/4 S @ 70mm, ISO 64, 1/8, f/11.0
Conclusion
Focusing is a deep topic in photography that is very important to understand. When your photos are properly focused, they will be sharp and detailed, with a sense of intent and skill behind them. This applies to every type of photography, from sports to landscapes. It’s best to learn things the right way as early as possible so that you don’t fall into bad habits along the way.
Hopefully, this guide helped you set off on the right path. If you have any questions about how to focus properly, or tips for beginning photographers, feel free to leave a comment below.
Download as an eBook
I’ve received many requests over the years to download Photography Basics for offline viewing. As of 2025, I’m excited to announce that I now have a dedicated eBook version of Photography Basics! The eBook covers the same information but is optimized for offline reading/printing, with a beautiful design and updated text. Photography Life members get this eBook included with their membership ($5/month, cancellable any time) alongside a lot of other benefits – including a Q&A group if you have questions about the topics I’ve covered in these articles. You can read more information about our memberships here.
