Trees and forests are deceptively difficult subjects to photograph. It seems that something is often lost in the process – maybe their scale, maybe their tranquility. Photos of a forest scene can easily turn into nonsensical jumbles even if the subject looks wonderful in person. How do you avoid that?
My hope is that this article will help. Today, I’m going to cover my favorite techniques for photographing forests – gear selection, composition, post-processing, and so on. Forests are some of the subjects I photograph the most, and even though there is no “magic bullet” when you’re photographing them, a little thought and effort can go a long way.
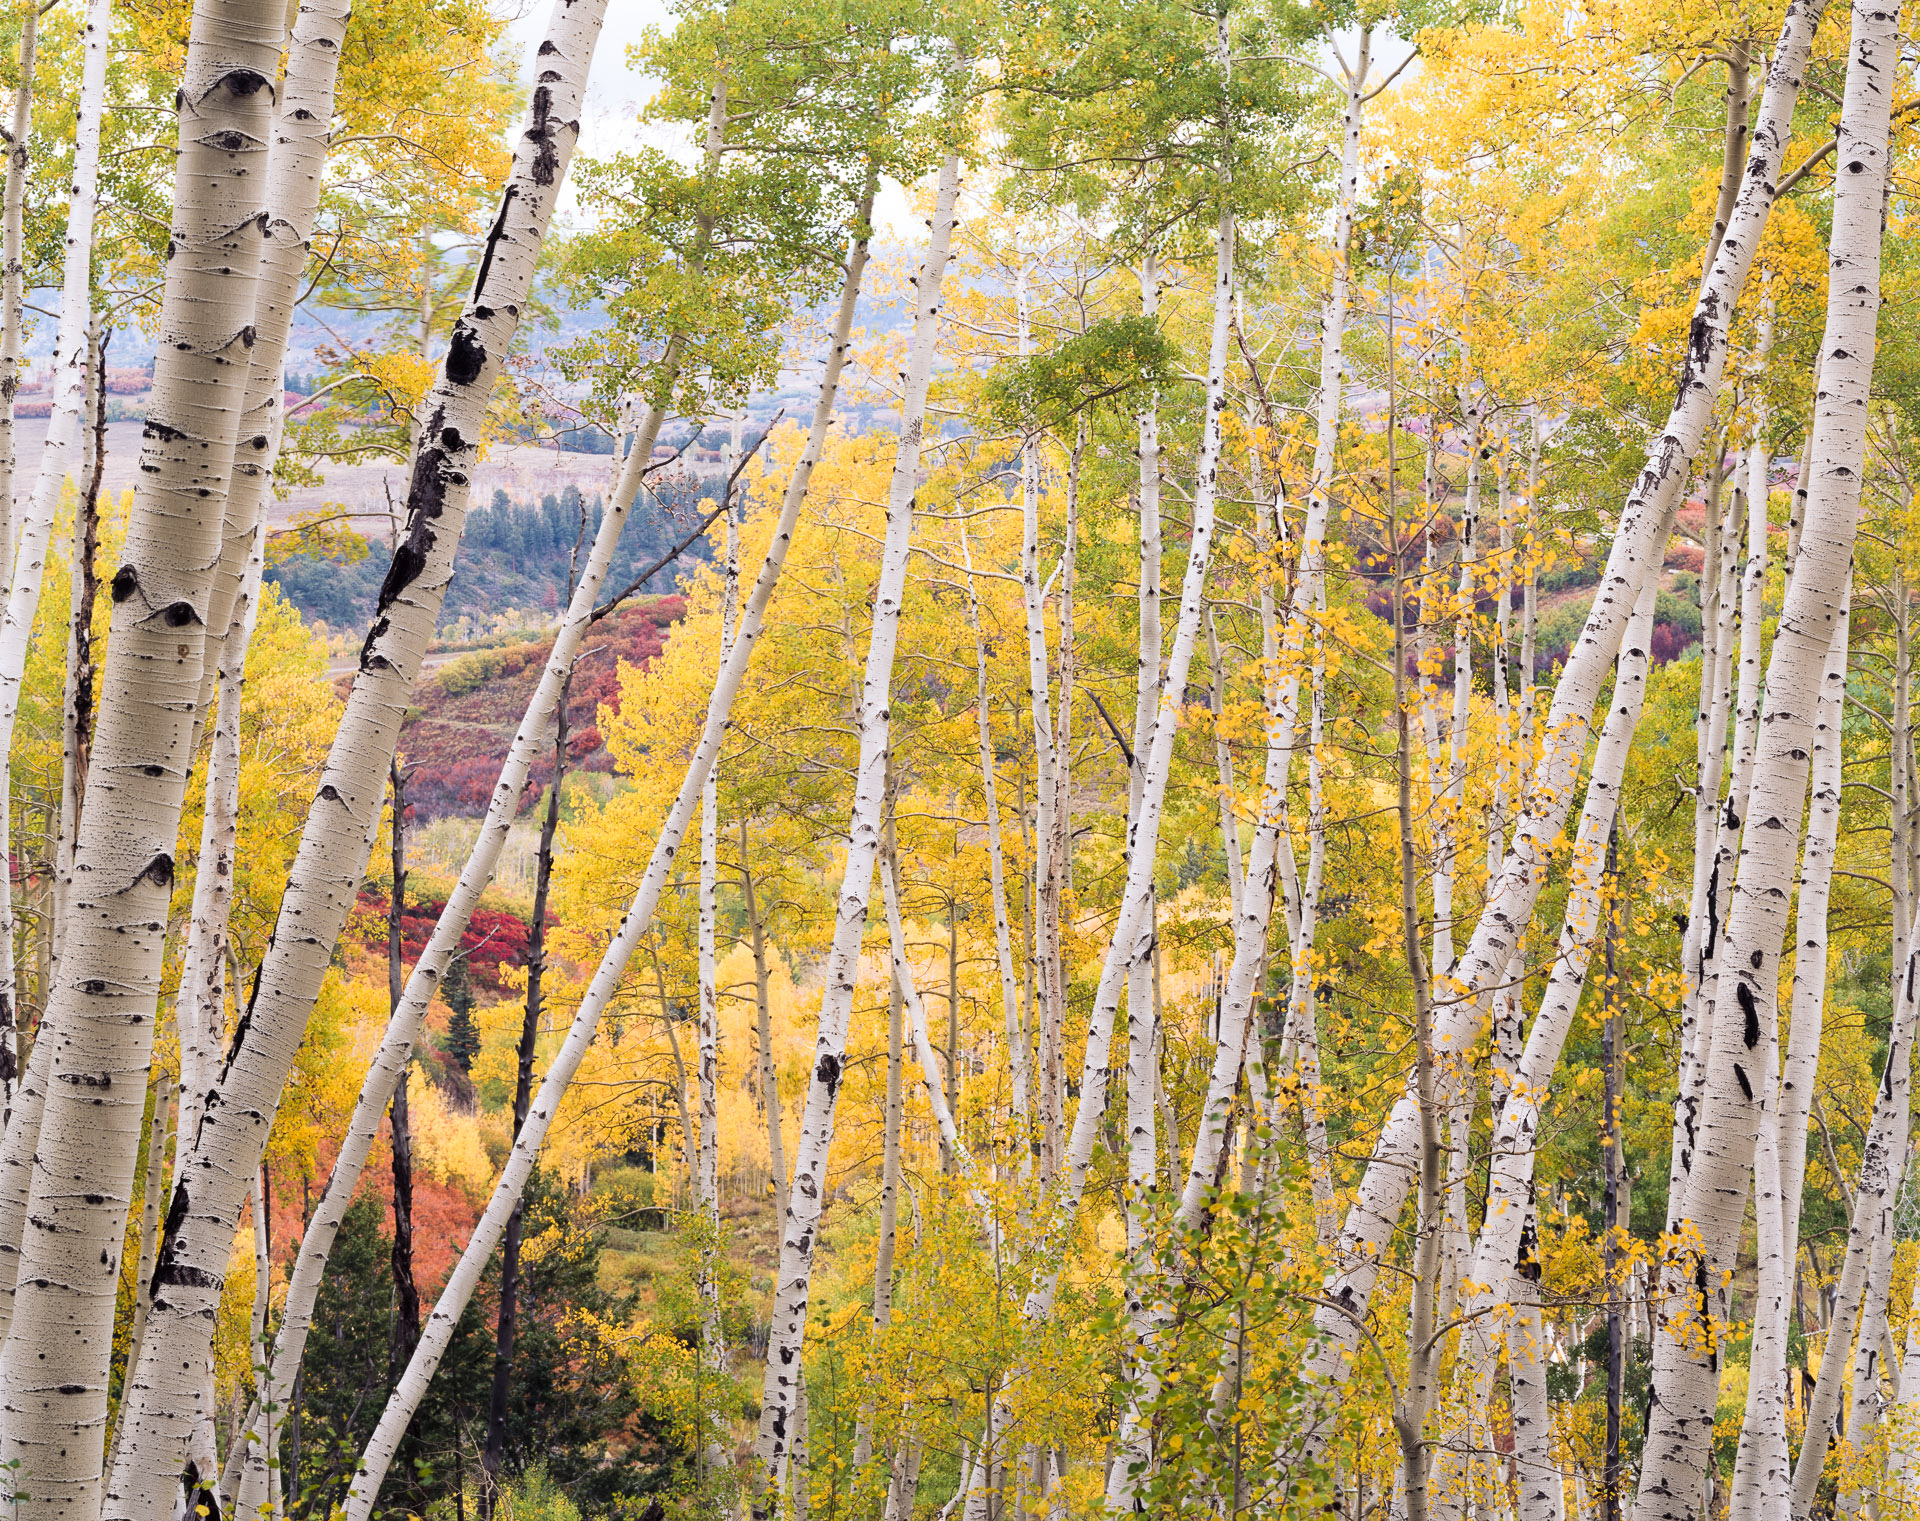
Table of Contents
1. Camera Gear
A common lens to use for landscape photography is an ultra-wide, something like a 14-24mm zoom. These must be used with extreme care in a forest environment.
The issue is that ultra-wide lenses, especially 20mm and wider (full-frame equivalent), inevitably stretch the corners of your image. This stretching effect may be invisible when there’s nothing but blue sky in the corners, but it can make tree branches look strange and exaggerated.
That’s also true when you point the camera up or down even slightly. The trees will start to look like they’re falling, either away from you (if you point up) or toward you (if you point down). This isn’t necessarily going to ruin your photo, but it may not be the effect you’re after. Not to mention that the “nonsensical jumbles” issue of photographing a busy forest will likely only get worse when you use an ultra-wide that includes massive amounts of the scene in front of you.

I find that a normal or slightly wide lens is my go-to choice for photographing forests. A 35mm or 50mm is a great place to start (again, full-frame equivalent). And if you’re after more of a portrait-type photo that focuses on some of the smaller details in the scene, a longer lens like an 85mm or 105mm can lead to excellent photos.
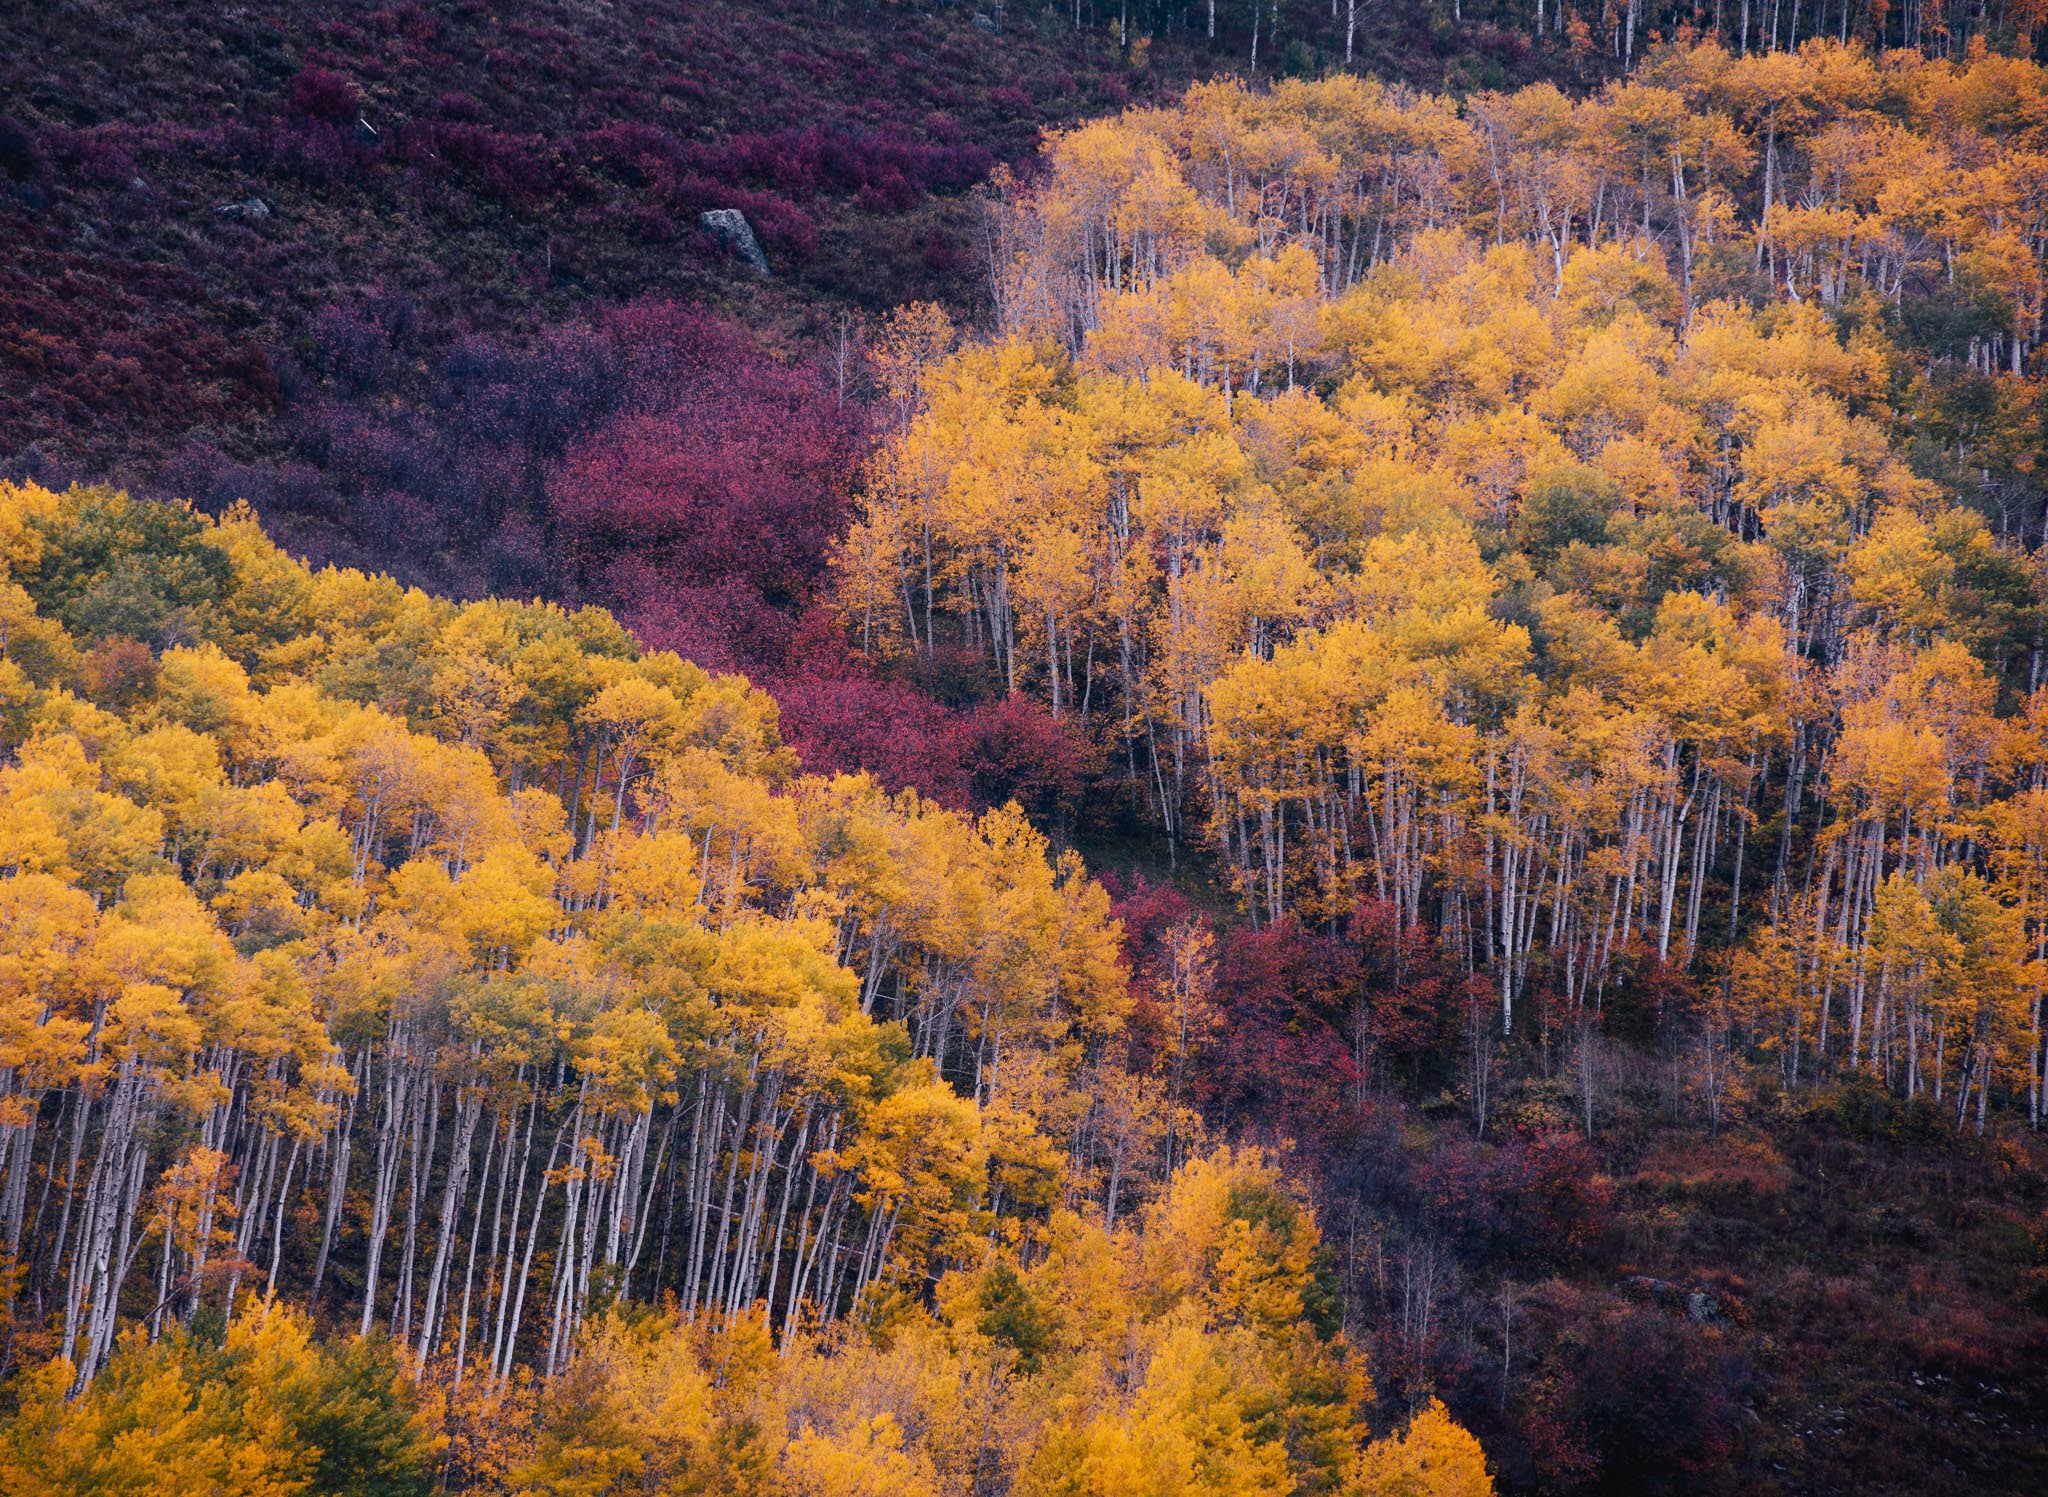
I’ve even taken many of my favorite forest photos at 200mm or longer, while standing at a distance, in order to flatten the subject and reduce it down to its innate patterns. I’ve said it before, but it bears repeating: Telephoto lenses give you a lot more control over what shows up in your photo compared to wide-angles.
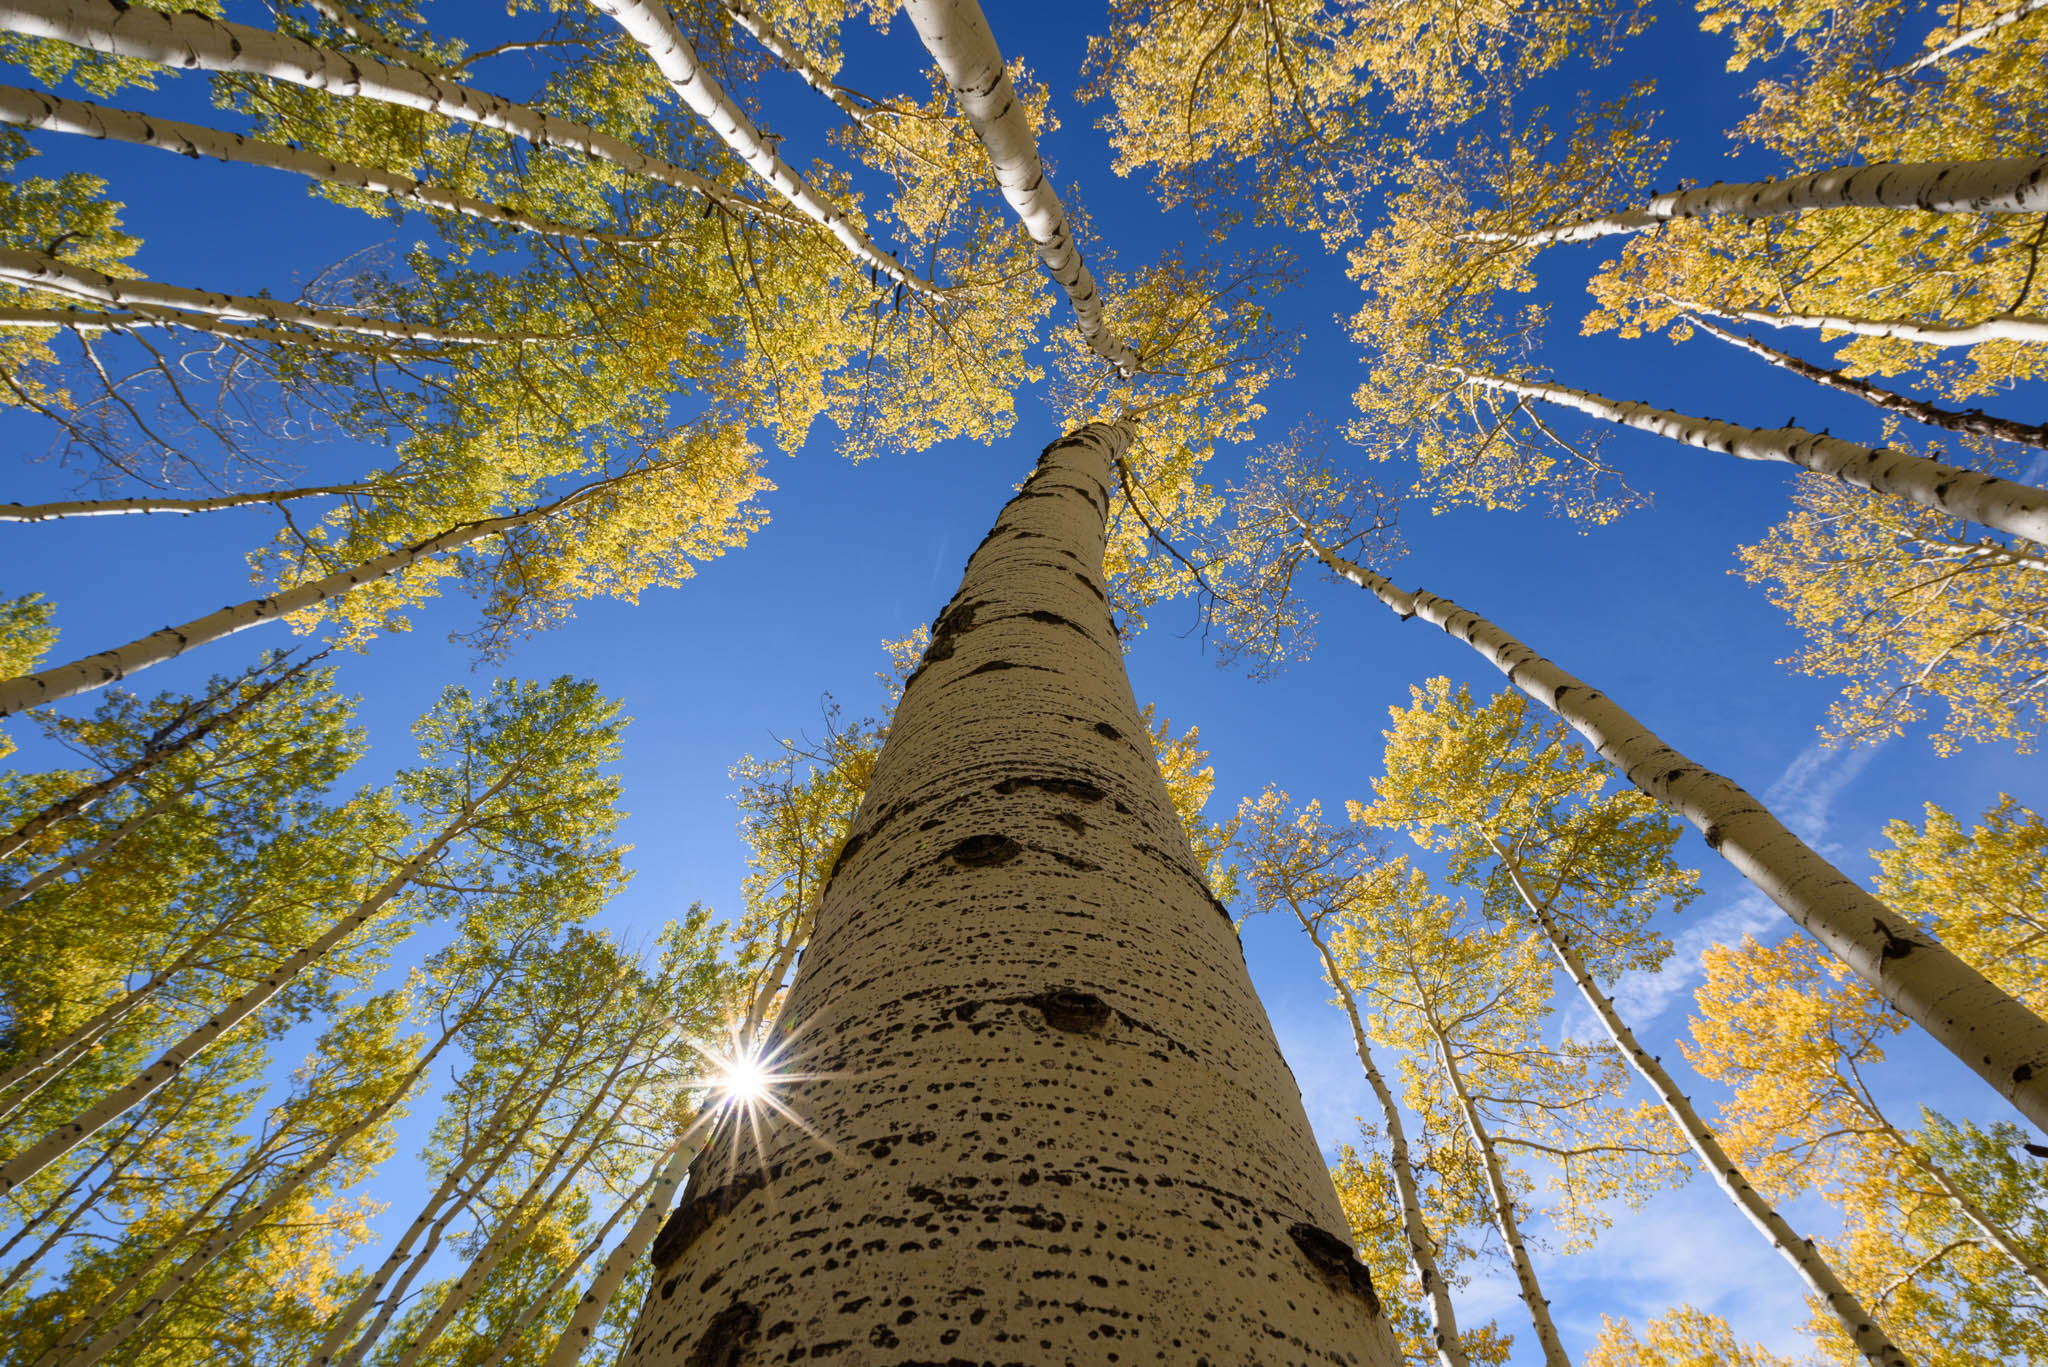
Of course, you can take good photos in a forest with something wider – the “pointing directly up with a 14mm lens” shot is a classic that often turns out surprisingly well – but the middling focal lengths are much more comfortable in these environments. Reserve the ultra-wides for cases when you have a specific shot in mind, not as walk-around lenses for photographing trees.
As for your other equipment, forests can be darker than most landscapes, especially on a cloudy or rainy day (which are often good conditions for this type of photography). My strong recommendation is to use a tripod. If that’s not an option, you’ll want a camera with good high ISO performance, plus image stabilization on the camera and/or lens.
I find that a polarizing filter can be a big help in forest photography because of how well it cuts down glare on the leaves. Many of the tips in this article revolve around simplification of complex scenes, and using a polarizer is no exception. Rather than distracting speckles of light across the photo, you’ll capture more of the gentle tones of the leaves.
I rarely use any other filters or special accessories for photographing trees and forests. A tripod and a polarizer should do it. However, if it’s raining or foggy – again, good conditions for these subjects – make sure to bring along a microfiber towel to keep the front of your lens clean, and possibly a rain cover or umbrella depending on how bad the weather gets.
2. Camera Settings
In forest photography, the trickiest part about your camera settings happens when it’s windy and you don’t want the tree leaves to get blurry. In cases like that, even if you’re using a tripod, you may need to bump up your ISO in order to keep your shutter speed fast enough. You’ll also want to take a series of images in a row to maximize your chances of getting something sharp.
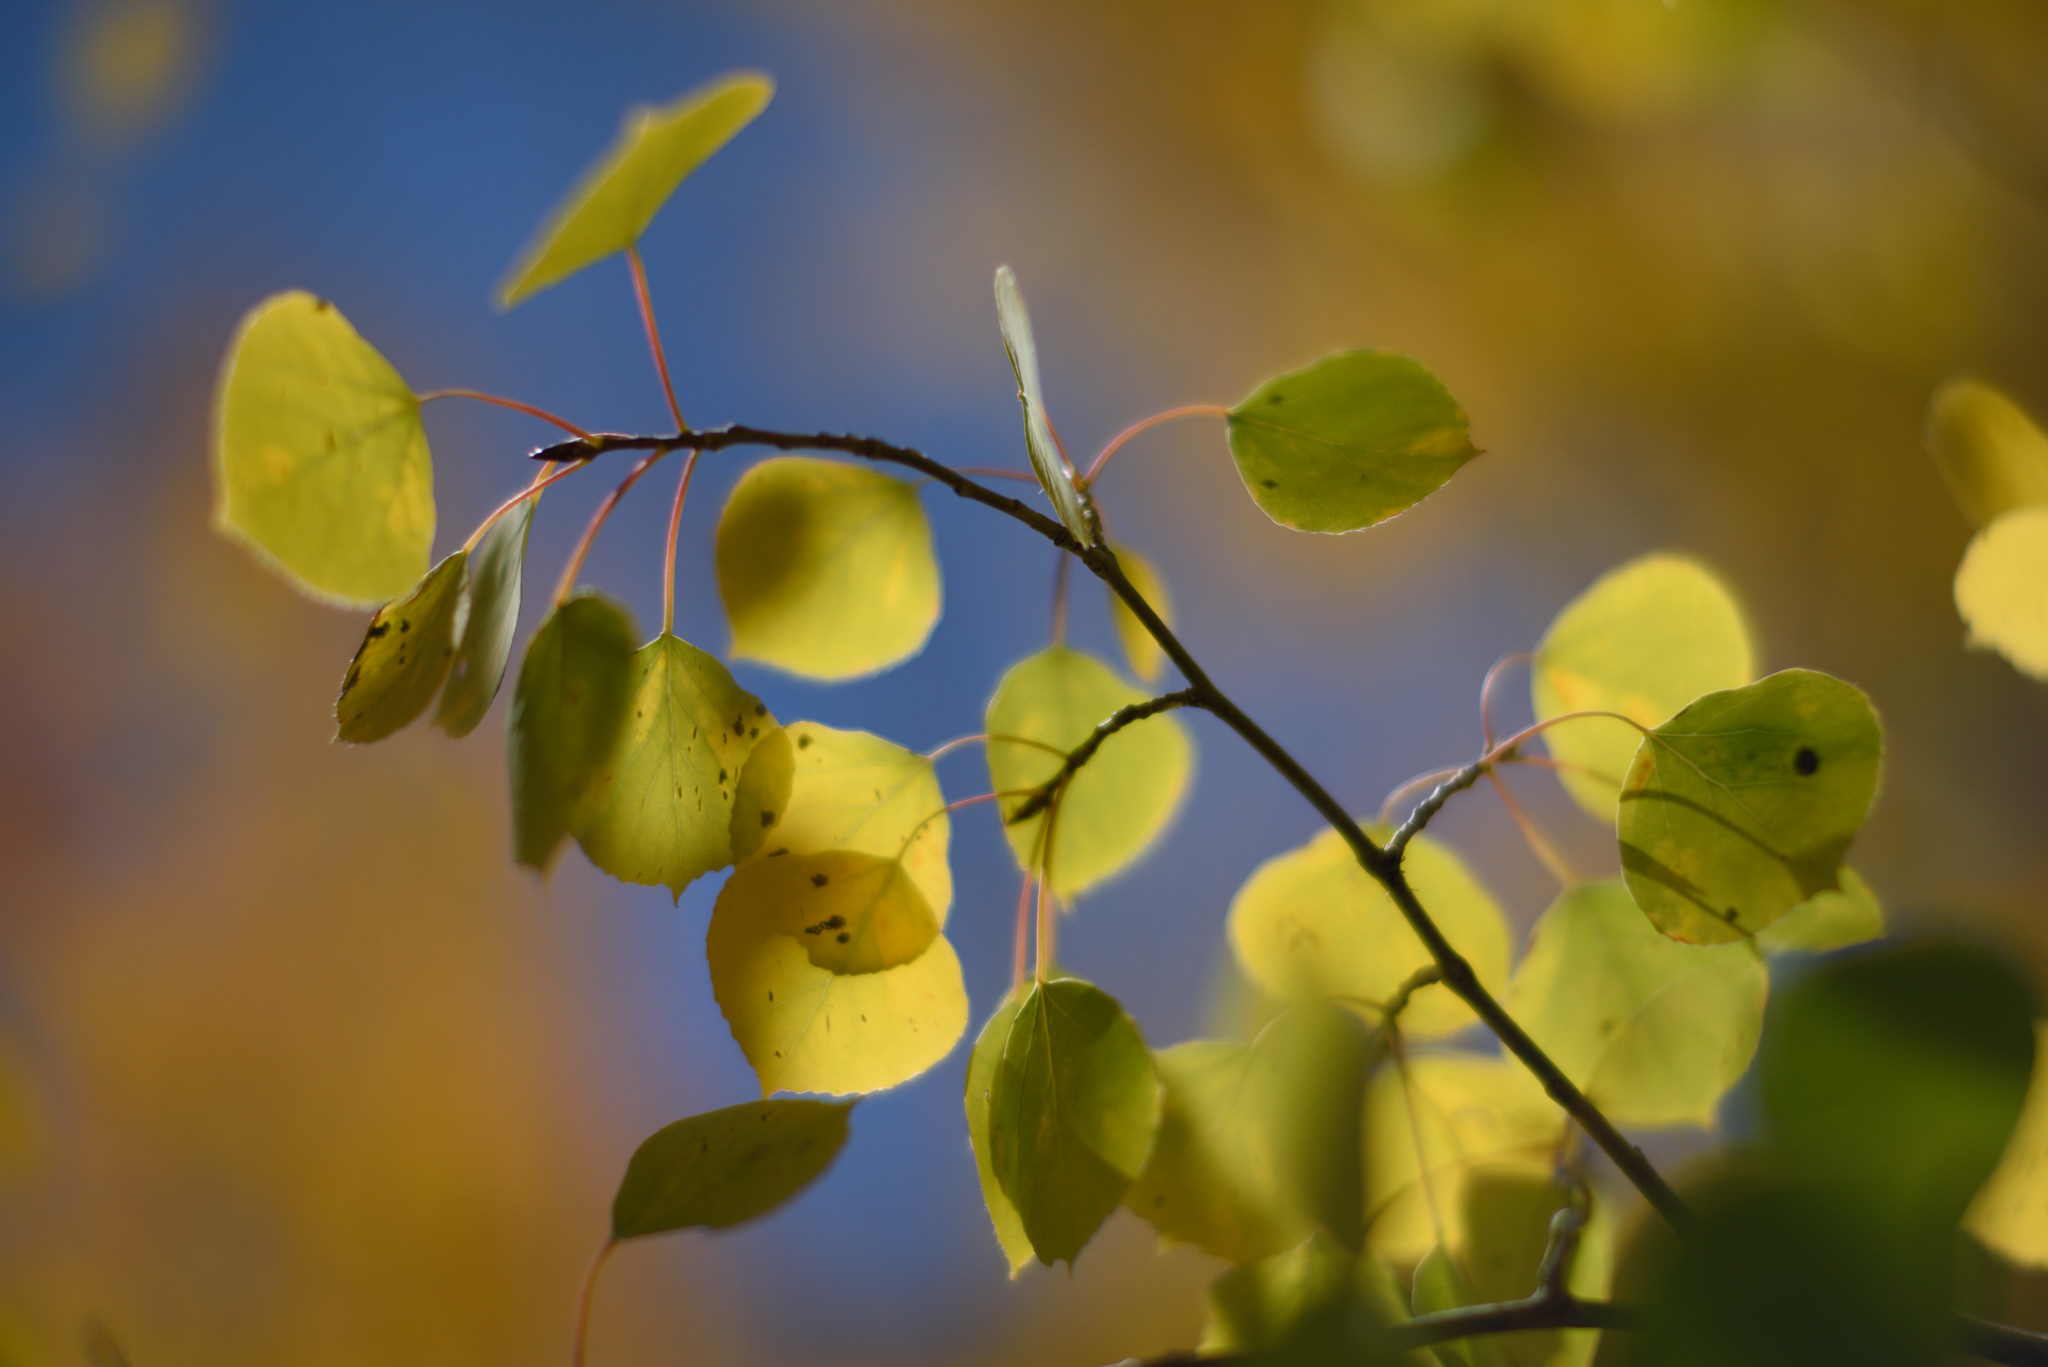
The only other challenge is making sure you’ve selected an aperture that gives you a sharp image and your desired depth of field. If you want a shallow depth of field for some of those detail shots, it’s easy enough to use a wider aperture value like f/2.8 or f/4. Below, I went all the way to f/1.2 to get a truly isolated subject:
On the other hand, if you want your depth of field to cover the entire scene, keep in mind your focal length. If you’re using a 35mm or especially a 50mm lens, depth of field will be a lot thinner than with a 14-24mm lens. You may need to stop down to f/11 or f/16 (even though it adds some diffraction) just to get everything sharp from front to back. Or, you may deliberately select a “medium” aperture like f/5.6 or f/8 to give a bit of subject separation without making the background turn completely out of focus.
It may sound like a lot to juggle, but in normal situations, the process I recommend is very simple. In aperture priority mode, just set base ISO and an aperture that gives you the desired depth of field. Allow your shutter speed to float. If you’re noticing too much motion blur in the leaves, consider bumping up the ISO until the shutter speed looks more reasonable, or wait for a lull in the wind.
The one remaining difficulty is that a lot of forest scenes, especially in sunlight, have extremely high contrast. It helps in such cases to expose to the right and therefore make sure you’re not allowing any important highlight details to blow out. I shoot more forest scenes -1.0 exposure compensation compared to almost any other subject, because the camera doesn’t always consider the critical highlight details in its metering.
You may be wondering if HDR photography can save the day here, but I’d be very cautious about using traditional HDR methods in a forest. If there’s any wind, the tree leaves won’t be in the same position from photo to photo, and even the best HDR blending software will struggle to piece them together without artifacts. If you must increase your dynamic range beyond what the camera is capable of, I strongly recommend using the image averaging or “AHDR” method instead of traditional HDR.
3. Composition and Shooting Conditions
Much of the time, your challenge when composing forest photos is going to be maintaining simplicity. More than ever, with all the distractions in a forest, you need to distill your subject down to its most important elements. Otherwise, the photo will just be too complicated.
I already mentioned a few ways to simplify your subject: using a polarizer, setting a medium aperture to get slight background blur, and using a normal lens instead of an ultra-wide. All of those are viable techniques, but the most important tools at your disposal are composition and your shooting conditions.
The first thing I’d think about is the light. What direction is it coming from? How low is the sun on the horizon? And is the sun blocked by a cloud or shining in full force?
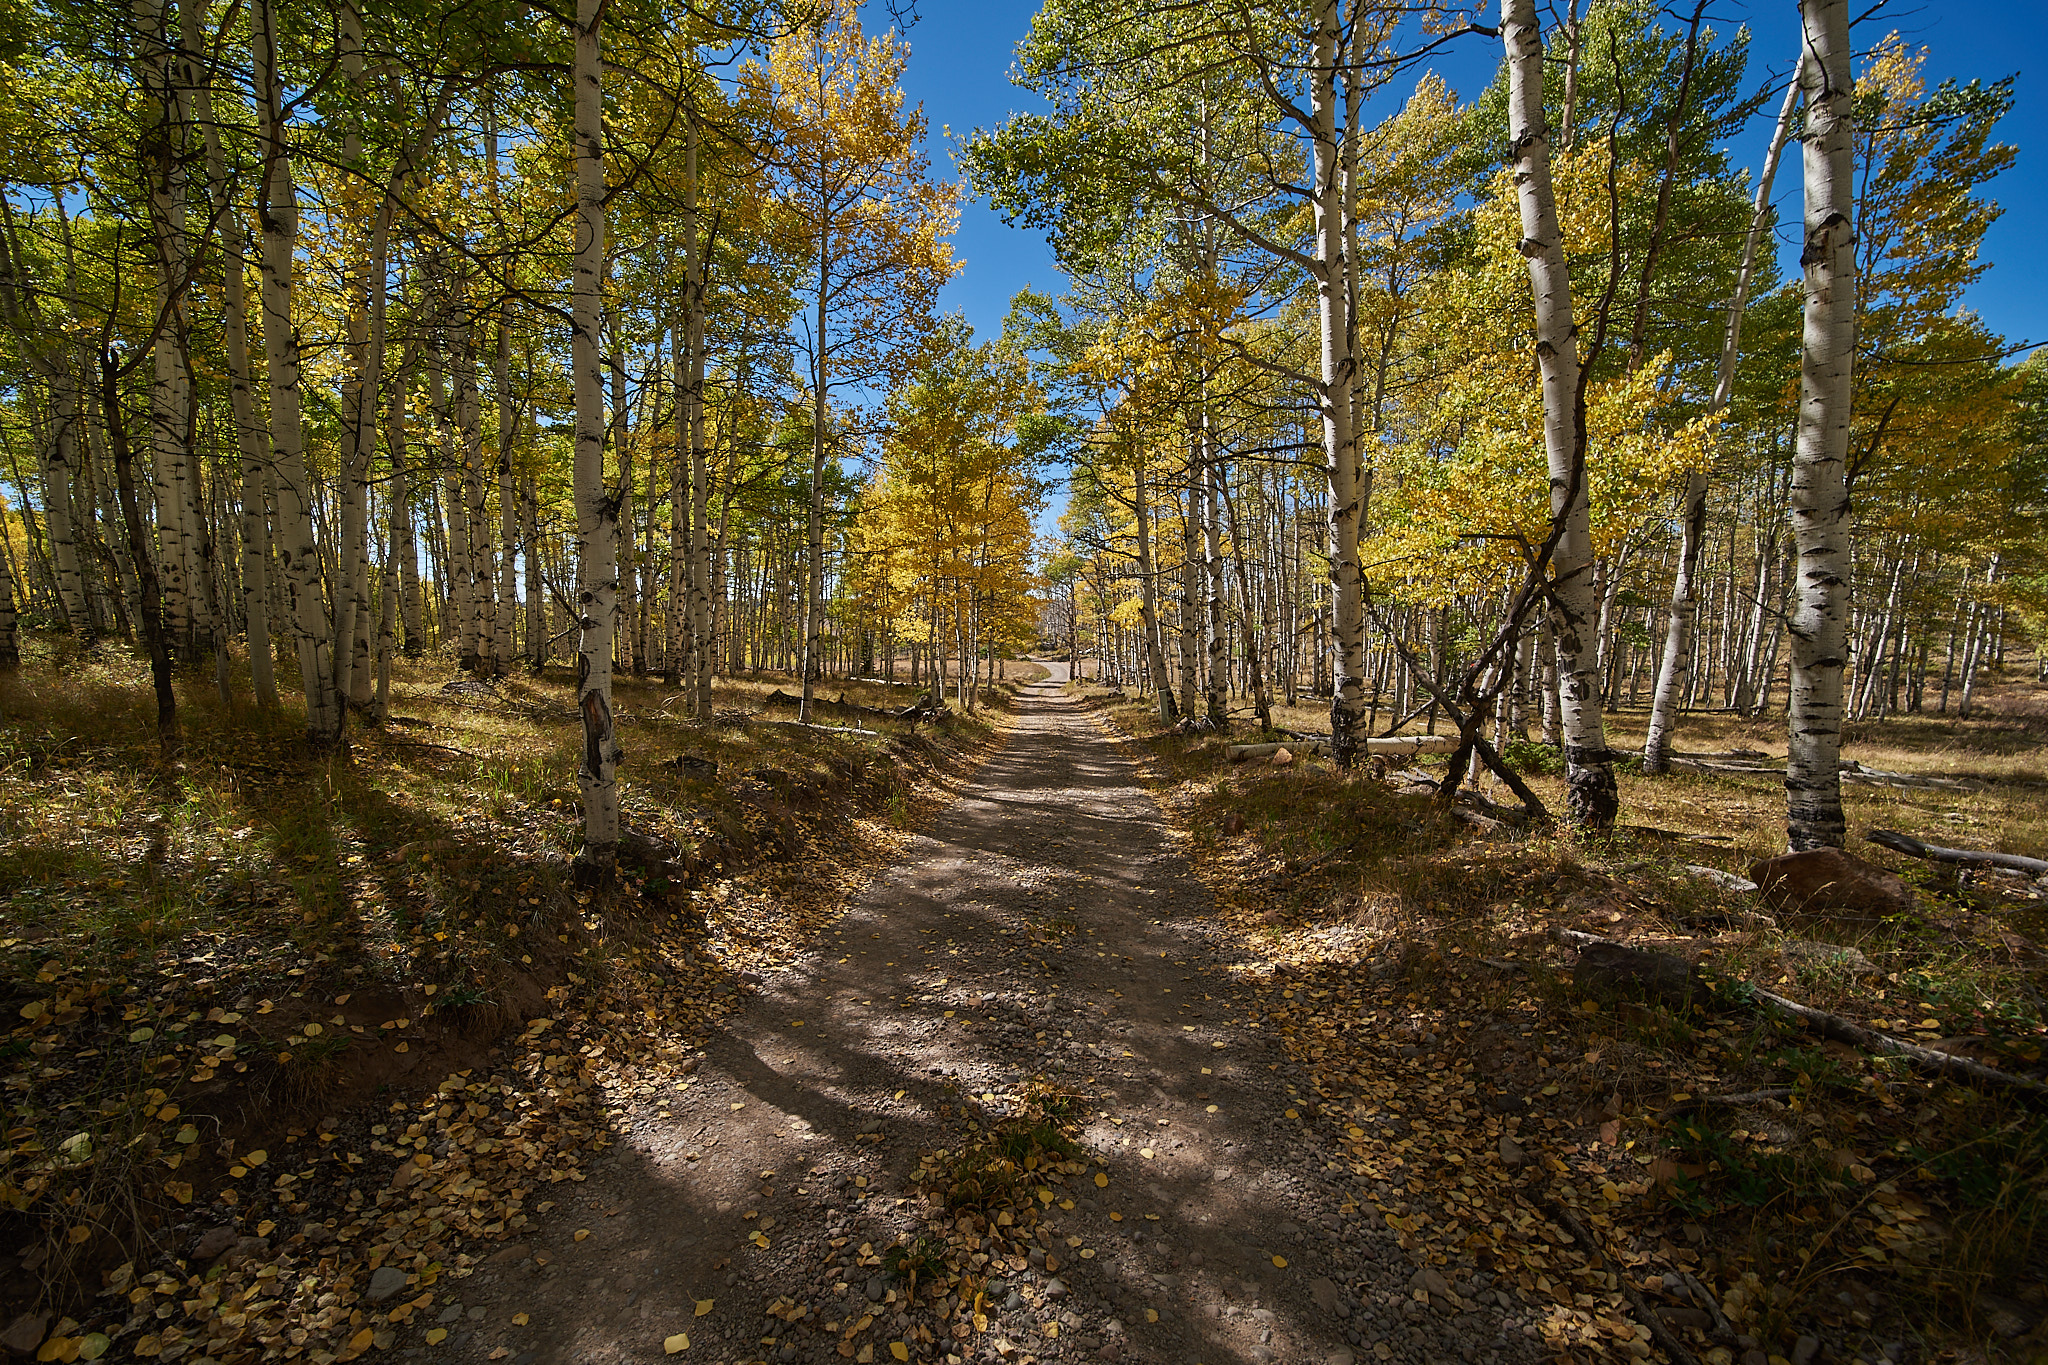
You’ll get the simplest photos in a forest by facing your composition toward the sun. Backlighting reduces the texture on tree trunks and leaves. It can give you powerful silhouetted shapes where once was an untamable foreground. Backlighting also makes chaotic backgrounds look much brighter and hazier.
Looking back at my forest photos, more than half of them are backlit. It’s always on my mind in these difficult landscapes: What direction is the brightest? Are there any good compositions facing that way? I find these questions important no matter the conditions, even on an overcast day or before sunrise/after sunset.
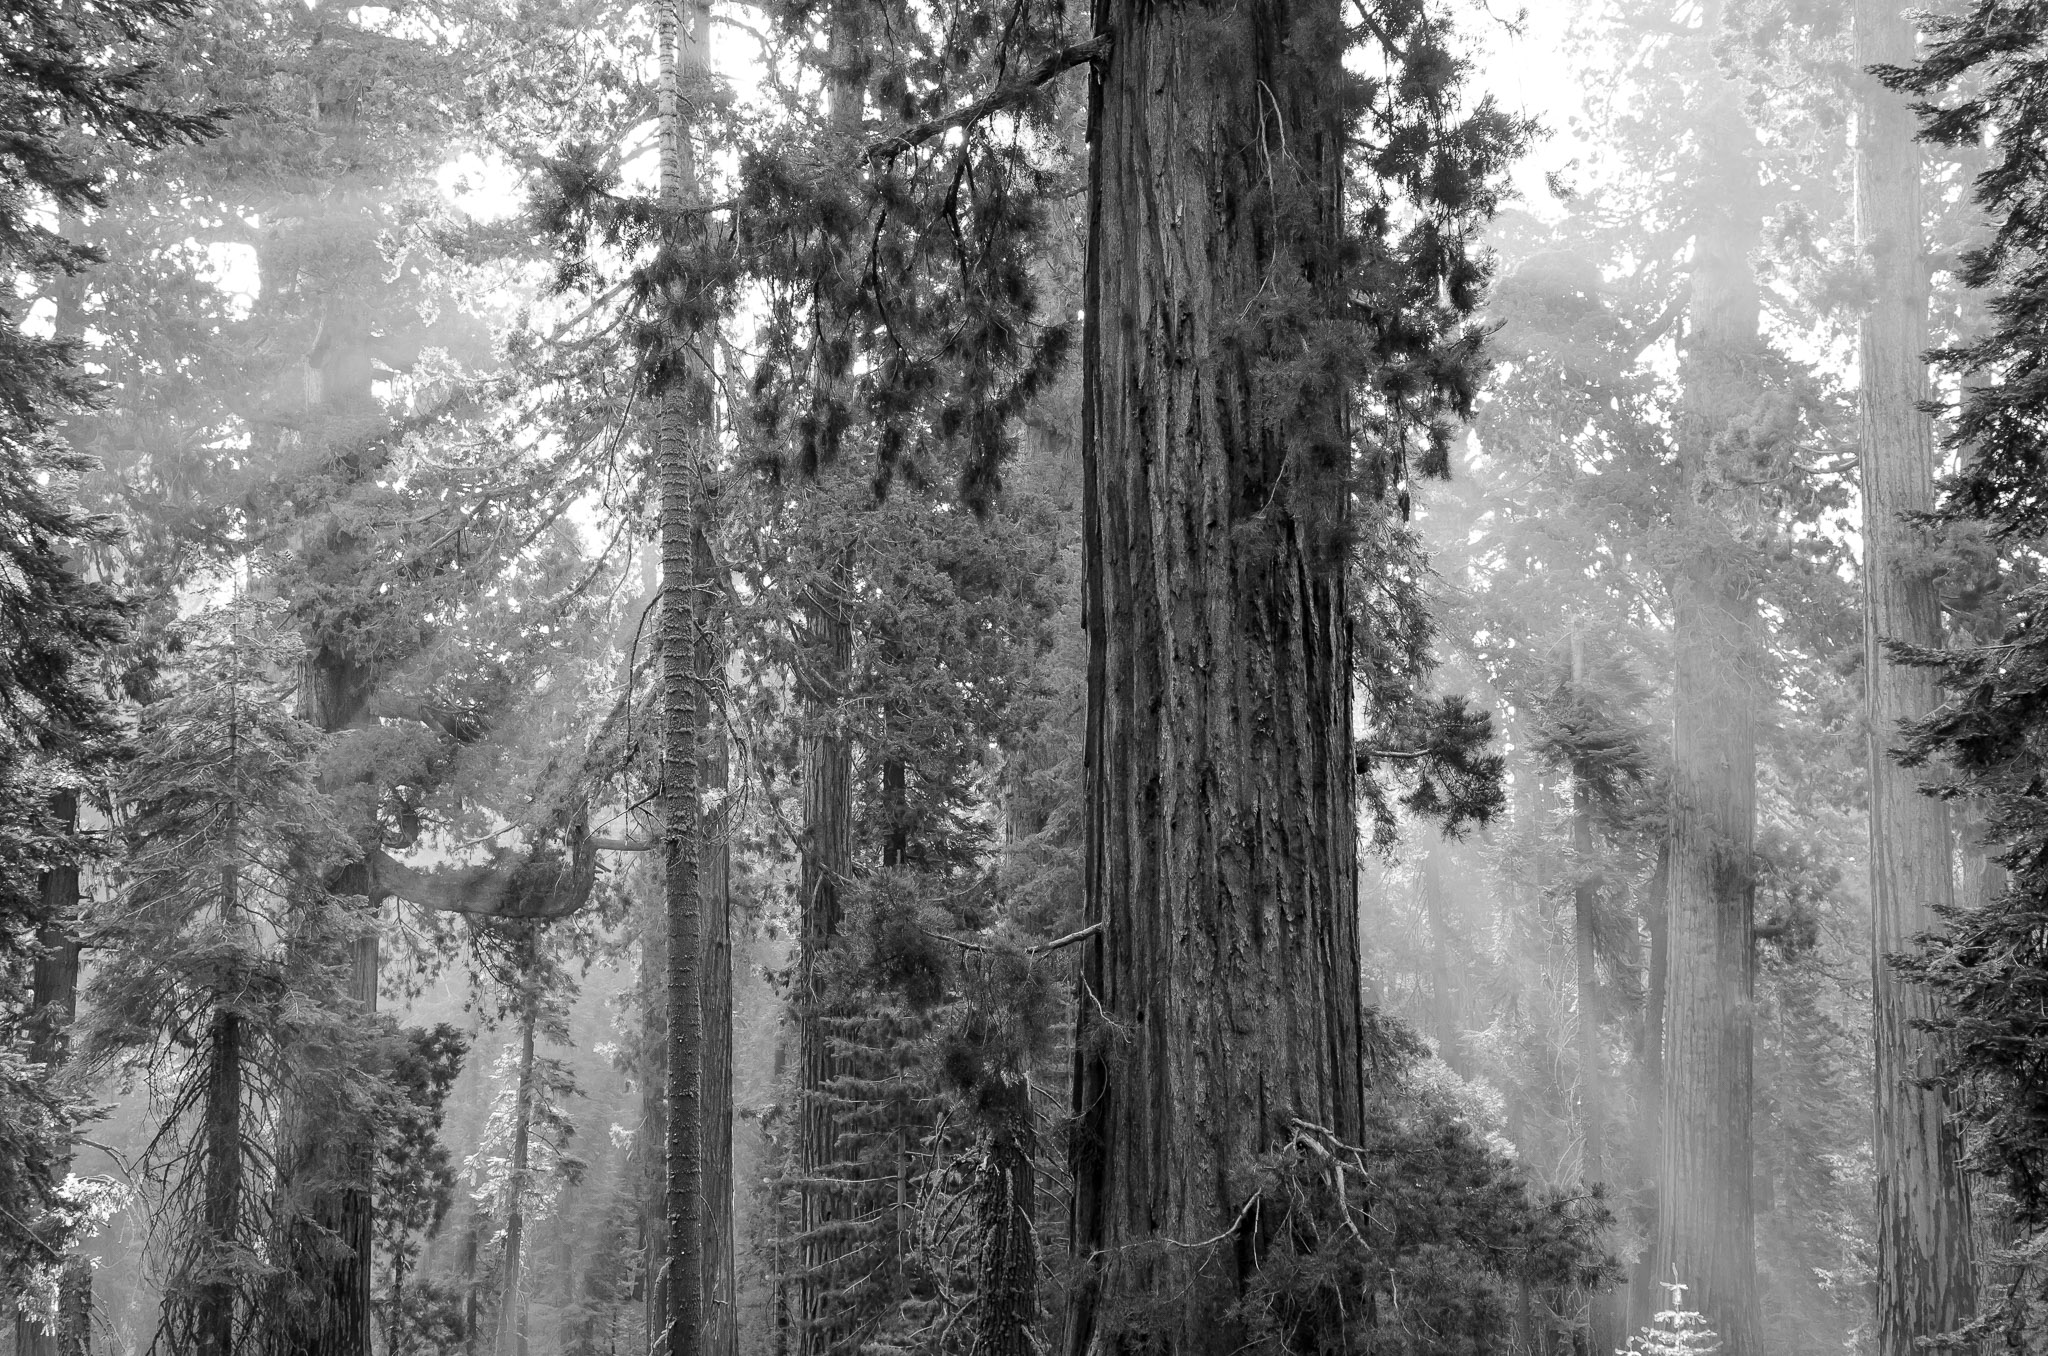
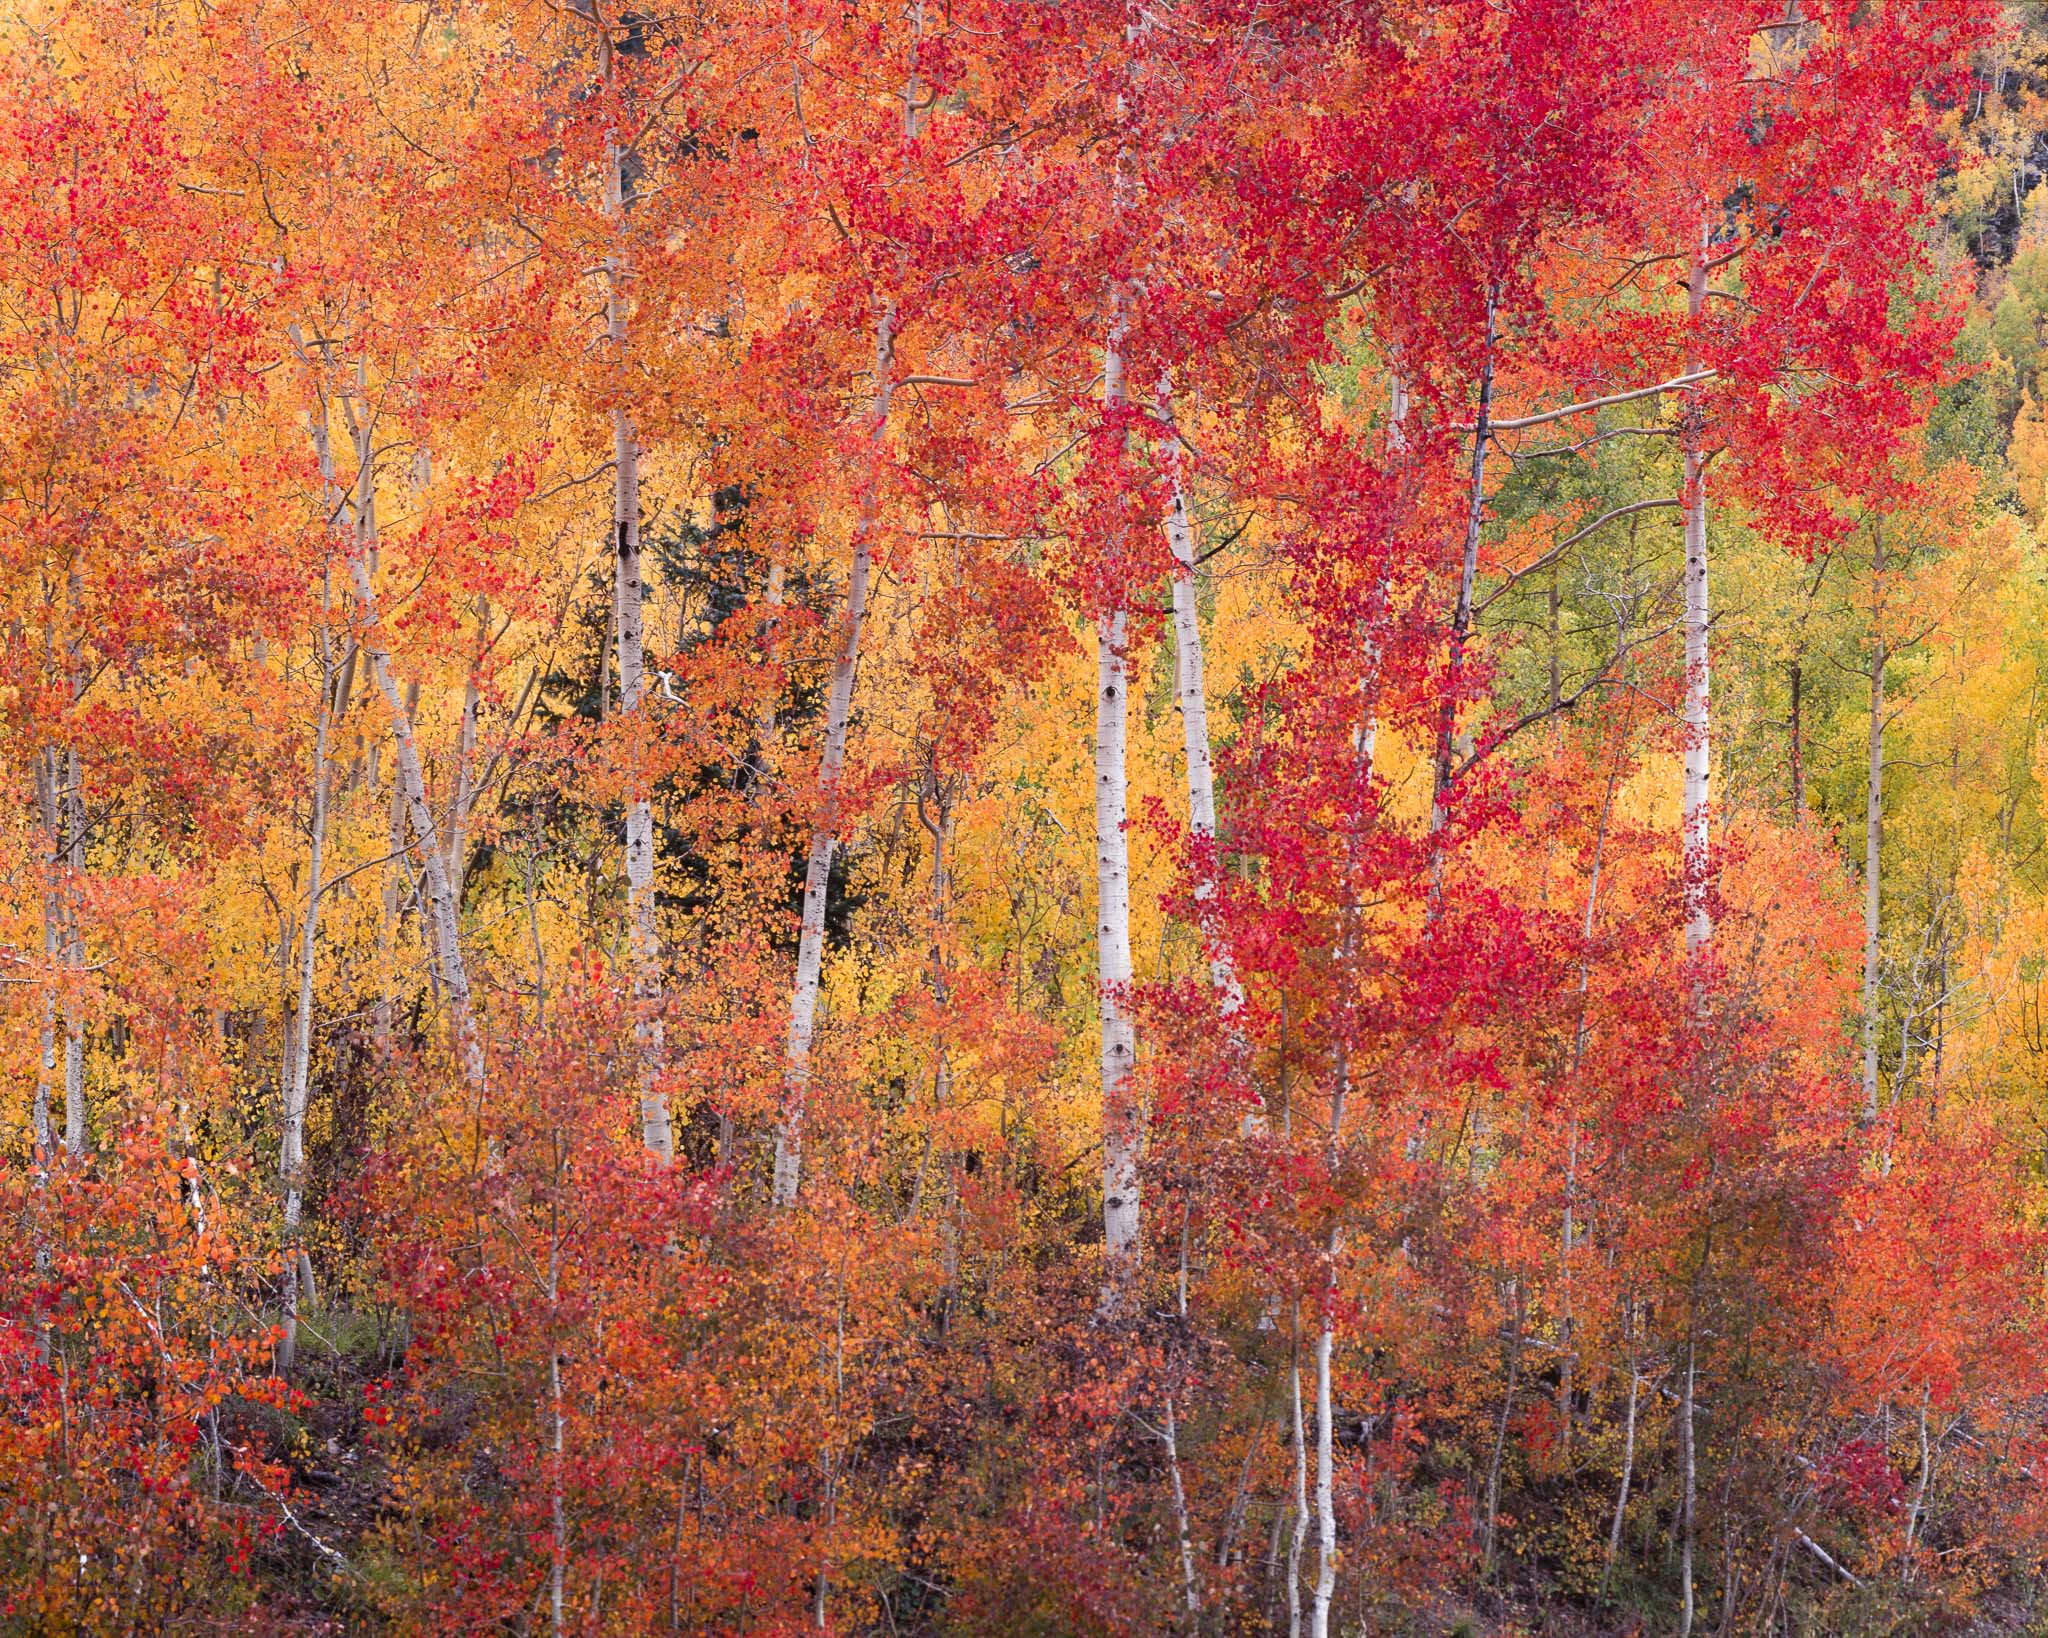
And of course, you should also consider the quality of the light and other shooting conditions. If the sun is behind a cloud, wild highlight messes will vanish. If it’s raining or foggy, chaotic backgrounds will do the same. It was raining when I took the following photo, which gives the background more of a muted quality and allows the nearest aspens to look brighter by comparison.

Sunrise and sunset aren’t as popular in forest photography as in other genres. This isn’t because they’re necessarily bad, but because their qualities of dramatic and colorful light don’t translate as well when you’re at risk of overcomplicated photos. That said, I do find that morning and afternoon are good times for forest photography because the slightly lower and more directional sunlight can give you more to work with (i.e., a sunbeam going through the trees or powerful backlit silhouettes).
I already mentioned earlier that I like standing back and using a telephoto lens when photographing forests, since it can simplify the subject down to its patterns. It’s worth mentioning again. One struggle in forest photography is simply finding a good subject in the first place, unless you’re lucky enough to find a tree so interesting it stands out from its peers. In cases like that, “pattern as subject” photos can be very powerful and are some of my favorite things to search for.
In any case, no matter what type of photo you’re searching for, moving around your camera position is more important in forest photography than almost any other type of landscape. Shifting just a few paces in any direction can dramatically change the relative sizes, positions, and importance of the trees in your photos. Don’t be afraid to move around your tripod!
4. Post-Processing
After you’ve taken your forest photos, it’s time to post-process them. This is once again a time to think about simplification. Consider the original post-processing tools in photography – dodging and burning – and how you can use them to make your message more effective. Distracting branches in the corners? Burn them (not literally). An interesting sunbeam that guides the eye to your subject? Dodge it.
Even though it might go against the original definitions, I’ve always taken dodging and burning to include other edits than simple brightening and darkening. For example, when I burn (darken) certain areas of the photo to de-emphasize them, I will often lower the contrast or clarity as well. Likewise, to draw attention to a subject, you could add texture, saturation, or dehaze rather than just relying on the brightness slider.
In any case, the idea is to keep doing what you started in the field by simplifying your subject. When you de-emphasize enough distractions in a photo, it’s amazing how much more effective it can get. As always, with local edits, it’s very easy to overdo things and end up with weird halos or artifacts, so take it slow.
I’ve shown the following two photos many times before, including how my compositional decisions led to a much simpler photo the second time. And while that was an important factor, post-processing was just as critical. In the second photo, I strategically burned the distractions and dodged my subject – along with cropping and changing my aspect ratio – to make the photo more effective.
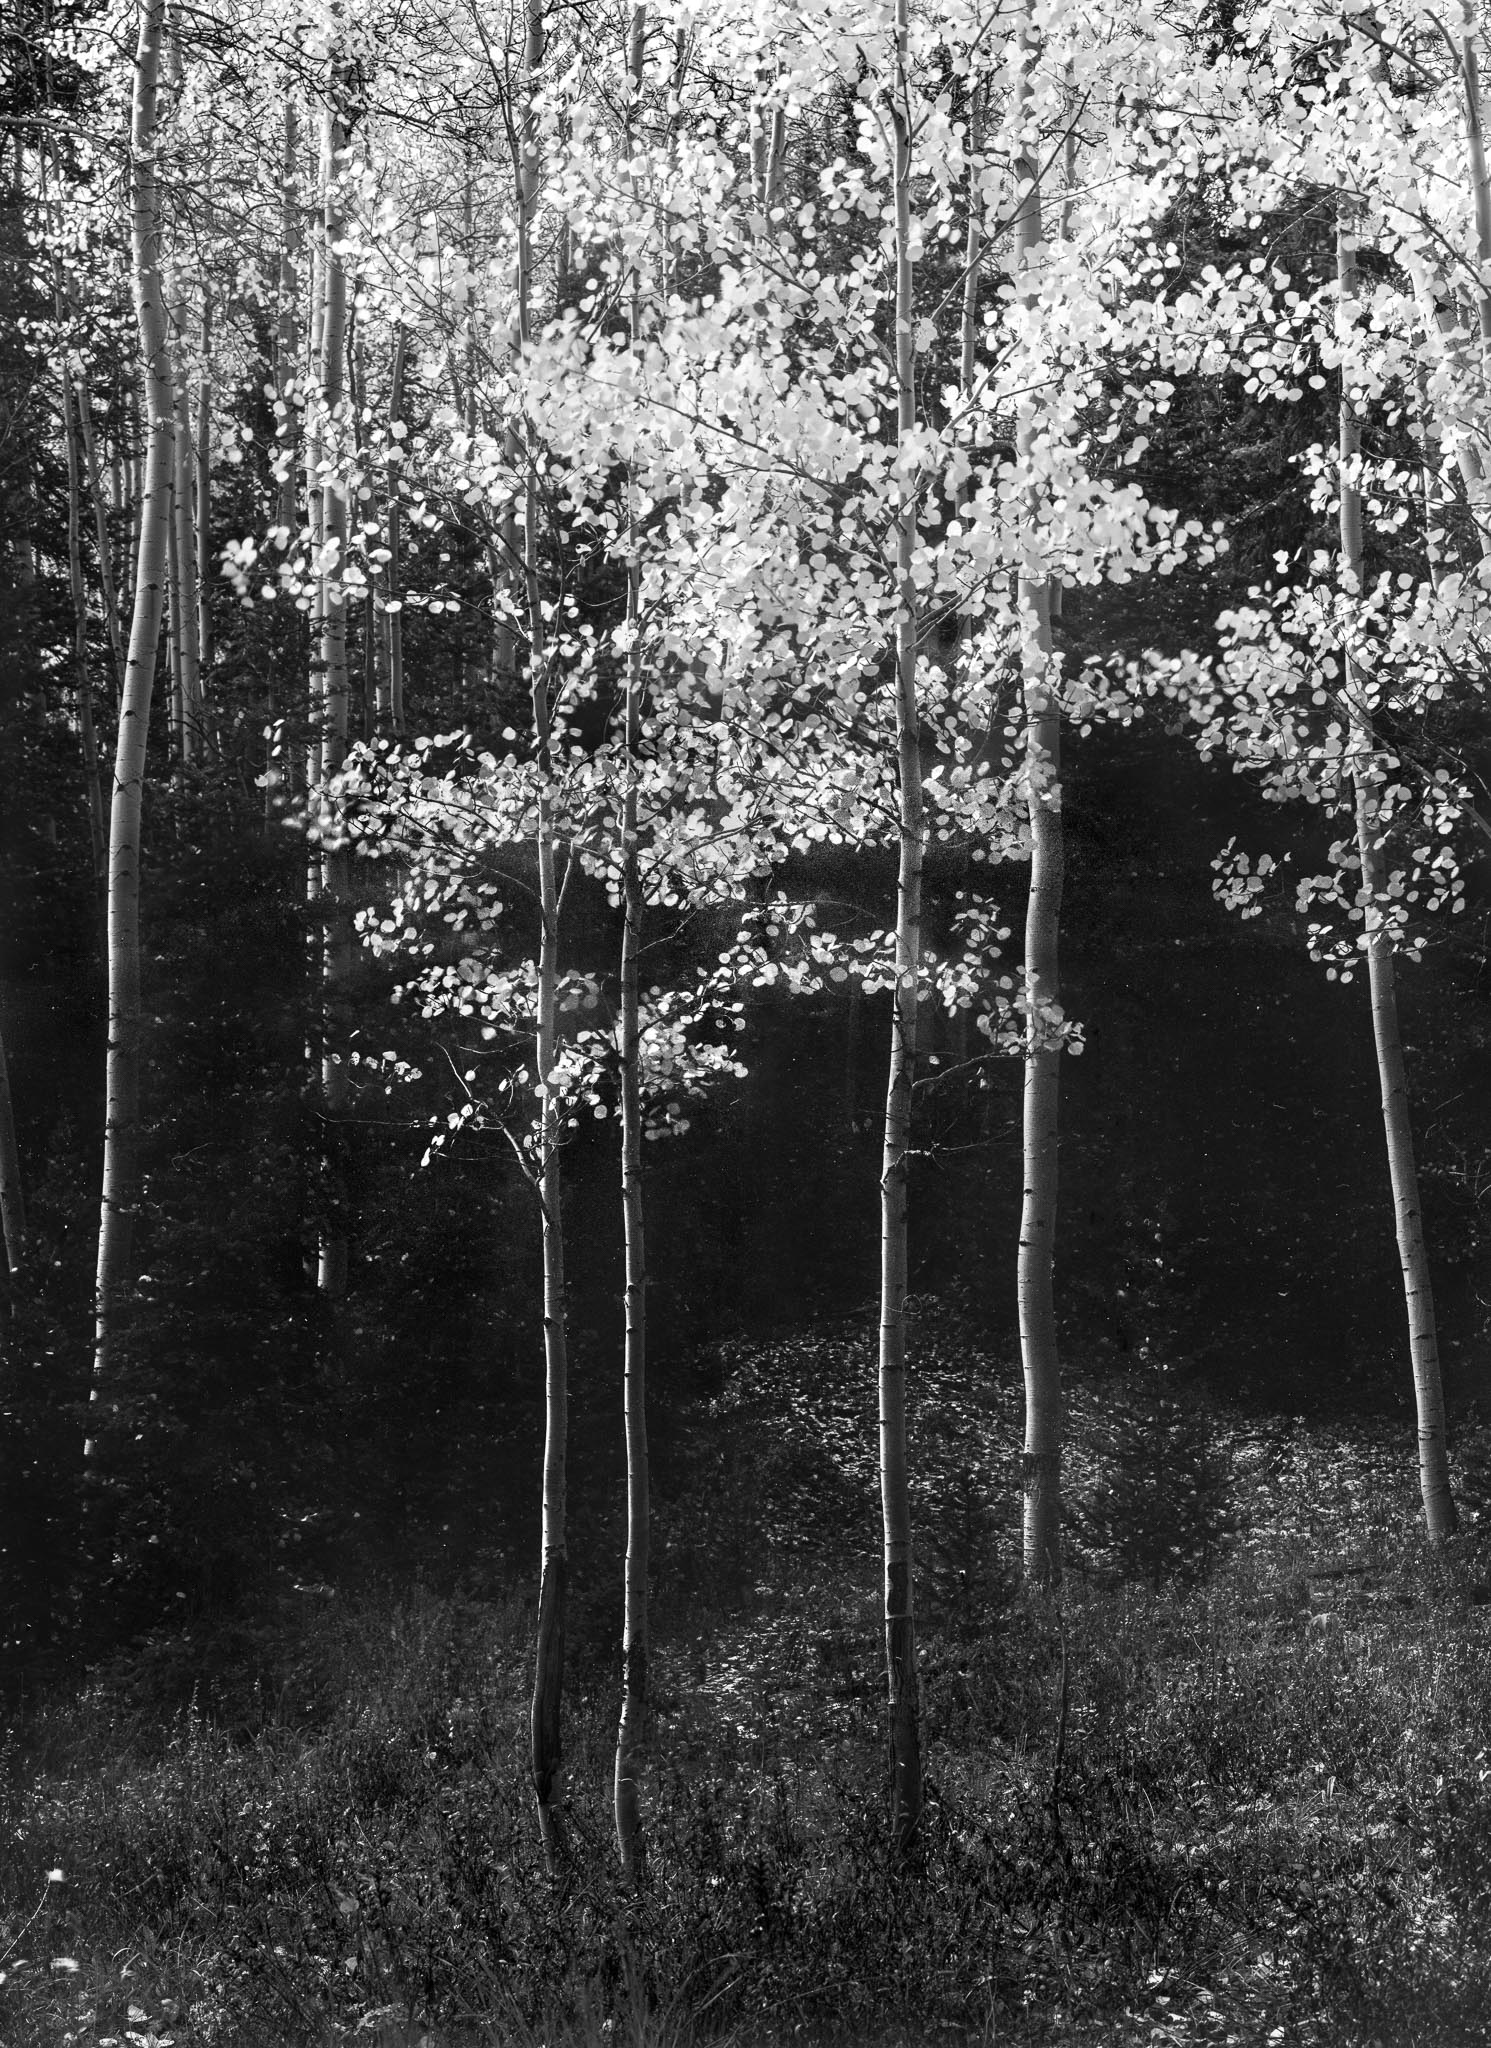
As the images above might also suggest, an additional edit I often consider when post-processing forest photos is a black and white conversion. I turn many of my forest photos to black and white (or shoot them with black and white film in the first place) because it leads to a more effective emotional message.
Black and white is its own form of simplification, since color patterns tend to draw lots of attention. If that attention is in conflict with a different, more important part of the photo, removing the color can create the simplification you need.
Other than that, processing forest photos is no different than any other type of editing. Just continue to be aware of overdoing things, because it stands out more when your subject already has a lot going on.
Conclusion
Even though forests can be challenging subjects for landscape photography, they are some of the most rewarding. A good picture of trees can transport us to a sanctuary of clean air and the sounds of nature.
Forest photography is also great because it’s possible almost anywhere in the world (pretty much unless you’re stationed in Antarctica). Combined with how beautiful forest photos can be, there’s a good reason why it’s such a popular sub-genre of landscape photography.
I hope this article helped answer some of your questions about getting better photos of trees and forests! Feel free to ask in the comments below if you have any questions or tips of your own. Forests are some of my all-time favorite subjects, and even if I don’t return with a good photo, just walking in a grove of trees is always refreshing in itself.
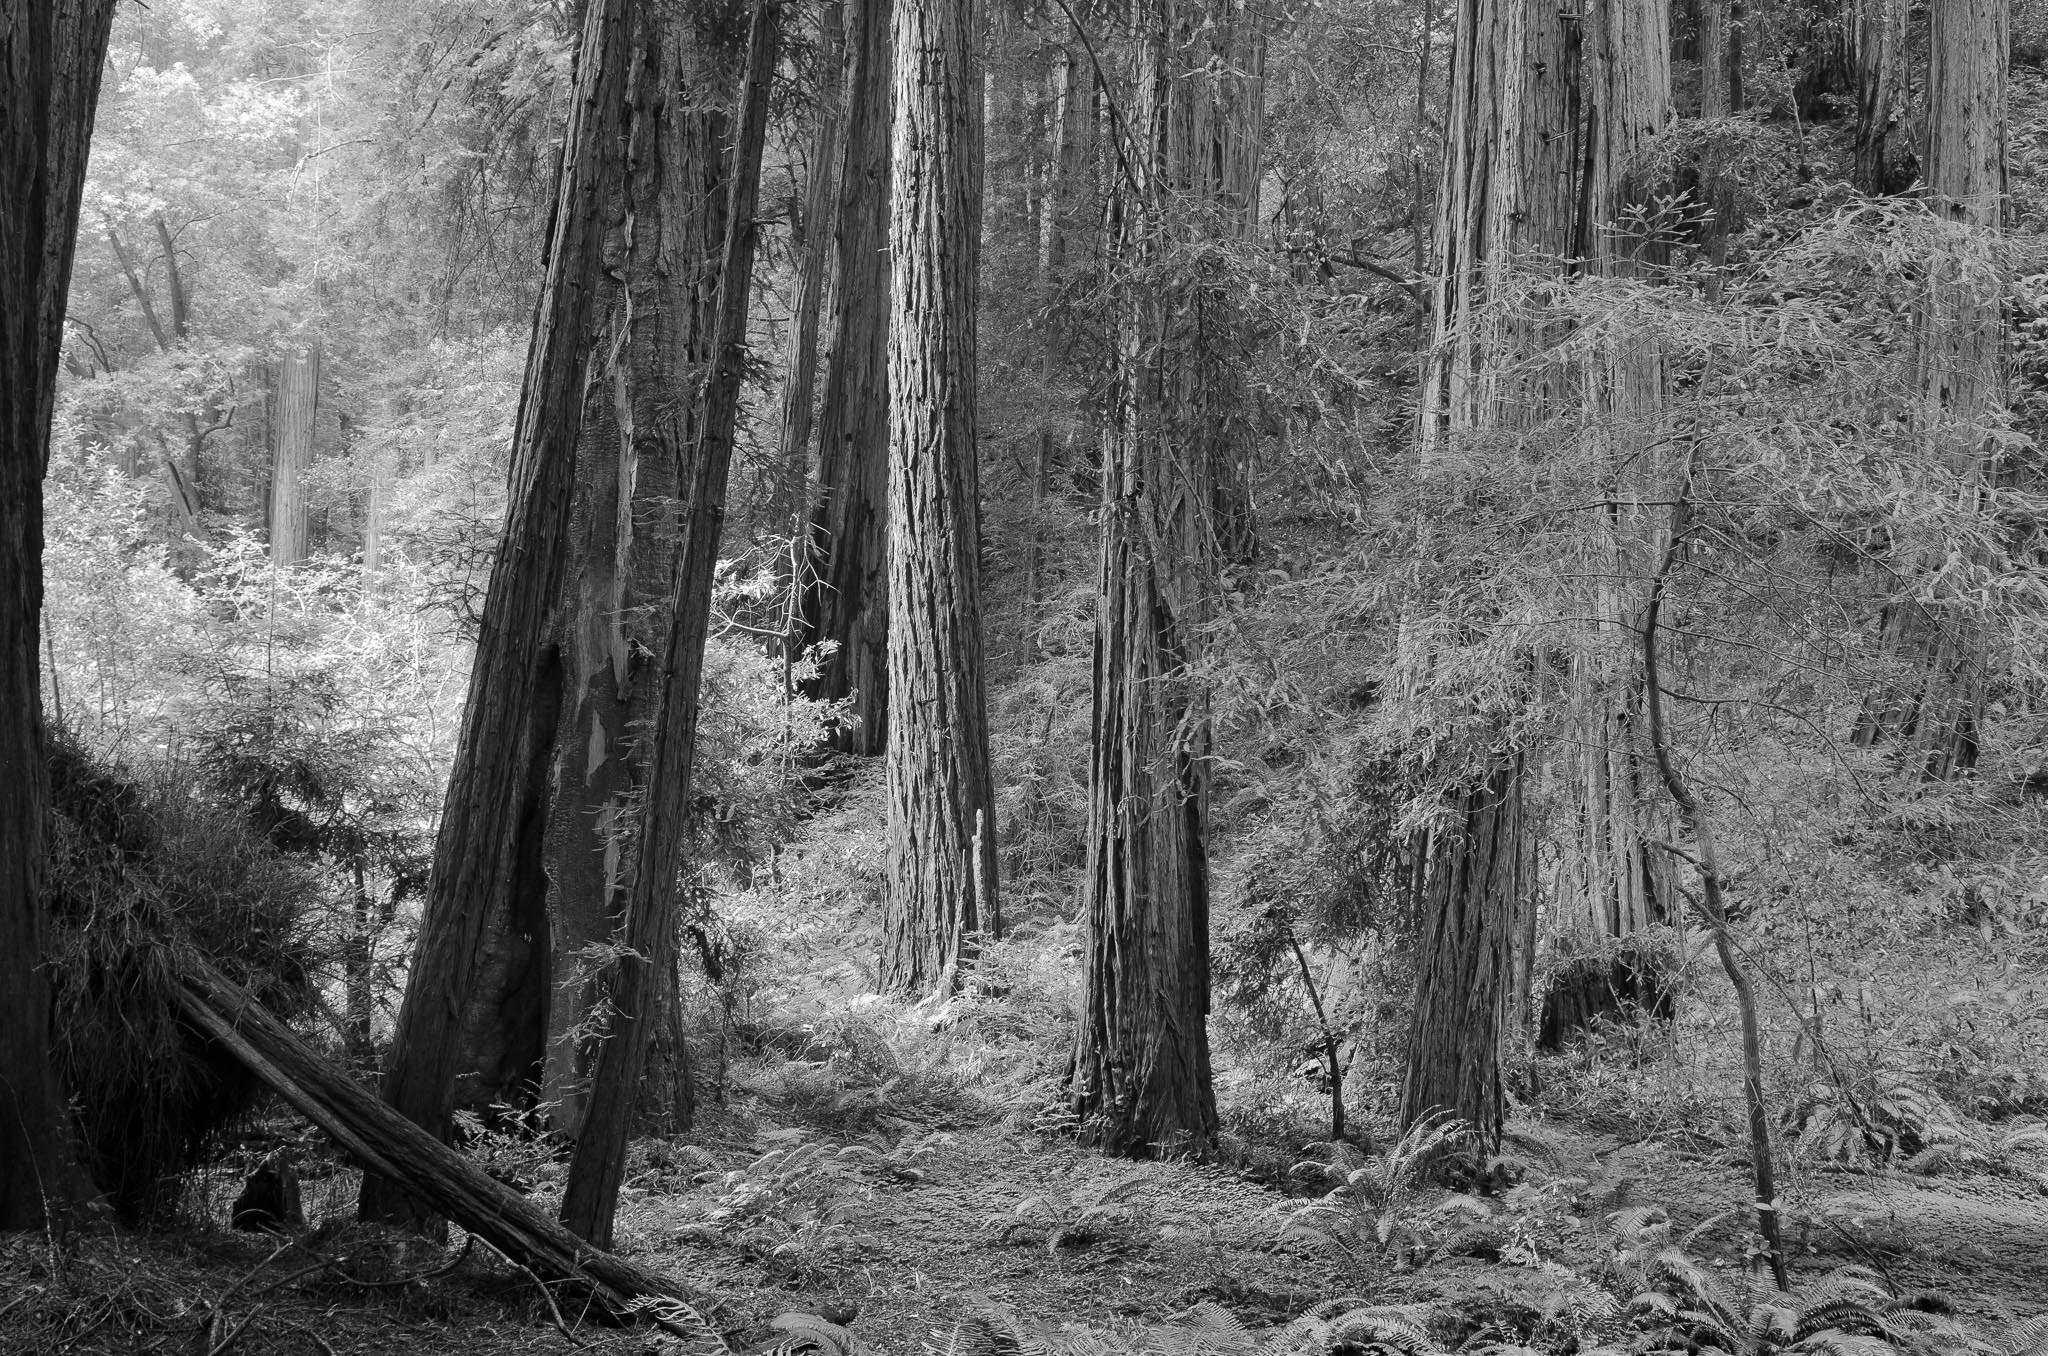
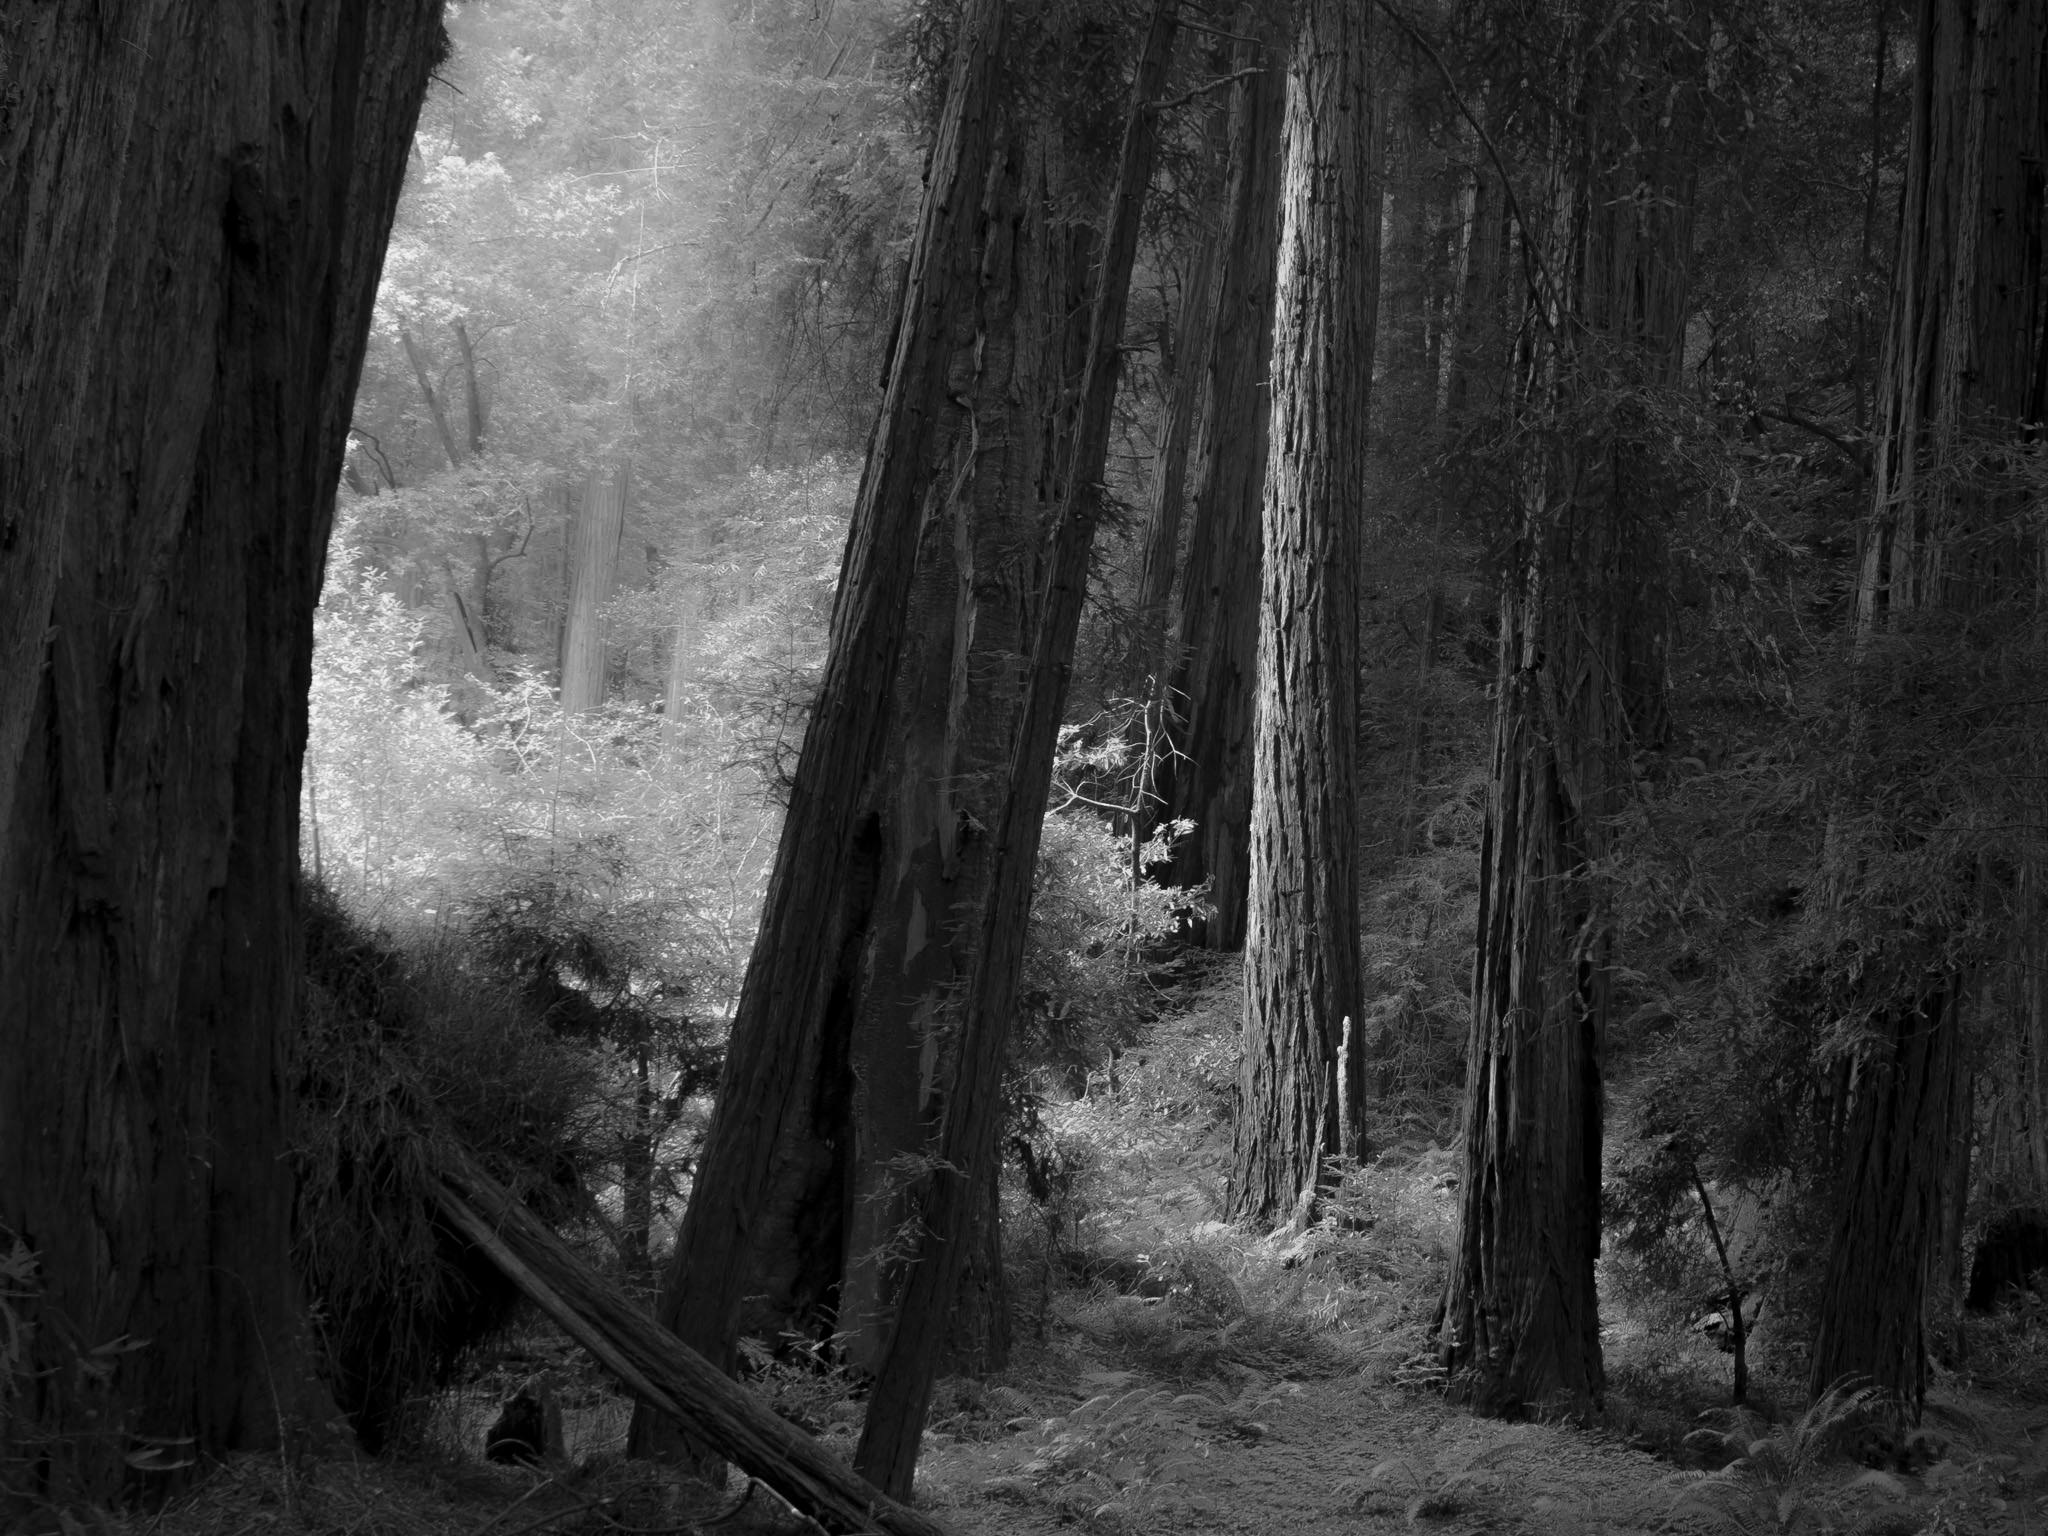
Similar to the black and white treatment, I like to shoot busy forest scenes in infrared. The foliage glows white and dark bark stays dark, so it’s super helpful in eliminating the clutter of the foliage while keeping the trunk shapes/lines.
Very helpful article! I’d love your thoughts on using color filters with forest photography – and landscape photography in general.
I love the B&W shot you took with the 11×14 where you used the green filter. I imagine you needed the actual physical green filter since you took that shot with film instead of digital. Do you ever use color filters when shooting digital? Or do you just simulate having a color filter in post as you convert to B&W? I’ve at times noticed handling it in post results in a lot of unpleasant noise (depending on the color(s) removed).
A very nice article, Spencer. As a person who photographs trees all the time, I found your tips to be very useful. Well done!
Excellent article as always Spencer.
BTW, I did some shots lastly with my brand new Z 40mm F/2, and it’s a marvellous lens for that usage.
api-da.wixmp.com/_api/…OcnIrlWO-o
Here’s one example of my 50 mm shots:
I tried 50 mm last time up in the Totenåsen Hills, and I found it really nice for forest photography:-)
Excellent article, Spencer. So much good information. Forests are difficult and this helps. I join with other commenters in requesting occasional large format posts.
Thank you, Gary! Good to know. In response to you and other commenters, I’m working on a couple large format articles right now.
Thank you again Spencer, Photography Life is decidedly a unique website. Would you consider photographing coasts and sharing your insights? I am in awe of the portion of the coast between Monterey and Cambria in California and cannot to photograph it well. While we are at it, would you consider a workshop in that area?
Glad you enjoyed it, Fabrice! I drove that coastline once and thought it was very beautiful. I’ve never lived by the coast and haven’t done enough oceanscape photography yet. But one day, I’d definitely consider a workshop in a place like that.
Spencer, always good to see large format pix!
Thank you, Art! I’ve really enjoyed the process so far. I finally finished setting up the makeshift darkroom in my apartment a couple days ago and have been busy making contact prints from the 11×14.
Spencer, would you consider doing an article on large format photography? I’m extremely curious about your 11×14. Is it a Chamonix as well?
I’m definitely familiar with the basic concepts of 4×5 and 8×10 rigs having read AA’s Camera/Negative/Print series. But now I’m seeing folks doing dry plate, wet plate, daguerreotype, etc and I’m just blown away by all the choices.
How do you even find 11×14 film? What lenses cover it? I’m seeing options up to 20×24, and folks hand build larger. What medium are they shooting? And if I buy a Chamonix 20×24 (I won’t), how do I even know what lenses cover that and allow for tilt & shift? Ahhhh… so many questions!
I have a few articles planned, if Photography Life’s nearly-all-digital audience doesn’t mind! The 11×14 is not a Chamonix. I bought one of the lighter 11x14s on the market, but I don’t really recommend the company I bought it from for various reasons, so I’m avoiding posting the name.
11×14 film is reasonably easy to find in stock, at least in black and white. B&H currently has some HP5+ in stock, which is the negative I’d recommend at this size (unless you want to save money with paper negatives or x-ray film). Even in color, it’s technically possible to get 11×14 film via custom order through Kodak. Not cheap. I’d love to do it some day, though.
11×14 lenses are a bit harder! This is a good list of some, not all, of the available options in modern shutters: www.largeformatphotography.info/lense…x14in.html
As you can see, choices are limited, although some judicious research can point you to a few more options. Same with larger sizes up to 20×24. Finding them for sale is a different matter, though!
By the way, for 11×14, you can divide all these numbers by 10 to get approximate full-frame equivalents. So, the 762mm lens I used for the shot in this article is roughly equivalent to a 75mm (and f/90 to f/9, in terms of depth of field and diffraction at a given print size).
We don’t mind :)
Thanks Spencer! As a Z7II shooter, I can’t wait to see the large format articles!
Thanks for writing an excellent article about one of my favorite subjects. I’d like to make a few additional suggestions (with examples linked below).
1. Avoid wide-angle perspective distortions in the corners by cropping to a 16:9 or similar aspect ratio. This works even at 15mm if your camera is completely level on a tripod and you’re several feet from the nearest tree.
larskilian.smugmug.com/Fall-…-b6wpmqg/A
2. Look for an interesting edge of a forest, especially if that forest has a complementary feature like a lake.
larskilian.smugmug.com/Twin-…/i-25JKXWt
3. Single trees can make excellent subjects in the right surroundings.
larskilian.smugmug.com/Highb…-L9G6fDN/A
larskilian.smugmug.com/Sprin…-qvSjhQb/A
4. Don’t be afraid to reach for a high focal lengths (>200 mm) in great settings, like national parks, to capture faraway trees.
larskilian.smugmug.com/Back-…-T6P7N6x/A
5. Blue skies are excellent backgrounds for trees anytime of year, especially if you are shooting outside of the golden hours.
larskilian.smugmug.com/Innis…-8M77586/A
larskilian.smugmug.com/Schno…-R6GRdz9/A
Nice additions and beautiful photos, thanks, Lars! The 16×9 trick in particular is a good way to get around the stretched corners issue. Same with using even more panoramic aspect ratios like 1:2 or 1:3.