Originally used as training for alpine or big wall climbing, bouldering is now well established as a sport in its own right. You climb a “problem,” typically on a free-standing boulder (hence the name) or the base of a cliff. Problems range from a single move through extended sequences. The compressed nature of the problems means the style of climbing can be much more powerful and/or gymnastic than other types of climbing. For me, it is climbing distilled, and the joy of solving a physical and mental puzzle never gets old. It also provides opportunities for some pretty cool photos. In this article, I will go through some useful tips for photographing bouldering (and climbing in general) so that you can take the best possible pictures.
A quick caveat – this is (clearly) not a full “how-to” of climbing photography, but rather some key points to pique your interest and help you get started. If even a few people get curious about climbing from reading this, I’ll consider it a job well done.
Table of Contents
Basic Climbing Photography Tips
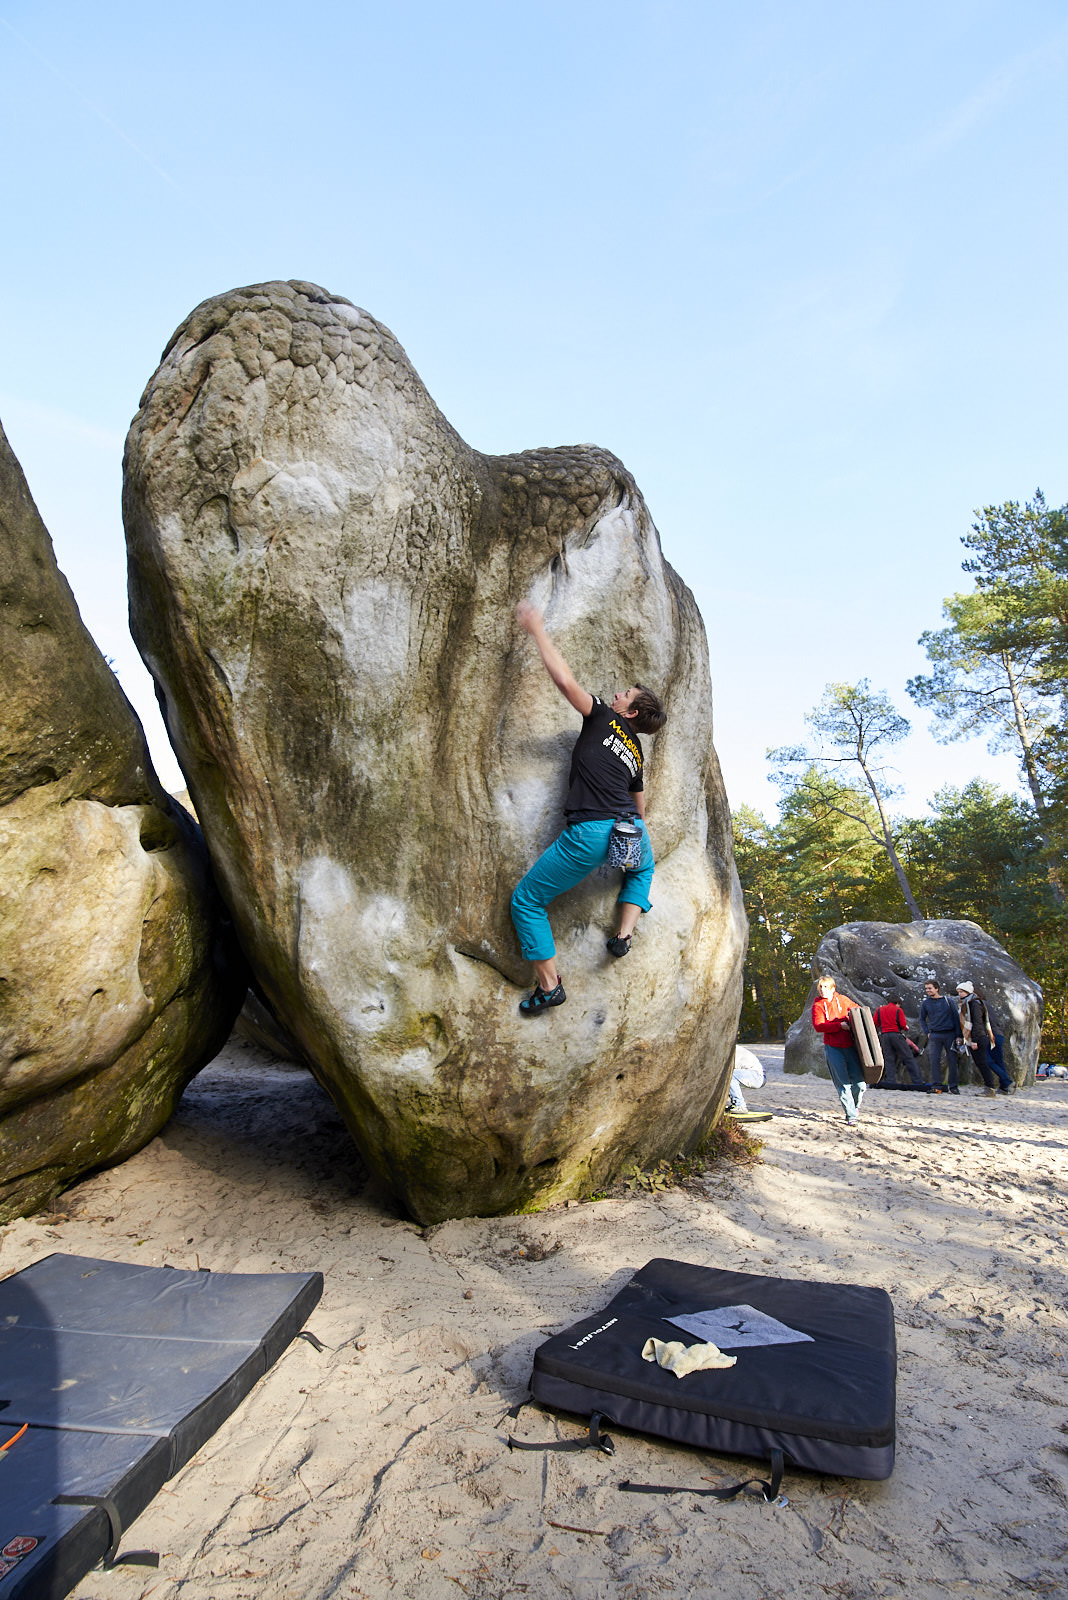
The first rule of climbing photography is (or at least, should be)… no butt shots. Sometimes they work, but most of the time they’re boring. You need to think about what the climber is doing and where they’re going.

NIKON D610 + Tamron SP 15-30mm f/2.8 Di VC USD (Nikon F) @ 19mm, ISO 200, 1/50, f/2.8
With that out of the way, the basics of shooting bouldering are similar to other sports. Try to keep the shutter speed high to capture action, and the aperture on the larger side to isolate the subject. Saying that, it’s worth experimenting with shutter speed, as a slower setting can bring some interesting movement to your shot – the picture above is at 1/50 to give a bit of motion blur to the scene and (in theory) a sense of movement.
NIKON D610 + Tamron SP 15-30mm f/2.8 Di VC USD (Nikon F) @ 15mm, ISO 250, 1/100, f/5.6
Composition
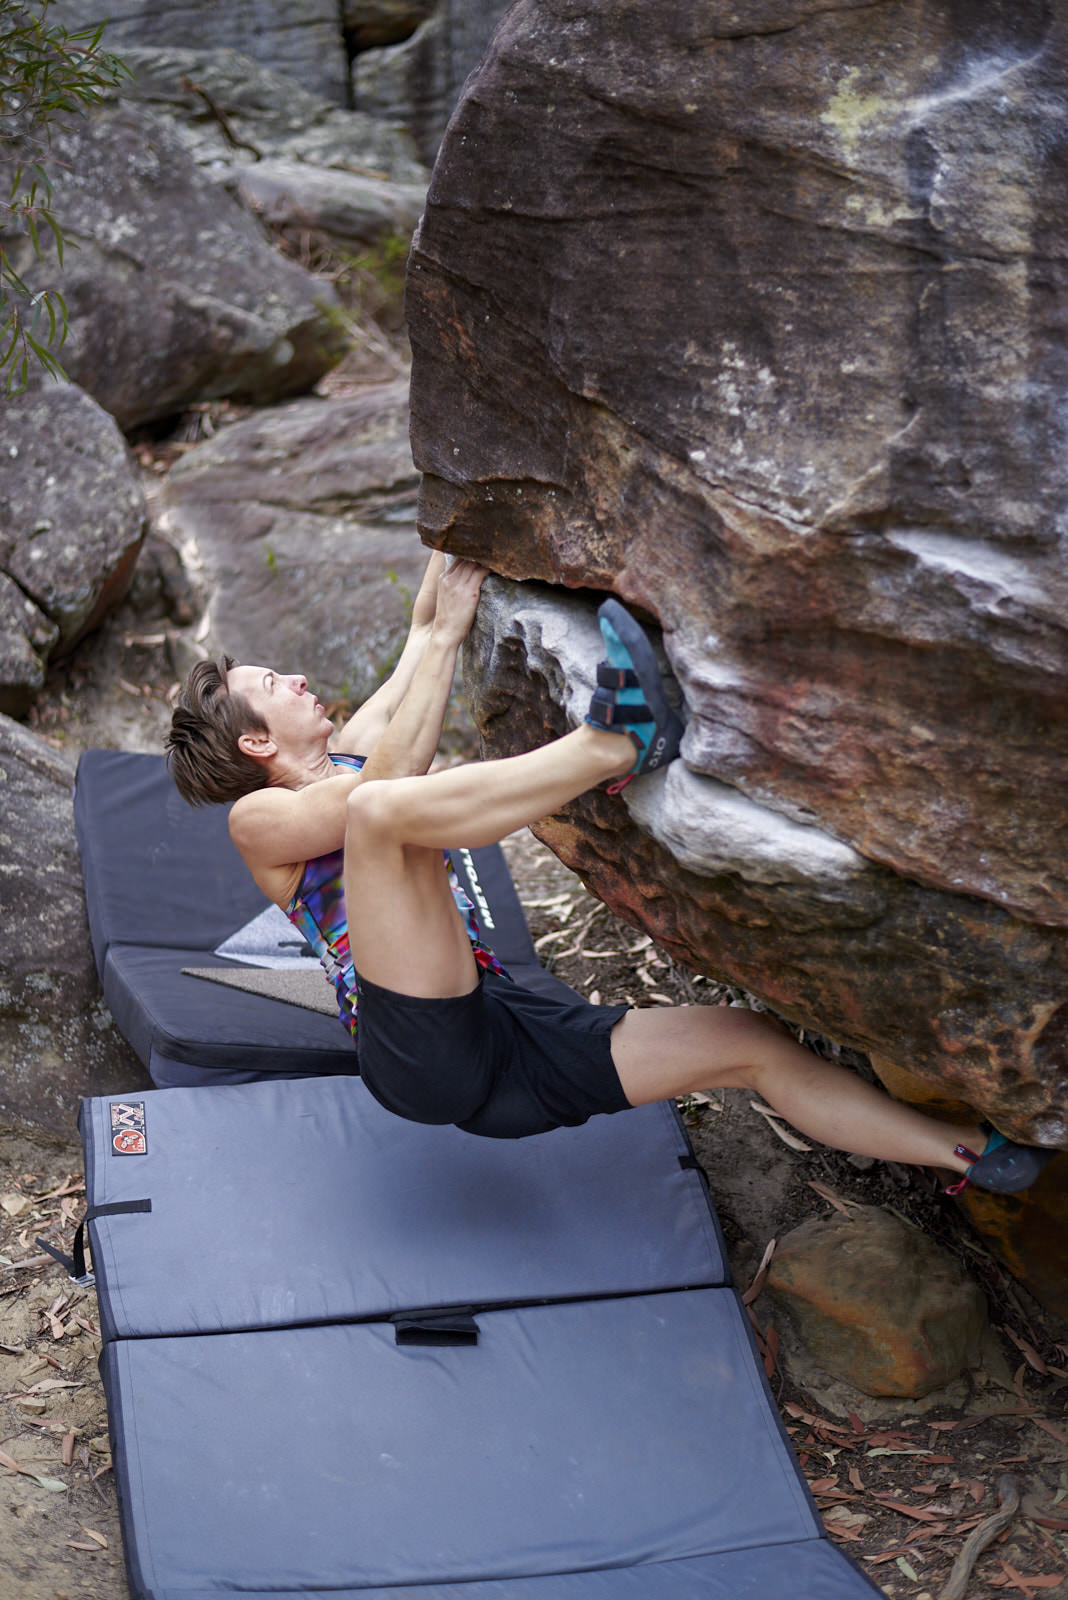
The closer-to-the-ground nature of bouldering provides some great opportunities for a photographer to get creative. Powerful moves and interesting body positions can create some fun compositional challenges.
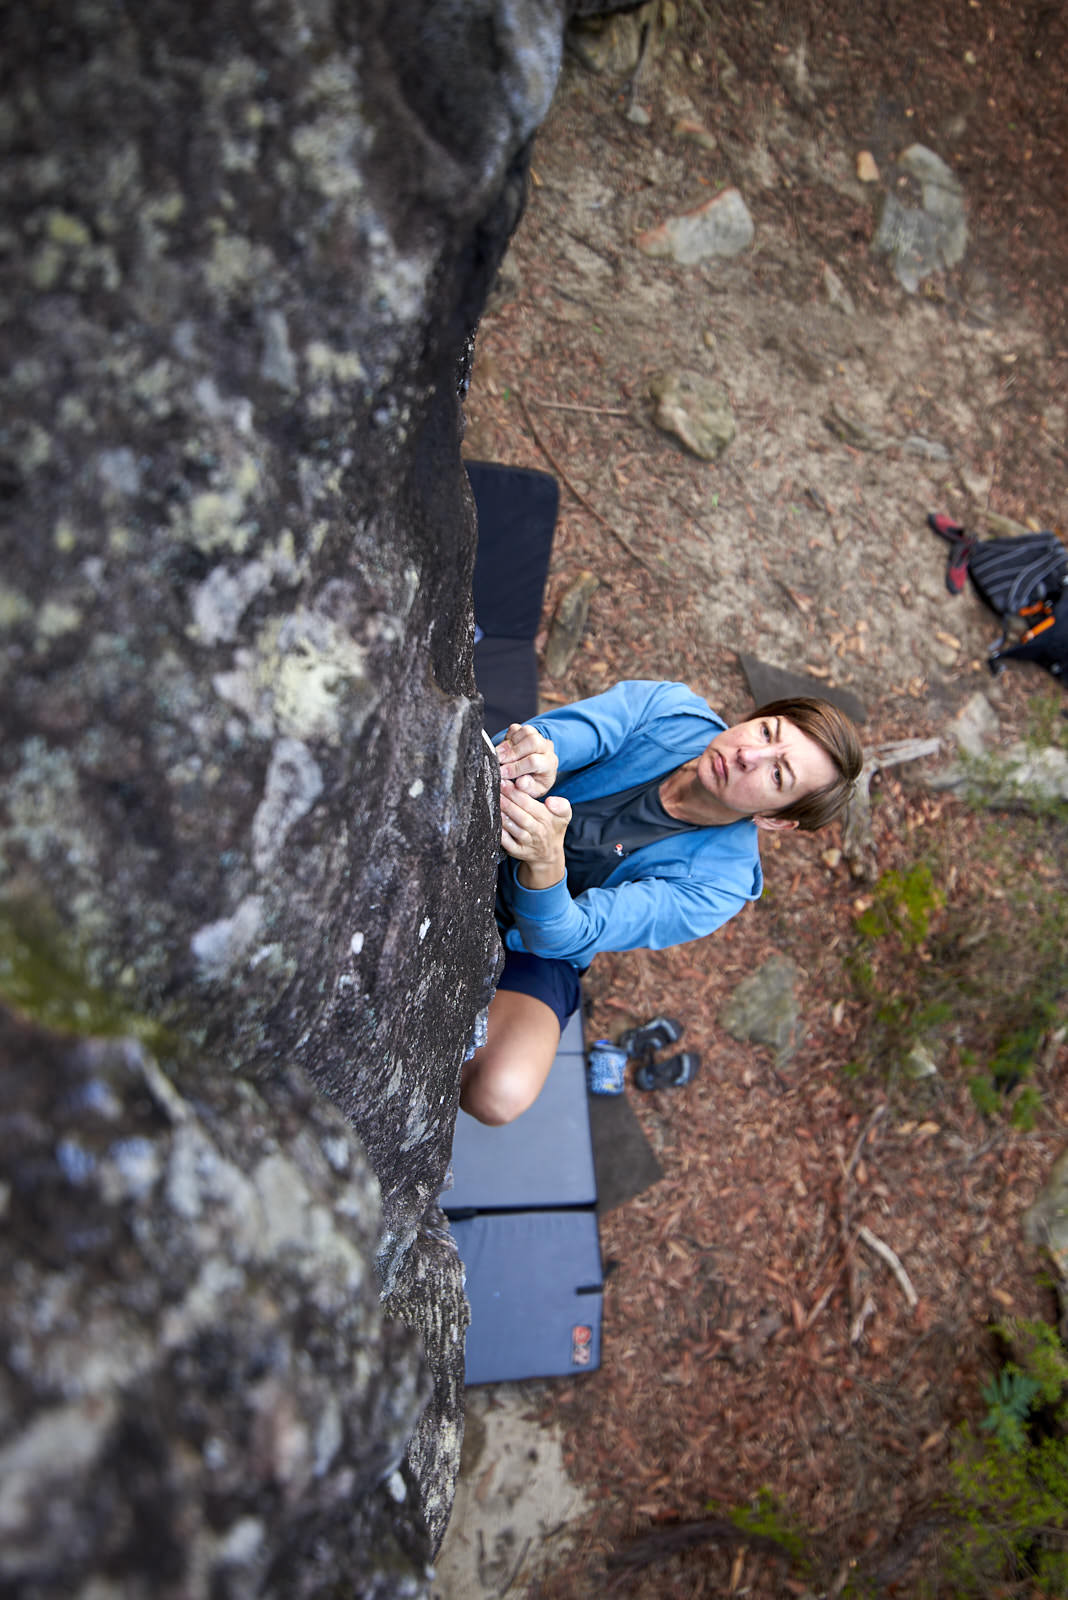
I love to get above the climber. You capture their face (climbers can make some interesting faces when things get hairy), their hands, and/or the holds. Plus, a climber’s feet tend to be pretty boring. And, once again, no butt shots.

NIKON D610 + Nikon AF-S NIKKOR 50mm f/1.8G @ 50mm, ISO 640, 1/160, f/1.8
NIKON D610 + Tamron SP 15-30mm f/2.8 Di VC USD (Nikon F) @ 26mm, ISO 100, 1/60, f/2.8
Recommended Camera Equipment for Bouldering Photography
I’m not going to delve too deeply into a discussion on camera bodies; if you’re reading a site like Photography Life, your camera is probably fine.
As a general guide, though, something with decent FPS and that can handle upping the ISO a bit to keep the shutter speeds high while in shadow will serve you well. I have a Nikon D610, and it’s been great, occasional moments of GAS notwithstanding (talking to you, D850).
For lenses, I tend to favour a wide-angle, as it enables you to get in close to the action while still capturing the climber and their surroundings.
My go-to is the Tamron 15-30mm f/2.8. The wide aperture really isolates the target and helps keep shutter speeds faster in shadowy conditions. And it’s built like a tank, which comes in handy when I bash or scrape it against rock as I jump around trying to find the best angle – which happens every single time I go bouldering.
The weight can be a lot when you’re hanging from a hold with the camera in one outstretched arm, trying to get an interesting angle, so you may want to go lighter, but for me, I know I’d end up breaking anything more delicate.
I’ve played around with Nikon’s “nifty fifty,” also (the 50mm f/1.8). It’s nice and light and brings that beautiful bokeh, but I keep coming back to the wide angle. I just think it gives the shots a sense of energy that a longer lens doesn’t always do.
NIKON D610 + Nikon AF-S NIKKOR 50mm f/1.8G @ 50mm, ISO 500, 1/800, f/1.8
A 24-70mm would serve you well, also – wide enough on one end, but can get in to capture details like the strain in a hand or an interesting hold. Plus it’s also a beast and would stand up to some serious abuse. Any of the other 24-whatevers would work, but might not stand up to the same level of punishment.
I definitely recommend using a hand strap over a neck strap, as every time I go out I end up hanging from a rock somewhere, arm outstretched and shooting blind as someone climbs. The hand strap means I can do that with a lot more comfort and am less likely to drop my kit in the process. Breaking stuff (cameras or people) is never a fun end to the day.
Include the Surrounding Scene
Getting in close can really capture the energy of a move or climb, but climbing tends to take place in some beautiful locations, so don’t forget to take a step back and look around.
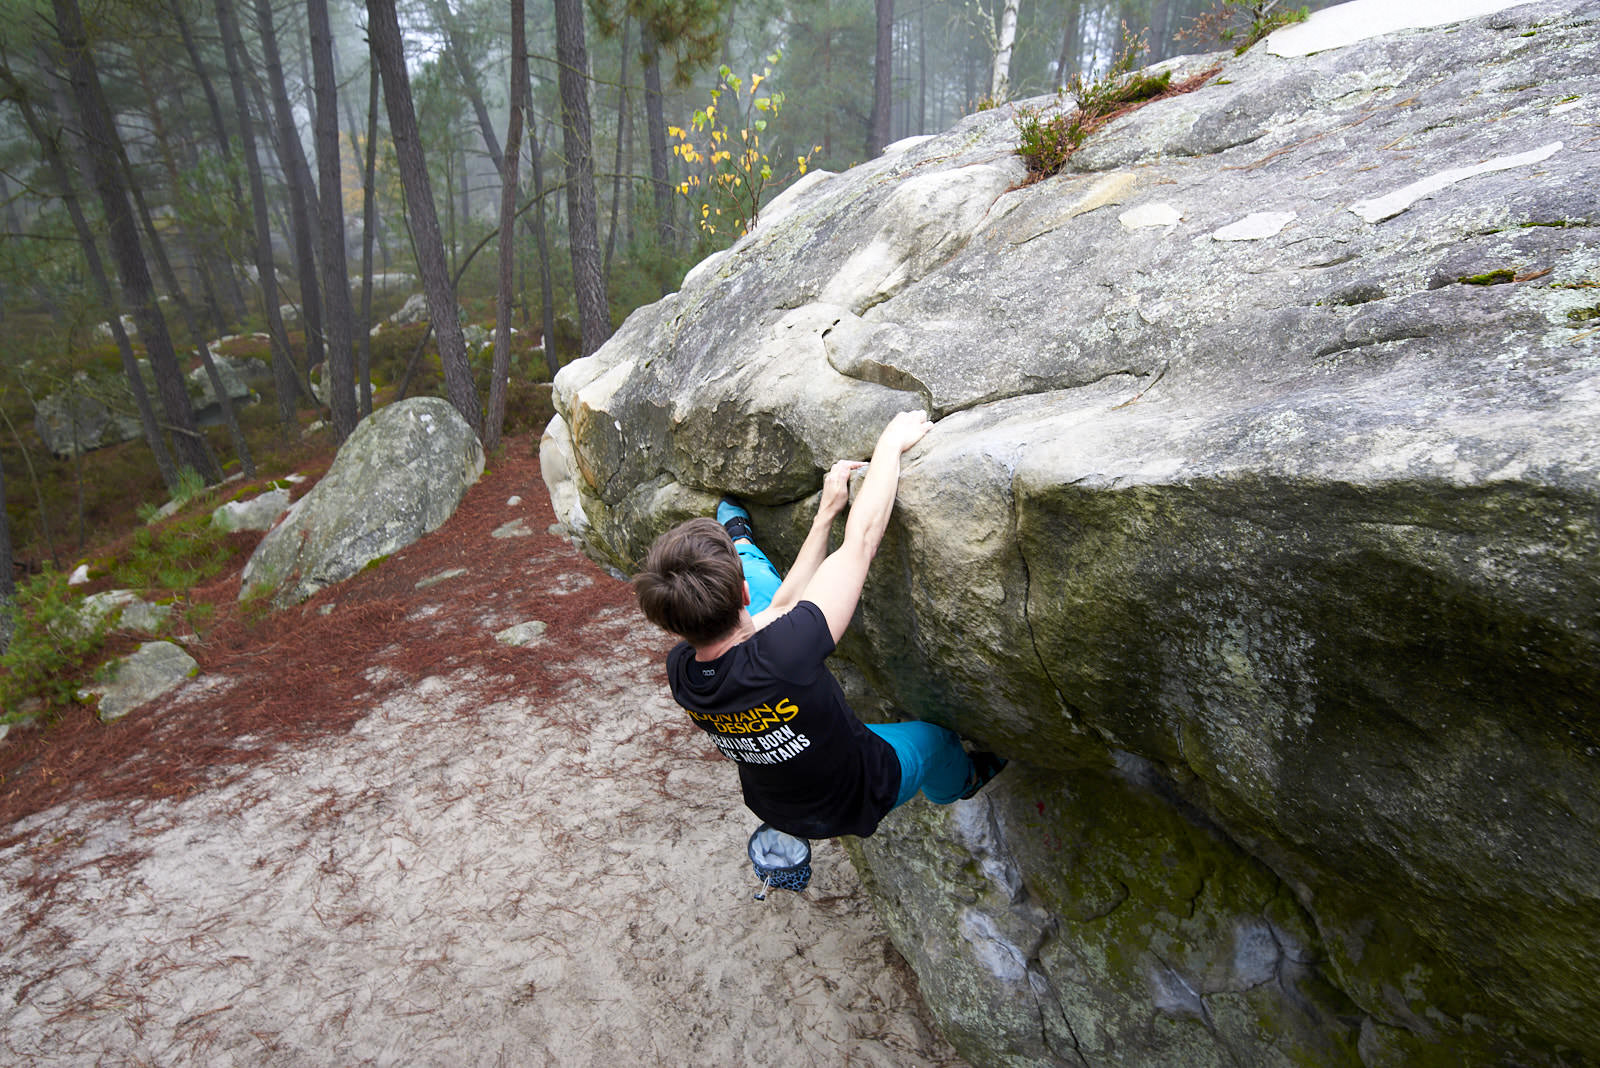
Stepping back can give more of a sense to an area – for instance, the jumble of rocks in the forest of Fontainebleau, France:
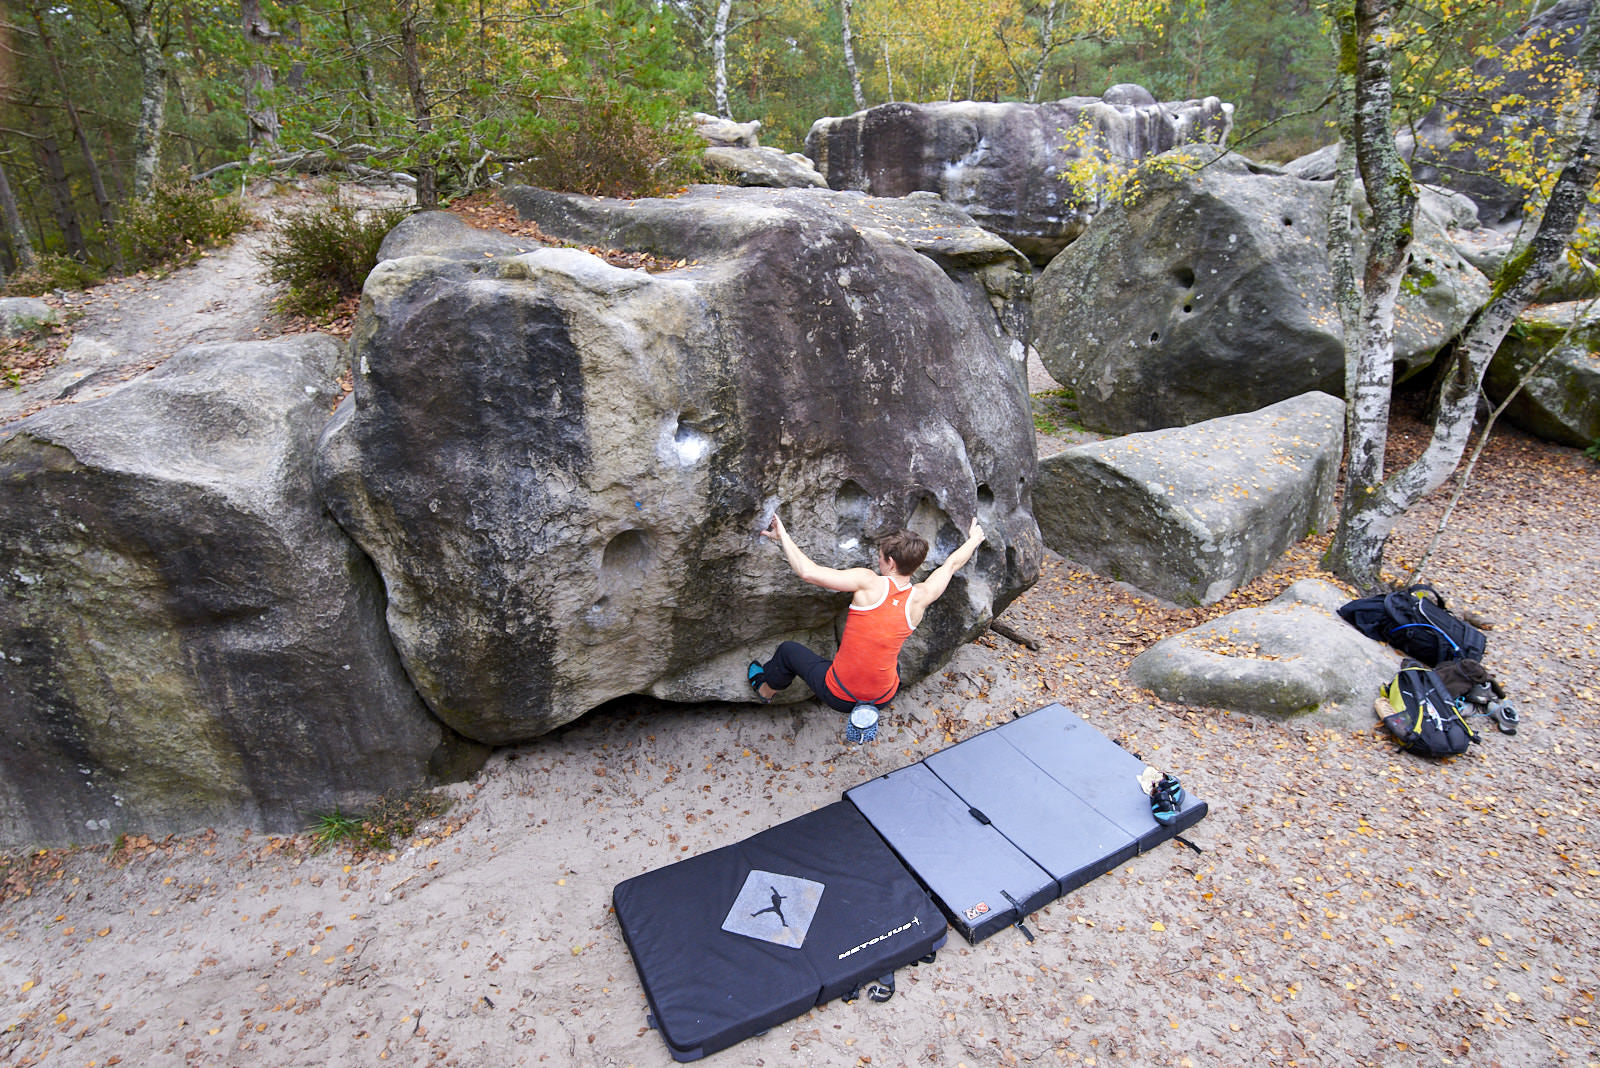
NIKON D610 + Tamron SP 15-30mm f/2.8 Di VC USD (Nikon F) @ 20mm, ISO 800, 1/125, f/5.6
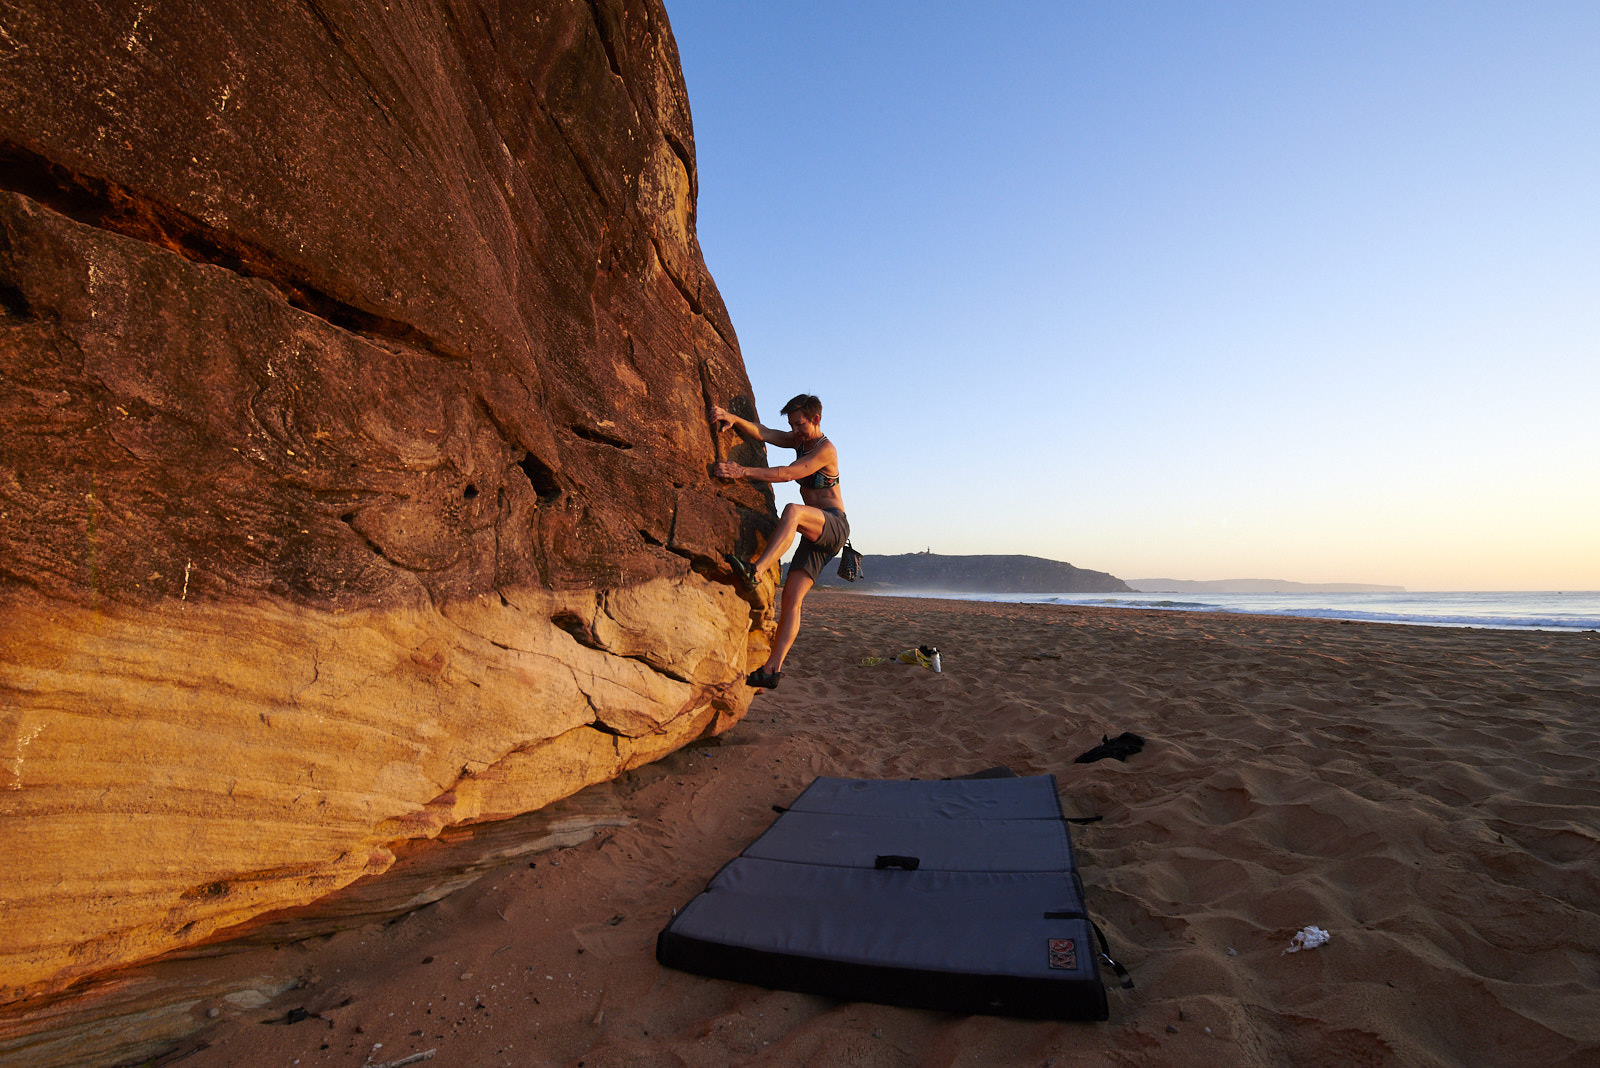
Sunrise warming the rock and sand at Palm Beach, Sydney, Australia:
Post-Processing Suggestions
This is a personal taste kind of thing, and there are plenty of articles PL that go into more detail than I’m capable of, but I thought it might be useful to include some basics. I use Capture One, as I really like the way it treats colours and the level of control it provides in the editing process, but this is pretty much like camera bodies – whatever you use is going to be fine.
In general terms, my editing workflow for bouldering tends to be along the lines of:
- White balance: Bring out the colour in the rock and trees, but don’t get too warm
- Brightness: If the climber is in shade, you might need to play with this. Depending on the shot, this could be for the whole image or using a layer to isolate the climber
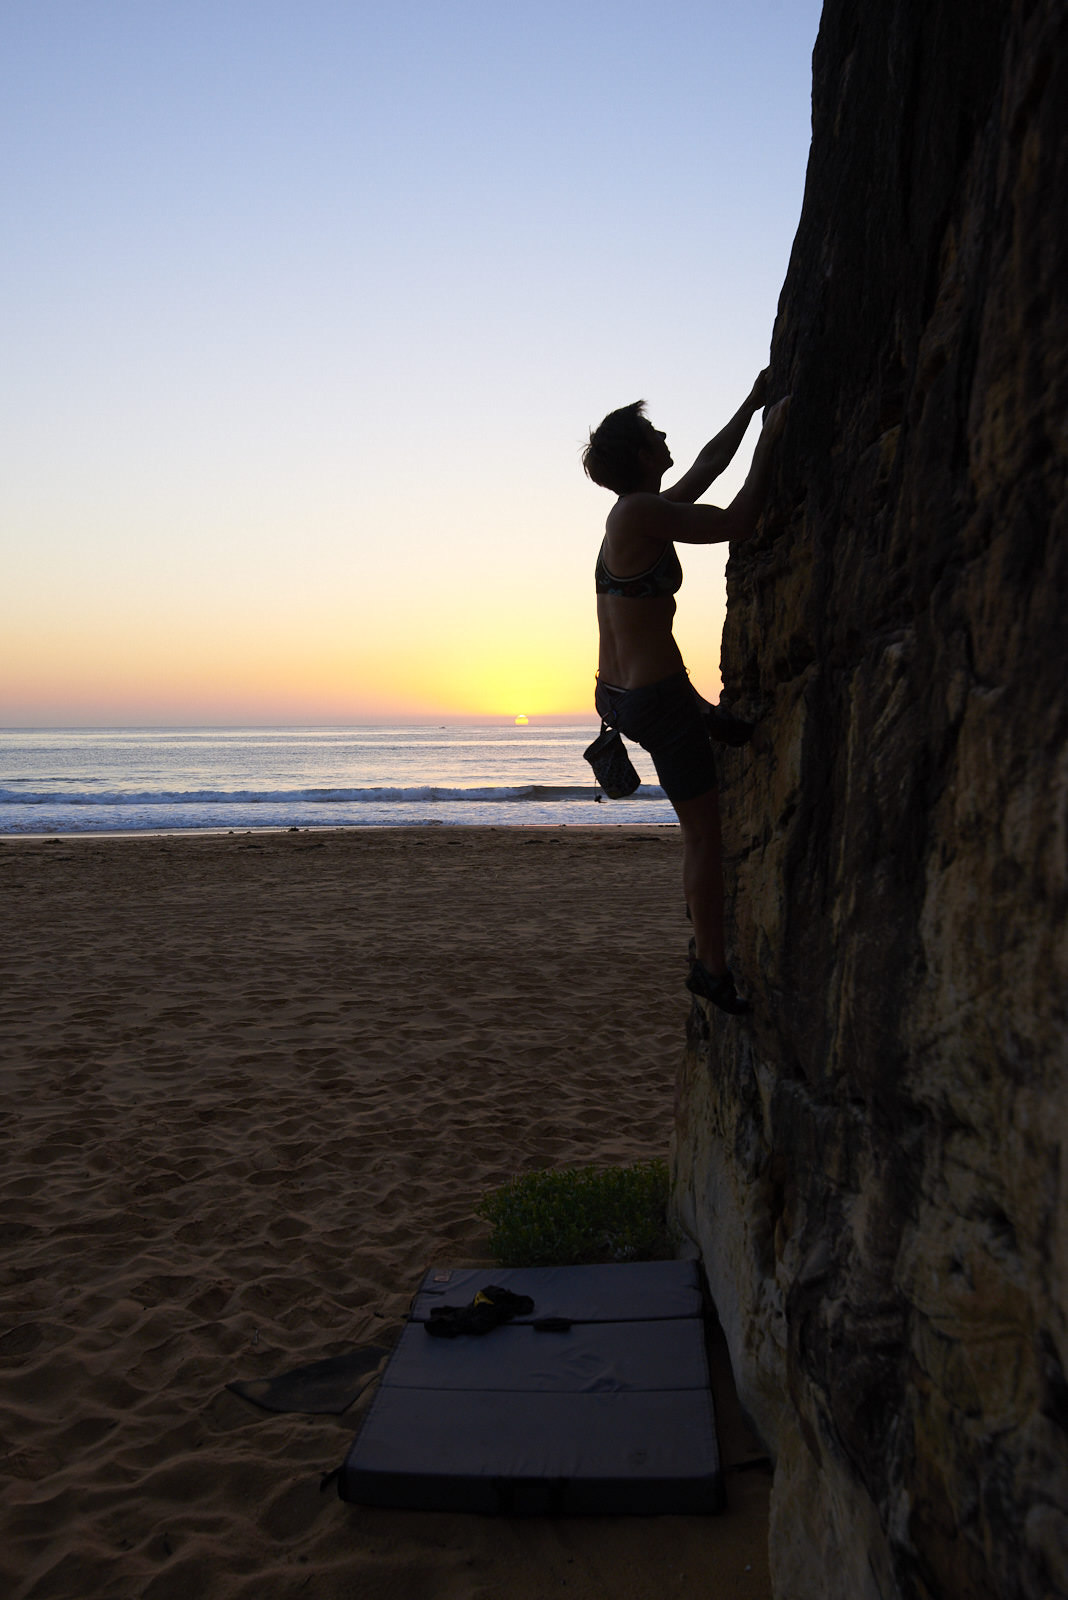
- HDR: It’s a personal preference, but I’m not keen on HDR-heavy images. That said, some tweaking of the shadows and highlights can really bring out the climber when you’re shooting from low in the shadows looking up at the sky. But keep it simple, as you can lose texture on the rock if you go overboard
- Levels/Curve: I tend to play with the Luma curve a little to bring out a bit of contrast without sacrificing colours
- Colour Editor: Depending on the image, I might tweak some of the colours to help them stand out, but for the most part, I tend to leave things as they are initially
There is, of course, plenty more you can do to your images, but the above is a good starting point and will help get more from each shot.
Plus, I’m usually pretty tired and sore after a good bouldering session and don’t feel like sitting at my desk for hours adjusting colours by tiny degrees. That cold beer earned from a hard day’s climbing won’t drink itself, you know…
Safety Tips
Please remember that rock climbing, while ridiculously fun, is a dangerous activity. Photographing it can be just as dangerous, as you tend to focus (hah!) on what you’re shooting instead of where you’re walking or standing.
Make sure you keep aware of your surroundings and remember that even the best photo is not worth a long wait in an emergency room.
Conclusion
Climbing is a fantastic sport. Some of the best people in my life (including my wife) have come to me through climbing. To be able to capture images of the sport and people that mean the most to me is an amazing experience. I hope you enjoy it as well!
Thank you to reader Neil Massey for this excellent article on photographing bouldering and climbing! If you would like to see more of his photos (including some very nice landscapes), please take a look at his website: Neil Massey Photography. You should also check out his Instagram page.
After reading one of the comments I really want to say that I enjoy those essays of “Tips for photographing XYZ”. I am always interested in different people talking about their favorite thing to shoot and sharing their tips about that! Please continue to post those essays.
I love photographylife, because there is a lot of content that is not gear related, really happy since I found this site, good work!
For problems with big dynos, set-up the focus at a precise point before the movement and then use the burst mode for trying to get a decent shot is a good solution. It’s hard to find some in Bleau (not the style of these place, except when you climb over 7B/7C) but when you can catch a decent posture, it’s really fun ! (And you can have the face AND a funny position.)
For climbing (and more generally for every sport) you need to understand how the spot “works”. Personally, I try to understand were the climber is going and what is hard in that problem. For example in Fontainebleau, holds are tricky and capturing hands and face of the climber is, imho, the most efficient composition to render the difficulty of the bouldering (and beauty of the [sand]stone). For big roofs and/or compressions, I use a wide angle to show the physical effort and the geometry of the place. And as I told, for dynos, burst mode for me.
Last but not least, bouldering contests can be fun to shoot (especially in Paris, with a huge concentration of strong climbers and route setters).
(Sorry for the awful english :s .)
(And thank you for the article !)
Thanks Straighrope, defintely some good points.
One of the many things I love about Bleau is it’s generally easy to get into a good position to take interesting shots and it’s fun just scrambling around over the tops of the boulders looking for the perfect position.
Next time we’re over in that part of the world i do want to get some shots of someone on Halle Bopp – now that’s a majestic dyno!
Rainboy rocket and La Puce (both around 8A, a bit harder than Halle Bopp) are pretty good dynos too !
I’ve forgotten another trick (because I’ve never tried it but I’ll soon) : taking a (telescopic) ladder to move near but above the climber. Eric Karlson Bouldering use this trick for his VLOG, and I thing it’s a good idea in order to find the good point of view.
All in all, the forest is magic, the atmosphere is incredible, so every photographe would find interesting pics to take.
Good article, thanks.
I assume the author, if not the entire readership of Photography Life, is aware that sometime PL contributor John Sherman was arguably the biggest name in late 80s/early 90s bouldering and is still one of the top contributors to its development and lore.
Thanks Stuart.
I’ll admit to being tempted to include a reference to John given his link to the site (and maybe a joke at the expense of the v-scale system as compared with the french and therefore automatically more elegant, grading system…) but figured that would probably just get me in trouble if he happened to have a say in the judging of the competition :)
Besides, the iconic verm image for me is beer, flip flops and punks in the gym!
There are more tools available today such as autofocusing, image stabilization and GoPro cameras. In the film days, cameras required manual focusing, 36 frames per roll of film, and limited fast zoom lenses. Galen Rowell is a good example of being a great photographer as well as an excellent climber. As you said climbing is a great sport but it also bring humility to ourselves when we are dangling several hundreds feet up the on ropes.
Thank you for sharing the great photos. I photographed rock climbers in Yosemite in the past and came to appreciate how hard it is to get great shots. Not only you have to be a competent climber for your own safety, you have to be a good photographer while suspended on several ropes. Lots of practice to overcome the “fear” of exposure and the possibility of getting hurt. Thus I have ton of respect for those photographers who excel under these circumstances.
Thanks Joe. There are definitely those moments where the brain goes “what are you doing?!”
Would love to get to Yosemite one day for both climbing and photography – must’ve been an amazing experience!
Cool Stuff. Bouldering in Boulder, CO back in the 80’s people would take photos, but not this good!!!
Cheers Eric! Boulder is definitely on my list of places to go and play on rocks at.
Hey — I was bouldering and climbing in Boulder in the ’80s! I only have a few photos from those days as I generally didn’t want to bring a camera along. It was hard enough doing the climb.
…checks photos…yep, there’s a few “butt shots”…
I am sure your website gives many people helpful advice but I would prefer to go to it when I require such advice and I am tired of receiving endless, unsolicited “tutorials” such as those shown above, from which it would seem that your ultimate ambition is to instruct every ignorant, would-be photographer in photographing every conceivable subject under the sun. What about “How to photograph milk spilt by the cat on the kitchen-floor,” as a future feature, or , say, “Gearing up for imaging the sausages and burgers at the in-laws’ next ghastly barbecue” ?
I have already asked to be “unsubscibed” – never having knowingly asked to be “subscribed, in the first place! – and would be grateful if my request could be actioned immediately. In case you aren’t aware, under new UK data protection laws, you are obliged to ask for addressees’ permission before sending them emails.
Good grief, can you not find the unsubscribe tab at the bottom of every email instead of complaining childishly like this on a public photography forum? Do you really need somebody else to do it for you? And while I am at it, just exactly what kind of essays do you expect to find on a photography website dedicated to photographers helping photographers? I wish you great success with your wish to unsubscribe immediately.
Hi Ian, although I second what Elaine said – you’re always welcome to unsubscribe on the bottom of the email, and there is no possible way for us to have gathered your address if you did not ask to be subscribed at some point – I do want to ask if you have any suggestions for improvements. Is it that you would like to receive fewer emails, and only when a certain type of content is posted on Photography Life? Or, is it that you would like to see more of a particular sort of article on Photography Life in the first place (and, what type)?
Our goal when publishing an article is usually to teach or enforce a new skill, suggest/review a particular piece of camera equipment, inform about news in the photo industry, or write an inspiring essay. We’re always open to new ideas to help us expand in the right direction so that as many readers as possible continue enjoying the site!
Although I will never climb I like to read how photographers deal with this or other or exotic subjects. If there comes an article about how to photograph milk spilt by the cat on the kitchen-floor I will probably enjoy to read. To unsubscibe is easy and the only thing here that has irritated me was the always returning pop-up subscribing venster but it has luckily disappeared. Thanks PL!
Thank you, Cees, we appreciate the feedback!
I think Mr White’s posting qualifies for the : Most ungracious comment of the year” award. I wonder who rattled his cage today.
Good tips but still waiting for the guide on photographing photographers taking photographs.