The Ultimate PC Build for Photography Needs

Thanks to the super high-resolution sensors we see today in digital cameras, a fast computer is absolutely essential for an efficient post-processing workflow when working with RAW images. If a few years back a standard PC or a mid-range laptop was good enough for post-processing images, 30+ MP RAW files can put a huge burden on processing power and make a high-end machine seem obsolete. In addition, most commercial software targeted at professionals has also gotten pretty heavy, requiring more memory, faster storage and high-end CPUs and GPUs for a smooth, delay-free experience. Having spent most of my adult life in information technology, I have always been building my own PCs. In my recent articles and reviews of storage equipment, a number of our readers asked me to share my preferences for a solid, future-proof PC build that could take pretty much anything you throw at it for post-processing large numbers of RAW images and video. In this article, I want to talk about the ultimate PC build for photography and other needs, and discuss my personal preferences for working with Lightroom catalogs and RAW files in terms of file management and performance optimization.

I will be presenting two different builds – one based on a full tower case, which gives a lot of flexibility in terms of space, storage and future expansion options, and one based on a very compact build for a lightweight setup that occupies minimum space. Although I have always been using large cases, I have been leaning towards more compact options lately – primarily because it is now possible to build small, but powerful machines.

Here is how you can build a powerful PC for Photography Needs:

  1. Choose the Latest Chipset and CPU
  2. Choose a CPU cooler
  3. Choose a feature-rich Motherboard
  4. Choose fast RAM (at least 32 GB)
  5. Choose M.2 PCIe NVMe Drive for primary storage
  6. Add SSD / HDD Storage for photos
  7. Pick a fast-enough Video Card
  8. Choose a powerful and efficient PSU
  9. Choose the right size Case
  10. Choose an IPS Monitor

We will go through the above steps in the next pages, depending on the type of PC build you want to make. Please keep in mind that components for the older builds might no longer be available, but if that’s the route you want to take for whatever reason, you should be able to buy them on the second-hand market for a very low price.

Buying vs Building

Most photographers I know are not computer-savvy and the idea of building a PC is something that scares the heck out of them. Because of this, they would rather buy a retail computer, or a computer that has already been built by someone else. While building a computer can indeed be a bit technical and time consuming, it is not a very complicated process! As long as you don’t mind some DIY work, you could save hundreds of dollars by doing it yourself. Once you are done, you will have a much better idea about how computers work and how you can troubleshoot them in the future, which is another plus. There are lots of simple video tutorials on YouTube that you can follow and get your machine get up and running without needing any kind of assistance. And if you do end up needing some help, I am sure you can find someone in your family who can give you a hand. Worst case scenario, you can visit a computer store or any electronics store like Best Buy, which will have the geeks to assist you in the process.

There are many advantages to building your own computer. You can customize the machine in any way you want, get the right components that fit your particular needs and once you know your way around, you can easily upgrade computer parts in the future by yourself, without having to buy a brand new machine.

So don’t be scared – you can do it!

Architecture

Bringing up Intel vs AMD can sometimes spark up debates among PC enthusiasts, similar to what we see when one brings up Nikon vs Canon. My choice has pretty much always been Intel as my preferred architecture, and I have never looked back or regretted this choice, since Intel has been rock-solid in every build I have had. Taking a quick look at this chart from CPU Benchmark reveals that Intel has been dominating the performance benchmarks for a while now. However, AMD’s newest processors have shown that competition is great in the CPU market and some processors such as the AMD Ryzen 7 2700X have a lot of great value when compared to Intel, especially for a photography PC build!

M.2 NVMe vs SSD

If you have been using an SSD drive and have been impressed with its performance, you have only touched the surface when it comes to extreme storage performance. The new generation M.2 NVMe drives deliver up to 32 Gb/s speeds, which is a boatload faster than 6 Gb/s limit of the SATA interface to which traditional SSD drives attach. So there is simply no comparison between SSD and M.2 NVMe – some of the best M.2 drives today can deliver up to 3,500 MB/s sequential read speed, while the best SSD drives will cap at 500 MB/s, if that. That’s over 7x performance you would be getting with an NVMe drive! So imagine booting up your operating system in a matter of seconds and using that extreme performance for cashing and other read/write-intensive operations. You know where your Lightroom catalog would live…

SSD / HDD / External Storage Considerations

In addition to the M.2 drive(s), which will be hosting your Lightroom catalog, my recommendation is to get fast SSD drives for storing photos. I know many of our readers will disagree with this because photos can be stored on regular spinning drives as well (which are often fast enough). However, ever since I started using SSDs for storing RAW files, I would have a hard time switching back. Keep in mind that whenever you open and make changes to a RAW/DNG file, Lightroom still needs to access it. And if you put those RAW files in faster storage, your access time will decrease and you will see pretty noticeable performance benefits.

For many, going with all-SSD storage is cost-prohibitive. You certainly do not get as much storage as you can with spinning drives either, so that’s another drawback. If you do not have an external storage array and you are planning to have all your images on your computer’s storage, my recommendation would be to add a couple of large capacity hard drives that you can use in a RAID 1 / mirror configuration to prevent loss of data if one of the drives were to fail.

My personal preference is to store current year photos (the ones I actively edit) in SSD storage and move everything else to slower, network-based Synology DS1819+ (see my detailed review of the DS1817+), which is absolutely amazing as a home server. I use the Synology DS1817+ heavily in my environment and Lola and I often access photos from multiple computers, which is very convenient. When she is done editing, we move multiple catalogs to shared storage, merge them there and copy back to our computers, keeping full backups in the common storage.

Lightroom Workflow

If you are planning to use M.2 NVMe storage, your best bet is going to be to place your Lightroom catalog(s) in the M.2 NVMe drive, for any of the builds presented in the article. Although the Lightroom catalog will be located together with your boot volume, I would not be concerned with such a setup – you still want to give the catalog the fastest space you have on your computer. While the catalog itself does not need much speed, the preview files will be loading from the same volume where the catalog is located and that’s where the M.2 read speed comes into play – it will be super fast!

Your photos should not reside in the same volume. I would recommend putting your photos in a separate volume. If you go with SSD drives, put the photos there – RAW files will load instantly and working on those high-resolution images will give you the best experience. Now if you want to work really fast without waiting for any previews to generate, especially when you want to view the full-size version, my recommendation is to generate full-size JPEG previews, as pointed out in this article:

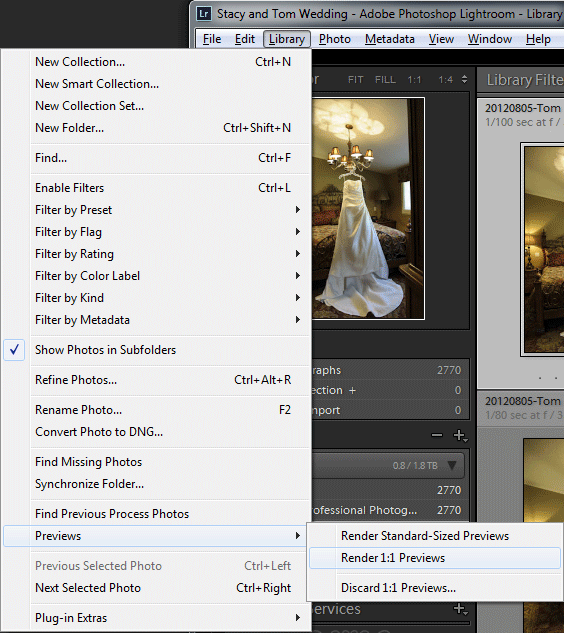
Once the files are in the SSD volume, generating full previews should not take a lot of time, considering how fast this PC and your storage are. But it is definitely worth the effort! I have been rendering full-size JPEG previews upon import.

If you run into space issues, it means that your catalog is probably too big and you have too many photos. I would recommend to reorganize your catalog and start splitting your work by year, as recommended in my article on organizing photos in Lightroom.

Now that we have all that out of the way, let’s get started. Please note that I separated different builds to different pages, with the latest architecture on the next page of this article – that’s where I will be placing the latest build going forward.

Update: Big thanks to Mr. Coen for providing lots of additional information on the components for the system. Please see the comments section of this article for more details!

While we are still waiting for Intel to release its 10nm Cannon Lake processors, Coffee Lake got another refresh with the 9th generation Intel CPUs, led by such superb processors as the Intel Core i9-9900K. Although at this time it might make more economical sense to go with the AMD Ryzen CPU for our PC build for photography needs, I decided to go ahead and include an Intel build anyway, for those who want to stay with Intel as their architecture. Let’s not forget that older 300-series chipset motherboards are compatible with the 9th generation Intel processors (after a firmware update), so instead of replacing both the motherboard and the CPU, some of our readers might be able to move up to a faster processor while keeping the same motherboard. The latest 9th generation Coffee Lake refresh offers more cores, threads and cache than the 8th generation processors, so they are definitely faster in multi-core applications. You might not see drastic improvements in day-to-day computer use for basic tasks within Lightroom and Photoshop, but for high-intensity workloads that involve large file exports, stitching panoramas and rendering videos in Premiere, the differences are going to be quite noticeable.

If you already own a 300-series chipset motherboard, make sure to flash your motherboard firmware with the latest version in order to make it compatible with 9th generation Intel CPUs. If you own an older 100 or 200-series chipset motherboard, you will need to upgrade both the CPU and the motherboard, and if you want to bring up the whole rig up to speed, you might need to upgrade your RAM as well. All other components should be perfectly compatible.

As before, I will be presenting two different builds – one based on a full tower case, which gives a lot of flexibility in terms of space, storage and future expansion options, and one based on a very compact build for a lightweight setup that occupies minimum space. Although I have always been using large cases, I have been leaning towards more compact options in the past few years, primarily because it is now possible to build small, but powerful machines. However, you do have to make sure that you take into account proper cooling and airflow, which is a must-have if you are planning to take advantage of fast M.2 NVMe drives (as explained further down below).

1) Chipset and CPU

For this build, I decided to go with the Z390 chipset, paired with the Intel Core i9-9900K CPU beast (Amazon). Why Core i9-9900K instead of Core i7-9700K? Because for less than $100 difference, the performance difference between the two is quite big. And since this is going to be the “Ultimate PC Build”, we are going to use the best price / performance ratio desktop CPU Intel offers today. With its base clock speed of 3.6 Ghz, 8 CPU cores and 16 threads, this CPU will be able to handle any photo or video task you throw at it! Now that most post-processing software is able to take advantage of multi-core CPUs (see Lightroom Performance Comparison), you will surely feel the difference, especially when performing CPU-intensive tasks. In terms of expense, our budget is still $2K for this build and although we are spending more money on the CPU, we are going to be able to save on other components that have gotten less expensive in the past year.

As for the CPU cooler, I don’t think there is a better air cooler than the Noctua NH-D15, which has dual 140mm fans. Unfortunately, such a massive fan is not going to work for the compact build, which is why it is going to be best to pick something much more compact, such as the Noctua NH-L9I.

2) Motherboard

With the Coffee Lake platform being pretty mature at this point, there are lots of great motherboard options available for the Z390 chipset at the moment from many different manufacturers. When building PCs, I don’t bother with picking either a low or a high-end motherboard, since the best value is in the mid-range. I don’t look for fancy motherboard features that are not needed for photography needs. As long as the motherboard has a good layout with at least two M.2 slots and good connectivity options, it should work out great. As for the choice of brand, I have tried many different brands including ASUS, MSI, Gigabyte, ASRock, Intel and SuperMicro. For the past few builds, I have been using ASUS and ASRock motherboards, which have been both very stable and reliable brands to work with.

Based on the above, the below two motherboards are my top contenders for the builds:

3) M.2 NVMe SSD Selection

As with the earlier builds, I will be including an M.2 PCIe NVMe SSD drive as part of the build. If you don’t know much about M.2 NVMe drives, you should do some research and understand what you have been missing all these years. M.2 NVMe drives are incredibly fast – there is simply no comparison between SSD and M.2 NVMe SSD! Some of the best M.2 NVMe SSD drives today can deliver up to 3,500 MB/s read speed, while the best SSD drives will cap at 500 MB/s, if that. So imagine booting up your operating system in a matter of seconds and using that extreme performance for cashing and other read/write-intensive operations. Take a look at my NVMe vs SSD vs HDD article for more details. You know where your Lightroom catalog would live!

When shopping for M.2 drives, you must make sure to buy NVMe and not SATA drives (M.2 is just a form factor).

One of the best M.2 NVMe SSD drives on the market today is the Samsung 970 PRO NVMe. With an impressive 3,500 MB/s read speed and up to 1,200 TBW endurance, this drive is not only fast, but it will also serve you for many years to come. You could also save a few bucks and get the slightly slower / lower-end Samsung 970 EVO NVMe, but to be honest, $10 difference is very minimal, so I would just go with the 970 Pro version.

Size-wise, I would not settle for anything less than 500 GB. NVMe prices have come down significantly in the past year and if you can stretch the budget a little, I would recommend to go for a 1 TB drive instead. Yes, that’s pricey, but RAW files are only getting bigger and your image catalog is probably growing fast too. Once you start generating those 1:1 JPEG previews to boost your workflow, you will need even more storage space.

One word of caution – these M.2 NVMe SSD drives get incredibly hot. In fact, I have reported about my Samsung M.2 NVMe failure and I have seen other people report overheating issues as well, especially in smaller and tighter cases with insufficient airflow. When building the PC, make sure that you are not placing the M.2 drive in odd locations where there is insufficient airflow. Make sure to keep it somewhat isolated from other hot peripherals, and ideally, place a fan on your case so that it directly blows on the unit (a side case fan would do a good job at this). In addition, make sure that the airflow is properly regulated, so that the air that gets sucked from the front of your case goes out from the back and there is nothing on the back of your computer that is blocking that air.

Another option is to install a heatsink that would help dissipate the heat coming from these M.2 drives. I would not recommend to remove the label from the Samsung drives, as doing so will void your warranty. However, some heatsinks can be installed on the drive without removing the sticker and you should definitely look into those options. While I personally haven’t installed heatsinks on my M.2 drives, others report success with using them. Here is an example of an M.2 heatsink that is specifically designed for M.2 NVMe drives.

4) SSD / HDD Storage

If you don’t mind the high price tag, my top choice would be the Samsung 860 EVO 2 TB SSD (Amazon) drives. Until larger capacity SSD drives hit the market, the 2 TB 860 EVO gives the best value at the moment, going for around $300 a pop. If budget is an issue and you don’t mind going with a lower capacity 1 TB SSD drive, the 860 EVO 1 TB SSD is currently selling for less than $150.

If you find other brand SSD drives with similar performance, those might be worth looking into as well – sometimes you will find great deals on Crucial, Intel, SanDisk and other brand SSDs. Another advantage of SSD is that you won’t have to worry about heat dissipation issues, as they do not get as hot as M.2 NVMe or regular hard drives.

If you have a lot of photos that you like keeping on the same volume and you do not want to buy expensive 1-2 TB SSD drives, then go for two 8+ TB hard drives. Just make sure that you don’t buy one of those green drives – go for 7200 RPM drives with a good amount of cache, similar to Seagate 8 TB IronWolf. For the full tower build, I would recommend to get four of these drives to use as backup / RAID 1 / RAID 5 storage if you have a lot of photos to store. If you need more, it is always ideal to go for an external storage array, as explained in my Storage Considerations for Photographers article.

5) RAM

Just like with the previous Coffee Lake build, you will need to go for DDR4 memory, and depending on whether you are building a full tower build or a compact build, you will need to get between two to four RAM sticks. Personally, I would go for at least 32 GB of RAM (choose 2×16 GB sticks for either build). If you want to future-proof your build, go with a 64 GB configuration. If you stitch huge panoramas, you will benefit from a 64 GB+ configuration. It is also worth noting that the performance of the Coffee Lake build will scale better with faster RAM, so the higher the clock speed, the better.

Here are a couple of good options I found:

6) Video Card

Since Lightroom and many other applications can take advantage of GPU rendering, the speed of your video card certainly does play a role in how fast applications render images / video and respond. If you want to take advantage of this additional benefit, I would get a solid video card that can easily handle the load. While those with deep pockets and a desire to run a 30-bit workflow should look into NVIDIA’s Quadro-series video cards (which can get pretty expensive), I would recommend GTX-series video cards for most photographers instead. My top pick for this build is the NVIDIA GeForce RTX 2060, which is a beast of a video card that can handle anything you throw at it, including the latest high-end games. Here are my two top recommendations:

I chose a smaller profile video card for the compact build, because it leaves plenty of space for cooling and cables.

7) Power Supply

Lots of options for power supplies too and you certainly want to make sure to get a solid power supply that is modular. With a modular power supply, you only add as many cables as you require and you don’t end up with a lot of dangling cords inside the case. My personal favorite has been Corsair CX and RM series PSUs, which are solid performance and are of great value. Here are the two I would recommend for the two setups:

8) Case

Now that we have picked a motherboard, CPU, PSU, RAM, storage and a video card, it is time time to pick a case for each setup. Again, the below choices are based on my personal preferences. If you like other brands and models, please feel free to share you opinion in the comments section below.

9) Monitor

Although a monitor is optional and you can use the current monitor you already have, having a nice 4K monitor with an IPS panel would be sweet for such a high-end setup. I have been personally using Dell’s and BenQ’s IPS monitors for the past few years for photo editing and I like them, but they do have their problems as highlighted in our article on calibrating Dell monitors.

If your budget allows, go for a solid NEC PA-series monitor like the NEC PA243W. While it does not have 4K resolution and other fancy features, it is a superb professional monitor with excellent color reproduction and hardware calibration options. If you can step up to a 27″ monitor, the NEC PA271Q is also a superb choice.

10) Assessing the Damage

Let’s take a look at both setups and assess the damage:

Component TypeComponent ChoicePrice
CPUIntel Core i9-9900K$495
CPU CoolerNoctua NH-D15$90
MotherboardASRock Z390 Phantom Gaming 9$219
2x M.2 NVMe SSDSamsung 512 GB 970 Pro NVMe M.2$320
SSD Drive (Optional)Samsung 860 EVO 2 TB$298
2x HDD Drives (Optional)Seagate 8 TB IronWolf 7200 RPM$498
RAMBallistix Sport LT 32GB DDR4 3000 (2x16GB)$184
Video CardZOTAC GeForce RTX 2060$350
Power SupplyCorsair RM650x$90
CaseNZXT H500i$96
GRAND TOTAL (WITHOUT MONITORS AND OPTIONAL STORAGE)$1,844

Thanks to decreasing PC part costs, we were able to build an incredible machine for around $1,850, well under the $2K budget!

Now let’s take a look at our compact configuration:

Component TypeComponent ChoicePrice
CPUIntel Core i9-9900K$495
CPU CoolerNoctua NH-L9I$40
MotherboardASRock Z390 Phantom Gaming ITX$199
2x M.2 NVMe SSDSamsung 512 GB 970 Pro NVMe M.2$320
SSD Drive (Optional)Samsung 860 EVO 2 TB$298
RAMCorsair Vengeance LPX 32GB DDR4 2666 (2x16GB)$140
Video CardeVGA GeForce RTX 2060 SC$345
Power SupplyCorsair RM550x$110
CaseCooler Master Elite 130 mini-ITX$50
GRAND TOTAL (WITHOUT MONITORS AND OPTIONAL STORAGE)$1,699

Just like the full tower PC, this small-factor PC will obliterate pretty much anything out there. The setup is pretty much identical to the full tower, except you are going for a smaller PSU and case.

Please note that I did not include the cost of the operating system.

Intel’s Coffee Lake architecture has been out for a while now and Cannon Lake seems to continue to be delayed, so it is time for another refresher to our ultimate build series, focusing on a very fast machine that should be able to handle pretty much anything you throw at it, including stitching large panoramas in Lightroom. While both Coffee Lake and Kaby Lake have a lot of similarities and they rely on the same microarchitecture, Coffee Lake processors are faster and come with even more cores and threads, making them more desirable to invest in. They also require different chipsets to work. For example, the Kaby Lake CPUs work on 100 and 200-series chipsets, whereas Coffee Lake CPUs require newer 300-series chipsets. This means that if you want to upgrade from a Kaby Lake build, you will need to replace both the CPU and the motherboard. For the below builds, I will assume that you are building a new machine from scratch. If you are upgrading, then keep in mind that in addition to changing the CPU and the motherboard, you might also need to upgrade your RAM, depending on how old your machine is. All other components should be perfectly compatible.

As before, I will be presenting two different builds – one based on a full tower case, which gives a lot of flexibility in terms of space, storage and future expansion options, and one based on a very compact build for a lightweight setup that occupies minimum space. Although I have always been using large cases, I have been leaning towards more compact options lately – primarily because it is now possible to build small, but powerful machines. However, you do have to make sure that you take into account proper cooling and airflow, which is a must-have if you are planning to take advantage of M.2 NVMe drives (as explained further down below).

1) Chipset and CPU

For this build, I decided to go with the Z370 chipset, paired with the Intel Core i7 8700K CPU (Amazon). This is a very powerful combination to go with, which should prove to be a worthwhile investment in the long run. With a total of 6 CPU cores and 12 threads, this CPU is far more capable compared to the Kaby Lake 7700K CPU that has 4 cores and 8 threads total, especially when it comes to applications that are optimized for multi-core performance. Speaking of which, that’s what Adobe has done with its latest Lightroom release, showing significant performance improvements when using beefier CPUs, as shown in my Lightroom Performance Comparison. While before it made sense to go with CPUs that had higher clock speeds, now that Adobe and other manufacturers are moving towards optimizing their applications to deliver better performance with more cores, it is better to invest in CPUs with as many cores as possible. In this sense, the Coffee Lake Intel Core i7 8700K will deliver a noticeable boost in performance when compared to its predecessors, even when compared to Kaby Lake.

As for the CPU cooler, I don’t think there is a better air cooler than the Noctua NH-D15, which has dual 140mm fans. Unfortunately, such a massive fan is not going to work for the compact build, which is why it is going to be best to pick something much more compact, such as the Noctua NH-L9I.

2) Motherboard

With the Coffee Lake platform being pretty mature at this point, there are lots of great motherboard options available for the Z370 chipset at the moment from many different manufacturers. When building PCs, I don’t bother with picking either a low or a high-end motherboard, since the best value is in the mid-range. I don’t look for features such as WiFi and Bluetooth, since those are not needed for photography needs. As long as the motherboard has a good layout with at least two M.2 slots and good connectivity options, it should work out great. As for the choice of brand, I have tried many different brands including ASUS, MSI, Gigabyte, ASRock, Intel and SuperMicro, and I always keep coming back to ASUS. For the past few builds, I have been using ASUS and ASRock motherboards, which have been both very stable and reliable brands to work with.

Based on the above, the below two motherboards are my top contenders for the builds:

3) M.2 NVMe SSD Selection

As with the earlier builds, I will be including an M.2 PCIe NVMe SSD drive as part of the build. If you don’t know much about M.2 NVMe drives, you should do some research and understand what you have been missing all these years. M.2 NVMe drives are incredibly fast – there is simply no comparison between SSD and M.2 NVMe SSD! Some of the best M.2 NVMe SSD drives today can deliver up to 3,500 MB/s read speed, while the best SSD drives will cap at 500 MB/s, if that. So imagine booting up your operating system in a matter of seconds and using that extreme performance for cashing and other read/write-intensive operations. Take a look at my NVMe vs SSD vs HDD article for more details. You know where your Lightroom catalog would live!

When shopping for M.2 drives, you must make sure to buy either NVMe or AHCI and not SATA drives (M.2 is just a form factor).

Without a doubt, the best and the most popular choice for M.2 NVMe SSD drives is the Samsung’s 960 PRO NVMe. With an impressive 3,500 MB/s read speed and 2,100 MB/s write speed, this is one of the fastest drives you can buy today. If you don’t mind the slower write speeds, the Samsung 960 EVO NVMe drives are also great and cost a tad cheaper.

Size-wise, I would not settle for anything less than 500 GB. Yes, that’s pricey, but 250 GB won’t cut it for large catalogs, especially if you are planning to generate full size JPEG previews (and you should, if you want ultra-fast Lightroom performance – see this article for more details).

One word of caution – these M.2 NVMe SSD drives get incredibly hot. In fact, I have reported about my Samsung M.2 NVMe failure and I have seen other people report overheating issues as well, especially in smaller and tighter cases with insufficient airflow. When building the PC, make sure that you are not placing the M.2 drive in odd locations where there is insufficient airflow. Make sure to keep it somewhat isolated from other hot peripherals, and ideally, place a fan on your case so that it directly blows on the unit (a side case fan would do a good job at this). In addition, also make sure that the airflow is properly regulated, so that the air that gets sucked from the front of your case goes out from the back.

Another option is to install a heatsink that would help dissipate the heat coming from these M.2 drives. I would not recommend to remove the label from the Samsung drives, as doing so will void your warranty. However, some heatsinks can be installed on the drive without removing the sticker and you should definitely look into those options. While I personally haven’t installed heatsinks on my M.2 drives, others report success with using them. Here is an example of an M.2 heatsink that is specifically designed for M.2 NVMe drives.

4) SSD / HDD Storage

If you don’t mind the high price tag, my top choice would be the Samsung 860 EVO 1 TB SSD (Amazon) drives. Until faster and larger drives hit the market, the 1 TB 860 EVO gives the best value at the moment, going for just $280 a pop. If budget is not an issue and you want to double that storage, the 2 TB version currently retails for around $650.

If you don’t have a lot of photos, go for the 500 GB version instead, which is much cheaper. Why not go for the 860 Pro series? Because it is overkill for photo storage in my opinion. However, if budget is not an issue, go for the 860 Pro line instead, as you will get a bit more performance and a better warranty out of those. If you find other brand SSD drives with similar performance, those might be worth looking into as well – sometimes you will find great deals on Crucial, Intel, SanDisk and other brand SSDs. Another advantage of SSD is that you won’t have to worry about heat dissipation issues, as they do not get as hot as M.2 NVMe or regular hard drives.

If you have a lot of photos that you like keeping on the same volume and you do not want to buy expensive 1-2 TB SSD drives, then go for two 8+ TB hard drives. Just make sure that you don’t buy one of those green drives – go for 7200 RPM drives with a good amount of cache, similar to HGST 8 TB drives. For the full tower build, I would recommend to get four of these drives to use as backup / RAID 1 / RAID 5 storage if you have a lot of photos to store. If you need more, it is always ideal to go for an external storage array, as explained in my Storage Considerations for Photographers article.

5) RAM

Just like with Kaby Lake, you will need to go for DDR 4 memory for this Coffee Lake build, and depending on whether you are building a full tower build or a compact build, you will need to get between two to four RAM sticks. Personally, I would go for at least 32 GB of RAM (choose 2×16 GB sticks for either build). If you want to future-proof your build, go with a 64 GB configuration that can handle anything you can throw at it. If you stitch huge panoramas, you will benefit from a 64 GB+ configuration. It is also worth noting that the performance of the Coffee Lake build will scale better with faster RAM, so the higher the clock speed, the better. Unfortunately, RAM prices have gone up significantly in the past year thanks to the crazy cryptocurrency mining business, so if 64 GB is too expensive, just go for a 32 GB build for now, then you can add more RAM later when the prices get lower (hopefully). To make this work, make sure to get 2x 16 GB sticks. If you go for 4x 8 GB sticks, you will have to replace all memory later, which will cost you.

Here are a couple of good options I found:

6) Video Card

Since Lightroom and many other applications can take advantage of GPU rendering, the speed of your video card certainly does play a role in how fast applications render images / video and respond. If you want to take advantage of this additional benefit, I would get a solid video card that can easily handle the load. While those with deep pockets and a desire to run a 30-bit workflow should look into NVIDIA’s Quadro-series video cards (which can get pretty expensive), I would recommend GTX-series video cards for most photographers instead. I personally chose the NVIDIA GTX 1060 video card, which is super fast and easily handles the load I throw at it. At this time, I do not see the benefit of a 30-bit workflow setup for my needs and I cannot justify spending over $1K on a Quadro-series video card, which is why I went this route. So here are my two top recommendations:

I chose a smaller profile video card for the compact build, because it leaves plenty of space for cooling and cables.

Unfortunately, we can once again thank cryptocurrencies for making video cards so darn expensive. Personally, I would not waste my money by buying a high-end video card that will cost you a lot of money. Until prices come down, it is simply not worth it.

7) Power Supply

Lots of options for power supplies too and you certainly want to make sure to get a solid power supply that is modular. With a modular power supply, you only add as many cables as you require and you don’t end up with a lot of dangling cords inside the case. My personal favorite has been Corsair CX and RM series PSUs, which are solid performance and are of great value. Here are the two I would recommend for the two setups:

8) Case

Now that we have picked a motherboard, CPU, PSU, RAM, storage and a video card, it is time time to pick a case for each setup. Again, the below choices are based on my personal preferences. If you like other brands and models, please feel free to share you opinion in the comments section below.

9) Monitor

Although a monitor is optional and you can use the current monitor you already have, having a nice 4K monitor with an IPS panel would be sweet for such a high-end setup. I have been personally using Dell’s IPS monitors for the past few years for photo editing and I really like them, but they do have their problems as highlighted in our article on calibrating Dell monitors.

If your budget allows, go for a solid NEC PA-series monitor like the NEC PA243W. While it does not have 4K resolution and other fancy features, it is a superb professional monitor with excellent color reproduction and hardware calibration options. If you can step up to a 27″ monitor, the NEC PA272W is also a superb choice.

10) Assessing the Damage

Let’s take a look at both setups and assess the damage:

Component TypeComponent ChoicePrice
CPUIntel Core i7-8700K$347
CPU CoolerNoctua NH-D15$90
MotherboardASUS ROG Maximus X Hero$249
1x M.2 NVMe SSDSamsung 512 GB 960 Pro NVMe M.2$325
SSD Drive (Optional)Samsung 860 EVO 1 TB$280
2x HDD Drives (Optional)HGST 8 TB 7200 RPM$540
RAMG.SKILL TridentZ Series 32GB DDR4 3200 (2x16GB)$370
Video CardEVGA GeForce GTX 1060 SC$330
Power SupplyCorsair RM650x$120
CaseCooler Master HAF X$180
GRAND TOTAL (WITHOUT MONITORS AND OPTIONAL STORAGE)$2,011

That’s pretty close to the previous Kaby Lake build, but keep in mind that I actually ended up reducing the number of M.2 drives to 1, since storage prices, RAM and video card prices have gone up significantly. To be honest, one M.2 is more than enough if you put your OS and Lightroom catalog, so there is really no need for a dual M.2 setup. Plus, those things get pretty hot and you are better off keeping your files in SSD / HDD storage anyway.

Now let’s take a look at our compact configuration:

Component TypeComponent ChoicePrice
CPUIntel Core i7-8700K$347
CPU CoolerNoctua NH-L9I$40
MotherboardASUS ROG Strix Z370I$179
1x M.2 NVMe SSDSamsung 512 GB 960 Pro NVMe M.2$325
SSD Drive (Optional)Samsung 860 EVO 1 TB$280
RAMG.SKILL TridentZ Series 32GB DDR4 3200 (2x16GB)$370
Video CardeVGA GTX 1060 Mini ITX$250
Power SupplyCorsair RM550x$100
CaseCooler Master Elite 130 mini-ITX$49
GRAND TOTAL (WITHOUT MONITORS AND OPTIONAL STORAGE)$1,660

Just like the full tower PC, this small-factor PC will obliterate pretty much anything out there, except for configurations with more powerful CPUs. The setup is pretty much identical to the full tower, except you are going for a smaller PSU and a video card with less memory.

Please note that I did not include the cost of the operating system.

It has been more than a year since I published my Skylake build for the ultimate PC build for photography needs, and it is time to update this article to include Intel’s latest Kaby Lake architecture. While the underlying technology behind the CPU and chipset architecture has not changed all that much between Skylake and Kaby Lake, there are a few changes worth moving up to. For example, the new Z270 and X299 motherboards support Optane Memory, which can provide incredible caching opportunities and help speed up applications by a huge margin, especially for those who will be using slower hard drives in their system. The biggest benefit of Kaby Lake, however, is the 4 extra PCIe lanes, which make a difference when using those amazingly fast M.2 NVMe drives (read about M.2 NVMe below), as they won’t have to share their bandwidth between devices anymore. Plus, using M.2 drives will still leave plenty of storage connectivity options for other devices, so it will be possible to run M.2 NVMe devices without worrying about them disabling SATA ports. Lastly, many Z270 and X299 motherboards now have two M.2 slots and some even support up to three, if that’s the route you want to take.

As before, I will be presenting two different builds – one based on a full tower case, which gives a lot of flexibility in terms of space, storage and future expansion options, and one based on a very compact build for a lightweight setup that occupies minimum space. Although I have always been using large cases, I have been leaning towards more compact options lately – primarily because it is now possible to build small, but powerful machines.

1) Chipset and CPU

For this build, I initially wanted to concentrate on the latest X299 chipset, paired with the Intel Core i7 7740X. Although X299 is a superior architecture compared to Z270 (ability to run high-end X-series CPUs with more cores, up to 128 GB of RAM and better components) and the 7740X CPU is priced pretty much the same as the Intel Core i7 7700K at roughly $349, I decided to go with the Z270 chipset instead, primarily because of few X299 motherboard options and their much higher price tags. Perhaps with time things are going to get better, but as of today, X299 motherboards are significantly more expensive compared to Z270 and their availability is pretty low. In addition, considering that neither Photoshop nor Lightroom are optimized for multi-core CPUs and the clock speed is still the biggest performance factor, the Intel Core i7 7700K (Amazon) is my top choice, especially when it comes to its price/performance ratio. With a total of 4 cores and 8 threads and 4.2 Ghz clock speed (4.5 Ghz Maximum Turbo Boost), it is an excellent CPU for photography needs.

As for the CPU cooler, I don’t think there is a better air cooler than the Noctua NH-D15, which has dual 140mm fans. Unfortunately, such a massive fan is not going to work for the compact build, which is why it is going to be best to pick something much more compact, such as the Noctua NH-L9I.

2) Motherboard

Unlike X299, there are lots of great motherboard options available for the Z270 chipset at the moment from many different manufacturers. When building PCs, I don’t bother with picking either a low or a high-end motherboard, since the best value is in the mid-range. I don’t look for features such as WiFi and Bluetooth, since those are not needed for photography needs. As long as the motherboard has a good layout with at least two M.2 slots and good connectivity options, it should work out great. As for the choice of brand, I have tried many different brands including ASUS, MSI, Gigabyte, ASRock, Intel and SuperMicro, and I always keep coming back to ASUS.

Based on the above, the below two motherboards are my top contenders for the builds:

3) M.2 NVMe Selection

As with the earlier builds, I will be including M.2 NVMe drives as part of the build. If you don’t know much about M.2 NVMe SSD drives, you should do some research and understand what you have been missing all these years. M.2 NVMe drives are incredibly fast – there is simply no comparison between SSD and M.2 NVMe SSD! Some of the best M.2 NVMe SSD drives today can deliver up to 3,500 MB/s read speed, while the best SSD drives will cap at 500 MB/s, if that. That’s 7x higher performance you would be getting with an M.2 NVMe SSD drive! So imagine booting up your operating system in a matter of seconds and using that extreme performance for cashing and other read/write-intensive operations. You know where your Lightroom catalog would live!

When shopping for M.2 drives, you must make sure to buy either NVMe or AHCI and not SATA drives (M.2 is just a form factor).

Without a doubt, the best and the most popular choice for M.2 NVMe drives are Samsung’s 960 PRO NVMe. With an impressive 3,500 MB/s read speed and 2,100 MB/s write speed, this is one of the fastest drives you can buy today. If you don’t mind the slower write speeds, the Samsung 960 EVO NVMe drives are also great and cost a tad cheaper.

Size-wise, I would not settle for anything less than 500 GB. Yes, that’s pricey, but 250 GB won’t cut it for large catalogs, especially if you are planning to generate full size JPEG previews (and you should, if you want ultra-fast Lightroom performance – see this article for more details).

For the second slot, I personally would get another 960 PRO M.2, but that’s obviously going to get pretty expensive. Just imagine pairing these up in a RAID 0 configuration! (Note: you will need to have RAID support enabled from the motherboard BIOS in order to be able to boot a pair of M.2s in RAID 0) Absolute insanity!

4) SSD / HDD Storage

If you don’t mind the high price tag, my top choice would be the Samsung 850 EVO 1 TB SSD (Amazon) drives. Until new, faster and larger drives hit the market, the 1 TB 850 EVO still gives the best value at the moment, going for less than $400 a pop. If budget is not an issue and you want to double that storage, the 2 TB version currently retails for around $750.

If you don’t have a lot of photos, go for the 500 GB version instead, which is much cheaper. Why not go for the 850 Pro series? Because it is overkill for photo storage in my opinion. However, if budget is not an issue, go for the 850 Pro line instead, as you will get a bit more performance out of those. If you find other brand SSD drives with similar performance, those might be worth looking into as well – sometimes you will find great deals on Crucial, Intel, SanDisk and other brand SSDs. Another advantage of SSD is that you won’t have to worry about heat dissipation issues, as they do not get as hot as regular hard drives.

If you have a lot of photos that you like keeping on the same volume and you do not want to buy expensive 1-2 TB SSD drives, then go for two 6+ TB hard drives. Just make sure that you don’t buy one of those green drives – go for 7200 RPM drives with a good amount of cache, similar to HGST 8 TB drives. For the full tower build, I would recommend to get four of these drives to use as backup / RAID 1 / RAID 5 storage.

5) RAM

With Kaby Lake, you will need to go for DDR 4 memory and depending on whether you are building a full tower build or a compact build, you will need to get between two to four RAM sticks. Personally, I would go for at least 32 GB of RAM (choose 2×16 GB sticks for either build). If you want to future-proof your build, go with a 64 GB configuration that can handle anything you can throw at it. If you stitch huge panoramas, you will benefit from a 64 GB configuration.

Here are a couple of good options I found:

6) Video Card

Since Lightroom and many other applications can take advantage of GPU rendering, the speed of your video card certainly does play a role in how fast applications render images / video and respond. If you want to take advantage of this additional benefit, I would get a high-end video card that can easily handle the load. While those with deep pockets and a desire to run a 30-bit workflow should look into NVIDIA’s Quadro-series video cards (which can get pretty expensive), I would recommend GTX-series video cards for most photographers instead. I personally chose the NVIDIA GTX 1060 video card, which is super fast and easily handles the load I throw at it. At this time, I do not see the benefit of a 30-bit workflow setup for my needs and I cannot justify spending over $1K on a Quadro-series video card, which is why I went this route. So here are my two top recommendations:

I chose a smaller profile video card for the compact build, because it leaves plenty of space for cooling and cables.

7) Power Supply

Lots of options for power supplies too and you certainly want to make sure to get a solid power supply that is modular. With a modular power supply, you only add as many cables as you require and you don’t end up with a lot of dangling cords inside the case. My personal favorite has been Corsair CX and RM series PSUs, which are solid performance and are of great value. Here are the two I would recommend for the two setups:

8) Case

Now that we have picked a motherboard, CPU, PSU, RAM, storage and a video card, it is time time to pick a case for each setup. Again, the below choices are based on my personal preferences. If you like other brands and models, please feel free to share you opinion in the comments section below.

9) Monitor

Although a monitor is optional and you can use the current monitor you already have, having a nice 4K monitor with an IPS panel would be sweet for such a high-end setup. I have been personally using Dell’s IPS monitors for the past few years for photo editing and I really like them, but they do have their problems as highlighted in our article on calibrating Dell monitors. The last good monitor was the Dell U2413 and even with that one, you must make sure that it has good uniformity and performance.

If your budget allows, go for a solid NEC PA-series monitor like the NEC PA242W. While it is an older model that does not have 4K resolution and other fancy features, it is a superb professional monitor with excellent color reproduction and hardware calibration options. If you can step up to a 27″ monitor, the NEC PA272W is also a superb choice.

10) Assessing the Damage

Let’s take a look at both setups and assess the damage:

Component TypeComponent ChoicePrice
CPUIntel Core i7-7700K$304
CPU CoolerNoctua NH-D15$90
MotherboardASUS ROG Maximus IX Hero$225
2x M.2 NVMe SSDSamsung 512 GB 960 Pro NVMe M.2$586
SSD Drive (Optional)Samsung 850 EVO 1 TB$365
2x HDD Drives (Optional)HGST 8 TB 7200 RPM$560
RAMCorsair Vengeance LPX 32 GB DDR4$295
Video CardEVGA GeForce GTX 1060 SC$235
Power SupplyCorsair RM650x$114
CaseCooler Master HAF X$169
GRAND TOTAL (WITHOUT MONITORS AND OPTIONAL STORAGE)$2,018

That’s a bit more expensive than the previous Skylake build, but not by a huge margin. Obviously, the price goes up if you add the optional drives and dual monitors, but those are optional and depend on your needs / what you already have. And you can certainly change a component or two to reduce the price even further, especially if you lower the M.2 card storage, which is what represents the bulk of the cost above.

If you are wondering how this would compare to a Mac, it will obliterate pretty much any Mac out there. Even the best Mac Pros won’t stand a chance against the above configuration (expect to pay $5K+ for an outdated high-end Mac Pro).

Now let’s take a look at our compact configuration:

Component TypeComponent ChoicePrice
CPUIntel Core i7-7700K$304
CPU CoolerNoctua NH-L9I$40
MotherboardASUS ROG Strix Z270I$180
M.2 NVMe SSDSamsung 512 GB 960 Pro NVMe M.2$293
SSD Drive (Optional)Samsung 850 EVO 1 TB$365
RAMCorsair Vengeance LPX 32 GB DDR4$295
Video CardGigabyte GeForce GTX 1060 Mini ITX$270
Power SupplyCorsair RM550x$90
CaseCooler Master Elite 130 mini-ITX$49
GRAND TOTAL (WITHOUT MONITORS AND OPTIONAL STORAGE)$1,521

Just like the full tower PC, this small-factor PC will obliterate pretty much anything out there, except for higher-end setups with the X299 chipset that cost a lot more. Nothing comparable from Apple either. The setup is pretty much identical to the full tower, except you are going for a smaller PSU and potentially less storage options.

Please note that I did not include the cost of the operating system.

Since publishing my Haswell build in 2015, most of the hardware has been discontinued, Skylake and some new hardware came out, so I decided to refresh the article, this time focusing on a very powerful Skylake build. Now if you have already built a PC using my previous guide, you have nothing to worry about – your machine is still a speed demon and you are set for a while. However, if you have not yet built one, my recommendation would be to go with Skylake and the hardware I recommend below. This machine should be able to handle anything you throw at it, including processing of 4K video.

As before, I will be presenting two different builds – one based on a full tower case, which gives a lot of flexibility in terms of space, storage and future expansion options, and one based on a very compact build for a lightweight setup that occupies minimum space. Although I have always been using large cases, I have been leaning towards more compact options lately – primarily because it is now possible to build small, but powerful machines.

1) Chipset and CPU

With Skylake and all the supporting hardware already out, it does not make any more sense to try to use older architectures. So the next question is, what CPU to pick for our build. As of 11/01/2015, the Core i7-6700K is currently Intel’s flagship desktop CPU, so that’s what we will be using. With its base clock speed of 4.0 Ghz, 4 cores, 8 threads and the ability to Turbo Boost to 4.2 Ghz, it is an insanely fast processor for photography and videography needs. It is based on the FCLGA1151 socket, which means that we will be going with the Intel Z170 chipset. Now that we know what we want in terms of both CPU and chipset, let’s move on to selecting the right motherboard.

One of the biggest advantages of Skylake over Broadwell and Haswell is maximum RAM – you can now use up to 64 GB of DDR4 RAM!

2) Motherboard

The choice of a motherboard is tough, because there are so many choices available out there, even though Skylake is relatively new. There are brands, then there are models, ranging from affordable to not so affordable. When building PCs, I don’t bother with picking either a low or a high-end motherboard, since the best value is in the mid-range. However, I do have selection criteria – I want a motherboard that comes with two M.2 slots, which is critical, as you will see below. As for a choice of brand, I have tried many brands including ASUS, MSI, Gigabyte, ASRock, Intel and SuperMicro, and I always keep coming back to ASUS. However, for this particular build, ASUS has been a bit of a disappointment, as none of their mid-range motherboards have dual M.2 slots. The ASUS Z170 Deluxe is nice, but it is rather expensive and its secondary M.2 slot is provided via a separate PCIe card. A more reasonable offering in this particular case in my opinion, is the Gigabyte Z170X Gaming 7 motherboard, which comes with two M.2 slots, both of which are of the latest Gen3 x4 type, supporting up to 32 GB/s data transfers.

So based on the above, the below two motherboards are my top contenders for the builds:

3) M.2 NVMe Selection

If you have been using an SSD drive and have been impressed with its performance, you have only touched the surface when it comes to extreme storage performance. The new generation M.2 NVMe SSD drives deliver up to 2,500 MB/s read speed, while the best SSD drives will cap at 500 MB/s, if that. That’s over 5x performance you would be getting with M.2 NVMe! So imagine booting up your operating system in a matter of seconds and using that extreme performance for cashing and other read/write-intensive operations. You know where your Lightroom catalog would live!

But there is something you have to keep in mind – not all M.2 drives are the same! There are plenty of cheap M.2 drives that are no different than a regular SSD drive in terms of performance. They have the M.2 form factor, but performance-wise, only deliver the performance of a regular SATA SSD drive. When shopping for M.2 drives, you must make sure to buy either NVMe or AHCI and not SATA.

So when it comes to storage, your best bet would be to either go with an ultra-fast M.2 card (based on NVMe), or an NVMe-based drive card that will sit on one of the PCIe slots. Both motherboards support either configuration.

As for the choice of an M.2 SSD unit, the new Samsung 950 PRO series PCIe NVMe M.2 is an absolute monster. With its impressive 2,500 MB/s read speed and 1,500 MB/s write speed, this is one of the fastest drives you can buy under $400.

Size-wise, I would not settle for anything less than 512 GB. Yes, that’s pricey, but 256 GB won’t cut it for large catalogs, especially if you are planning to generate full size JPEG previews (and you should, if you want ultra-fast Lightroom performance – see this article for more details).

For the second slot, I personally would get another 950 PRO M.2, but that’s obviously going to get pretty expensive. Just imagine pairing these up in a RAID 0 configuration! (Note: you will need to have RAID support enabled from the motherboard BIOS in order to be able to boot a pair of M.2s in RAID 0) Absolute insanity! Now the 256 GB version of the Samsung 950 PRO M.2 sells for less than $200 right now, but boy, you do lose quite a bit of write speed by going with that. So in a way, going with a dual 512 GB setup would be the ultimate choice now.

4) SSD / HDD Storage

If you don’t mind the high price tag, my top choice would be the Samsung 850 EVO 1 TB SSD drives. Until new, faster and larger drives hit the market, the 1 TB 850 EVO still gives the best value at the moment, going for less than $400 a pop. If budget is not an issue and you want to double that storage, the 2 TB version currently retails for around $750.

If you don’t have a lot of photos, go for the 500 GB version instead, which is much cheaper. Why not go for the 850 Pro series? Because it is overkill for a photo storage in my opinion. However, if budget is not an issue, go for the 850 Pro line instead, as you will get a bit more performance out of those. If you find other brand SSD drives with similar performance, those might be worth looking into as well – sometimes you will find great deals on Crucial, Intel, SanDisk and other brand SSDs. Whatever brand, make and size you choose, make sure to buy two of the same drives. Although SSD is much more reliable than HDD, I would still go for a RAID 1 / mirror setup just in case you forget to frequently back-up your work. Another advantage of SSD is that you won’t have to worry about heat dissipation issues, as they do not get as hot as regular hard drives.

If you have a lot of photos that you like keeping on the same volume and you do not want to buy expensive 1-2 TB SSD drives, then go for two 4+ TB hard drives. Just make sure that you don’t buy one of those green drives – go for 7200 RPM drives with a good amount of cache, similar to Western Digital 4 TB Black drives. For the full tower build, I would recommend to get four of these drives to use as backup / RAID 1 / RAID 5 storage.

5) RAM

With Skylake, forget about the older DDR3 RAM – you will have to get the new DDR4 memory, which is faster and more power efficient compared to DDR3. In addition, you can double your memory capacity by going with DDR4, which allows you to max your build out at 64 GB with four memory slots!

Personally, I would go for 32 GB of RAM for now, as I find it to be enough for my needs, but if you want to future-proof your build, go with a 64 GB configuration that can handle anything you can throw at it. If you stitch huge panoramas, you will probably need to go for a 64 GB configuration.

Here are a couple of good options I found:

Although the mini-ITX build is limited to 32 GB of RAM, finding solid 16 GB sticks that are compatible with such a compact setup might be a challenge at this time. The above-mentioned Corsair Vengeance LPX DDR4 should work for this build, but I am not 100% positive, as it is not listed in the official supported list of compatible memory cards.

6) Video Card

Now that Lightroom and many other applications take advantage of GPU rendering, the speed of your video card certainly does play a role in how fast applications render images / video and respond. If you want to take advantage of this additional benefit, I would get a high-end video card that can easily handle the load. While those with deep pockets and a desire to run a 30-bit workflow should look into NVIDIA’s Quadro-series video cards (which can cost up to $10K alone), I would recommend GTX-series video cards for most photographers instead. I personally chose the NVIDIA GTX 970 video card, which is super fast and easily handles the load I throw at it. At this time, I do not see the benefit of a 30-bit workflow setup for my needs and I cannot justify spending over $1K on a Quadro-series video card, which is why I went this route. So here are my two top recommendations:

I chose a smaller profile video card for the compact build, because it leaves plenty of space for cooling and cables.

7) Power Supply

Lots of options for power supplies too and you certainly want to make sure to get a solid power supply that is modular. With a modular power supply, you only add as many cables as you require and you don’t end up with a lot of dangling cords inside the case. My personal favorite has been Corsair CX and RM series PSUs, which are solid performance and are of great value. Here are the two I would recommend for the two setups:

8) Case

Now that we have picked a motherboard, CPU, PSU, RAM, storage and a video card, it is time time to pick a case for each setup. Again, the below choices are based on my personal preferences. If you like other brands and models, please feel free to share you opinion in the comments section below.

9) Monitor

Although a monitor is optional and you can use the current monitor you already have, having a nice 4K monitor with an IPS panel would be sweet for such a high-end setup. I have been personally using Dell’s IPS monitors for the past few years for photo editing and I really like them, but they do have their problems as highlighted in our article on calibrating Dell monitors. The last good monitor was the Dell U2413 and even with that one, you must make sure that it has good uniformity and performance.

If your budget allows, go for a solid NEC PA-series monitor like the NEC PA242W. While it is an older model that does not have 4K resolution and other fancy features, it is a superb professional monitor with excellent color reproduction and hardware calibration options. If you can step up to a 27″ monitor, the NEC PA272W is also a superb choice.

10) Assessing the Damage

Let’s take a look at both setups and assess the damage:

Component TypeComponent ChoicePrice
CPUIntel Core i7-6700K$370
MotherboardGigabyte GA-Z170X Gaming 7$207
2x M.2 x4 SSDSamsung 512 GB 950 Pro NVMe M.2$696
2x SSD Drives (Optional)Samsung 850 EVO 1 TB$736
2x HDD Drives (Optional)WD 4 TB Caviar 7200 RPM$438
RAMCrucial Ballistix Sport 32 GB DDR4$220
Video CardEVGA GeForce GTX 970 SuperSC$325
Power SupplyCorsair RM650$106
CaseCooler Master HAF X 942$180
GRAND TOTAL (WITHOUT MONITORS AND OPTIONAL STORAGE)$2,104

Considering that the previous Haswell build ran at $1,966, that’s a difference of around $140, which is not bad considering that you will be on the latest and greatest! Obviously the price goes up if you add the optional drives and dual monitors, but those are optional and depend on your needs / what you already have. And you can certainly change a component or two to reduce the price even further, especially if you lower the M.2 card storage, which is what represents the bulk of the cost above.

If you are wondering how this would compare to a Mac, it will obliterate pretty much any Mac out there, with the exception of some Mac Pro models in terms of sheer processing power when specific software can utilize all the cores (Xeon vs Core i7). Overall though, even the best Mac Pros won’t stand a chance against the above configuration (expect to pay $5K+ for a high-end Mac Pro).

Now let’s take a look at our compact configuration:

Component TypeComponent ChoicePrice
CPUIntel Core i7-6700K$370
MotherboardASUS Z170I PRO GAMING$170
M.2 x4 SSDSamsung 512 GB 950 Pro NVMe M.2$348
2x SSD Drives (Optional)Samsung 850 EVO 1 TB$736
RAMCrucial Ballistix Sport 16 GB DDR4$113
Video CardGigabyte GeForce GTX 970 Mini ITX$328
Power SupplyCorsair RM450$95
CaseCooler Master Elite 130 mini-ITX$48
GRAND TOTAL (WITHOUT MONITORS AND OPTIONAL STORAGE)$1,472

Compared to the previous Haswell build that cost $1,483 at the time, this particular build is even cheaper! Just like the full tower PC, this small-factor PC will obliterate pretty much anything out there, except for higher-end setups that cost a lot more. Nothing comparable from Apple either. The setup is pretty much identical to the full tower, except you are going for a smaller PSU, less memory and potentially less storage options.

Please note that I did not include the cost of operating system, since it varies quite a bit and you might already have options to upgrade for free.

Please note that the below configuration is for the now dated “Haswell” architecture (the original article was written in 2016). I left all the information in this section for reference only, for those who might go with an older build, or review the components they used for a particular build. For the latest build, please see the second page of this article.

1) Chipset and CPU

Without a doubt, “Devil’s Canyon” Intel Core i7-4790K proved to be the top choice for the Haswell architecture, with its insane single and multi-core performance that seriously challenges even the latest Intel CPUs. Since the Intel i7-4790K has the LGA1150 socket, it means that our default choice is Intel’s Z97 chipset. Although Z97 is pretty aged by now, it is a very solid chipset, with plenty of great motherboard choices on the market. Now that we know what we want in terms of both CPU and chipset, let’s move on to selecting the right motherboard.

2) Motherboard

The choice of a motherboard is tough, because there are so many choices available out there. There are brands, then there are models, ranging from affordable to not so affordable. When building PCs, I don’t bother with picking either a low or a high-end motherbooard, since the best value is in the mid-range. However, I do have selection criteria – I want a motherboard that comes with an M.2 slot, which is critical, as you will see below. As for a choice of brand, I have tried many brands including Tyan (anyone remember Tyan Trinity with dual CPU support?), ASUS, MSI, Gigabyte, ASRock, Intel and SuperMicro, and I always keep coming back to ASUS. While I am not a big fan of ASUS software (particularly their AI Suite software), I have not been disappointed with the hardware, which has been rock-solid, running for many years. That’s not to say that other motherboards are bad – ASUS has just been my personal preference all along. But ASUS does come with a relatively high price tag, so if you find that the motherboards I picked below are too expensive for your budget, feel free to pick any other motherboard with WiFi + M.2 support.

Another brand that I have recently started to favor is ASRock, which is basically a daughter company of ASUStek, the same company that makes ASUS hardware. As you will see below, my top contender for the Z97 chipset for desktops is an ASRock motherboard.

So based on the above, the below two motherboards are my top contenders for the builds:

3) M.2 NVMe

I would not get anything less than the Samsung SM951. This is the puppy that will give you 2,150 MB/s read and 1,500 MB/s write speeds. Nothing beats that at the moment. When XP951 or 950 Pro hit the market, they will be my top choice, but for now, the SM951 is simply unrivaled.

Size-wise, I would not settle for anything less than 512 GB. Yes, that’s pricey, but 256 GB won’t cut it for large catalogs, especially if you are planning to generate full size JPEG previews (and you should, if you want ultra-fast Lightroom performance – see this article for more details). And if you are planning to use the above ASRock motherboard, you should get one Samsung SM951 and one lower-end M.2 unit. The second slot is limited to 10 Gb/s, which is still much faster than SATA. Plus, you save some space and there are less cables to pull and worry about.

4) SSD / HDD Storage

In addition to the M.2 drive(s), which will be hosting your Lightroom catalog, my recommendation is to get fast SSD drives for storing photos. I know many of our readers will disagree with this, because photos can be stored on regular spinning drives as well (which are often fast enough). However, ever since I started using SSDs for storing RAW files, I would have a hard time switching back. Keep in mind that whenever you open and make changes to a RAW file, Lightroom still needs to access it. And if you put those RAW files in faster storage, your access time will decrease and you will see pretty noticeable performance benefits. If you don’t mind the high price tag, my top choice would be the Samsung 850 EVO 1 TB SSD drives. If you don’t have a lot of photos, go for the 500 GB version instead, which is much cheaper. Why not go for the 850 Pro series? Because it is overkill for a photo storage in my opinion. However, if budget is not an issue, go for the 850 Pro line instead, as you will get a bit more performance out of those. If you find other brand SSD drives with similar performance, those might be worth looking into as well – sometimes you will find great deals on Crucial, Intel, SanDisk and other brand SSDs. Whatever brand, make and size you choose, make sure to buy two of the same drives. Although SSD is much more reliable than HDD, I would still go for a RAID 1 / mirror setup just in case you forget to frequently back-up your work. Another advantage of SSD is that you won’t have to worry about heat dissipation issues, as they do not get as hot as regular hard drives.

If you have a lot of photos that you like keeping on the same volume and you do not want to buy expensive 1-2 TB SSD drives, then go for two 4+ TB hard drives. Just make sure that you don’t buy one of those green drives – go for 7200 RPM drives with a good amount of cache, similar to Western Digital 4 TB Black drives. For the full tower build, I would recommend to get four of these drives to use as backup / RAID 1 / RAID 5 storage.

5) RAM

Choosing RAM can also give you a lot of headache, as there are so many different types of RAM out there. I am typically not as picky when it comes to RAM – I choose a good brand like Corsair, Crucial, G.Skill and Kingston, and pick whichever one is on a good sale. Back in the day I would spend a lot of time looking at RAM timings, overclock-ability and other factors, but nowadays I don’t bother wasting my time – most RAM out there is quite good. I don’t heavily overclock my computers anymore, particularly when going small, so typical timings and speeds are sufficient for my needs. Here are two options I found with a quick search for solid memory:

Unfortunately, mini-ITX builds are limited to 16 GB of RAM, so that’s the maximum we can use on the compact build. I like low-profile RAM like the above Ballistix series, since they work great with oversized third-party fans / CPU coolers. If you are planning to overclock your rig, I would certainly look into higher-end memory though, potentially with better, taller heat-sinks that dissipate heat better.

6) Video Card

Now that Lightroom and many other applications take advantage of GPU rendering, the speed of your video card certainly does play a role in how fast applications render images / video and respond. If you want to take advantage of this additional benefit, I would get a high-end video card that can easily handle the load. While those with deep pockets and a desire to run a 30-bit workflow should look into NVIDIA’s Quadro-series video cards (which can cost up to $10K alone), I personally went for the NVIDIA GTX 970 video card, which is super fast and easily handles the load I throw at it. At this time, I do not see the benefit of a 30-bit workflow setup for my needs and I cannot justify spending over $1K on a Quadro-series video card, which is why I went this route. So here are my two top recommendations:

I chose a smaller profile video card for the compact build, because it leaves plenty of space for cooling and cables.

7) Power Supply

Lots of options for power supplies too and you certainly want to make sure to get a solid power supply that is modular. With a modular power supply, you only add as many cables as you require and you don’t end up with a lot of dangling cords inside the case. My personal favorite has been Corsair CX series PSUs, which are great value. Here are the two I would recommend for the two setups:

8) Case

Now that we have picked a motherboard, CPU, PSU, RAM, storage and a video card, it is time time to pick a case for each setup. Again, the below choices are based on my personal preferences. If you like other brands and models, please feel free to share you opinion in the comments section below.

9) Monitor

Although a monitor is optional and you can use the current monitor you already have, having a nice 4K monitor with an IPS panel would be sweet for such a high-end setup. I have been personally using Dell’s IPS monitors for the past few years for photo editing and I really like them, but they do have their problems as highlighted in our article on calibrating Dell monitors. The last good monitor was the Dell U2413 and even with that one, you must make sure that it has good uniformity and performance.

If your budget allows, go for a solid NEC PA-series monitor like the NEC PA242W. While it is an older model that does not have 4K resolution and other fancy features, it is a superb professional monitor with excellent color reproduction and hardware calibration options. If you can step up to a 27″ monitor, the NEC PA272W is also a superb choice.

10) Assessing the Damage

Let’s take a look at both setups and assess the damage:

Component TypeComponent ChoicePrice
CPUIntel Core i7-4790K$340
MotherboardASRock Z97 Extreme 9$232
M.2 x4 SSDSamsung SM951 512 GB$369
M.2 SSDSamsung 850 EVO 500 GB$195
2x SSD Drives (Optional)Samsung 850 EVO 512 GB$684
2x HDD Drives (Optional)WD 4 TB Caviar 7200 RPM$405
RAMCrucial Ballistix Sport 32 GB$200
Video CardEVGA GeForce GTX 970$330
Power SupplyCorsair CS850M$130
CaseCooler Master HAF X 942$170
GRAND TOTAL (WITHOUT MONITORS AND OPTIONAL STORAGE)$1,966

Obviously the price goes up if you add the optional drives and dual monitors, but those are optional and depend on your needs / what you already have.

Not bad for an under $2K PC! If you are wondering how this would compare to a Mac, it will obliterate pretty much any Mac out there, with the exception of some Mac Pro models in terms of processing power (Xeon vs Core i7). Overall though, even the best Mac Pros won’t stand a chance against the above configuration (expect to pay $5K+ for a high-end Mac Pro).

Now let’s take a look at our compact configuration:

Component TypeComponent ChoicePrice
CPUIntel Core i7-4790K$340
MotherboardASUS Maximus VII Impact$220
M.2 x4 SSDSamsung SM951 512 GB$369
2x SSD Drives (Optional)Samsung 850 EVO 512 GB$684
RAMCrucial Ballistix Sport 16 GB$89
Video CardGigabyte GeForce GTX 970 Mini ITX$329
Power SupplyCorsair CS650M$88
CaseCooler Master Elite 130 mini-ITX$48
GRAND TOTAL (WITHOUT MONITORS AND OPTIONAL STORAGE)$1,483

Just like the full tower PC, this small-factor PC will obliterate pretty much anything out there, except for higher-end setups that cost a lot more. Nothing comparable from Apple either. The setup is pretty much identical to the full tower, except you are going for a small PSU and less storage options. I would certainly add at least one 1 TB SSD drive though, as the 512 GB M.2 storage won’t be sufficient.

Please note that I did not include the cost of operating system, since it varies quite a bit and you might already have options to upgrade for free.

Exit mobile version