This post is the second in a three-part series dedicated to teaching sports photography at all levels of competency. In part one I covered the basics for photographers who are just getting started. This article will focus on intermediate amateurs who have mastered the basics, and want to gain additional competency to bring their images to the next level. The final part will be geared towards advanced amateurs looking to build a portfolio.
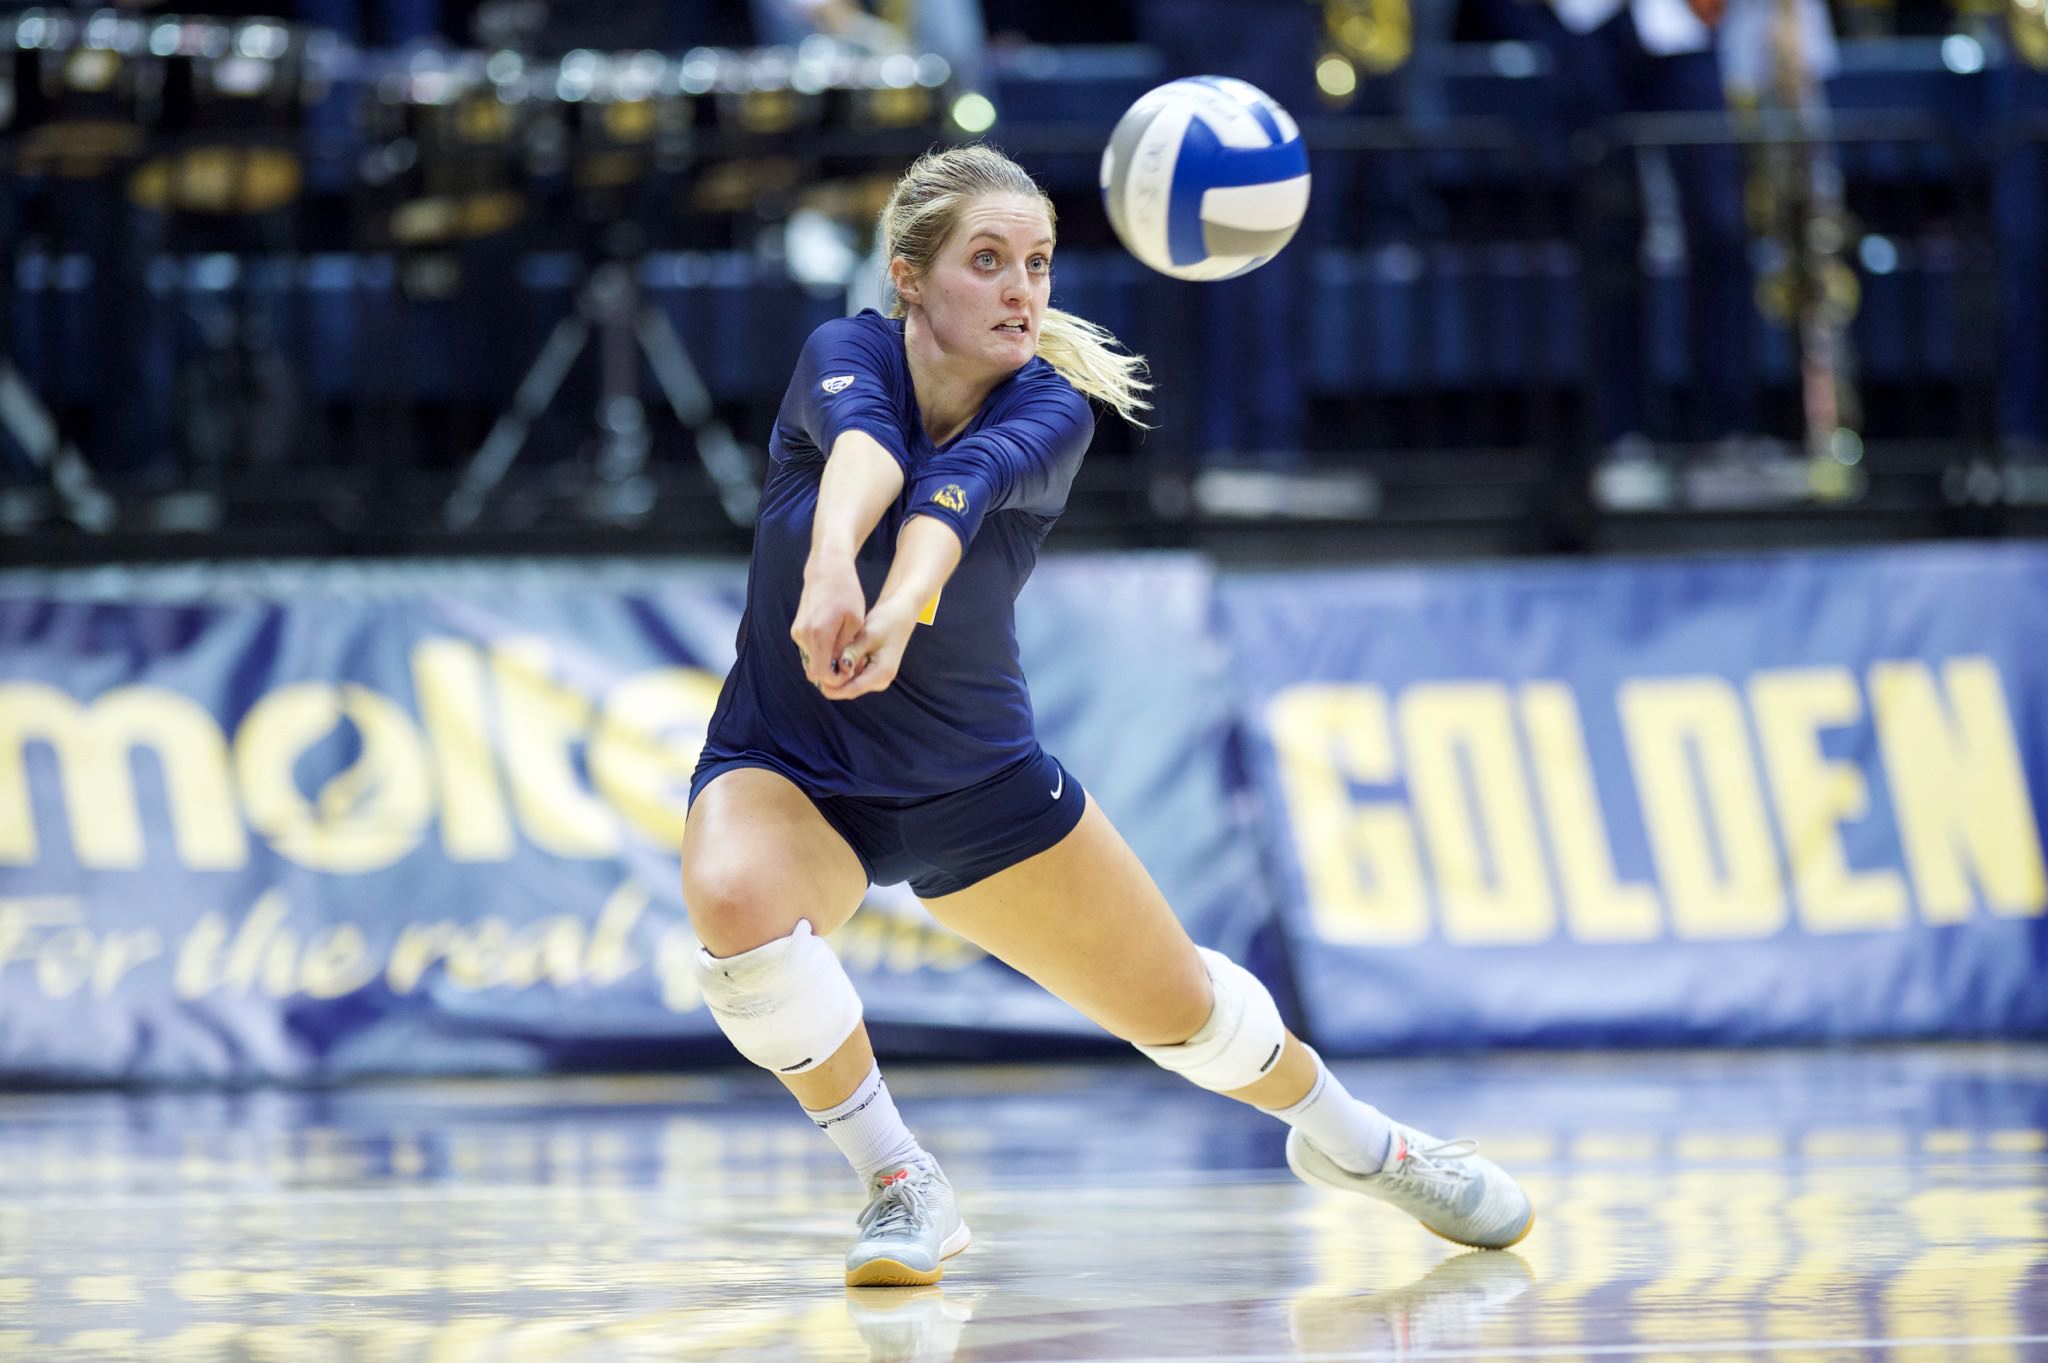
Table of Contents
1) The Formula
The goal of a sports photographer is to record the events unfolding at an athletic competition. Photography, even in the context of sports, is a creative pursuit, meaning that no “rule” or “formula” can definitively establish whether or not an image is satisfactory. However, I have a few guidelines that will help you understand why some sports images succeed while others fail.
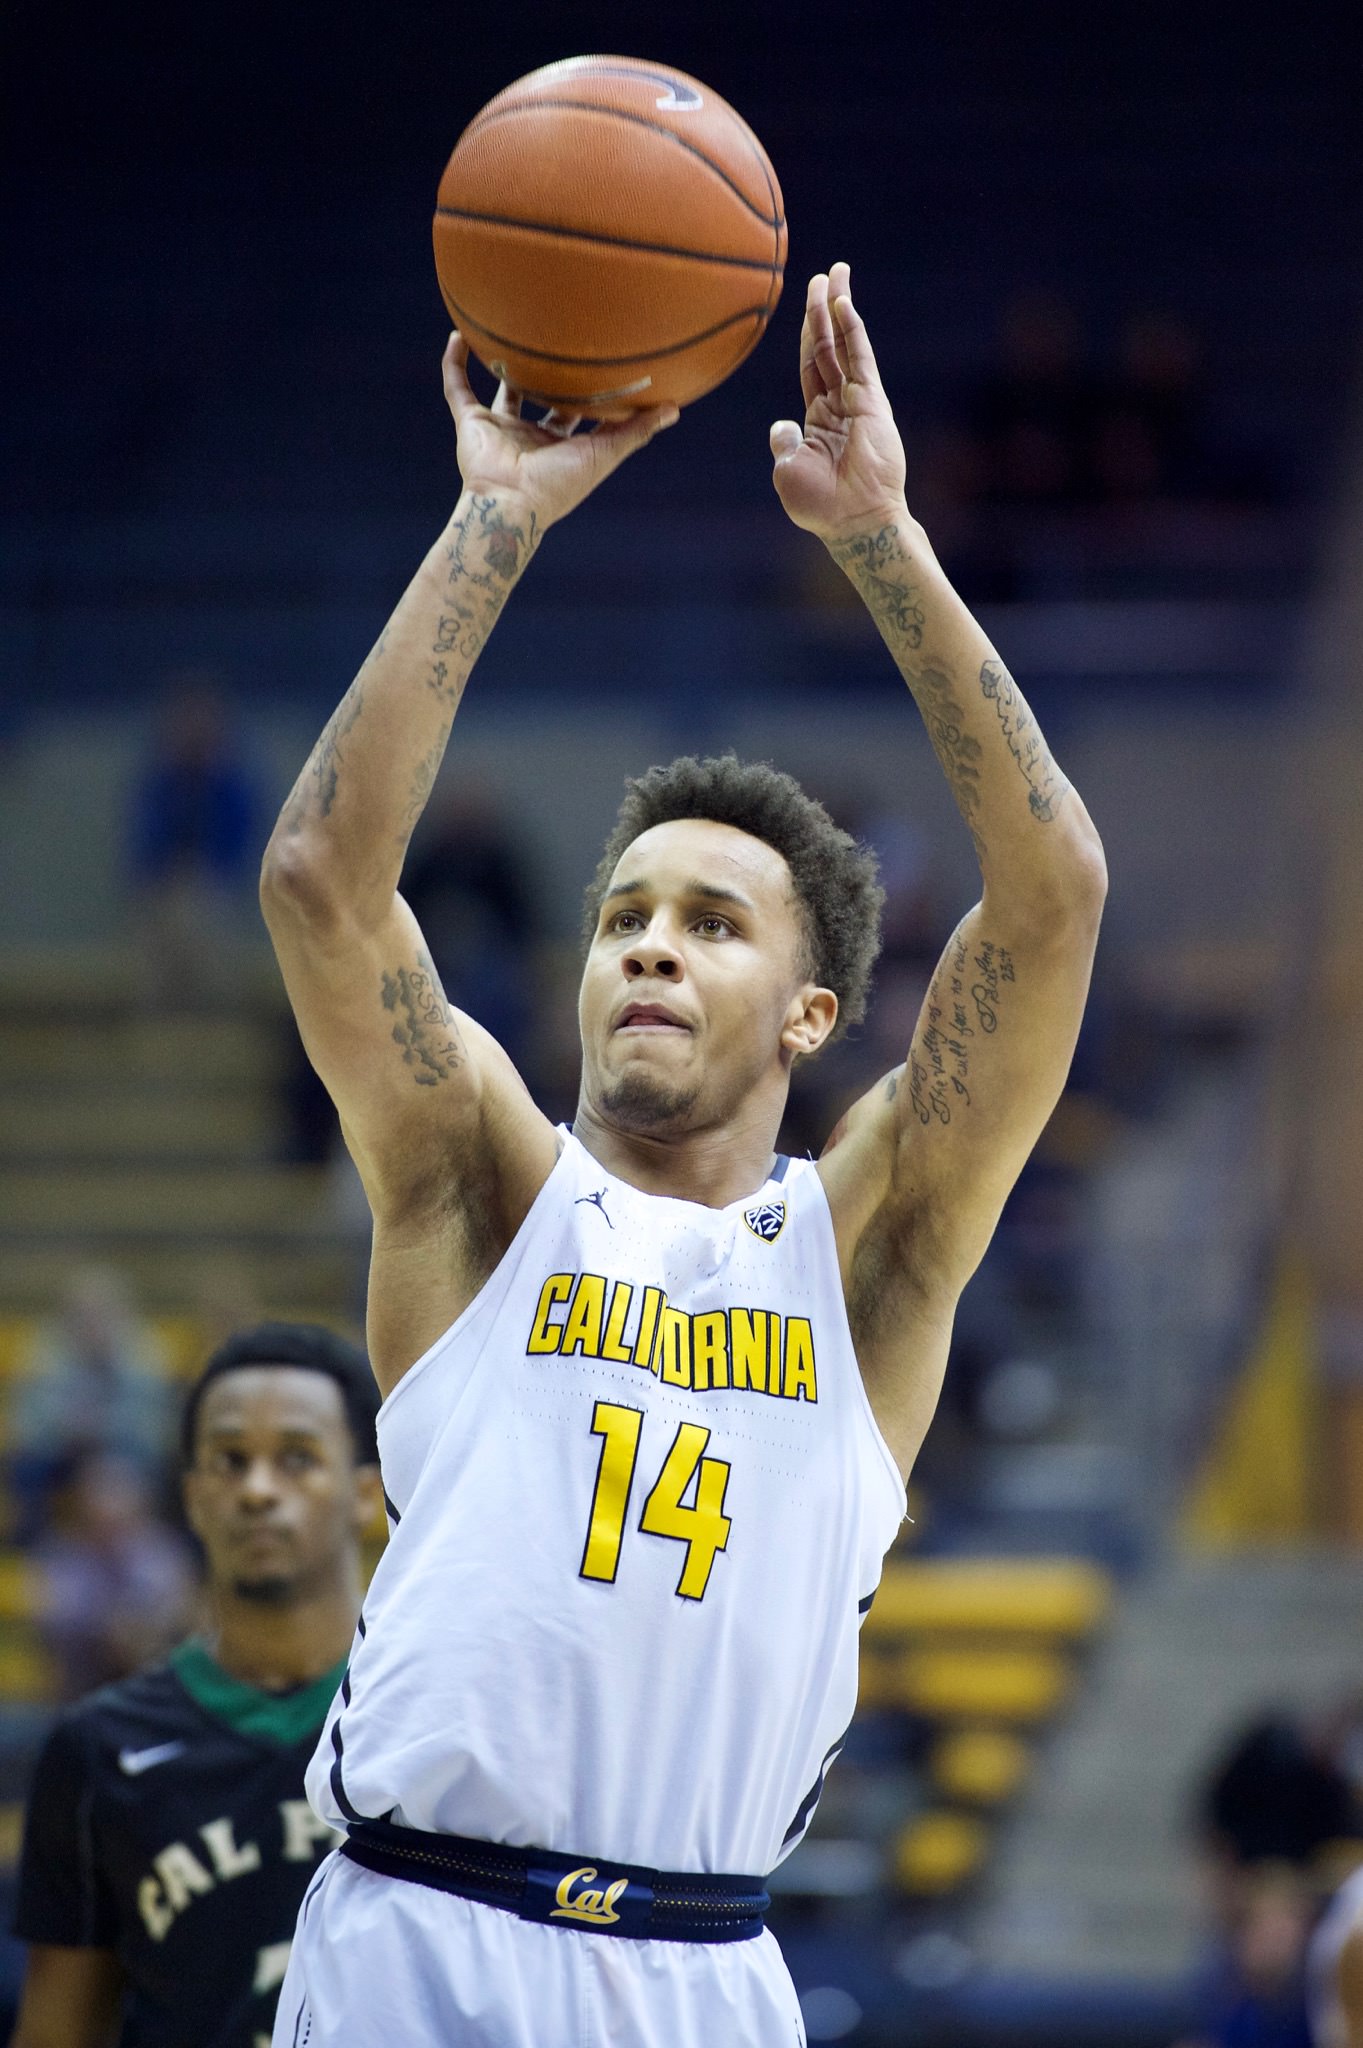
- Focus. The subject must be sharply in focus, especially the face. If the subject is even slightly out of focus, you should throw out the image.
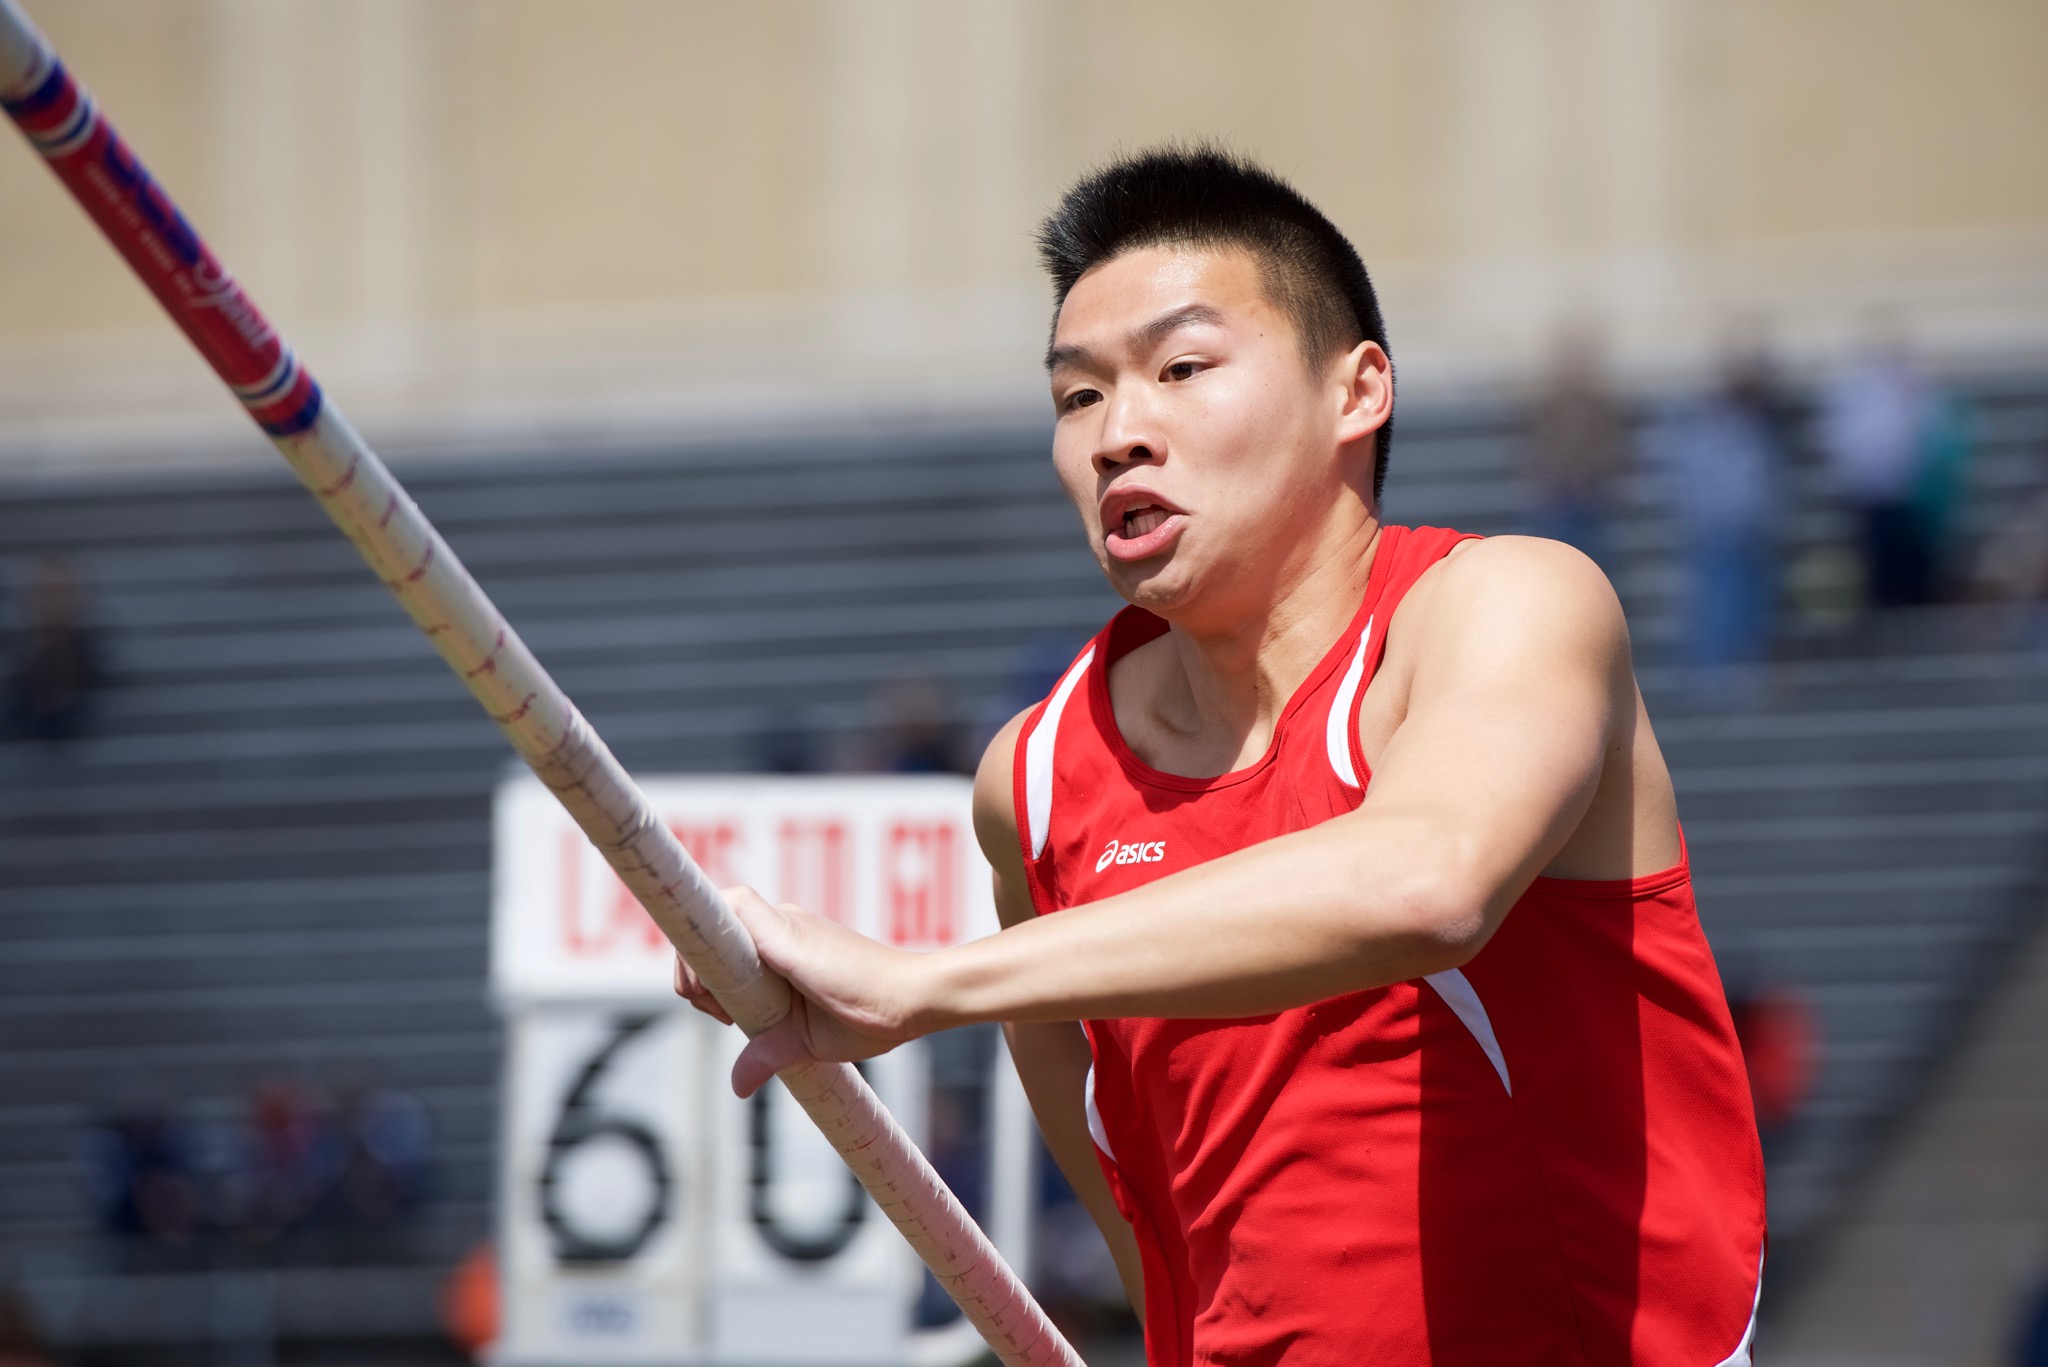
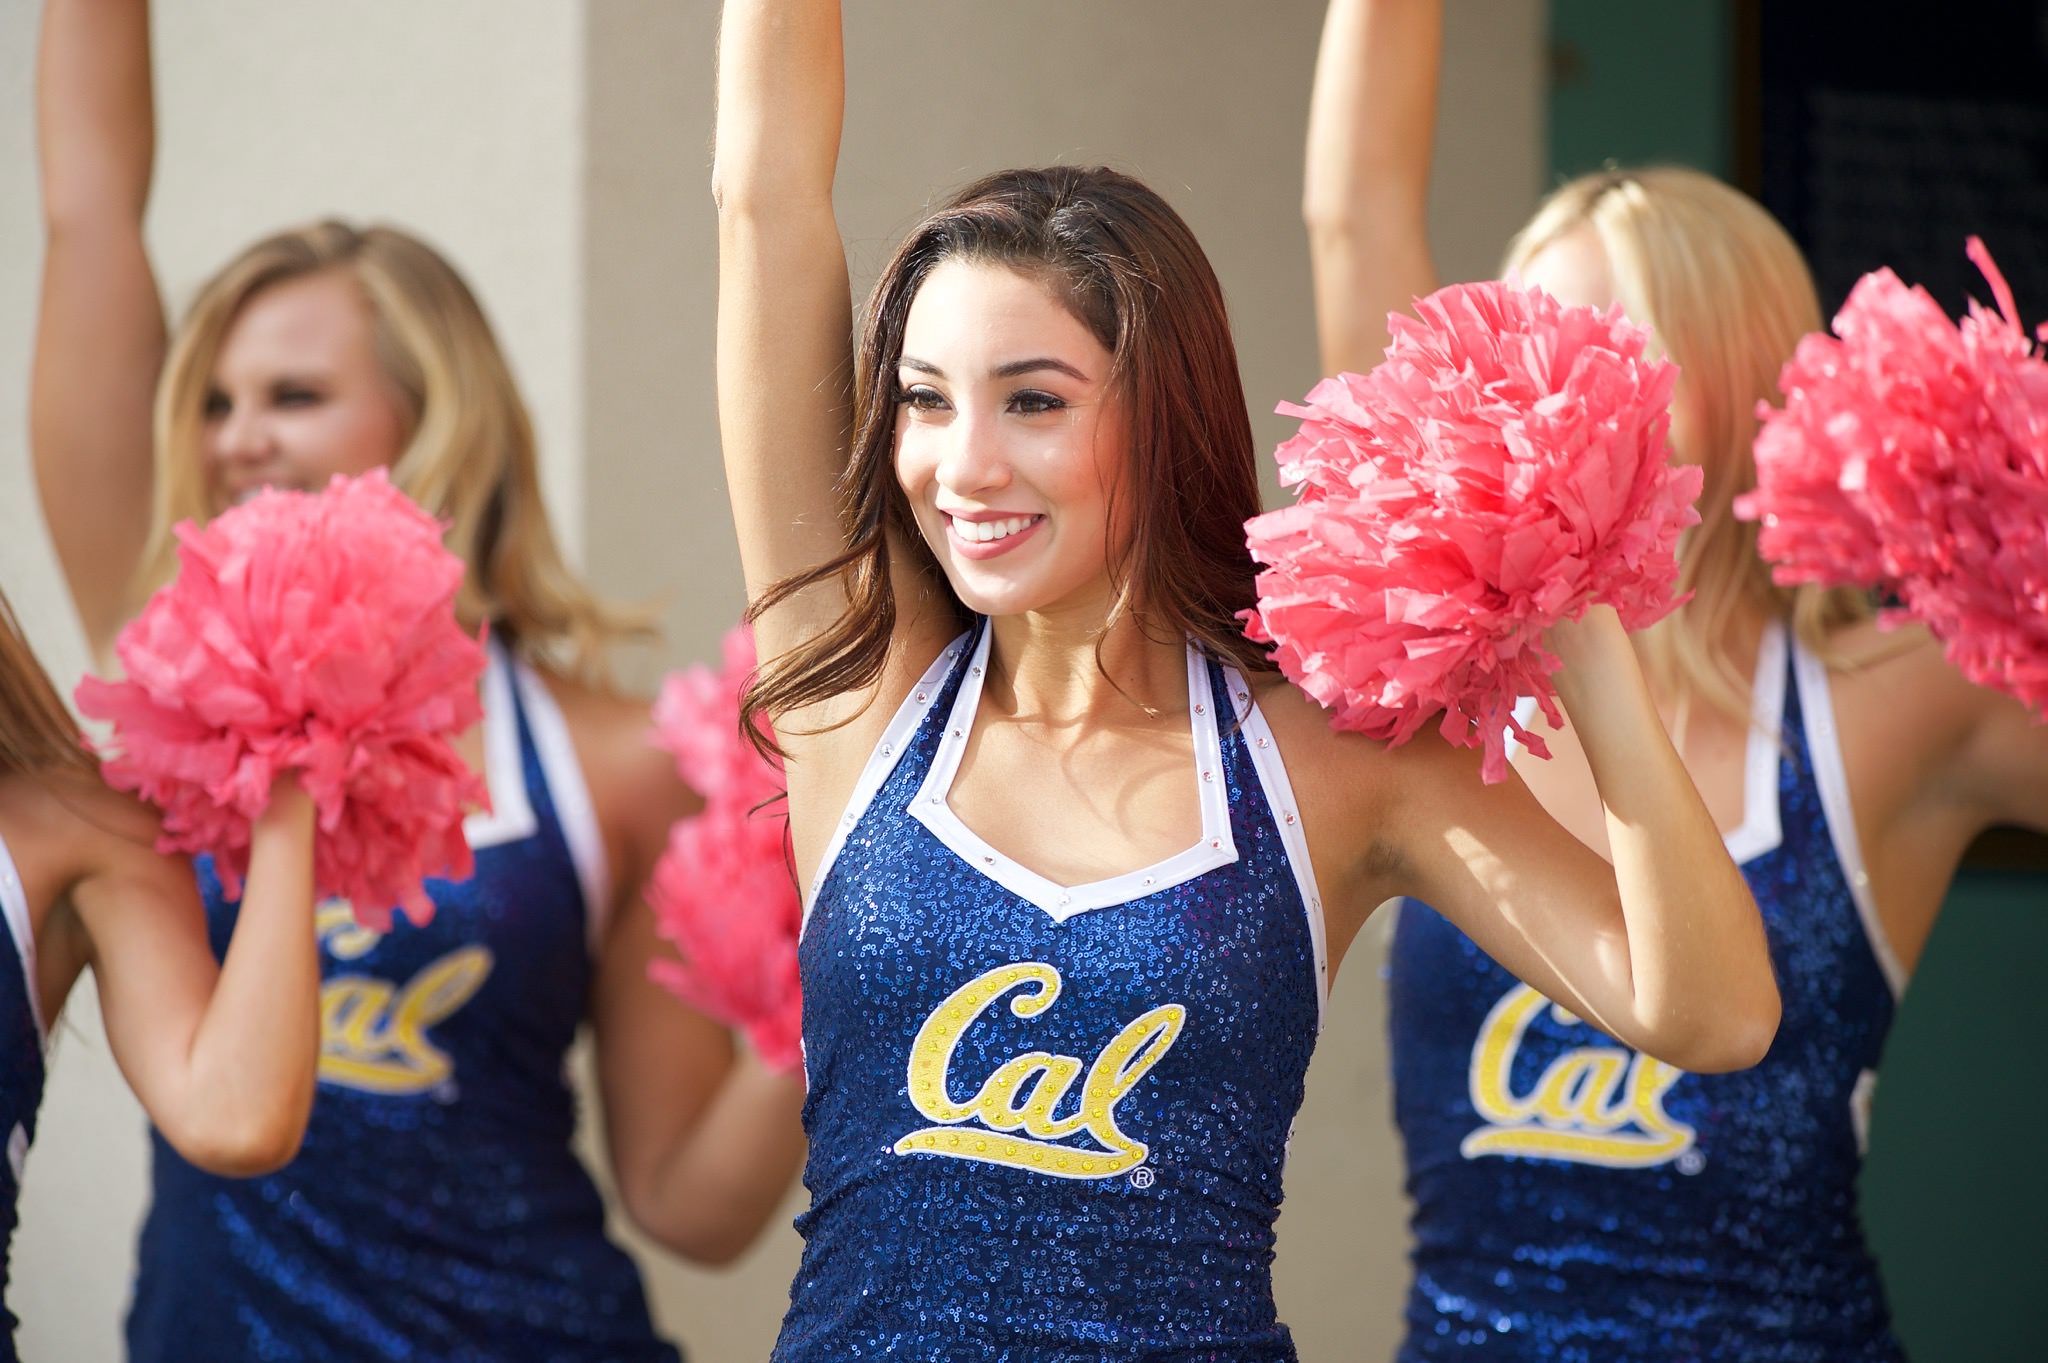
- Face. Humans connect with others when we see a face, especially eyes. Shooting an athlete’s back simply does not work.
- Action/emotion. Athleticism or an emotional outburst is the core of a sports photo; the more intense, the better.
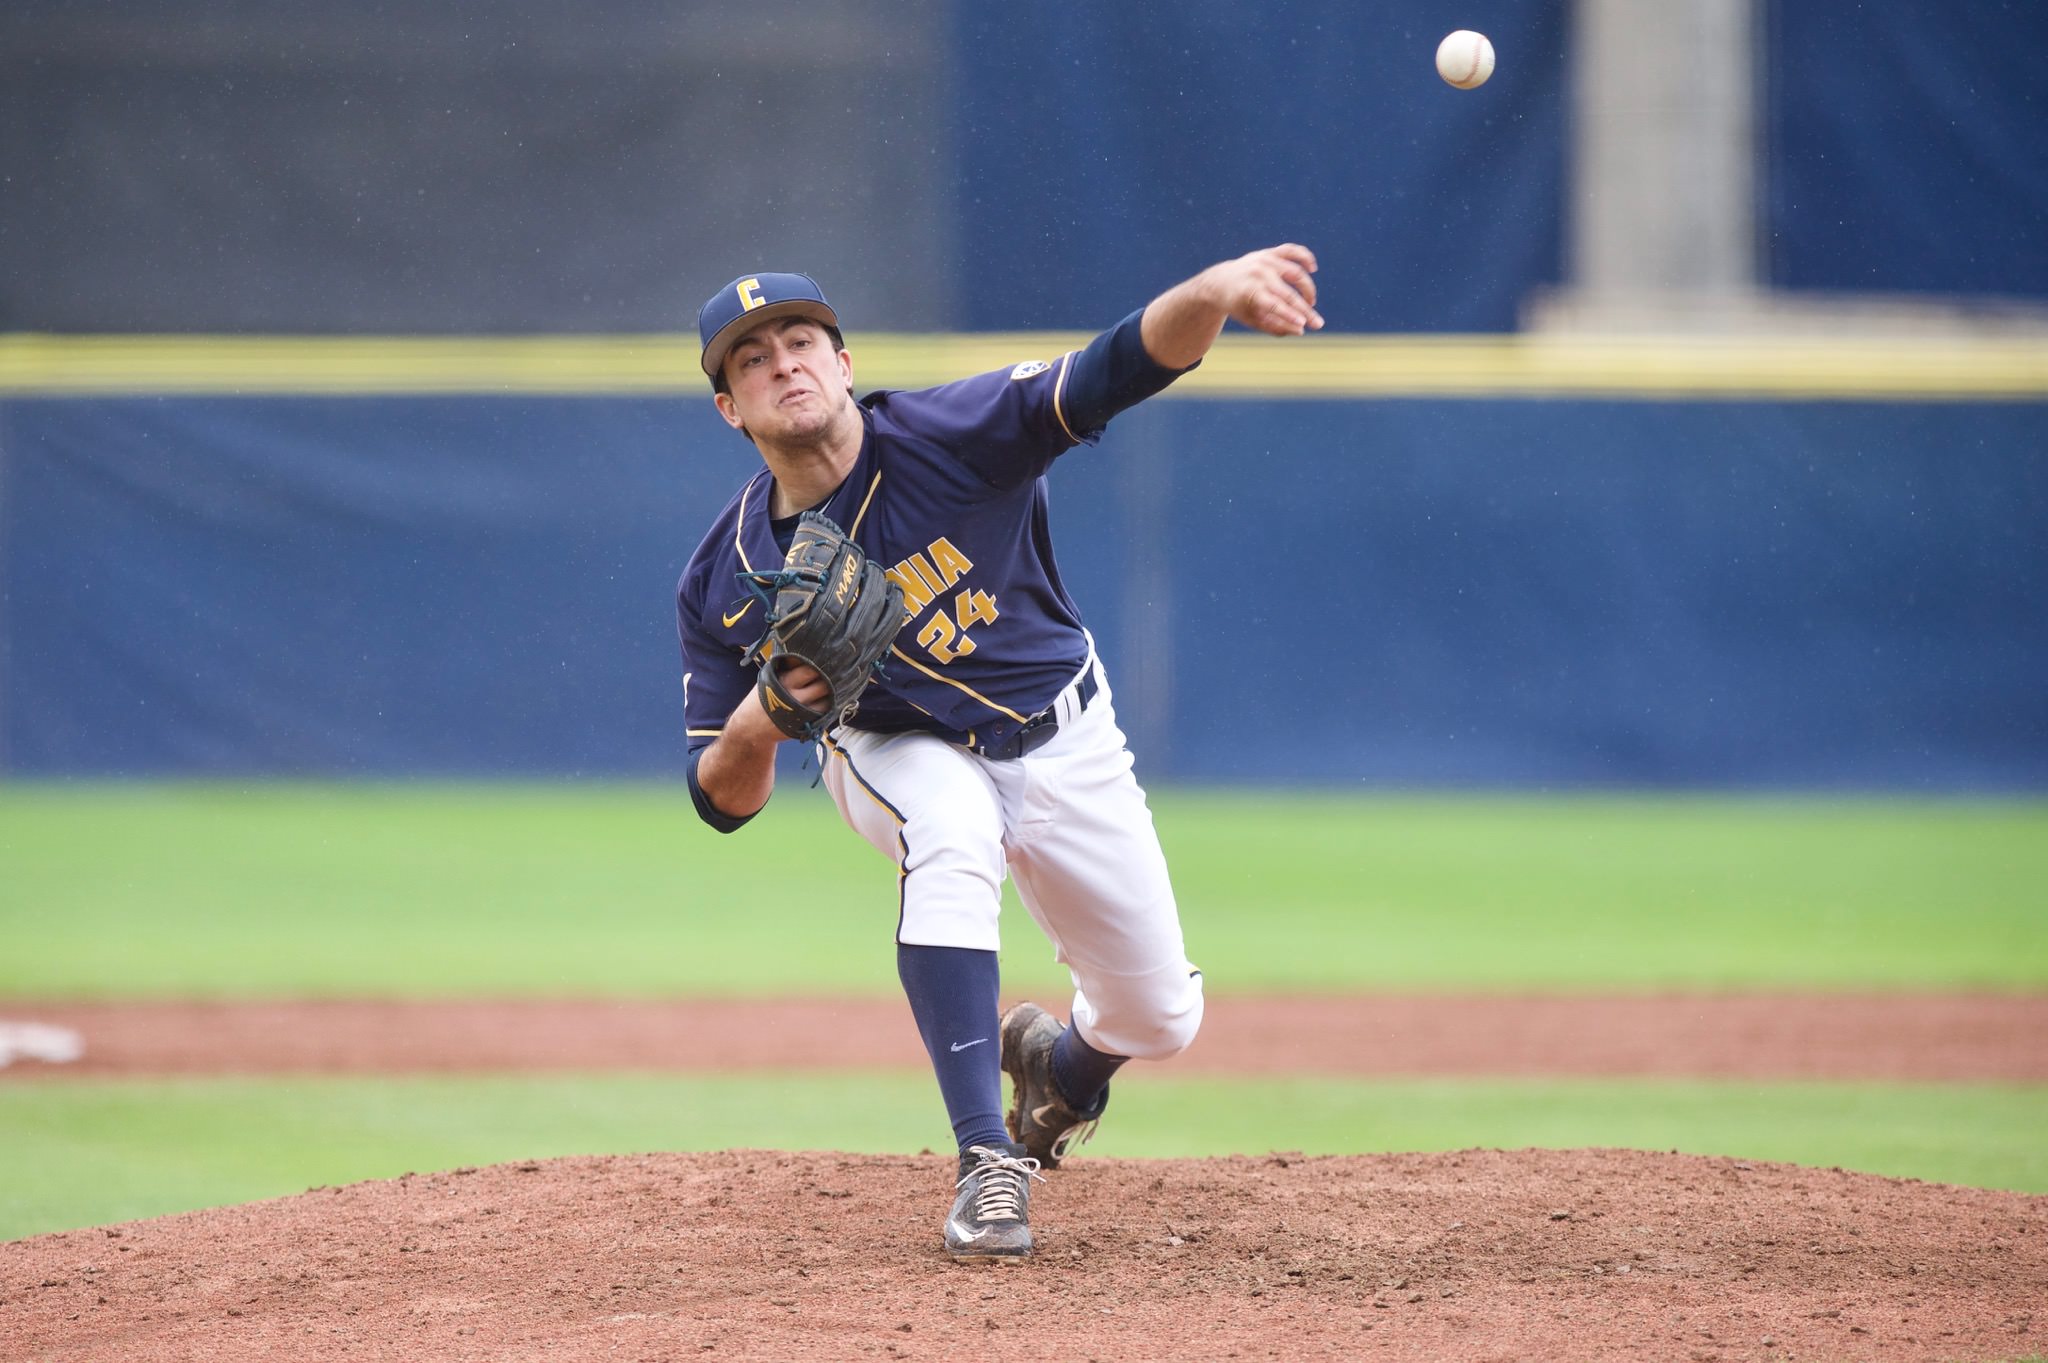
- Equipment. If the sport you are shooting uses a ball, bat, racket, or any other form of equipment it is good to show it being used in your photo.

2) Equipment
Good sports photos are often taken with good camera equipment, but good camera equipment does not necessarily make good sports photos. This is an important distinction because many photographers believe that simply by buying expensive gear they will improve their images. Actually, the opposite is sometimes true because big lenses and pro bodies can be more difficult to use than your entry-level kit.
I began photographing sports in 2015 with a Nikon D3300 and a Nikon 55-200mm f/4-5.6 lens. At the time, it was all trial and error. Pretty quickly I picked up a Nikon D700 (roughly eight-year-old body) and a Nikon 70-200mm f/4G. Later, it was a Nikon D750 and 70-200mm f/2.8G VR II. Now I have a Nikon D4S and a Nikon 300mm f/2.8G VR II as my primary sports kit. Progressing through this gear taught me some important lessons that I hope to share with you.
- Buy used. I saved $1500 alone by purchasing a used 300mm instead of new, and the difference in quality is indistinguishable. Be careful of sales that do not include actual product images or are “too good to be true.”
- Buy what you need plus a little extra. Do not compromise to save a few bucks; this will cause buyer’s remorse.
- Buy practical gear. Extra does not mean extravagant. Evaluate your use cases and buy accordingly.
- Buy lenses over bodies. Camera bodies date quickly; lenses are nearly timeless.
- Master what you have before buying more. Figure out what is holding you back (it is probably your skills, not your gear).
Every photographer is different, but here are a few equipment recommendations that will help to guide those who have learned the basics and want to take their images further. These are items that I consider to be essential for any serious sports photographer.
- Get a good 70-200mm f/2.8. With this lens you can photograph just about any sport and get good results. First-party brands are the way to go; I have met many photographers who complain about the quality of their off-brand lenses.
- Go full-frame unless all you do is daytime field sports. Full-frame has twice the image quality of APS-C except when long telephoto reach in daylight is your objective.
- Consider teleconverters before buying a new lens. For example, if you have a 70-200/2.8 and need more reach, consider a 1.4, 1.7, or even 2.0 TC before jumping on 300mm or 400mm lens.
3) Camera Settings
Chances are that you have already been told a million times that you need fast shutter speed for sports photography. Now you are going to learn some advanced camera setting tips to make capturing the action easier while increasing your keeper rate.
3.1) Autofocus
Getting tack-sharp focus on your subjects is one of the differentiators between a novice and an experienced sports photographer. The best way to do this is by optimizing your autofocus settings. Here are some tips:
- Use continuous AF, always.
- For small, fast subjects use dynamic focus point selection.
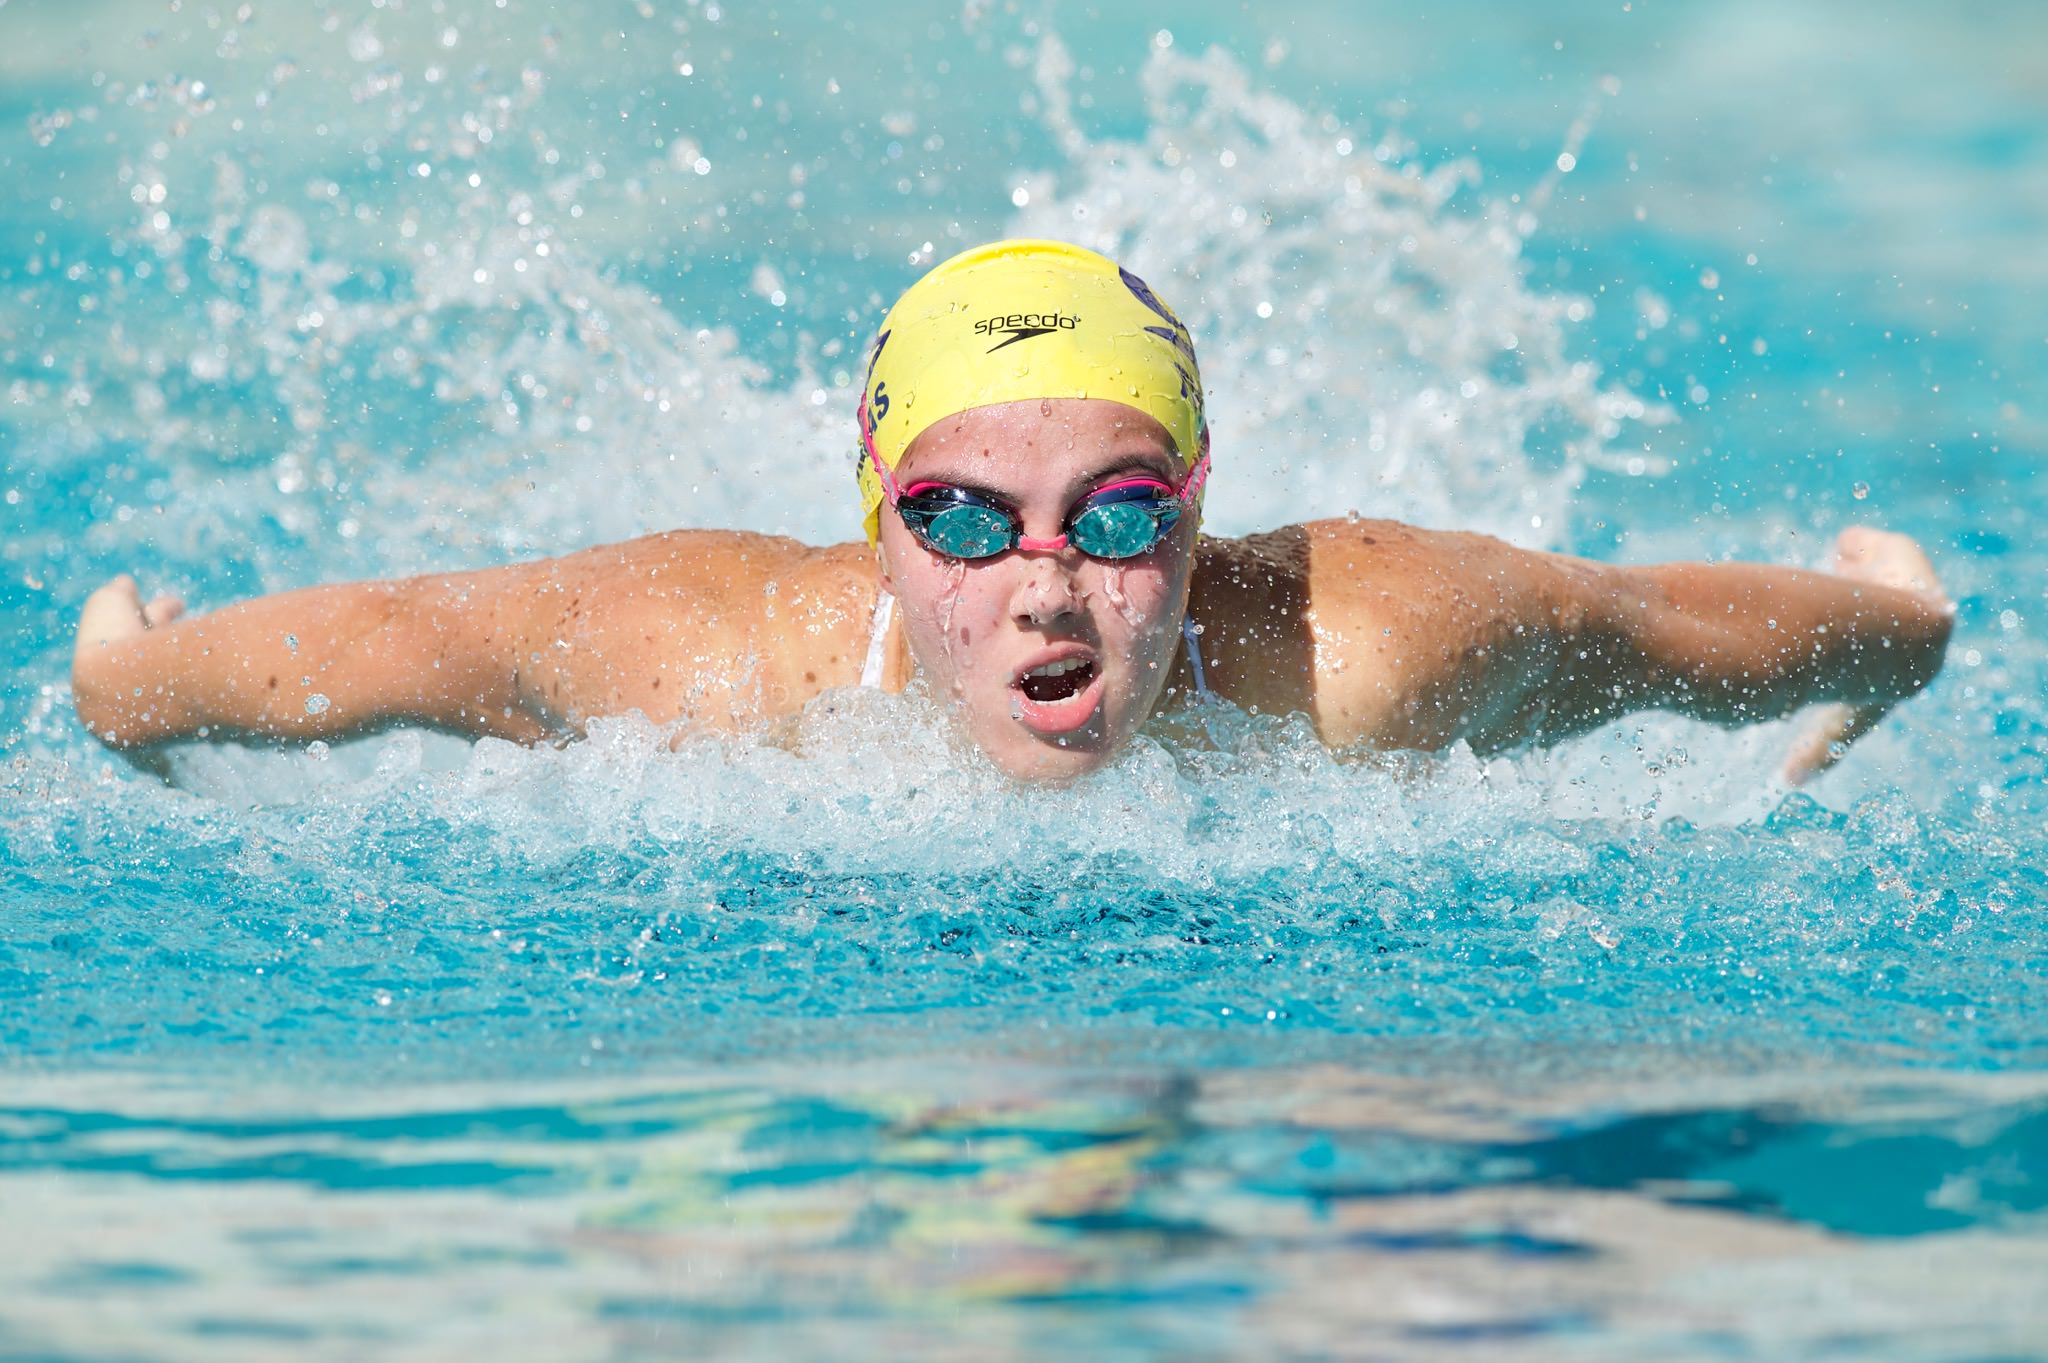
- For large subjects or in situations where objects frequently get in front of the subject (think water droplets in swimming) use single-point AF.
- Use back-button AF. The idea here is simple: separate your shutter and your AF activation. Allowing the shutter button to control both results in focus going where it should not.
- Adjust the location of your primary AF point to get proper framing, but remember that some focus points may not be cross-type (detect horizontal and vertical lines).
3.2) Auto-exposure and Metering
I generally advocate for two different approaches for achieving proper exposure for sports images. The approach chosen depends on the situation.
- Manual. Modern cameras are good at achieving proper exposure automatically, but can easily be thrown off by unusually bright or dark areas of the frame. The best way to avoid this is to set your exposure manually. This approach works best indoors and on cloudless days where the quantity of light does not change.
- Auto-ISO. For some reason I do not see other photographers use Auto ISO as much as aperture or shutter priority, but I feel it is the best for sports. Sports photographers should not be afraid to raise their camera’s ISO well into the thousands. Freezing action and controlling depth of field are more important than limiting image noise.
3.3) RAW
It is critical that you record your images in RAW format. A few sports photographers will tell you that it is better to shoot JPEGs because they take up less space on your memory card. Today large capacity memory cards are cheap and camera image buffers are spacious. If you are shooting for an organization that demands JPEGs during or immediately after an event, then consider shooting RAW and JPEG formats simultaneously. RAW images store all of the data captured by your camera’s image sensor, making them easily manipulated in post-processing.
4) Shooting Position
Few things in sports photography are as important as choosing a good position to shoot from. Changing your position by just a few feet can have a large impact on the quality of the images you capture. The best shooting positions vary greatly depending on the sport, venue, and level of competition. I intend to provide you with a framework for deciding where to shoot from in any situation.
4.1) Get Low
In general, it is advantageous to stay lower than your athletic subject in order to make them appear more powerful. If you are relatively short, then this is less of a concern. If, like me, you are above six feet in height it is recommended that you sit, squat, or kneel in some fashion to give extra drama to your images.
4.2) Back to the Sun
Back or side-lit subjects are a pain to shoot. First, they appear darker than their environment, and viewers tend to look at the brightest parts of an image. Second, lens flare and poor contrast can become issues. Try to choose a location that will keep the sun at your back. Your images will look so much better this way.
4.3) Athletes Facing You
You have already learned the importance of capturing faces, and the easiest way to ensure this happens is by staying on the side of the venue that your subjects are approaching. Here are a few examples:
- Soccer: sit near the opponent’s goal.
- Basketball: sit slightly to the side of the opponent’s basket.
- Swimming: sit on the side of the pool for long-axis strokes and at the end of the pool for short-axis strokes.
4.4) Where Action Might Happen
This one is vague, but it is important to learn the schedule of the event you are covering and position yourself accordingly. For example, at the end of a big basketball game you may want to prepare yourself for a celebration on the court. Anticipation is the key to sports photography; once the action has happened it is too late!
5) Closing Words
Thank you for reading the second post in a three part series about sports photography. Today you learned critical techniques that will assist you in taking your images from a beginner to an intermediate level. Stay tuned for the final segment geared towards advanced amateurs. I will cover how to get involved with higher levels of competition, post-processing, white balance, more gear recommendations, and other topics.
I’d like to hear your thoughts on composition when filling the frame with the athlete. At some point, you start to “crop” out parts of the image and this can be parts of their body. At what point do you toss out for hands/feet being cropped out? Or go even closer for the classic head and shoulders shot? I see this in legs a lot, if I see the knee, I want to see the whole leg, but if it is just above, and the ball/stick is in their hand, I think it looks ok.
Hi Steve. Your question is one that portrait photographers often struggle with, but it applies to sports, as well. My general advice is to avoid cropping at the joint because this looks like an amputation. Regarding sports, it’s important to keep the objects your viewer cares about in the frame (face, ball, bat, important body parts). For example, a photo of just the upper body on a swimmer would be fine, but for a soccer player this would leave out the ball at their feet. This article might help: digital-photography-school.com/good-…portraits/
NIce.
One extra on the positioning. This is a venue thing. When you have considered all the points here mentioned, then look consciously at the background that your position gives. Are there any weird artifacts, dominant color patches or other things that will prevent your subject from standing out? If yes, consider moving, perhaps only slightly. In the end, it will be the background that will make or break your subject :)
One exception on the “get low” is indoor volleyball. If you have the possibility, try getting up high. Best to have a long lens for that
You’re totally right about avoiding cluttered backgrounds and shooting high up for volleyball. I will talk more about framing and backgrounds in the next segment. Sounds like you know your stuff because I would consider your tips “advanced.”
Very nice article. Lots of good tips and advice. I shoot a lot of sports (17 grandkids) and I like auto ISO outside and in good lit indoor events. If the lighting is not real good I tend to like shooting full manual. Even if you set a max limit for ISO and minimum shutter speed if something has to give (not enough light) then your camera will still try for a good exposure. What happens is your camera will go below the minimum shutter speed you set.
I also like to shoot raw but if I’m just taking action snapshots for the web or small prints then I shoot jpg. Easier (faster) to post process.
Thanks for writing such a in-depth article. I’m sure it will help many.
Thanks, Mark! Good luck and have fun out there.
Masted the basics? I need to do that.
I enjoyed reading about buying used lenses and camera body. I currently use a Canon 6D for my kids’ sports but am concerned that fps, autofocus, etc. is holding me back. Any thoughts on a new body or if I need one. Don’t own enough Canon lenses to be married to Canon. Almost purchased a Sony A6000 but got cold feet when I read about the lack of lens options. Thank you in advance!
-Todd
Hey Todd. What lens are you using with your 6D? I think Nikon and Canon are about equal overall with Sony being more focused on mirrorless. I’ve only seen one sports photographer use mirrorless in the field.
I am using the Canon 70-300mm f/4-5.6 L IS.
Would there be downside to picking up a Canon SL1 (which has a 1.6X sensor) and stick with the Canon 70-300mm f/4-5.6 L IS in order to increase my reach. My biggest issue is that the 300mm reach is not quite enough to get good sports shots of the kids from the sidelines. I guess that I could also get a 2X telconverter with the 6D but are there some negative consequences? Lastly, would it be best to invest in a Canon 70-200mm f2.8 IS II and then crop my way to the picture I want? Many questions. Thank you!
I wouldn’t recommend getting a crop sensor body if you already have a full frame 6D. I would highly discourage putting a teleconverter on an f/5.6 zoom lens because autofocus and sharpness will be terrible. What sports are you shooting that you can’t get tight shots at 300mm? Are you on the sidelines or in the stands?
Todd,
I have only been doing serious photography for 6 months. I bought a new Nikon camera. And, with the exception of one lens, I bought all of my Nikon lenses used on Ebay. I bought from people and not from dealers. And, I have not been disappointed. If you think you need another lens, read Ken Rockwell’s comments on the best Canon lenses. Then, see if you can get other opinions from Nasim or others. That is what I did. I chose the lenses I bought based on straightforward talk from these experts. Ebay allows you to review “sold” items. That way, you can get a feel of what the market price is for what you want. If you are not comfortable dealing this way, then go to a reputable dealer and buy a used lens with a short term guaranty.
peter
Great suggestion. I will focus on buying from people versus dealers. Thanks!
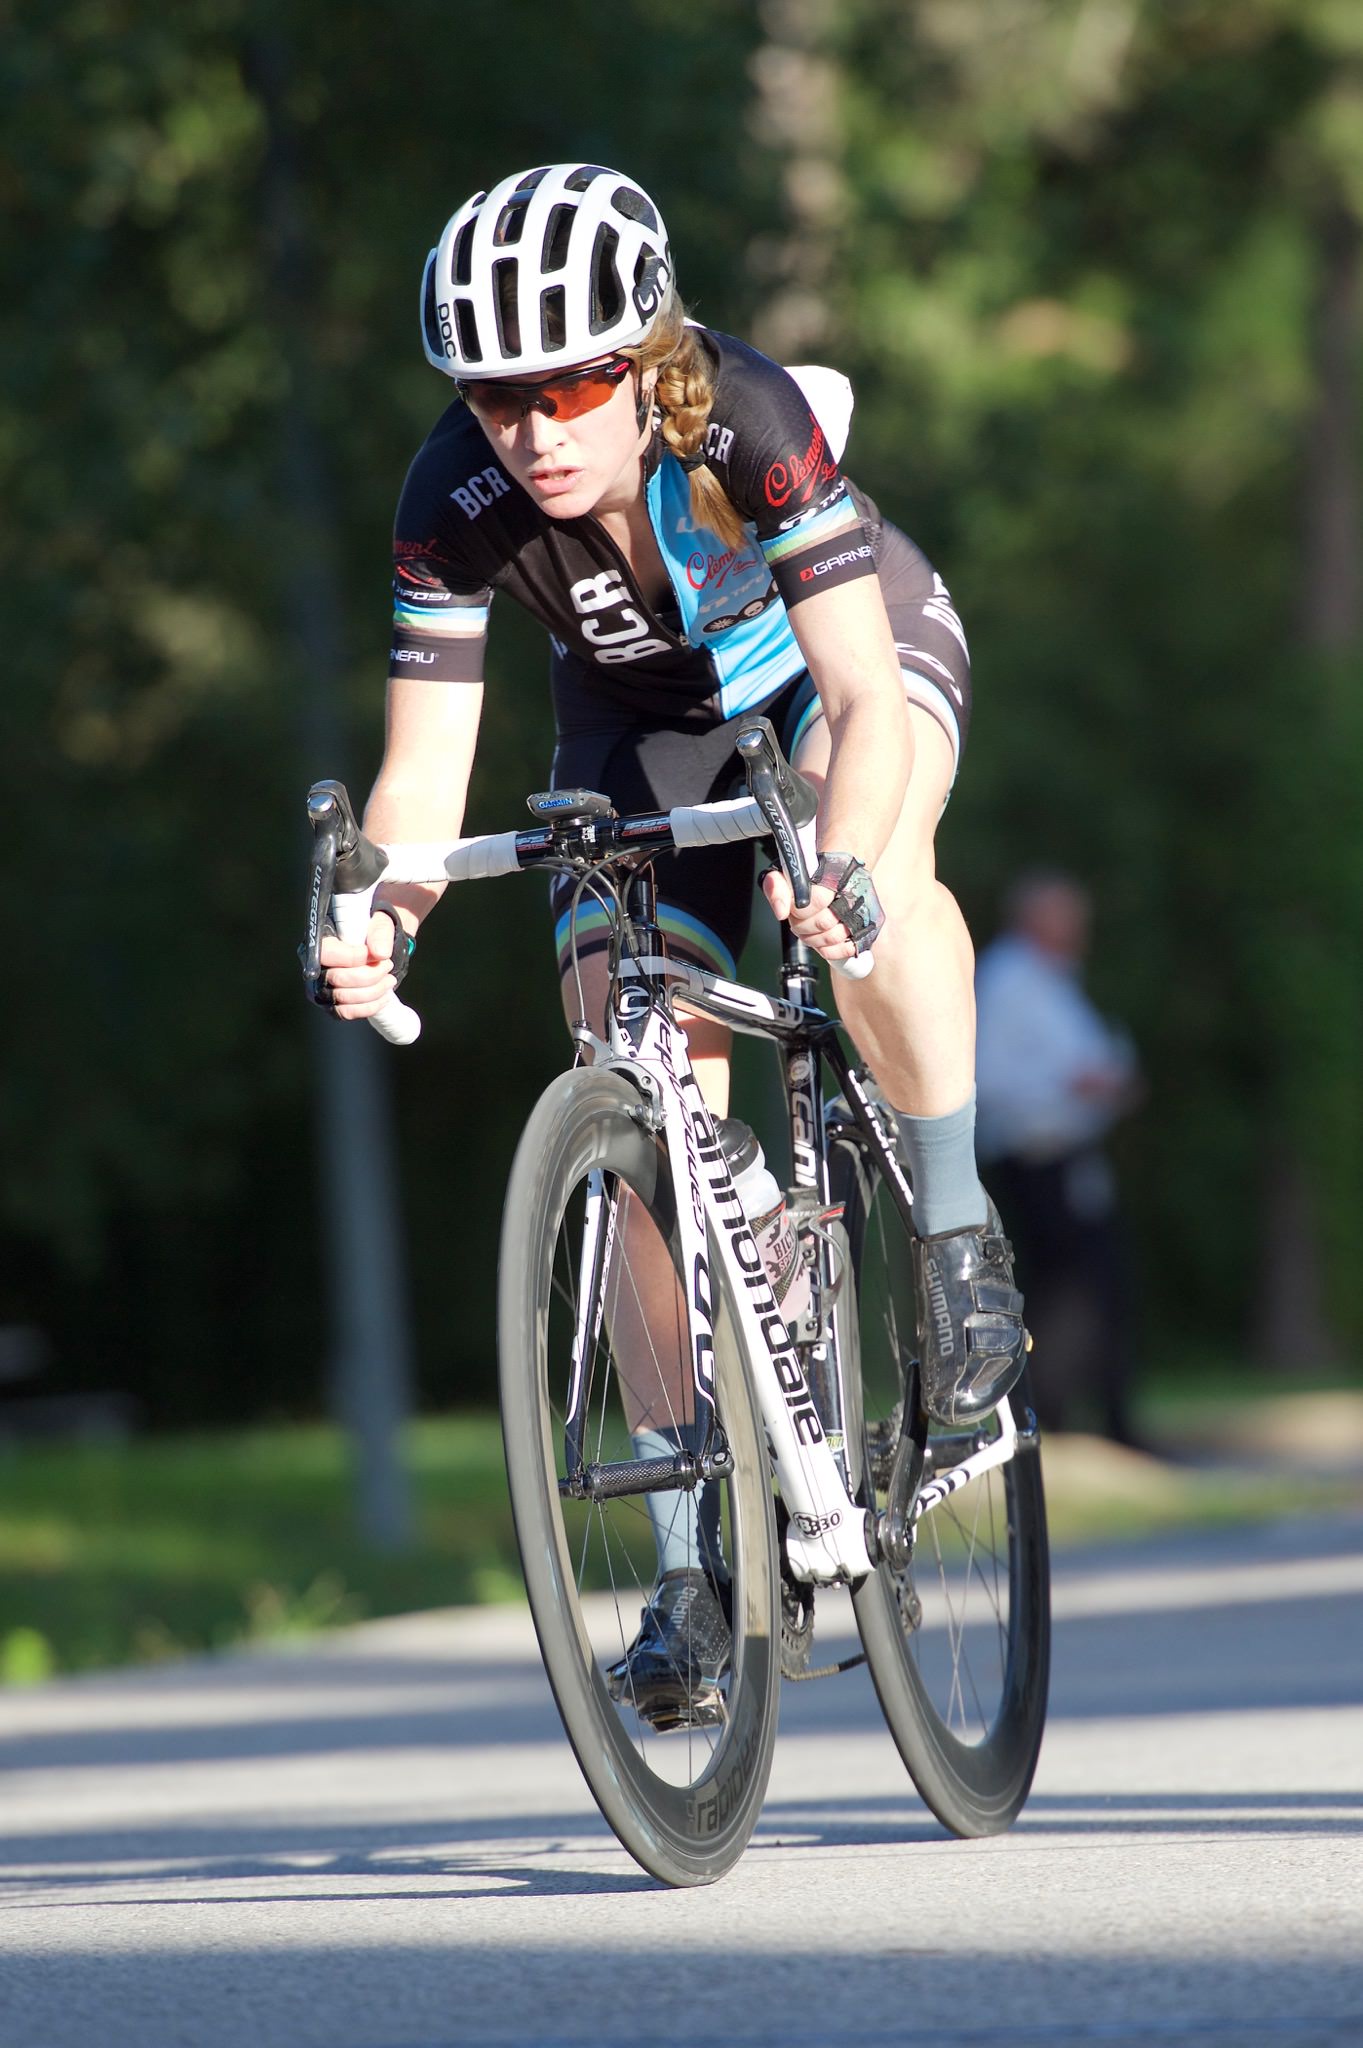
Lots of great points. For several years, I’ve shot bicycle racing (mostly cyclocross and winter fat tire), kayaking and rodeo. Of the three, for me rodeo is far and away the most challenging because of the speed and erratic movement of so many of the events. Based on my experience, to your point about getting low, I would also add “keep moving.” For me, that translates into much better variety. If you do decide to keep moving, my advice is to study the venue in advance so that you can find the sweet spots that offer the promise of good action and decent light. As to your point about going full-frame, I’ve moved the opposite direction. I started with a Nikon D700, moved to a D800, then a D810 and now shoot with a D500. I don’t think the images have suffered. And matched with the D500’s state-of-the-art autofocus and flicker reduction (makes a big difference under some arena lights), the slightly deeper depth of field at big apertures has improved my rodeo chances of getting both the horse and rider’s head sharp when they’re moving toward me. It also gives me more reach, although I seldom need it, and you can fire off 10 frames a second, although I usually use “continuous low” set to 7 frames per second. To the extent it’s possible, I try to keep the shutter speed really high. Like north of 1600th. In particular, for kayaking a very fast shutter seems to make the flying water more showy. When I do have to go slow, I try to use a monopod and time the shot to some slower part of the action (the swing around the barrel during barrel racing, surfing a standing wave on a kayak).
Thanks for the comment, George. It’s great to hear the perspective of another photographer. You’re completely right that moving around is better than staying in the same spot for the whole event. Experimenting with different viewpoints is the best way to get a variety of shots. It’s good to hear you’re enjoying the D500!
One phrase I’ve heard (and use) is from the newspaper world: “no face, no ball, no picture”.
I like that saying!
Matt,
thanks for continuing this series. I have a problem: Keeping my shutter speed at 1/500 or higher.
I am shooting in a roller skating rink with poor to uneven lighting. My photos wind up grainy (lots of noise). I have a D810 and the best Nikon lenses ( 28-70; 70-200; 300-500). Yesterday, I photographed my 5 year old granddaughter doing her first artistic roller skating lesson. I was on skates and used my best portrait lens (85mm f/1.4). I set the max ISO for 6400; minimum speed at 1/500; and EV at +0.7. The camera wants to stay in focus – to do that, the camera takes pictures at less than 1/500. Most at 1/320 and a couple at 1/200. This produces a slight motion blur and lots of grain.
Question: Am I better off getting underexposed shots and trying to fix them with Lightroom?
To do that, I would switch EV to -0.3 or -0.7. The goal is to get faster shutter speed – like someone else wrote 1/800.
That high speed is not possible with the lighting conditions I am working with.
Any other suggestions. Thank you. peter
The best piece of advice that I can think of is to go manual. No more +- e.v. ever. You get all the settings just the way you want them. We all come to that moment when we realize that we have to turn off auto if we want to advance. It’s scary, but once you do it you will wonder why you waited so long!
Thank you Elaine. I just started using manual photographing sunrises on a tripod. You have so much more control over the shutter and produce much better color. I never thought about using manual off of the tripod. I will do so tomorrow.
peter
Elaine, I have really learned something today: Manual + Auto ISO. Nasim probably instructed on this combination. I have only been on the quest with my D810 + lenses for 6 months.
Manual + Auto ISO is really easy to use. You do not have to worry about “exposure” (lightness or brightness) because the camera automatically sets the ISO. I set a max for ISO – in my case in the rink, for like 10000. Manually focus the camera. Dial in whatever minimum speed I need. And, the aperture for a single skater is usually wide open or a stop down. That’s it. You look at your light meter and adjust the aperture accordingly. For the skater, I don’t really need much DOF.
Thank you again.
peter
Hey Peter,
A couple more thoughts. I agree with Elaine, that shooting in manual might be a great place to start. I do disagree in regards to exposure compensation. Cameras are very sophisticated these days, and are capable of figuring out the exposure of most scenes faster than you or I could. But there are times when the lighting is difficult (say a strongly backlit portrait) and the camera is “fooled”. This is where exposure compensation can help. Exposure compensation allows you push or pull your exposure in a direction that is favorable to your primary subject. Remember that your camera is generally looking to find an exposure that is in the middle of your brightest highlight and you darkest shadow. Most times this works, but under high contrast lighting conditions it can create results that do not work for your subject. The next thought I had was it sounds like you are pushing your camera to the limits of what it is capable of. The environment your granddaughter is skating in sounds like a real challenge. When shooting in extreme conditions it always comes down to compromise. In your case you are going to have to choose between noise or blur. Personally I’ll always take noise over blur, and I think the author of the article said pretty much the same thing! You may not want to hear it but you may even want to push your ISO higher than 6400. If your lens is wide open and your shutter speed has to be 1/500, then higher ISO is the only way your going to get more exposure. I would also suggest avoiding the mindset of “fixing it in post”. Do your best to get it right in camera, over the long term you will be much happier with your results. Also remember that if you underexpose and pull up your exposure there’s a good chance you’re going to induce more noise in the image anyways (especially high ISO shots). That’s not to say that there are not times where we need to fix it in post, it’s just that it should be the exception not the rule. Just a few more thoughts…. The D810 is a beast! I shoot a D800, and I have come to understand that it is very demanding with regards to shooting technique (one of the reason I also have a D750 for more of my run and gun shooting!) In your comment you said you were on skates….while shooting? Your are braver than I! If this was the case I would say that you are introducing another movement variable that is actually fighting you when it comes to getting sharp images. You need stability. Check PL site for their article on correctly bracing the camera for maximum stability. If you have to be on skates find a way to stabilize, kneel perhaps. The last suggestion I have is shoot a short burst, maybe 2-4 frames. I have found that many times the shots in the middle of the burst tend to be a bit sharper, perhaps I’ve settled in. In any event it will give you a few choices in hopes that all the stars align!! I hope that helped. Good luck and have fun!
Jeff,
thank you for your comments. Nasim has every right to be proud of his website – you really get terrific information here and fast!
I agree that a 73-year man should not be skating backwards during a roller rink practice just to try to get a decent photo a person with an 85mm lens. And, I never did that before until yesterday. All of my other photos of my oldest granddaughter were made on the sidelines. And, all of them are noisy. Not terrible – but, no photo contest entries.
I also shoot fencing at 1/1000 in unevenly lite environments – my oldest grandson. The lighting is better (brighter) but the action is super fast. A skirmish is over in less than 3 seconds. There, I shoot with the 70-200mm f/2.8 wide open and blast away, getting possibly one terrific photo out of 50.
Nasim, on my part, the interest in sports photography is huge. And, the help that is wanted is help for dealing with miserable conditions, for example – track and field and soccer and lacrosse and football in pouring rain or dust or snow. Same for fishing and hunting and bird watching. Please show us how to make good photos in miserable conditions. We can not control the weather but we can control the camera.
Regards,
peter
Hi Peter. I think the other commenters have given some good tips. What I’ll add is that I’ve been in similar situations where you realize that the conditions are not great and your photos may not be perfect. 1/1000s is enough to freeze a pro athlete. I think 1/400s would work fine for your granddaughter. One other thing is that at high ISO it’s important not to underexpose because dynamic range varies about 1:1 with ISO. If you have 12 stops of DR at 100 ISO you’ll have about half that at 6400. This means less flexibility in post processing.
Regarding rain and other poor conditions, I’ll try to touch on that in my next post if there is room. Thanks for reading!
Go Bears! have you shot the Quidditch play on the field just north of the main library?
So far I’ve only covered a few of their varsity sports. Soccer, baseball, volleyball, basketball, swimming, water polo, and softball.
Matt: If you can add 1 thing to the article, it is the light & the ISO settings for each of these light situations. I see a few pics at ISO5000. Wonder how much noise it creates?
Hi Kalyan, sure thing, I’ll just put the details in this comment. Any full frame camera made in the last four to five years should do pretty well up to 6400 ISO. For my D4s and D810 the noise at 5000 is very acceptable with most details staying intact. Regarding the images:
1, 2, 6: Haas Pavilion at UC Berkeley, pretty standard college basketball arena.
3, 5, 8: Outdoors under clear skies.
4: Outdoors in the shade shortly before sunset.
7: Outdoors in the rain.