Before Nasim and I traveled to the Faroe Islands two months ago, the weather forecast predicted nonstop rain and nearly 100% cloud cover for the entire ten-day trip. Upon arrival, things didn’t look any better. Rain today. Rain tomorrow. Hey – only a 70% chance of rain on Sunday.
Turns out that accurately predicting the weather in the Faroes (an island chain in the North Atlantic, roughly between Norway and Iceland) is a fool’s errand. That’s why locals call it the “Land of Maybe.”
For our purposes – photography, of course – we soon learned that it was possible to get good light on occasion, but it always involved a lot of waiting and hoping. Certainly, landscape photographers are no strangers to the waiting game, but the Faroe Islands kick things up a notch by throwing 60+ MPH gusts of wind and sudden downpours at you while you huddle in place.
When the sky does open up, though – something that ultimately happened six of the eighteen sunset/sunrises we spent on the islands – the scenery is amazing for photography. But you have to be quick, and you have to be at the right location, ready to take pictures at a moment’s notice.
That was truer than ever on our final evening of the trip, when we took a ferry to the northern island of Kalsoy. There’s a bit of a hike on that island to reach a great spot for photography – a famous lighthouse at the northernmost tip (though “famous” is relative on an island with a population of 76 people; we were the only people there at sunset).
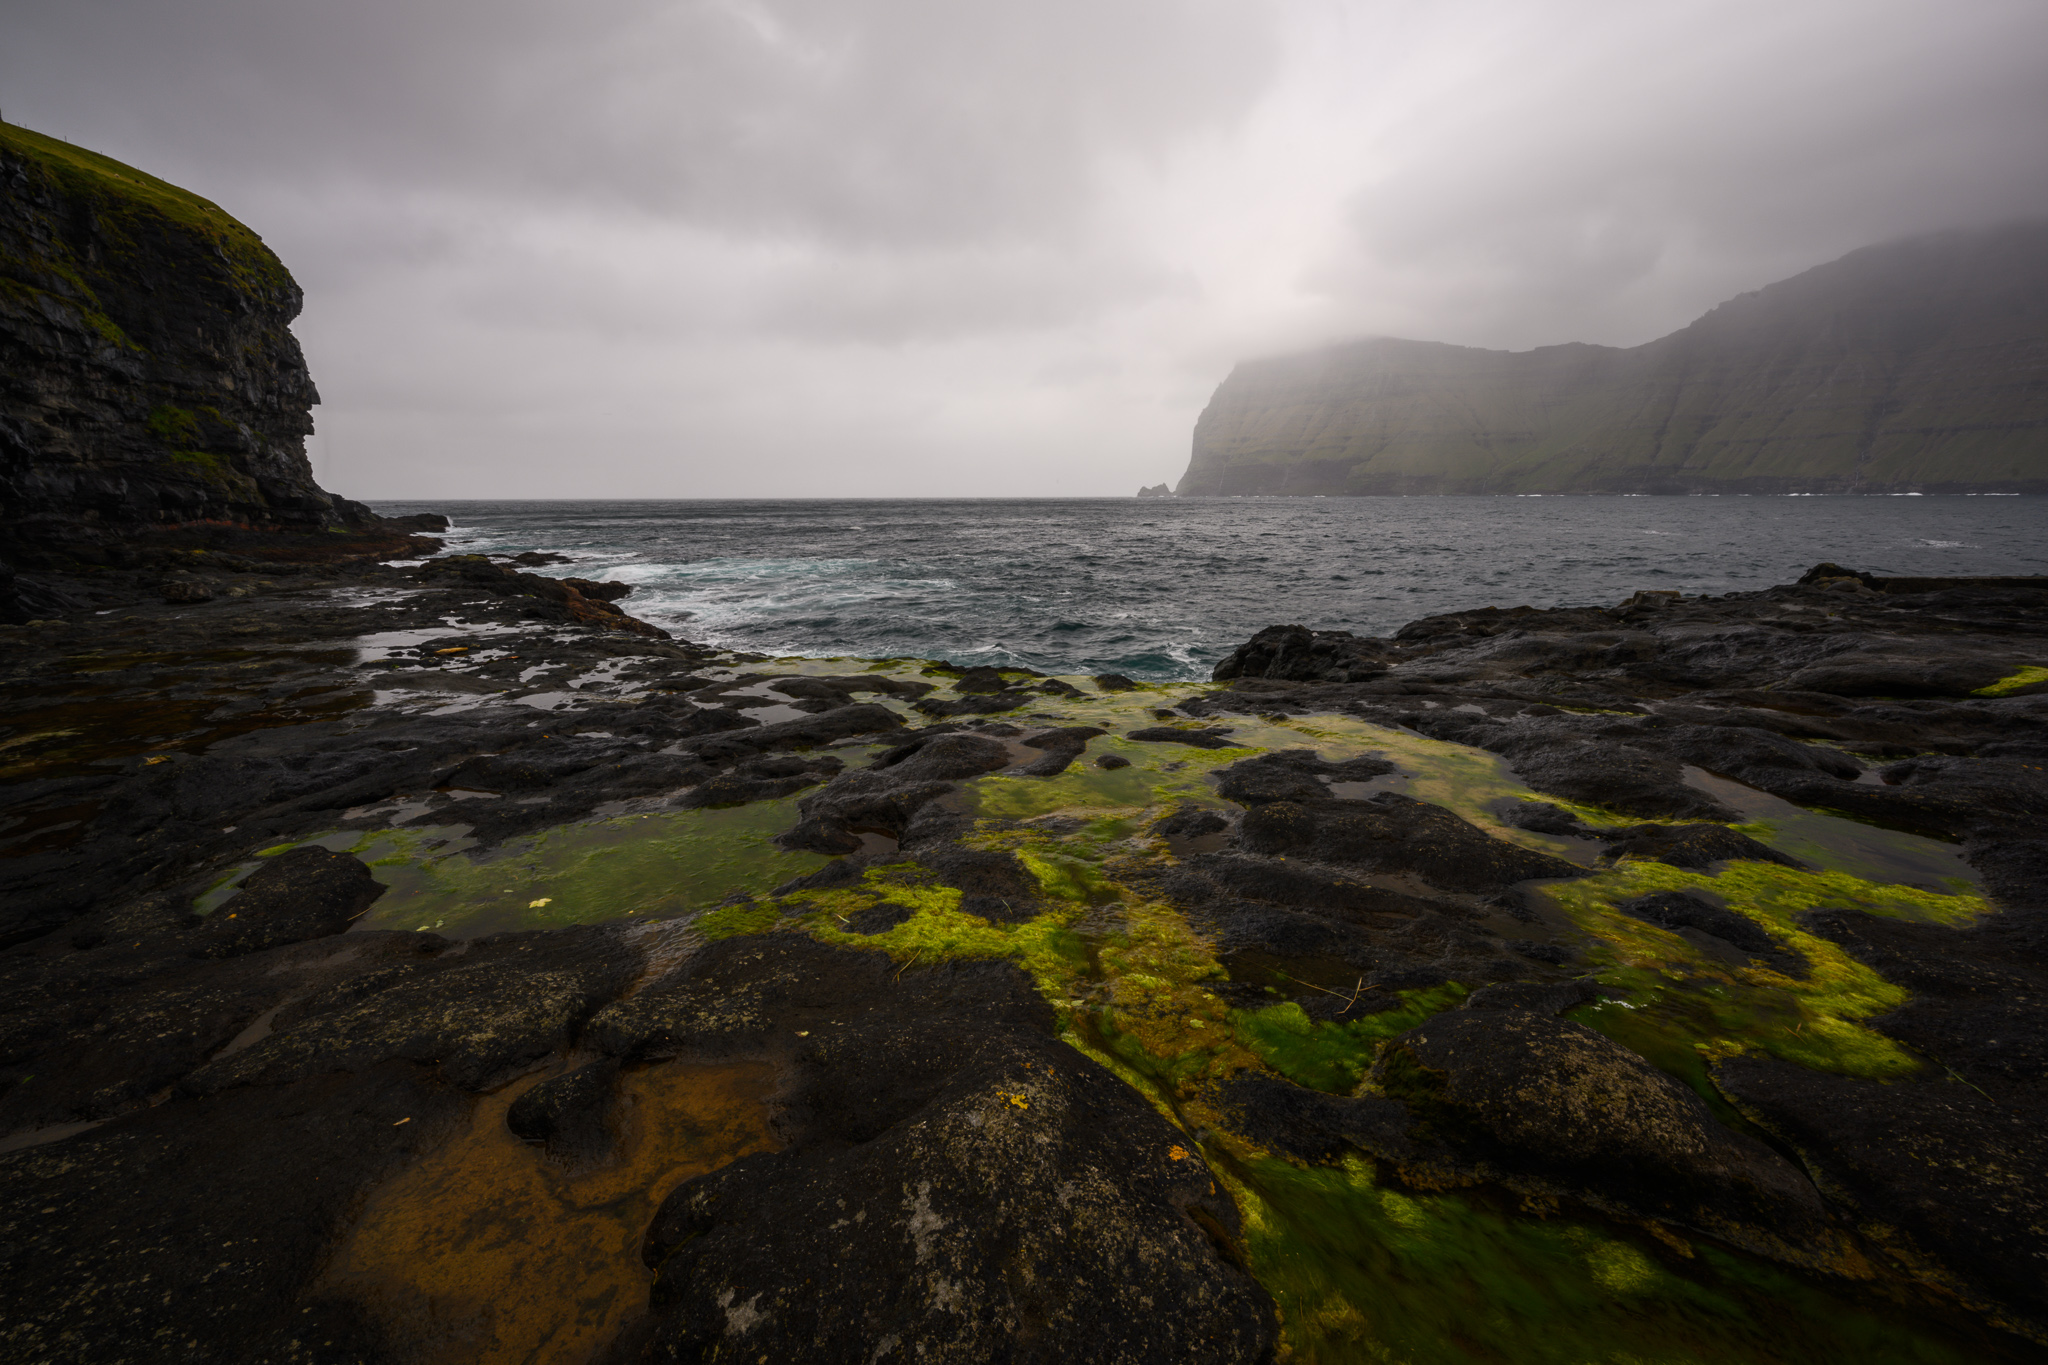
The weather was not promising that day. It had been raining for hours, and clouds blanketed the sky. For context, less than two hours before we arrived at the lighthouse, I captured this uplifter of a shot:
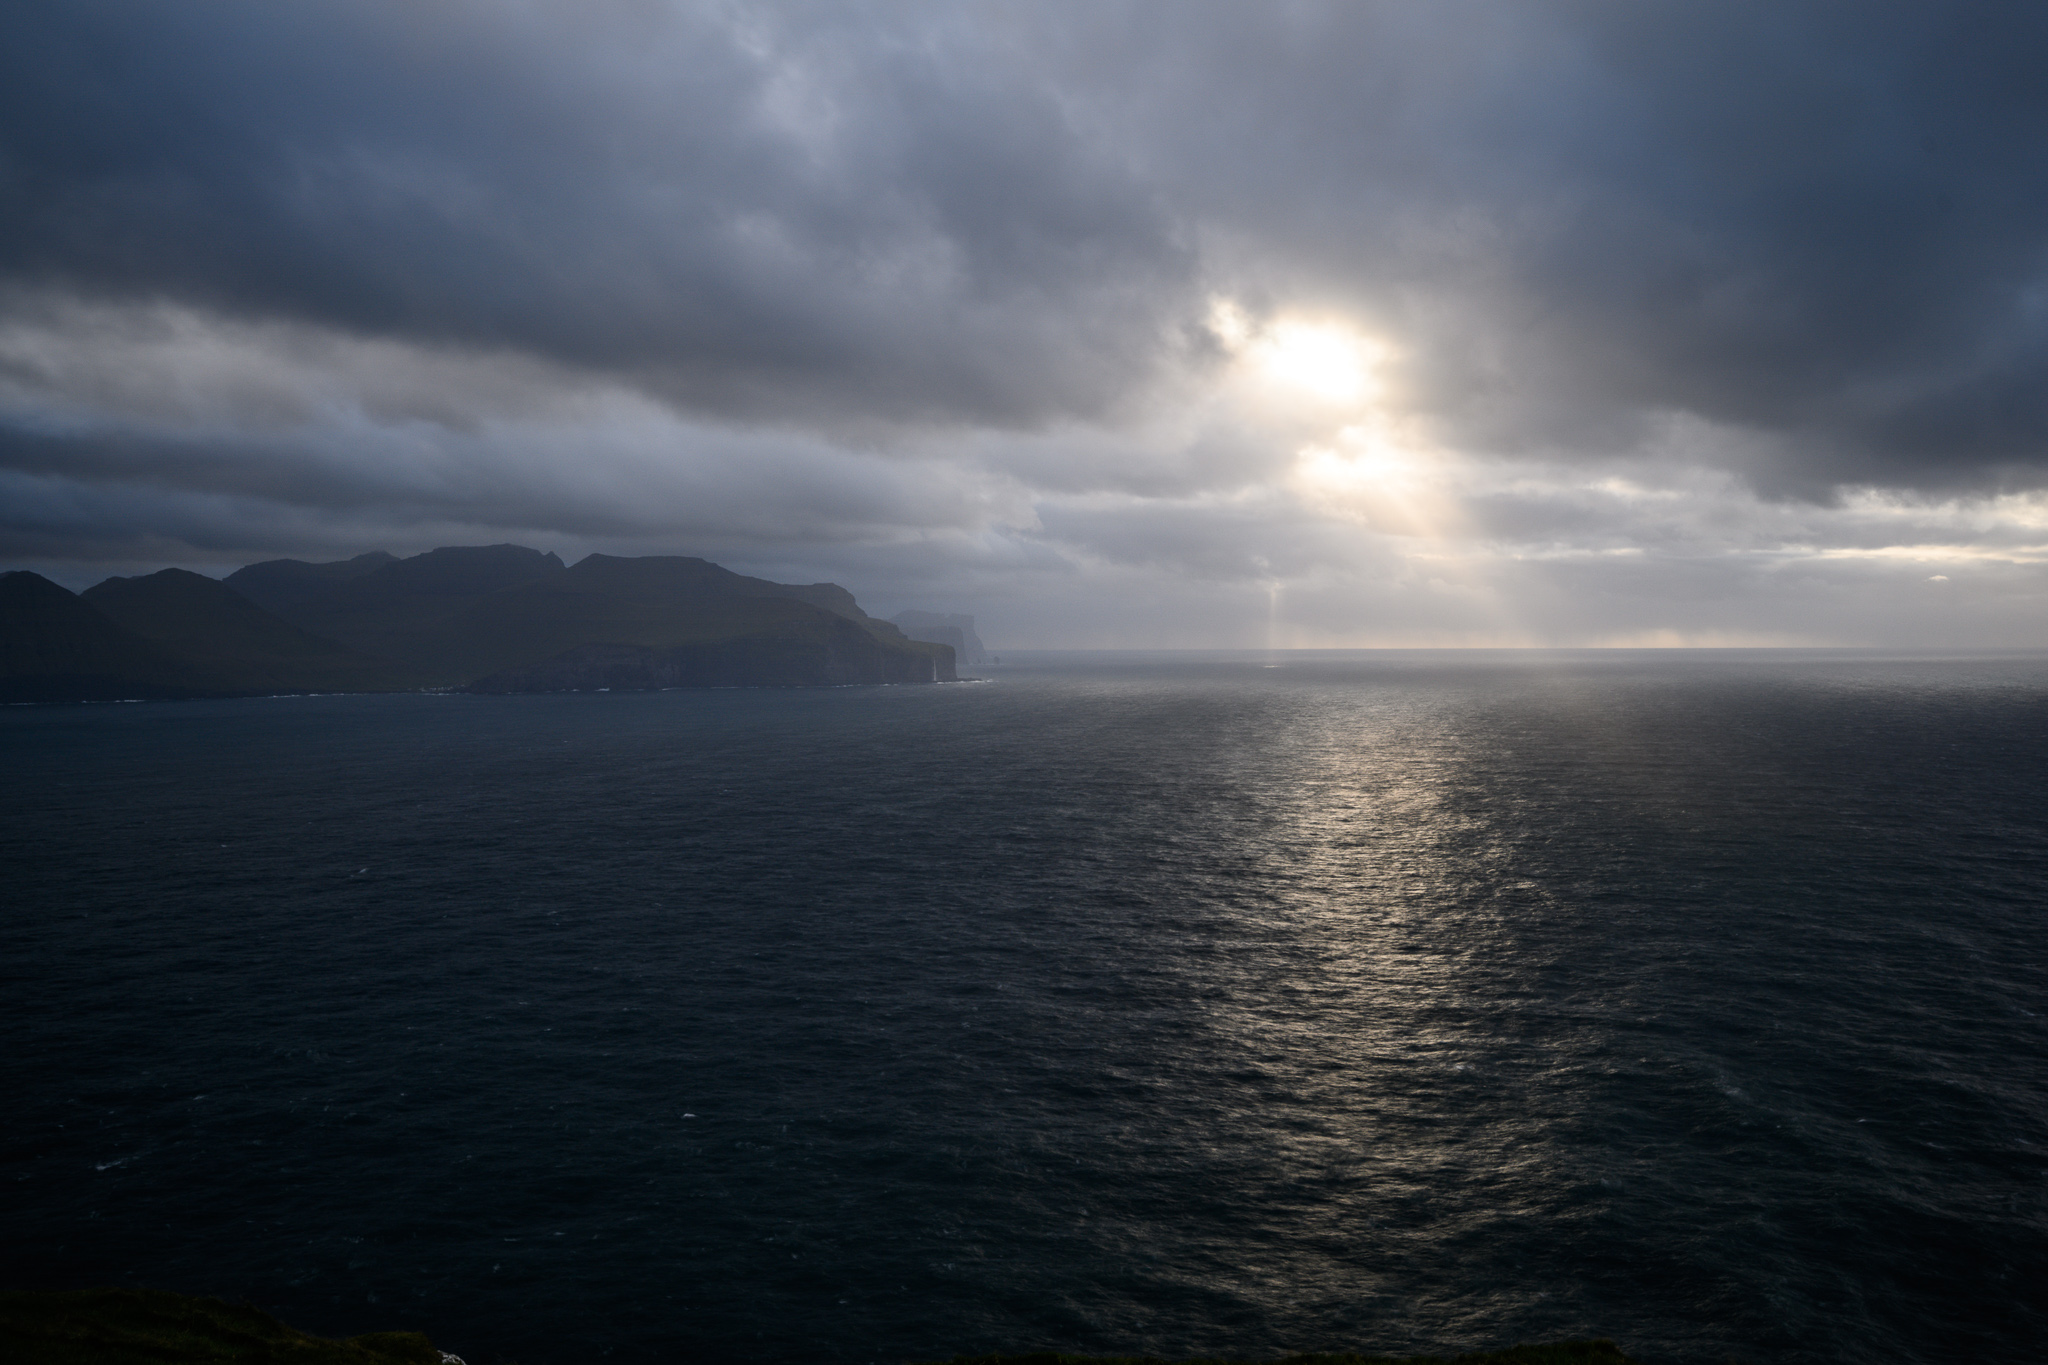
When we arrived on location, things were a bit better. Clouds still dominated the sky, but occasional breaks allowed a hint of sunlight and color to reach through:
But breaks like this were rare, and the weather seemed to be getting worse. The wind picked up, and it got cold. Nasim and I stood for more than an hour with our backs leaning on the least-windy side of the lighthouse. It was peaceful, in a way, and we took turns calling our families in the United States while we waited. (The Faroe Islands have remarkable cell coverage, even in the isolated areas.)
Then it got darker and even colder, and more clouds rolled in. No chance it would work out for photography. Neither of us said it aloud, but I think we both secretly hoped the other would call it a day so we could go back to the car.
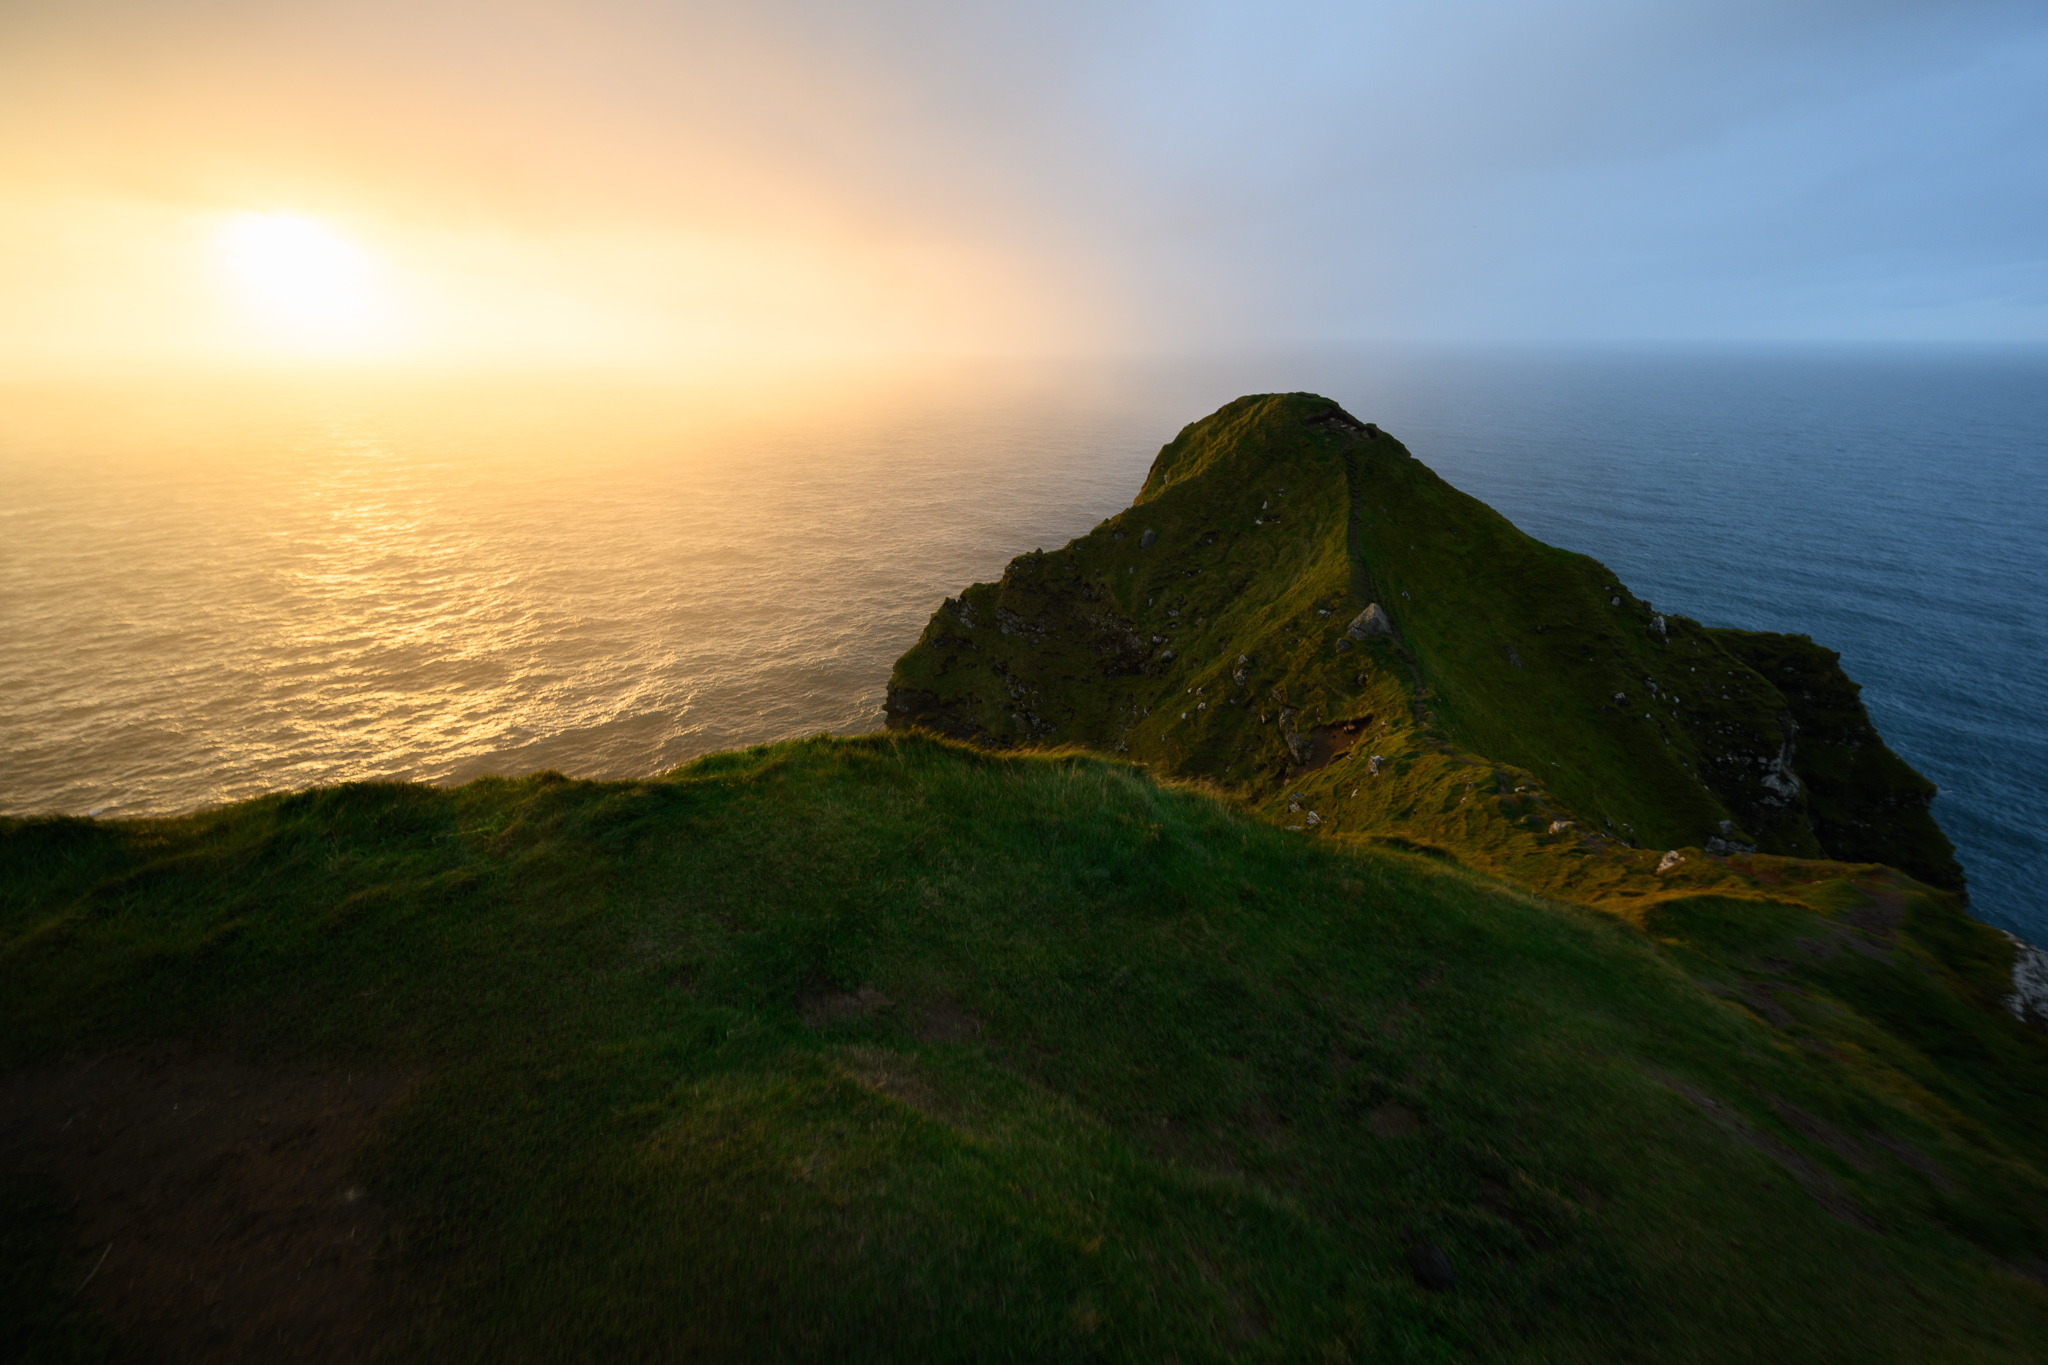
When this happened out of absolutely nowhere:
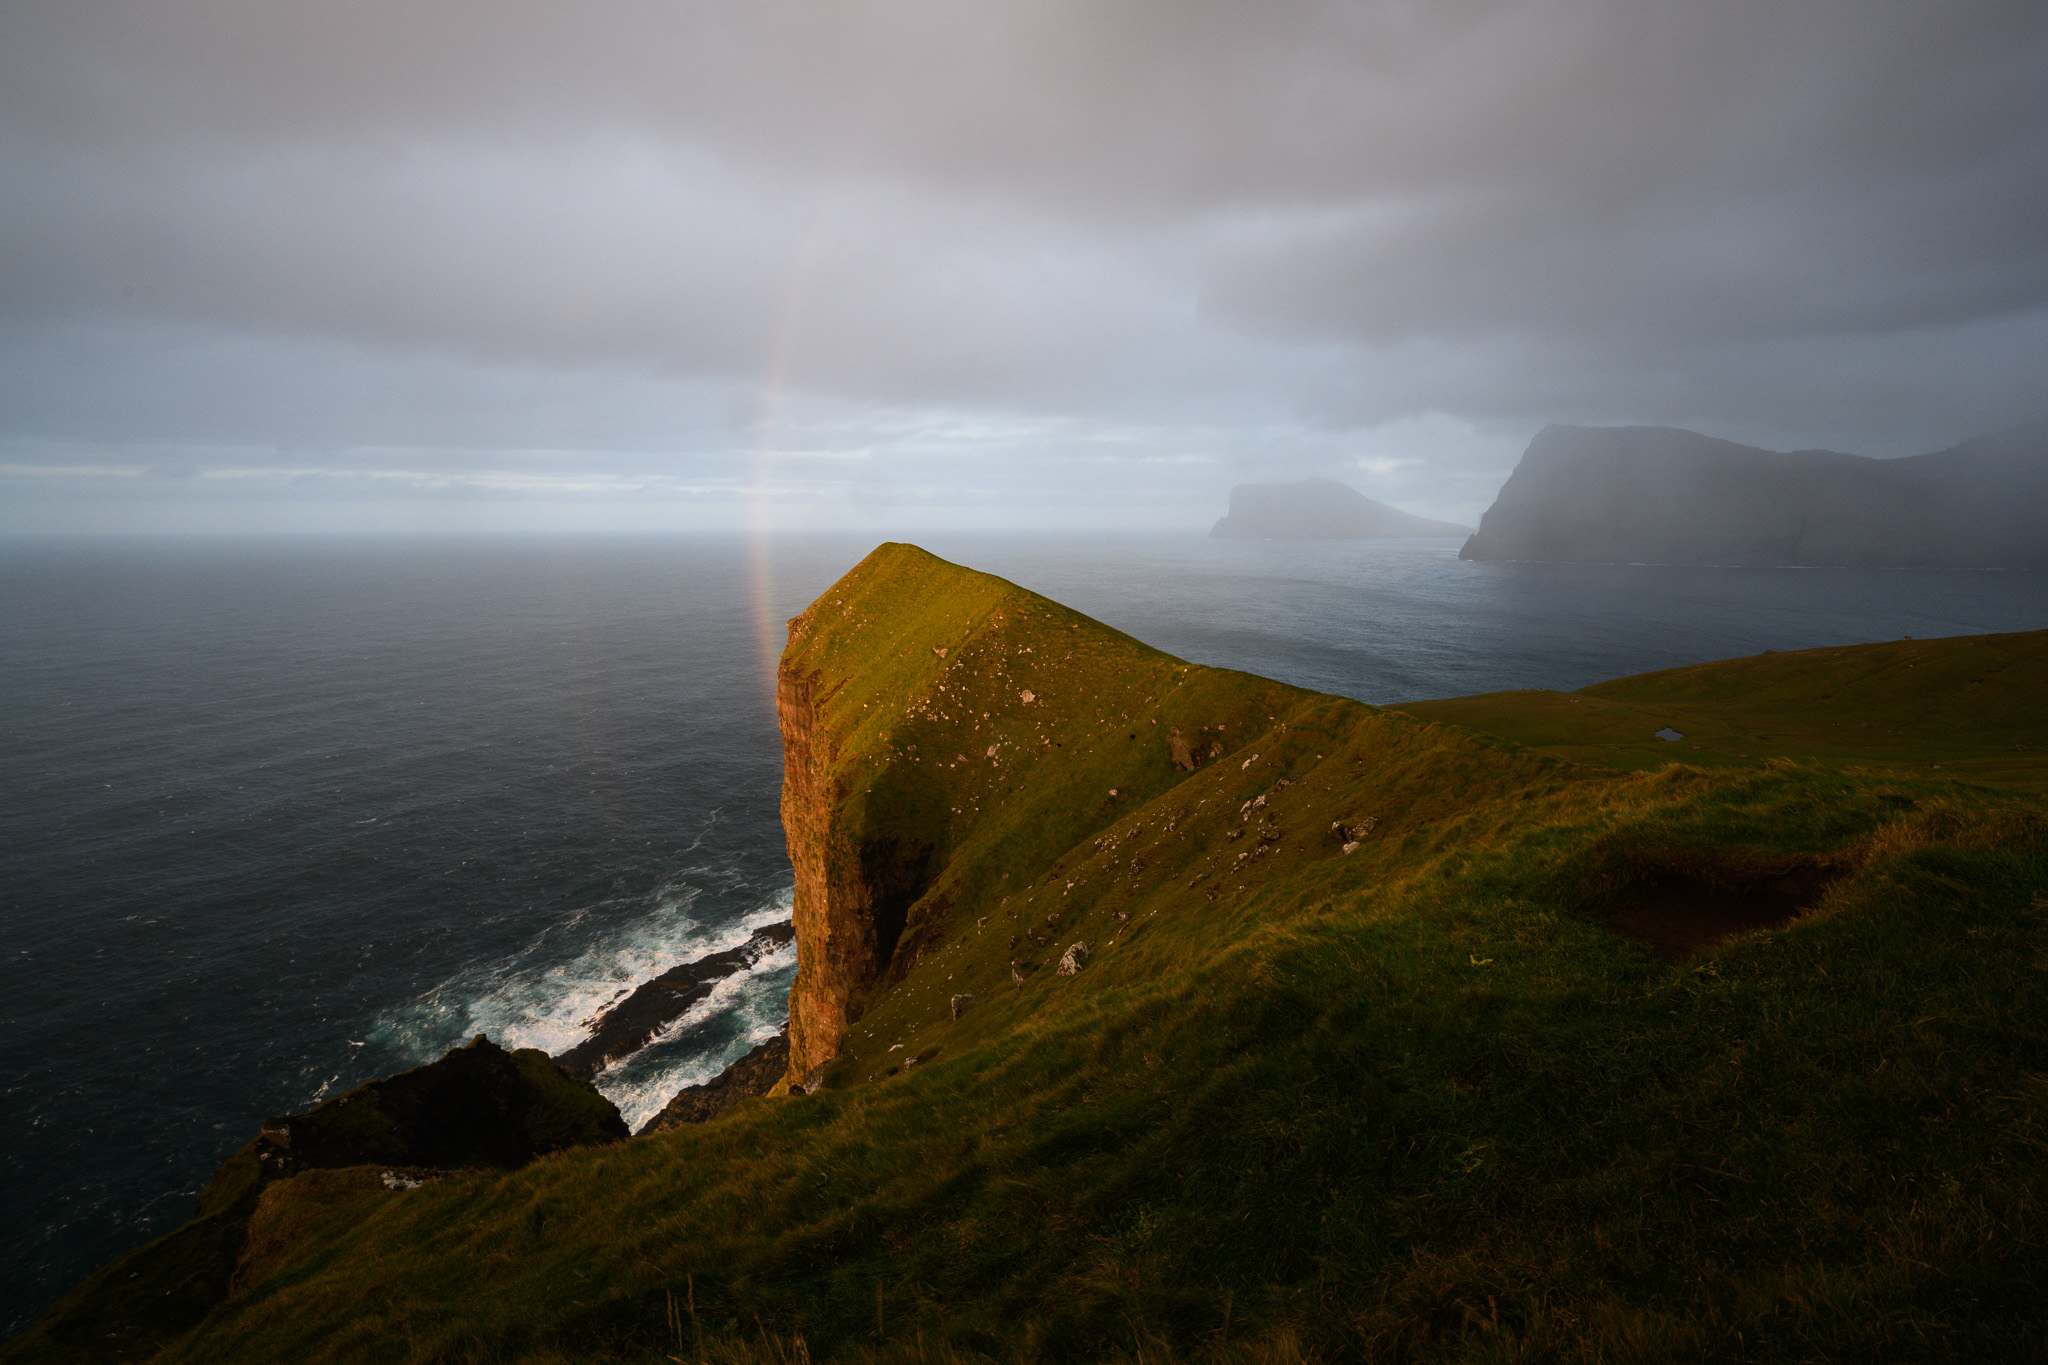
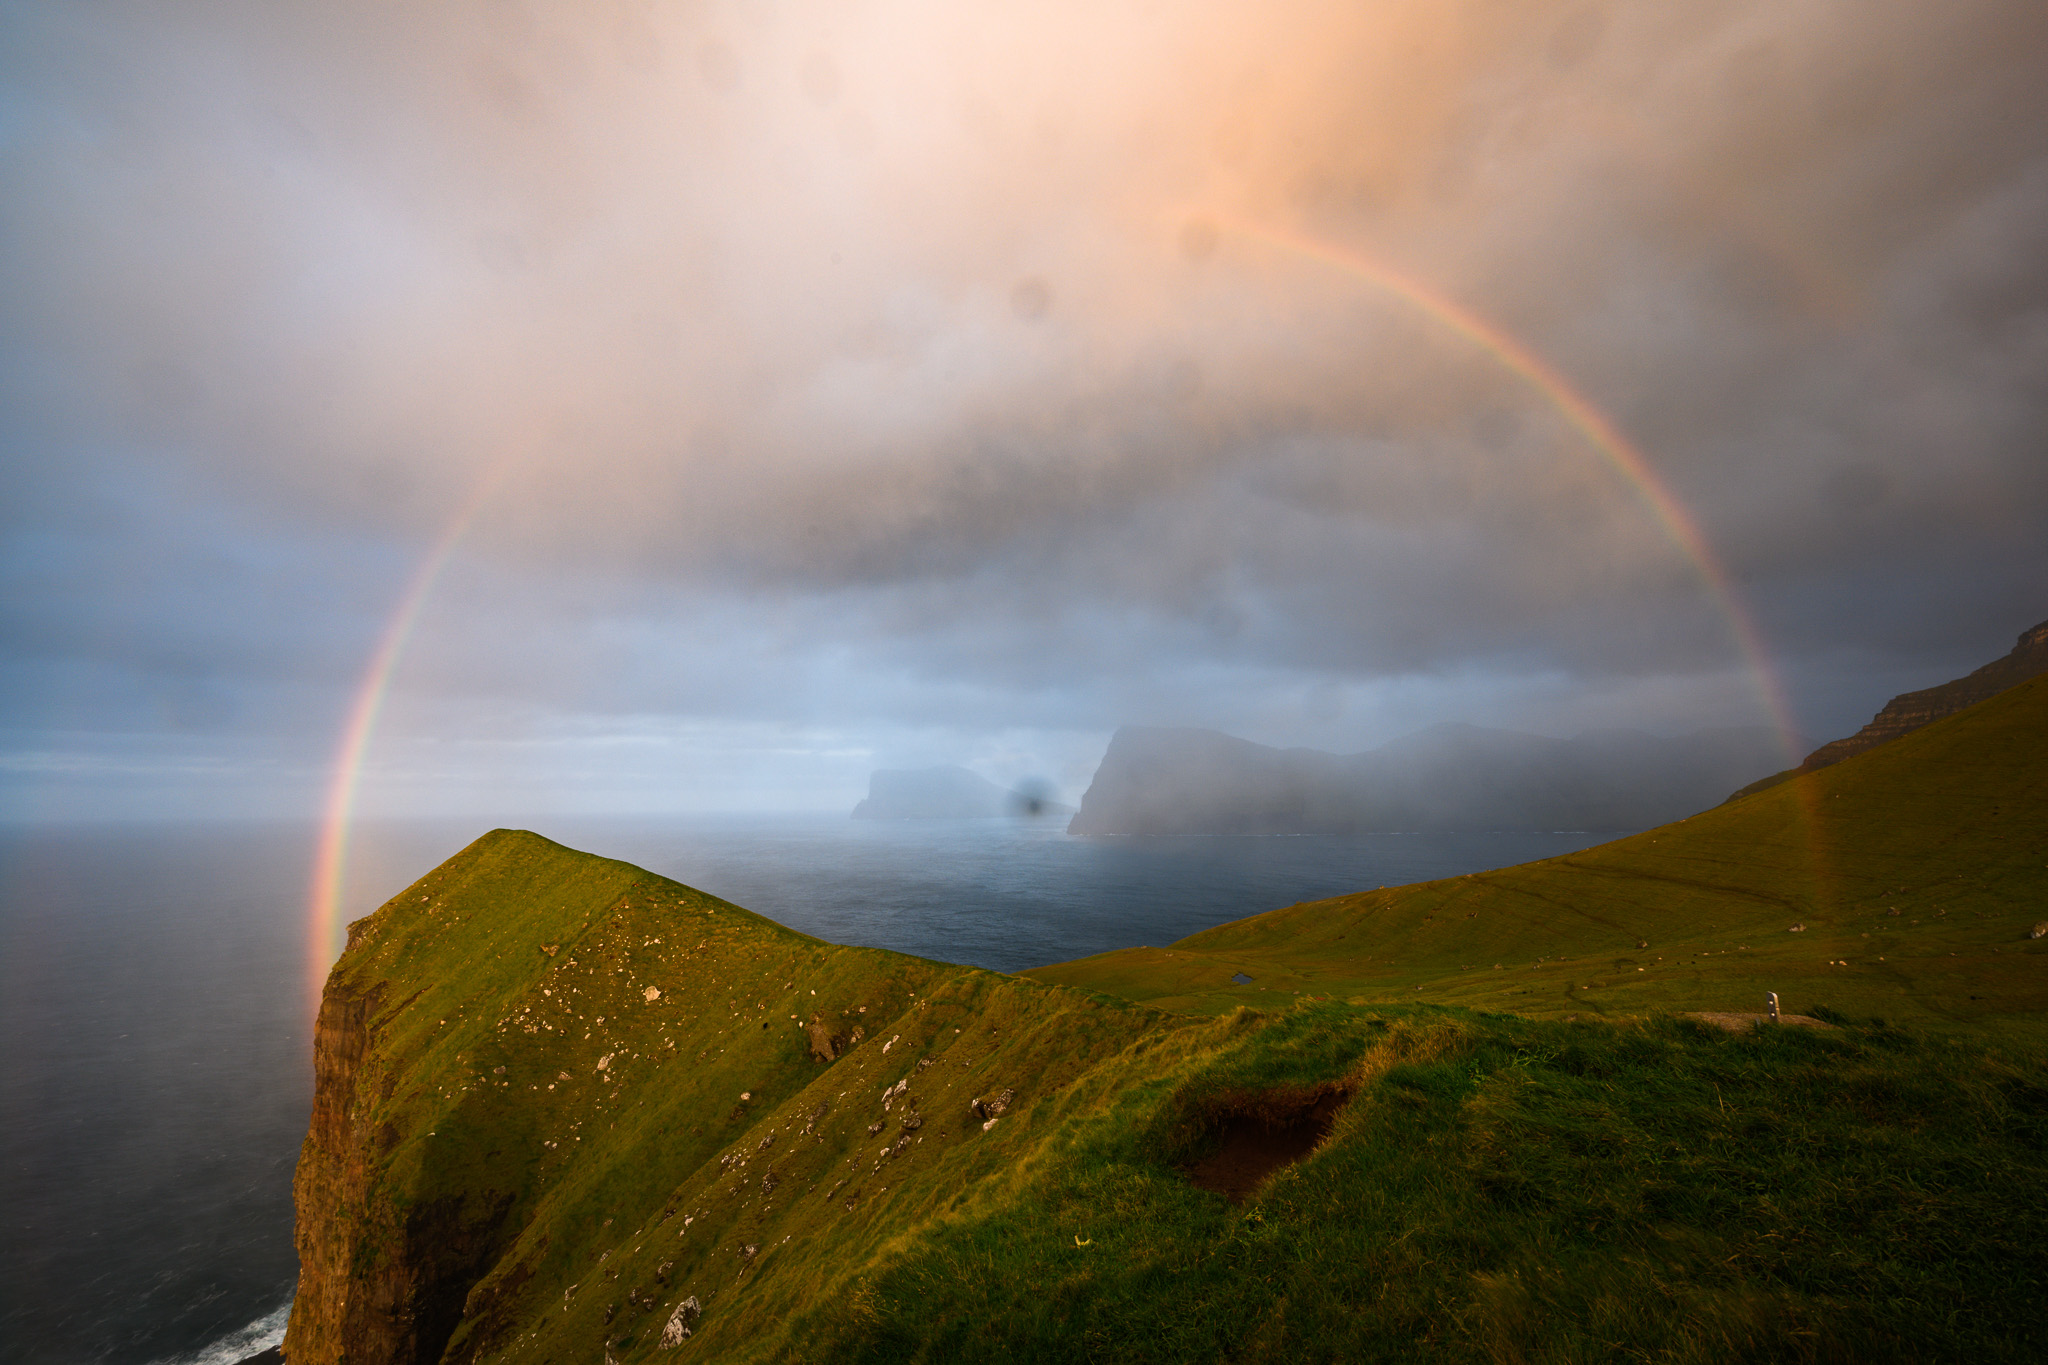
And two minutes later, a rainbow began to appear:
Both of us went into the full euphoria-panic mode that landscape photographers love. Nasim, with seamless intuition, had started flying his drone about a minute before the rainbow appeared. I started going through my favorite mental checklist of all the easy ways I could fail, especially with a race against the clock before the rainbow faded.
In the Faroes, the biggest sources of error for landscape photography are wind and rain. One drop of water in the wrong spot on your lens, and you may have just ruined your photo without realizing it. A slightly unstable tripod position, plus a gust of wind, and the best photo in the world will have distracting zig-zag blur up close.
Case in point – the first photo I took of the full rainbow has more than a dozen splotchy raindrops scattered across the composition (those are water droplets and not dust spots on my sensor):
To make matters worse, I couldn’t find my lens cloth. I thought it had blown away in the breeze (though I later found it in a pocket I rarely use). I did have a backup lens cloth, luckily, and although it’s not as absorbent as my usual, it did the job.
Photo two:
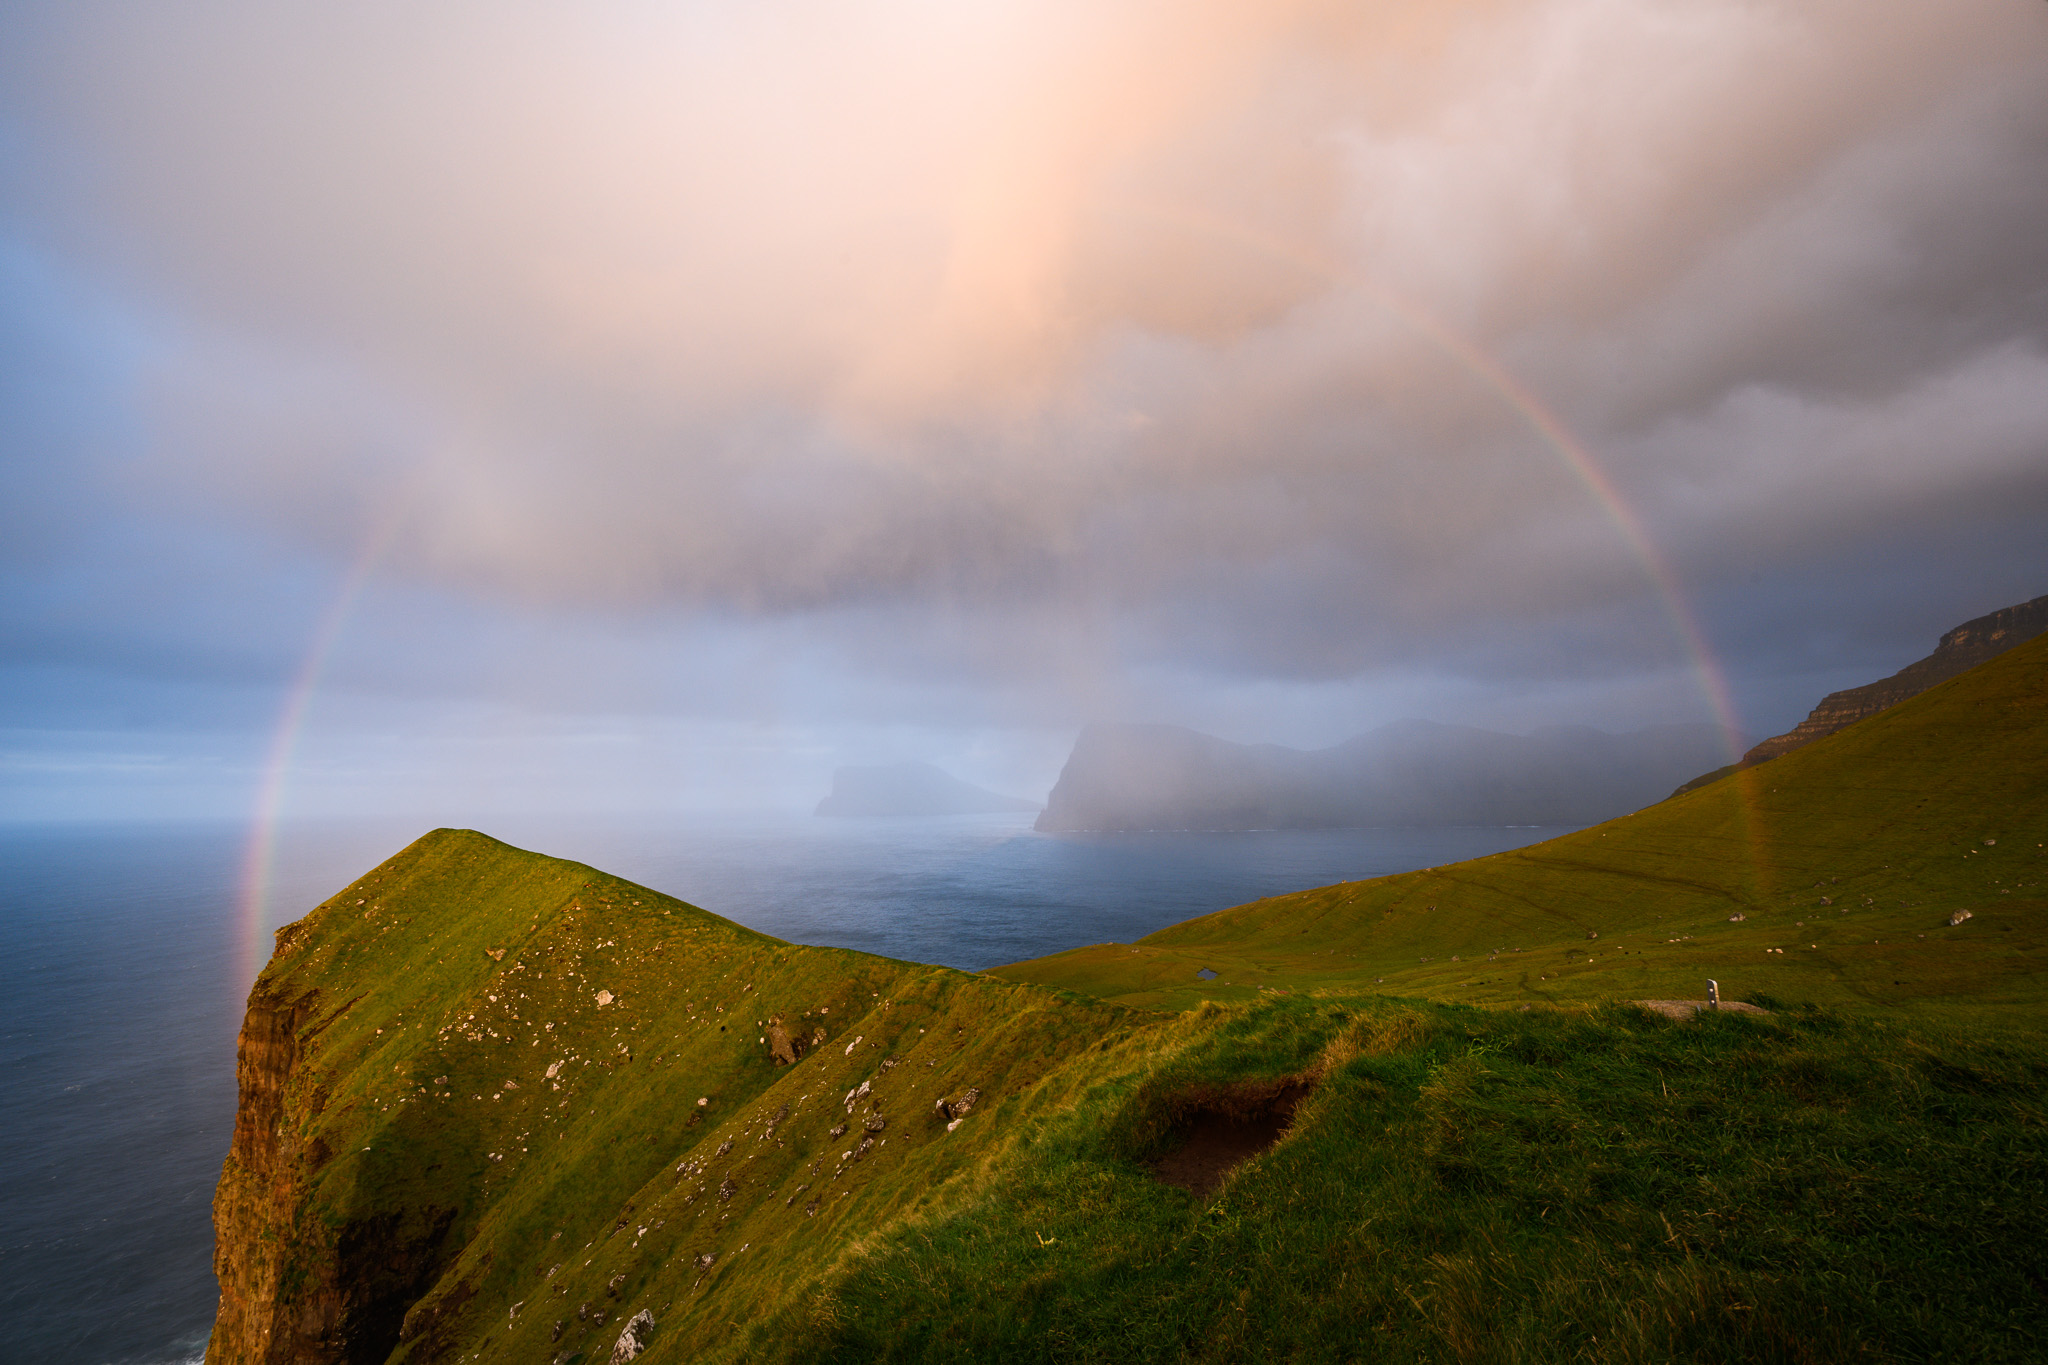
No water droplets, thank goodness. If the rainbow had faded immediately afterward, this would be my portfolio photo from that sunset. But it’s still not perfect. The composition is a little weak. For starters, the big splotch of mud in the bottom-middle of the image is distracting and unnecessary. Same goes for the metal fencepost on the right; it’s easy enough to clone out in Photoshop, but I always prefer not to clone things if I can avoid it.
One minute and one second later, I had repositioned my tripod and composed again. The new framing excluded the patch of mud and the fencepost, with a better foreground overall – more geometrical (even with a bit of a leading line) and fewer distractions. The rainbow had improved, too, with less of a gap at the top. I took this photo, my main portfolio shot of the evening:
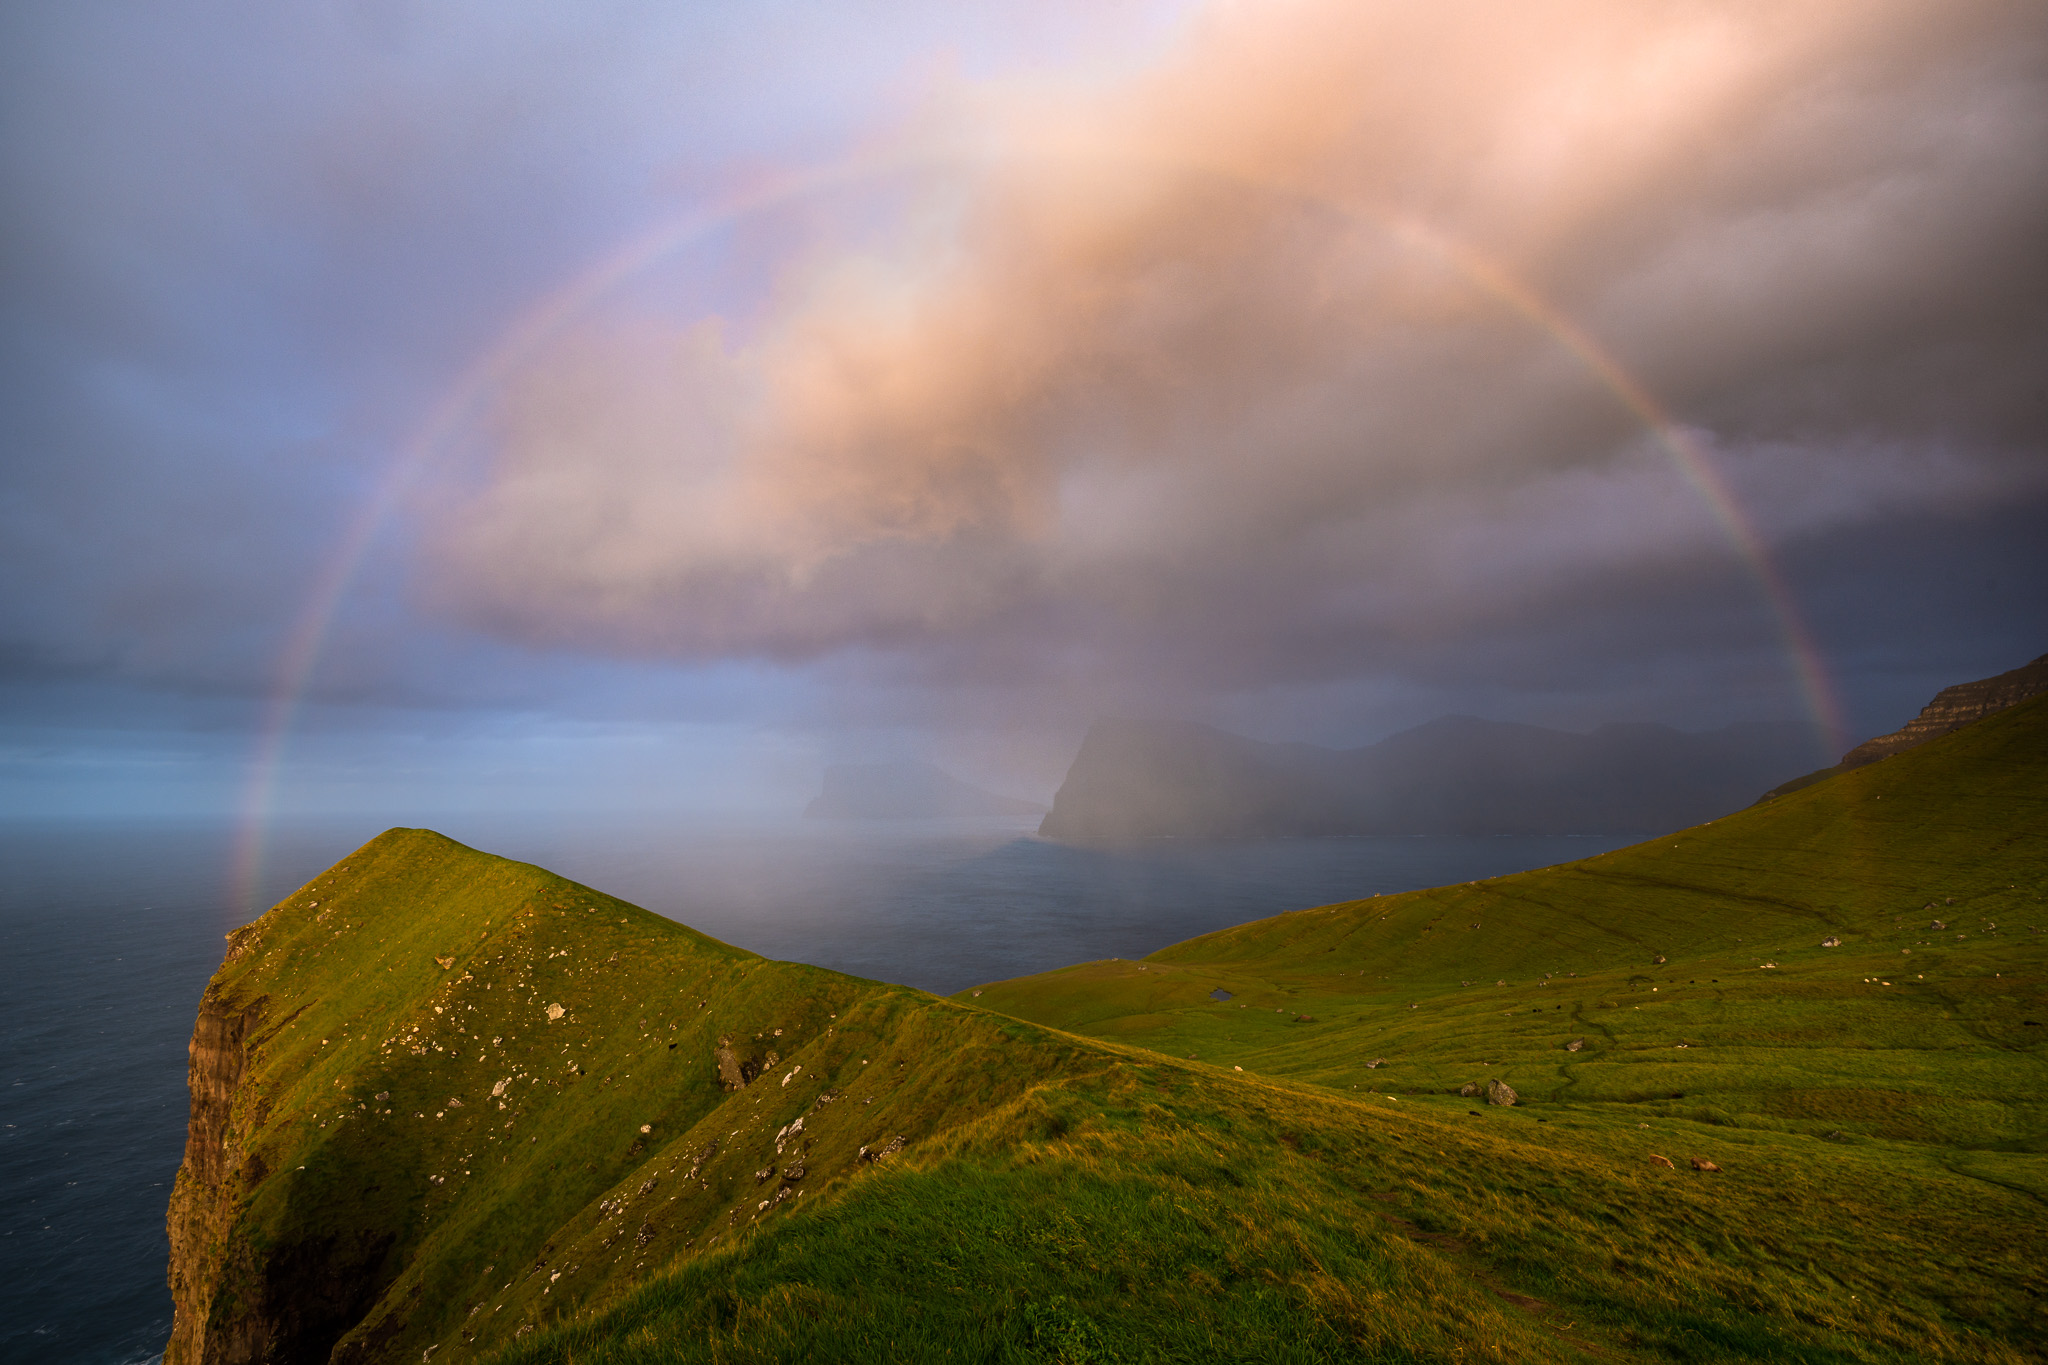
I triple-checked this photo in the field. Photographers often recommend against “chimping” the photo you just took – reviewing it in the field – when conditions are moving fast. Still, I’ve found it a useful part of my process.
If not for chimping, I may not have noticed the water droplets in the first photo, nor the imprecise foreground in the second. The third time, I made certain that everything looked optimal, took a couple backup shots just in case, and then moved on to my next goal: shooting a panorama.
In windy, rainy conditions, taking a successful panorama is fraught with error. One blurry frame messes up the photo. Not enough overlap, and the images may not stitch. Incorrect camera settings, and one side of the panorama may have serious errors in exposure or depth of field.
That’s why I only attempted the panorama second, after I had gotten the “easy” shot out of the way. But it worked out, too. I recommend clicking to see full size if you’re on a desktop or laptop:
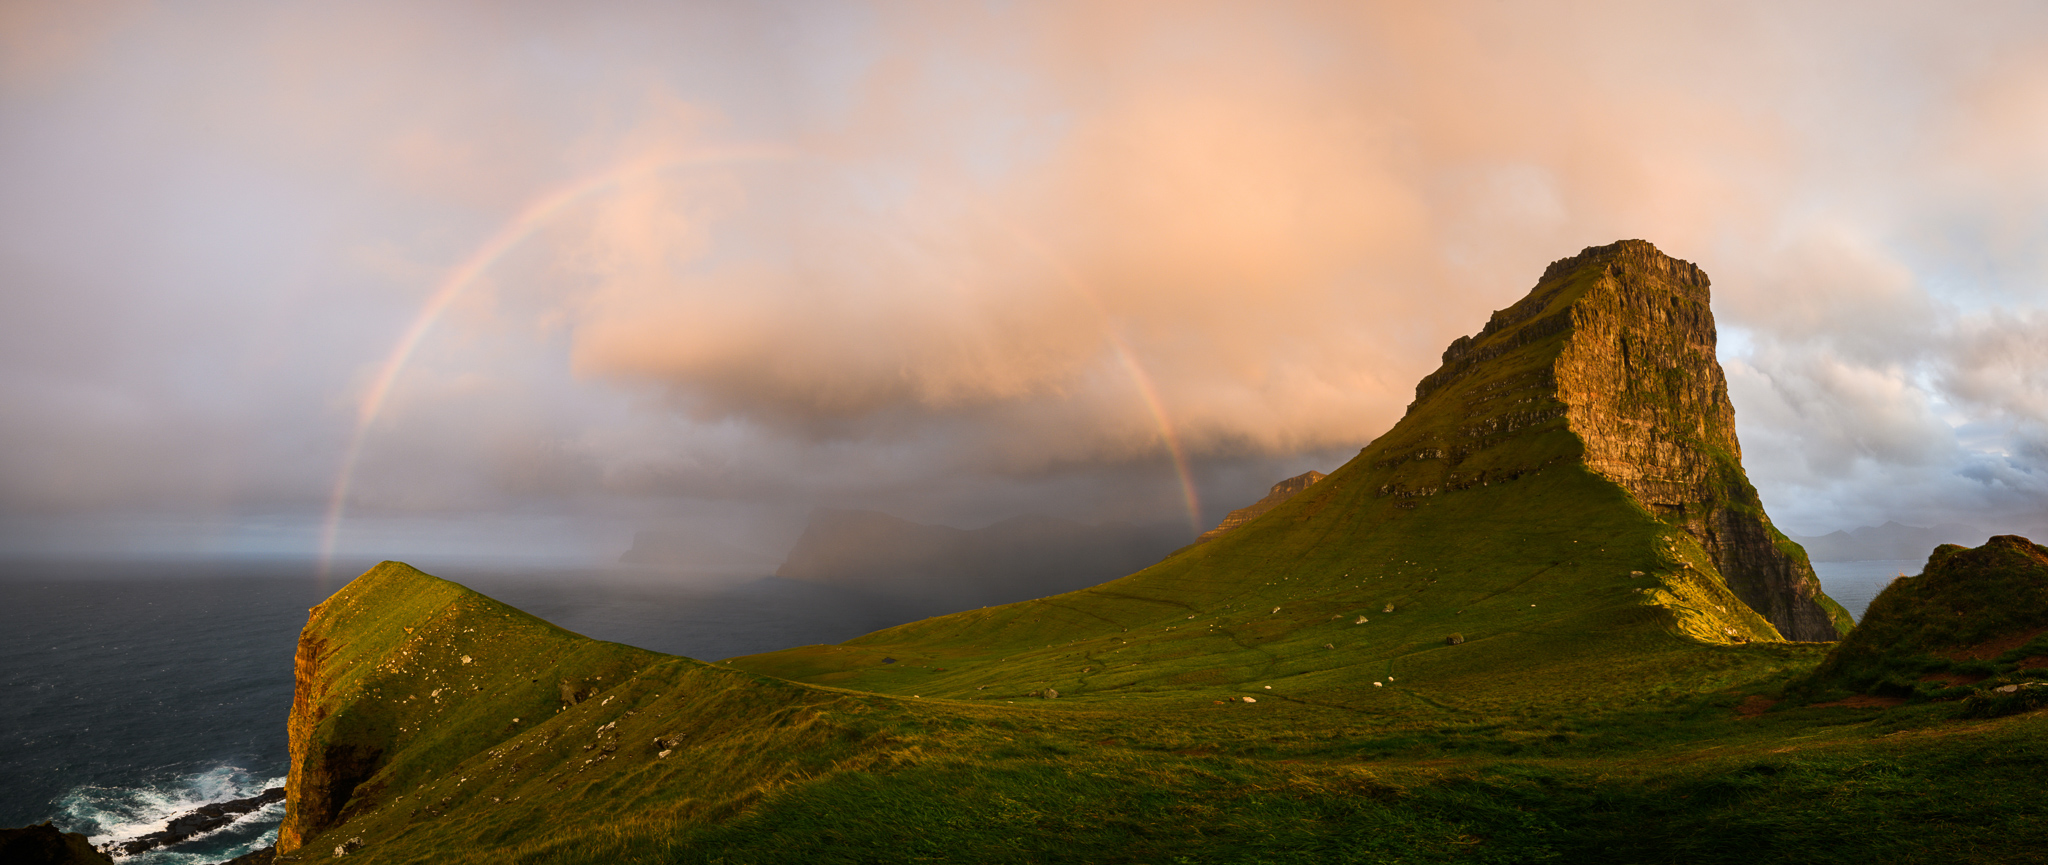
The later frames of the panorama did have some water droplets, but it wasn’t a huge problem. I had overlapped each photo more than usual, and every part of the landscape came out properly in at least one of the photos. Regions of sky with a water droplet were easy enough to spot heal in Lightroom.
And that’s the process!
This entire time, meanwhile, Nasim had been shooting drone photos of the rainbow, and some of them turned out amazingly well. It seems that the rotors of the drone protected the camera from any water droplets, and despite the heavy gusts of wind, the photos stayed totally sharp (and, just as importantly, the drone stayed on course). He caught a photo when the entire foreground lit up, giving a different mood from my photos above:

It was pretty daring to fly the drone in this weather, to be frank. I chickened out and stuck to ground-based photography. But sometimes a bit of daringness is worthwhile, and it certainly paid off here for Nasim. Meanwhile, my frantic rush to get different compositions also paid off. Each of us got photos that we’re happy with – perhaps the best from the trip, which is saying something in a place as amazing as the Faroe Islands.
Here are my main takeaways from the experience:
- Never count out a sunset. Nature is full of surprises, even in places with less variable weather than this.
- Pay attention to changing conditions. Nasim had the right idea to start flying the drone when he did. If he had taken off a couple minutes later, after the rainbow had already started, there’s a good chance he wouldn’t have gotten the shot.
- Recognize potential sources of error. Luckily, I was in the right mindset to think about water droplets on my lens and fix them in the field – but only because this was day nine of a trip filled with rain. No matter what, keep in mind what could go wrong and do what you can to fix it.
- Move around. A lot of photographers will stay in place when conditions get good, but photography often requires a more active approach than that. My initial composition of the rainbow was all right, but a bit of movement allowed me to improve the foreground significantly.
- Don’t be afraid to chimp. Even if time is fairly short, reviewing your images in the field can be worthwhile. I know not everyone follows the same process, but for me, landscape photography has a big component of refining. I like to look at the photo I’ve just taken, scan for flaws, and fix them in the next shot – then repeat.
I hope you enjoyed this essay and the photos we got on Kalsoy. If you have any questions about the process behind these images, please let me know in the comments section below!
A very insightful article.
Hi Spencer !
All the photos are great, but I love the Panorama. How many photos did you stich and were they vertical or horizontal ?
Kind regards
Great information and situational refreshers…
Hi Spencer<. a wonderful read and of course your images give LIGHT to what patience should be to be a landscape photographer. The one thing I think myself and others should take from your article is resilience from patience. I find myself looking out my window at the cold damp and flat cloudy sky with no desire to suit up and stand in a location waiting for the magic to arrive. Your amazing images would never have been created without your determined mindset.
One quick question if I may. I often do panorama's and the distance from the main subject looks great when I am standing in real time. But when I get my image back in photoshop and sticked up, the main subject that is located in the background becomes so tiny and not important anymore. I wonder what would you suggest for a distance from your background main subject and how many shots should you take to make up a panorama ? I know this is kind of a vague question so I won't fault you if you cannot give me some kind of answer that will give me direction for my next photo shoot.
kind regards Spencer
Great article — I always wondered what it’d be like to shoot in the Faroes, but have never been able to pry loose the money and the time simultaneously.
Dust/water spots: It’s a good idea to briefly clean the lens every time you change it, or while winds are kicking up. If you forget your cloth, there’s nothing wrong with using your shirttail. It’s 100% cotton, very smooth, and no dirtier than a cloth you stick in your pocket. Actually cleaner — your pocket is filthy, and your cloth is full of static electricity. There’s nothing wrong with going around with your shirttail out.
I really enjoy this kind of picture story! Yes, I’ve been there, but not THERE. Sort of like a mountaineering story! I do like the panorama, and will seek it out on a bigger screen.
How do you all feel about the island now shutting down during some parts of the season to control tourists and photographers? It seems like they do not want to go the way of Iceland.
Matt, it was actually quite sad to see that. We saw some fence posts that had some pretty rough words on them like “No More Tourists!”. When a place like this becomes so popular, it is inevitable that some people out there will make a bad name for the rest of us.
Great article Spencer,
Really like the natural feeling of your shots, I can almost feel the fresh-air! Apart from the Raw processing, have you had a chance to use the Expeed 6 picture profiles and WB options for JPEGs? I find the new Auto-Daylight is superb, and the added precision in the clarity adjustments now available are great. I really think Nikon should be applauded for listening to the requests for more comprehensive raw-processing in-camera, and the customisable i-menu. The Z50 is proving incredible so far!
I agree with the views above about chimping.
The ability to review photos immediately is widely acknowledged as one of the most important advantages of digital over film, so why not make use of it?
There is a danger of missing opportunities while staring at the back of the camera, so it probably shouldn’t be a completely automatic reaction, but it is also an incredibly useful tool (although perhaps less so for those who have made the transition to mirrorless than to those of us still stuck in DSLR-land.
Spencer. If it is any consolation you would have done no better 3 weeks earlier. On the other hand if you like being on the edges of weather in transition then the Faroes are paradise. With a family in tow I did well with a competing strategy of just driving until conditions changed and then shooting from a roadside pull out. And yes, those fencelines were in the most improbable places. I would love to see one of Nasim’s more comprehensive travelogue articles from your trip.