Svalbard, a Norwegian archipelago where nature reigns supreme, provides a unique and challenging photographic experience. While many trips to this region focus on wildlife, and I’ve traveled there for that purpose, too, the Arctic landscape is an incredibly captivating subject. I’ll explore it in this article.
Doing photography in the conditions commonly found in Svalbard is no easy feat. It’s a real challenge that tests a photographer’s creativity, patience, and physical endurance, especially when seeking the most dramatic scenes at the start of the season. But it is also immensely rewarding as a photographic subject.

Table of Contents
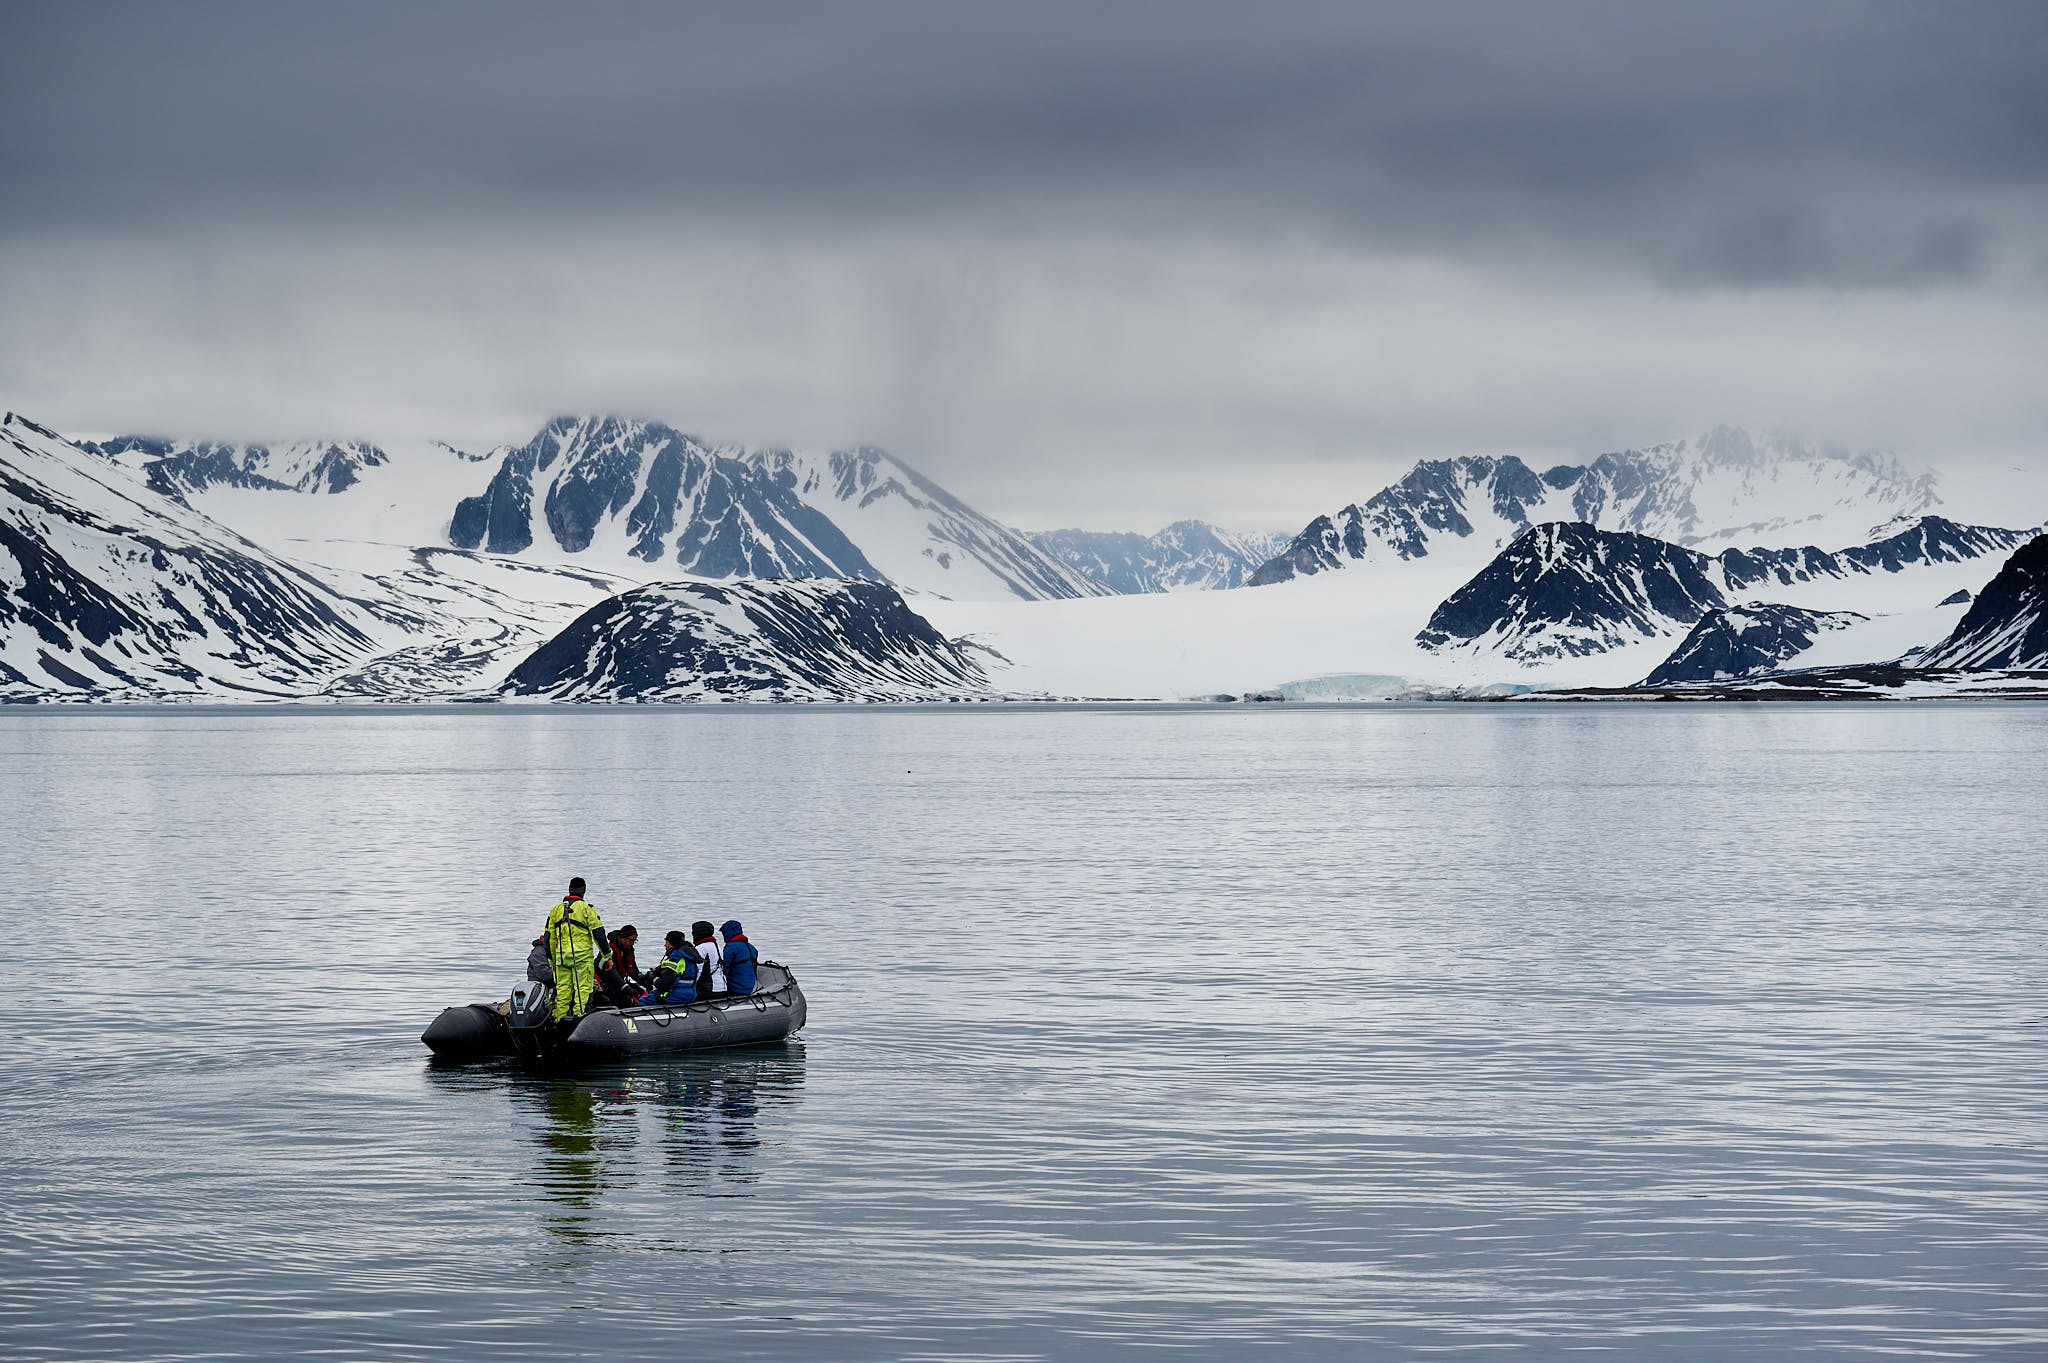
Exploring Svalbard often means traveling by sea aboard expedition ships, or (once you get closer to shore) inflatable boats. It’s best to choose tours that use smaller vessels, typically accommodating only around 12 photographers, plus the crew and guides.
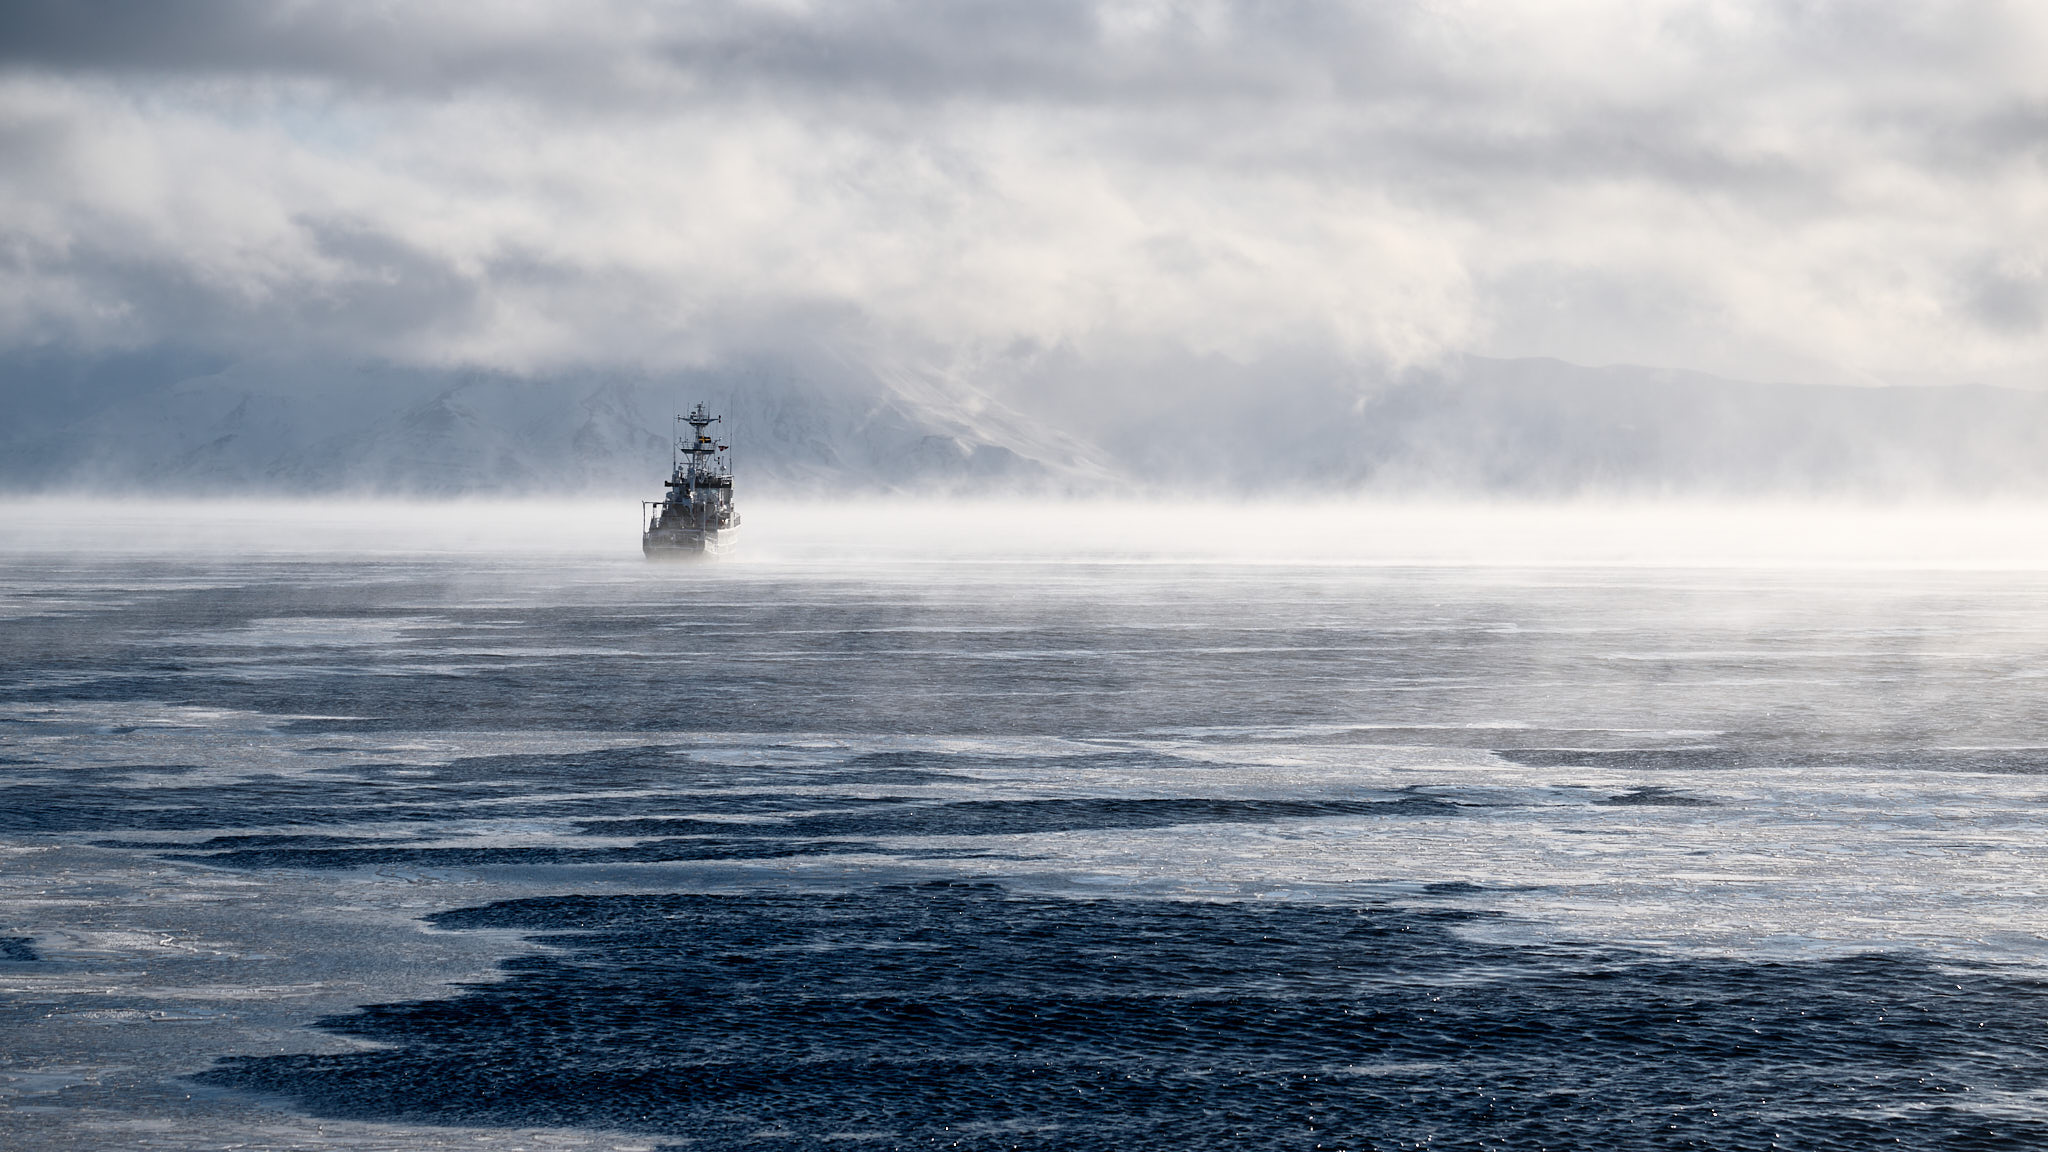
This method of travel allows for quick movement between locations and increases the chances of capturing diverse landscapes, wildlife, and lighting conditions. However, it presents unique challenges for landscape photographers, primarily the need to shoot while moving – often in unpredictable weather. This demands patience and adaptability.
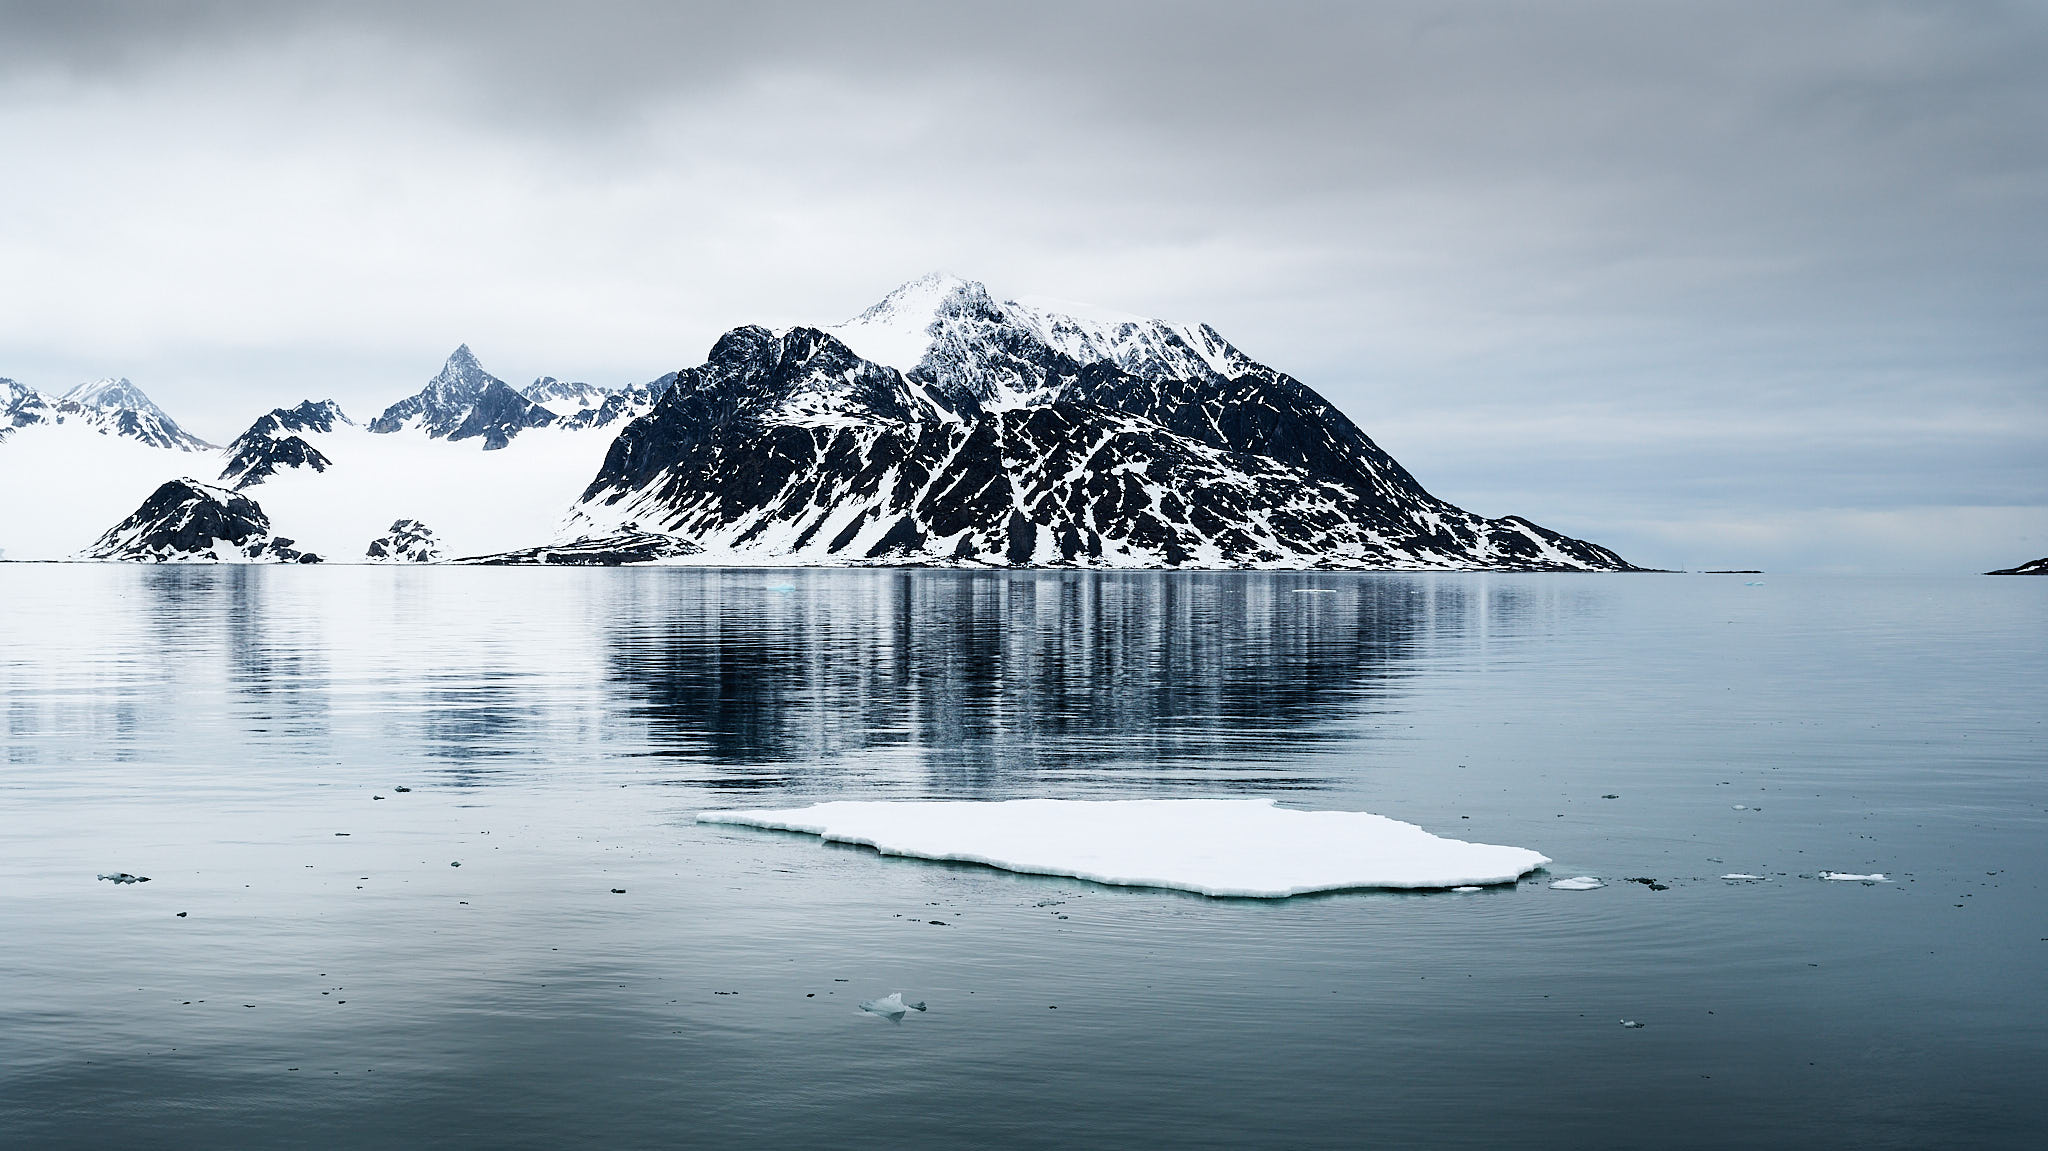
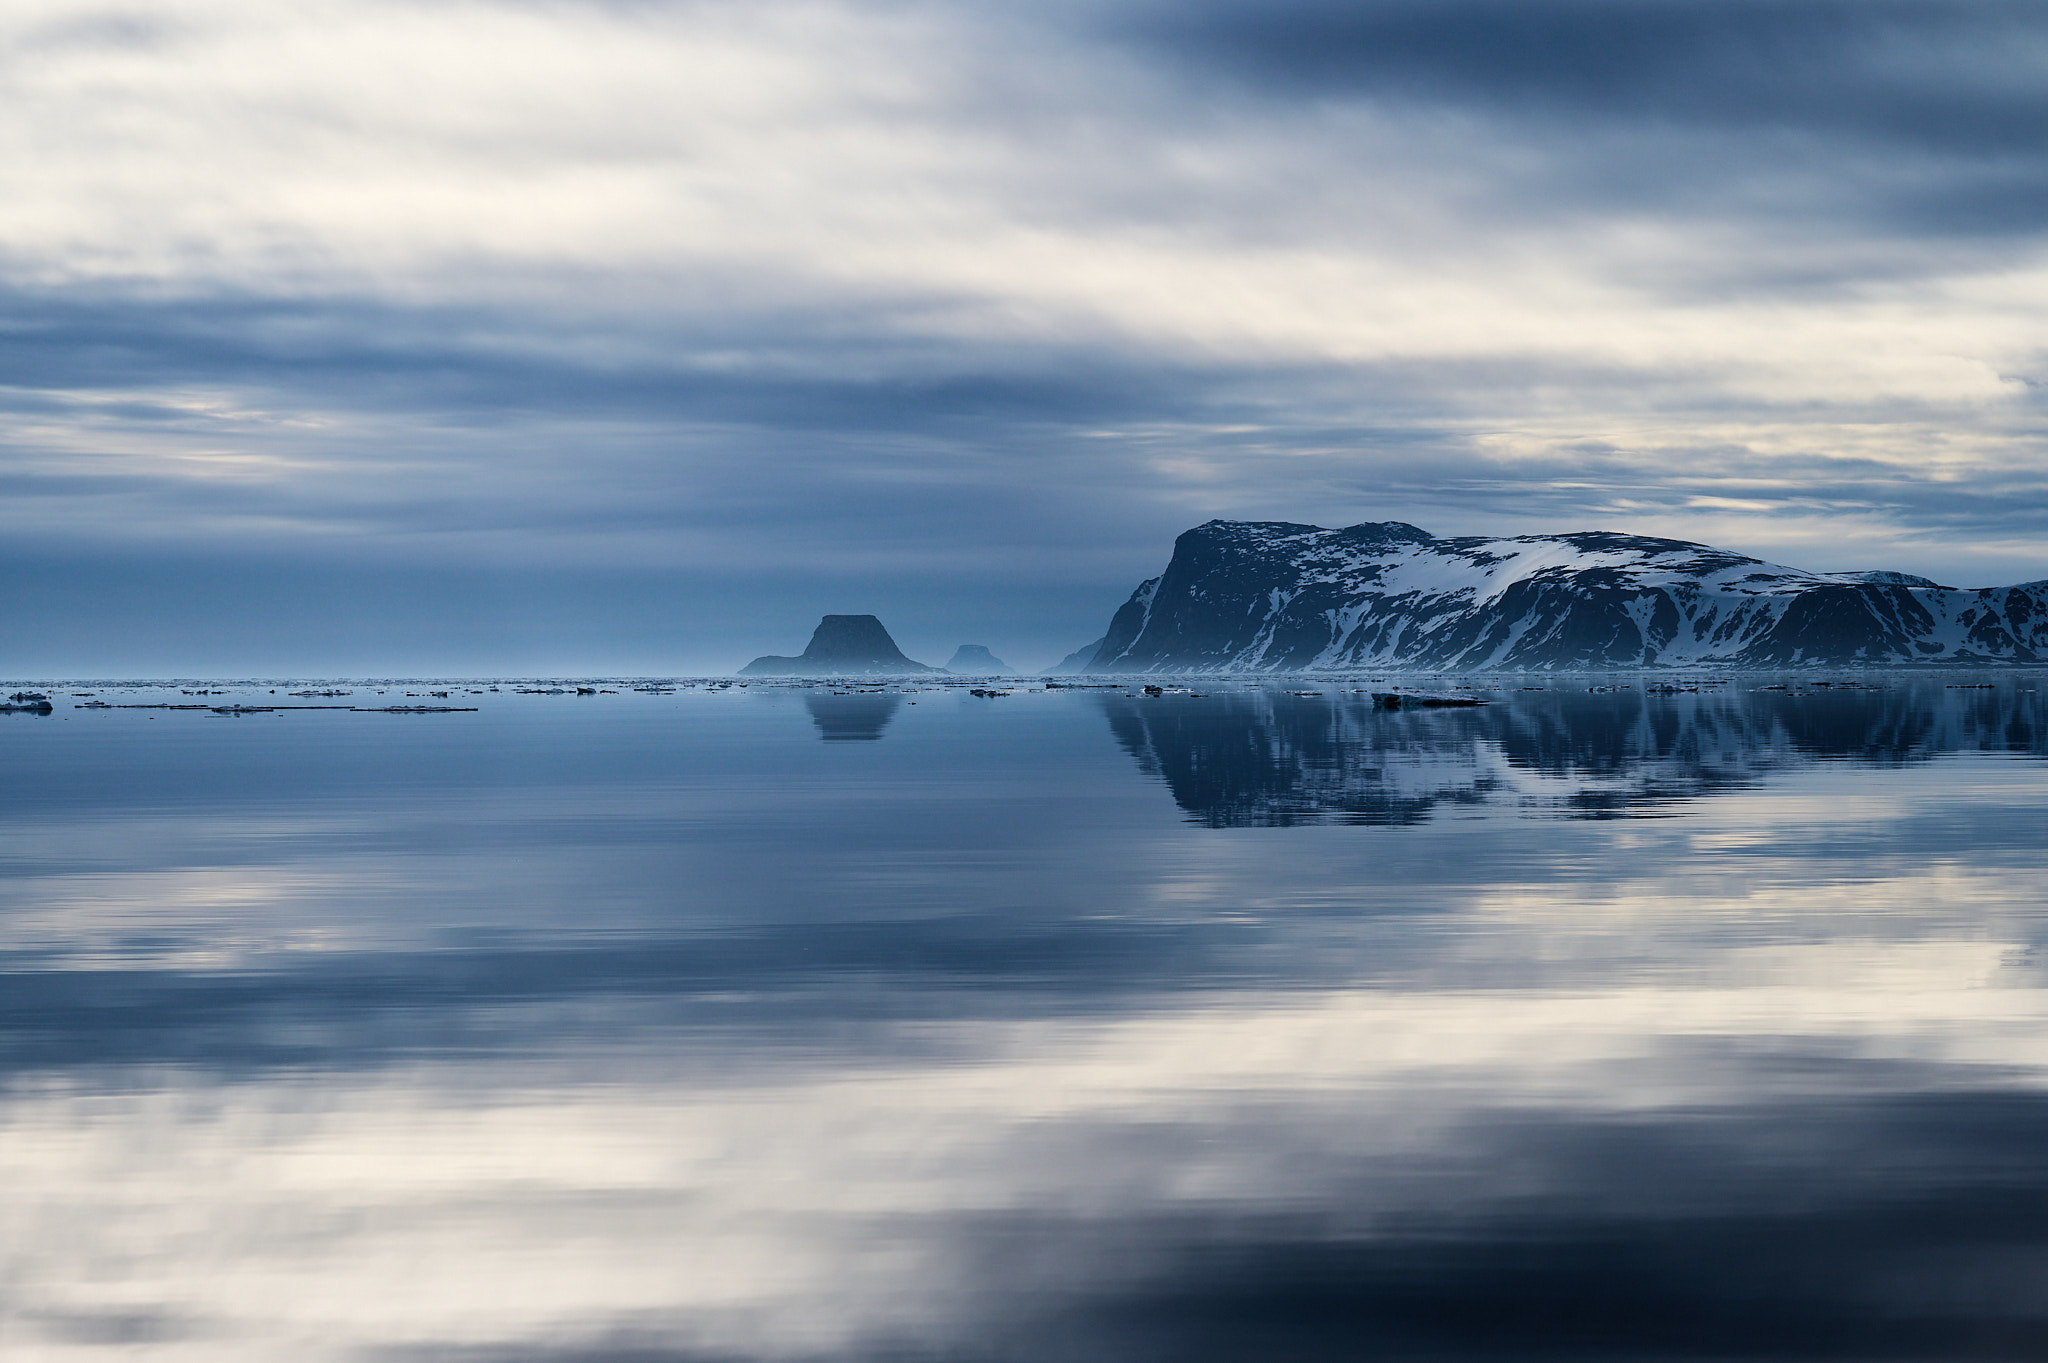
For example, while cruising along a fjord with mountains reflected in calm waters, a sudden ray of sunlight might break through the clouds, illuminating the scene. At that moment, you often have only a few seconds to compose the shot, adjust your settings, and capture the image. If you’re not prepared, you’ll miss the opportunity. Auto ISO can be your friend, and don’t even think about using a tripod! You’ll notice I took many of the photos in this article a little higher than base ISO.
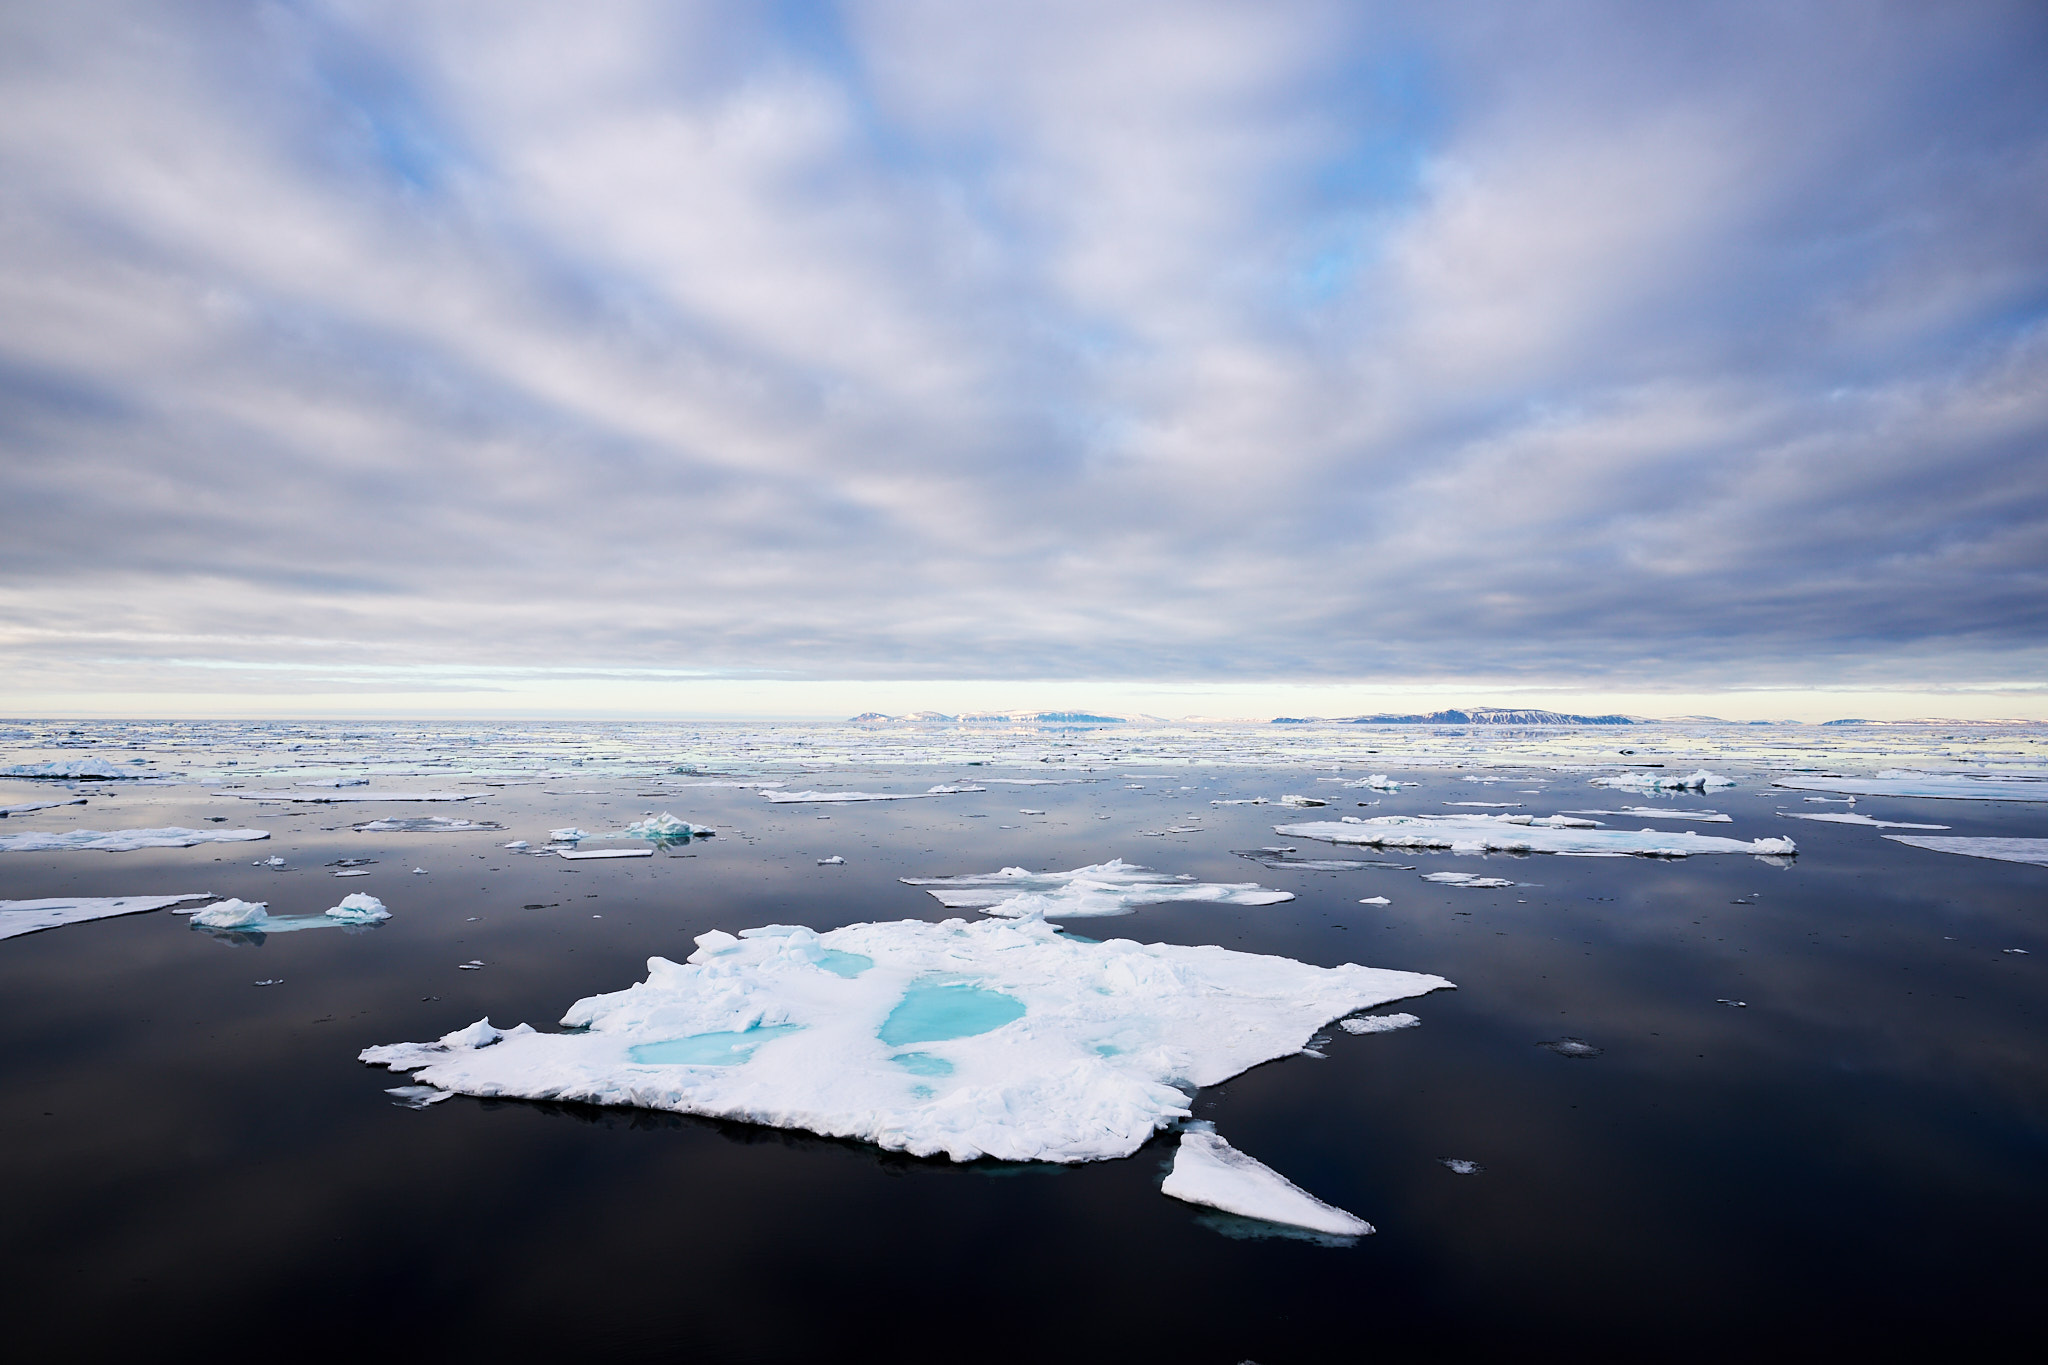
Shooting from a boat, you’ll encounter clouds and fog more frequently, and the ship’s movement constantly changes your perspective. Each turn and course adjustment reveals new views and compositions as the relative positions of ice floes and mountains change. Photographers must remain alert, ready to seize fleeting opportunities and shoot quickly, relying on instinct and experience to set up the camera promptly. Still, though, patience is key. Simply waiting and observing how the landscape transforms can reveal hidden details and evocative atmospheres.
Patience: The Art of Managing Light
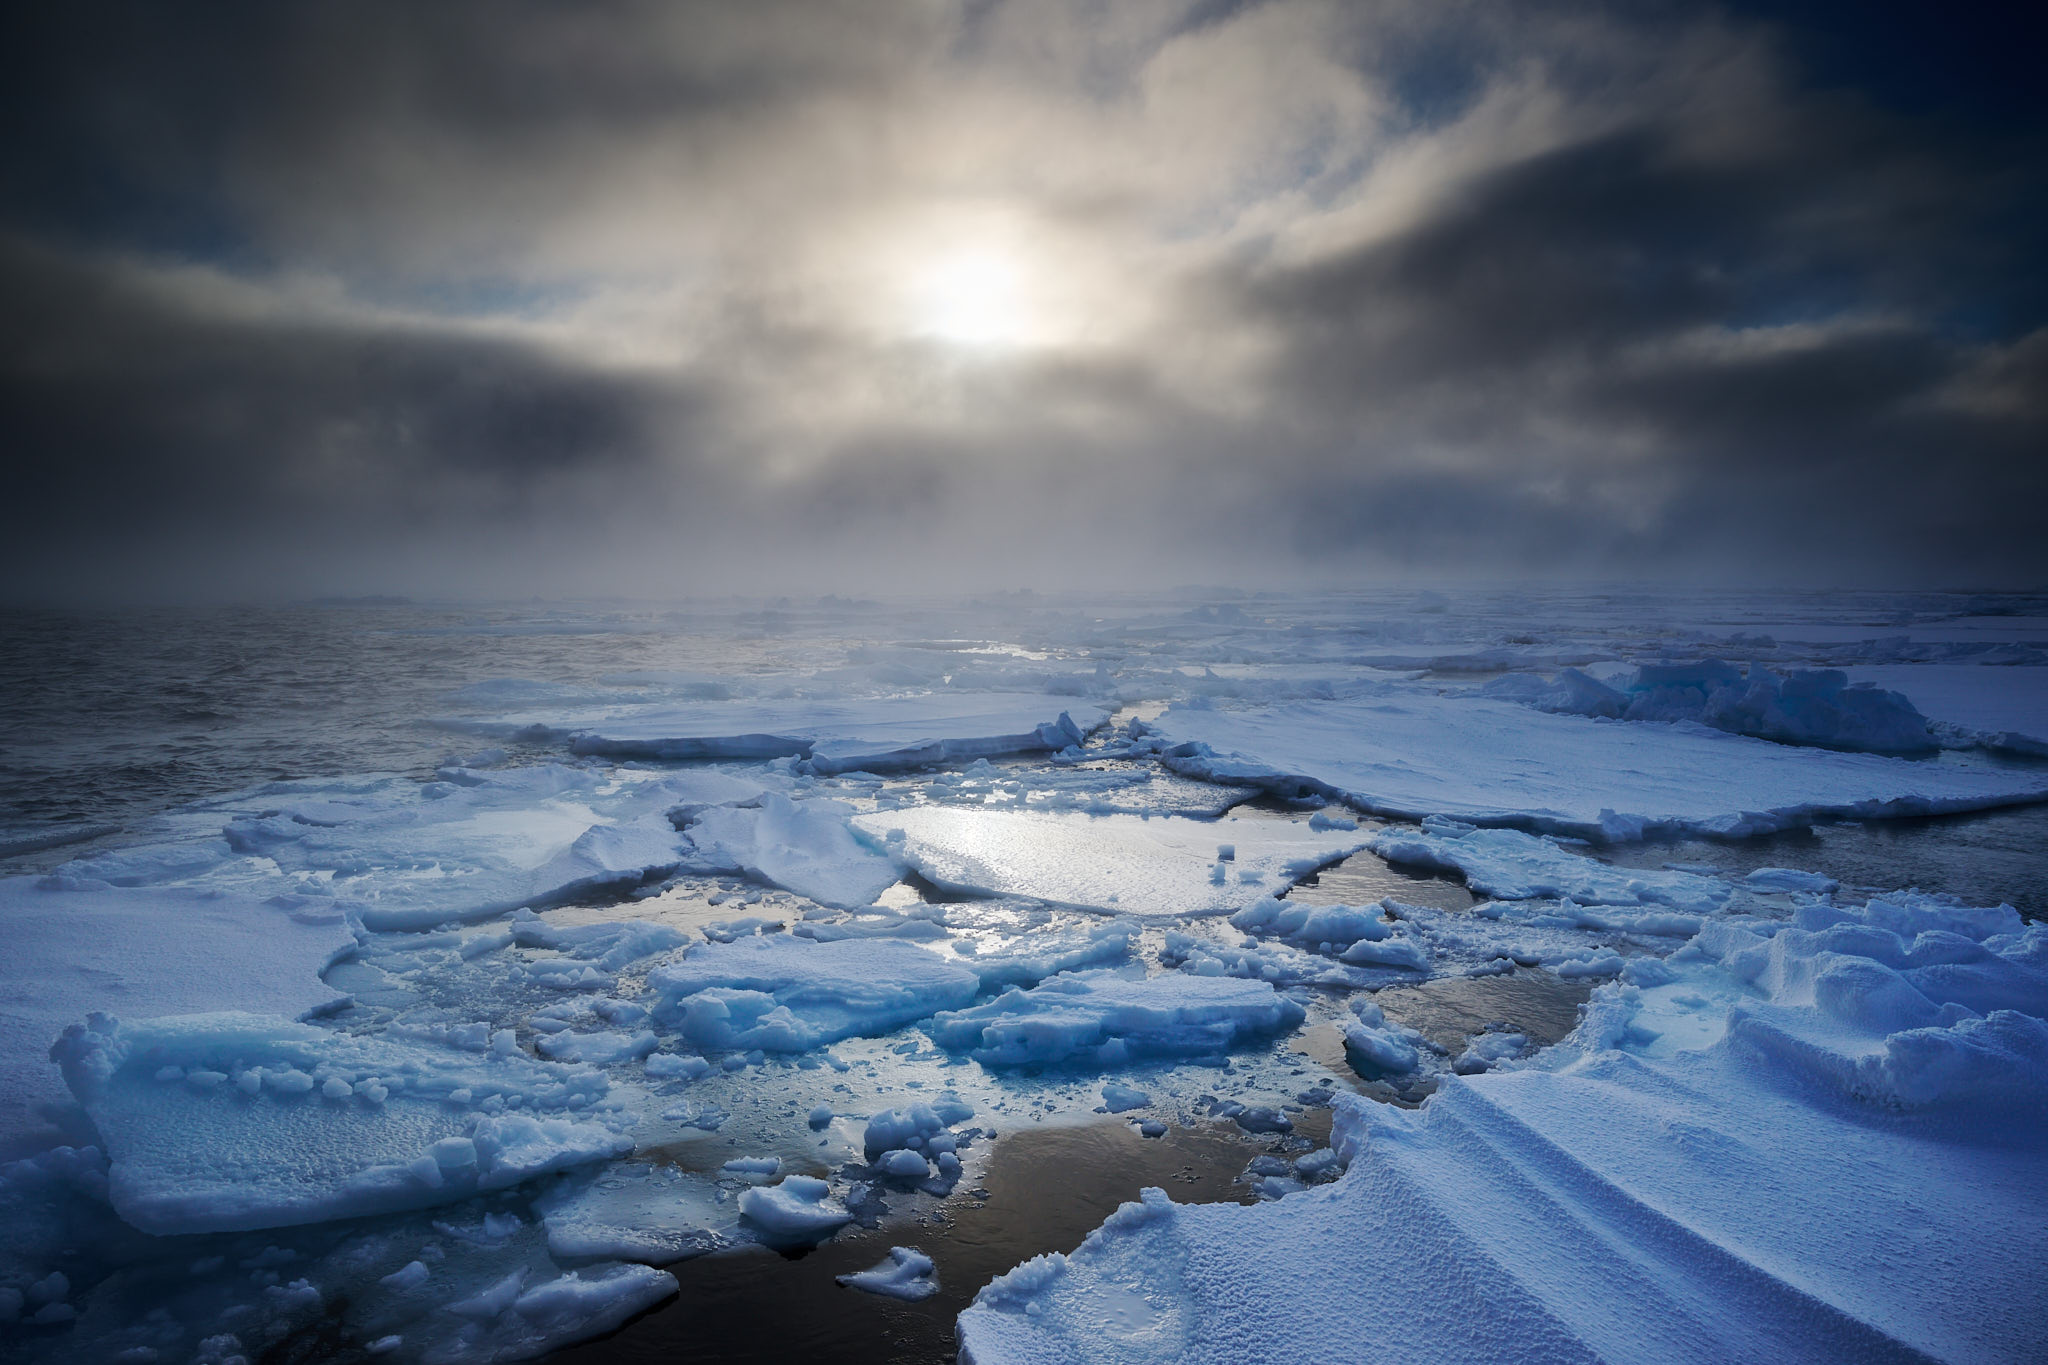
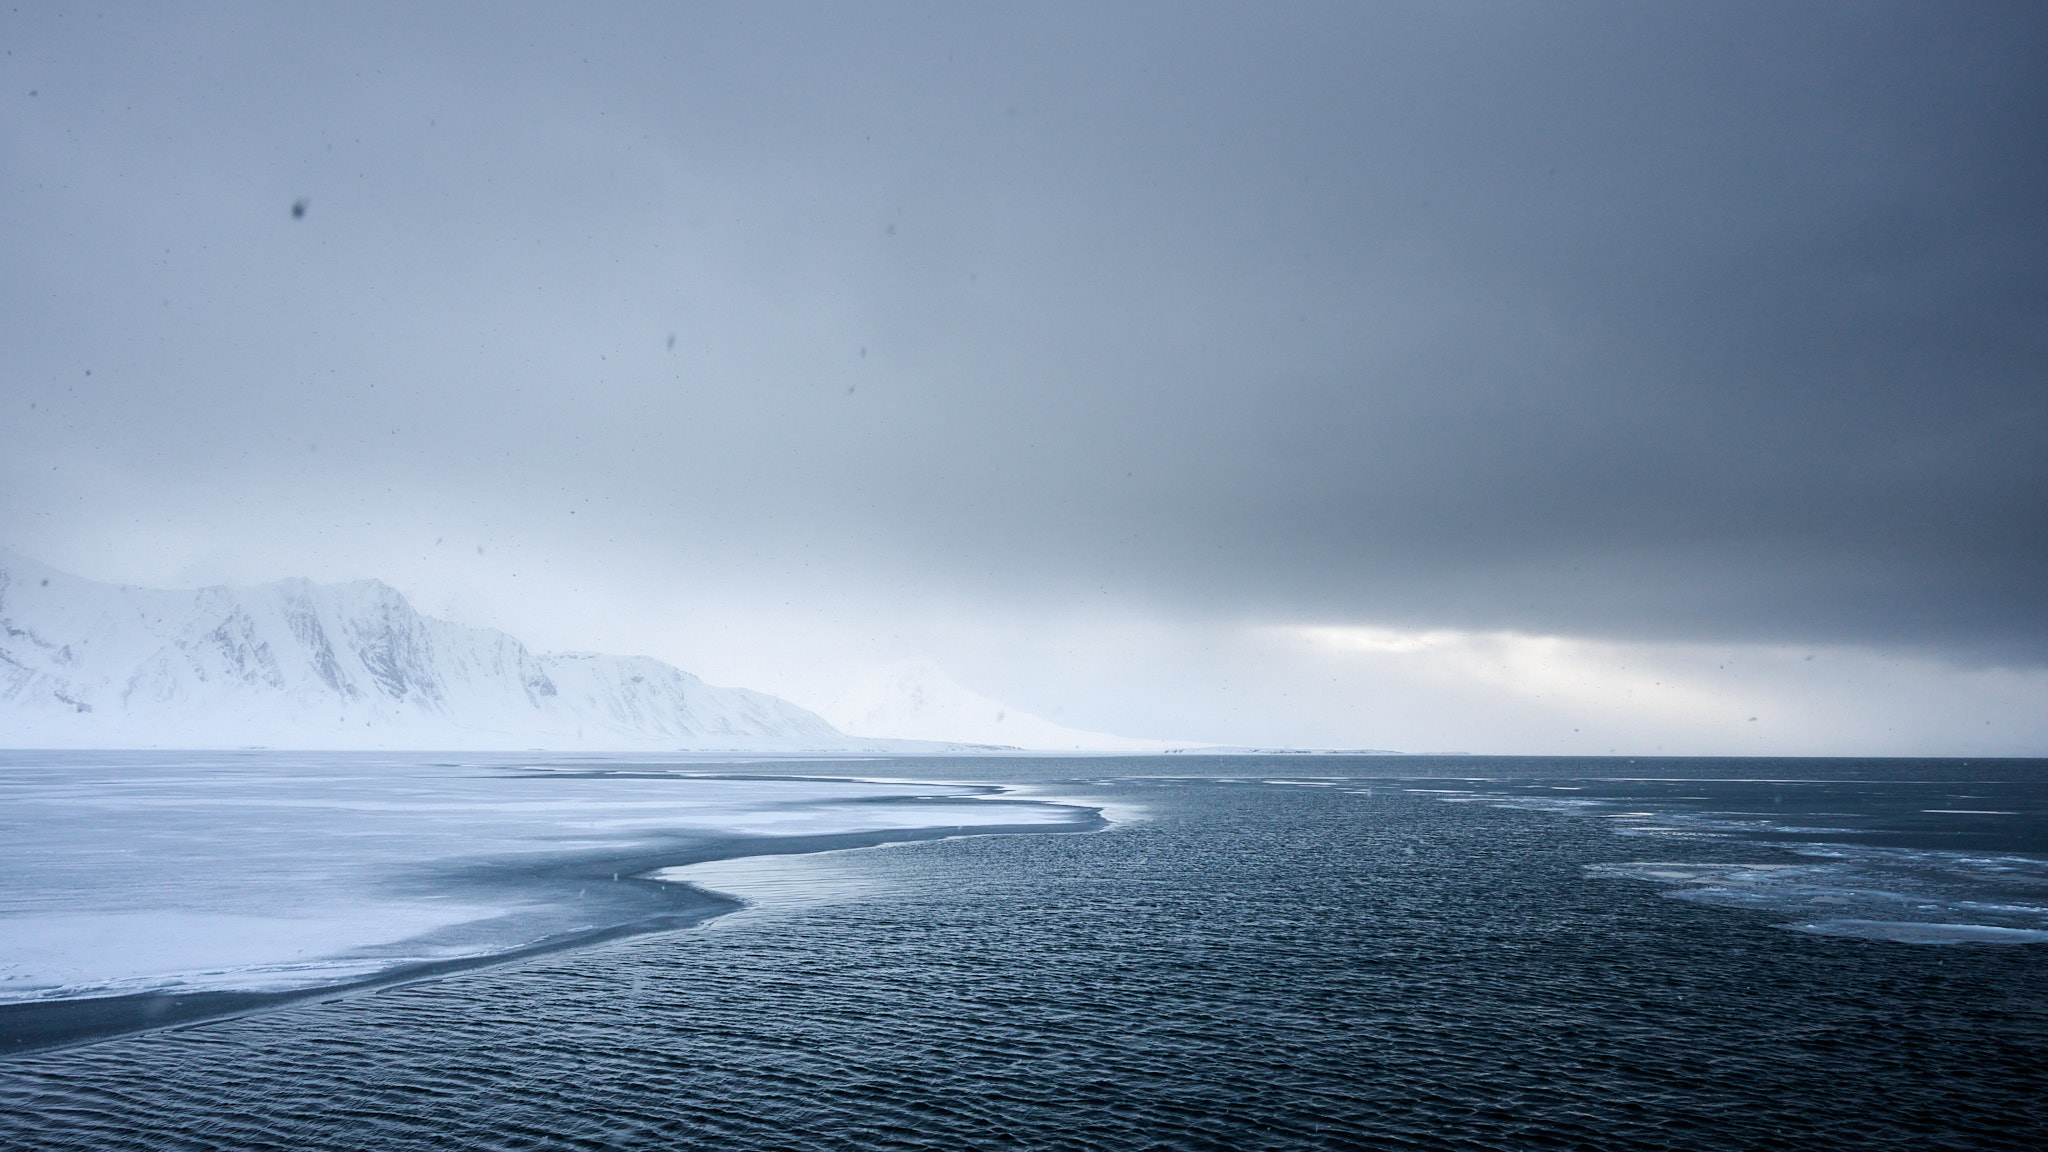
Arctic light is unique. During the summer, the midnight sun provides all-day illumination and leads to extended golden hours. Meanwhile, if you’re fortunate and visit at the very beginning or end of the season, you might witness the Northern Lights dancing across the sky, a truly unforgettable spectacle. This is even more likely during the polar winter, though I haven’t experienced that season myself due to the limitations regarding the lack of daylight.
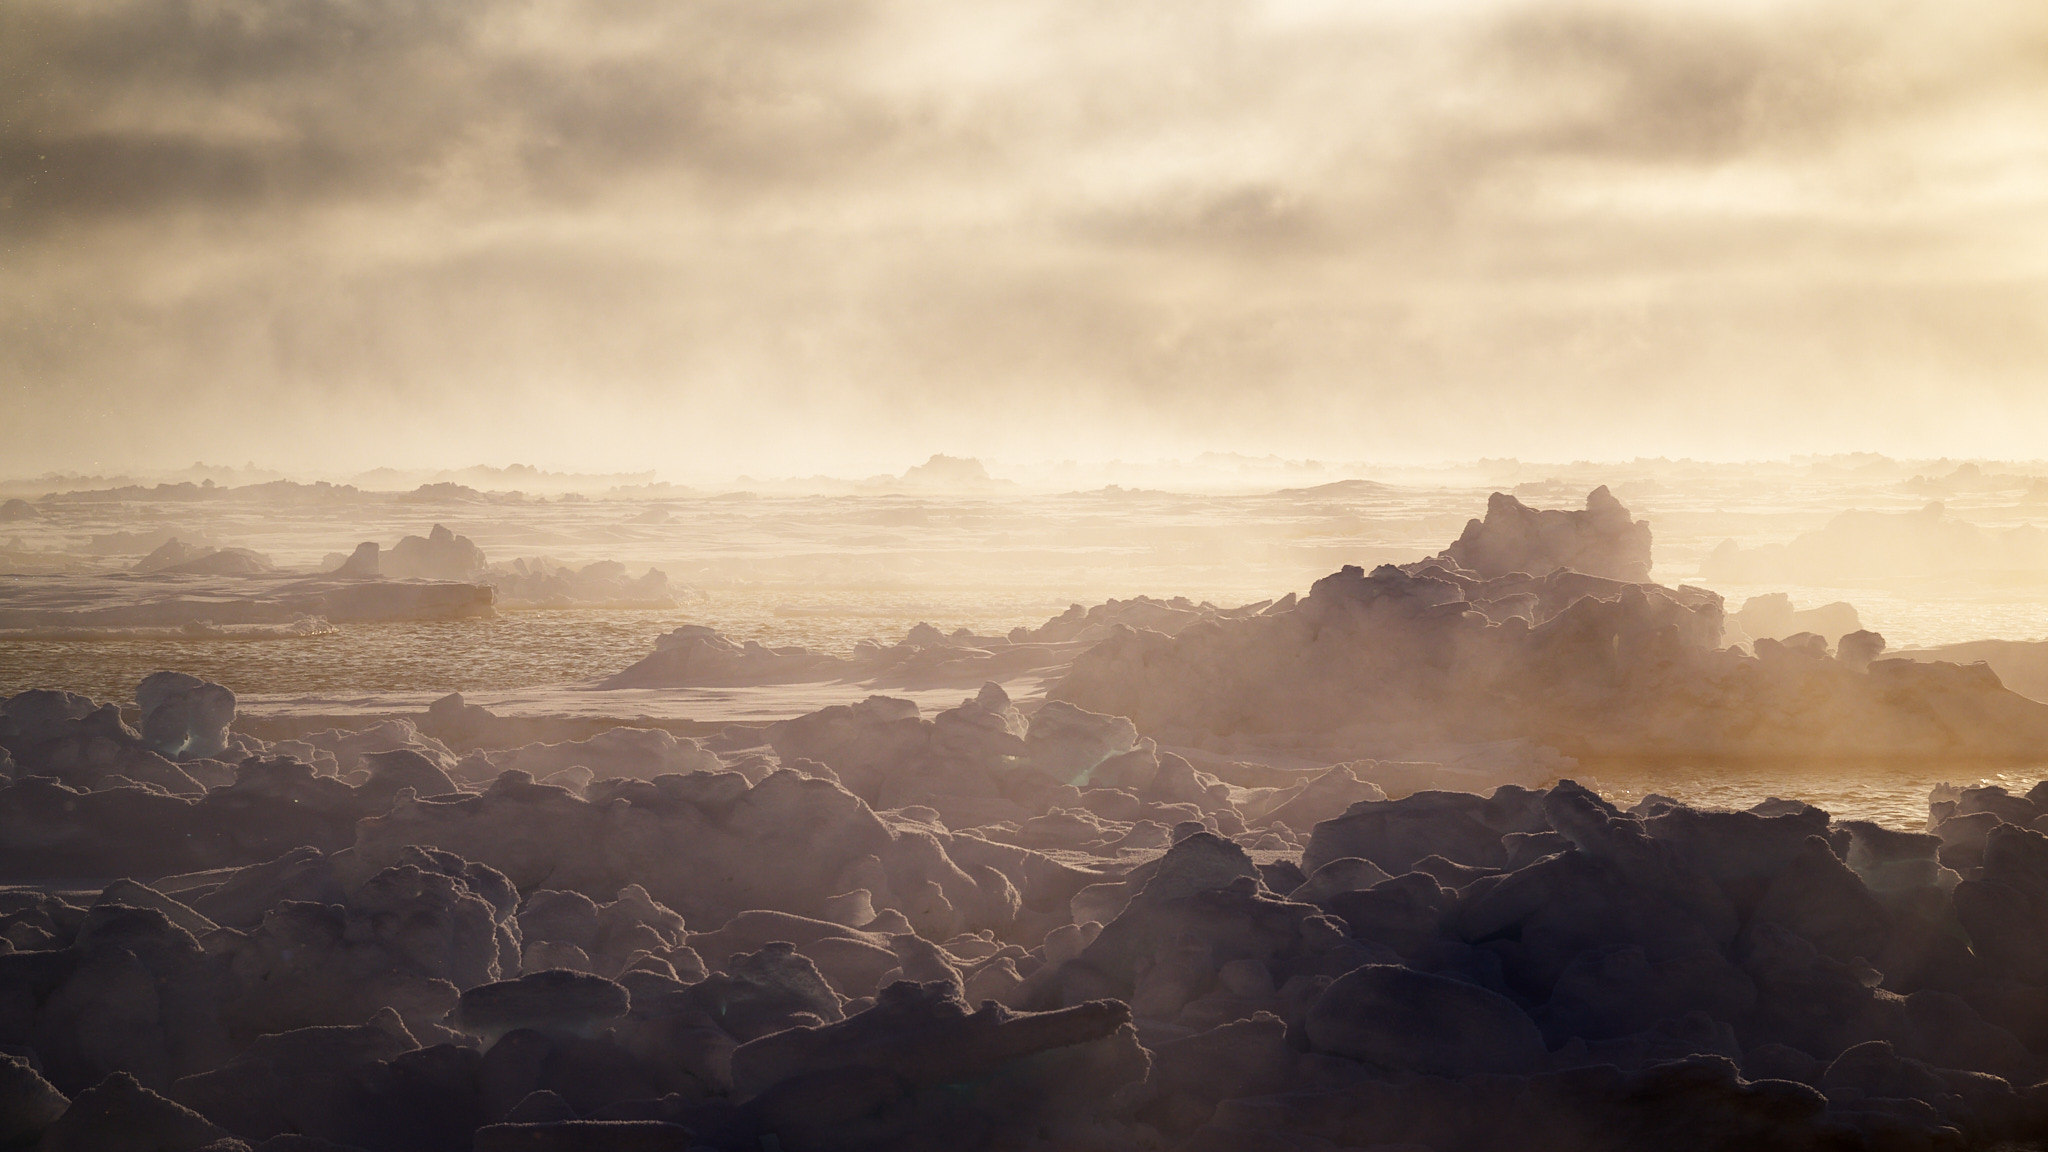
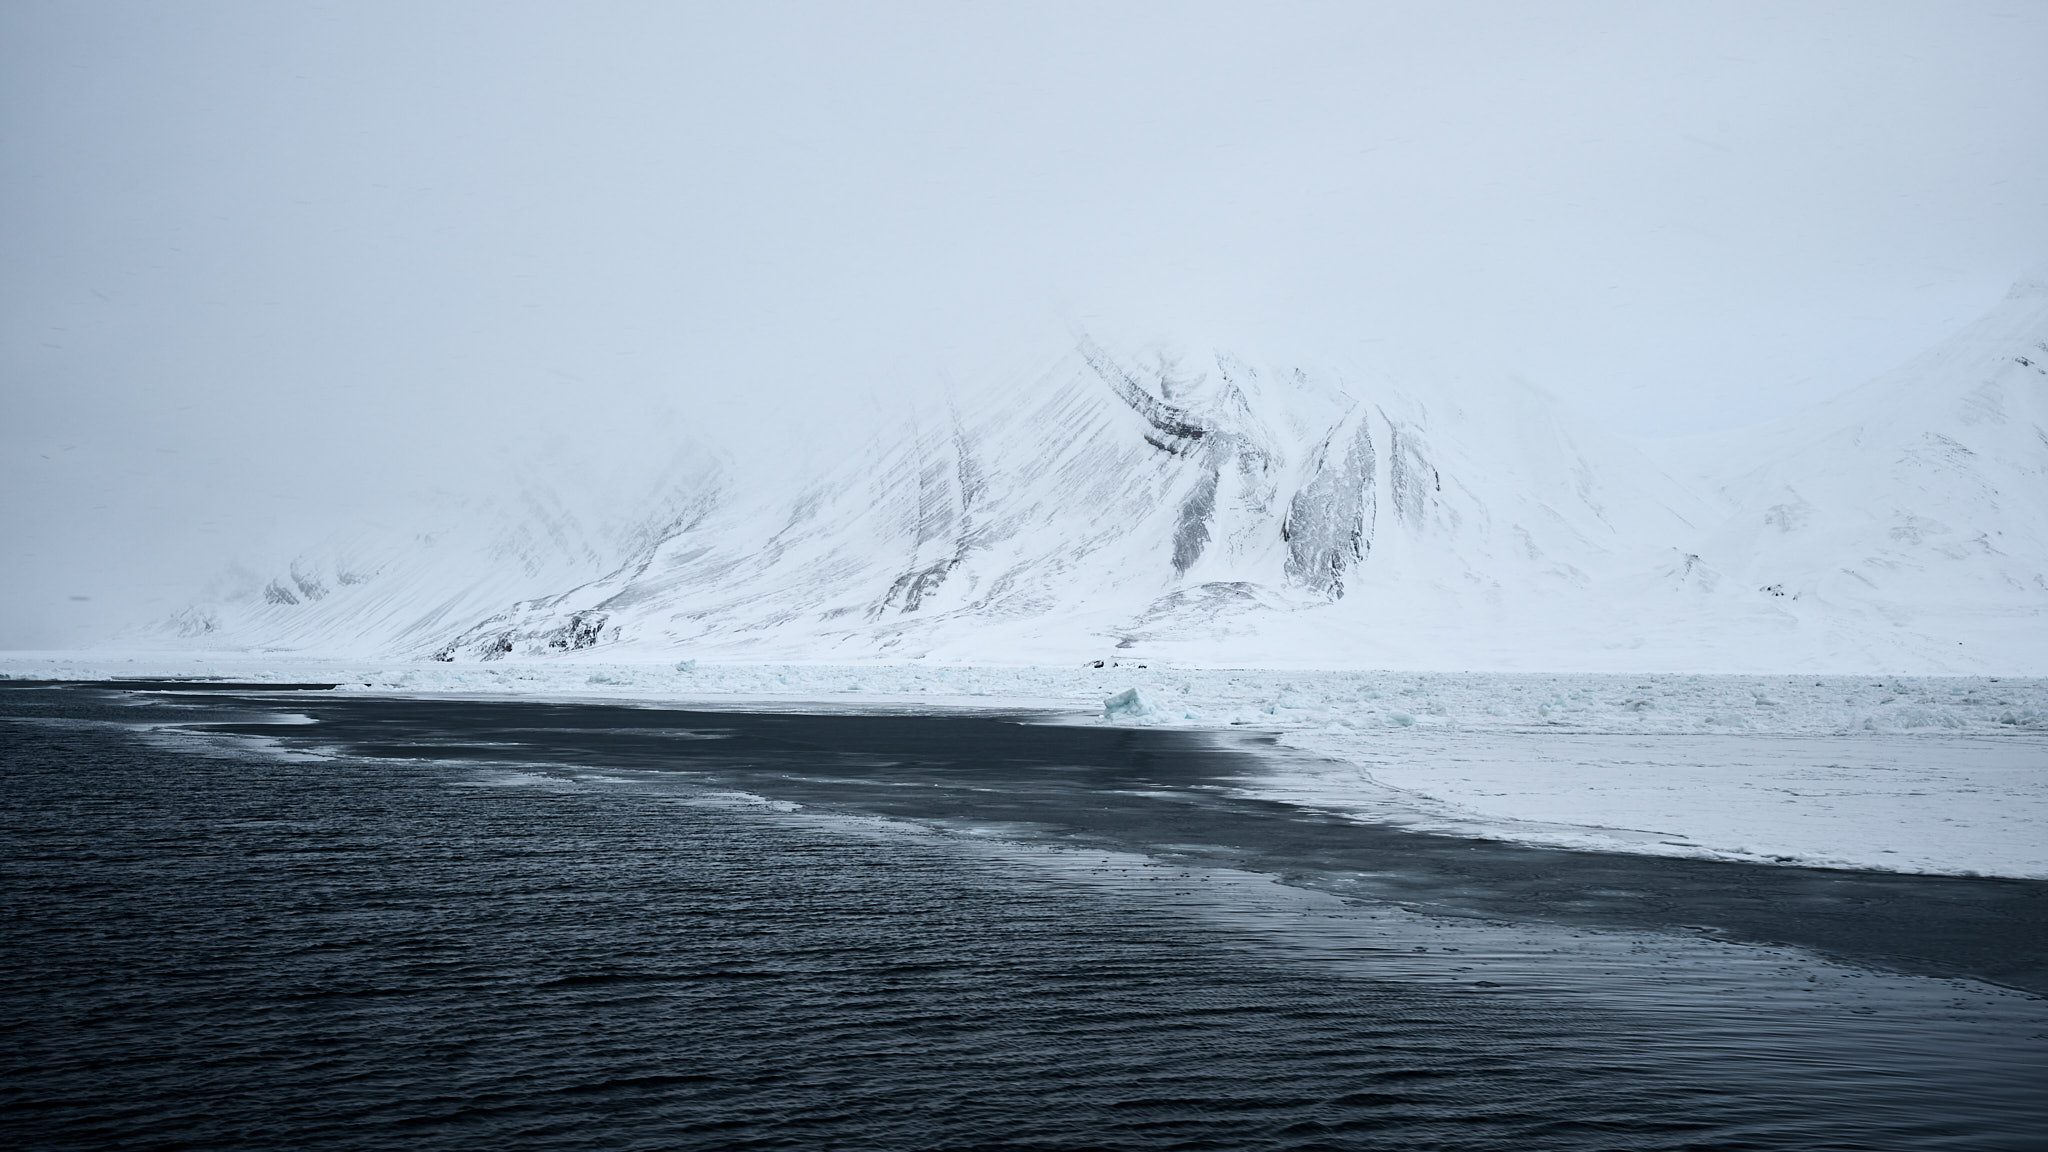
The photographs accompanying this article were taken during two trips, one in June and the other in March. The light and landscape conditions were drastically different. Yet, regardless of the season, Arctic light remains unpredictable and ever-changing. Clouds can quickly obscure the sun, turning a vibrant scene into a uniform gray. Conversely, after patient waiting, the clouds may part, revealing a fiery sky and a landscape illuminated by a light that, to photographers unfamiliar with these extreme latitudes, seems otherworldly. Or, the low sun might strike fog over the ocean, transforming everything into a golden vista.
In these situations, the photographer must skillfully use the available light to capture the evolving mood of the scene, enhancing its inherent magic with whatever elements are present in the landscape.
Tips for the Sailing Landscape Photographer
- Keep your equipment ready and accessible: It’s helpful to have two camera bodies prepared. One can be set up with a versatile 24-120mm zoom lens, and the other with a longer zoom, like a 100-400mm. I bring three lenses (24-120mm, 100-400mm, and a 500mm or 600mm prime) and two bodies. I keep the 100-400mm on one body for the entire trip, while the other camera switches between the telephoto zoom and the supertelephoto prime, depending on the subject. I typically shoot in manual mode with auto-ISO, adjusting the shutter speed and aperture based on the subject and the lighting conditions.
- Avoid condensation: Although my previous recommendation is to keep your equipment accessible, there is one exception. Especially during early or late-season trips, it’s best to leave your gear on deck inside the backpack, at least during the day. This prevents condensation buildup caused by the temperature difference between the warm interior of the ship and the cold outside. As long as you can run out and grab the camera quickly if something interesting happens, this doesn’t conflict with the previous tip!
- Use stabilized lenses: Tripods aren’t practical on Zodiacs and are ineffective on the ship due to engine vibrations. Using them would necessitate very fast shutter speeds. It’s much better to rely on stabilized lenses and shoot handheld with sufficiently fast shutter speeds to avoid motion blur! (Consider faster shutter speeds during the ship’s navigation, and only using longer shutter speeds when the boat is staying in place.)
- Embrace dynamic composition: Try to anticipate how the scene will unfold as the ship moves forward – how the relationships will change between upcoming pieces of ice. Use the ship’s movement to align objects and create dynamic compositions, rather than shooting randomly.
- Maintain constant observation: Carefully scan the surrounding landscape for interesting views and photographic opportunities. Don’t just think about the wide-angle scene; also consider how zoomed-in details will translate photographically.
- Patience, patience, and more patience: Be prepared to wait for the ideal light, favorable weather, and the perfect moment to capture your shot. As soon as it happens, it may last only a few seconds. But remember that observing the environment is also a part of the experience, and you’re not just there to take pictures.
Dress Properly
The seasons bring significant variations in both climate and light conditions to Svalbard. The key to staying comfortable is dressing in layers:
- Start with a breathable base layer, such as merino wool.
- Add one or more insulating thermal layers.
- Windproof and waterproof outer layers are essential, despite the islands’ relatively dry climate.
In my experience, typical summer conditions (June, July, and August) can be managed with gear commonly used in the Alps, as temperatures range from about -5°C to +10°C (23°F to 50°F). However, if you are standing on deck for hours watching the landscape and taking photos, you will get cold quickly without proper gear. Your fingers may also grow cold from handling your camera for so long, so bring hand warmers along as well.
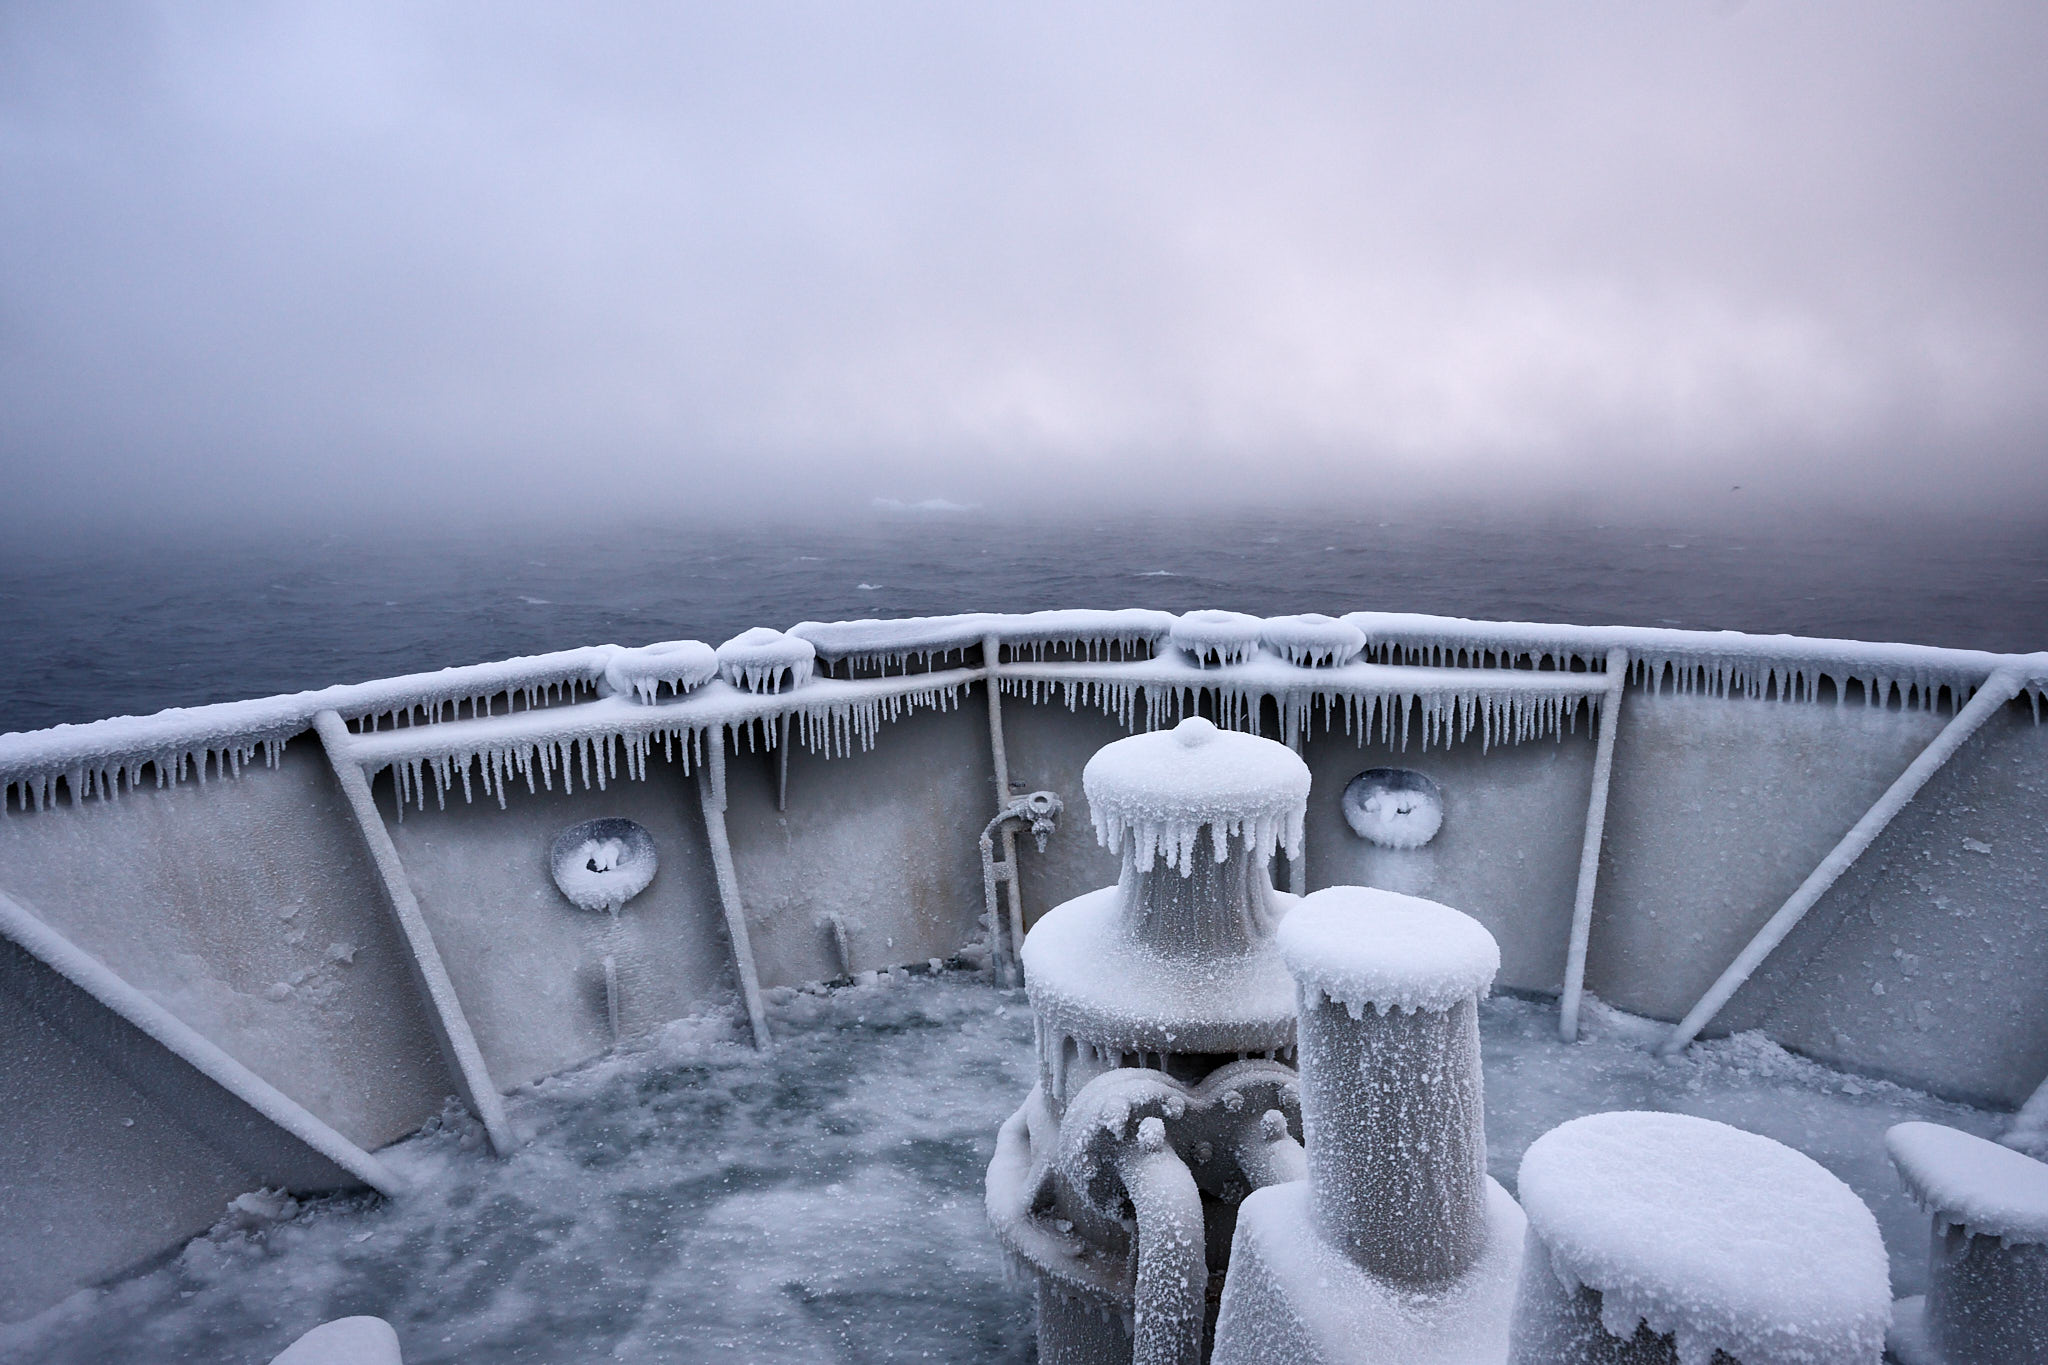
During my second trip in March 2024, the temperatures were significantly colder, and I experienced a personal record of photographing at -37°C (-34.6°F). In such extreme conditions, full-body protection is crucial. This includes wool socks and thermal boots for your feet, double gloves for your hands, a wool hat and balaclava for your head and face, and insulated over-pants added to a thick down jacket. Not all cameras will work properly in conditions this cold, but the unique environment can make for some truly fascinating photos!
Conclusion
Svalbard offers a remarkable photographic experience that demands technical skill, quick reflexes, and ample patience. For landscape photographers, these islands provide an opportunity to push creative boundaries and capture images that tell the story of a wild and pristine world. Here, nature sets the rules, and light – whether soft and diffused, or strong and directional – plays the starring role.
I hope this essay about landscape photography in Svalbard was enjoyable and valuable. If you want to share your thoughts about this topic or ask some question about this kind of trips, I’d be happy to discuss it with you, so don’t hesitate to leave questions or feedback in the comments section below!
Another question on lens selection (this one related to the longer end): I have a 100-400, but planned to keep equipment to 24-120 and 180-600. Is it a mistake not to also take the 100-400 for whenever I dont expect to need to get to 600mm or do you think it would be unnecessarily redundant?
I don’t have a first-hand opinion about the 180-600 because I haven’t had the chance to use it for more than a few shots so far.
That said, I think the 100-400 is a better lens overall, but the difference between the two in the overlapping focal length isn’t significant enough to justify bringing both. The case for the 100-400 could be if you have difficulty using the 180-600 freehand.
You had 2 choices of lenses covering 100-120mm. I’m guessing the right choice is “the one that’s on the camera”, but do you perceive a difference between the 24-120mm and 100-400mm in their overlapping range?
Hi Brian, thank you for your question. I would like to receive more of them to better understand how to improve my articles!
Honestly, they are so similar optically that there isn’t any real reason to switch between them to optimize the image. By pixel peeping, you can find that 100-400 is slightly sharper in the corners, while in the center they are quite similar. However, at f/8 and f/11, their performance overlaps nicely.
Brilliant and inspiring images, Massimo! I hope you are very proud of these photos—they unflinchingly capture the awesome and majestic beauty of the Arctic. I know it’s extremely hard to pare down equipment for such an endeavor, but I would have had to bring a 20mm, or 14-24. How were you able to limit yourself to 24mm at the wide end?
Hi John, thank you for your kind words; I’m glad you liked the images.
Regarding the lenses, I took my 14-24 for my first trip but didn’t use it. Taking photos while onboard the ship, even on a small one, doesn’t allow you to be close enough to the foreground to use such a short focal length effectively. Obviously, it depends also on personal taste!
That was my experience as well–the 14-24 only twice: once doing a straight down shot while pushing through ice, and a second time from the highest point on the vessel (and that ended up being hot garbage).
Your lens mix matches what I would go with in the future. The 14-24 just isn’t useful unless you’re going to be on land.