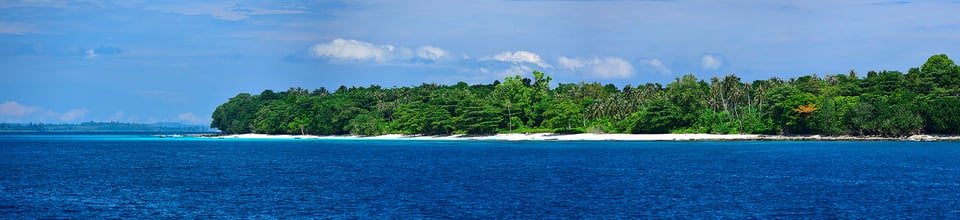
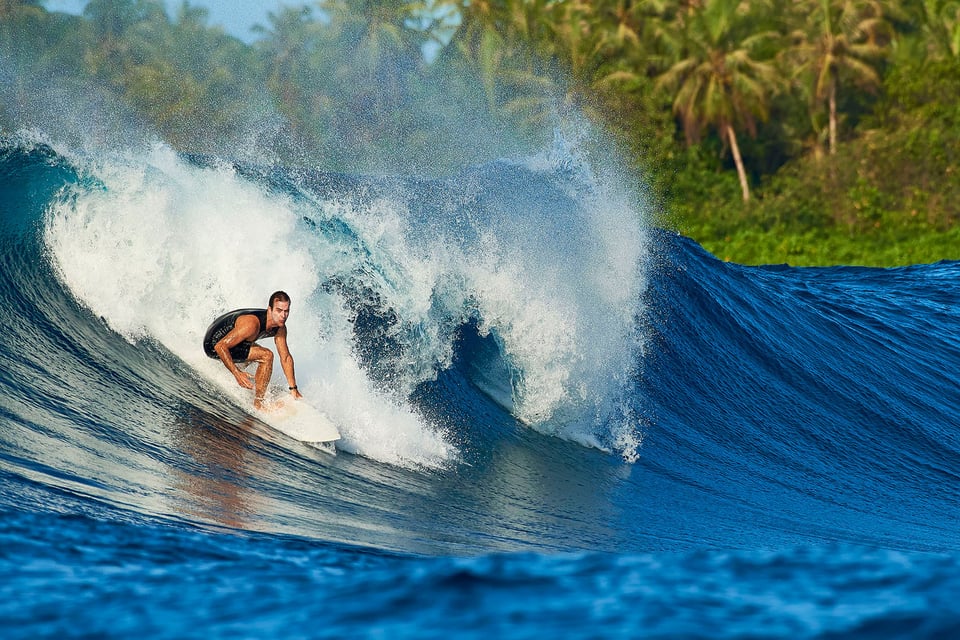
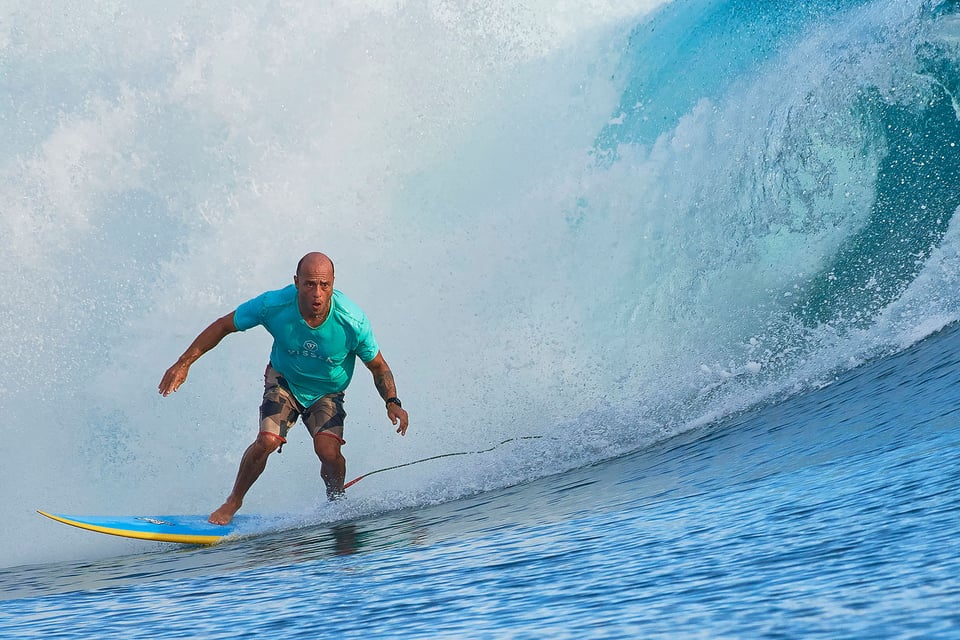
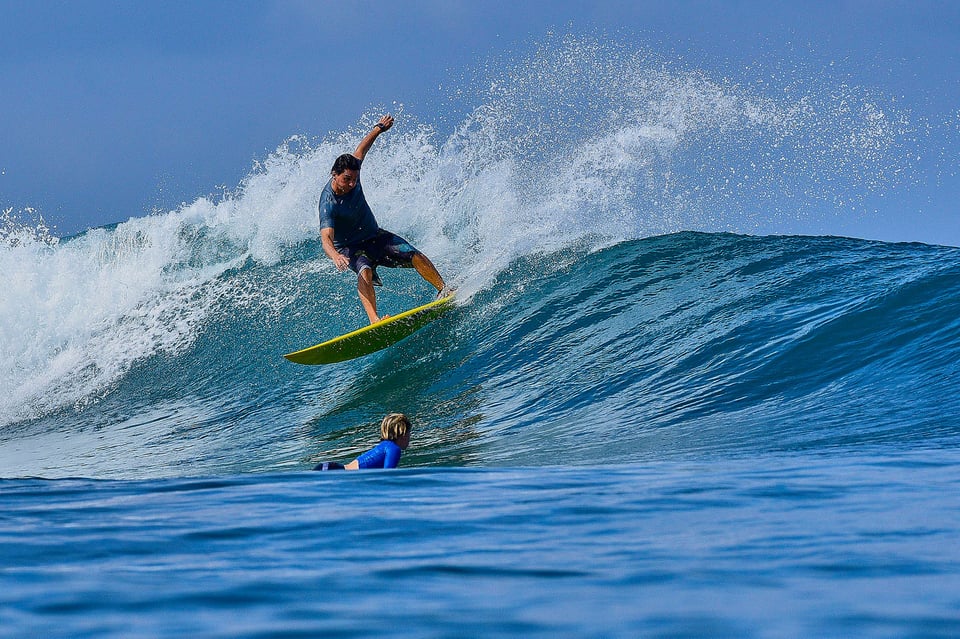
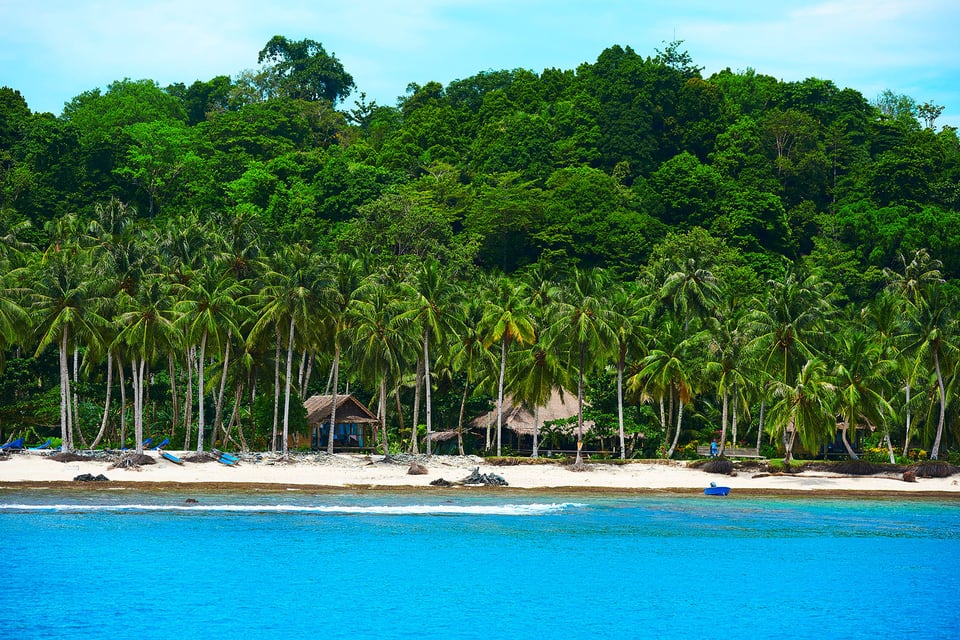
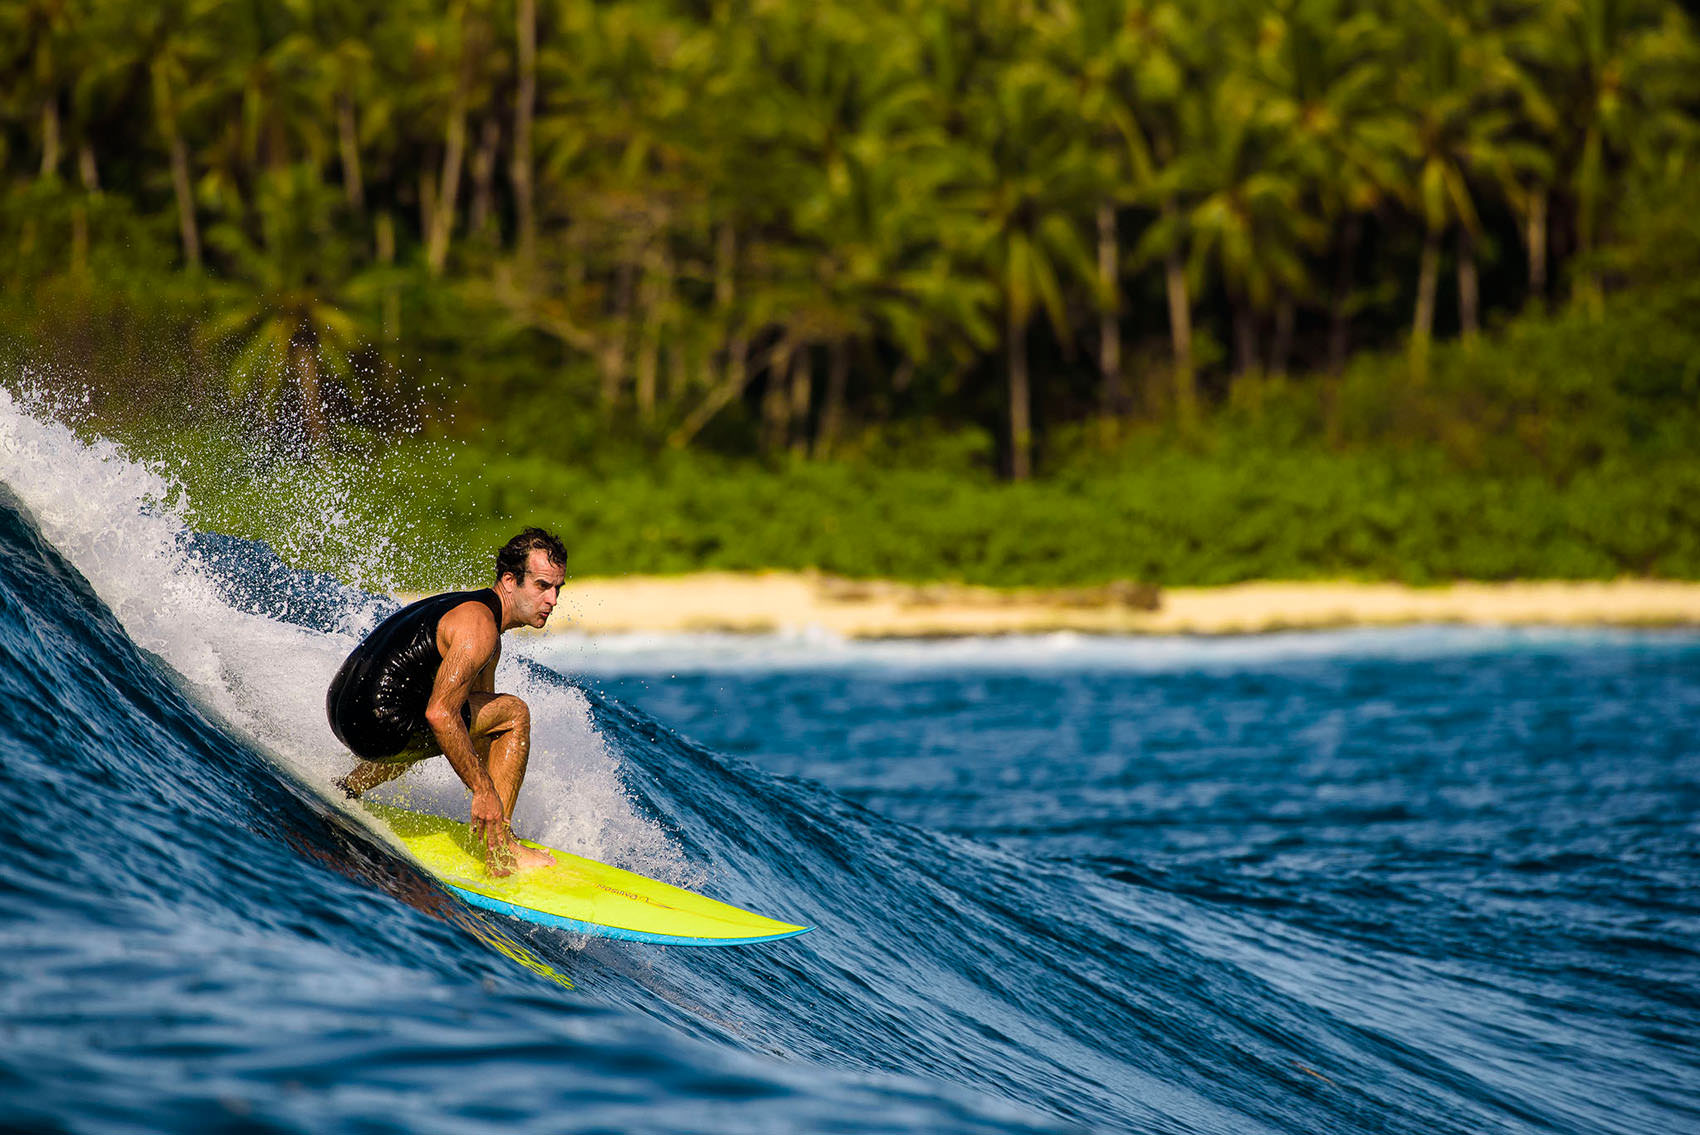
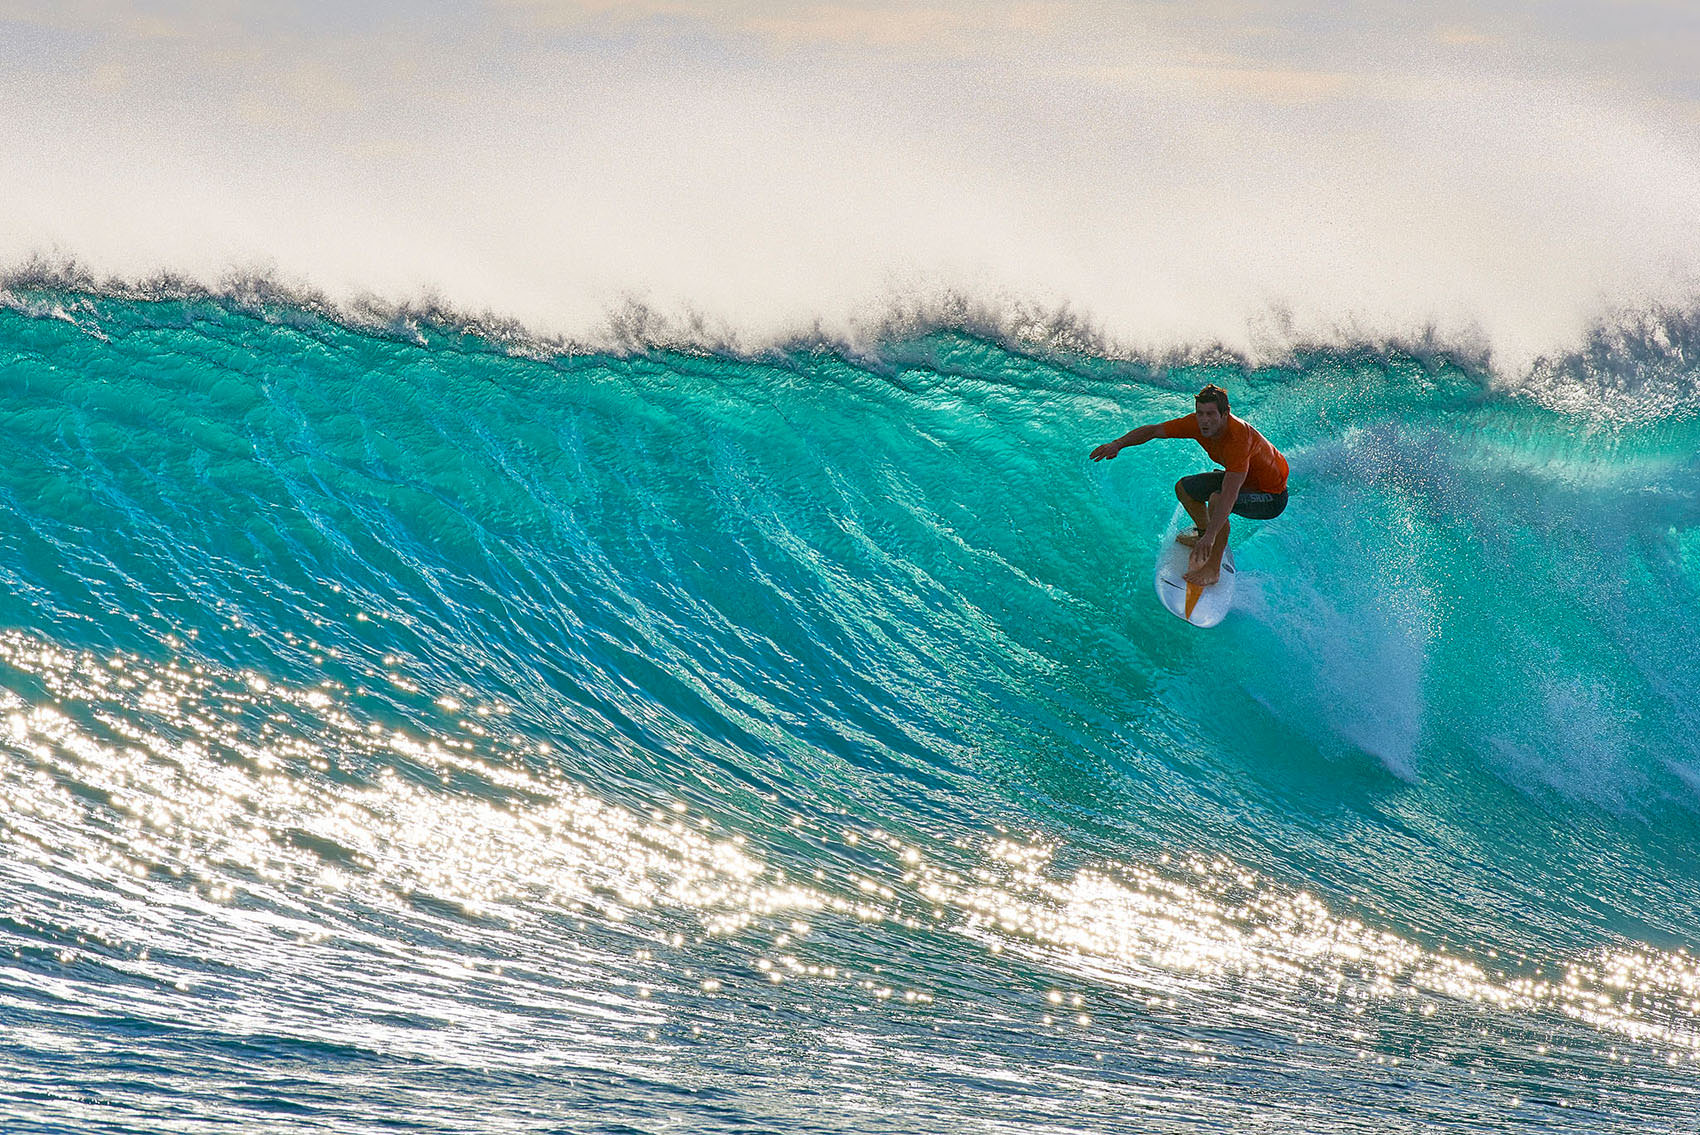
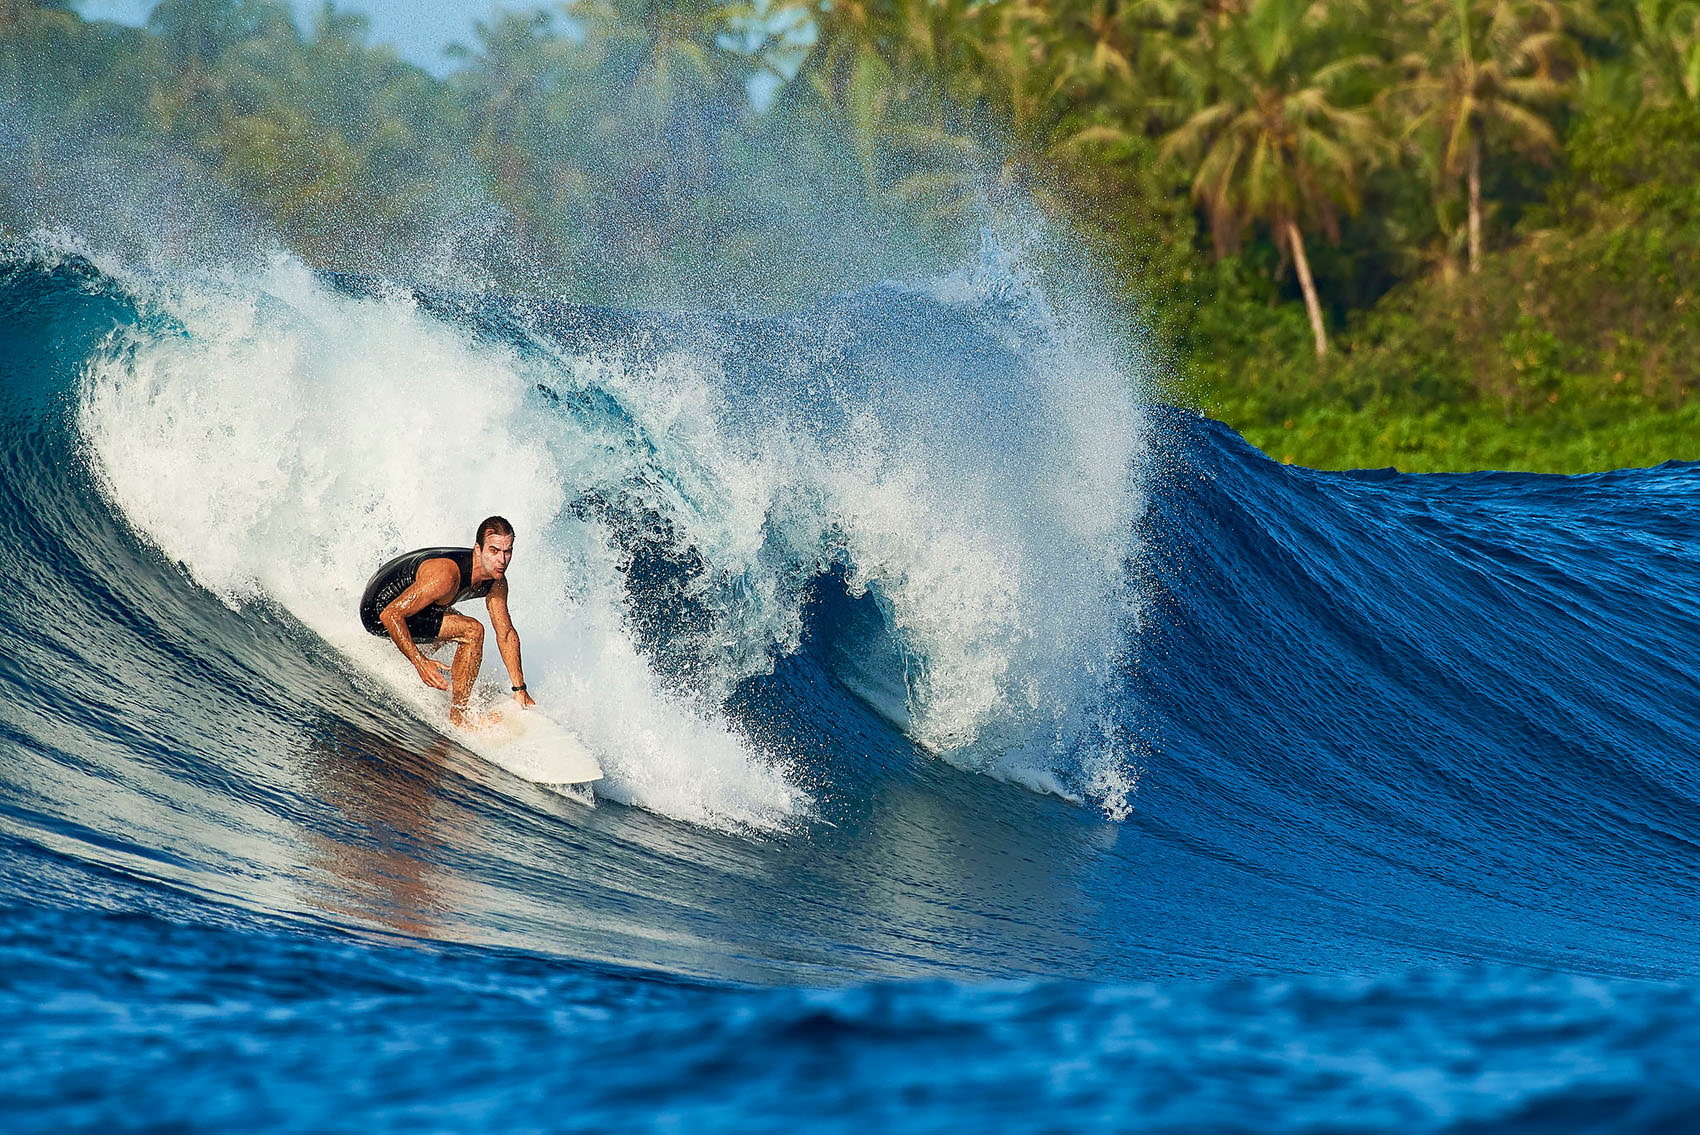
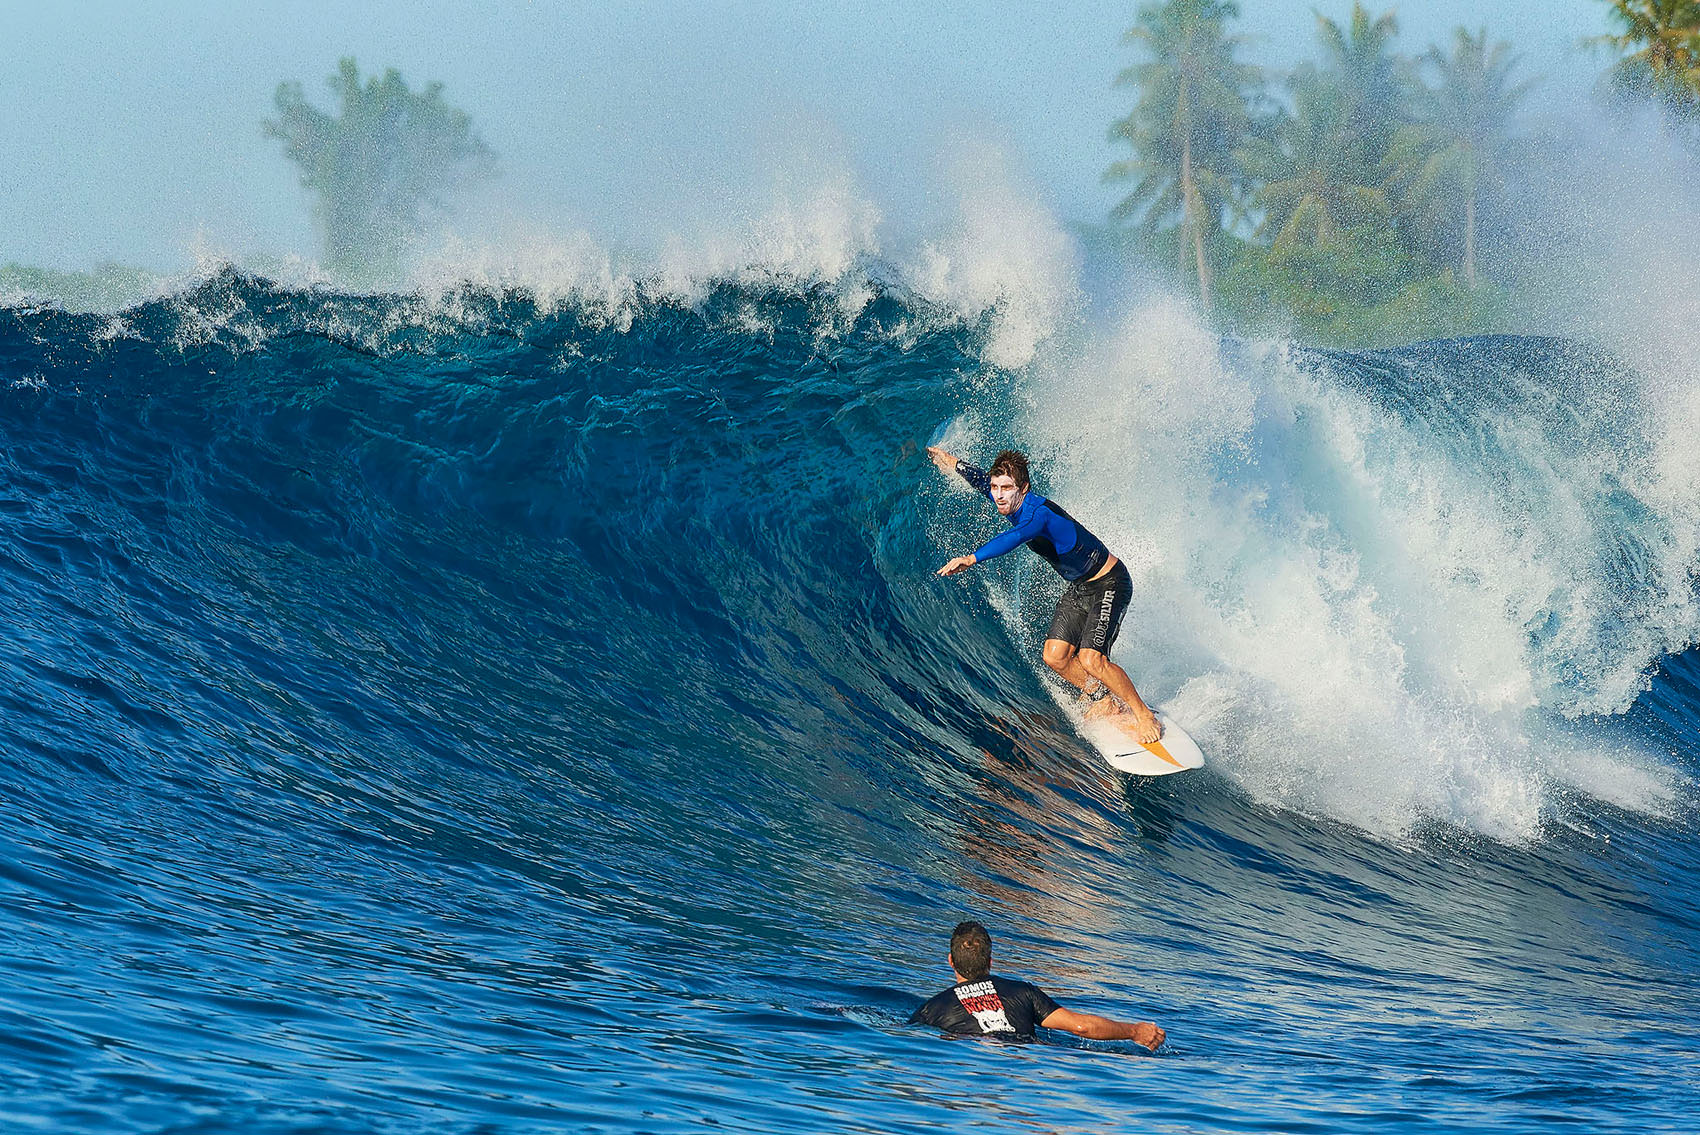
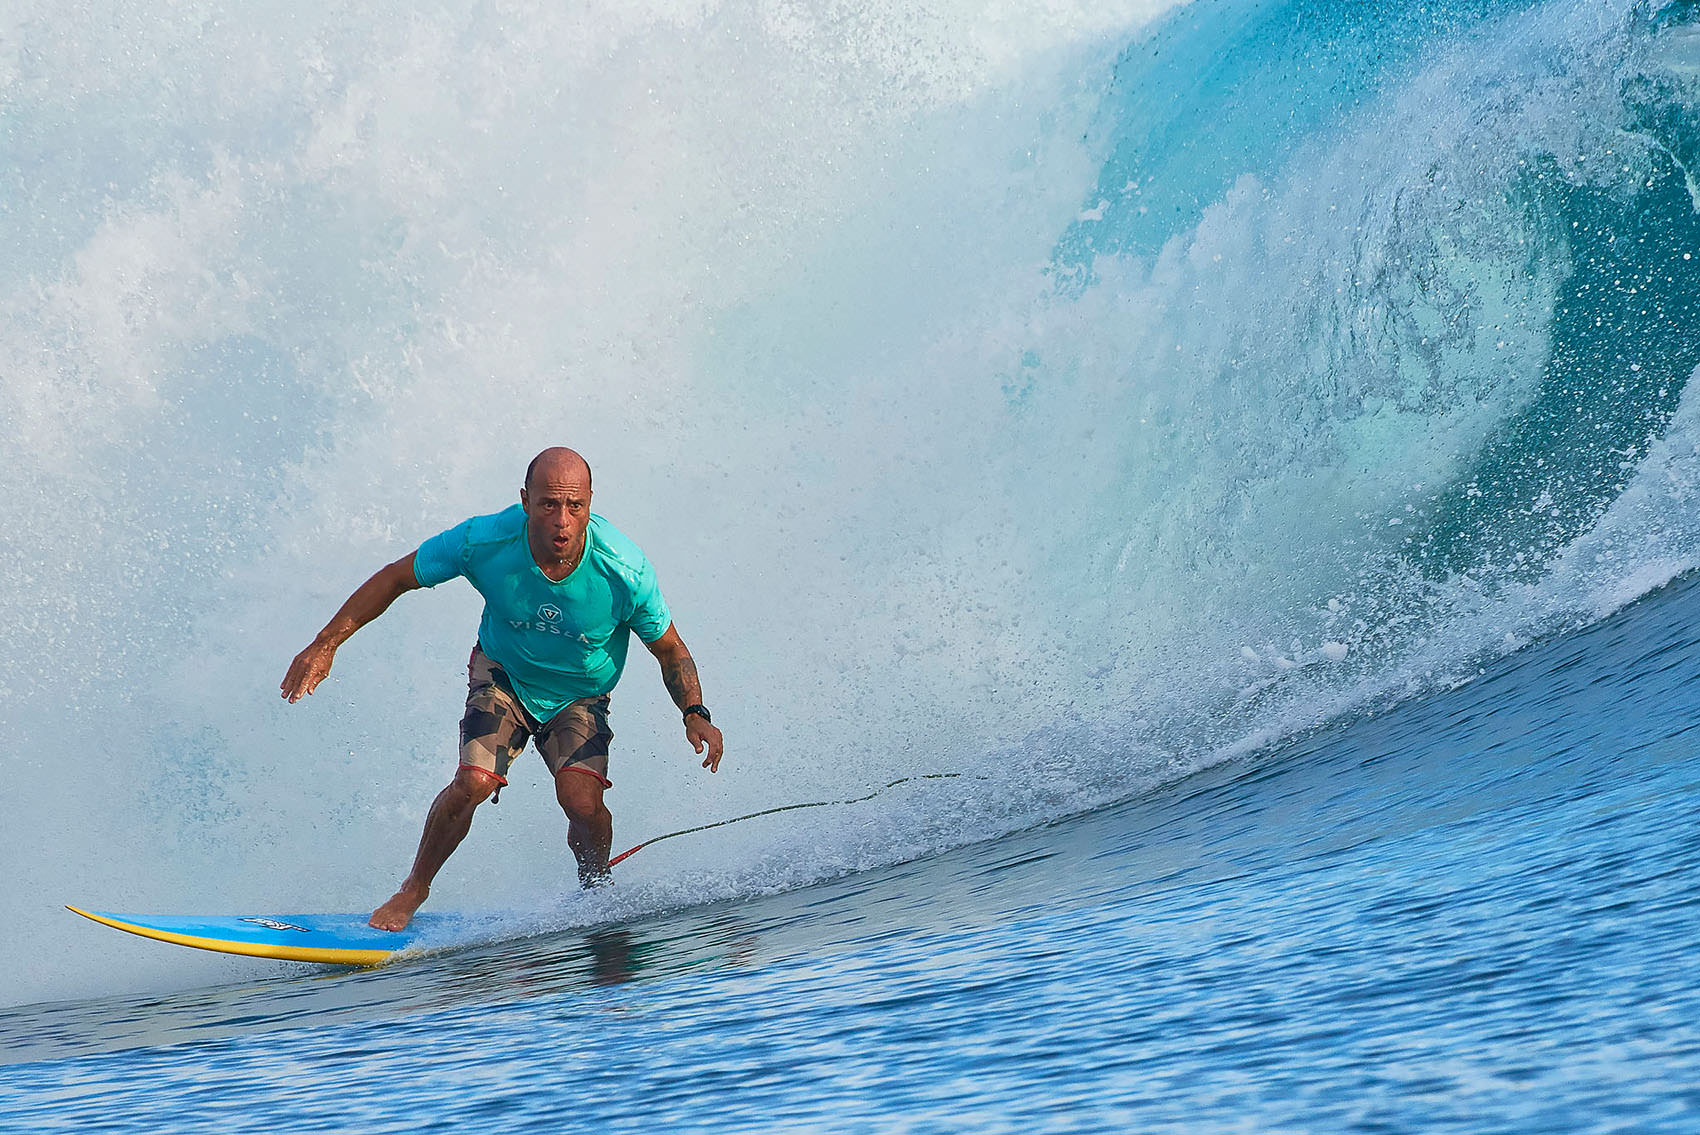
In 2017, I received an invitation to photograph on the Mentawai Islands in Indonesia. My cousin, who is a surfer and makes this trip practically every year, asked me to join them in their next trip. For those who do not know, Indonesia is a surfer’s paradise, with surfers from all over the world visiting this remarkable destination. It has been a while since I photographed surfing professionally, so without much hesitation, I accepted the invitation. In this article, I want to go over some of the things I learned during this assignment and hopefully provide some tips to those who want to engage in commercial surf photography.

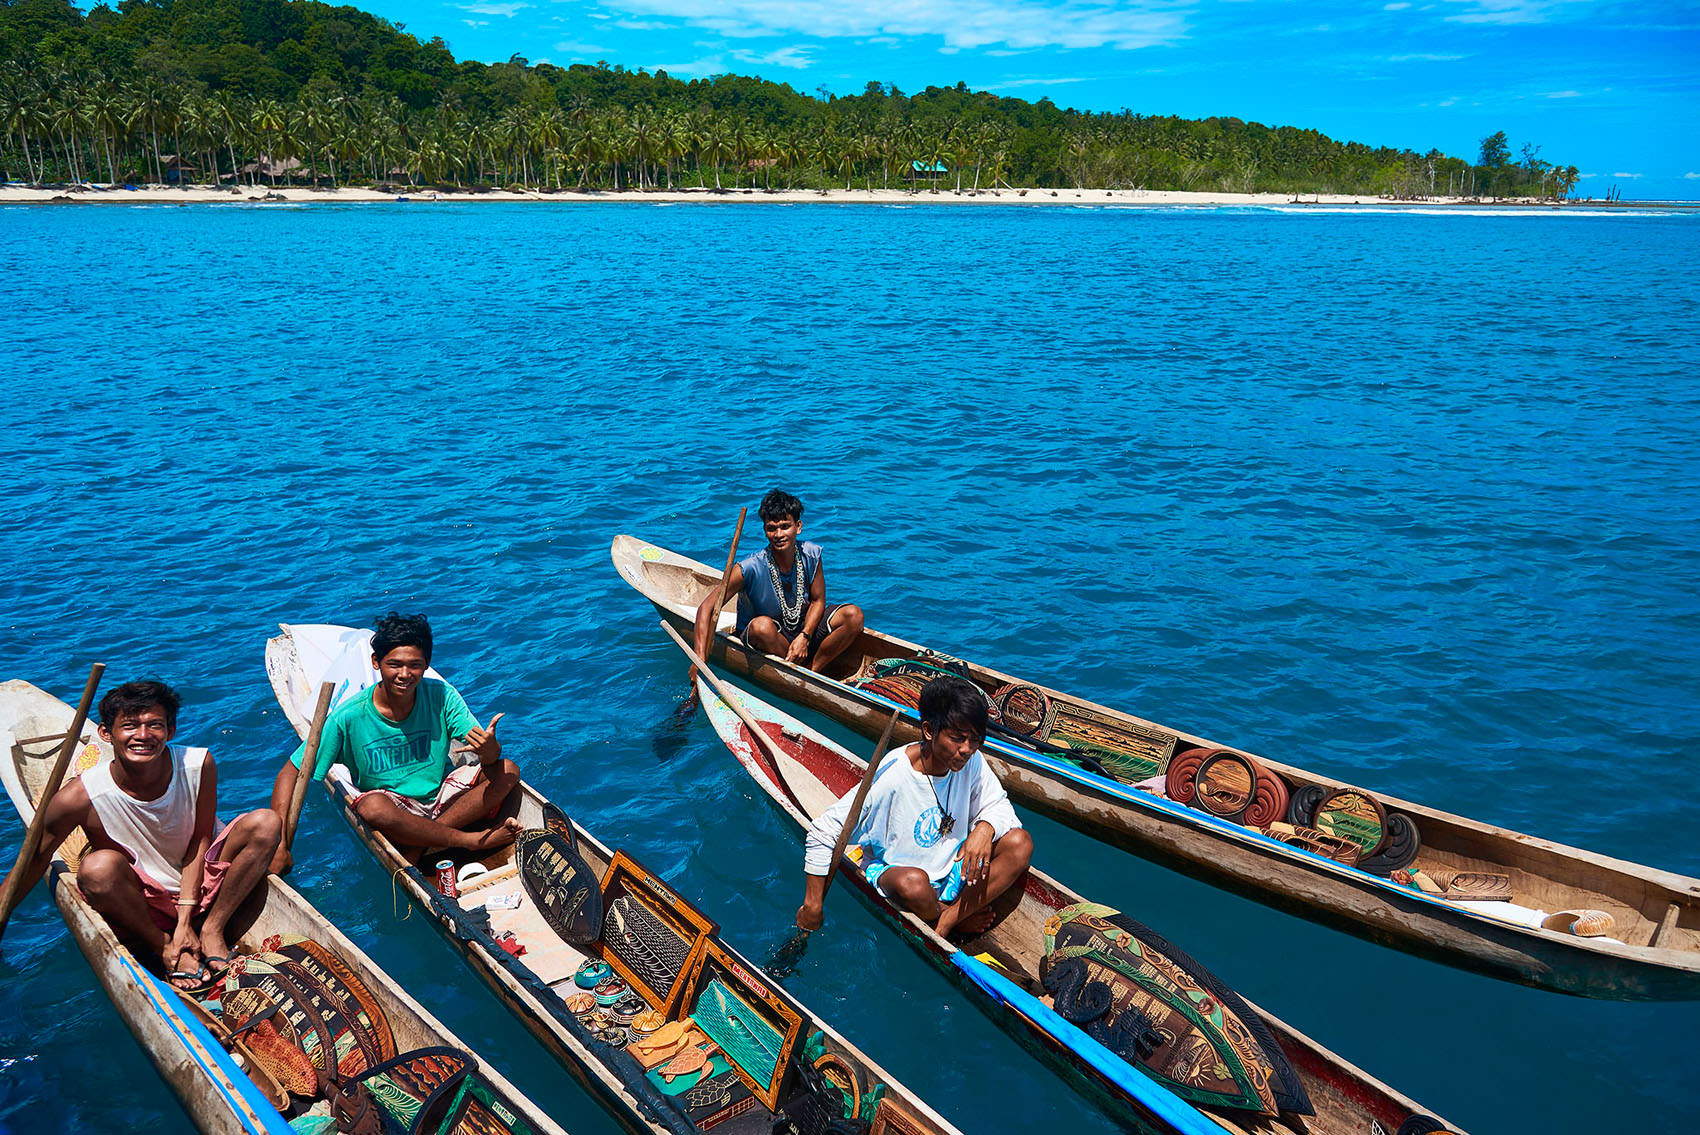
Table of Contents
The Scope
The scope of the job was to photograph 13 surfers on an 11-day cruise on the Mentawai Islands of Indonesia. From there, a series of doubts, yearnings and fears arose in my mind. I devised a plan to get ready for the job:
- Prepare myself physically.
- Get as much prior information as possible and all necessary care, so that nothing can go wrong.
Preparation Tips
Below is a list of what went right and what went wrong during this assignment.
Physical Preparation
As I signed my contract 3 months earlier, I immediately began to prepare physically – I went through a specialized swimming training. This preparation was very useful and I recommend all photographers to always be prepared physically. Whether it is to work at sea or on mountains, physical preparation is fundamental to succeed.

Work Methodology (70% Went Right, 30% Went Wrong)
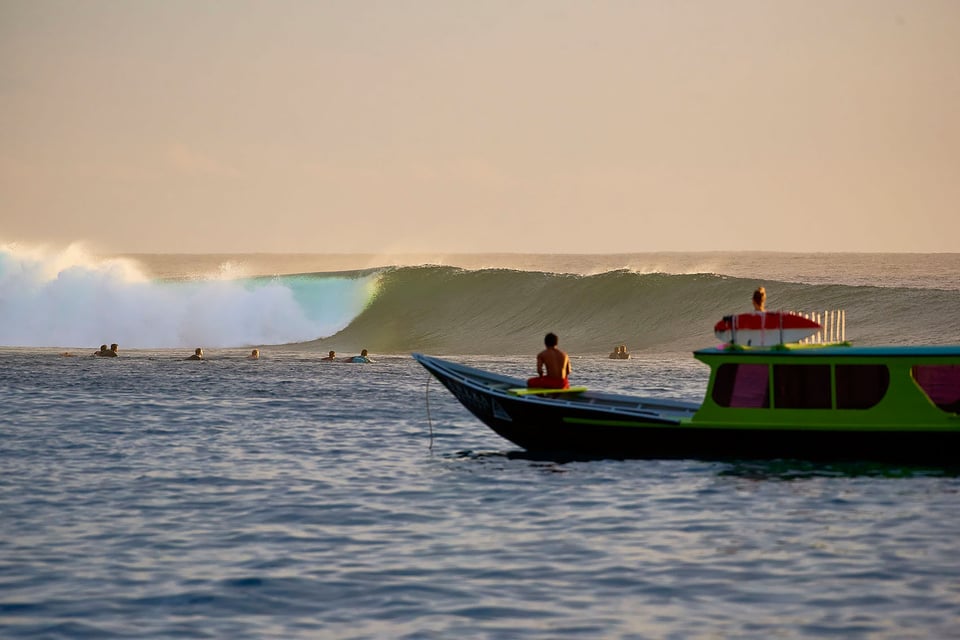
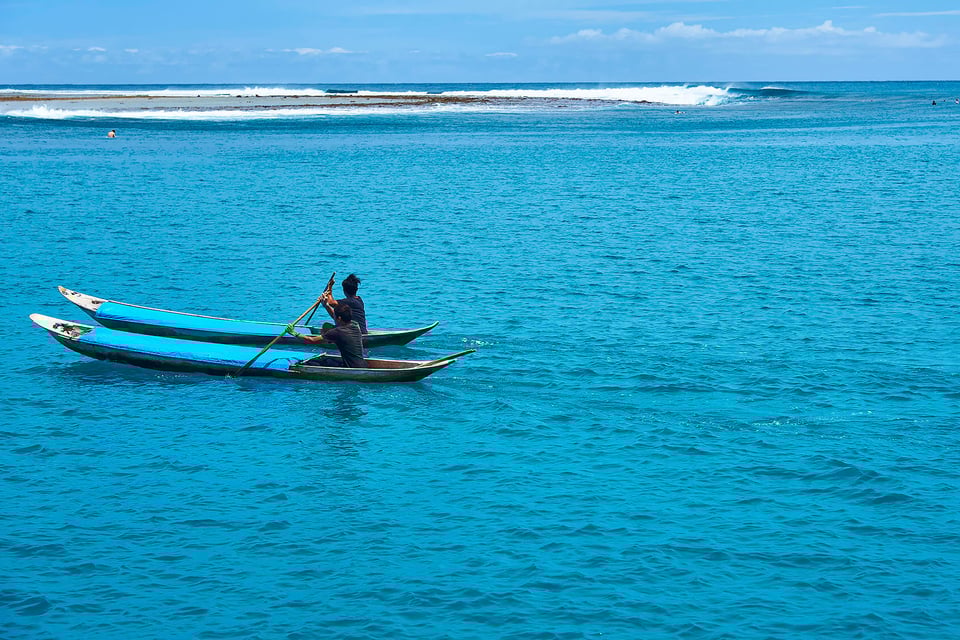
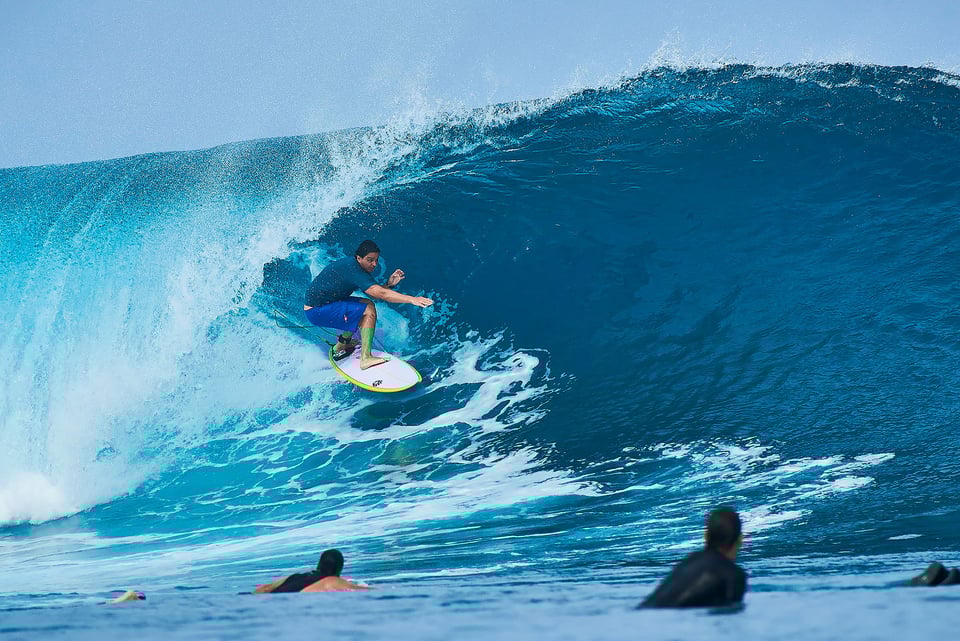
Basically there are two possible photographic scenarios in the Mentawai Islands: Shoot from a small boat in the channel near the waves, or photograph in the water. In my case, the biggest question was: which lens should I use in and out of water? Out of water, would something like a 70-200mm suffice, or would a telephoto zoom like the 200-500mm be a better choice? Would the latter be too heavy? For photographing in the water, what lens would be ideal? I was not planning on using an underwater housing kit for a specific camera + lens, and instead chose to go with an Outex housing case, which meant that I had to decide on the lens and also make sure that the Outex case was good enough to resist large waves. I also wondered if it was worth bringing a GoPro. Too many doubts and questions, which made me go crazy and lose some sleep. In the end, I decided to be rational, and separate the equipment by categories:
Lenses: First, I decided that I should take the Nikon 200-500mm with me, because I knew that I would probably be photographing from the boat and from the beach, so getting as much reach as possible was fundamental. But after some more thought, I decided to also bring my 80-200mm f/2.8 lens, as it could be a versatile choice for photographing close action. Finally, I also decided that a 24-120mm f/4 was fundamental and this would be the lens I would use with the Outex rubber housing. When it comes to prime lenses, I decided to take the Nikon 50mm f/1.8G and the Nikon 20mm f/1.8G as well, since they are small and compact.
Camera Bodies: I took two Nikon D750 DSLRs, 5 batteries, two chargers, one GoPro and one DJI Standard Drone.
Accessories: Outex rubber housing, watertight box for GoPro and a Lowepro Pro Runner 350 Backpack, plus tripod with double heads.

Problems and Issues
Somehow, I thought that I would have a chance to make videos as well – I had delusions of the grandeur, imagining that I would make stunning quality videos. Poor me… hahaha! It turns out, you either make videos, or you take pictures!
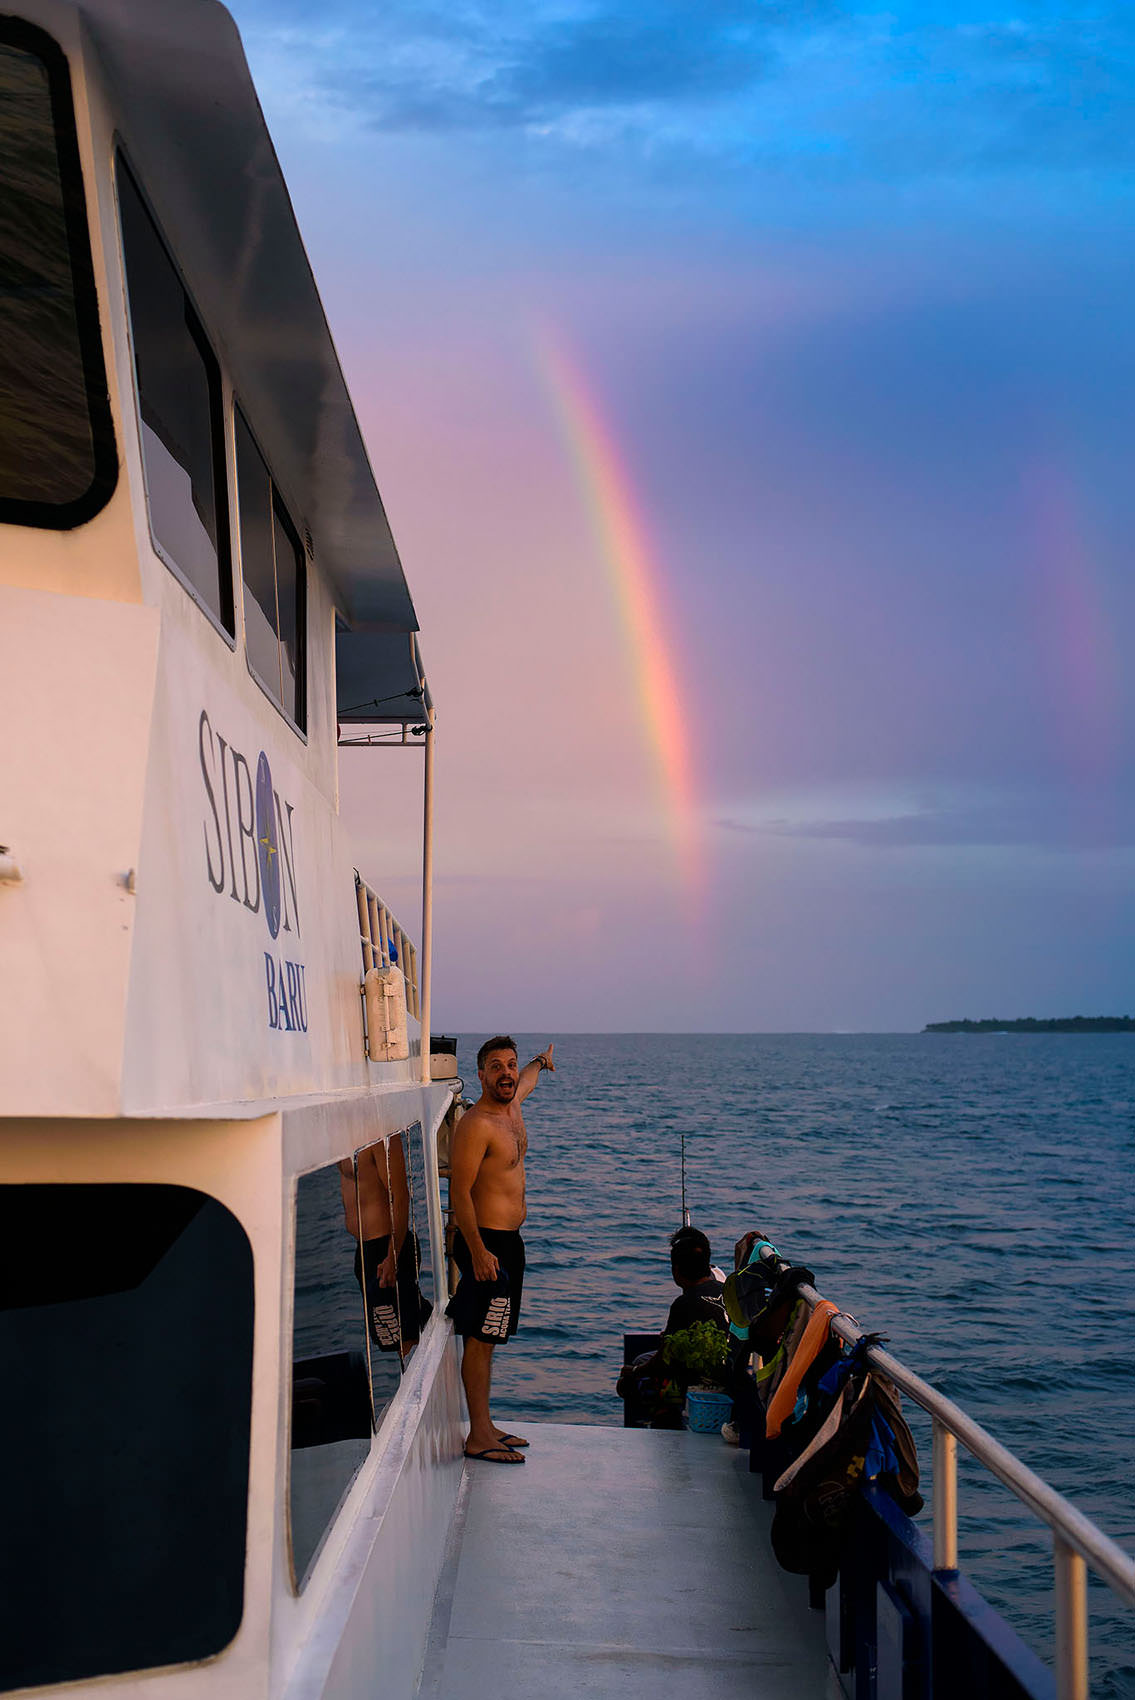
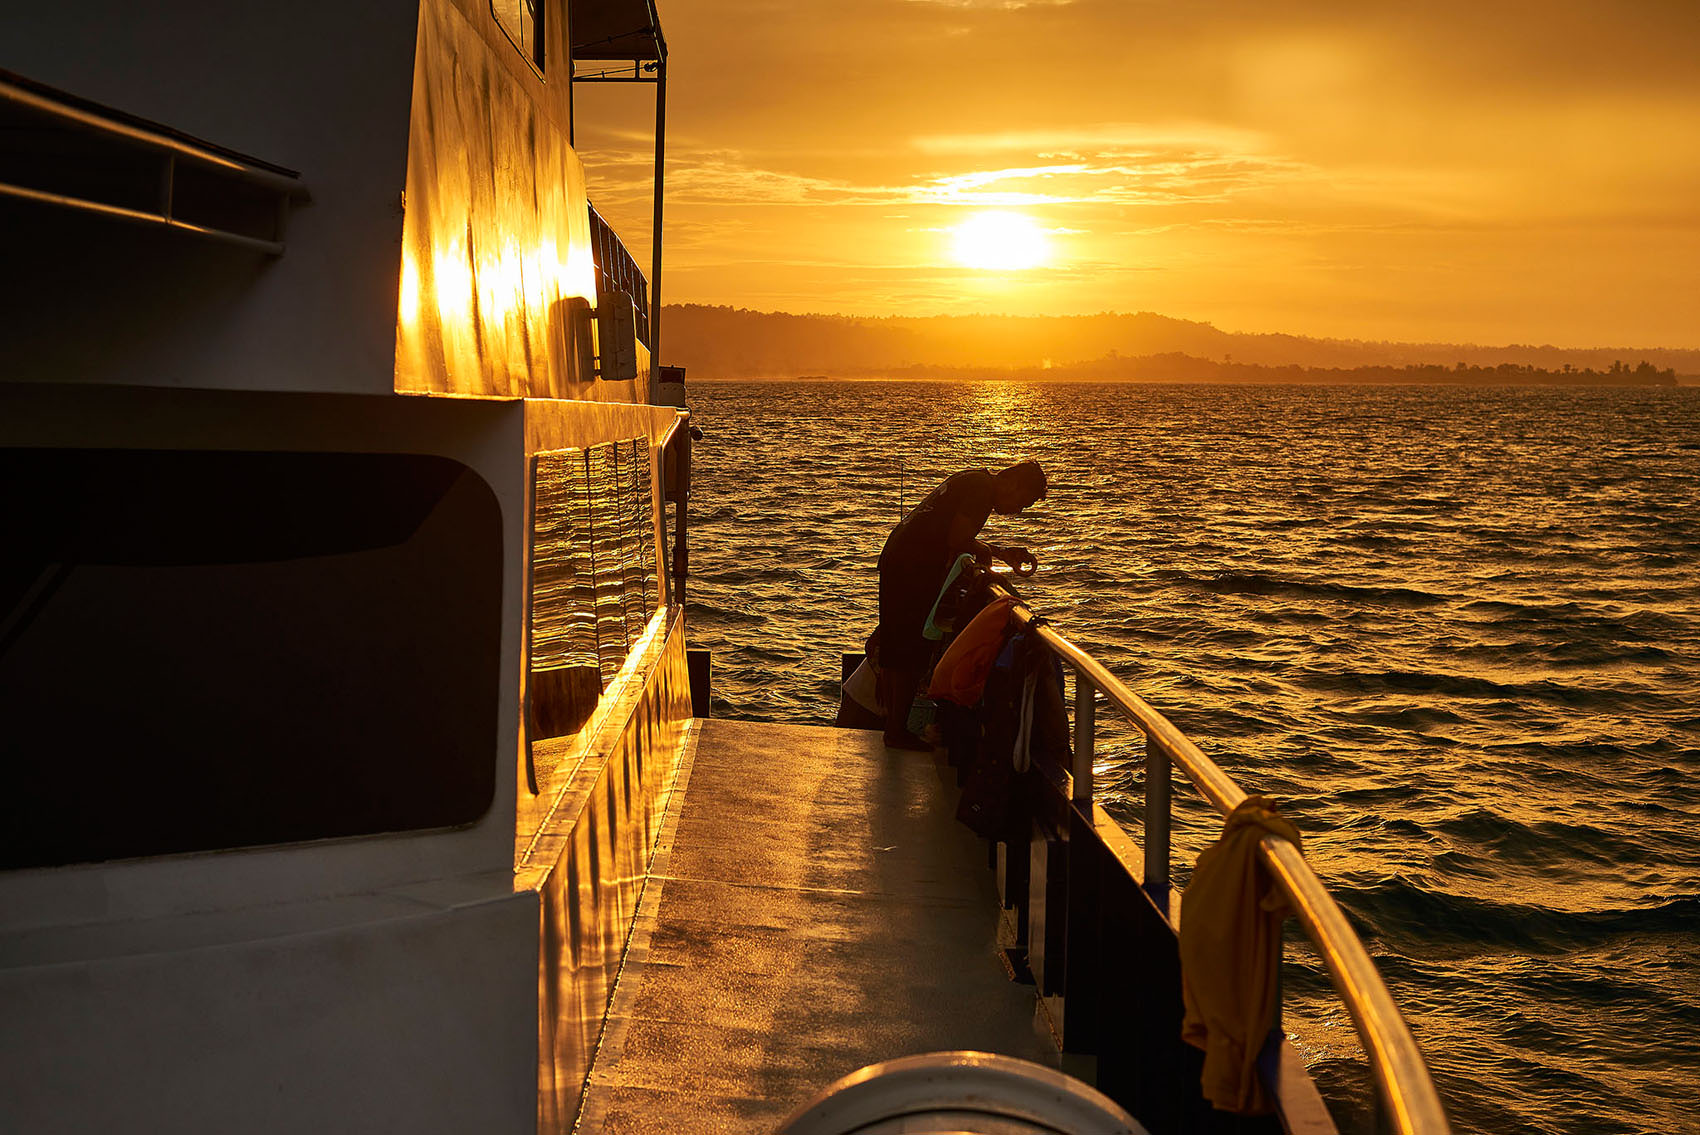
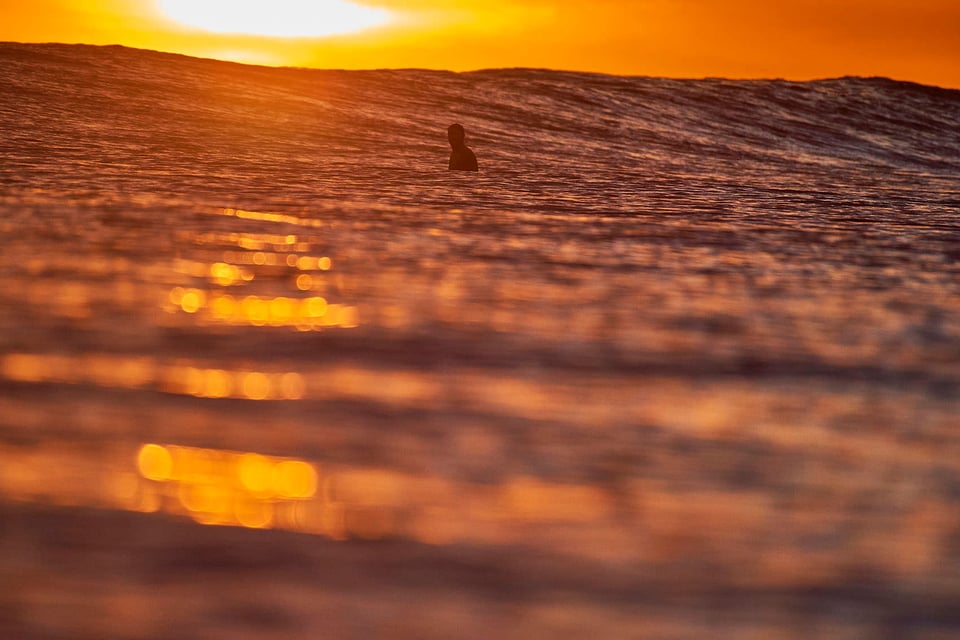
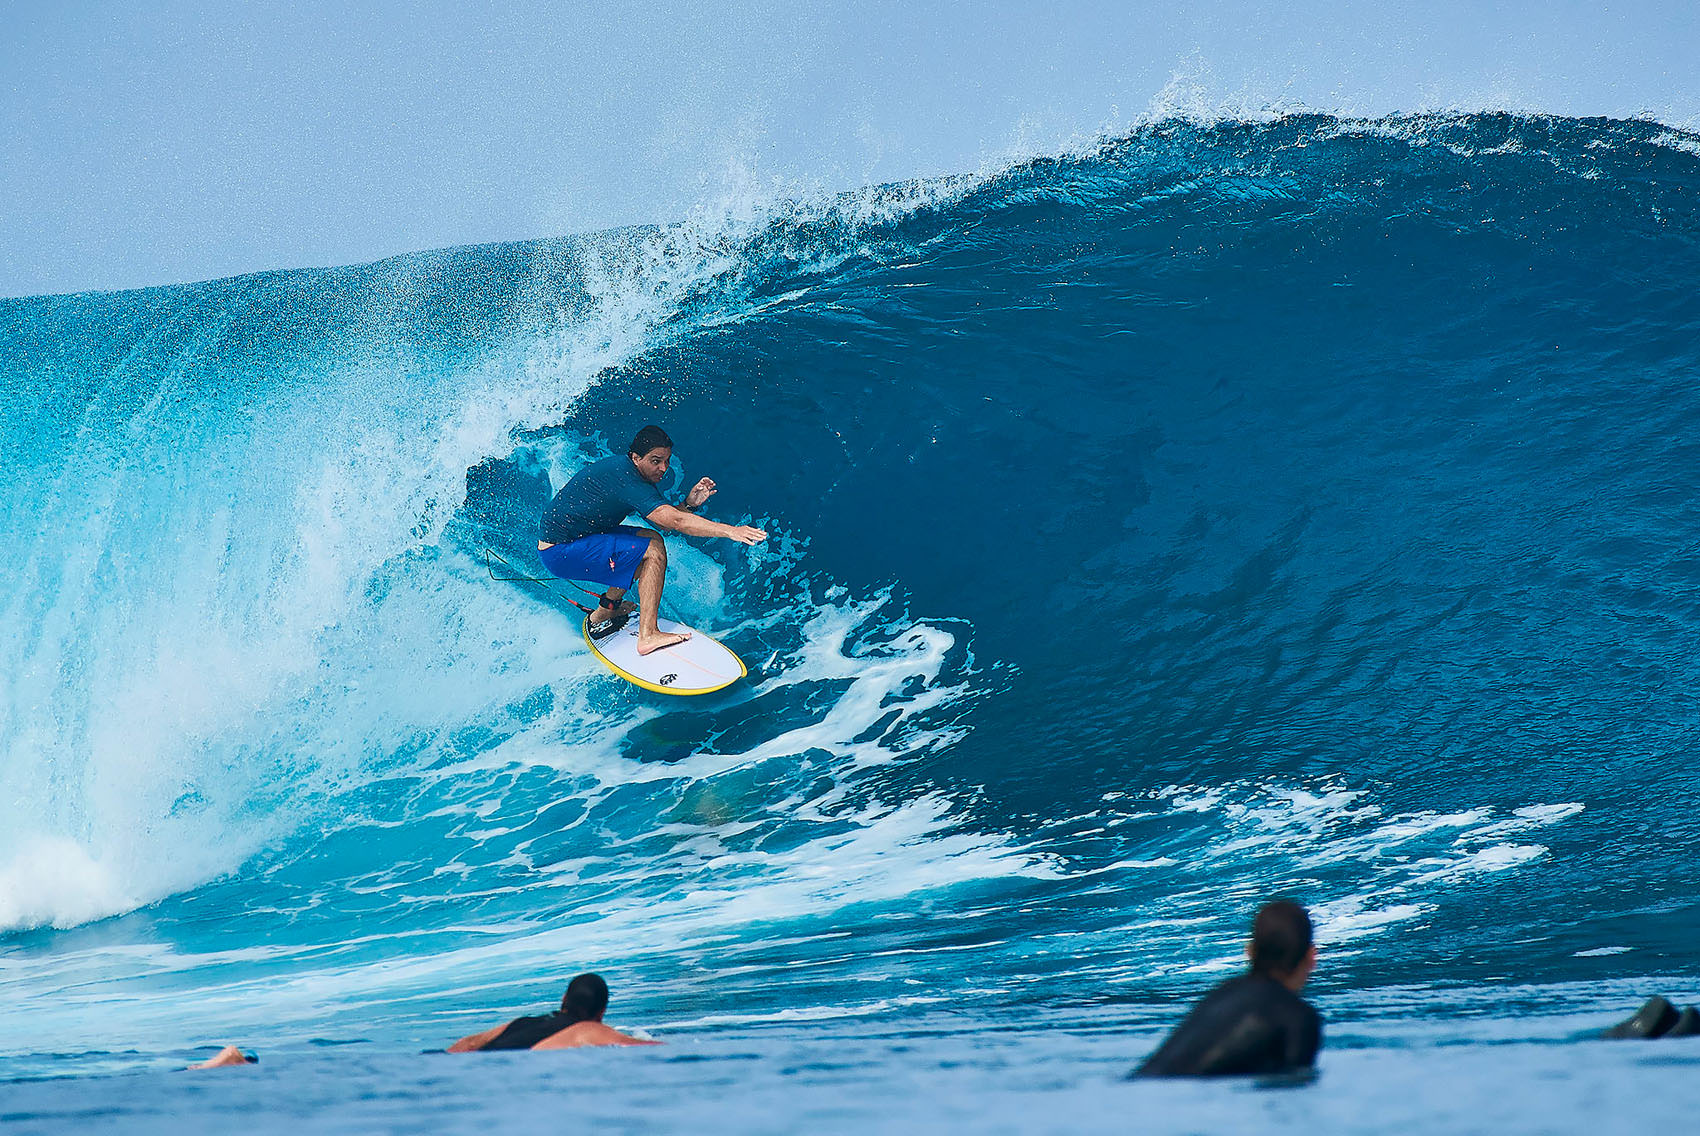
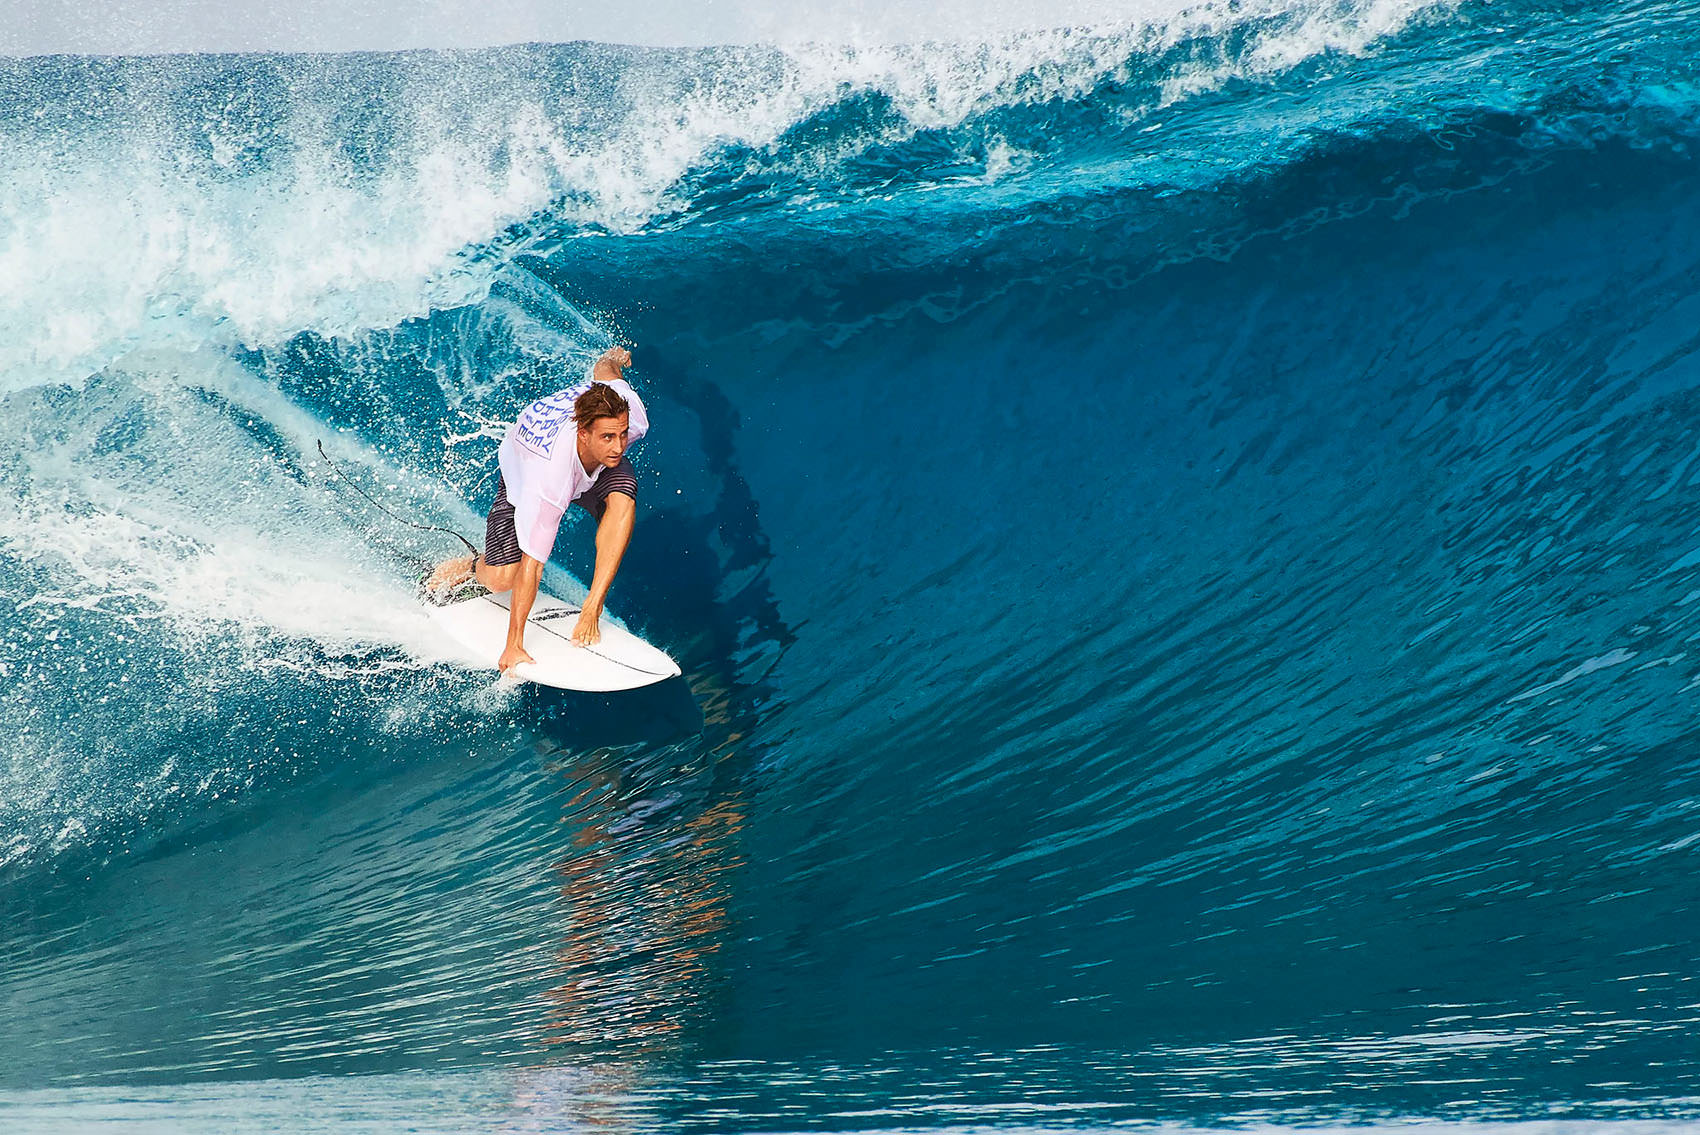
I thought I would shoot a lot in the water! Two days before I took my flight, I called a great photographer friend of mine and he was pretty critical of my plans. He recommended that I don’t shoot from the sea all the time. He reminded me that I would have to meet the needs of 13 different surfers and told me that if I missed a single great wave for one of them, that it would get them pretty upset. Also, any small wave could become an obstacle to take a photo and I might lose a chance to photograph a critical moment. Ultimately, his recommendation was to stay on the boat, and if I wanted to give a feeling of being close to water, to lower myself on the boat and shoot from a lower perspective. I breathed in relief, as this was a great tip I was not going to ignore!
On the video side, I still wondered about how I would stabilize the footage from the boat. My solution was to take a Glidecam Stabilizer.
The Truth
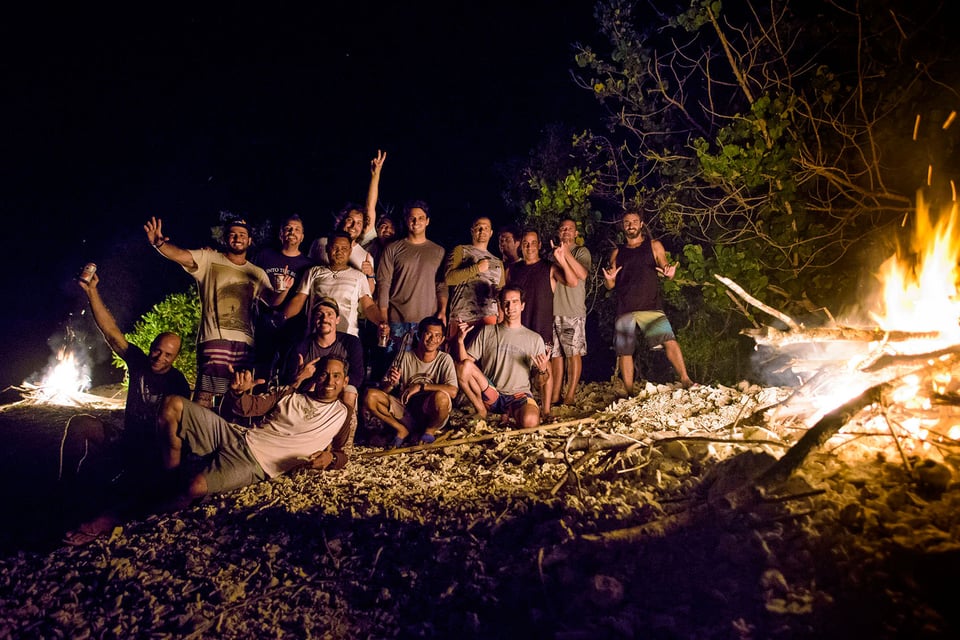
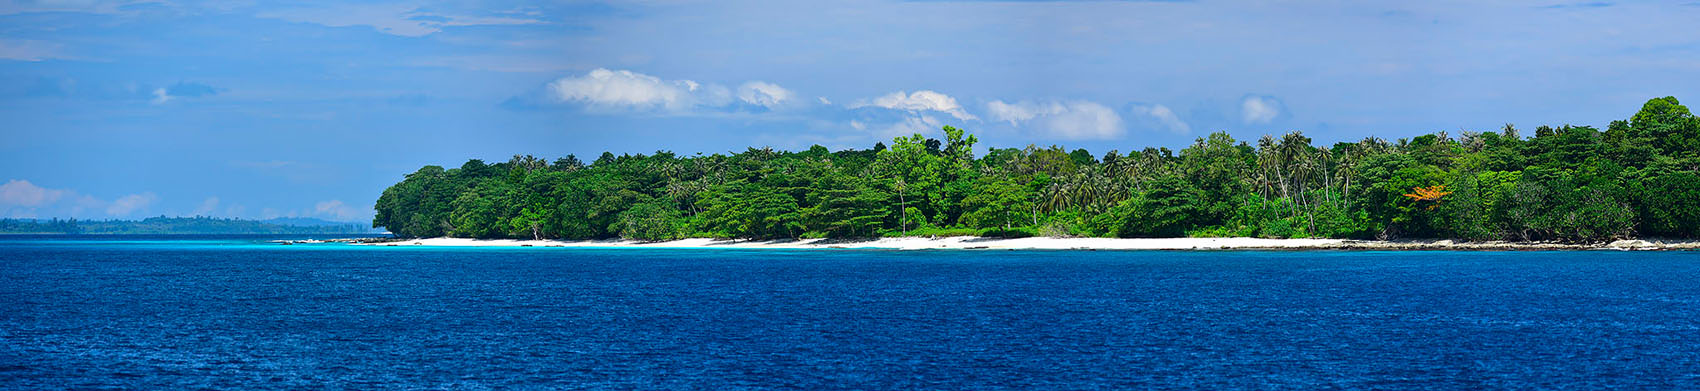
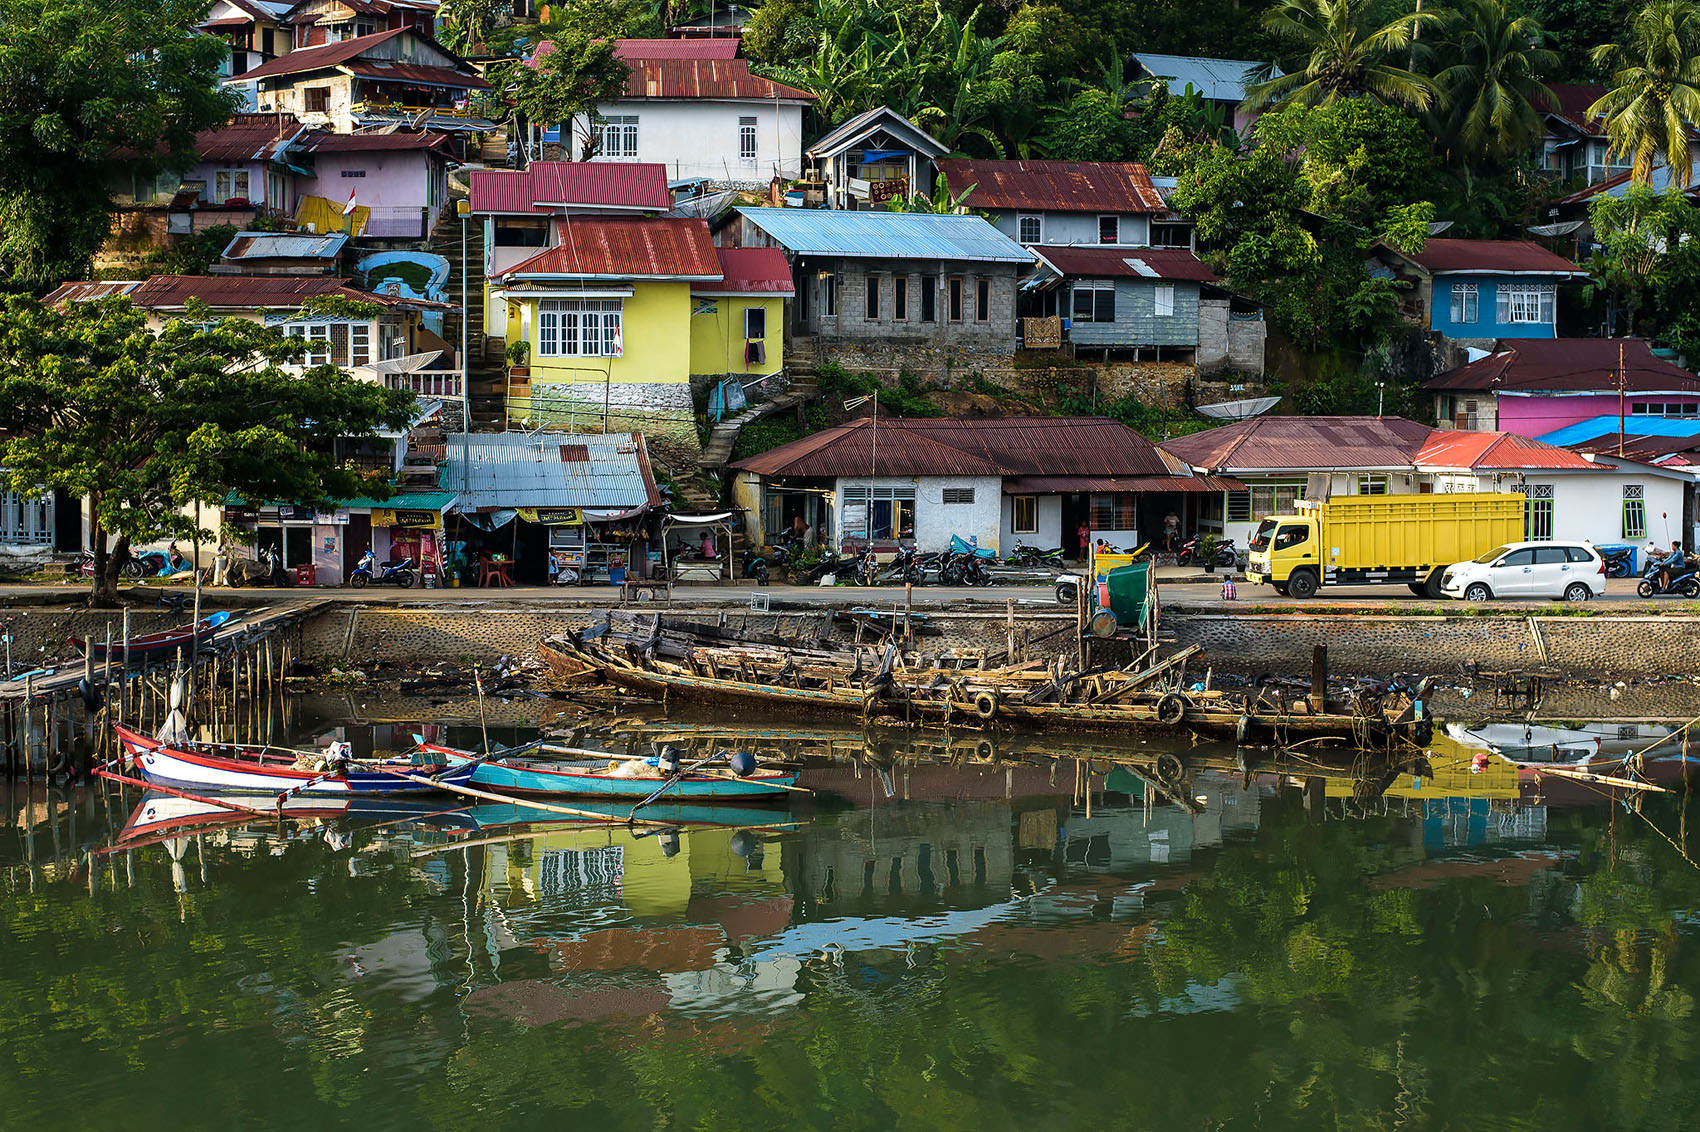
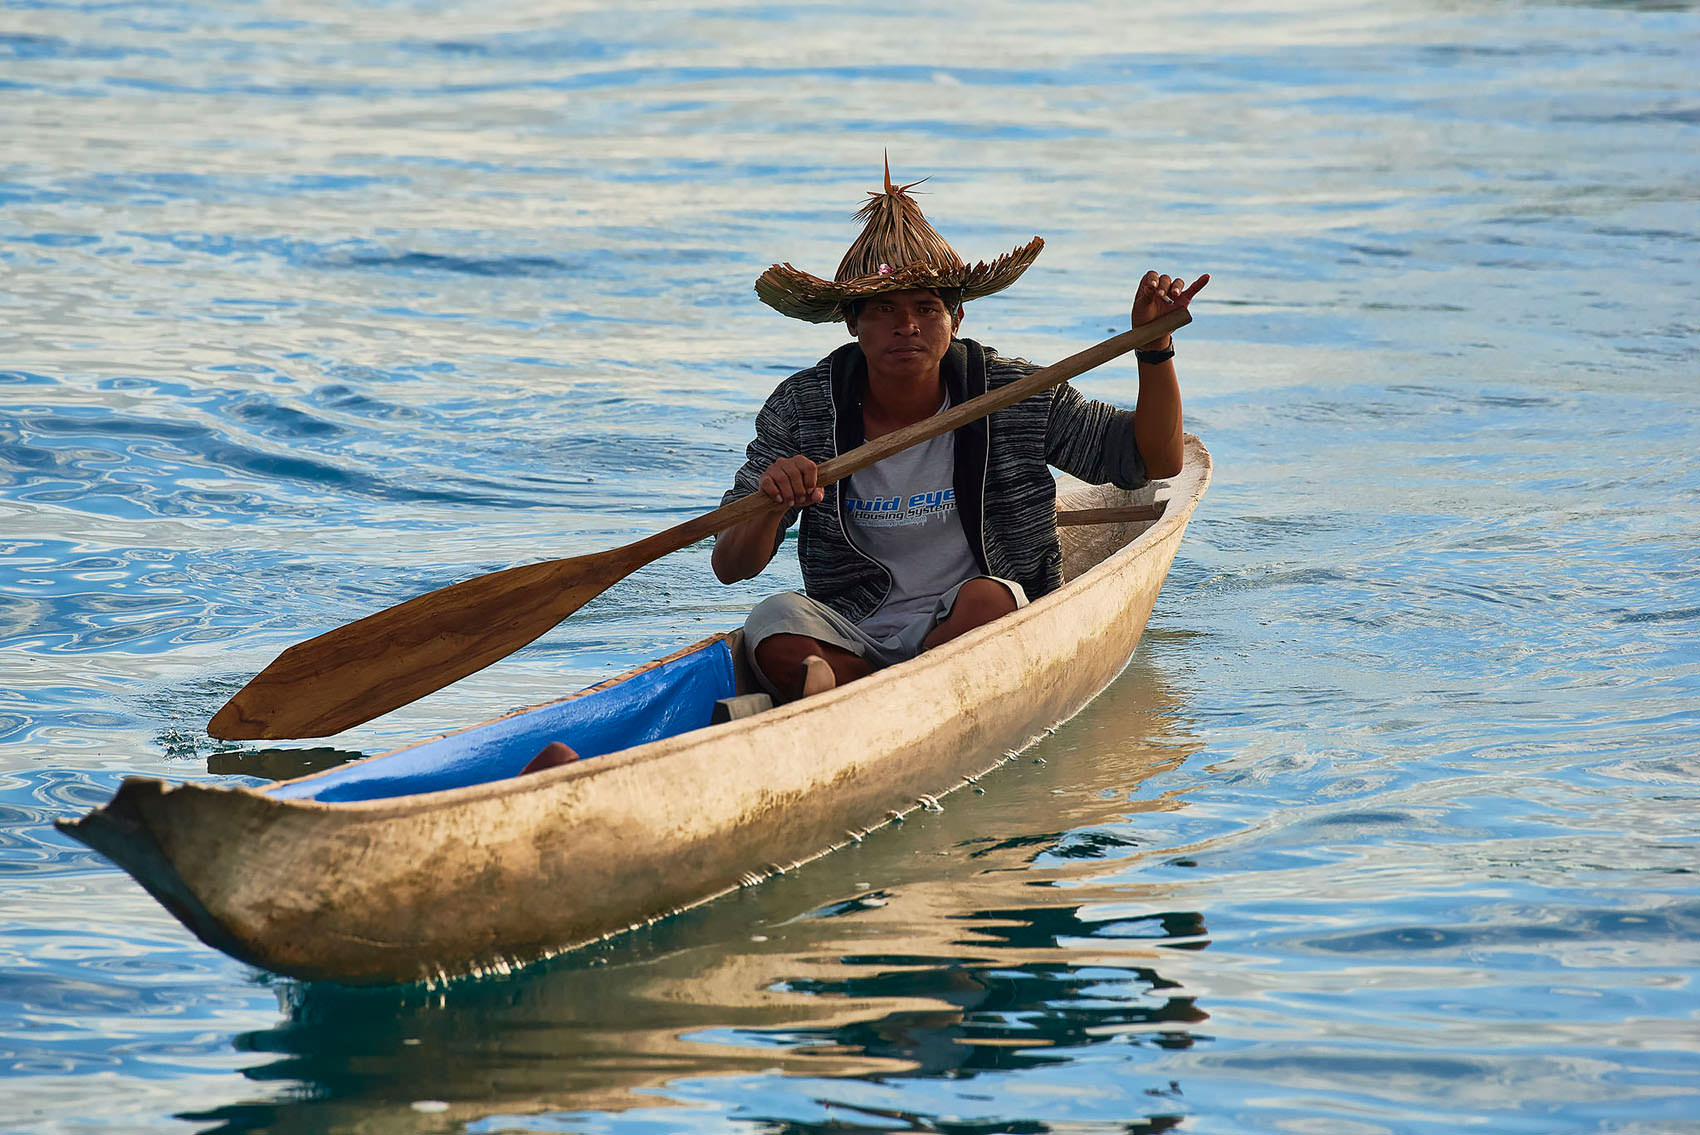
From Brazil, the trip had three stages to get to the Mentawai islands with more than 30 hours of flights, without counting all the connections. After arriving in Padang, Indonesia, we took a boat and sailed for another 11 hours to the Mentawai islands. Right from the start, my clients told me to emphasize the photographs and leave videos aside, because they thought I should focus on just one activity – which they were absolutely correct about!
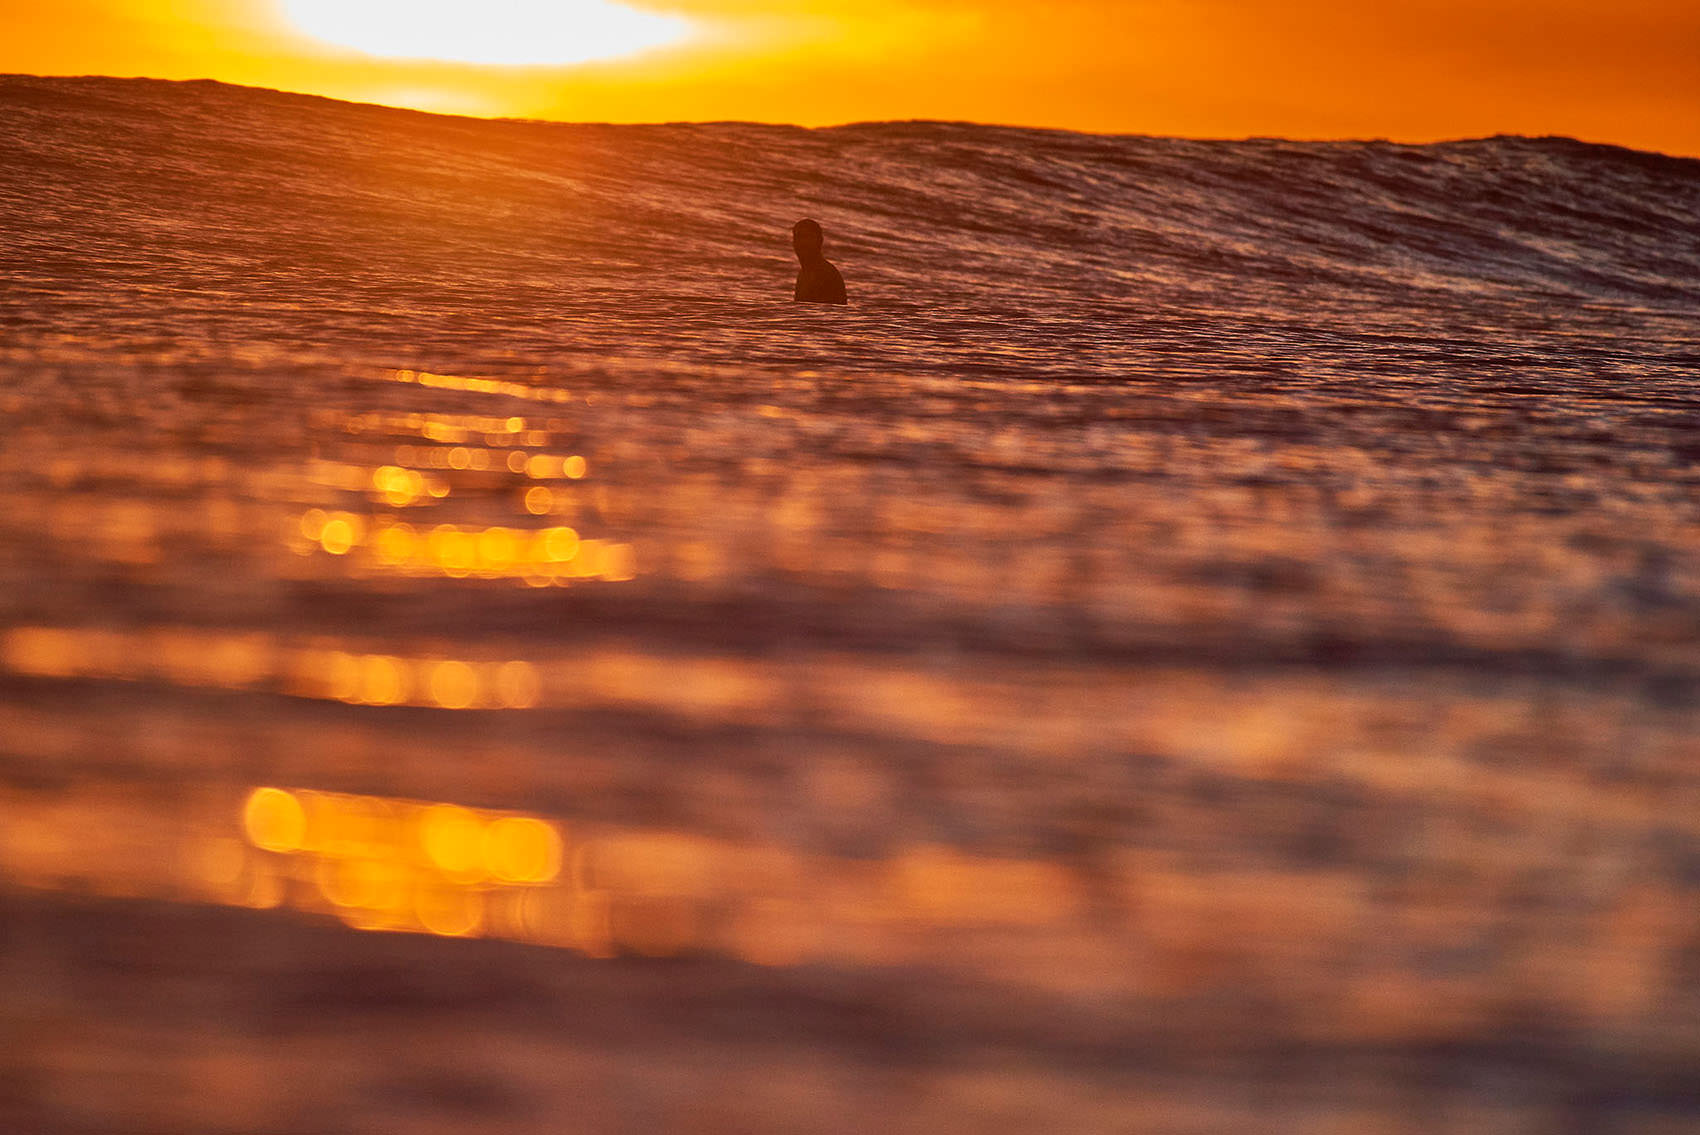
Every day, I would wake up at 5:30 AM and go to bed at 10 PM. Sadly, something I never expected happened – the sea did not cooperate and the waves were weak for 70% of the trip. In the end, the sea rose and I could make better material.
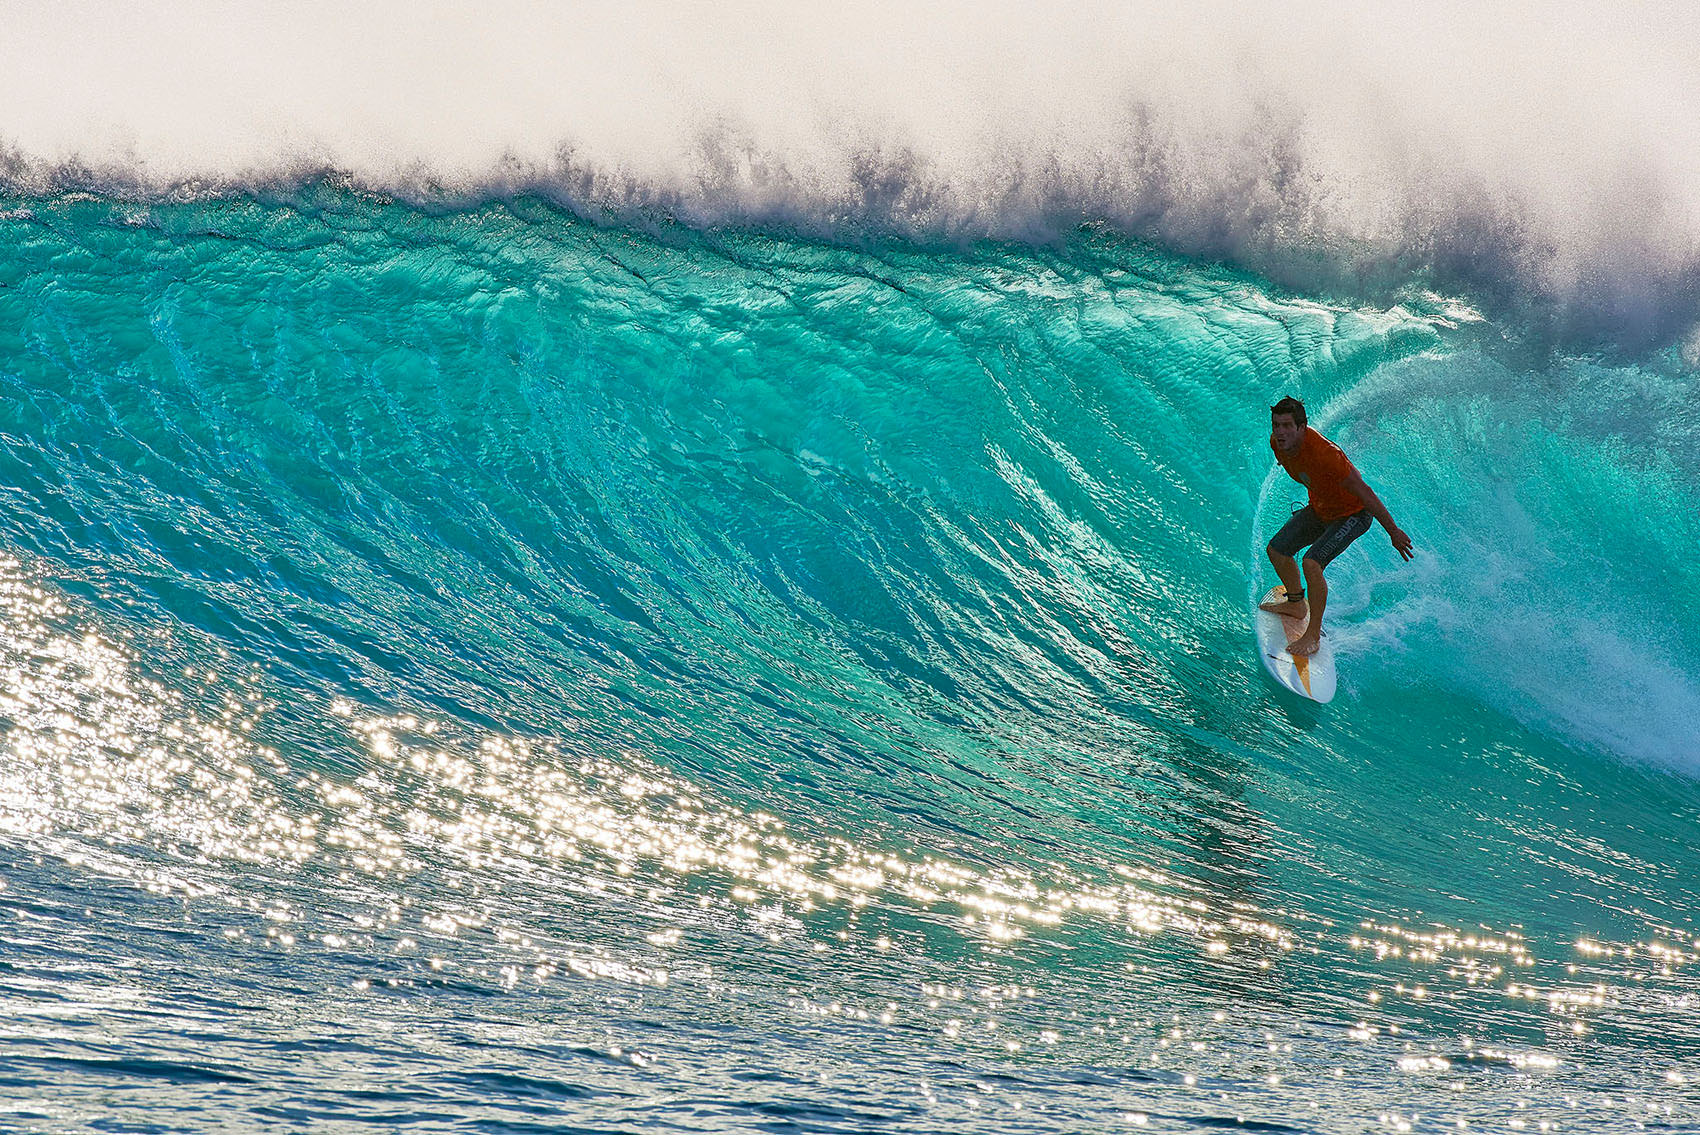
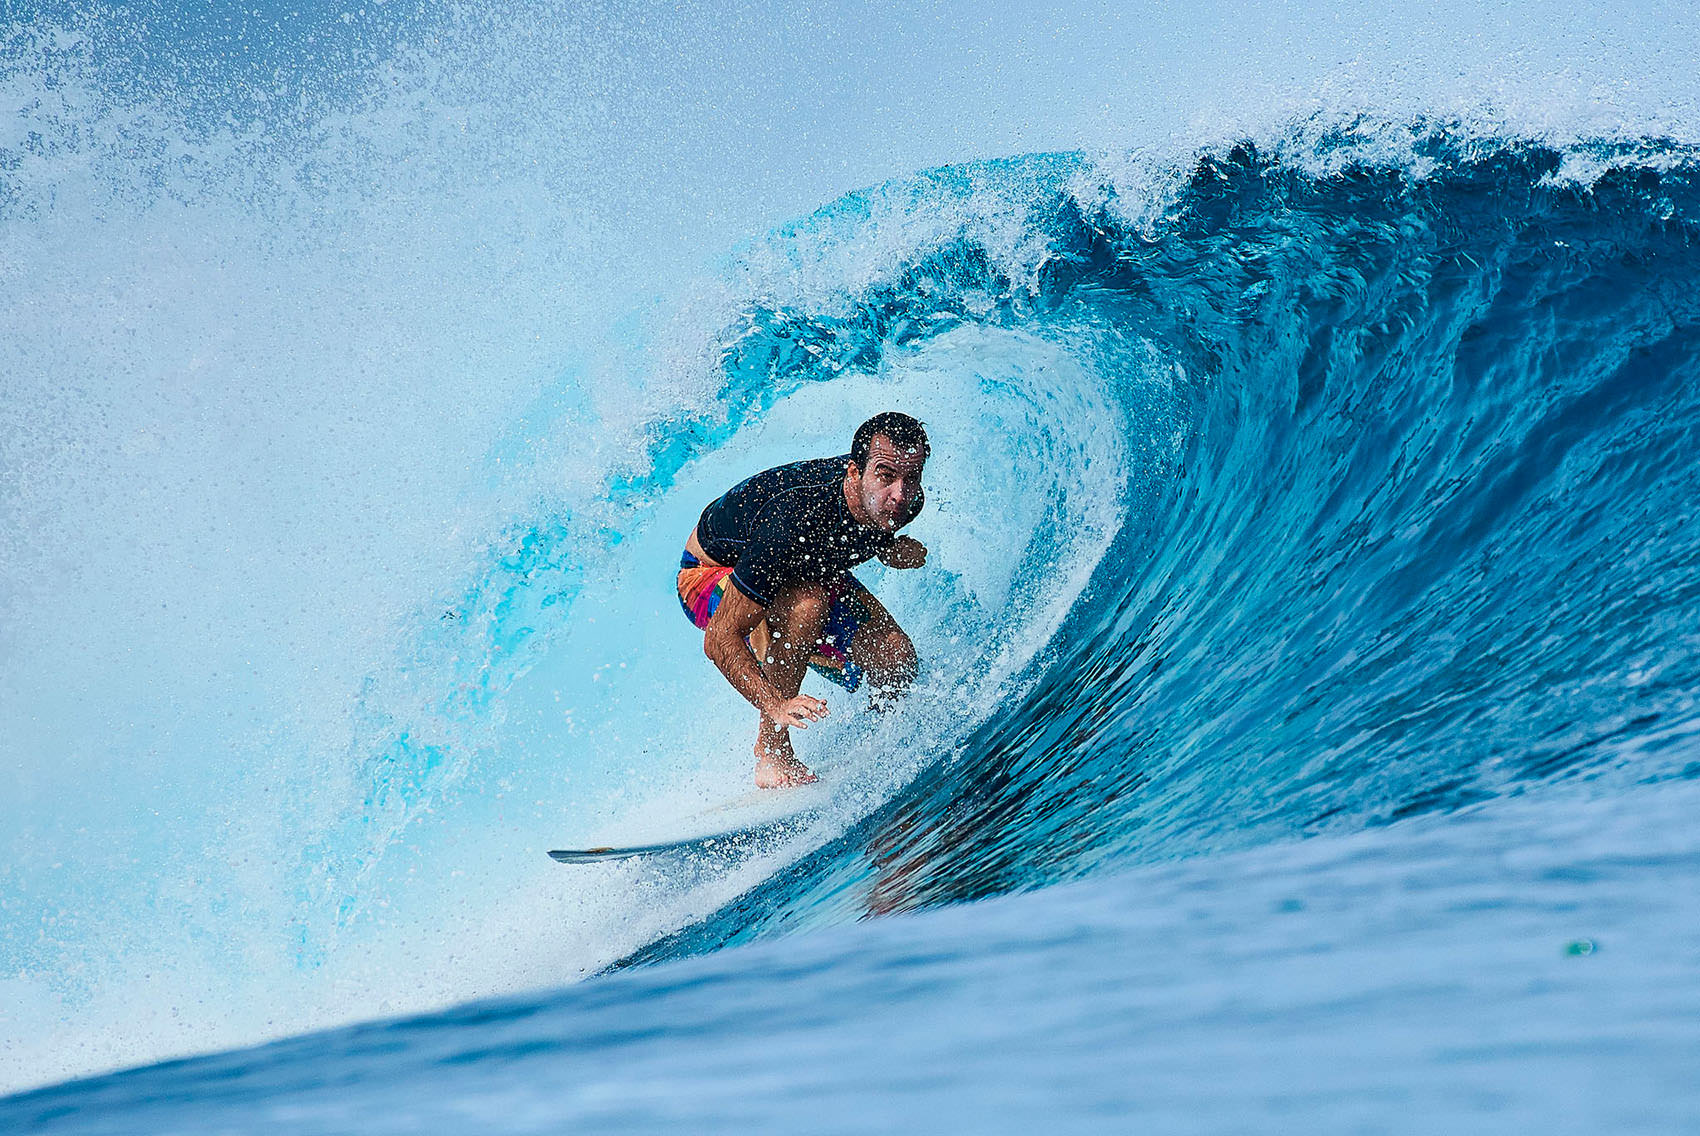
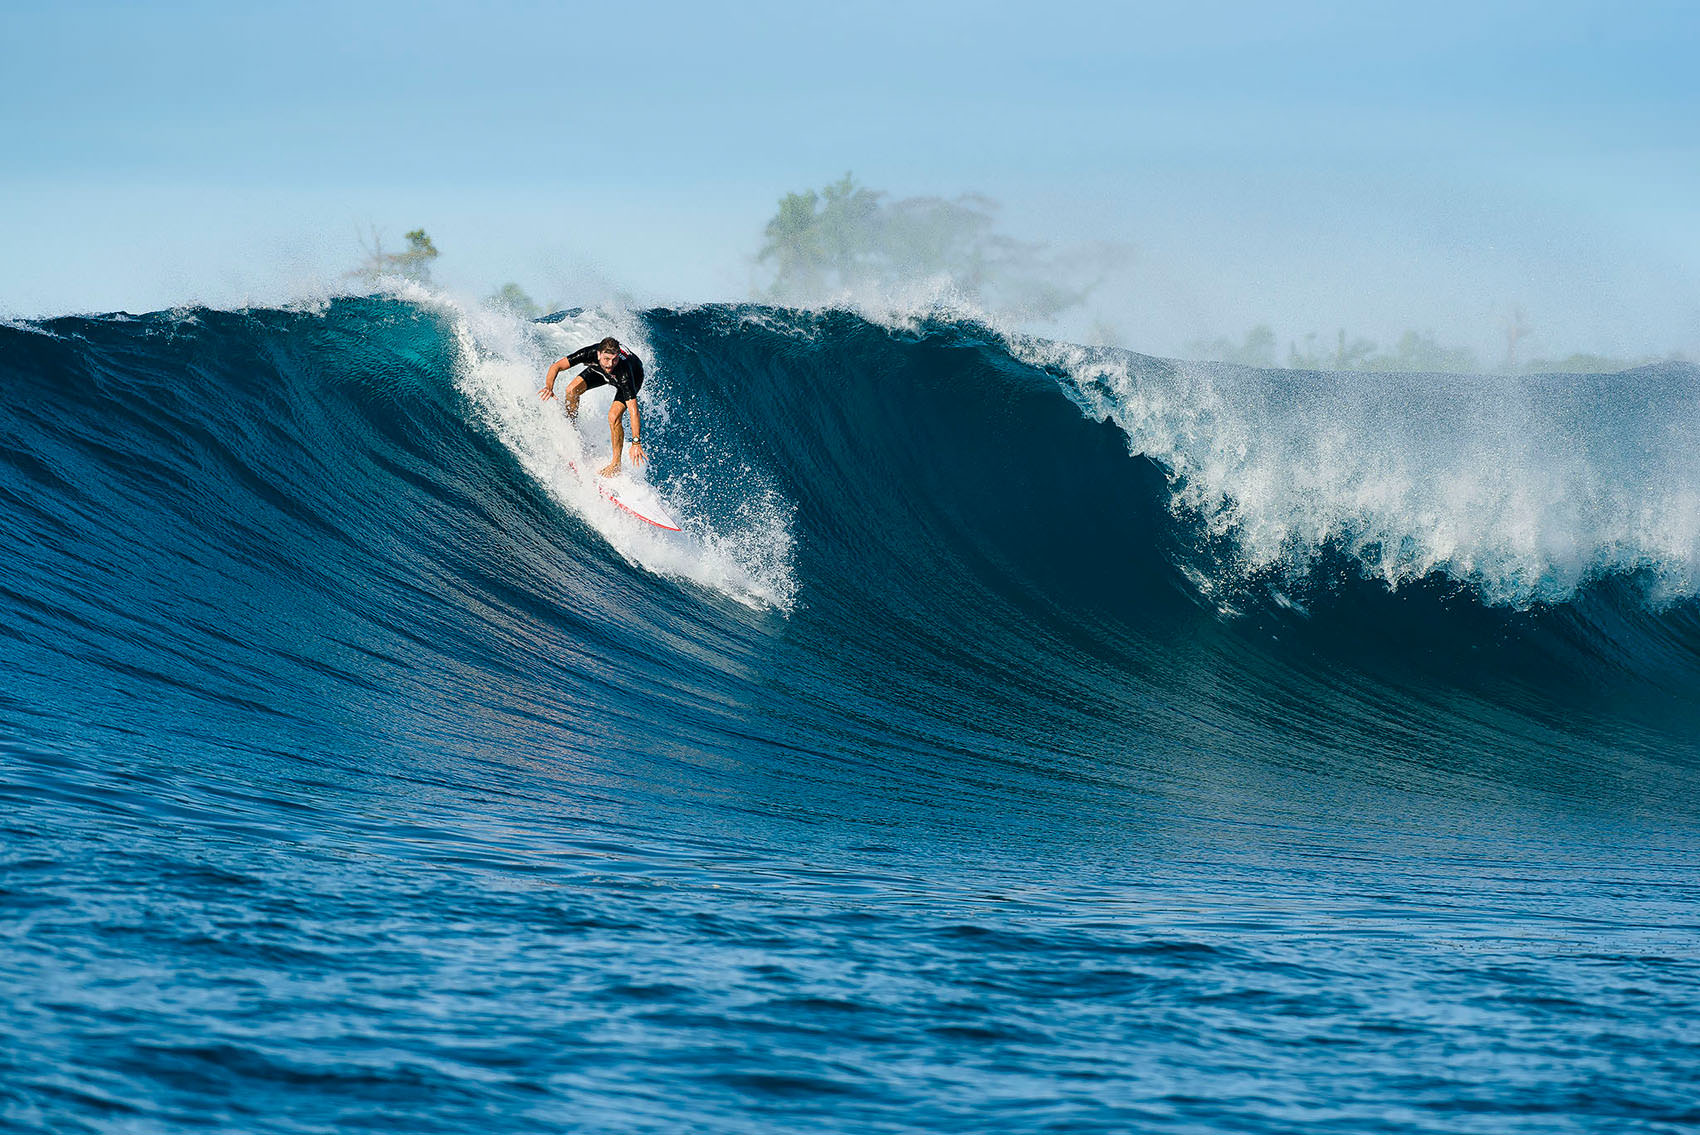
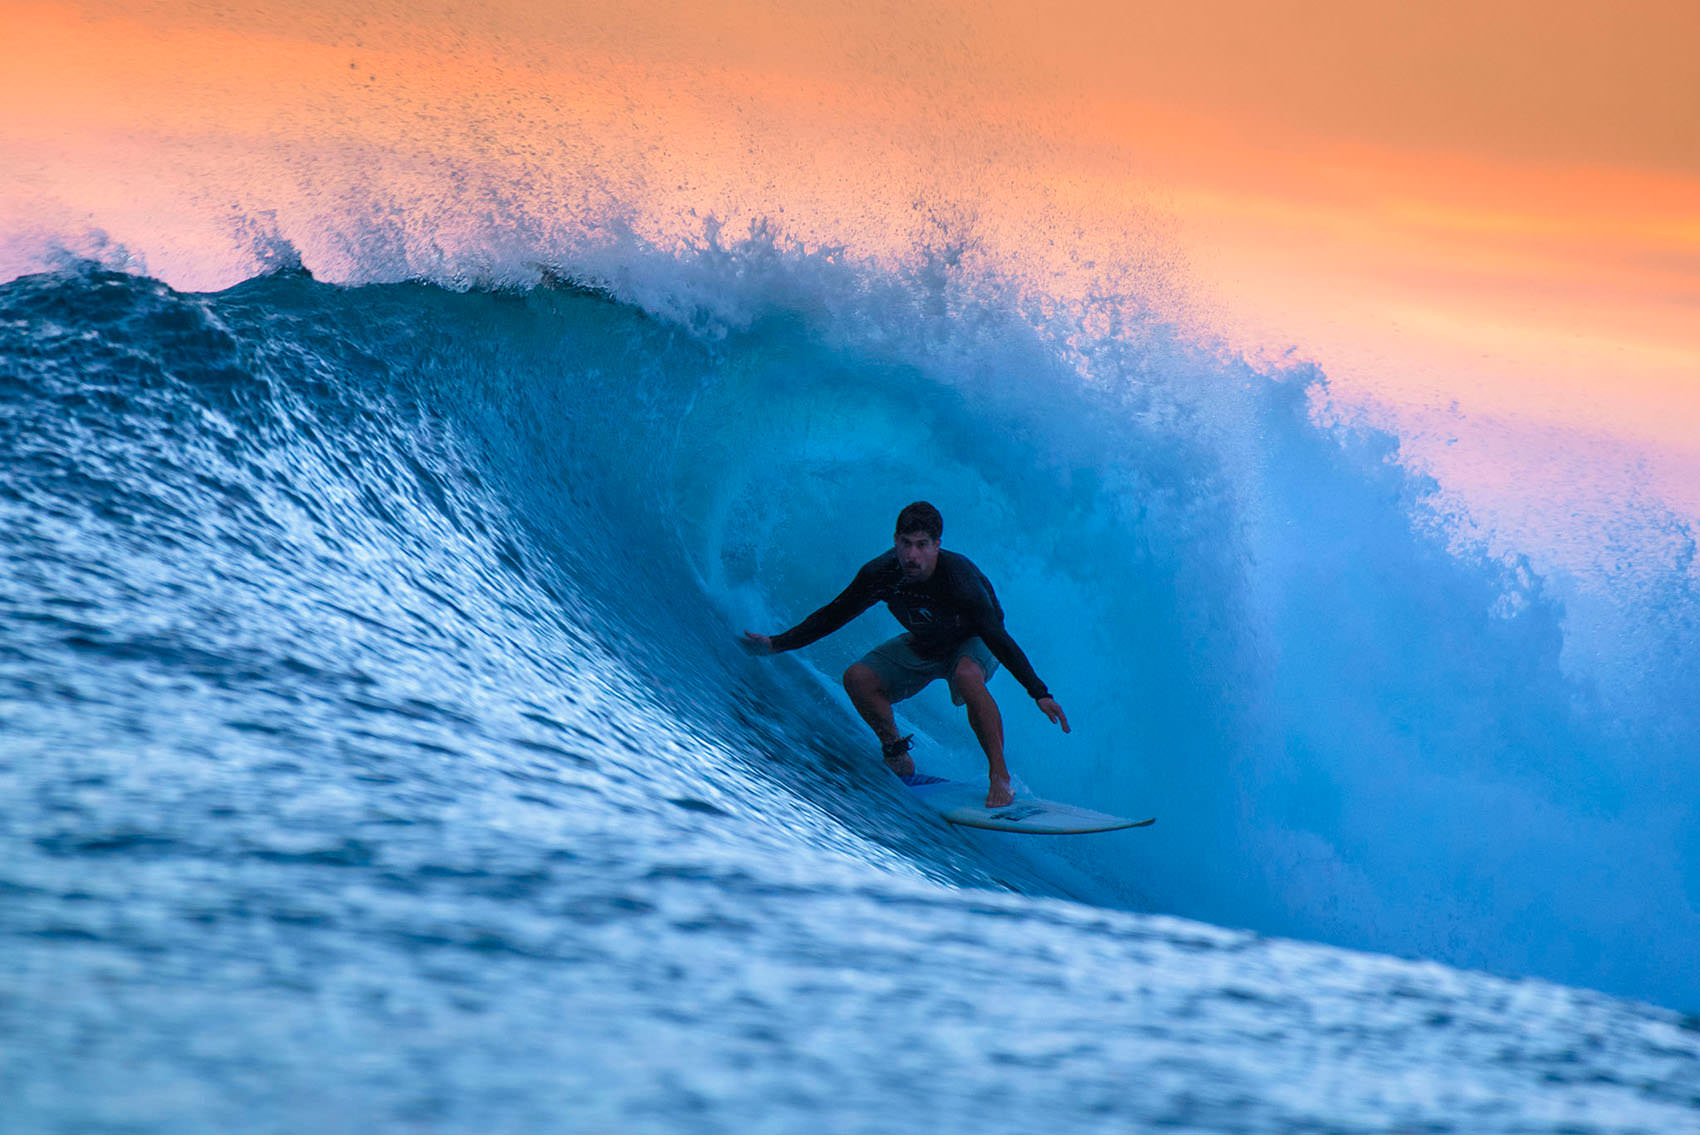
As incredible as it seems, the lens I used the most was the Nikon 200-500mm. A 70-200mm lens would have never worked out, as all the action was in the distance. Below, I will summarize the main surf photography tips I have for everyone who will carry out a job like this.

Surf Photography Tips
- Pick versatile lenses for the job. It’s no use having multiple bodies and multiple lenses. When the action takes place, you have to be present and ready! You will NOT have time for any distractions.
- Gather information from experts. If you don’t have any experienced friends, you can find plenty of information on the Internet.
- Listen to your customers with good humor. Always try to be in a good mood – it really helps to make good bonds with your clients and elevate your spirit.

- Focus on the customer. You might encounter very demanding and potentially annoying customers. Listen to them and try to meet their needs. Do not be childish to the point of not hearing criticism, even if it hurts you. Go ahead and focus on your work, more and more.
- Don’t forget your place. Being close to your customers might open up opportunities for discussions and confessions, resulting in potential friendships. Do not get involved in anything that might hurt your business and your image. Always stay “behind the camera”, after-all, you have been hired for this and you will be remembered as the photographer of the trip. Nothing else.
- Take care of yourself. Take advantage of the little free time to feed yourself, hydrate yourself, and take care of your equipment. If your equipment is in a common area due to lack of space, leave it always closed inside a case you can keep an eye on.
- Keep your backup routine in place. Even if you are tired, don’t forget to keep up with your backup routine and your established photography workflow. Do not postpone important tasks and do not procrastinate, especially when it comes to backups. Remember, tomorrow may be “THE DAY.” And always take an extra hard drive just in case!

- Watch your health and well-being. If you get hurt at the beginning of the trip, you will be there for nothing – you just become a great disappointment for your clients. So do not get involved in dangerous activities, do not be sullen or inattentive. Be focused! In the case of the Mentawai Islands, I was at least two days away from any medical attention, so it was important to stay healthy.
- Photograph in RAW + JPEG. This way, you can transfer images immediately to your clients. Sharing is everything today, so it is important to be able to do it while on the job. Remember, this mode will slow down your camera. So have high performance cards!

- Establish a daily image-sorting routine. Start separating the images of each client from day one (to the JPEGs), because at the end of the trip, you might have to deliver images immediately. No one will wait for you to handle the pictures.

- Don’t forget about the RAW files. When it comes to RAW files, you will work on them at home and deliver final images to the client. You will also have a chance to upload the files to the cloud for extra backup and other reasons.
- Make a daily review of your equipment, batteries and work methodology. Preferably, leave your equipment ready for use every night before going to bed.

- Boost your immune system. Take vitamin C and a vitamin complex every day. You will be giving your best every day for a long and stressful period of time. Your body will feel the wear and tear.
- Do not talk too much or get busy showing your photos. Usually at the end of the day, you will have a chance to go over some of the images.
- Let your clients comment on your work. It is better to let the work speak for itself, than to speak about the work.

- Observe the valuable details beyond the action moments. They can tell a very interesting story later.

- Offer additional products for extra revenue. After the trip, don’t forget to offer some physical products like prints or photo books, as they can be another source of income and generate a good souvenir of the trip for your customers. In my case, besides prints, I also produced a magazine.
- Lastly, be happy and enjoy the opportunity! Give it all, but not at once. Just as in the Tour de France, those who put all the energy in the beginning end up not completing the race – on a long trip, you will need to space out your energy bursts.


Good luck!
Great article!!
Always I found something valuable and new.
Thanks a lot for providing these information.
God bless you.
Hi Andre, great article!
On a side note I have a cousin living in Indonesia whose husband does surf photography, after a few years of that his camera was infiltrated by mould. Canon service centre in Fountain Valley California couldn’t save it.
Fortunately his mother-in-law bought him a new Canon as a gift, presumably he is storing the new one in dry storage
but be warned ! Tropical environment can be hostile.
Sadly I cannot see any of your imbedded photos from my workplace (it’s lunchtime), I’ll check those out at home tonight
Keep up the good work
Jim
This is a triist thing, but I have a tip, because here in Brazil we have this problem too. Tell your cousin that he can use a box like this: www.amazon.com/IRIS-…olife0c-20 + box and put clothes dehumidifiers in along with the equipment. Always store the equipment there. This works fine. Another thing is to clean the equipment EVERY time it comes back from the sea with a cloth slightly moistened in mineral water. Clean the lens and then store.
Hi Andre! It’s exactly what I do, plastic box +dehumidifiers (I live in Brazil, too). With humidity levels close to 80% we have to deal with this problem very carefully! Great article, stunning pictures!
Cool. Thank you Paul.
Another thing that helped me a lot and what I consider to be fundamental was the use of DRY PACKS like these: www.amazon.com/Water…olife0c-20
and I tell you that they saved me. I did not have the money to spend on a Pelican bag so these dry packs were very good when I transported the equipment in the small boat to the outside. Several times he got wet and I was calm. That was a good trick.
Hi Andre, really enjoyed your article. I loved your honest approach advising what you did and what equipment you took, and of course what you didn’t need. I am not a swimmer so therefore not a surfer but I think your information can be applied to a lot of different scenarios and genres. I am an amateur hobbyist photographer and loved your down to earth approach. So many articles out there talk down to you, this my friend, you didn’t do and it is appreciated.
Thank You Jane. Any question, i´m here.
Phenomenal photography!
I would have liked seeing some of the metadata for each shot.
Kate, I’ll arrange it. Wait a little bit. Thank you
Hi Andre, great article and tips. I did not expect that you used nikon d750, i expected a faster body here to be able to ‘get’ the moment. Seeing the results, i assume they did the job wel or did you felt the need during the job to have more acquistion speed?
Jacco, I’m from the time I was shooting surfing with film, so my style is to select the best moment. Very different from today, that just the surfer stepping on the board and a burst of photos appear. Today is another reality, but honestly I at some moments I missed a faster camera. For me a D500 would be ideal.
I don´t know if I’m correct, but generally we photographers always carry more equipment than we really need and maybe this is a form of psychological support and I think photography is much more than equipment. (of course it is necessary), but it is also a state of mind and knowledge of the place. Today if I went back to the Mentawai I would not take many things. Outex rubber I did not like. I found the optical quality bad. Gopro just to shoot video, because for photos I found it very bad. I sincerely think that to carry out a good quality material inside the water the waterhouses are still indispensable. But this is life. Every day we learn something.
I love the kvetching about which gear to bring!
hi Andre, great reportage.
question: how did you create/publish the magazine for this trip?
thanks
Hi Colin. Thanks for the question. I created the magazine in Indesign. The name and the design I made myself. Bagus, it means cool, so I found that name interesting.
There’s an important aspect that helps me. In today’s busy life I do a lot of things. Sites, Design, Banners, Folders etc. always with the photography together and this helps me sell my photos. Continuing the answer. Then I sent it to a digital graphic, like blurb, so I made magazines with the same core but different covers. Each guest had his own cover. It was a success! Sorry for my English because I’m using google.
Andre:
Extremely useful tips, and not just for commercial work. Just about everything you said applies to workshops, “photo safaris”, etc.
And beautiful shots, BTW.
Thank you Al Gentile.
Really great article, one the most informative and practical guides I’ve ever read. Thank you.
XitedEye. Thank you for your comment. If you have any questions or curiosity about any situation that might contribute to your work, I am in command.