One of the most common mistakes I see when reviewing images submitted by our readers, or when reviewing portfolio images during our workshops, is a rather simple case of crooked horizons or badly aligned lines. Although most photographers are very well aware of this one, for some reason many simply fail to see such problems in their images. Now it is one thing when an image is tilted intentionally to create an interesting composition, and totally different when the photographer is not paying attention to or is unaware of the surroundings and background elements that are part of their photographs. In this article, I will demonstrate examples of crooked horizons and badly aligned lines, how they can be easily fixed in post-processing software like Lightroom, and talk about the importance of lines in composition.
Table of Contents
1) Why Lines Are Important
Why are horizons and lines important in photographs? Because we as human beings generally prefer straight, leveled lines instead of odd angles. Think about it. When you hang a photo in your living room, why do you want to perfectly align it with the ceiling, your floor or your furniture? Why does your TV or your computer monitor stay on a flat surface or hung perfectly aligned on the wall? Why do we have so many objects with the right angle? That’s because we like things straight and if things looked crooked, it throws our sub-conscious perception out of balance. We seek visual balance in everything we do, including photography. That’s why looking at a photo with a crooked horizon does not feel natural. We have a built-in ruler in our brains that makes us want to tilt our heads to try to align those lines.
Therefore, it is always a good idea to pay close attention to your scene, its surroundings and backgrounds, not just your main subject. And this applies not just for landscape or architectural photography – I apply it for photographing people and wildlife as well, as demonstrated below. So in a way, it is a universal rule.
1.1) Portrait Photography Example
Take a look at the below bridal photograph. I opened the unprocessed RAW file, then drew red lines on top of the lines that needed to be fixed:
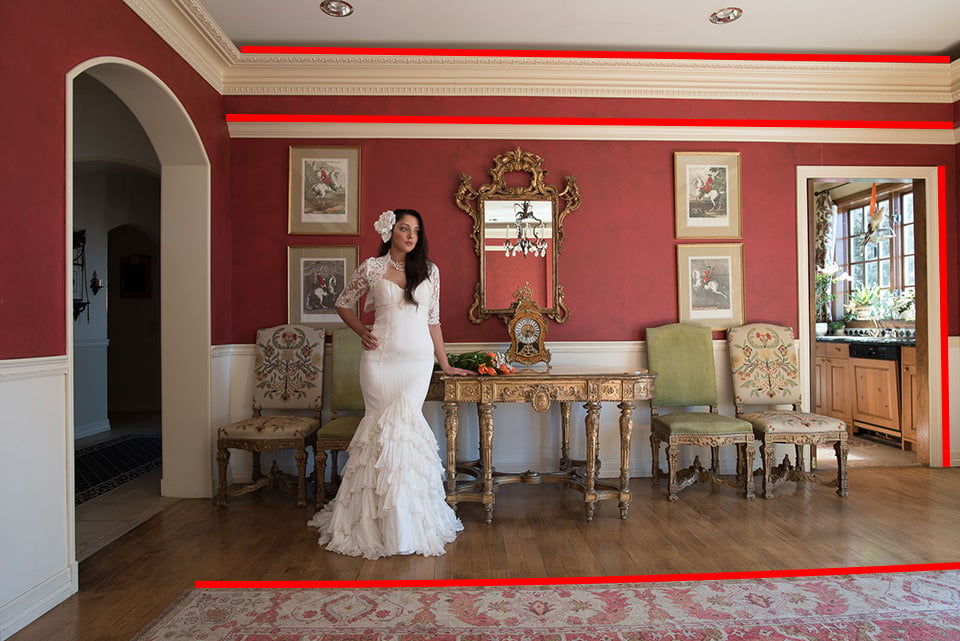
While it is a nice photo, looking at the horizontal ceiling lines and the carpet, we can clearly see that the image is distorted and the lines running from left side of the frame to the right appear tilted. There was nothing I could do in my camera, because it was the combination of the lens focal length and its distortion properties that were distorting the lines and I did not want to change my or model’s position. After a couple of minutes in Lightroom, I was able to fix the tilted lines with a few clicks. Next, I gave a boost to colors and removed unwanted objects in the shot and I ended up with the following shot:
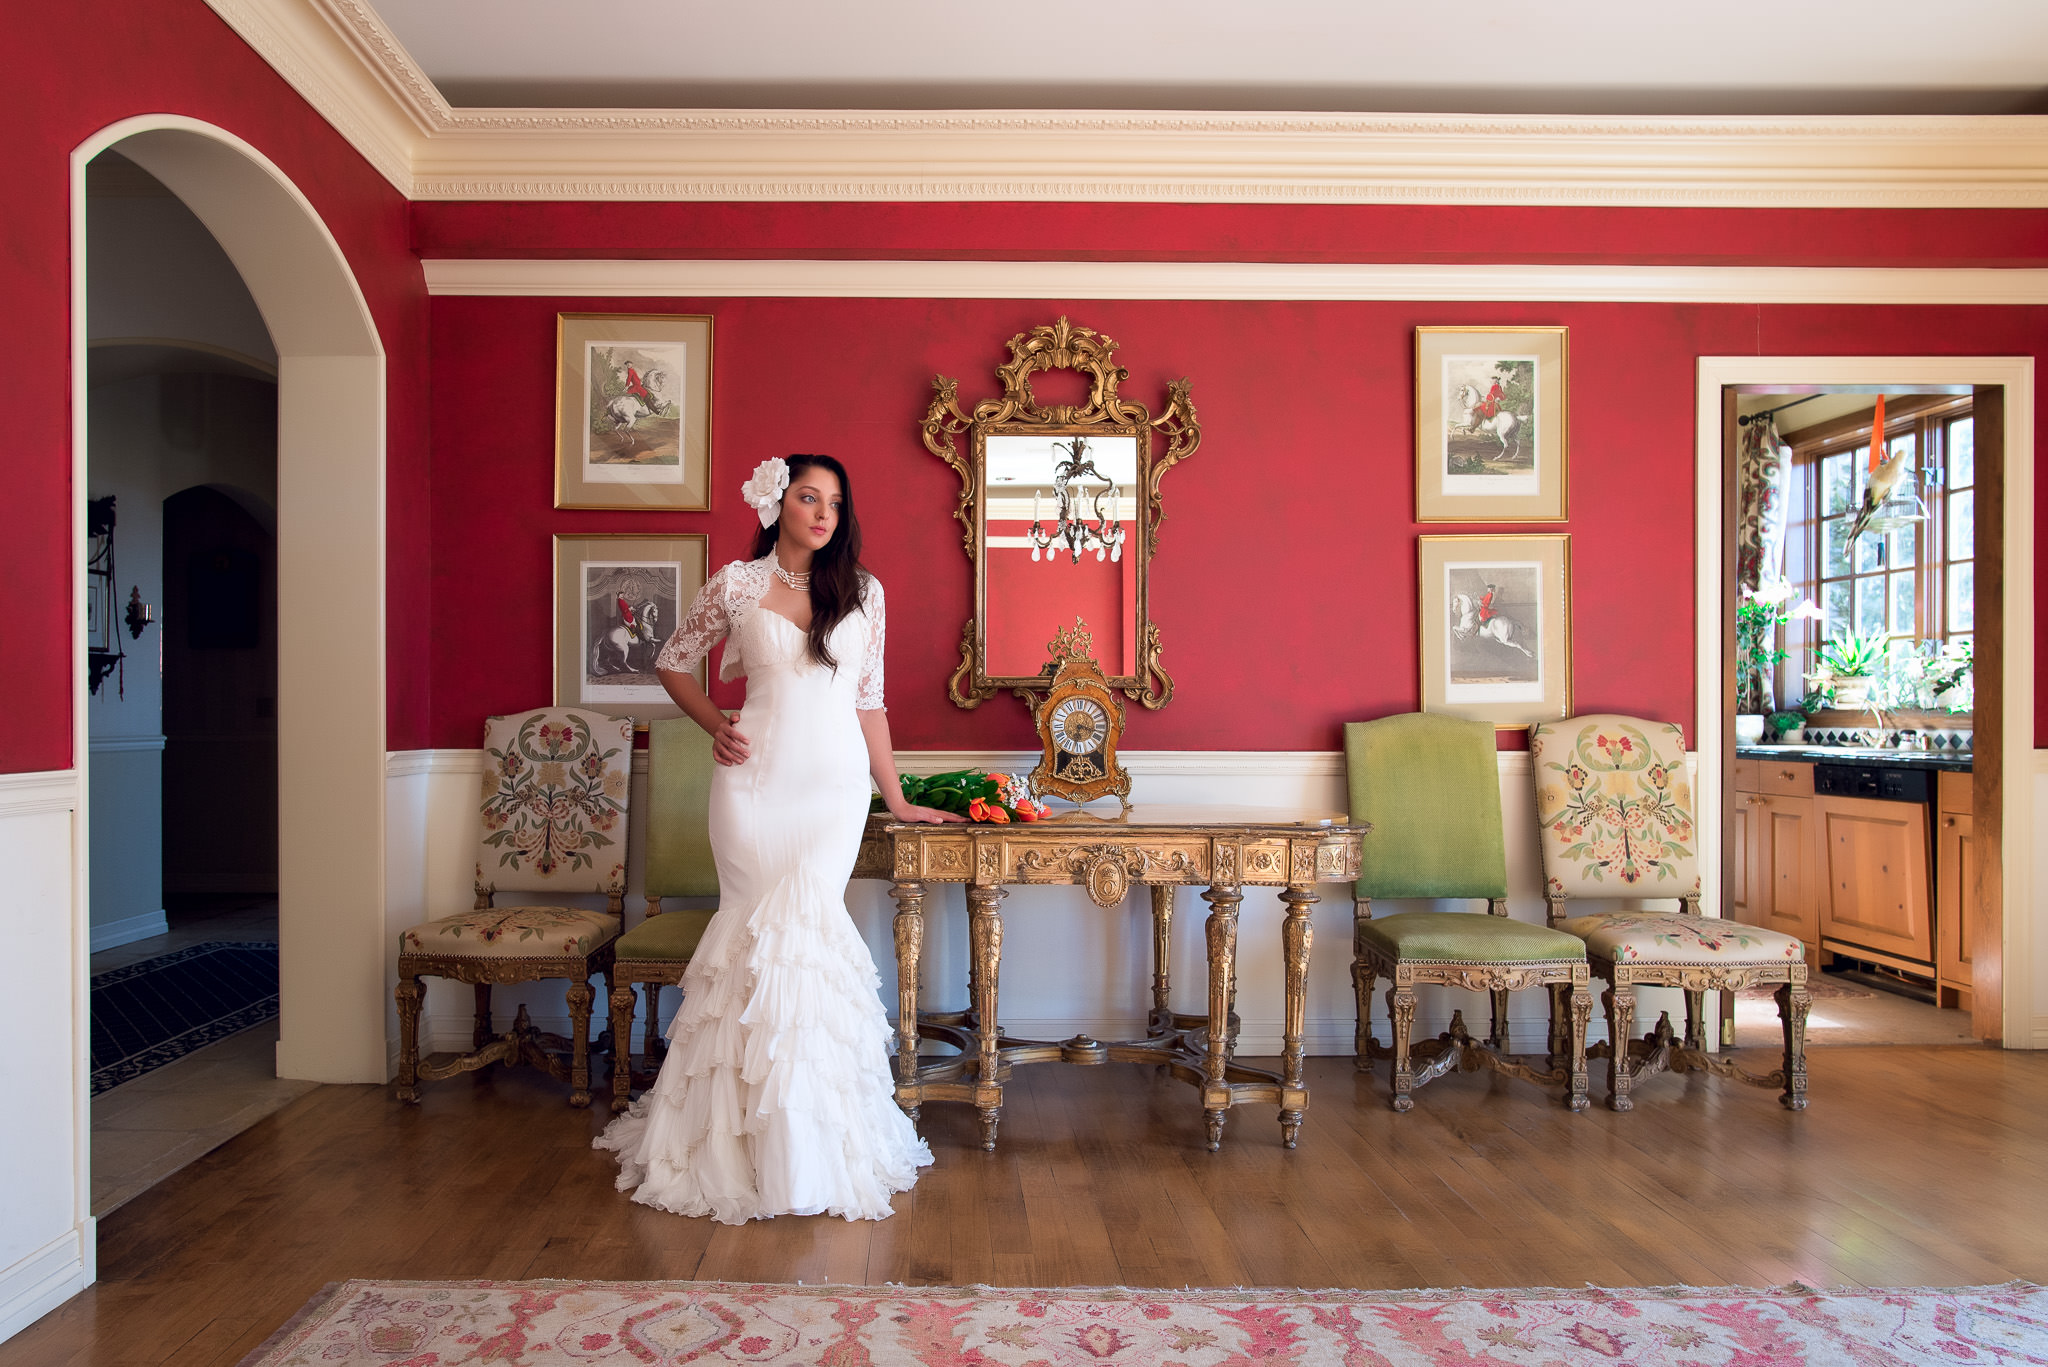
Now the image looks much better and strikes a better visual balance. I lost a little bit of the image as a result of these corrections, but the lines now look straight and parallel, giving me a good balance of vertical and horizontal lines.
1.2) Landscape Photography Example
Let’s take a look at another image and this time we are dealing with a curvy and crooked horizon of a seascape. Again, the below shot is unprocessed RAW:
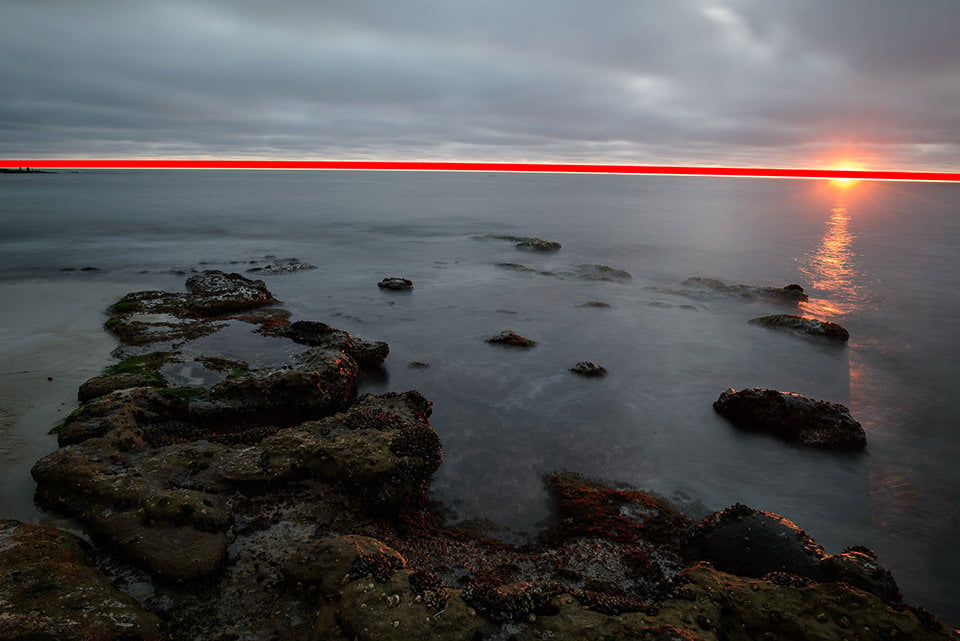
Although I did my best to keep the horizon leveled, it is pretty clear that the horizon is not only tilted, but also appears a bit curvy thanks to the barrel distortion exhibited by the lens. Here is the same image with the fixed horizon after I made some adjustments

Now that looks much better. If I had not straightened and aligned the horizon properly, the image would not have had the same balance as it does now, even without any color adjustments.
1.3) Architecture Photography Example
Here is an example of a glass building that shows tilted horizontal lines:
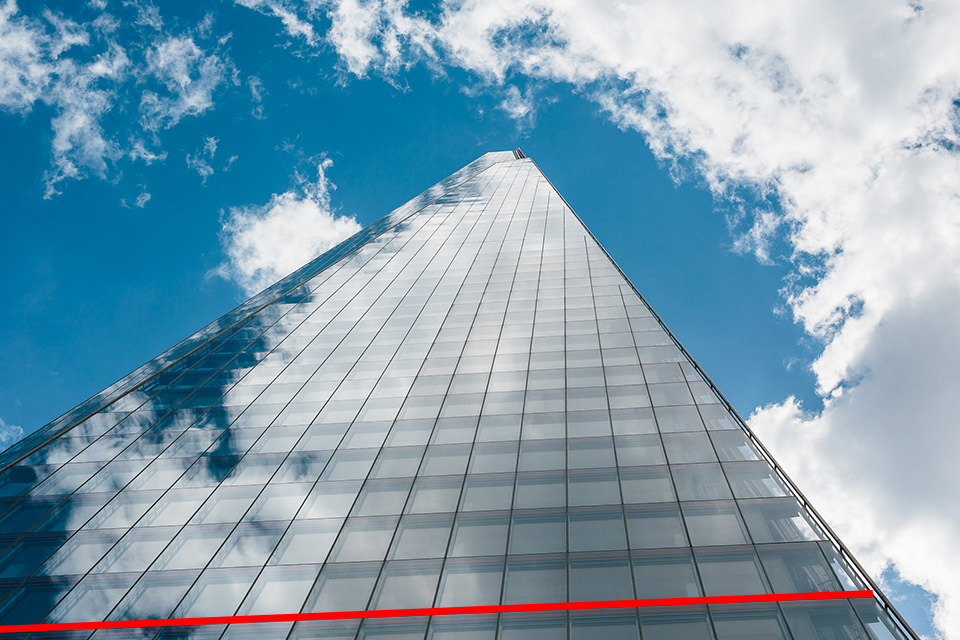
The image appears unnatural this way, because every horizontal line is impacted by the visible tilt. And here is the same image, with the properly aligned horizontal lines:

Just a subtle change in tilt and the image now appears much more balanced.
2) How to Find and Align Lines / Visual Guides
There are situations, when it can be tricky to identify the horizon or the lines by which the scene needs to be adjusted / aligned. Sometimes those visual guides simply do not exist. What do you in such situations? If the image achieves good visual balance without any lines, then sometimes you do not have to worry about any of that. However, in many cases, visual guides are there, but they are hard to find and identify. Let’s go over some examples where such visual guides might not be immediately visible to your eyes
2.1) Engagement Session Example
In the below sample image of an engaged couple, we have multiple elements that form different lines – the fence and the kissing couple that are standing at an angle. We also have vertical trees and the hard to see horizon line in the background. Which do we use as visual guides?
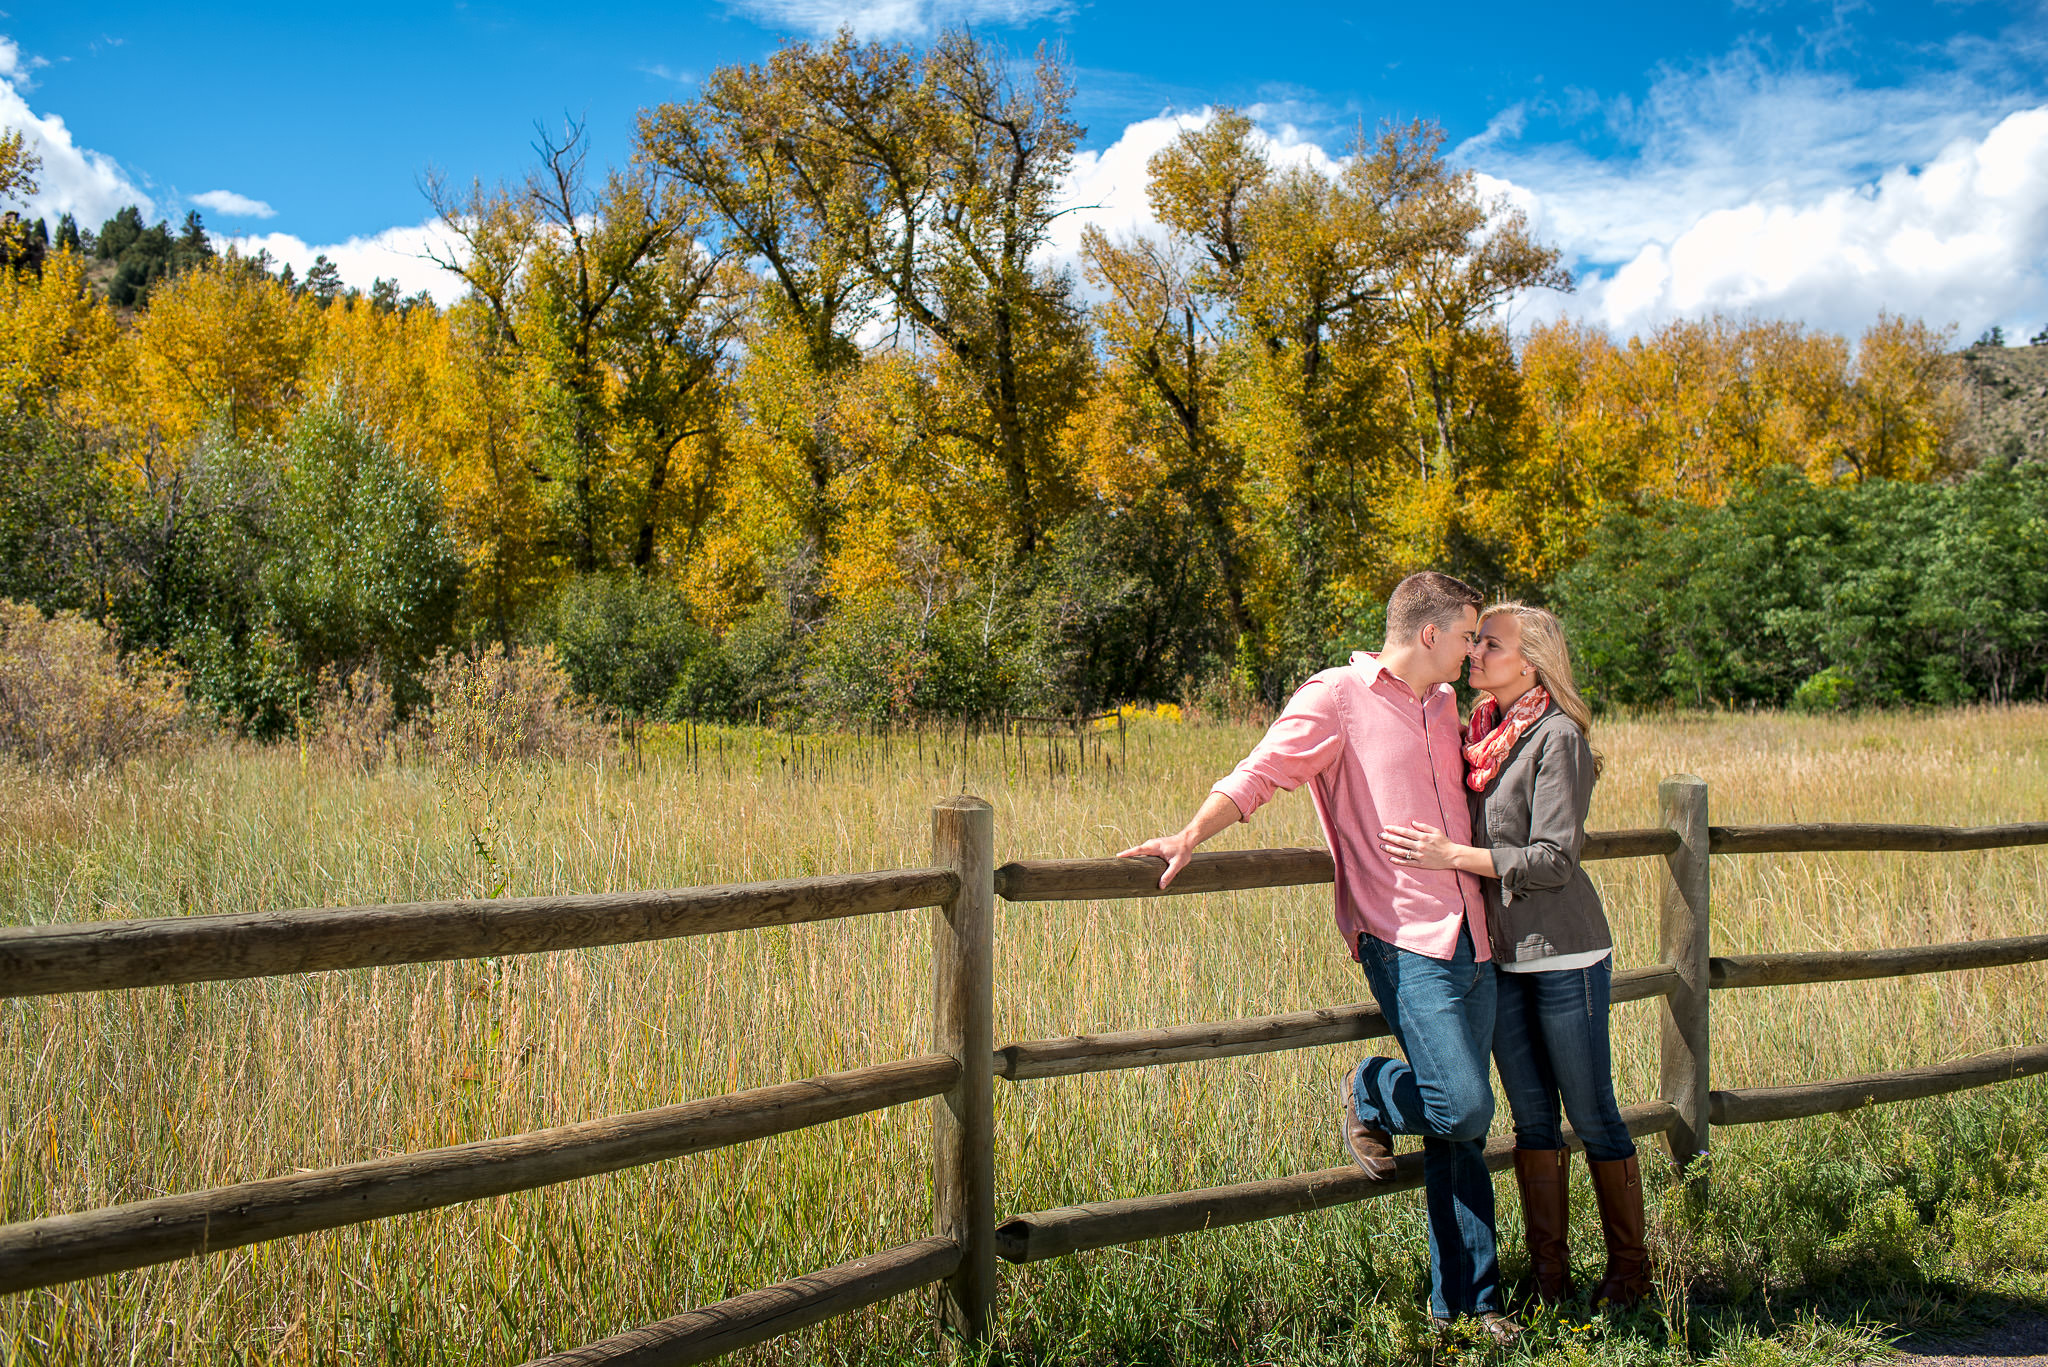
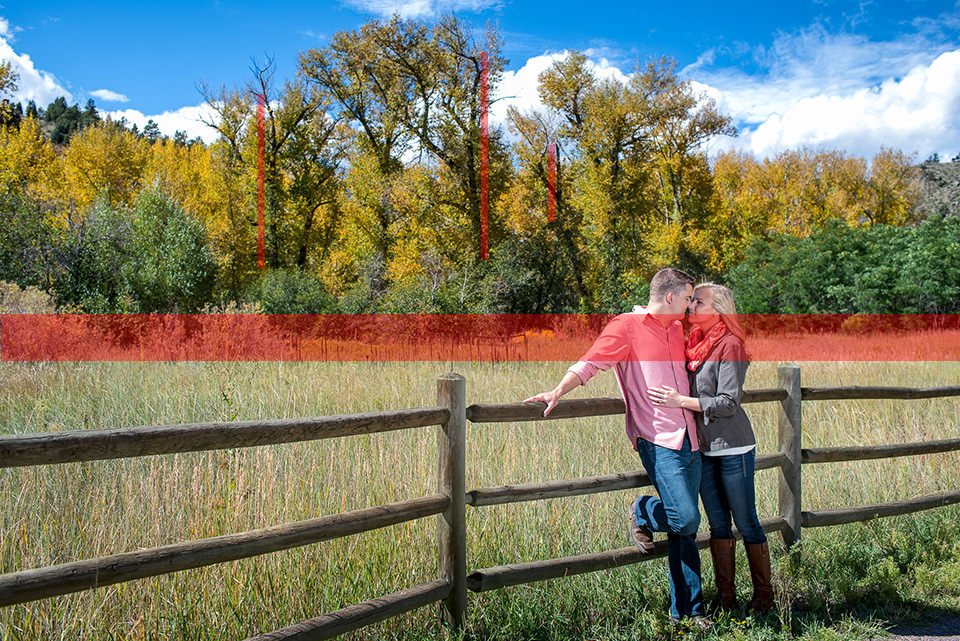
It should definitely not be the fence or the couple, as they are only one part of the overall landscape. So when I was framing this shot, I used the trees and the horizon as my visual guides, as shown in red:
2.2) Landscape Example #1
Here is a sample image of a landscape that contains multiple elements, but has no clearly defined horizon line. Which elements would you pick for alignment?
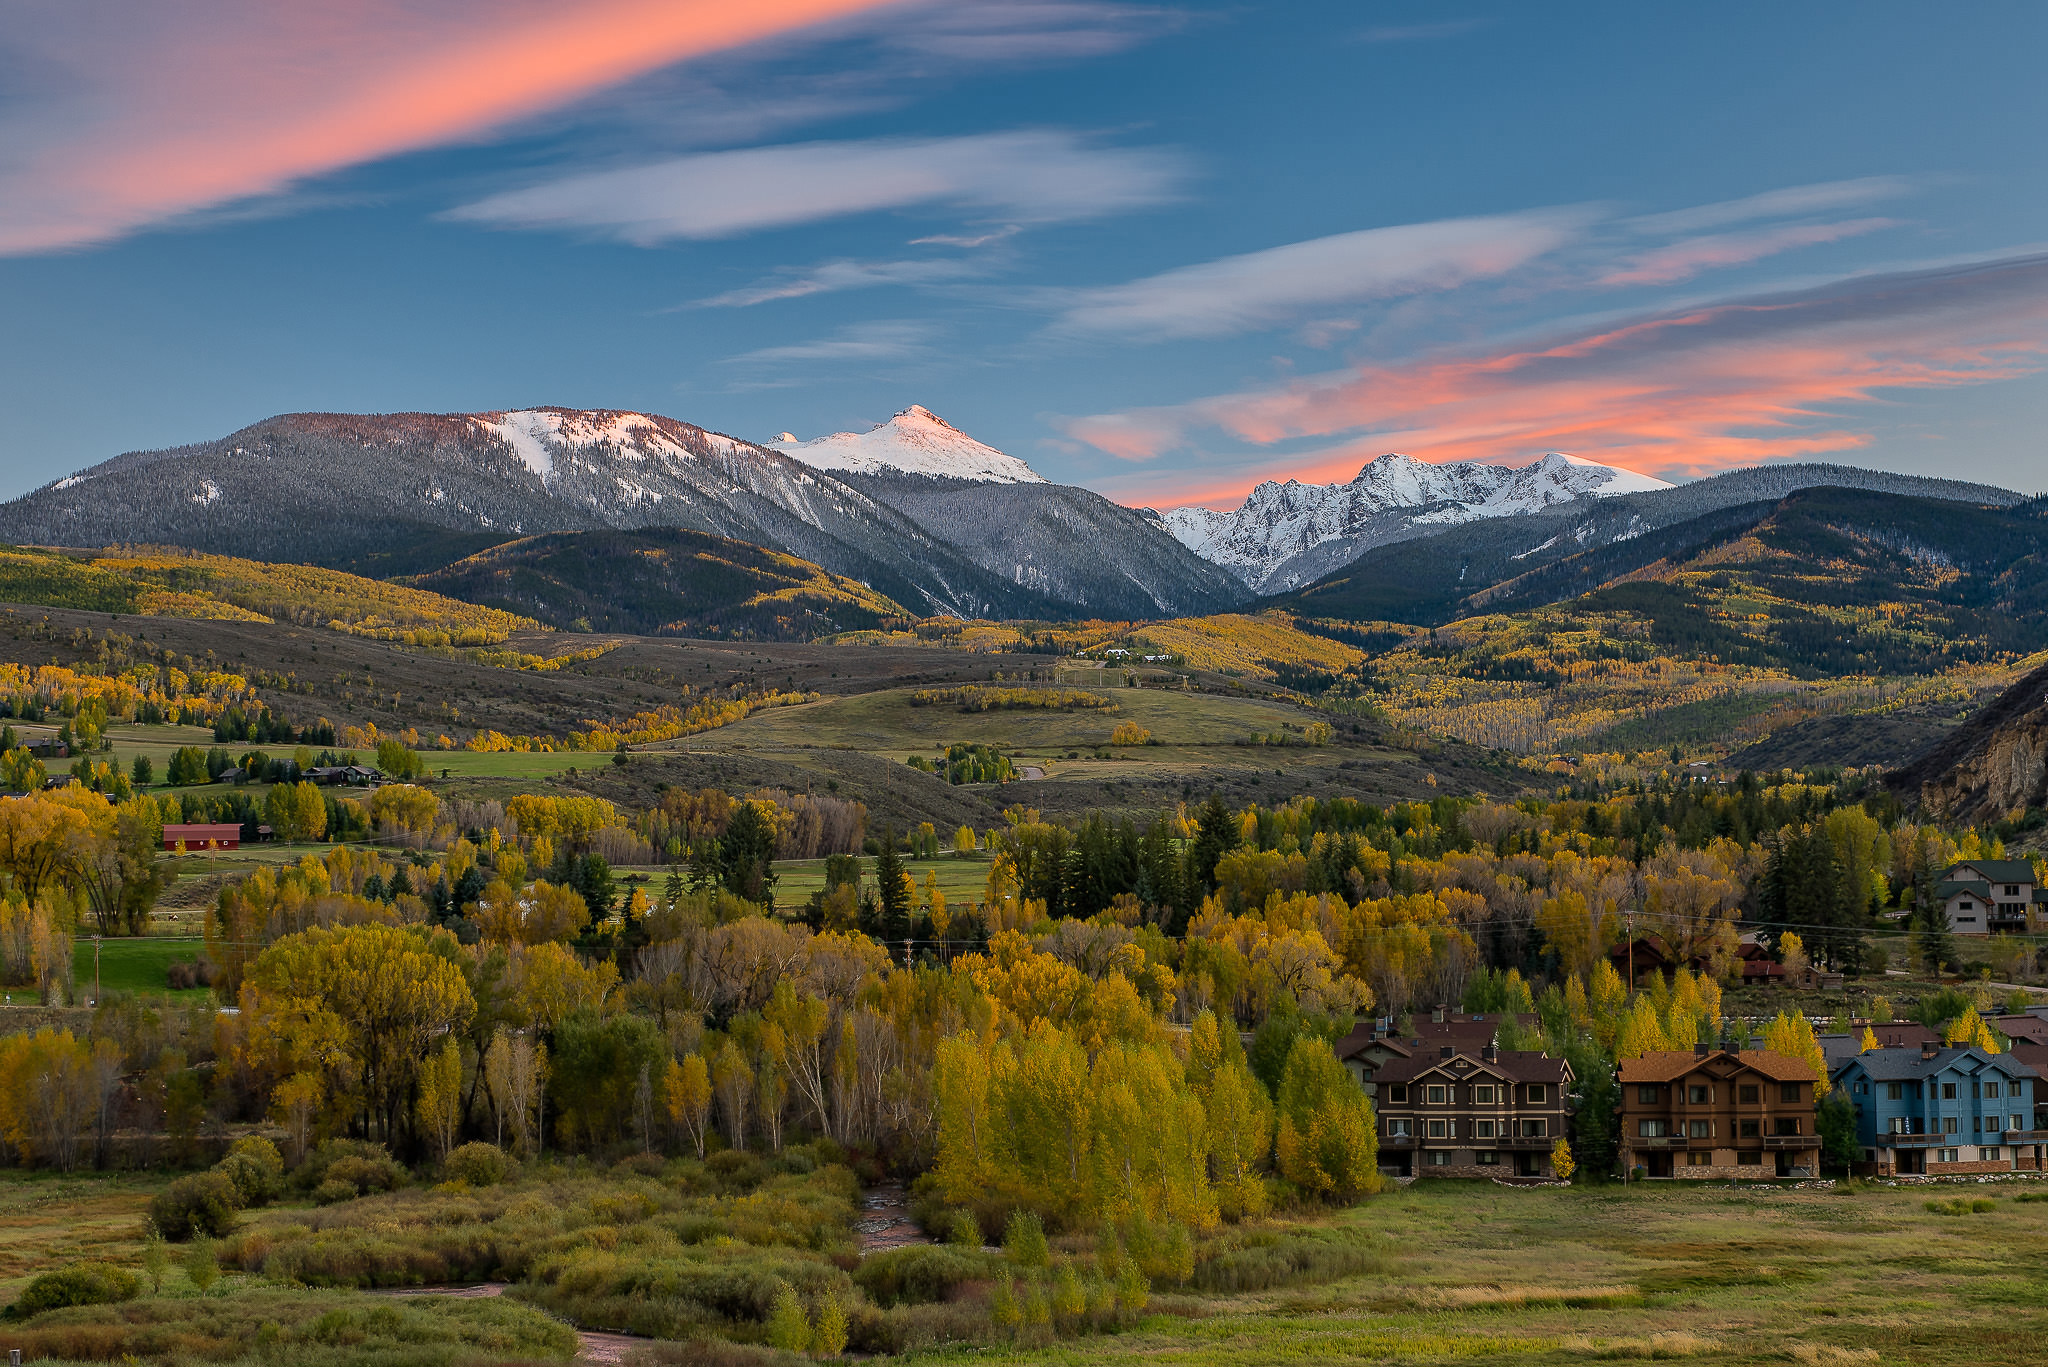
When framing this particular shot, I used the houses on the bottom of the frame, the trees on the left and the mountain line to properly align the image:

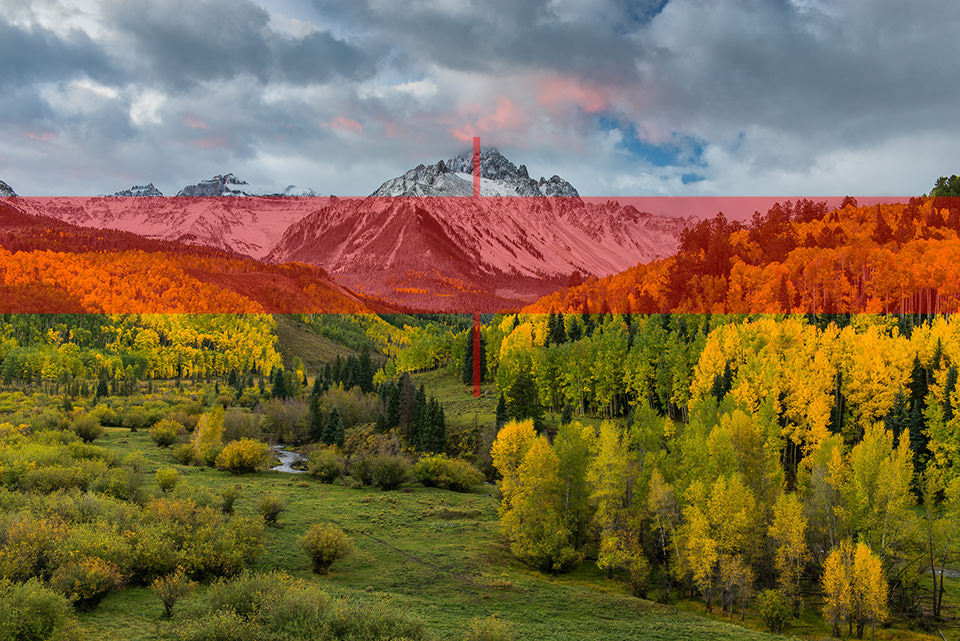
2.3) Landscape Example #2
This shot is a tough example, because there are so many different lines in the scene that are heavily tilted:
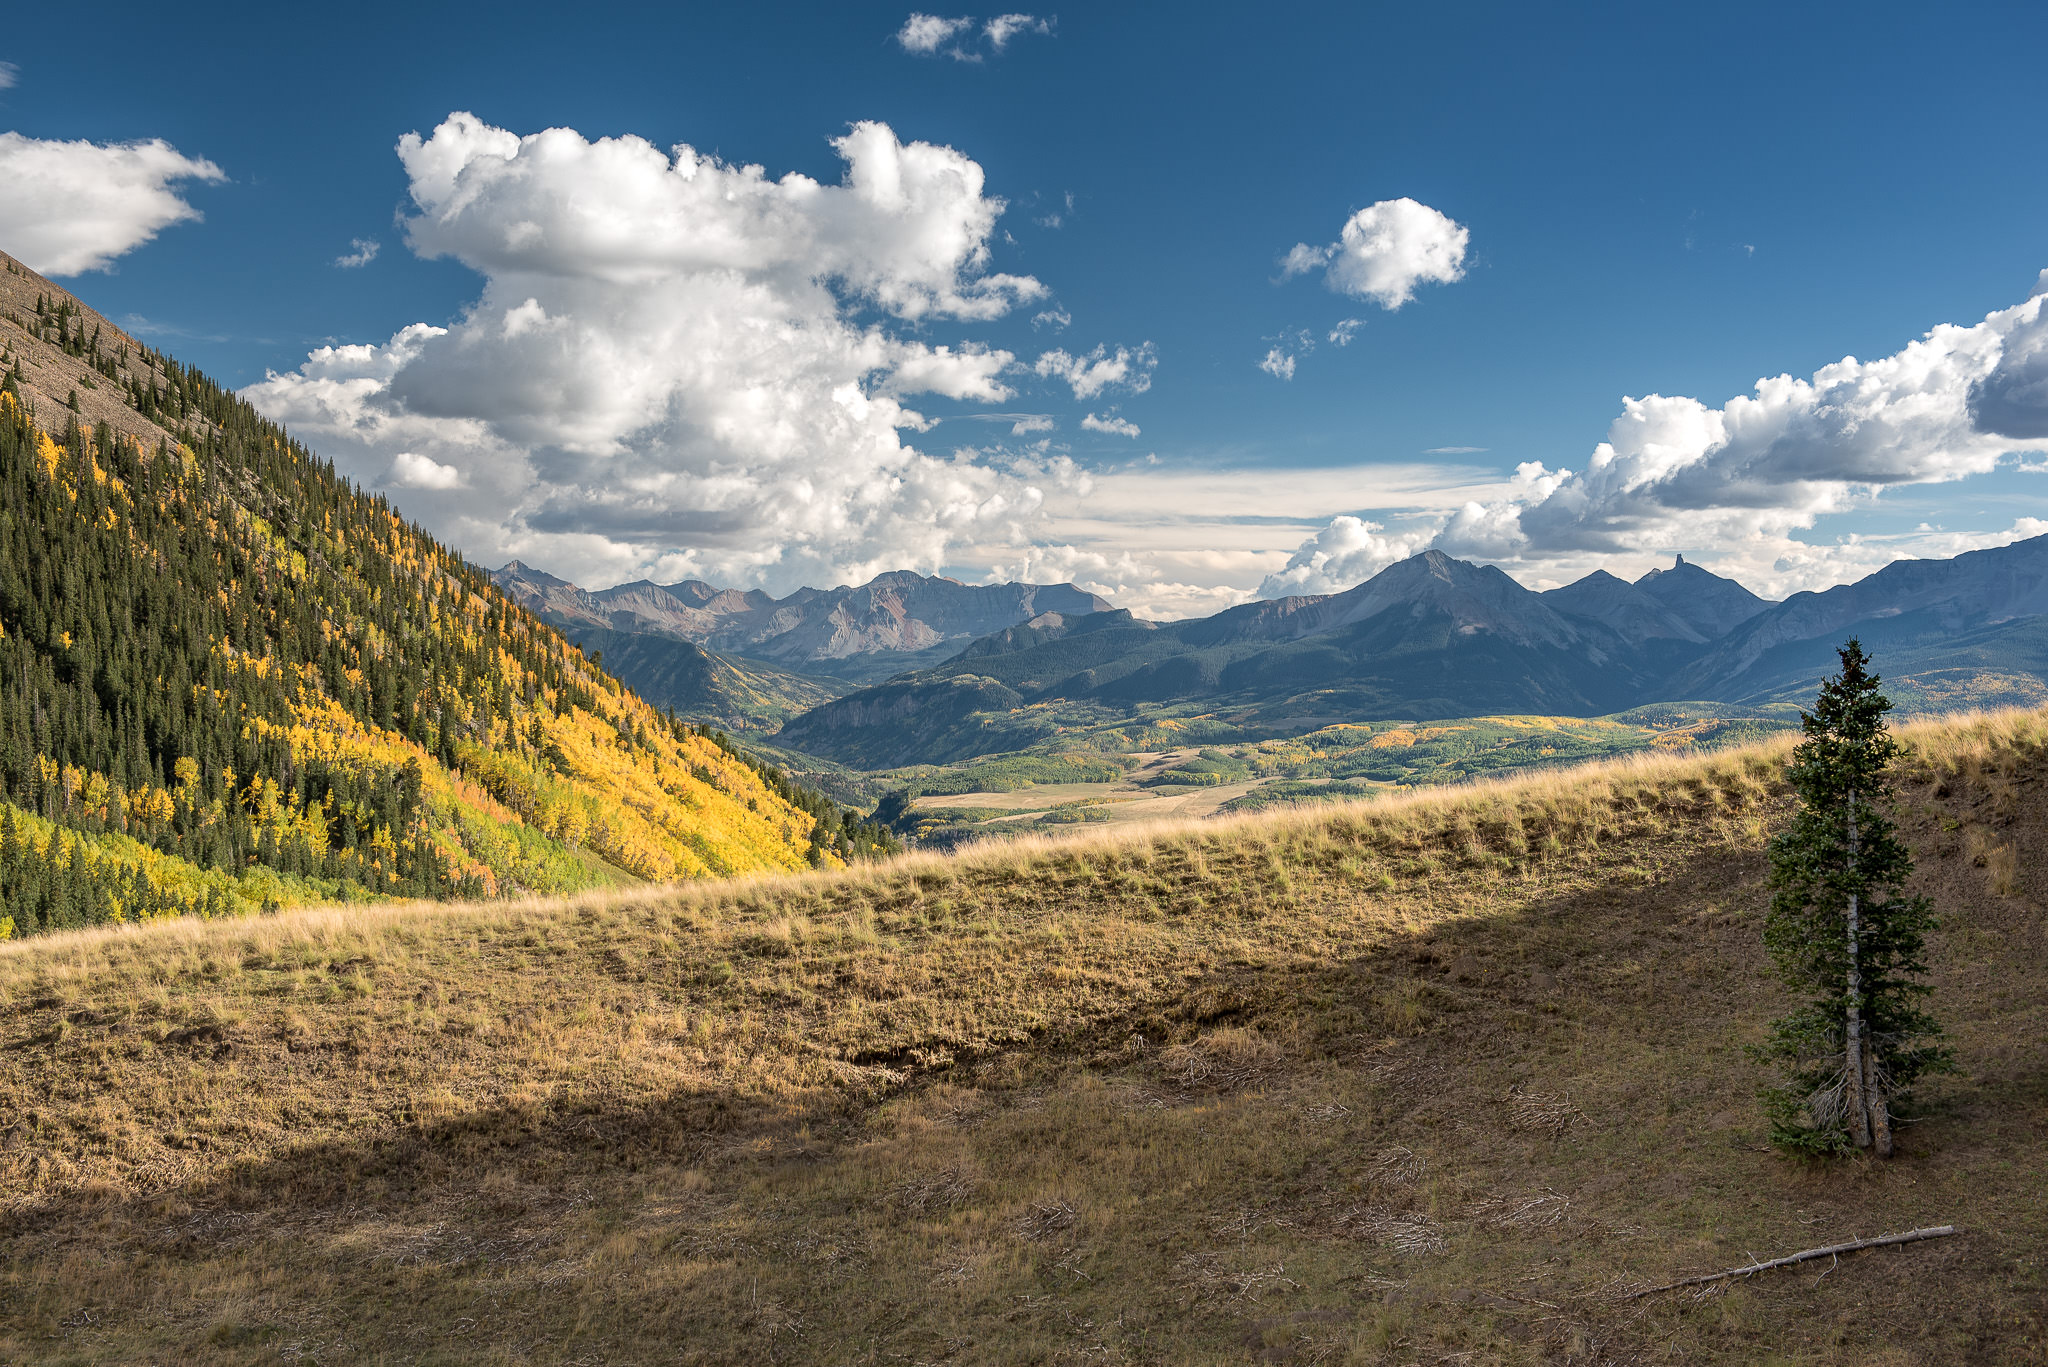
I used two elements in the scene as my visual guides – the mountain range in the back and the tree on the right side of the frame:
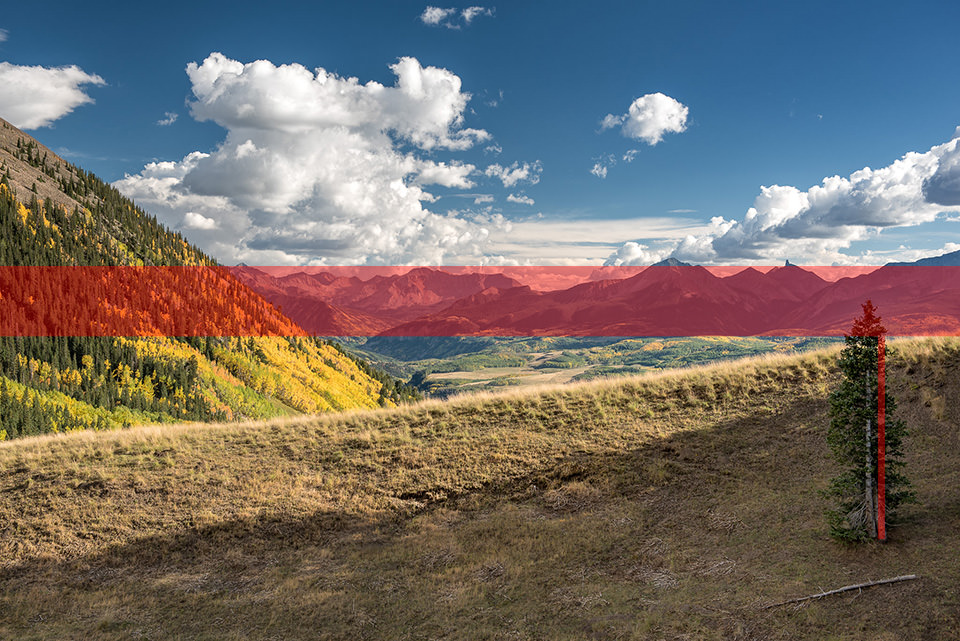
2.4) Landscape Example #3
This is another tough one, because there are no clear lines in the frame. I have seen many photographers struggle with scenes like this and they have to lose portions of the frame when they align it properly later in the post. Which visual guides do we use here to properly align the scene in the viewfinder?

I used the tree in the center of the frame, the peak of the mountain and the two hills on the sides of the frame as my visual guides. The heavy one here is obviously the hill line – if that appears too crooked, the whole scene will be thrown out of balance:
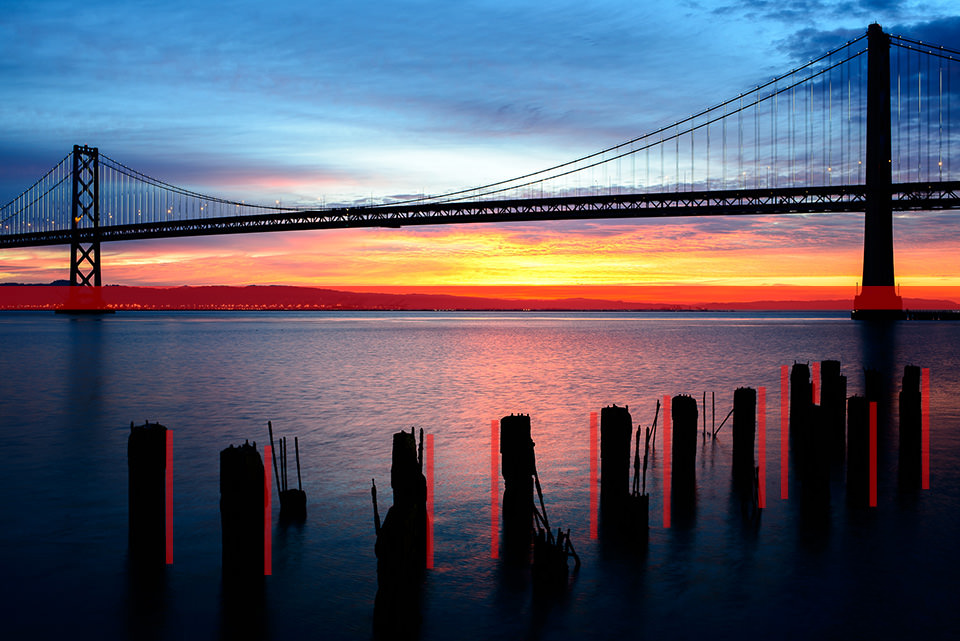
2.5) Bridge Example
In the below example of a bridge, do we align the scene using the bridge or the horizon?
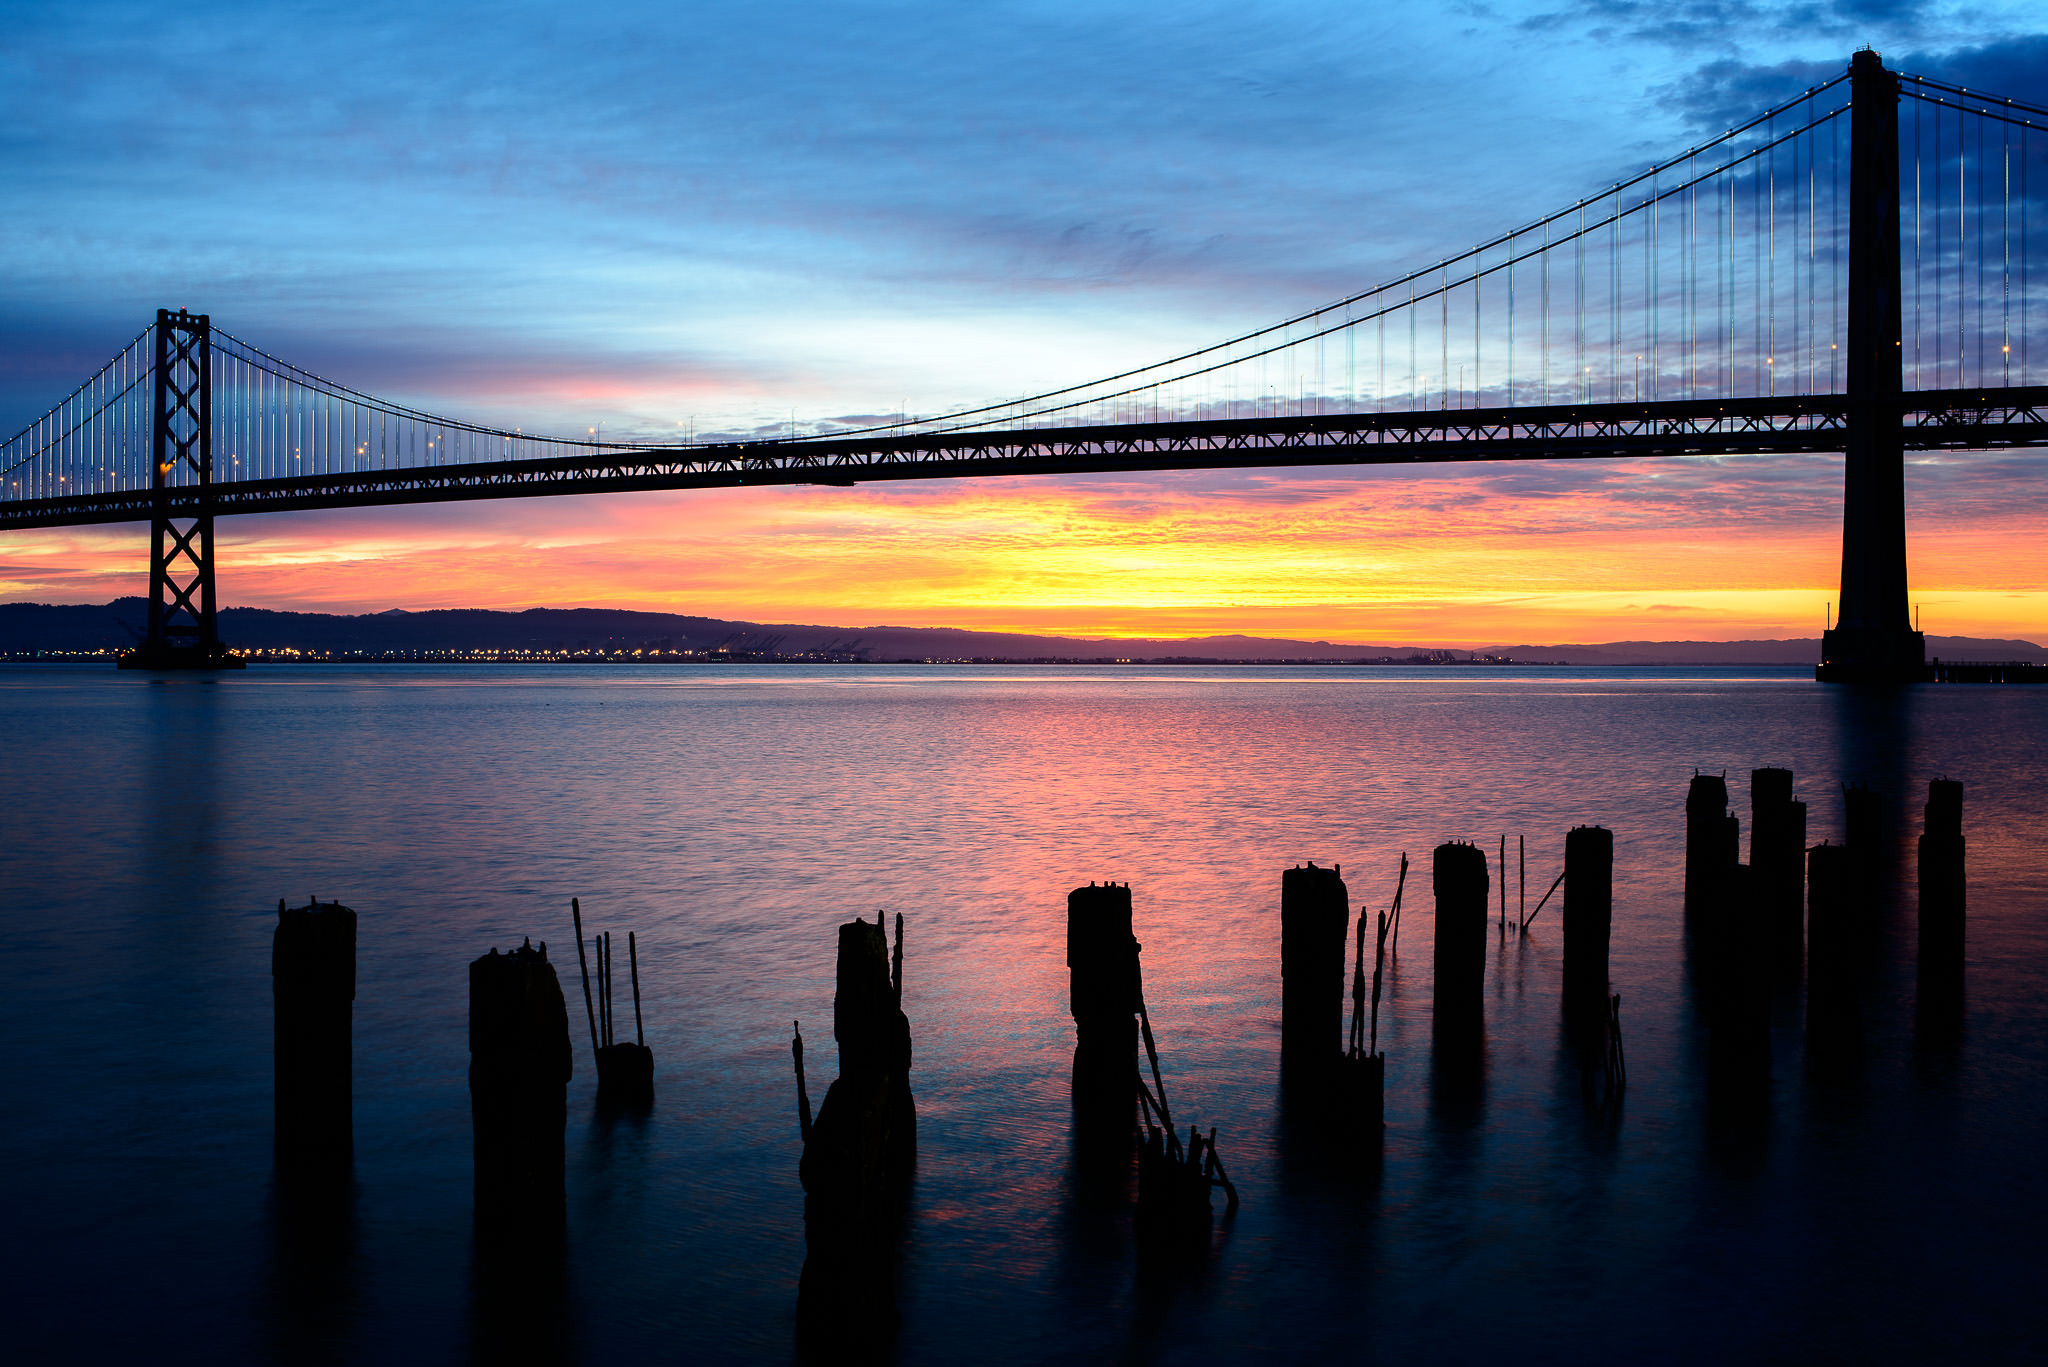
The horizon, of course. Remember, always keep the horizon of your landscape as your main guide – everything else is part of the landscape, including the bridge. When composing this shot, I used several visual guides – the horizon and the wood sticking out of the water.
2.6) Bridal Portrait Example #1
Let’s now jump to another portrait and this time we have a close-up of a bride:
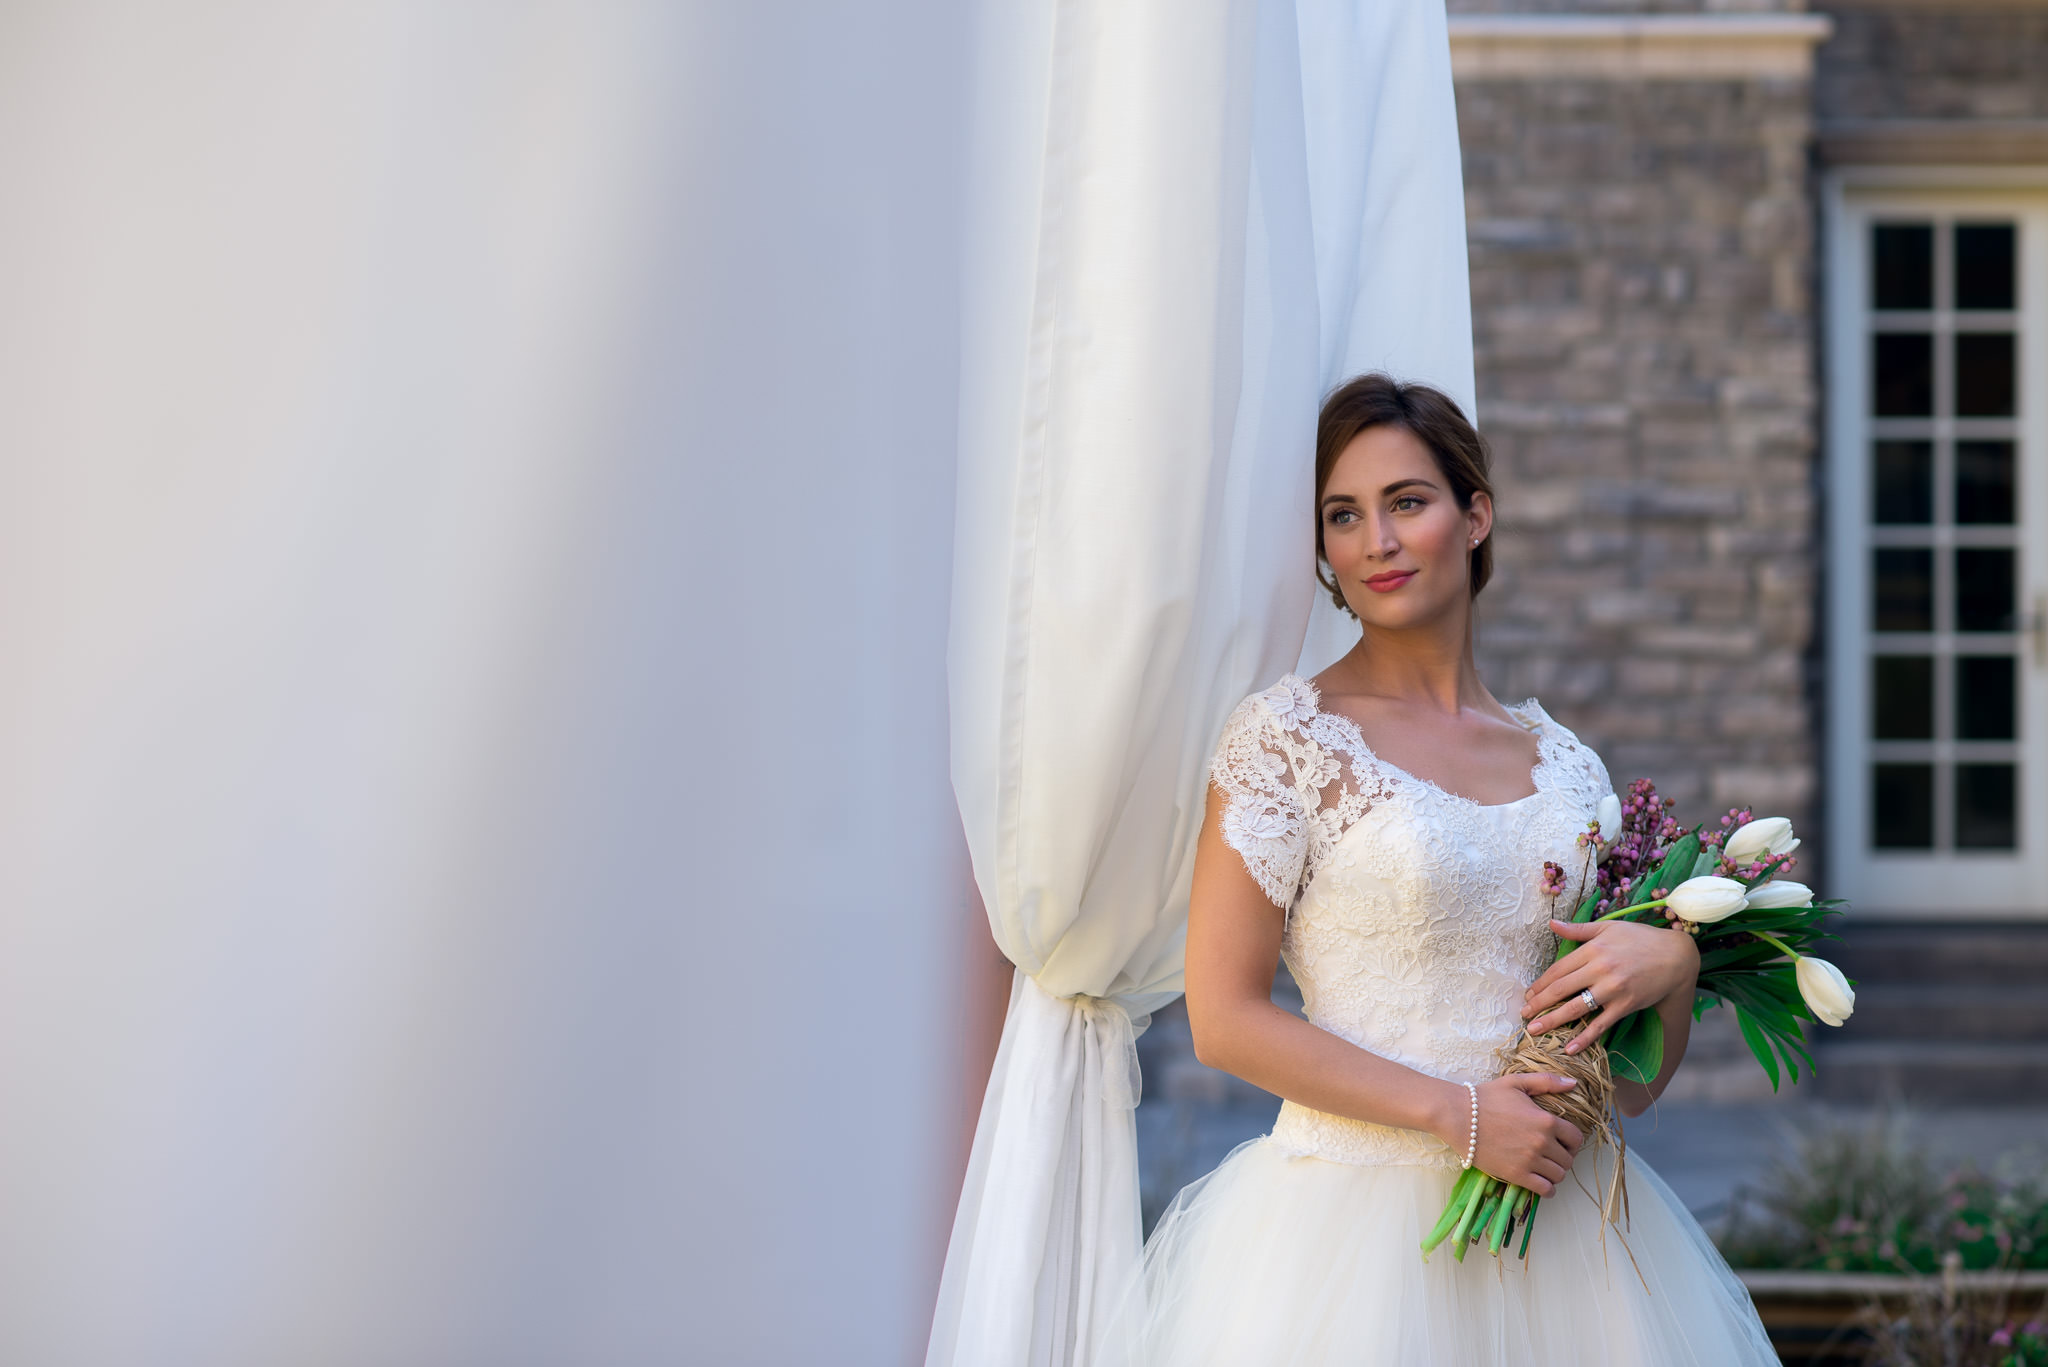
The main element is obviously the bride, but that does not mean that everything else in the background should be ignored. Here, I used the window on the back of the bride as my main visual guide for proper alignment:

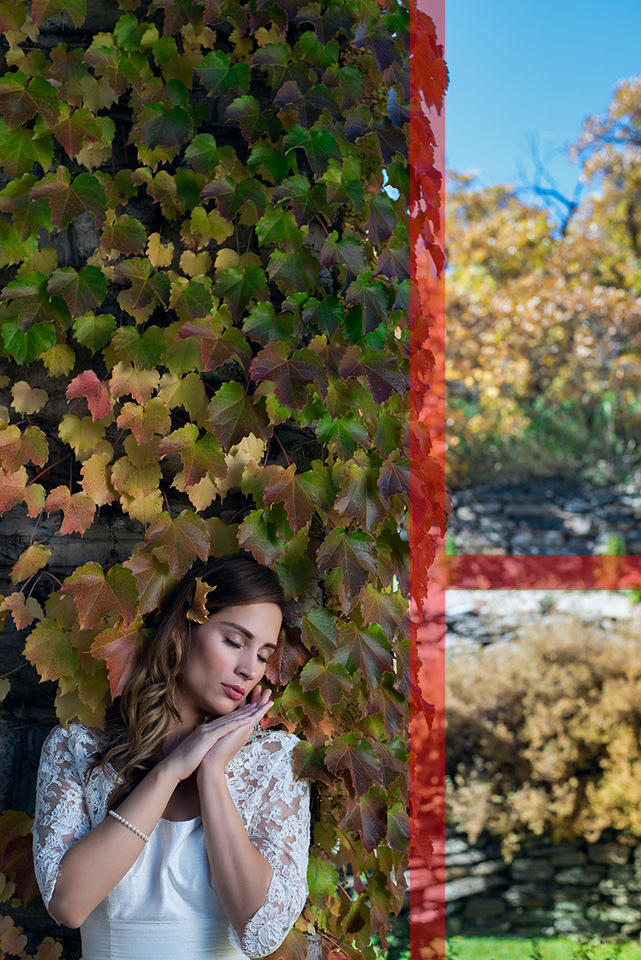
2.7) Bridal Portrait Example #2
Here is the last example of a portrait, with the bride on the lower left side of the frame that Lola captured with her nifty fifty:
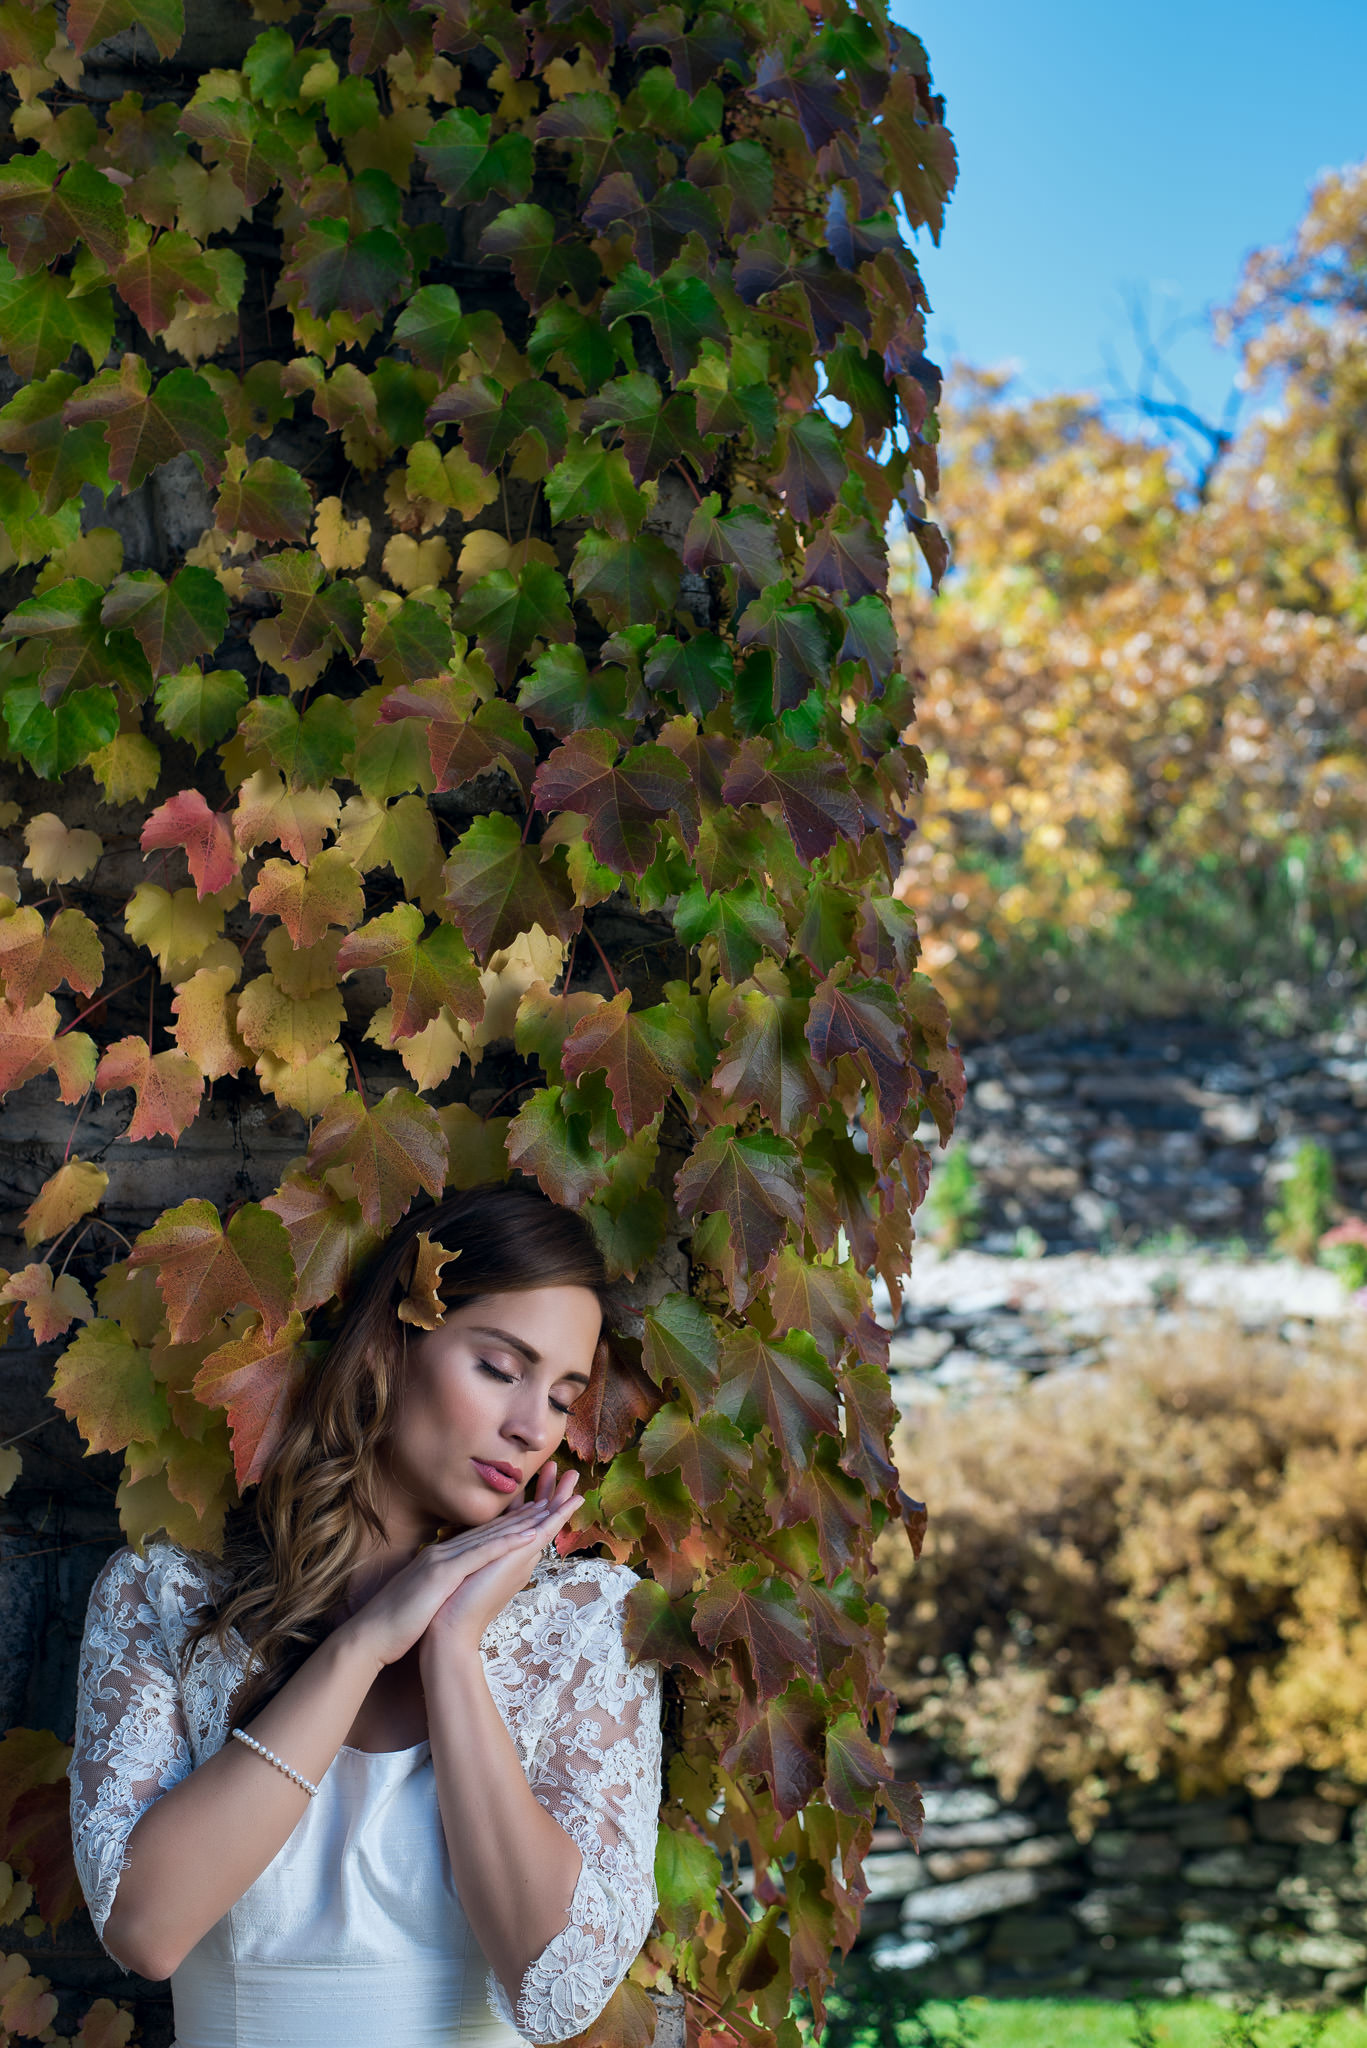
Here, the visual guides are pretty obvious – we have the wall separation and the white line on the background that serve as the proper visual guides.
But the most important thing here is not the alignment itself, but how Lola was able to get the wall aligned straight down. She pre-visualized the shot and wanted the wall line to appear straight. To do that, she moved back far enough, so that there is little natural perspective distortion to deal with. If you want to straighten lines like this, you have to use the right combination of camera to subject distance and focal length. Another key factor sometimes is height – shooting anything upwards will usually result in perspective distortion. For this particular shot, Lola had to stand on an elevated surface and she was on her toes to keep the wall straight.
3) Aligning Lines in Camera
By now I showed you many different examples of what visual guides I use for alignment and proper visual balance. With the exception of the first image, pretty much every shot was composed as shown, in camera. The most important thing is to try to do this in your camera and not leave the task for post-processing. Why? Because if you frame your shot tight, alignment in post-processing might not be possible, as you might lose key parts of your composition elements. Slight adjustments are easy to deal with, but if your horizon is crooked heavily, you will lose quite a bit after the image is aligned and cropped.
My advice is to always pay attention to your framing and look for anything that might serve as your visual guide. Once you identify what the visual guide for alignment is, only then start framing your subject.
What really helps when doing this is to keep the viewfinder grid turned on in your camera. On mirrorless cameras, you can generally pick between different grids – rule of thirds, 9 or 24 grids, HD framing, etc. On my Fuji X-T1, I have 9 grids set up. If you have a Fuji camera, you can do that by going to SET-UP -> SCREEN SET-UP -> FRAMING GUIDELINE -> GRID 9. On my Nikon DSLRs, I always have my “Viewfinder grid display” option turned on. You can find it under CUSTOM SETTING MENU -> Shooting/display -> Viewfinder grid display.
Here is how the viewfinder looks like on the Nikon D810 with the grids turned on:
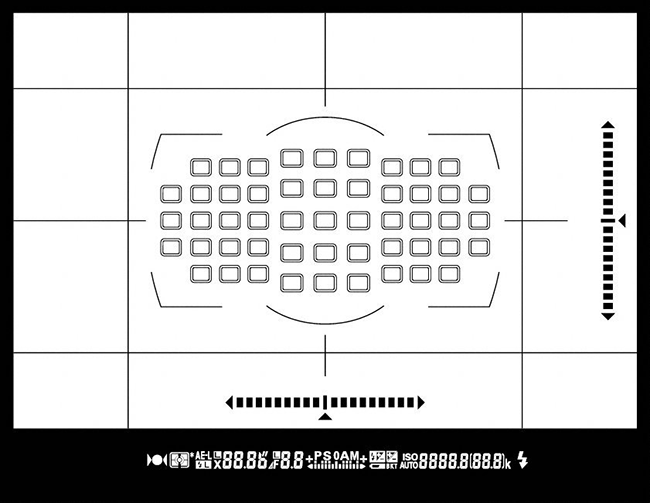
The lines that are running all over the viewfinder outside of the focus point area are the grids and they help quite a bit in properly framing your shots.
4) Aligning Images in Lightroom
The process of aligning images in Lightroom is super simple. All you have to do is go to the Develop Module, then click the “Crop Overlay” icon above the “Basic” sub-module. You can also press the “R” button on your keyboard to bring up the same window. Once the “Crop & Straighten” window expands, you will see an icon that looks like a ruler, with the word “Angle” in front of it:
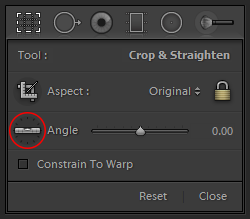
Once you click on that icon, you will see that your mouse icon will now have a ruler on the bottom right side of it – this means that the ruler has been activated and you can now align your image. All you have to do from there is find either a vertical or a horizontal visual guide, click and hold your mouse on one side of it, then move to the end of the guide and release the mouse button. This will basically align your image to your visual guide / ruler. That’s really it!
Now if you want to fix perspective distortion as in the first image of this article, that process is more complex than simple alignment, so we will leave that topic for another tutorial.
5) Experiment and Break Rules
Keep in mind that the above are my suggestions to improve your composition – they are not strict rules that you always need to obey. Experiment with angles and lines and see what works for each photograph. Sometimes tilting horizons and lines in your shots can produce stunning results. Take a good look at some superb examples of using tilted lines by our team member Sharif / Alpha Whiskey Photography, who knows how to intentionally tilt the horizon and lines in images to create beautiful and engaging shots.
Hope you enjoyed this article. If you have any questions or feedback, please post them below in the comments section.
hehehehaw
Great article and tips!
As a photographer of over 40 years, I still struggle with post-production and quite a painful purist when it comes to digital photography – I still prefer film. I really don’t do a lot of PP as I don’t like manipulating my images. Although, I pretty much always have to straighten my horizon as I have a problem in my eyes. Also, as my full frame Nikon D600 and 28-300mm lens produces quite a lot of distortion on architectural shots (more so than my previous Canon 550D), I need to adjust these – very annoying.
Hi, I am new to photography and I ave a problem of tilted horizon in most of the photos I take, the horizon is tilted slightly counterclockwise, I try to allign the horizon with the grids in the viewfinder but the problem is still here, any advice ?
thanks
Hi Ali.
My advice is based on my experience as a keen landscape photographer (and to a lesser extent, a macro shooter).
Have you got this problem when handholding the camera? Some of us have compositional problems which incorporate lack of foreground interest, busy or distracting background objects, cutting things off at the wrong point, such as peoples’ heads or legs in mid limb, and of course, your own problem, the horizontal horizon.
If this is a handheld camera issue, you might find it very rewarding to start using a tripod for most of your shots, for a while, before you go back to handholding. Somehow, the tripod helps you to concentrate more on composition, or at least, in my case, it definitely does. The fact is, you lock your camera in a set position, and then you can study the image more closely in the viewfinder / liveview, and see the problem a little more clearly, before you shoot.
A handheld camera is so easy to disturb, after you have settled on your composition, and throw the horizon, verticals, or other compositional problems mentioned above back, into the shot, causing a fail.
You will, or should, find, that when you then go back to trying to shoot handheld, your eye is a bit keener, and you ‘see’ these issues a little more than you are now.
The other approach which may help, especially to rescue the images you have already amassed, would to be to use the ‘horizon’ tool which comes with, in my case, both Adobe Camera Raw, and DXO Optics Pro.
This involves drawing a line along the horizon, in your image, and the sofware rotates the image to ‘straighten’ the image, relative to edge of frame and the horizon. If you are doing this in software, try to use the distortion correction available in the software BEFORE you try adjusting the horizon, otherwise you may find that you have a curved horizon to start with, because the lens you were using has introduced either barrel, or pincushion distortion – a bit like a mirror in a funfair’s hall of mirrors.
Tripods are a pain to use, even the good ones, as they ‘slow’ you down, but, they are a great way of getting you thinking about compostion too, and you do learn a lot from them, and this helps when you go back to handheld shooting.
As to software, I wouldn’t get over-reliant on using it to correct your future work, as it is always best to capture the image properly, if at all possible.
very helpful…thanks alot
In reply to autofocus Ross.
There is a tool something like “force parallel” as you describe in Corel’s Paintshop Pro suite (which itself is rather like Photoshop but with an expansive collection of photography tools). Its “perspective correction tool imposes a rectangle on the screen. Each corner of the rectangle can be independently dragged to anywhere on the screen for example to the corners of a building that look to be distorted by the excessive perspective of a wide lens that has been tilted when used. Having done this, when you click the button to activate it the software reconfigures the object you are fixing into a rectangle. This is perfect for instantly fixing the “falling over building” syndrome one gets from tilting a lens when photographing a building. Or you can leave some sides unfixed as often its easy to overdo the effect and you may want some perspective left in the final image. The beauty is its simple and quick. If you can align a line on screen with edges of something you can be sure they will be pulled into parallel.
Video demo here explains it well.
www.youtube.com/watch…piIuL5RhdE
Hi Peter,
Yes, the tools in the Corel demo are similar to those found in ACR and in DXO OpticsPro. For those following this particular part of the thread, OpticsPro differs in two respects (from the Corel system).
On the distorted image with the chapel, DXO, when it first loads up the image, will analyse two things, independent of the image at all. These things are…
1. What Camera was used
2. What lens was used (and then, if a zoom, what focal length and aperture).
It picks up this data from the RAW exif file contained within the RAW. Once it has the information, OpticsPro then either applys it instantly, or, if the camera or lens is not already downloaded onto your computer (a separate, unique module for every camera, and every lens) it first asks your permission to download the module(s) needed. Once this is done, the module remains on your computer, so further images taken on that lens, that camera, or a combination of the two, is already on your system.
Once the module is in place, either by pre-existing, or by a fresh download, the distortion to the chapel image occurs instantly, and automatically. The horizon is straigtened etc. There are no sliders, no user judgement needed, the software ‘knows’ exactly how to correct the problem, and just gets the job done.
Looking at the second image in the video, the window, I see corel have a rectangle which you draw over the four corners and then the perspective correction occurs.
OpticsPro ‘force parallel’ is not quite the same. OpticsPro does, however, have a similar tool to the Corel, it sits up on the toolbar, right next to the force parallel icon, it is a draw rectangle tool, and it works pretty much the same as the video you uploaded.
OpticsPro force parallel operates differently, in that it only concerns itself with the plane of adjustment you drew. ie, if you drew the two separate lines along the left, and the right hand edge of the window, the two edges are adjusted so that they are now parallel. The upper and lower edges of the window are not ‘straightened’ or otherwise adjusted, save for their individual length, in order to accomodate the vertical edge re-alignments – in other words, they are stretched or shrunk to fit the new paralleled image. The horizontal lines remain out of line with the top and bottom edge of the image – if that is how they started, and only the vertical plane is changed, to fit in with the lines you drew.
The interesting part is that each of the two lines has a ‘handle’ at either end, so you can drag them around to re-adjust the image any way you like. There is also a reset button to cancel the adjustment if you need to restart.
What is nice about this tool, in respect to the main topic, is that when working on images that lack any visible horizon, you can ‘straighten’ them, even with converging (via wide angle lenses) verticals. I have a series of shots of an old celtic church, taken in a tiny churchyard in a seaside village, where retreat for compostion was not possible, so the wide lens had to be employed.
The distortion to the verticals was pretty bad, even though unavoidable, but use of the force parallel on the outer edges of the building, brought the image back to a normal perspective, other than the front to back elongation that you get with wide angle lenses.
I would imagine your corel rectangle tool would have done much the same job on those particular images – it’s amazing how competing products approach the same problems and come up with different, but similar tools. Having gone through the learning curve of OpticsPro (not easy, to be honest) I have ‘grown’ into it. They’ve just issued a new version, version 10, so I am trying to find out what it has that I could use before I make a move… I will post some info on that if I do upgrade but I am so happy with my version 9 right now, maybe I won’t bother until V11 comes along.
Hi, great article with examples to show the effect.
Just a additional tip – in many pictures the straight line is the horizon. Sometimes it’s difficult to adjust to that line for several reasons (trees etc in front). In other occasions the picture do not look balanced if the line which is considered as horizont appears straight
What nearly every time works for me is the usage of vertical lines (up/down), instead of horizontal lines (left/right) for allignment. If the camera is not tilted/shifted it does not make any difference, but often the camera was not exact in the required position (a bit left or right), and the picture is therefore tilted. Vertical Lines are much easier for allignment in these cases.
Hi Joe, I would 100% agree with you on the use of vertical lines, in cases where the horizon is not shown. In fact, I often use that technique for that very reason. It could be a tree, an edge of a building, a lamp-standard / lampost or even a drainpipe on a building where no convienient edge is usable.
As a user of OpticsPro from DXO there is an interesting tool that I sometimes use as an alternative, where using just one edge is problematic and throws other lines in the composition into an ‘obviously wrong’ alignement (as a result of straigtening by using one of the other edges).
That tool is called, I think, ‘force parallel’ and is most useful where, for example, you have the perspective distortion of a building, shot from street height, looking slightly up, with a wideangle lens. The converging verticals sometimes give you an effect that you may want, oftentimes though, you would rather have the building’s edges square to each side of the image. The force parallel tool requires you to draw two guide lines on the image. In the example I give, you would draw one along the left hand vertical edge, the other line along the right hand vertical edge.
The program then corrects the vertical perspective completely. To achieve this, you will lose a chunk of the building’s higher level. I was only showing my wife this very editing tool yesterday, on an image of a castle wall in Rhodes, Greece, and was telling her that years ago, with film cameras, it was possible (but prohibitively expensive) to purchase a ‘Tilt and Shift’ lens which would do exactly what the software can do now… only much easier, as drawing those lines is achieved in moments, whereas setting up the tilt and shift lens took some work!
I think those lenses are still available in new, digital camera compatible, form but I would rather spend it on other things, such a travel etc.
I know ACR has a vertical and a horizontal correction tool but they are comparitively very fiddly, but will do the job too if you don’t want to pay for yet more software.
Good point though, Joe, there are many images which do not have any horizon as a reference point, so making the job of straigtening a little more subjective than would otherwise be the case.
Thank you fro this article Nasim. I absolutely agree about the need for straightening and aligning lines and elements in an image. No matter how careful one is when making the shot its almost inevitable that there will be some misalignment, not the least due to perspective and the way that three dimensional objects are captured on a sensor and rendered in two dimensions. This means that correcting the image for such misalignment becomes an almost inevitable necessity. I would say I make this correction in 90% of cases even where there are no obvious objects that suffer particularly from this issue like the horizon or buildings etc.
I have been using Corel Paintshop Pro (PSP) for the last few versions, simply because I tried it and liked it so switched from PS Elements which I had been using previously (Adobe Lightroom was not yet available at that time). I found PSP to have some flaws, but was and is more complete in terms of the tool set than PS Elements and much easier to use (and cheaper) that the full PS suite. Long story short, one of my reasons for sticking with PSP has been that it has effective tools for horizontal and vertical correction and also for perspective correction. Both tools are worth their weight in gold.
Quite often, after converting my file from RAW for post processing, the very first change I make is to correct alignment issues and fix any problems with horizontals or verticals. Quite often this requires a creative choice – which line or lines should be aligned and corrected – not all can be of course? That is the choice that must be made depending on how you want the final image to look. But in any event my rule of thumb is to always select at least one major line in the image to be corrected to make it properly horizontal or vertical as your artistic decision dictates. The PSP perspective correction tool is sweet. It can be used to simultaneously fix both verticals and horizontals, something that is otherwise difficult if not impossible. Of course this can be overdone and removal of all perspective can make an image look objectionable so care is needed
Without these corrections, the image will too often just look plain shoddy to anyone who is looking for it. Of course sometimes creativity may dictate the need for the image to be angled although this is not a frequent necessity. But occasionally I will make this choice. The rule of thumb I work to here is that if I have an image that is angled it is important to make it clear that this is not by accident – its a deliberate choice. Usually this is done by making the angle quite significant – just off horizontal or just off vertical almost never looks right. If you are going for an angle, a big angle looks better. That’s about it. But I have to say I am quite anal about this issue and see too many images ruined because the photographer has failed to fix this obvious problem in post.
A few of my examples in which I feel my image has been optimized by using these techniques:
Main vertical on the far right: www.flickr.com/photo…026079130/
One where the strict vertical (left) plays well against the other angled lines: www.flickr.com/photo…085541041/
Top left and bottom lines corrected together using perspective tool: www.flickr.com/photo…562002958/
Main left vertical: www.flickr.com/photo…166453012/
Main right vertical: www.flickr.com/photo…753591267/
One where I deliberately went off vertical for effect www.flickr.com/photo…246686077/
I find the new Photoshop CC/Camera Raw “Upright” feature is remarkably good and works in more than one dimension at a time…
The Upright feature (Camera Raw dialog > Lens Correction > Manual tab) in Camera Raw enables you to automatically straighten image content. The Upright mode automatically corrects the perspective of the elements in a photograph. The feature has four settings that you can choose from:
Auto: Balanced perspective corrections
Level: Perspective corrections are weighted toward horizontal details
Vertical: Perspective corrections are weighted toward vertical details
Full: Combination of Level, Vertical, and Auto perspective corrections
Hi,
A completely out of the topic question. In the photograph of the Bay Bridge a certain combination of Shutter Speed/Aperture was used i.e. 13/10, f/16.0.
What will happen if I increase one and decreased (relatively) the other or vice versa? How do decide what combinations will suit the best??
Thanks in advance!
Hemal,
I’m sure Nasim will be along to answer you question better than I, but in the mean time consider that the f stop controls depth of field while the shutter speed controls the amount of light reaching the sensor or film. If you were to alter one without the other, you may over expose or under expose the image. If you were to alter the f stop and shutter speed one stop more or less the exposure would stay the same. Example: the shot was 1/13sec at f16. Had the photographer changed the f stop to f11 and the shutter speed to 1/25sec the exposure should be exactly the same. However if only changing the f stop to f11 and leaving the shutter speed at 1/13sec might over expose the image at the sensor; or perhaps give a better exposure because more light was needed.
The f stop and exposure combination you need to make any single photograph is in consideration of what you want the end result to be and what type of lens you are using at what ISO value.
Thank you for another good article! I read it thoroughly, and cannot close the page without leaving an comment just to thank you for your solid effort ;). I am the type of photographers that some how forget about the horizontal line when shooting, even though the concept is fairly simple. These awesome examples inspire me to pay more attention to this issue – it does make a difference.
Unfortunately the first image looks like it is sloping to the right in the corrected version. That also shows by simply scrolling the picture in the browser and aligning the ceiling border with the straight edge of the screen.
I found that using Capture NX 2 and the distortion tool + straightening guide I was able to achieve “straighter” results on that image.
Fred, it is a very slight slope, but it does not bother me. I did that adjustment in 2 minutes in Lightroom and I did not want to get the carpet fixed, since the carpet itself was imperfect and slightly curvy when I photographed it. If I try to fix the curve in the carpet, it will require some advanced post-processing in Photoshop. If I were to print this or submit it somewhere, I would probably get it perfected beforehand.
Capture NX has superior tools for some things. I love the selective color adjustments in CNX2, which now Nikon killed in NX-D. Very sad ending for Capture NX2!