Most recommendations for ETTR (exposing to the right) require you to use the histogram and “blinkies” on your camera to judge overexposure. And while this method works fairly well and has plenty of benefits, it isn’t flawless. Here’s an alternative method involving spot metering, which works better in many cases.
Table of Contents
What Is ETTR?
ETTR is a method of exposing photos which involves capturing as much light as possible, without blowing out any important areas of an image. We’ve written about it before. It is also known as optimal digital exposure.
Some photographers incorrectly think that ETTR involves taking photos that “look too bright” and then darkening them in post-processing. This isn’t always the case, though. Many photos which are properly exposed to the right will look dark out of camera. That’s because a central tenet of ETTR is to avoid overexposing critical highlight detail.
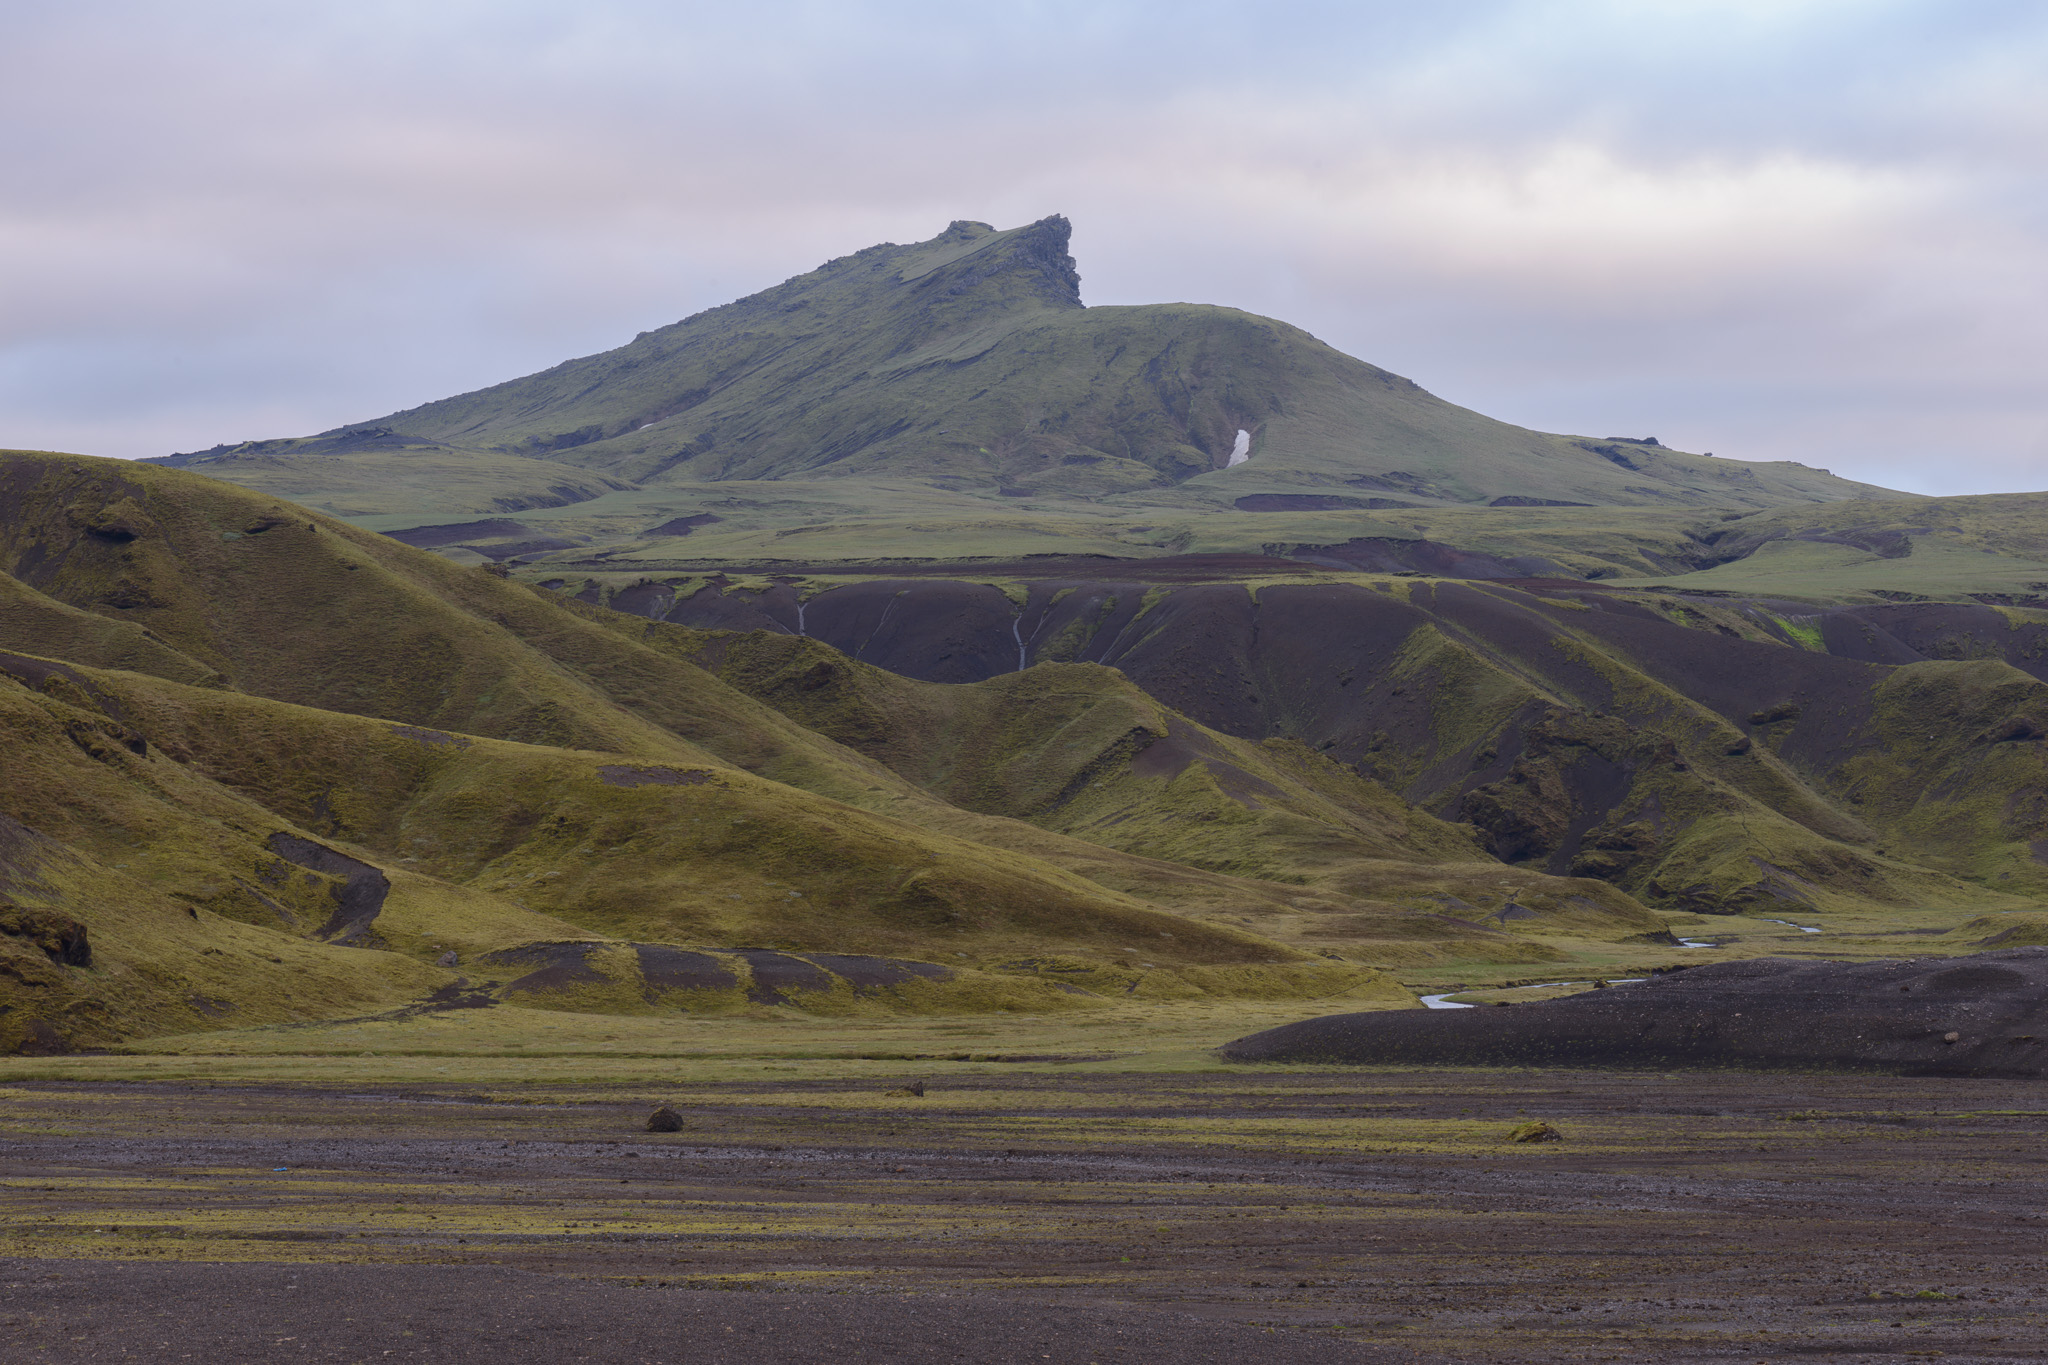
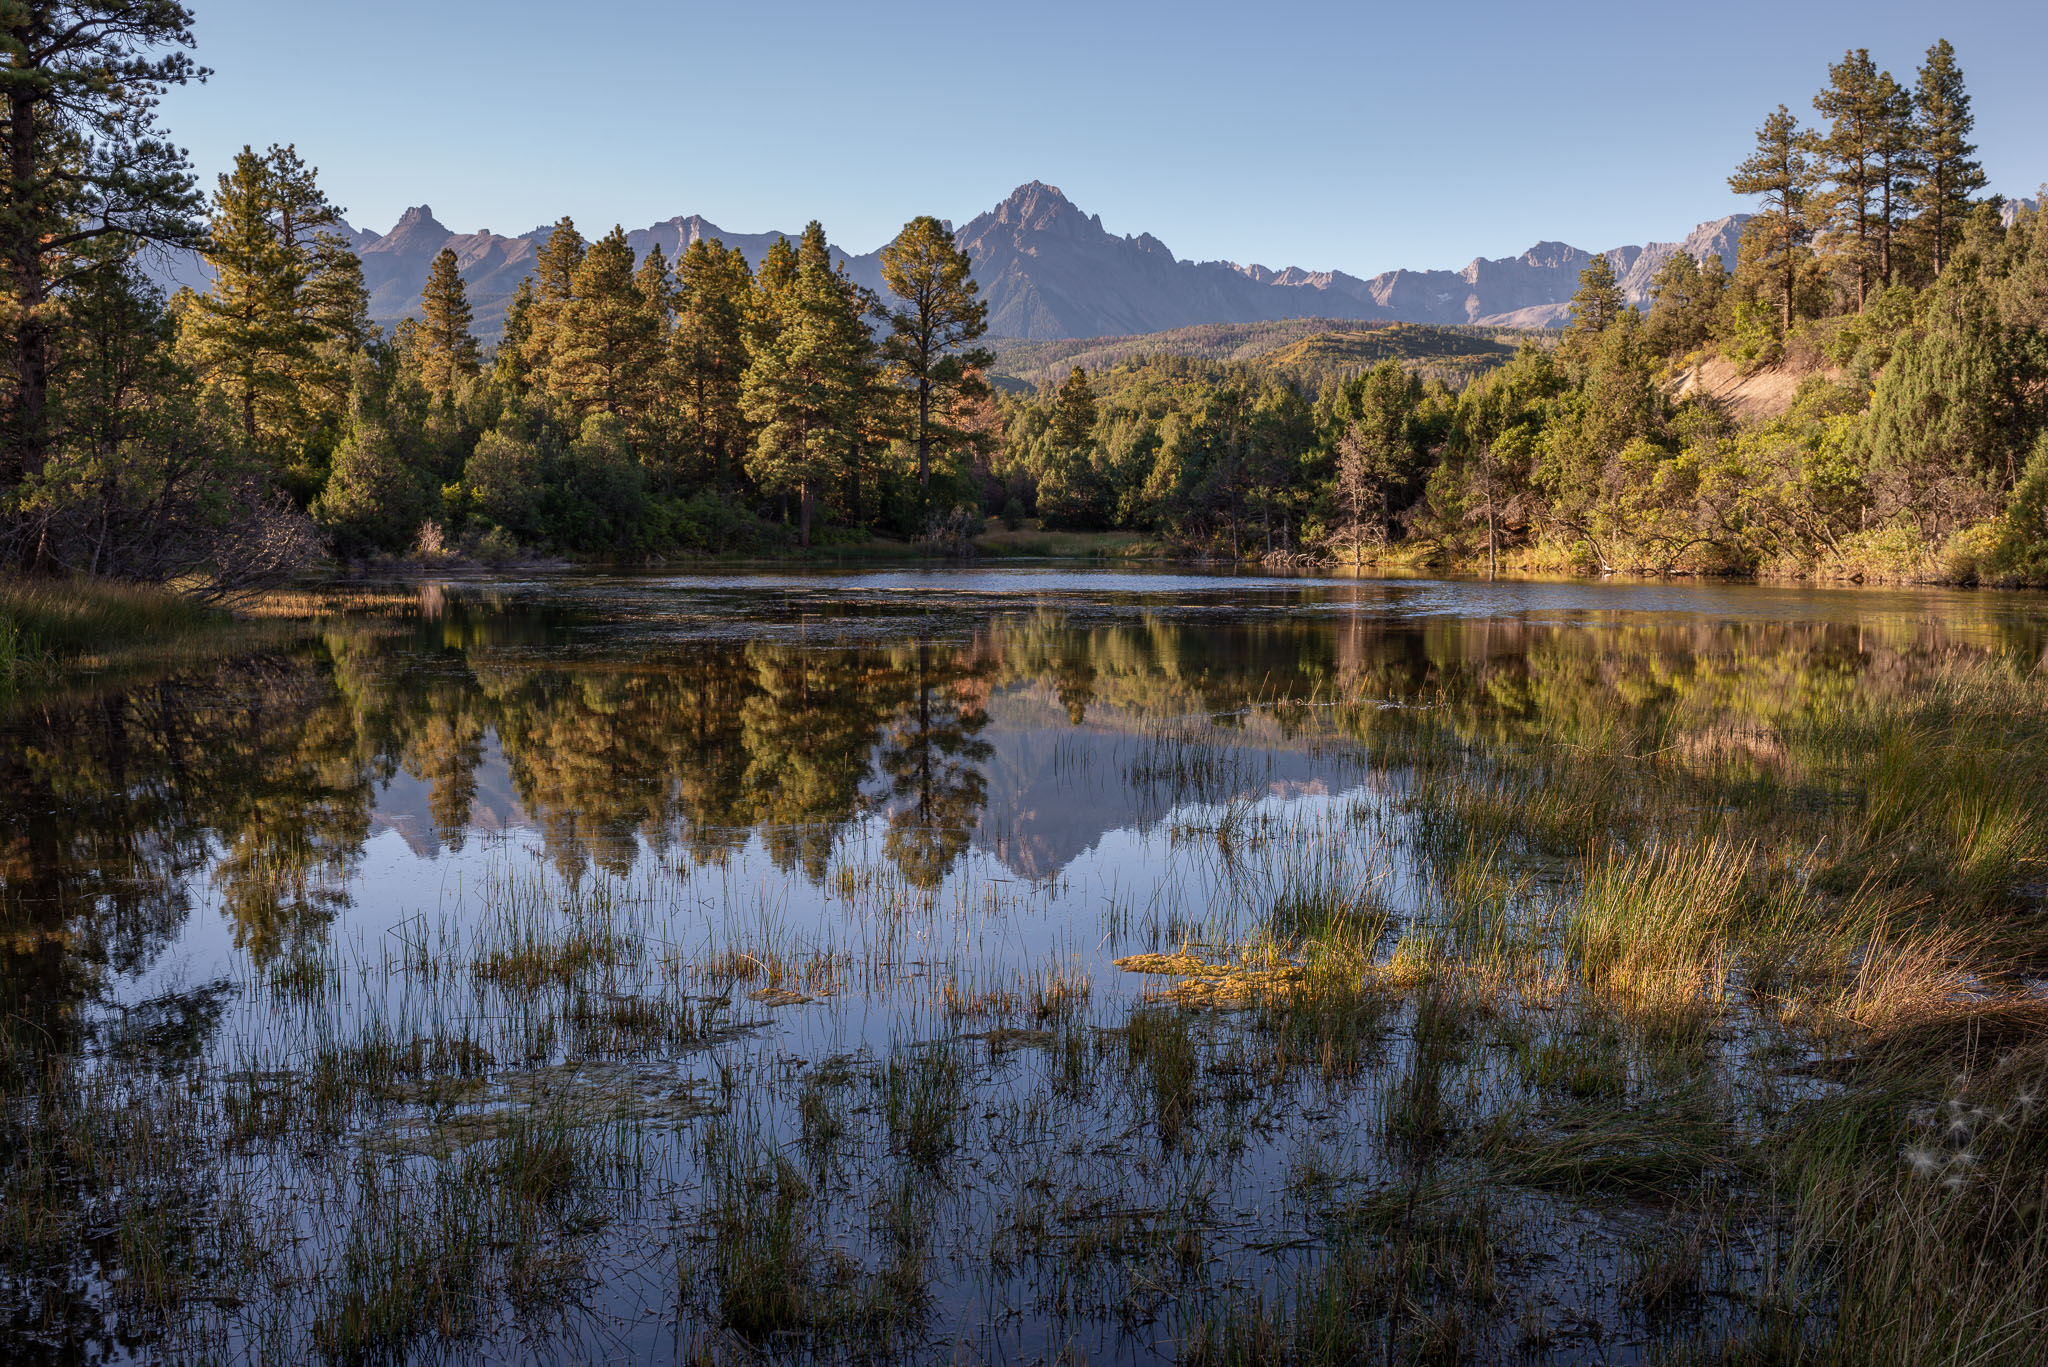
The following image is exposed to the right; in other words, it is captures as much light as possible without any overexposure:
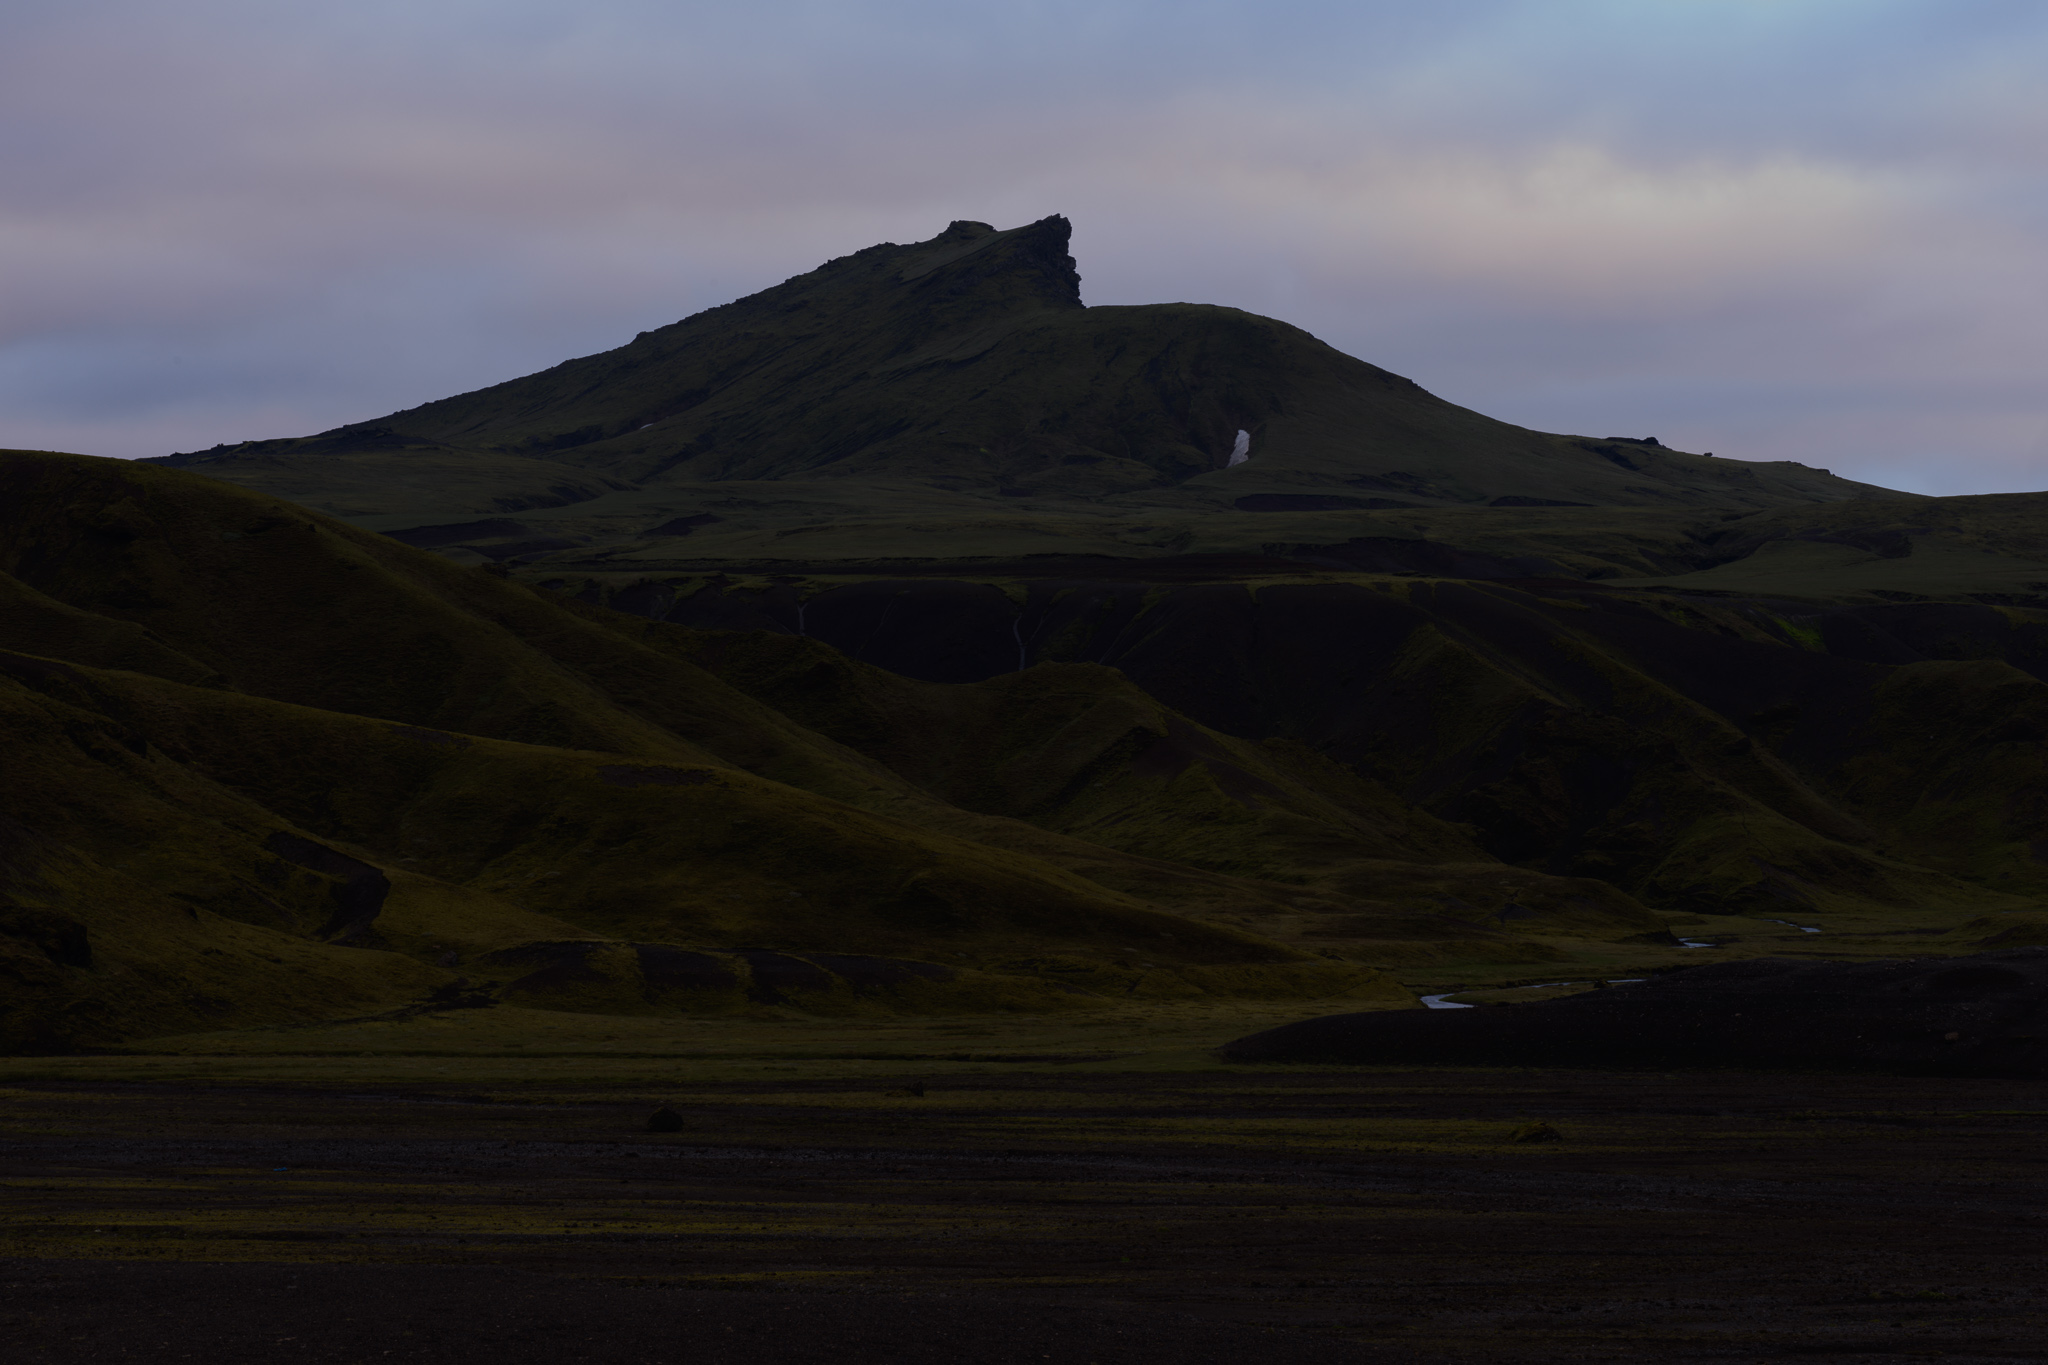
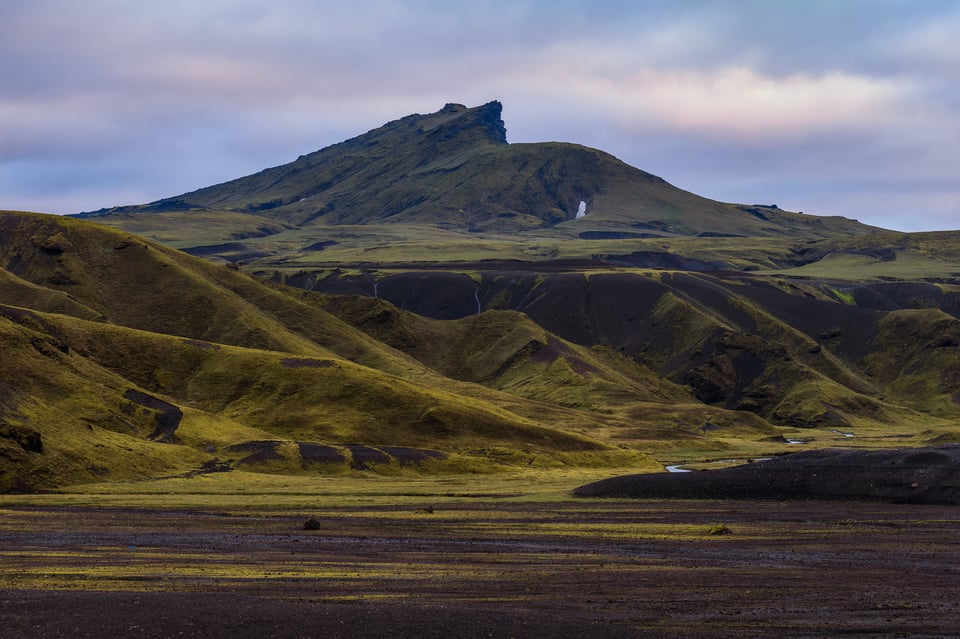
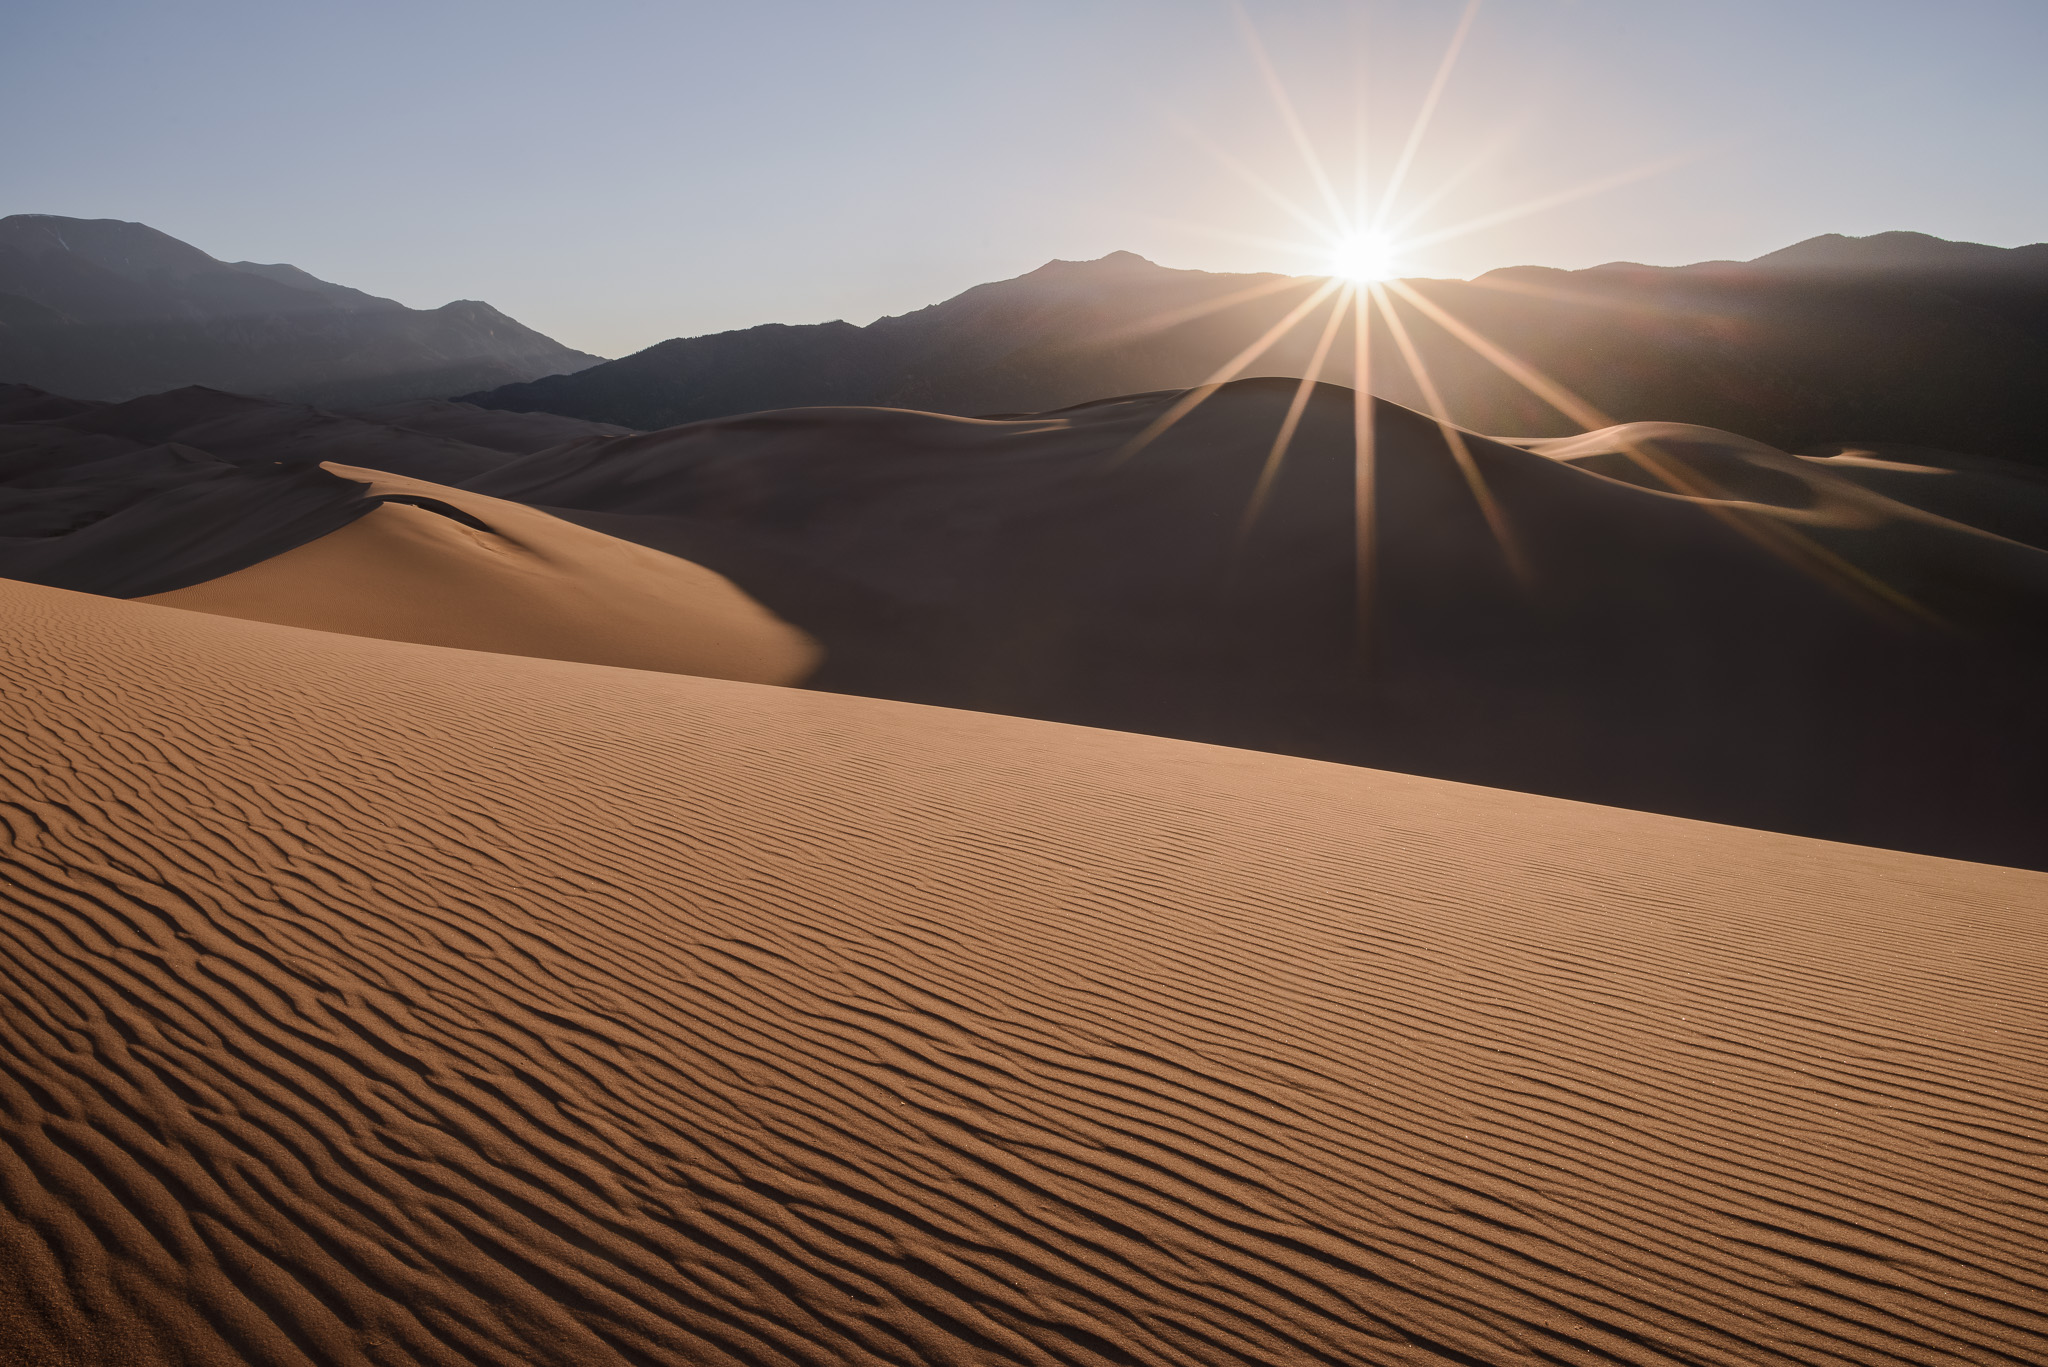
But so is this image, since it also is the brightest possible exposure that doesn’t blow out any important highlights (those clouds are just barely recoverable):
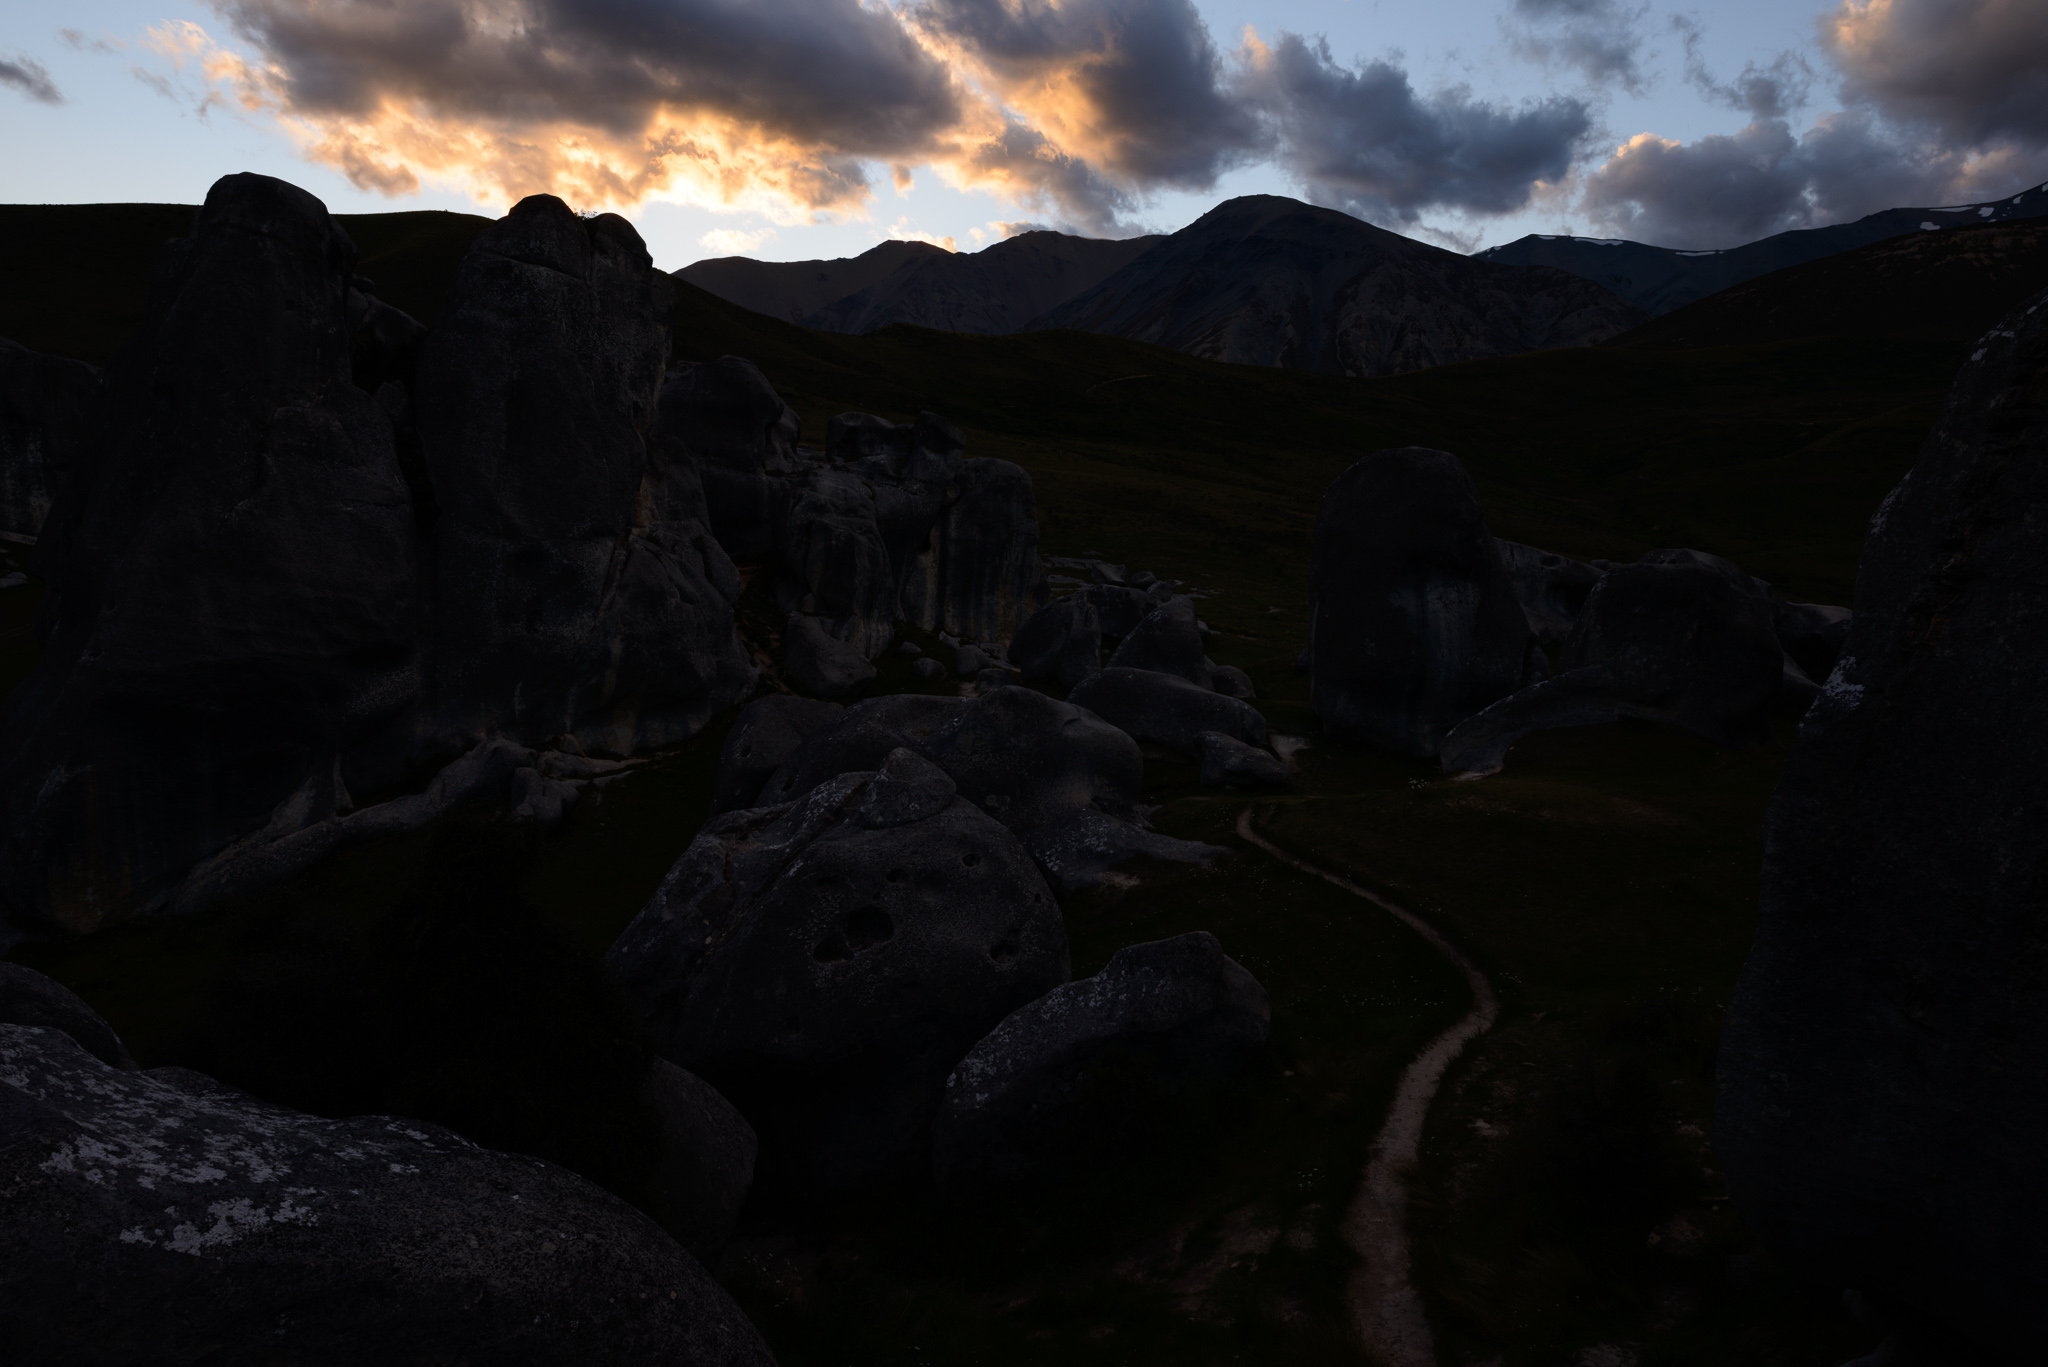
It’s critical to understand why both cases are proper ETTR if you want to understand optimal digital exposure – including how to implement the spot metering technique in this article. (If it’s still not clear why both samples above are ETTR, check out Nasim’s article on the myth of exposing to the left).
Issues with the Usual ETTR Technique
Exposing to the right may seem straightforward – you’re just capturing as much light as possible without blowing out any important details – but finding that balance in practice isn’t always easy.
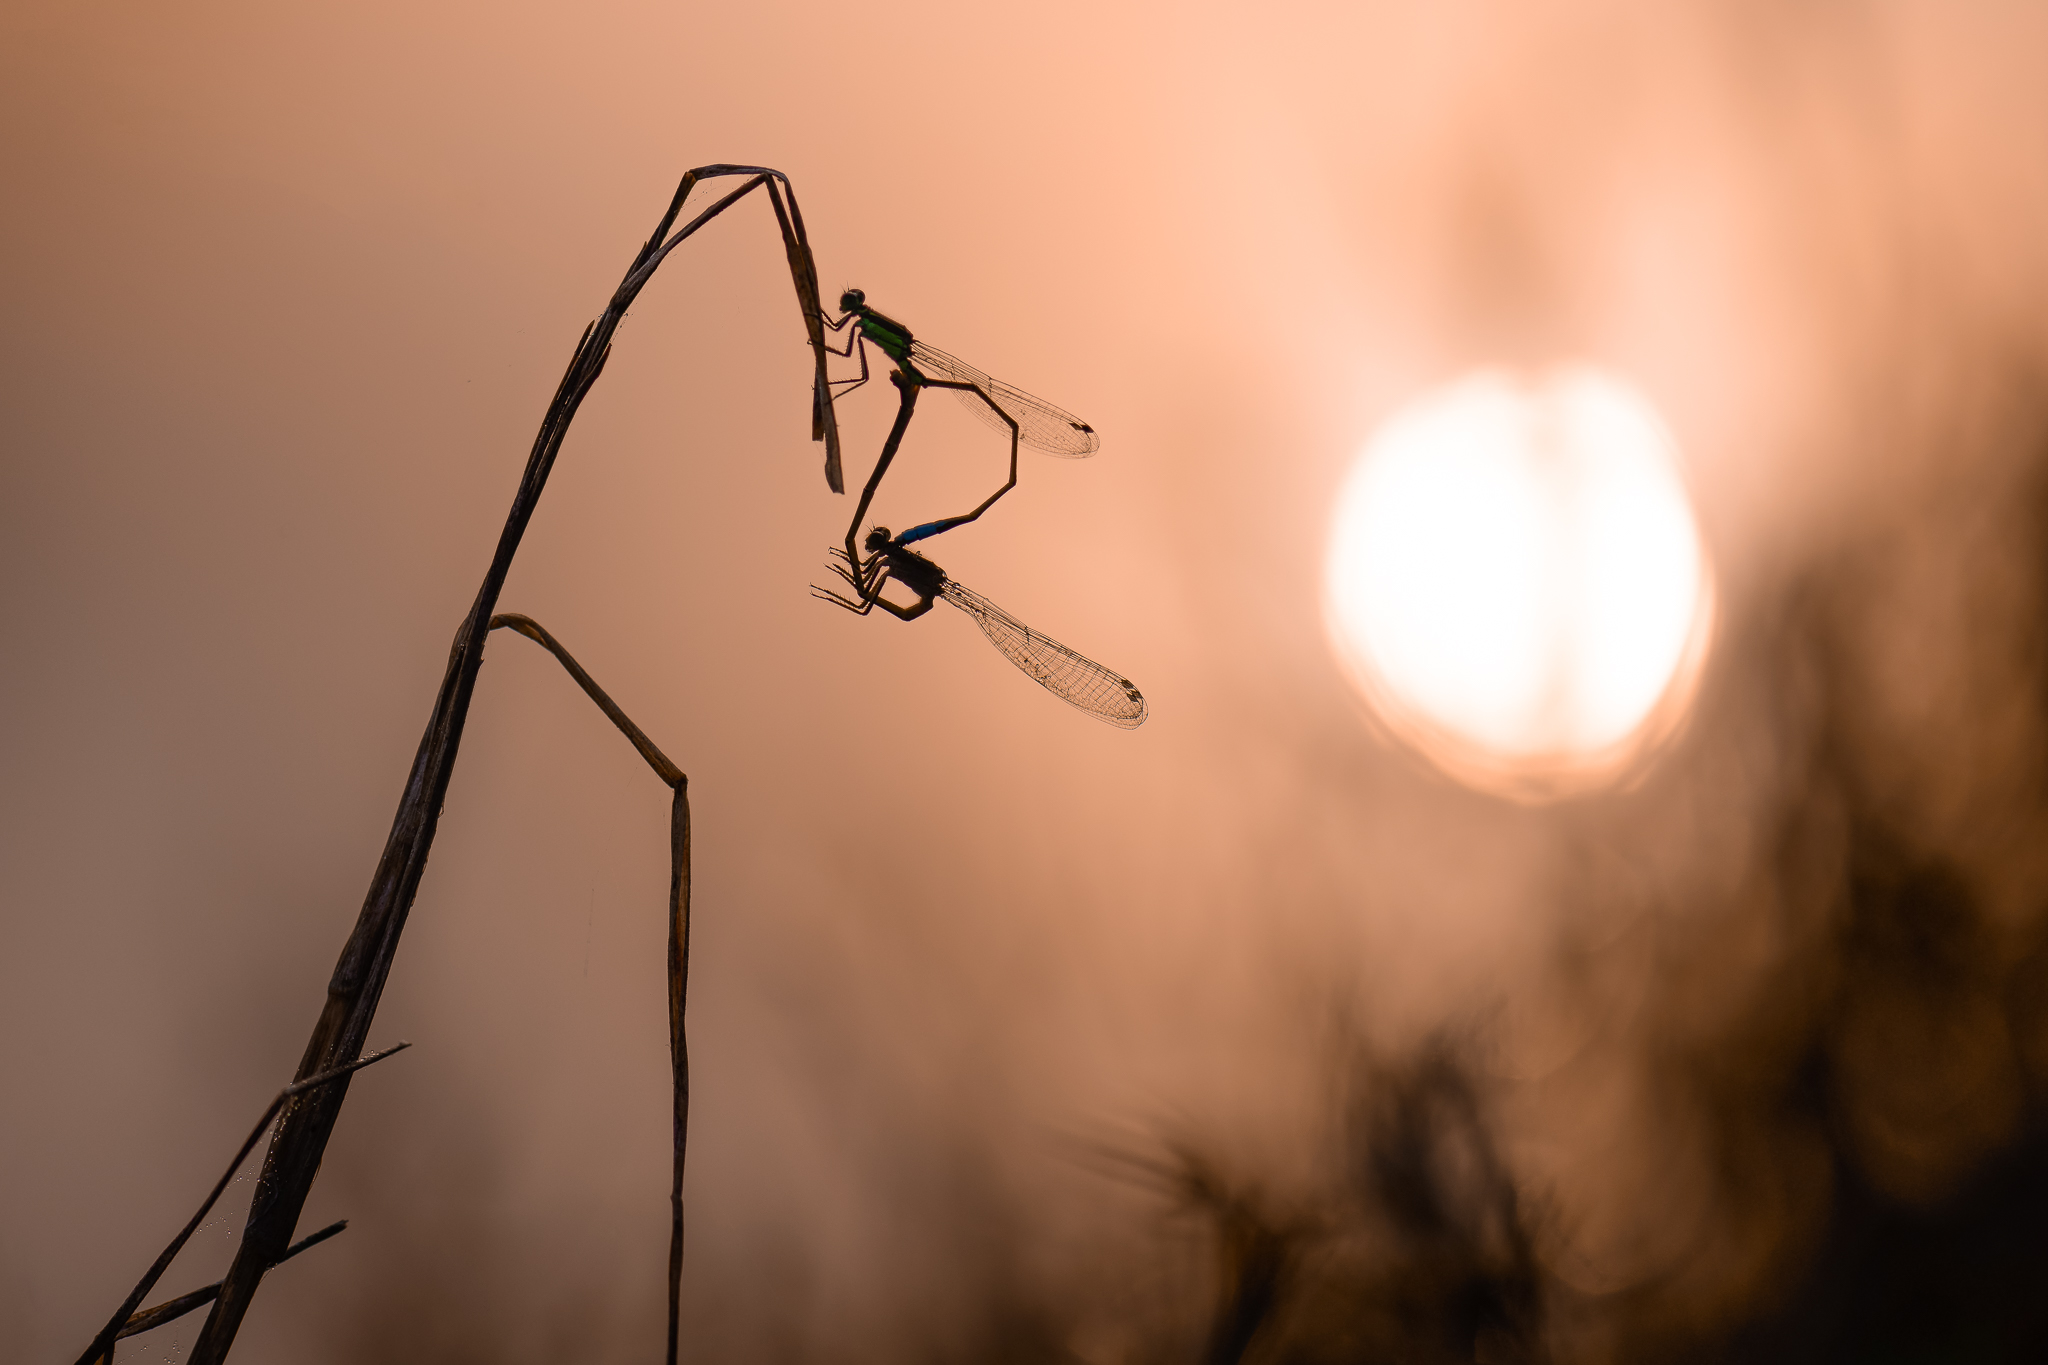
For example, if the sun is in your photo, it often will be blown out, with no detail in any of the color channels. That’s not a problem, though; what you’re really trying to avoid with ETTR is blowing out important highlight details. So long as you don’t mind if the sun is completely white in your photo, it’s not relevant to this discussion – except that it affects your histogram and makes the rest of your photo much more difficult to judge.
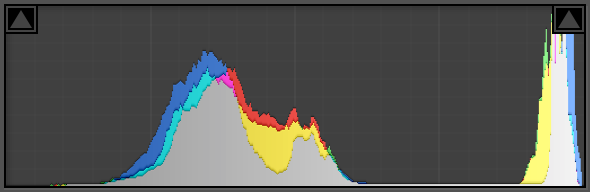
The following histogram may look overexposed, with a spike on the right edge:
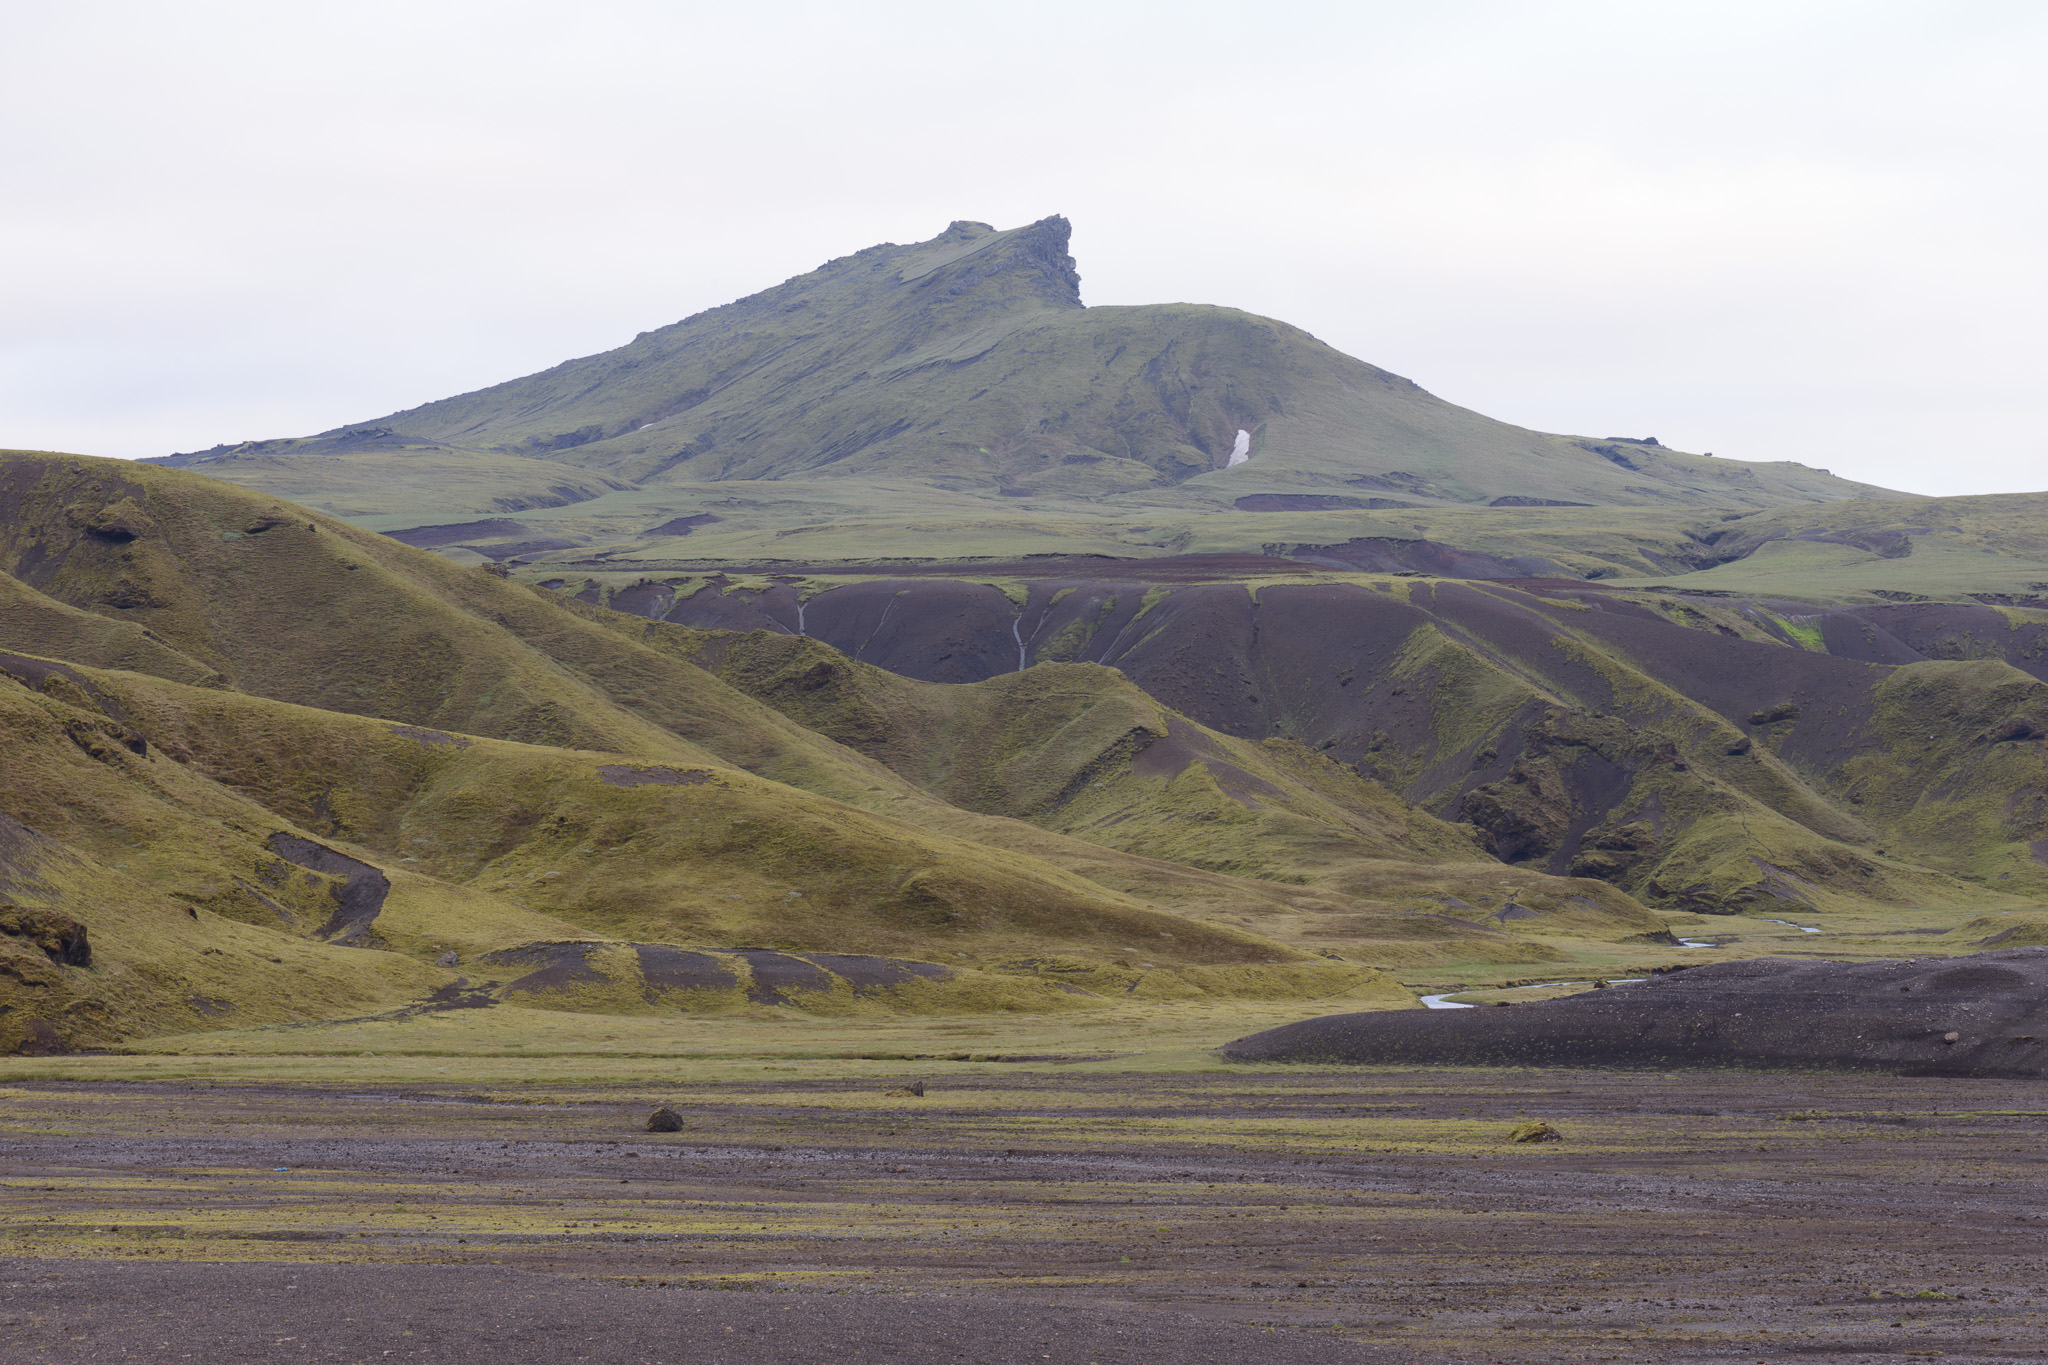
But it really isn’t, because that spike corresponds to the sun in this properly exposed image:
Since most photographers judge ETTR based on their camera’s histogram, this presents a bit of a problem. Your histogram may look overexposed, yet nothing important in the image is actually blown out.
That’s why a lot of photographers recommend looking at your in-camera “blinkies” as well – those little black/white flashing indicators to pinpoint where overexposure is occurring.
But these also are an imperfect solution. As you have probably realized if you use blinkies often, they’re generally too sensitive to what counts as “overexposure.” Often, bright areas are recoverable even when the blinkies say they’re blown out. Some recent cameras let you fine-tune the sensitivity level to be stricter, but many do not.
Finally, a big issue with both blinkies and histograms is that they depend on your JPEG picture control settings, even when you’re shooting RAW (which, of course, you should be doing). For example, as you use progressively higher contrast JPEG settings, your histogram and blinkies will show overexposure sooner and sooner – even though the underlying RAW photo isn’t changing.
You can get around this issue to some degree by setting ultra-low contrast and “flat” picture controls – but even then, unless you’re at a specific white balance setting (known as UniWB), the histogram still won’t match that of your RAW photo!
In the end, fully optimizing your in-camera histogram is not an easy process. It involves setting your JPEGs to have ultra-low contrast, as well as the maximally green “tint” value, leading to JPEG previews that look almost nothing like how your final image will appear. (Admittedly, you can mitigate this somewhat – and even potentially extend the dynamic range of your sensor – by using a CC30 or CC40 magenta filter on the front of your lens. But I suspect I could count the number of photographers who do this regularly on one hand.)
Instead – though it has issues of its own – the ETTR method I’m about to describe tends to be more precise than the usual histogram and blinkies methods, without the same JPEG preview compromises. Depending on your style of photography, you may find it preferable.
ETTR via Spot Metering
To implement my preferred ETTR technique, you first need to switch to spot metering. After that, you need to spot meter on the brightest part of your photo and add a significant amount of positive exposure compensation. The key is to figure out how much positive exposure compensation you can get away with, while still being able to recover all highlight details in post-processing. This depends on your particular camera’s sensor characteristics.
Here’s the exact process:
- Spot meter on the brightest part of your scene. It may take a few moments to figure out what that is (especially if there are a few different bright regions, and you’re not sure which is brightest), but you’ll get faster at this with practice.
- Since your camera is trying to place those highlights at middle gray, you need to expose several stops brighter than what the meter is telling you. The specific +EV value is something you can find pretty easily for your camera (I’ll show you how to do that in a moment), but something in the +2 to +3 EV range is about typical.
- Regardless of what +EV value it is, you’ll use the same one every time. Take the photo, and post-process as you normally would for an ETTR shot.
The benefit of this method is its consistency. Once you pin down how much highlight recovery your camera can do, you’ll be able to use this technique on a wide variety of scenes – from low to high contrast – and achieve an optimal exposure.
With my Nikon D800e, for example, I figured out that I consistently could recover highlight information when it was 2.7 stops above middle gray (i.e., +2 2/3 EV). So, my process with that camera was to spot meter on the brightest highlight in my photo and add 2.7 stops of exposure compensation (or boost my shutter speed 2.7 stops in manual mode). And that’s all there is to it! I think this technique is pretty easy in practice, even if it takes a moment to describe here.
Note, too, that this method does not require you to pick certain JPEG settings or a specific white balance in order to work properly. That’s because none of the JPEG picture controls alter how your camera’s meter works (aside from Active D-Lighting on Nikon cameras, which you should always turn off). That’s a nice benefit and allows you more flexibility in picking your JPEG preview settings.
Real-World Example Photo
Take a look at the sample below. The brightest region here is pretty clearly in the center of a cloud on the right-hand side:
With spot metering selected, I moved my focus point over the center of the cloud. (I did this in live view, which I typically use for landscape photography, but it works when shooting through the viewfinder as well.) The camera recommended an exposure that looked like this:
Of course, this is too dark, since the camera placed the brightest highlight in my image at middle gray. However, I knew from prior tests with my Nikon D800e that I could recover 2.7 stops of exposure beyond middle gray. So, I boosted my exposure +2.7 stops, and my out-of-camera RAW image looked like this:
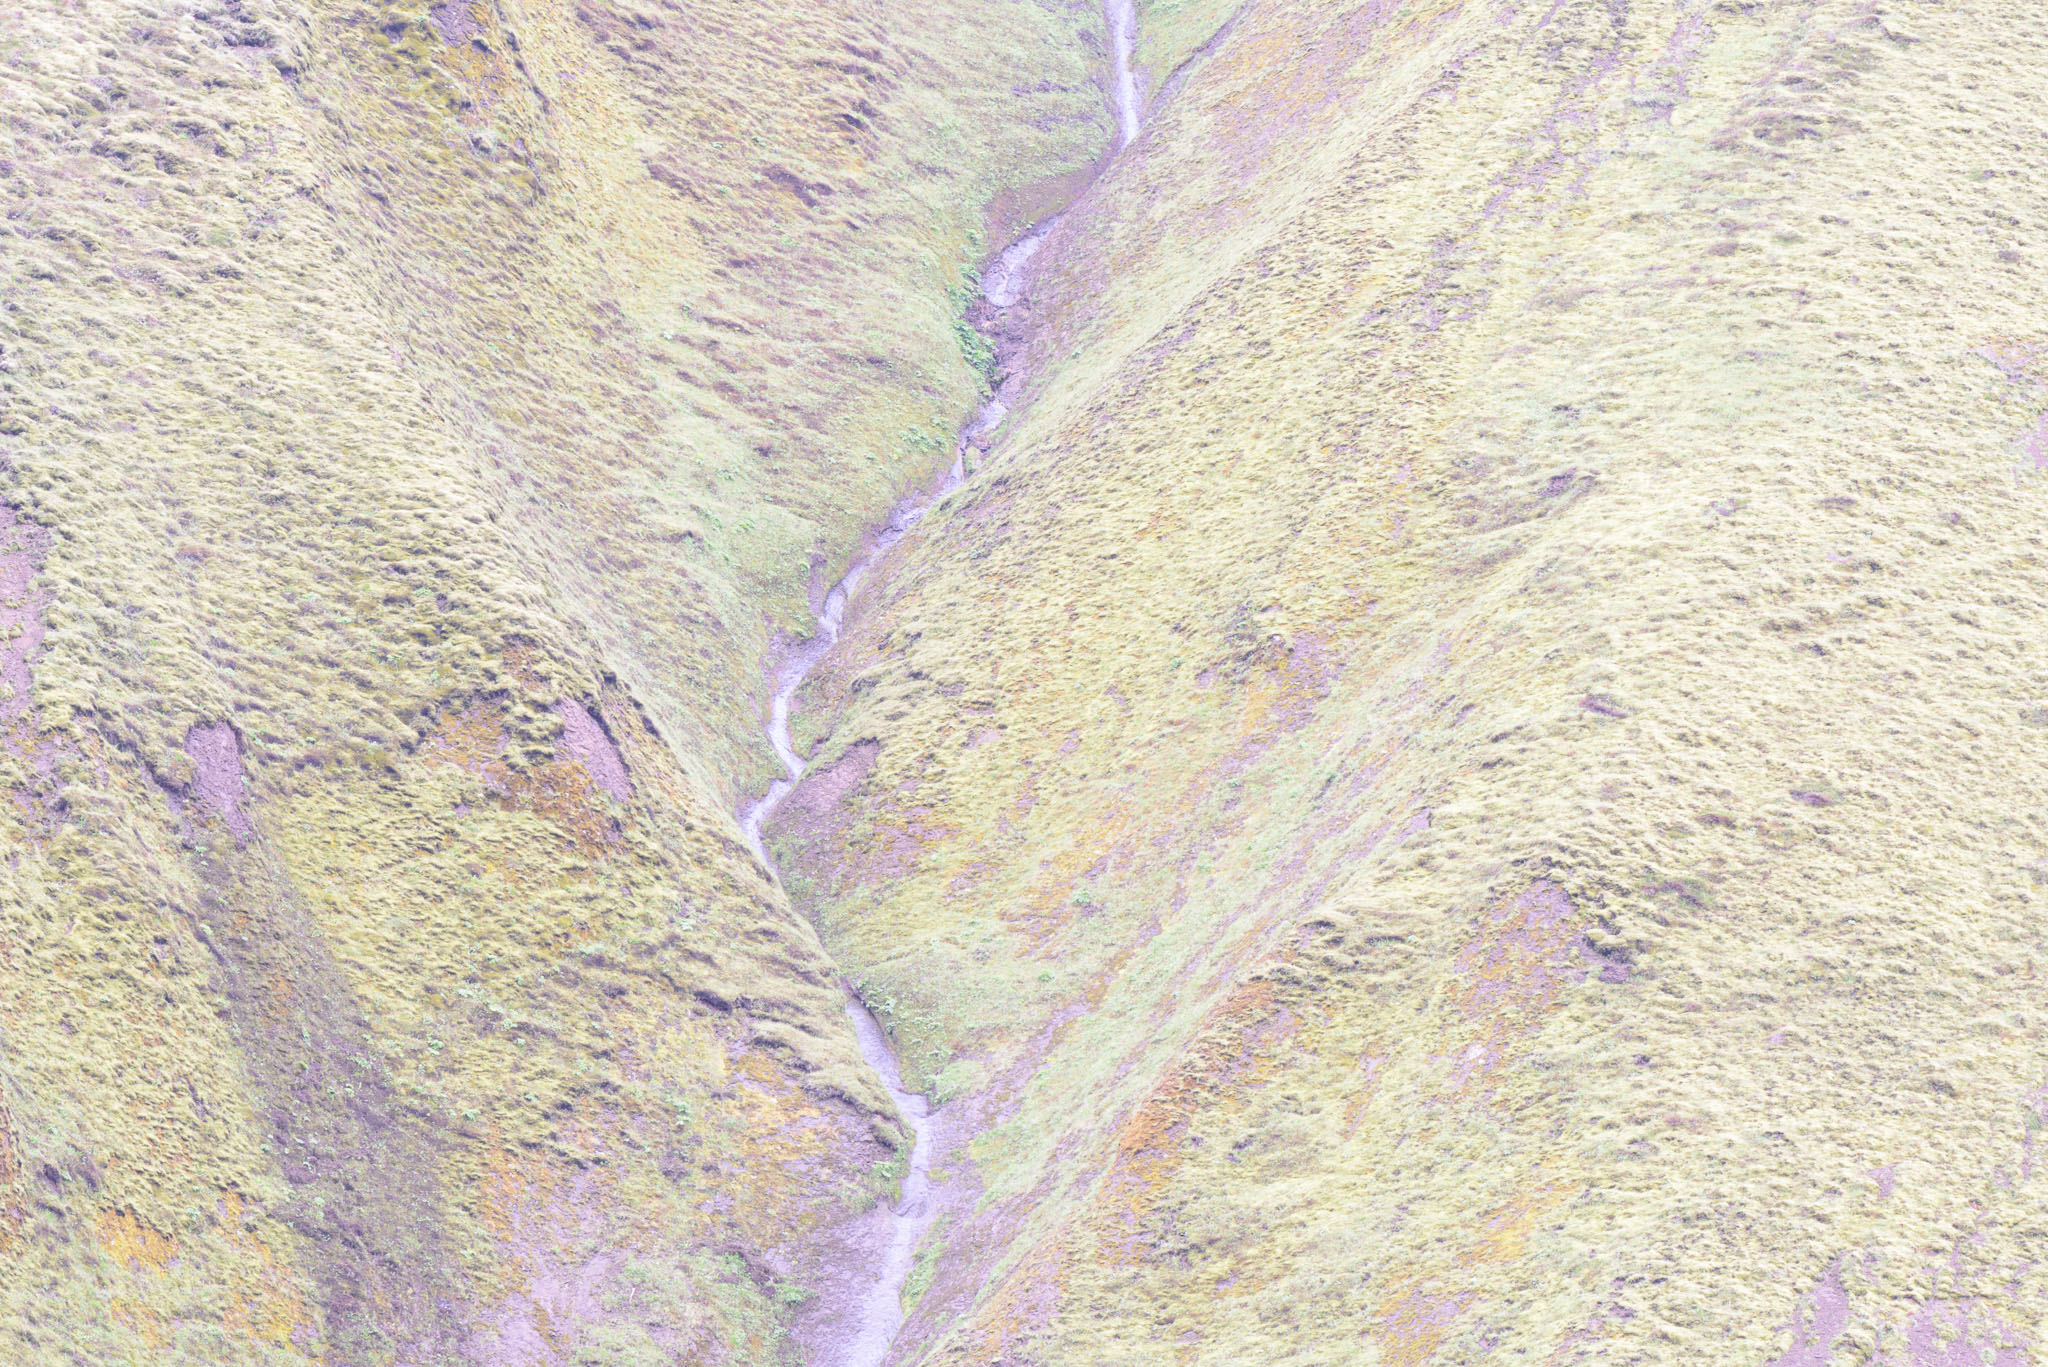
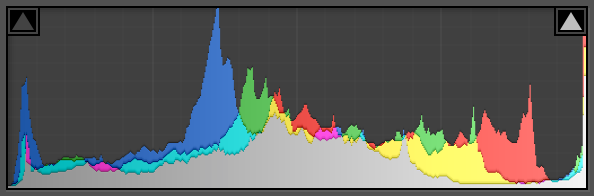
This is the proper ETTR exposure. Although it may seem overexposed at first glance, here is this photo’s RAW histogram:
As you can see, although the highlight detail is right next to the edge, none of it is actually touching. As a result, all the highlight details are recoverable in this image. When I decrease the “highlights” slider in Lightroom and do my usual post-processing, here’s how the final image appears:
Success! Not only is this image sharp, with high image quality in the traditional sense, but it also benefits in noise and dynamic range thanks to my optimal ETTR exposure. And none of the highlights are blown out, either.
Finding Your Camera’s Highlight Recovery Capability
The only missing point at the moment is to figure out the amount of highlight recovery you can expect on your camera. In the case of my D800e, it was 2.7 stops, but anything in the 2 to 4 stop range is worth testing just to see how it looks.
Testing for highlight recovery is fairly easy.
- Find or set up a scene with even lighting, where the brightest item has a modest amount of texture and some color – for example, a plant under diffused studio lights.
- Spot meter on the brightest part of your subject and take a reference photo at the camera’s recommended settings.
- Increase your exposure (by using a longer shutter speed) and take a series of photos from +2 EV to +4 EV brighter than the reference photo, in 1/3 increments, for a total of seven test images.
- Open the photos in your post-processing software, and try to recover them to match the reference photo.
- If the color shifts significantly or any highlights turn gray when you recover the image, that means it’s overexposed. (Though make sure your white balance setting is the uniform across the images.)
- The brightest photo which is not overexposed represents your highlight recovery range. In the case of my D800e, it was the image at +2.7 stops.
- Test out this +EV with different subjects – especially the types of subjects you commonly photograph – to make sure you get consistently recoverable results with this value.
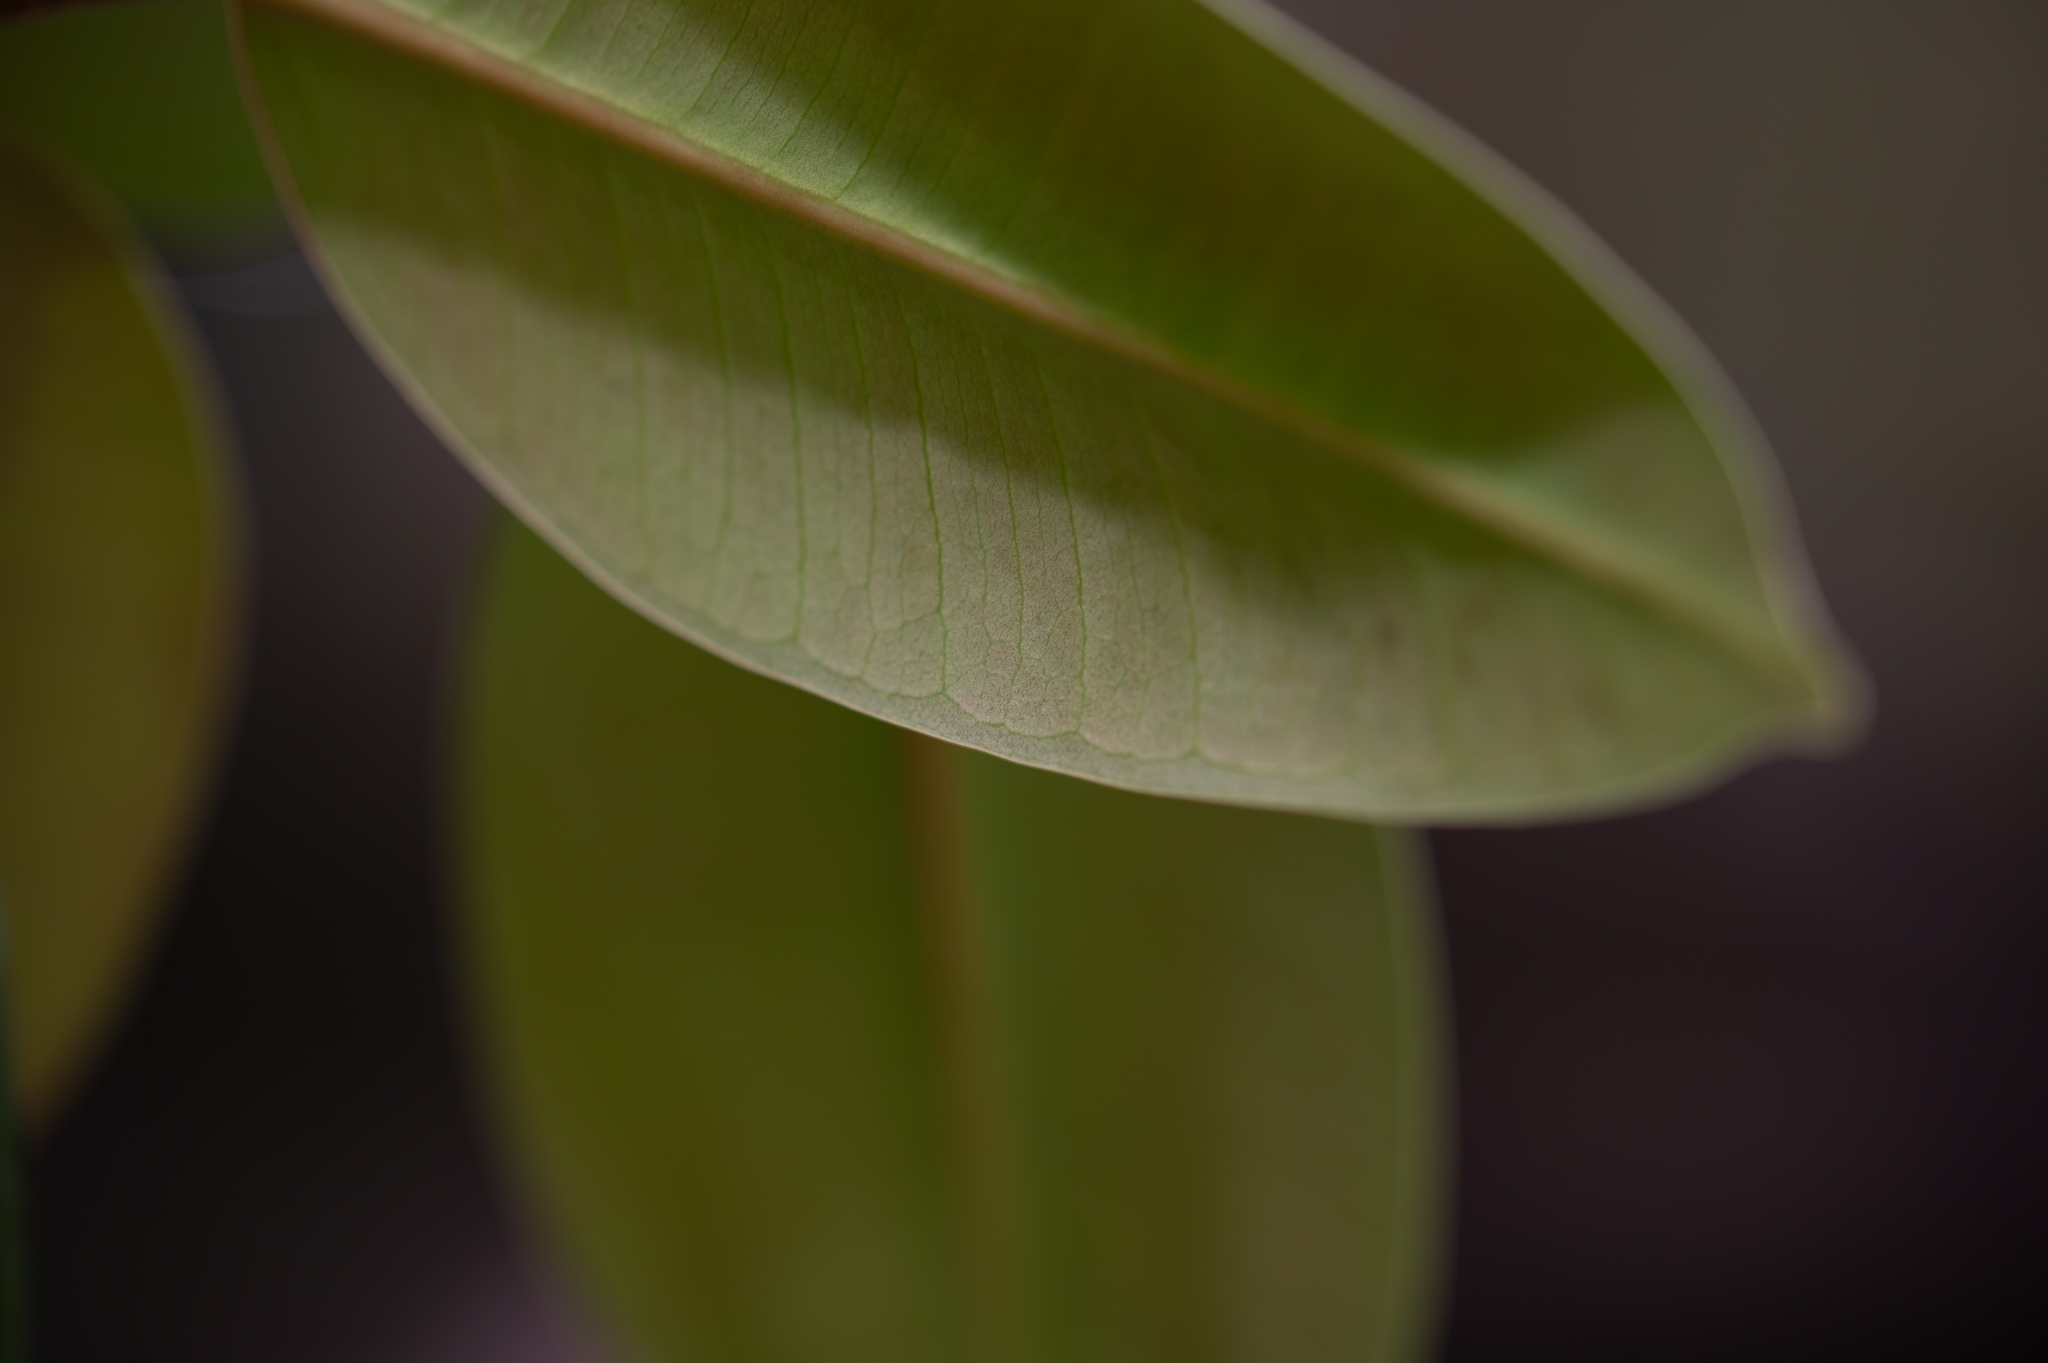
To make things even clearer, here’s the exact process with the Nikon D780. First, this is the reference photo of my scene. I metered in the center of the image on the brightest part of the leaf:
Then the seven test images:
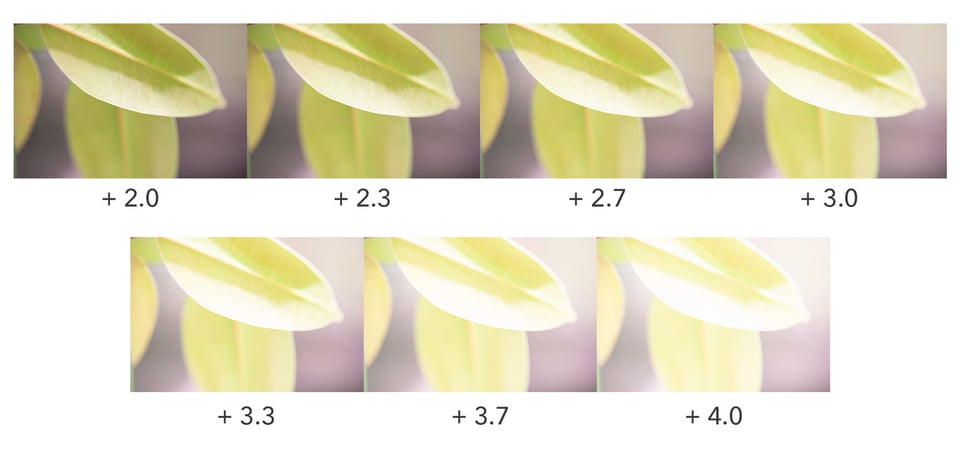
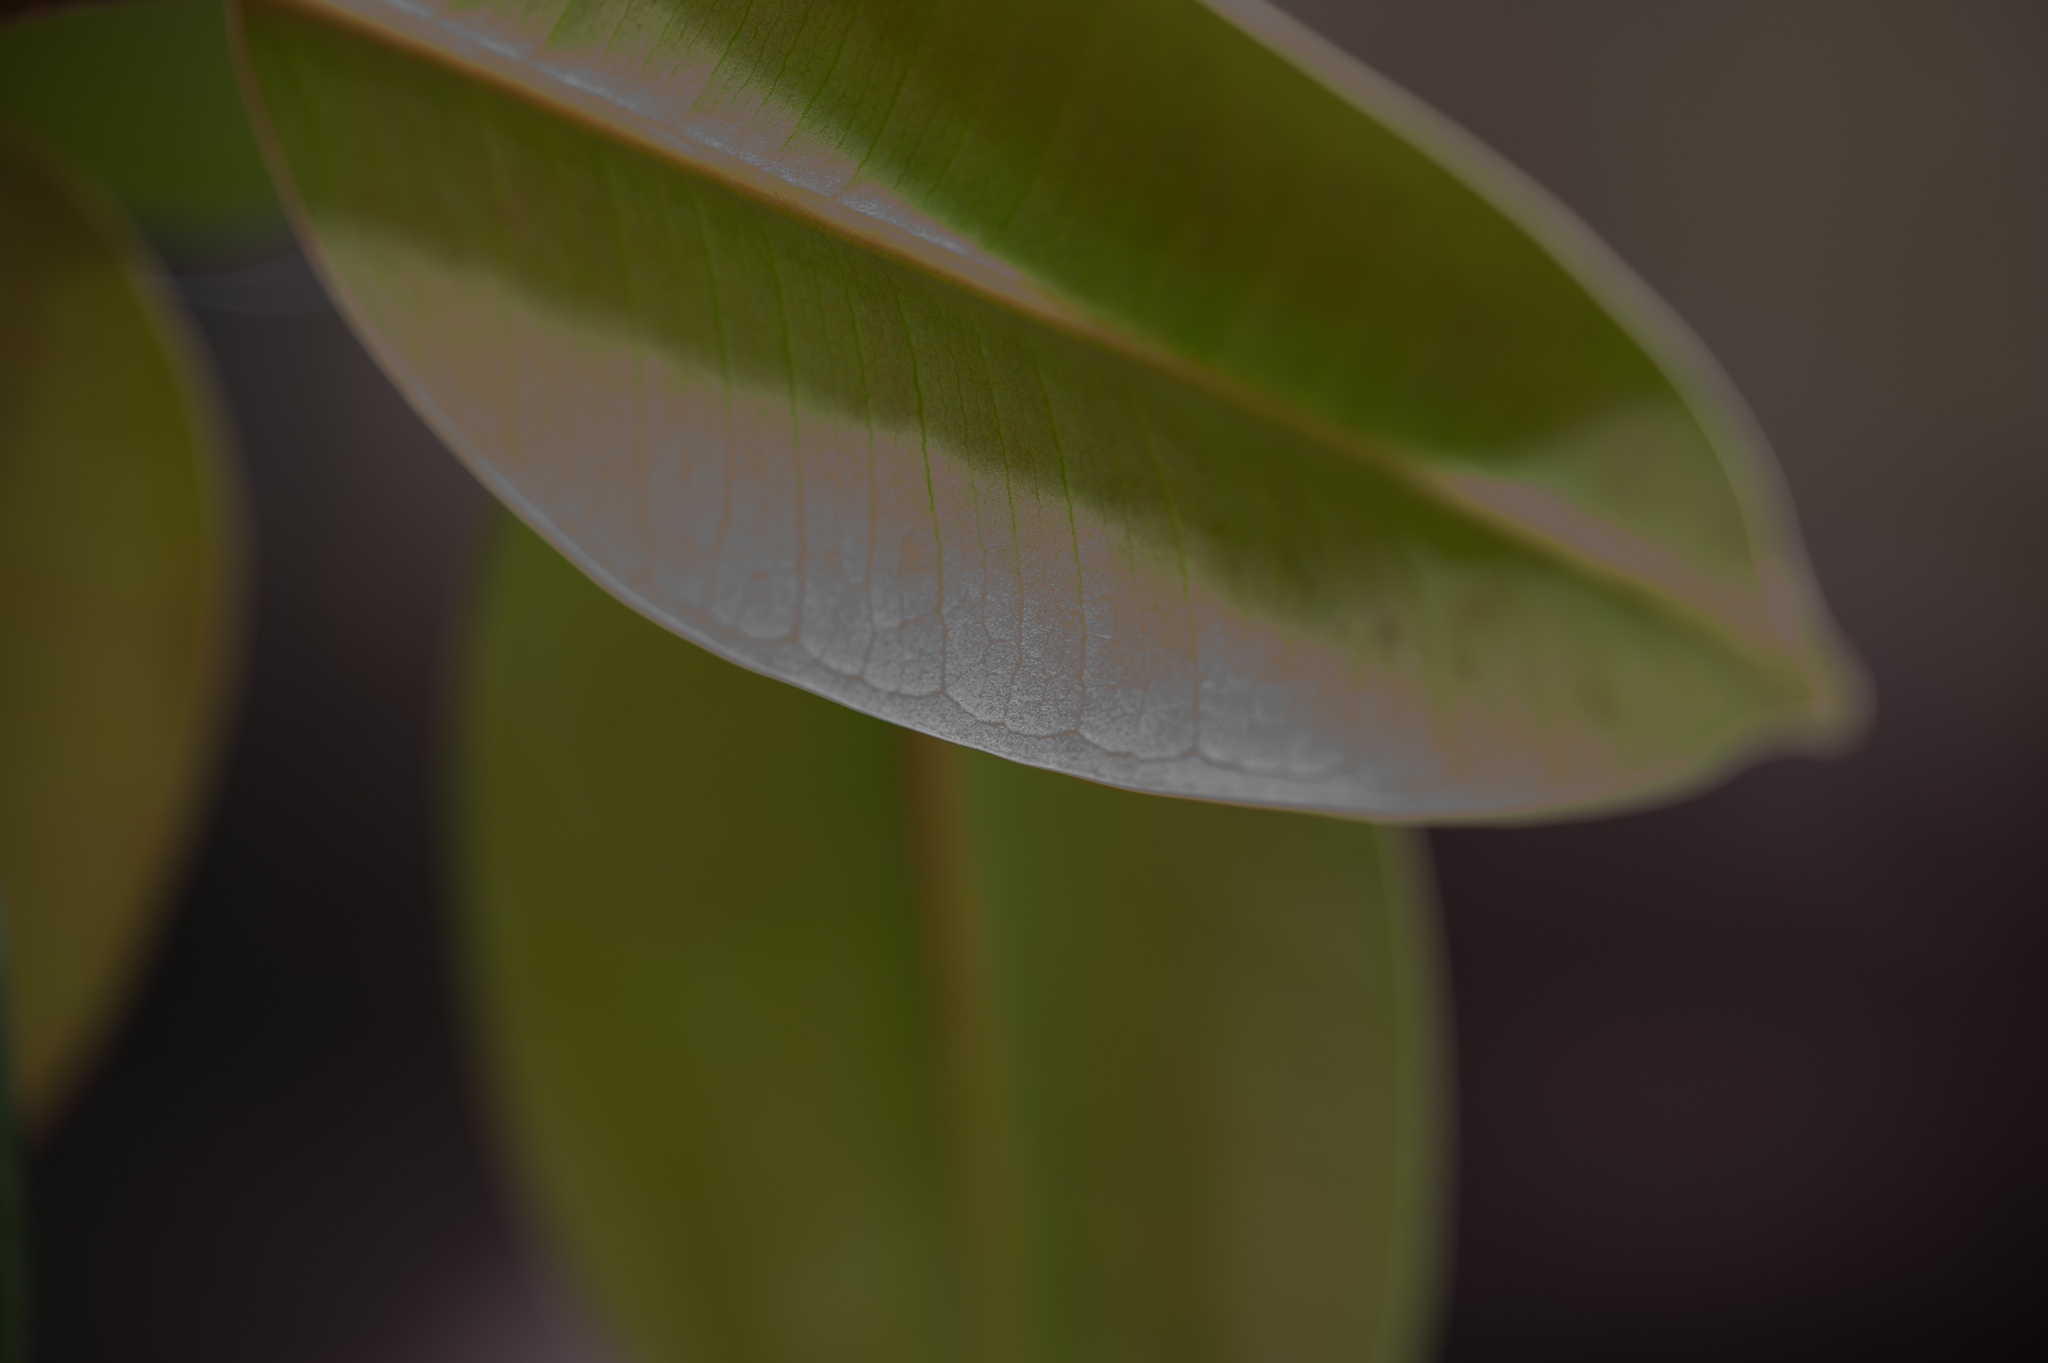
When I recovered those seven images, the first three looked perfect, and the fourth image (+3.0 EV) only had very slight regions of overexposure. The final three images looked quite bad, with significant areas of blown highlights. Here, for example, is the recovered image at +4 EV:
By comparison, here are extreme crops at +2.3, +2.7, and +3 EV (in that order from left to right):


To me, the first two images have proper colors and appear indistinguishable. As for the third image (the one at +3 EV), the overexposure is admittedly not huge, but it does exist. If you look closely at the edge of the leaf near the center of the image, you can probably tell that it is quite a bit duller than the previous two. You will probably find it easier to spot this difference if you click the images to see larger previews.
Since even a slight color shift is enough to disqualify the photo, the real-world highlight recovery range on the D780 is about the same as that of the D800e: 2.7 stops. If I had chosen a subject with practically no texture at all, like a ColorChecker Passport, I perhaps could have recovered the +3.0 or maybe even the +3.3 EV image. But this test is meant to give you a practical guide for real-world photography, so a leaf under gentle light is a better sample subject than a flat color swatch.
Thanks to this test, when I’m using the D780, I now know that I just need to spot meter on the brightest part of my frame, add +2.7 stops of exposure compensation, and take the photo. It’s a quick and easy way to expose to the right.
Drawbacks of This Method
As useful and easy-to-implement as this method can be, it isn’t perfect. One of the main issues is that it simply adds some more time to the process of photography. That’s especially true because it isn’t always immediately obvious which part of your photo is the brightest, and figuring out the answer (by scanning your spot meter across the frame) can take some time in the field. So, I really only recommend this method if you’re shooting a nonmoving subject from a tripod, such as landscape or architecture photography.
On top of that, the camera’s implementation of spot metering itself can cause some problems. Specifically, spot metering doesn’t measure an infinitesimally small point; instead, it averages readings from a relatively small box, about the size of a focusing point. If your subject has very strong textures, such as grains of sand up close, this average reading may not actually be close to the brightest highlights in your photo. So, you could end up overexposing by accident. (The same is true if the brightest element is smaller in size than your spot metering point, like a thin outline around a backlit subject.)
That’s why this method isn’t always ideal, and should be combined with the histogram/blinkies method in difficult cases. Still, for common situations – especially landscape photography with a bright sky – I’ve found it easier to get consistent ETTR exposures with this method than any other technique.
When in doubt, too, you can always darken the photo slightly and go with a safer value for your exposure compensation – say, +2.3 stops rather than +2.7.

NIKON D800E + 105mm f/2.8 @ 105mm, ISO 100, 1/40, f/11.0
NIKON D800E + 35mm f/1.8 @ 35mm, ISO 100, 1/25, f/11.0
NIKON D800E + 20mm f/1.8 @ 20mm, ISO 100, 1/25, f/16.0
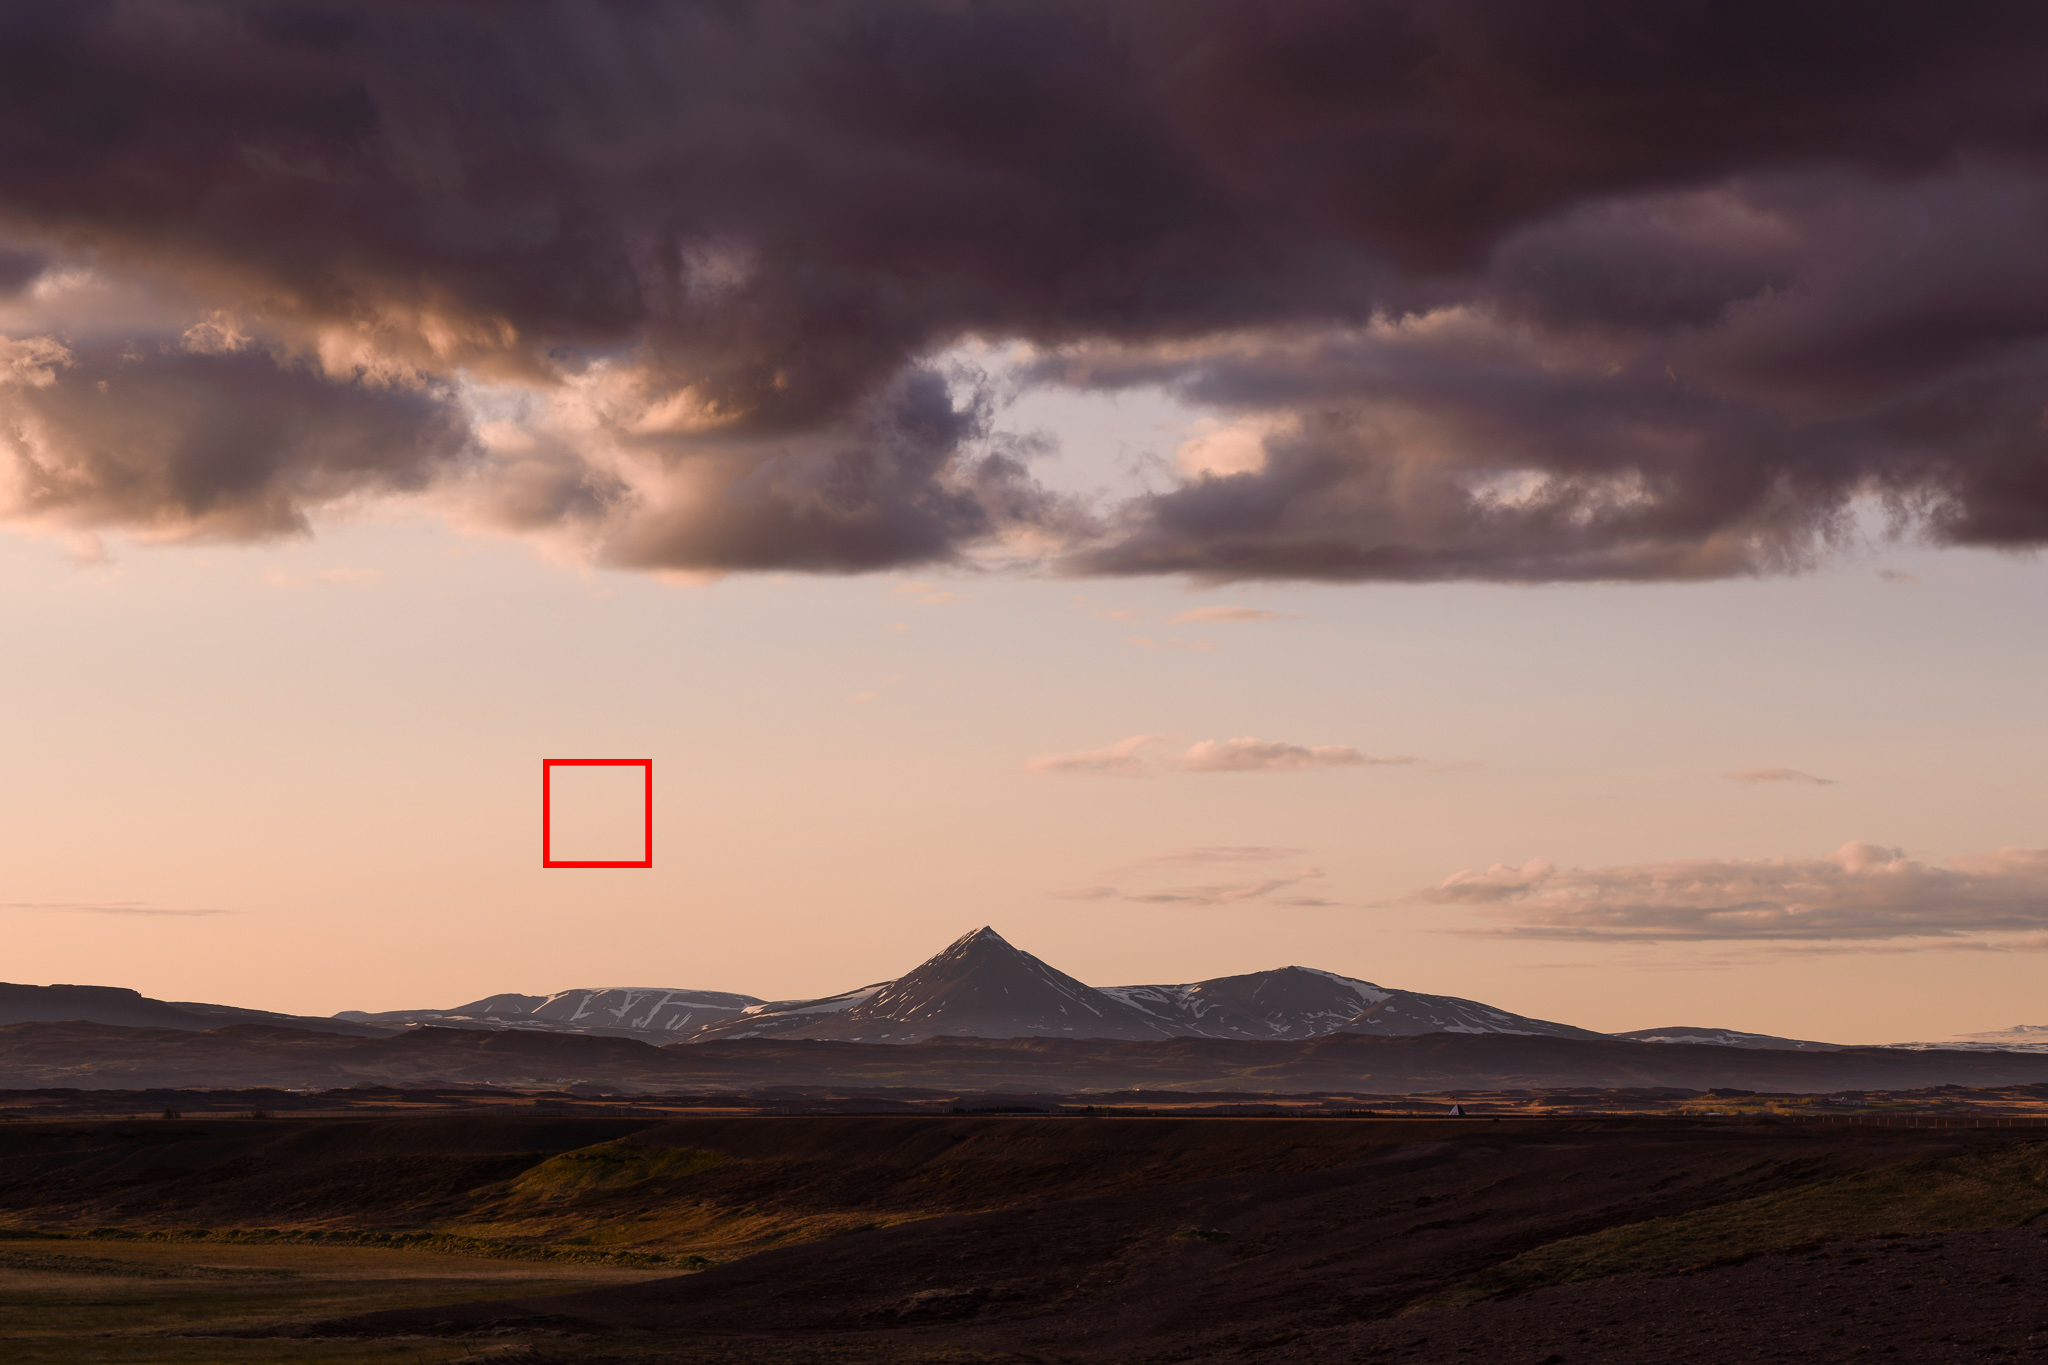
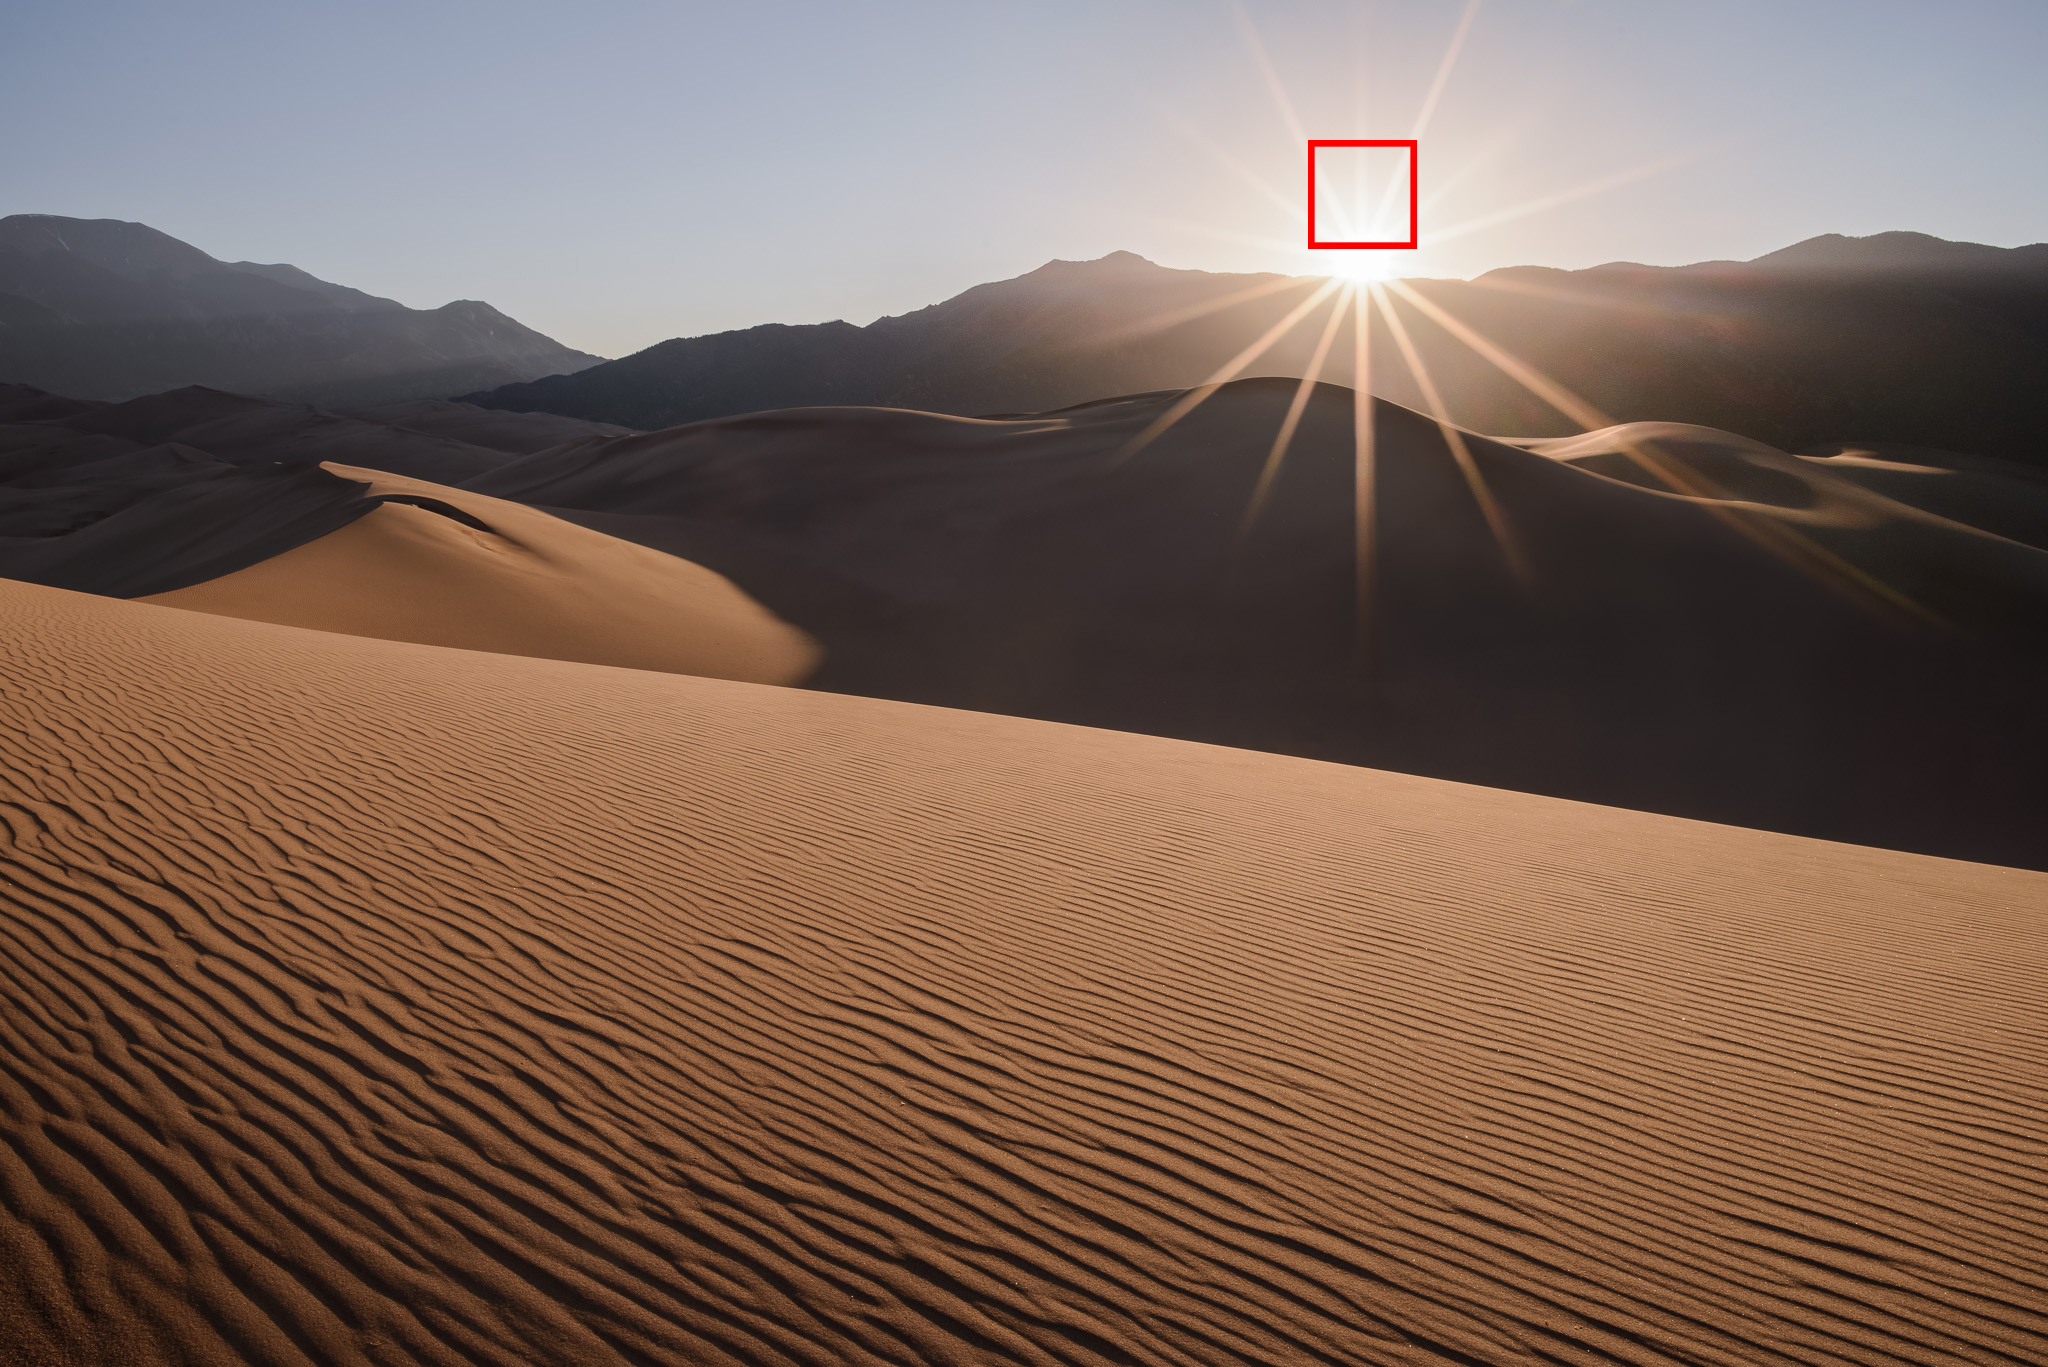
In response to a comment to this article, here are the same three images with a red box to indicate where I spot metered:

Conclusion
If you’ve found it difficult to achieve consistent results with ETTR, perhaps this spot metering technique will help you out.
Personally, this is my current go-to method of ETTR for landscape photography, and I now only use the histogram/blinkies as supplementary guides for more difficult exposures. The spot-metering method of ETTR is more precise and accurate than trying to gauge the histogram/blinkies, at least for most subjects. It also means you don’t have to worry about using an ultra-flat Picture Control style or UniWB, so the preview on your camera now can look more like the final image.
That’s not to say this is the perfect method, nor is it right for everyone. Even if it is useful for you, keep in mind that ETTR in general is pretty far down the list of things you should worry about as a photographer, and this technique is even more esoteric than regular ETTR. It definitely plays second-fiddle (or third, or fourth, etc.) to things like light, subject, and composition.
But for those of you who are trying to get every bit of image quality out of your camera, hopefully you found this essay to be useful and informative! If you have any questions, please let me know below.
Thanks for sharing this technique! Do you use AE-lock after picking the brightest spot?
Not a fan of ETTR. Not real keen on using the highlight slider in LR for deep correction of highlights either.
While both can render an acceptable image, both have issues. ETTR for example may keep the edges of your luminance intact, but it desaturates the image coloration with the extra brightness. Sure, you can re-sat your image, but you’ve lost the original color saturation and it (sat) then becomes another LR/PS chore.
The highlight slider in LR has a range that covers beyond the brightest of highlights. When you use it globally you also reduce the range of highlight throughout your image that give it life. You could could use the slider locally with the brush tool, for instance, but there are better ways to keep the tonality and saturation within normal boundaries.
Do the test that the OP suggests, but look at where your images begin to clip, not how deeply you can stretch into the DR of the camera. The clipping point is where you’d want to start heading for the highlight/shadow sliders. Then, while out shooting, take two images of your subject, one within the clipping point of the highlights and one within the clipping point for the shadows. From LR, load the images into PS as “layers” and use either “Blend If” or luminosity masking to blend the images. Now, you have a well exposed image that contains all of the natural saturation and the best representation of tonality that your working bit-depth can represent.
There are tools that make this easier. A light meter with spot metering capability and a color calibration tool. I use a Sekonic L-858 which holds a profile for my camera and visually shows me where the clipping point for my particular cameras highlights and shadows are. I can visually see if the tonality in my scene requires one shot or two. If two, I can see the exposures that I need to take each shot. There are several color calibration tools available, but I use the X-Rite ColorChecker. I’m not affiliated with either company, and as mentioned above, applying the OP’s method to finding your clipping point rather than DR will work as well.
I primarily use a Nikon D750 with either the Nikkor 16-35 or 24-120 lenses for landscapes. I’ve always resorted to using the “blinkies” approach to ETTR, and I worried that I was underexposing most of my images. What I’ve discovered with my D750 is that my best ETTR exposures are usually to the left of dead centre on the in-camera slider. Because I have a relatively large memory card, I often make as many as a half dozen exposures of a single scene to make sure I’ve got the right exposure. In the end my ETTR method should probably be called ETTL as little as possible. This seems to work for me in most situations, but it requires an intimate familiarity with how your particular camera works. When I use my D7500, I’ve found that I need to move a little more to the right to get the same result as the D750.
@Spencer: Thank you for your very interesting and easy to understand articles!
@Stephen Green: Sure there is a way of spot-metering with Canon cameras while your camera is fixed on a tripod. Get in live-view mode and choose matrix(!) metering. Select the point you need and then press the auto exposure lock. After that you can set your focus and take your shot. The EV won’t change.
This works well with my Canon Rebel T4i.
I appreciate this. I will try to remember to try this next time I’m out doing landscape photography, because I can’t imagine I’ll be able to do this on the fly with any other photography I do. Neat idea and I’m curious to test it out with my Z6 and D850.
Spot metering was normal in film photography especially for Kodachrome and then Velvia. Much is made of ETTR but I am not a fan now that we have such good sensors that are pretty much ISO invariant. The trouble with faffing about with manual exposure is remembering to reset. In my experience ever since the F3 Nikon has started to nail exposure. With transparency film you exposed for the highlights or the most important tone. With any recent digital camera it is the same except that we can recover vastly more from the shadows.
I must try if it is possible to use a preset mode for this on one of the “Ux” positions of the dial: Flat profile, and the predetermined camera’s tolerance dialed in as fixed exposure compensation (+2.7), and spot mode. This should save a few steps and help not to make errors. Of course when in doubt, bracket from there…
Thank you Spencer for an another fantastic article. And thank you to both you and Nasim for the supportive atmosphere of PL.
Hello
Many thanks for sharing this very helpful knowledge. On Spot Metering though – do you think it works excellent in cool early morning temperatures, but as the temperature gradually rises and the rising heat waves start interfering and the accuracy of spot meter gets impacted …?
Another very informative and well-written article Spencer, thanks !
I was wondering whether the max +EV value that allows to recover highlights depends on the ISO setting you’re using?