People often ask me about my post-processing when they look over my photography. To be honest, the post-process I’ve developed has been a combination of small tutorials I’ve taken over the years from artists I respect. I’ve since developed my own style from these tools, but the most important part of post-processing is having an image that will take it on well. In this article, I will be talking less about the post-process and more about how to utilize natural light. In order for proper digital development, the shot has to be versatile for the final result.
Do you want something dark and soft? Do you want something bright and warm? These are just a few questions to ask yourself when setting up a portrait session.
The greatest joy for me, as a photographer, is utilizing light to produce a moving image. This can come in any number of forms, from the smallest single strand of light against a face or a subject in a field mid-afternoon. It’s imperative to train the eye to the spectrum of natural light. The only way to do so is to shoot constantly.
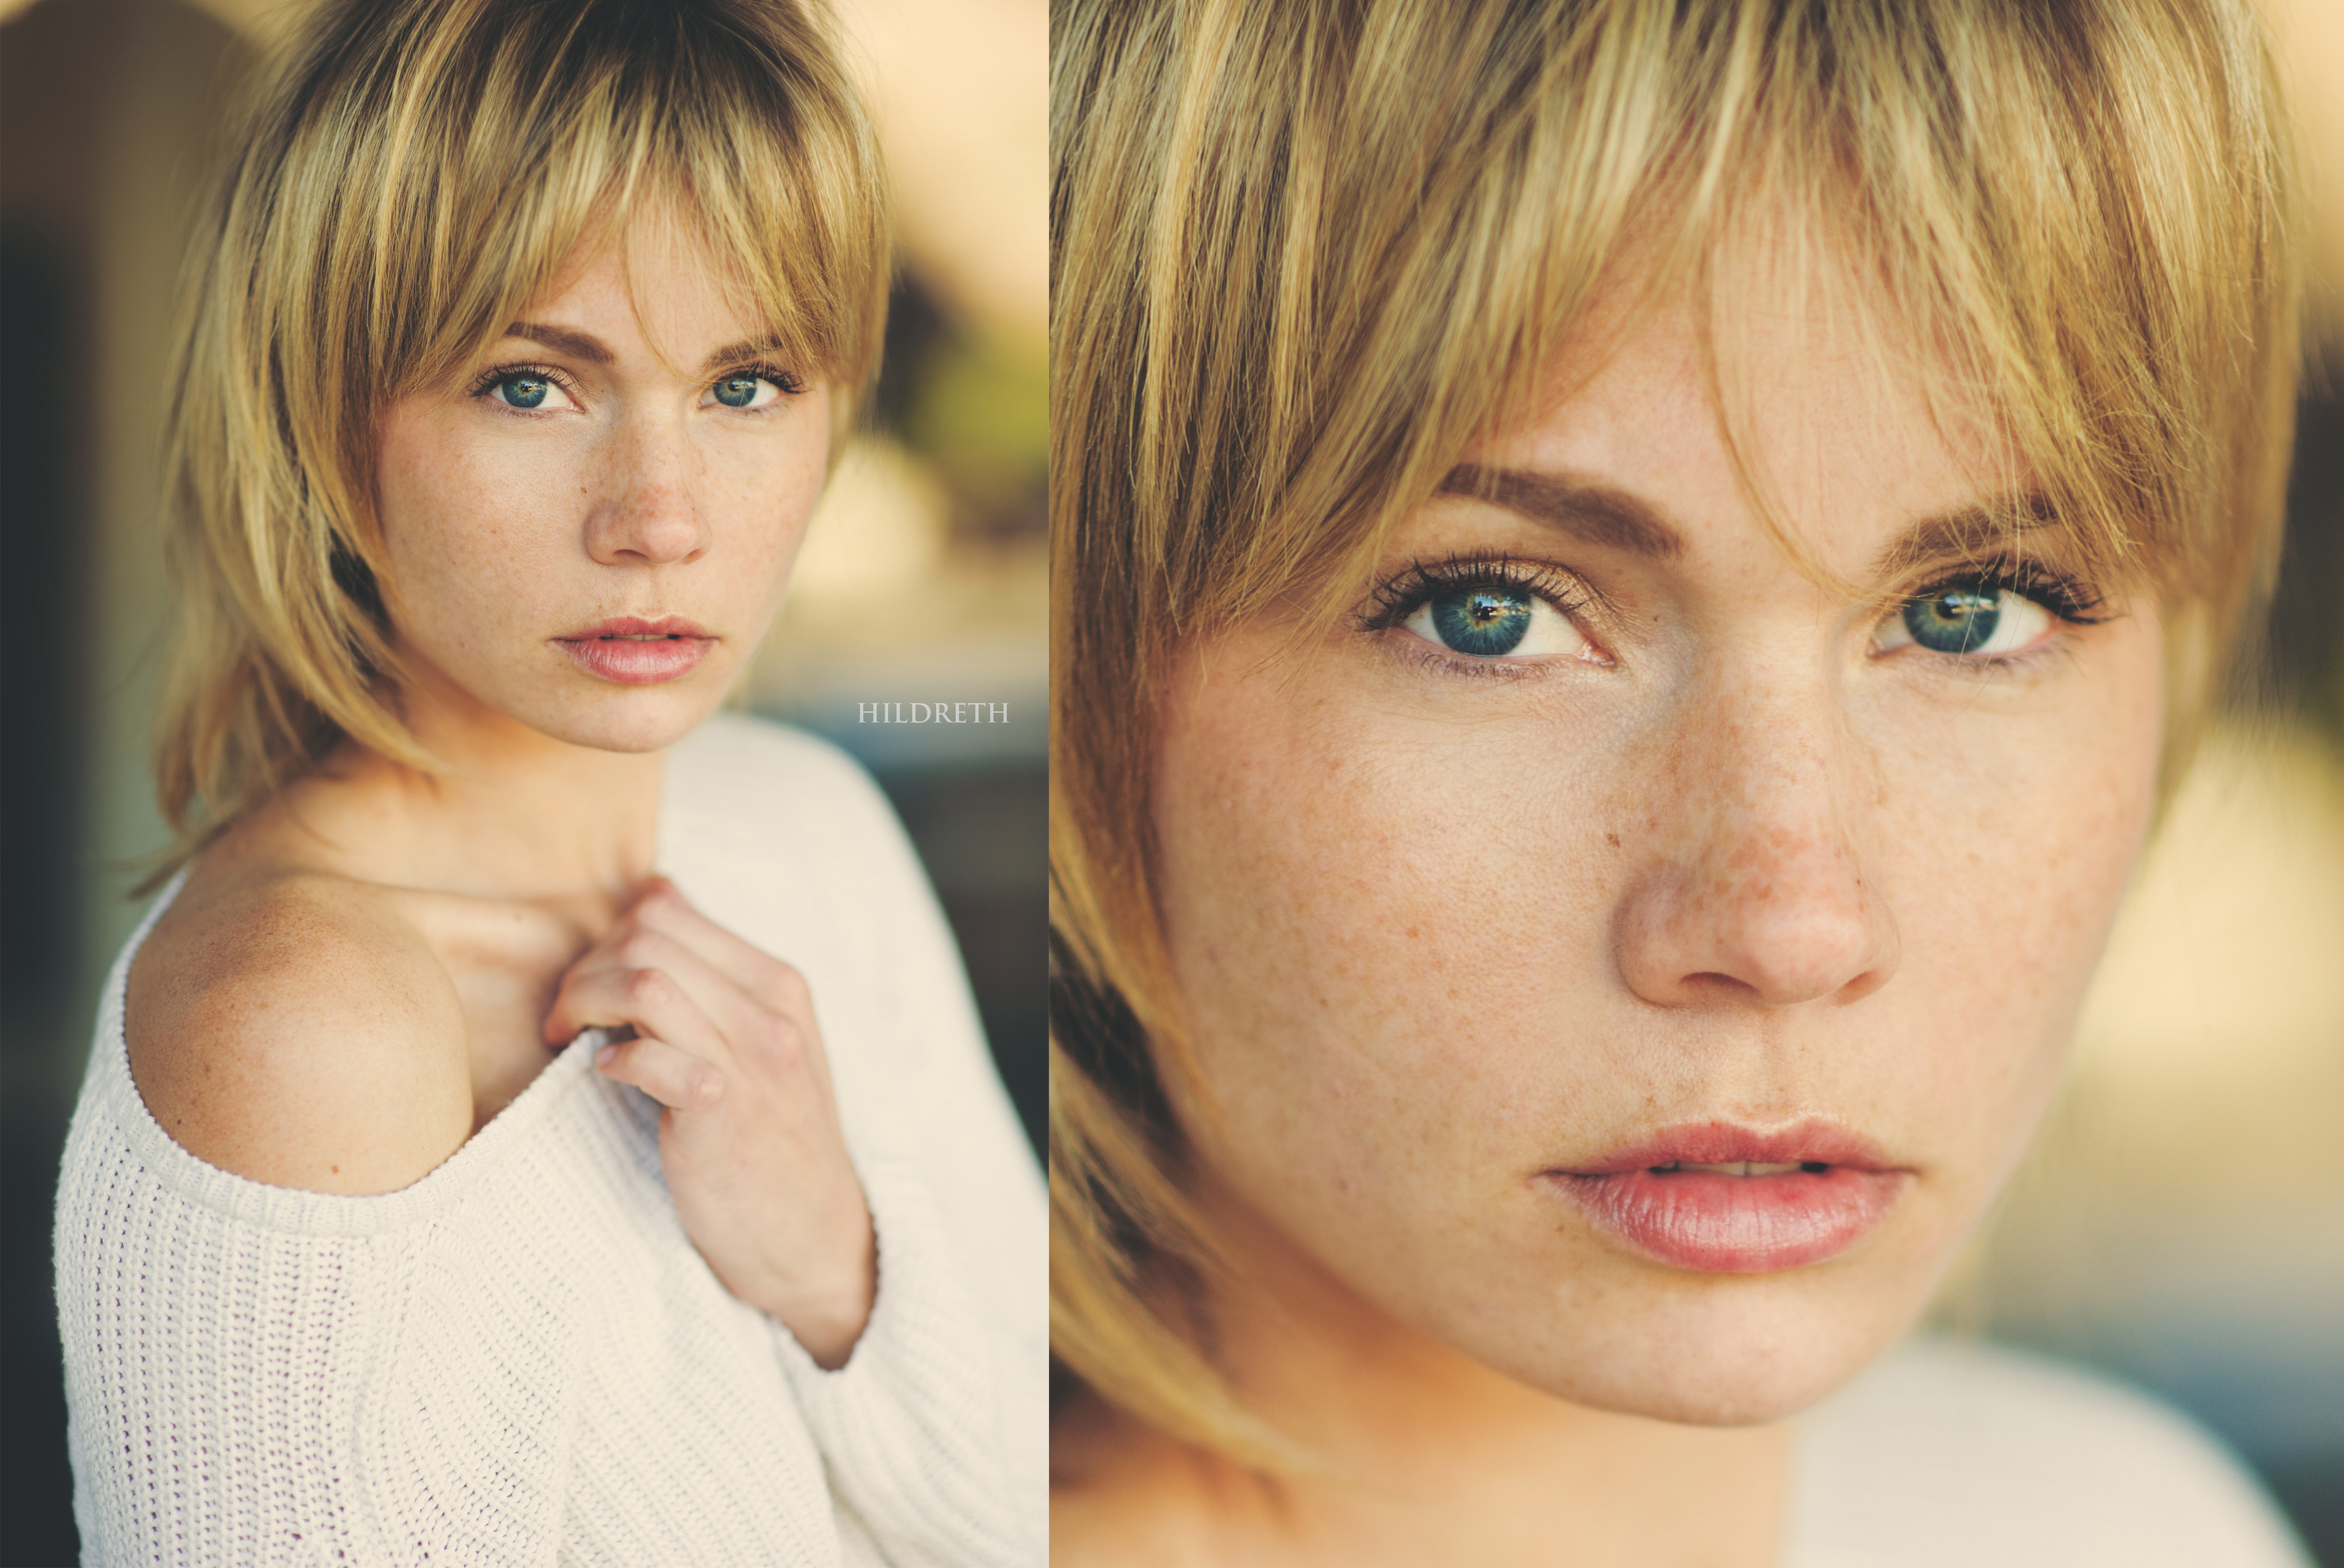
In this first photograph, I shot my subject near the doorway of her apartment complex. Amazing light seems to find itself in doorways, or under the shade of a tall building, especially under an awning. I had her move directly to her right, away from the entrance, so I could bring in some reflection off the window. If you do this, you’ll have to watch closely to your reflection and also her shadow, especially if she has dark hair. I love shooting subjects in this light and it appears, no matter what time of day, to have that golden hour feel. It’s great for headshots, especially. Since this shoot was just an impromptu one with a friend, and our first time working together I had decided to leave the reflector at home. I try to keep my portrait shoots as basic as possible so I can get to know the model. I can nitpick this image and wish I had reflected light onto her back and her jawline (her right side), but expression and composition are all I’m focusing on here. I feel there is something pleasant about imperfect lighting, it makes the image feel less staged or forced, more natural, like a moment in this person’s life.
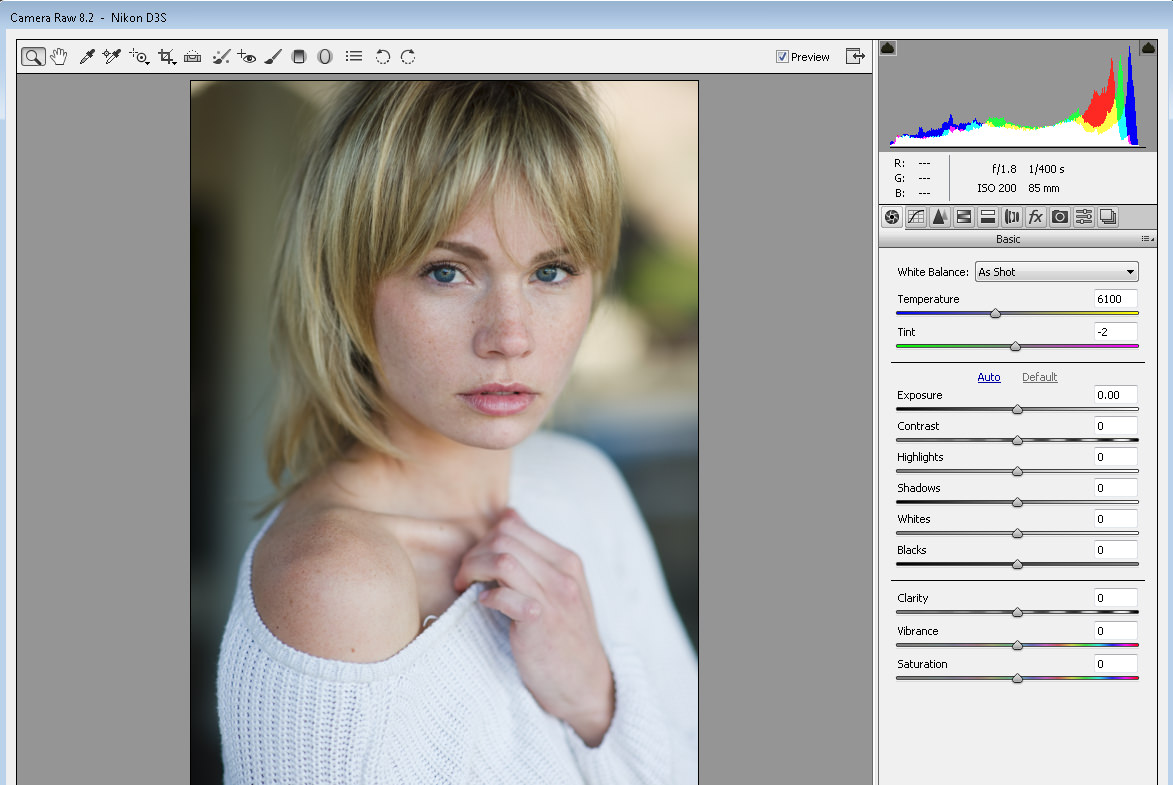
For this image, I photographed her with a Nikon D3s at f/1.8 using a Nikon D-series (f/1.4) lens. I put auto-focus aimed with a single-point at her eye closest to me (her right one). Since it was afternoon, light was enough to allow me to stay at 1/400s shutter speed and 200 ISO. I like trying to stay within 200-400 ISO when doing outdoor portraiture. I like having some feel of grain there, rather than opting for low ISO ranges to make an image crisp. That is just personal preference.
At this stage, the photograph I’ve captured has enough detail overall to make for a digital RAW. None of the shadows are too harsh, allowing me to find small details there if necessary. I can see it by the histogram clippings telling me there are no red (blown out highlights) or blue (darkened shadows) on the image itself. I know I can have full control over this image in Photoshop later and that is the first step to a solid post-processing workflow with natural light.
Now, we aren’t always going to be so lucky and have ample light, the chance to pose a subject, or even have an option to be outdoors. In this situation, a subject’s environment can lend extra details about who they are. So having a vision for your composition is important.

Your best friend as a photographer using natural light is any source that allows it in. This indoor photograph has plenty of brilliant light flooding in through the right hand side. Sometimes moments are setup for you and being conscious of how to expose the image is key. The other thing to keep in mind is the quality of your images at different ISO. Older, less expensive bodies will start to get grainier faster when you surpass 800 ISO. I knew this was the case when I took this photograph, since I was using the Nikon D90 body. In order to maintain a crisp image I kept it at 200 ISO, forcing me to shoot at f/1.4 (on the Nikon 50mm f/1.4 lens), with a shutter speed of 1/60. At this shutter speed it is difficult to have it handheld and maintain focus. I had no other option, however, because any elaborate setup would make this a non-candid portrait session, and I knew the subject would not be interested. So being limited in my setup, I had to improvise the kitchen table as a tripod and take a few shots to get the composition in check. Once I had her perfectly framed, I waited until the moment she went in between thoughts, before she spoke again, to capture her in this pose.

This next image for me is what really started making me think about window light in portraiture. The glass on a window really diffuses light so it pleasantly falls onto a model’s face. It also offers a dreamy, thoughtfulness if the model is less engaged with the camera/audience, and is more in her environment. I’ve framed her in a way that really pulls her out from the background by letting shadows engulf her left side. I also love how the post-processing technique I use rolls through and lifts blacks/shadows, giving them that hazy look. In this image we see a variety of shadow/light play, from the almost over-exposed window area to the under-exposed shadows on her left. These flow nicely over her face, giving her face some dimension with the shadow on her jaw, and leaving her eye bright and in focus. Generally a window will provide as much light as you’ll need, depending on how close the model is to it. In this image I shot her on a Nikon D700 using the Nikon 85mm f/1.4D at f/1.4. I kept my ISO at 200, despite being indoors. This allowed me to shutter her at 1/200s.

Another image of this subject, we shot after quick clothing change and went outside. We had nothing overhead to make even light across her face, but as the sun was going down, we were able to make use of that golden light. There is still a strategy to use here to make sure it is even though. I had her stand in the middle between two tall buildings, so it could reflect the disappearing light onto her from both sides. Early on in my photography I was primarily shooting wide-open outdoors, while it offers great flexibility in shooting portraits, it’s equally over-exposing the background. This typically happens when shooting with only sky behind a subject, so if you’re able to find even light where the background isn’t so transparent, a more comprehensive image can be produced.
As you may gather from this introductory post on natural light, there are never any certainties. It’s about adapting to what you’re given. The best you can do is to understand how light looks at different exposures, and the only way to find what you like is to shoot. I started my photography exploration by going into downtown Denver once a week, at least, any time of the day, and shooting. Once I felt comfortable with low light situations in broad daylight, I moved my work indoors to practice. Understanding how natural light works is the foundation to not only producing an image of any kind, but it’s also essential for strong post-processing. The two go hand-in-hand.
Nobdy cares about niggas
Charles,
I’m from South Africa and an artist. I came across one of your photo’s that I would like to paint and if possible would like your permission to use. How do we go from here?…..If you have the time I would like to discuss this possibility with you. Thank you.
THis is a fake comment
BTW your article is interesting.
WTF Silly person
This is silly who started it blablablablablablablablabla
niigggggerrr
Funny, when I saw the edited version of the first photo I immediately thought hey, those colours make this photo look strikingly similar to the style and work of Charles Hildreth? Then what do ya know, turns out this article is indeed by Charles Hildreth! Haha. Great article. Love your work Charles.
excuse me what is your camera
Thanks for the article and the examples.
Hello Charles,
Thanks for the stories and detailed explanations. what’s also very interesting is the relationship you build with your models to make them pose, or to capture, “that” moment…
Enjoyed your post and some very nice examples of what you can do with no flash.
Thank you!
I love shooting with natural light myself. Some of my best results often come while shooting sans any lights/strobes. Am still a bit of an amateur but would love some you folks to check out my photography at 500px over at: 500px.com/chandanksingh
Nice, I mostly use natural light and reflector sometimes, only 30% flash usage. I love that B/W 2nd picture and the 3rd one, I love those shadows on the face. The 1st and last picture also good but I prefer more shadows on the face if it’s about personal taste. Well, photography is market for the eye right? Just like food is market for the tongue, you might like a lobster while I hate it. Well, it maybe different if we shoot for client, because we have to produce image for our client’s eye, this is what I confuse sometimes and need advice on this. When you shoot for client, do you shoot according to your personal taste or guess what the client’s like? Or maybe ask what kind of photo, etc. Thank you, I love your blog.
I agree with you! To each their own, right?
As far as shooting for the client, it’s a tricky answer. My best advice is stay true to yourself. If the client was referred to you by your work, then you know they trust in your style. If someone referred them to you without seeing your work and they had a specific job for a photographer, then you may need to adapt to their idea. If it doesn’t seem like a good fit, do yourself a favor and take work you know you will enjoy – it will be beneficial to both parties. I hope that helps!