I upgraded from an infrared-converted Nikon D7200/720nm to a Nikon D750/550nm combination this past spring. Although I suspected the D750/550nm filter would suffice for most of my infrared needs, I was hesitant to forego the bright whites produced by the 720nm filter. As such, I decided to test two of Kolari Vision’s external filters to determine how well they would perform on my D750/550nm configuration.
Table of Contents
Mirrorless or DSLR?
But first… a little diversion. Before deciding on the Nikon D750, I considered purchasing a Sony A7 mirrorless camera for my infrared needs. Why? Mirrorless cameras offer a distinct advantage over their DSLR counterparts for infrared photography: the electronic viewfinder provides the ability to see your image through the viewfinder, regardless of which infrared filter is attached to your lens. Once you attach a 720nm filter on your lens mounted on a 550nm converted DSRL, however, you see nothing but darkness because the optical viewfinder can’t see through your nearly-black 720nm filter. Nikon’s LiveView offers a way around this conundrum, but you either have to hold your camera away from your body to view the back of your LCD (not a very enticing proposition if you have a larger lens such as a Tamron 70-200mm f/2.8 G2 or 150-600mm G2 on the front of your DSLR) or be tethered to a tripod. Since I often move at a fairly quick pace, combining a cardio workout with my photography outings, neither of these options was very appealing.
I considered waiting for Nikon’s impending mirrorless FX camera but knew it might take me a good long while to obtain one. And after recalling some of the problems with Nikon’s new DSLR introductions, I decided to wait for the product reviews and assessments of the initial production runs. I was well along the way of purchasing a Sony A7 but came across a few photographers who had used both the Sony mirrorless and Nikon DSLR FX platforms for infrared photography. Helen Bradshaw, in particular, was very generous with her time, outlining her experiences, (Thanks, Helen!) and contrasting the two platforms. After extensive correspondence with Helen and doing some additional researching of my own, I settled on the Nikon D750 for the reasons below:
- Sony still has a relatively limited set of native mirrorless lenses considered to be good performers with infrared light.
- The Sony lenses I considered did not appear to offer good value relative to their cost.
- Nikon had many more lenses (including those from third parties) that perform well with IR at reasonable price points.
- Since I already had a series of Nikon F-mount lenses, I was not enthusiastic about purchasing an overlapping range of Sony lenses, let alone carrying them around in my backpack.
- I did not look forward to learning another camera menu system.
- The feedback I received regarding the Sony menu system was not very positive.
- Nasim offered me a gray market D750 for a very good price and threw in a Sunway Photo L bracket.
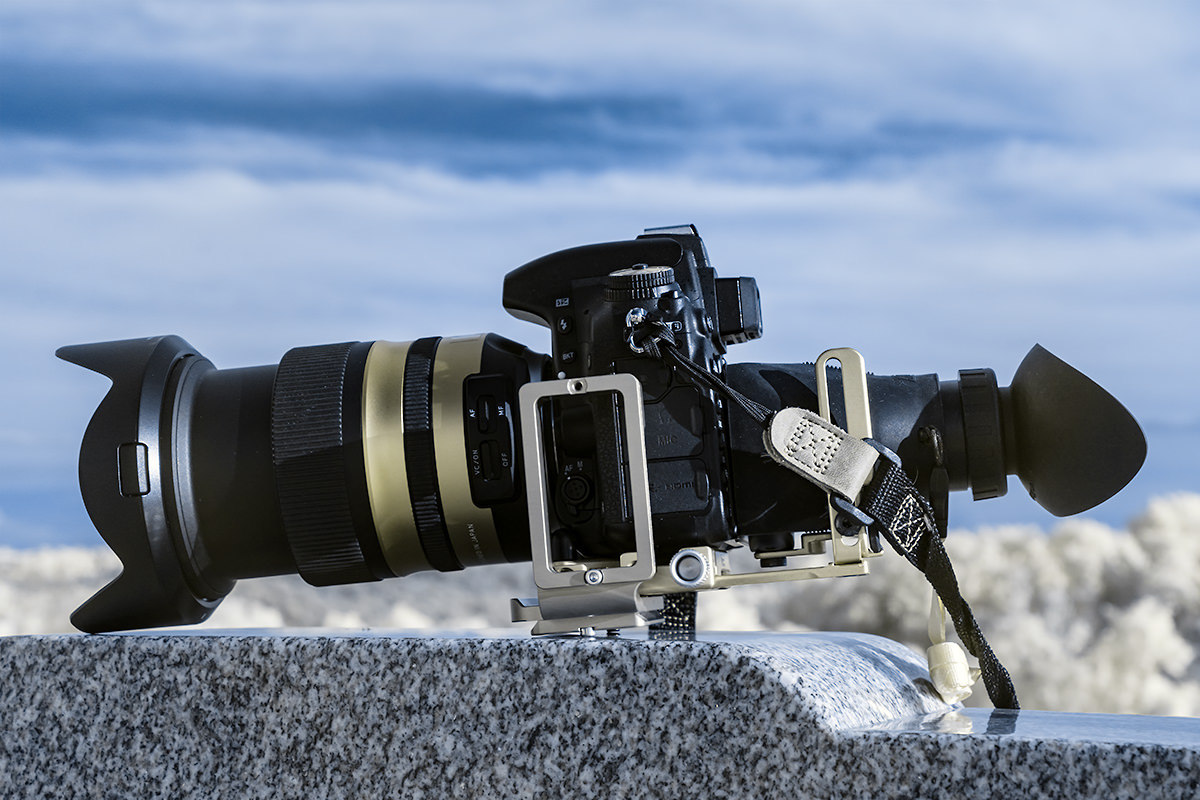
- Helen Bradshaw suggestion using a Hoodman unit with Nikon LiveView, enabling me to hold the camera against my eye, enabling me to reduce camera shake.
- I found a Hoodman Live View Kit allowing me to firmly attach the Hoodman loupe to my D750 (more below).
- I had already been considering a Hoodman loupe because I often find it difficult to see my LCD on sunny days.
1. Build Quality
The Kolari Vision filters came packed in foam-padded cases. The filter’s metal rings felt very sturdy and had a series of smooth ridges making it easy for my fingers to grasp and turn the filter. The filters threaded onto my lenses and adapter rings with just a few flicks of my wrist.
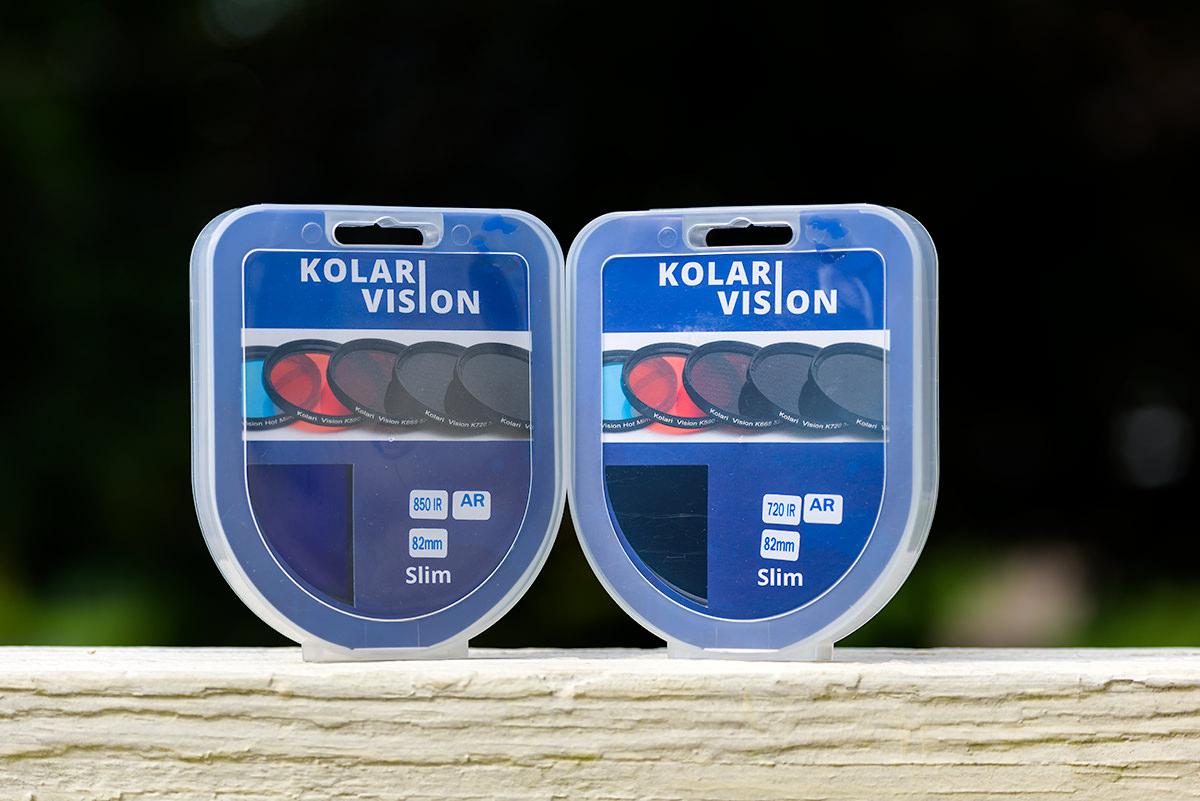

This is of particular importance if you want to shoot scene using multiple filters and attach them with only two or three quick turns. Using a filter with poor quality threads will make this more difficult and can result in your filter ending up in pieces on the ground.
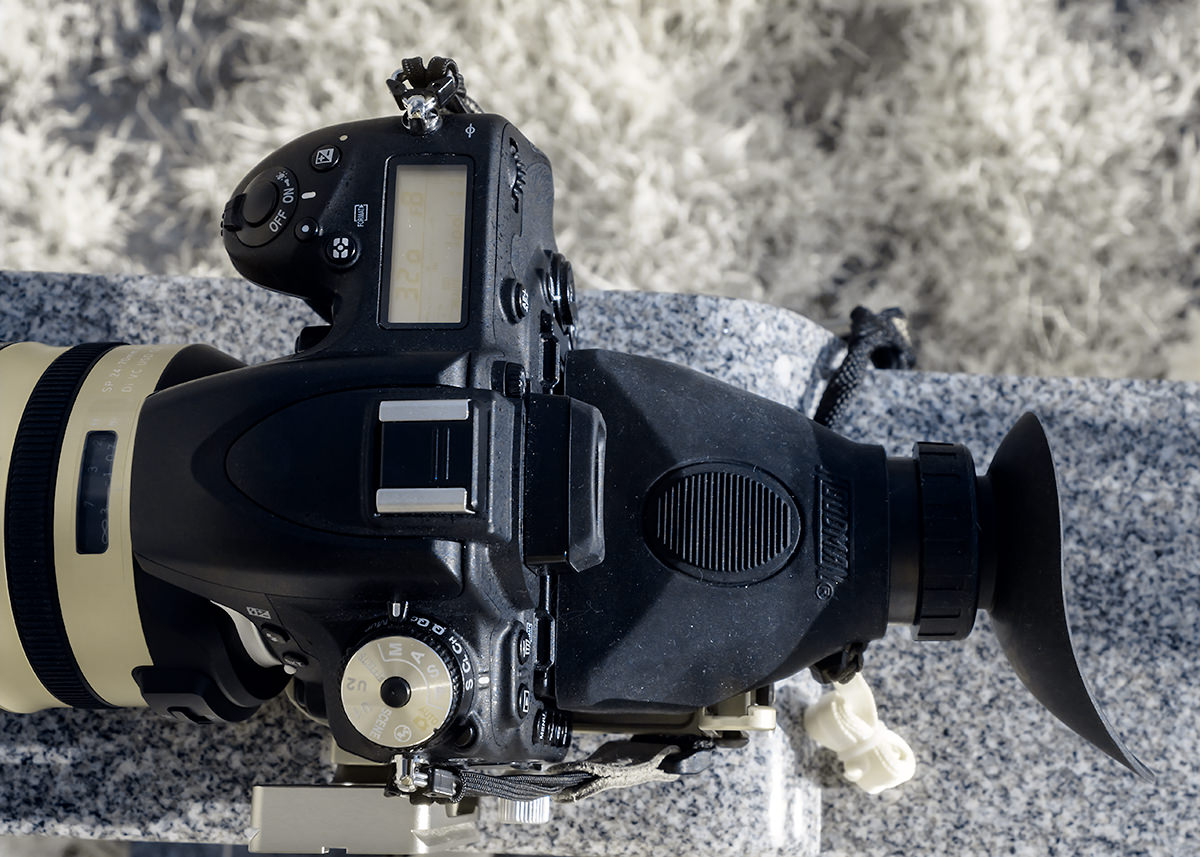
2. Using the Hoodman Live View Kit
I found the Hoodman Live View Kit extremely sturdy, despite its light weight. Once attached to my DSLR, the bracket was rock-solid. It was just as sturdy when attached to my tripod. The loupe fit my D750’s LCD perfectly. I was able to adjust the diopter for my vision, which now requires me to wear reading glasses. The optics were very sharp. The only drawback when shooting with LiveView and the Hoodman kit was my forgetting to turn LiveView off, which I learned can rapidly drain your battery.
I was able to find the Hoodman Live View Kit on sale at a significant discount from the list price. There are other ways to attach a Hoodman loupe to your DSLR. My good friends, Mark & Emilly Fagan, shared a picture of their innovative, patent-pending Hoodman Loupe Bracket. It has allegedly stood up very well thus far under extremely harsh and demanding conditions. They are currently taking pre-orders for the unit if you are interested ;)
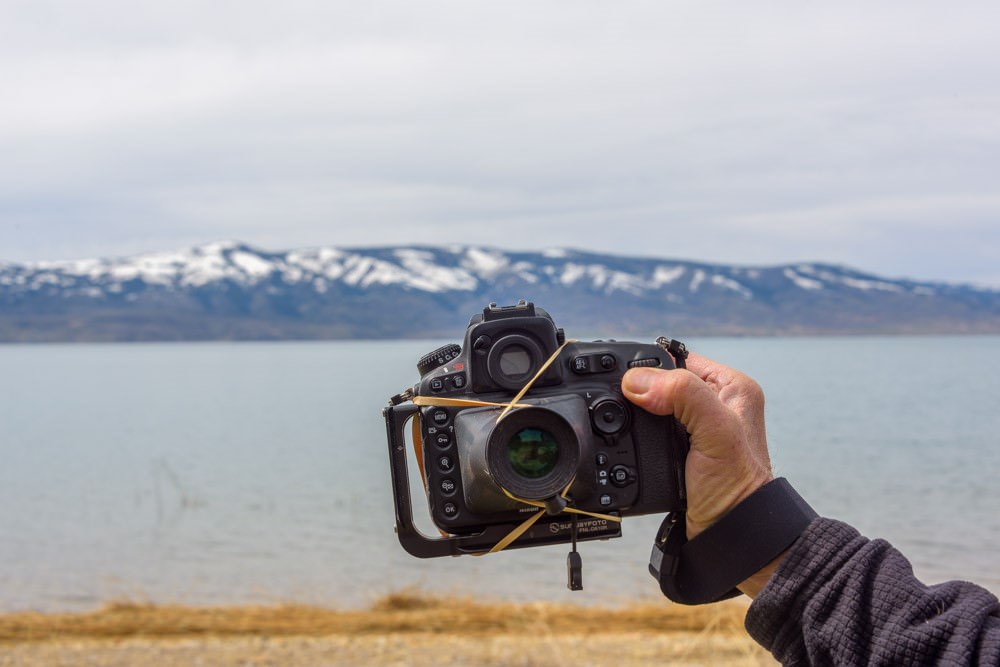
If the Hoodman Live View Kit and Fagan Patent-Pending Hoodman Loupe Bracket are out of your price range, some claim these mini-bungee cords also do a fine job in attaching a Hoodman loupe to your DSLR.
3. White Balance
As I discussed in my previous article, shooting with different IR filters requires either a customized white balance per filter or a single white balance setting enabling you to view your images taken with any filter. I chose the latter approach because I did not want to have to change the white balance settings in my D750 menu each time I changed the filter. I settled on the white balance setting of 2700/6 in my Nikon menu.
4. Anti-Reflective Coating
Kolari Vision introduced the Anti-Reflective coating a few years ago in an attempt to overcome the dreaded “hot spot” problem. Hot spots (an area in the center of your photo usually lighter than the surrounding image) are caused by the coatings used on lenses and light reflecting off the inner lens elements and lens housing. There are a variety of sources available on the internet regarding which lenses are subject to hotspots and under which conditions you’re likely to encounter them.
Since infrared accounts for the bulk of my photography outings, I only purchase lenses with good infrared ratings. Even so, I’ve noticed even venerable performers (usually zooms) such as the Nikon 16-85mm can, under certain circumstances (normally on the lowest end of the focal range), produce slight color shifts in the center. Knowing every lens is capable of producing something less than a perfect infrared exposure, I began using Kolari Vision’s Anti-Reflective internal filters on my DSLRs a few years ago, including my new D750/550nm combination. The external IR 720nm and 850nm filters reviewed here also have the Anti-Reflective coating.
While I have not thoroughly tested the Anti-Reflective coating, I have discussed the matter extensively with Ilija of Kolari Vision and reviewed the results of his tests and those of others, such as Mark Hilliard, who have tested the Anti-Reflective filter. I have noticed my need to correct anomalies in my infrared images has dropped off considerably since I converted to Kolari Vision’s Anti-Reflective coated glass. In the worst case, I make a very small adjustment using Lightroom’s Radial Filter tool If this doesn’t completely address the issue, I will make a slight tweak to the blue channel in Photoshop’s Curves tool using a layer mask.
No lens is perfect and no coating can completely prevent hotspots, but Kolari Vision’s Anti-Reflective coating appears to reduce their impact and thus the efforts required to correct them.
5. Sharpness
I noticed no loss of sharpness using either of the filters. My Tamron 24-70mm f/2.8 G2 and Nikon 28-300mm lenses produced excellent results with both external filters.

6. Sample Images
Here are a few images I took with my 550nm-converted D750, the Hoodman unit, and the Kolari Vision external filters.
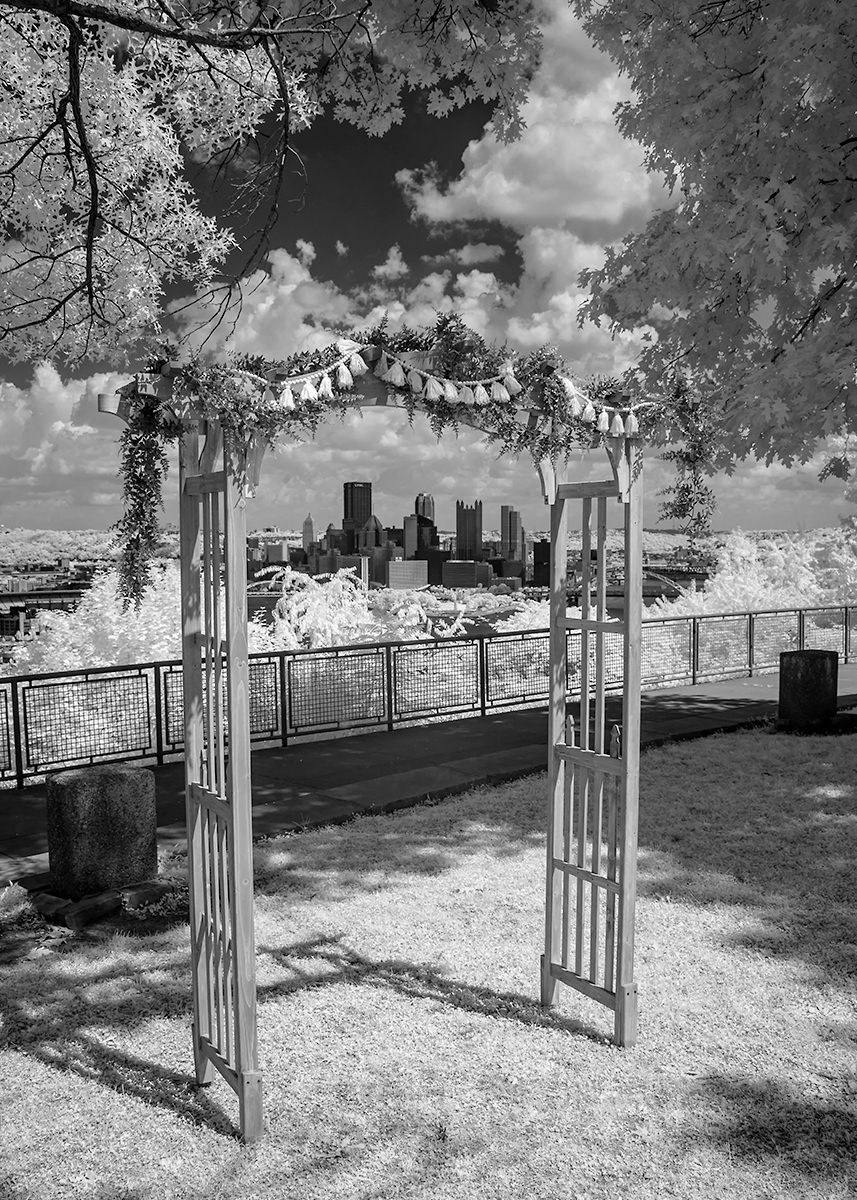
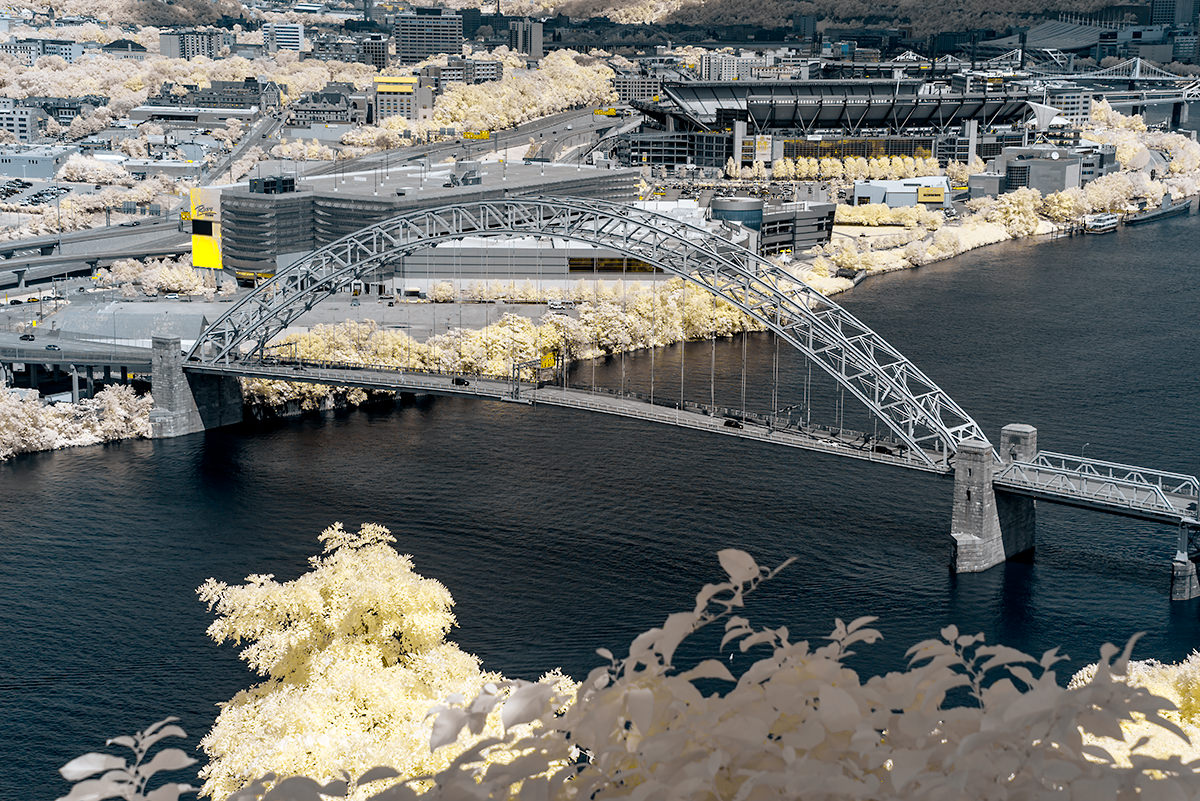
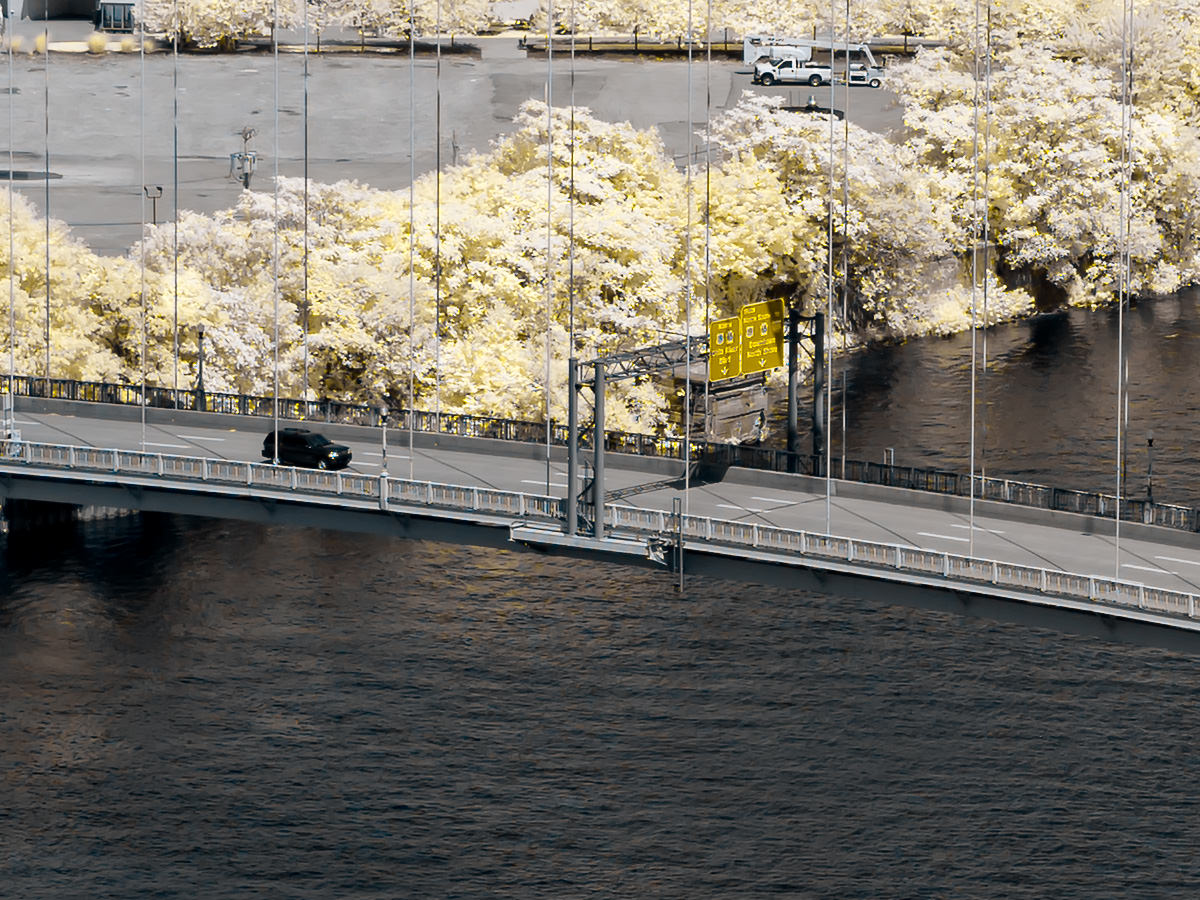
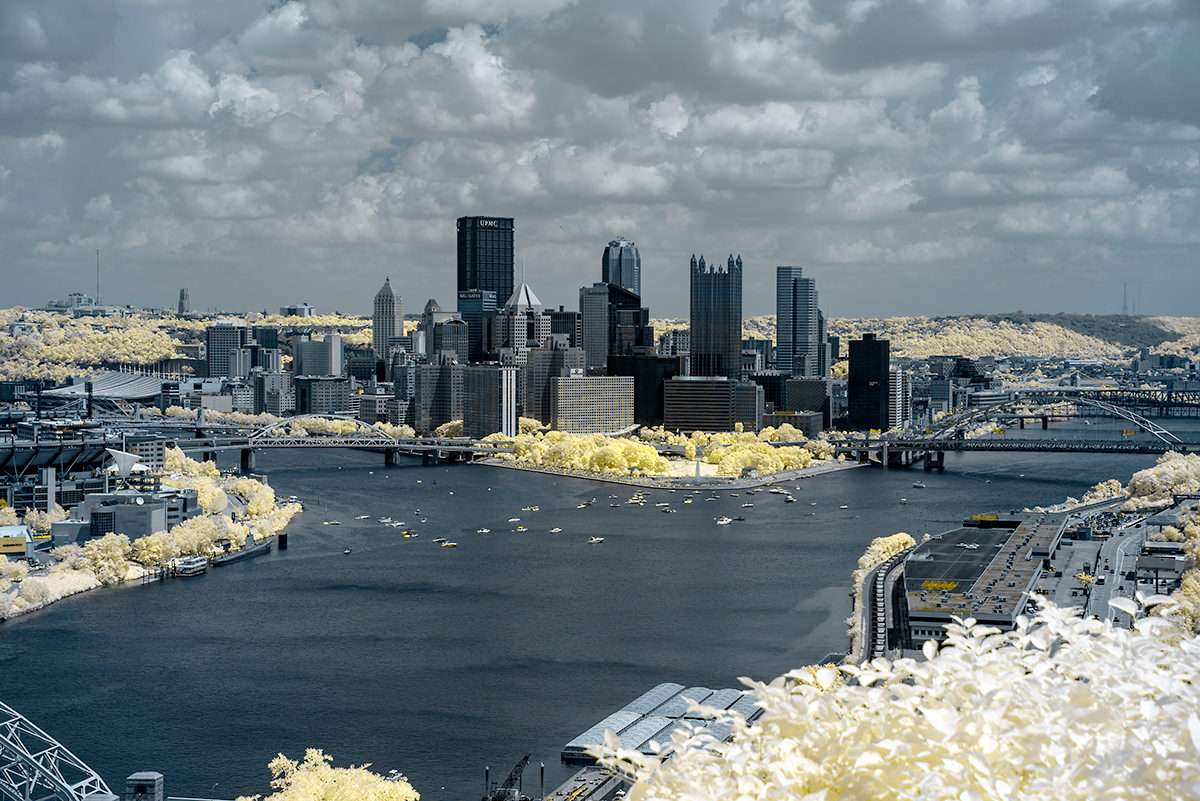
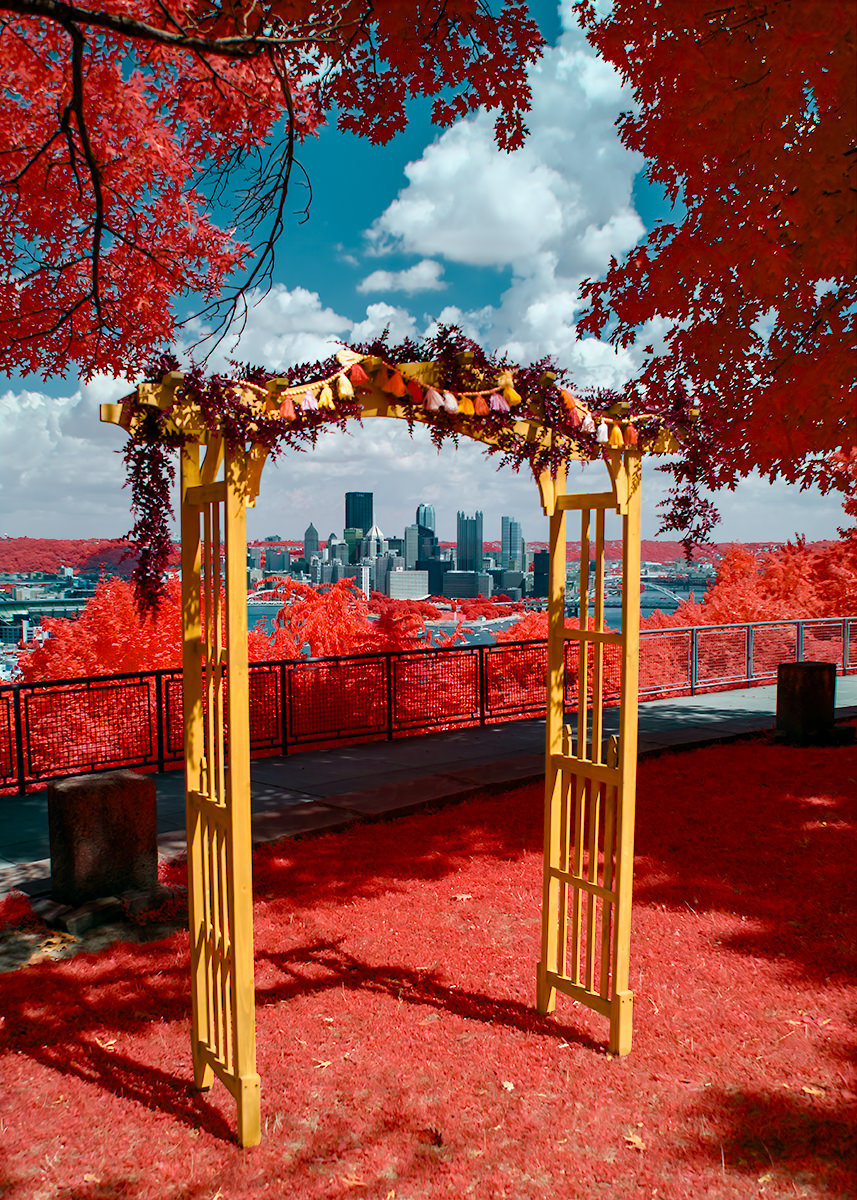
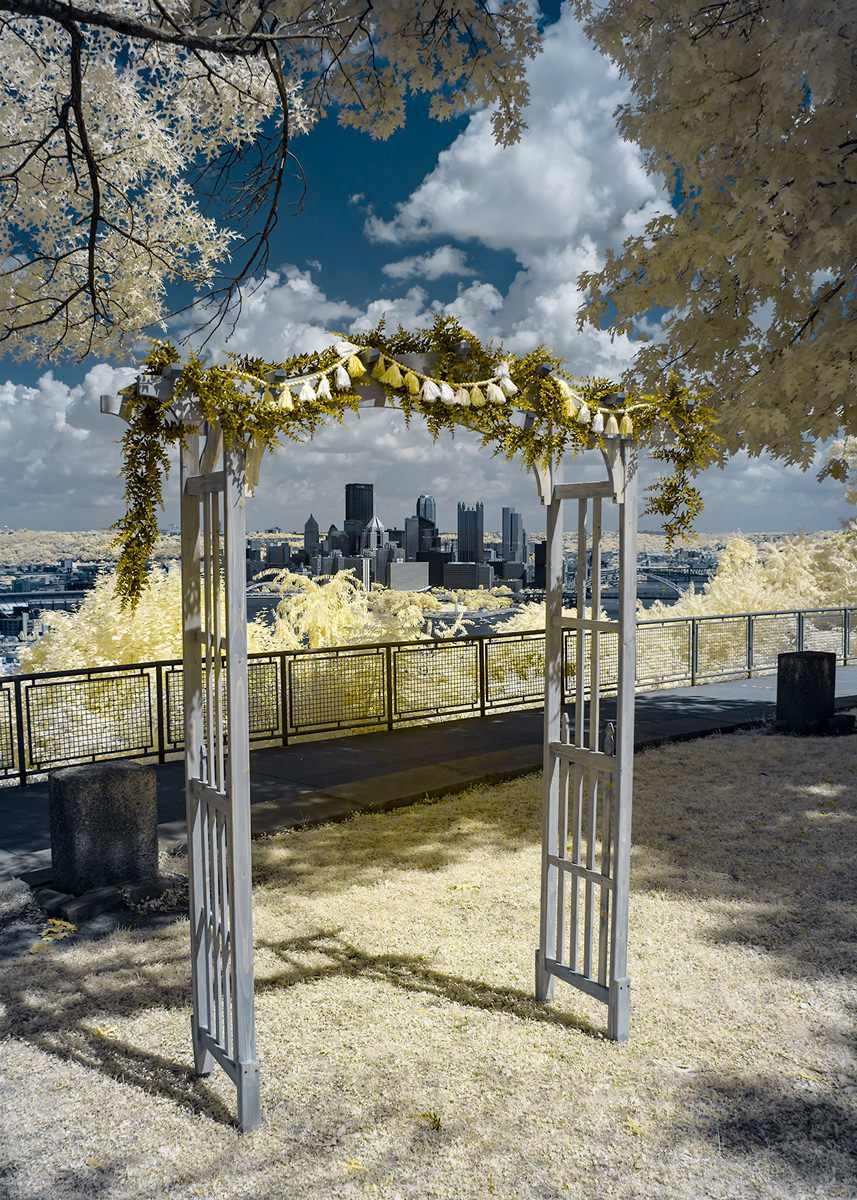
6.1 Pittsburgh Skyline


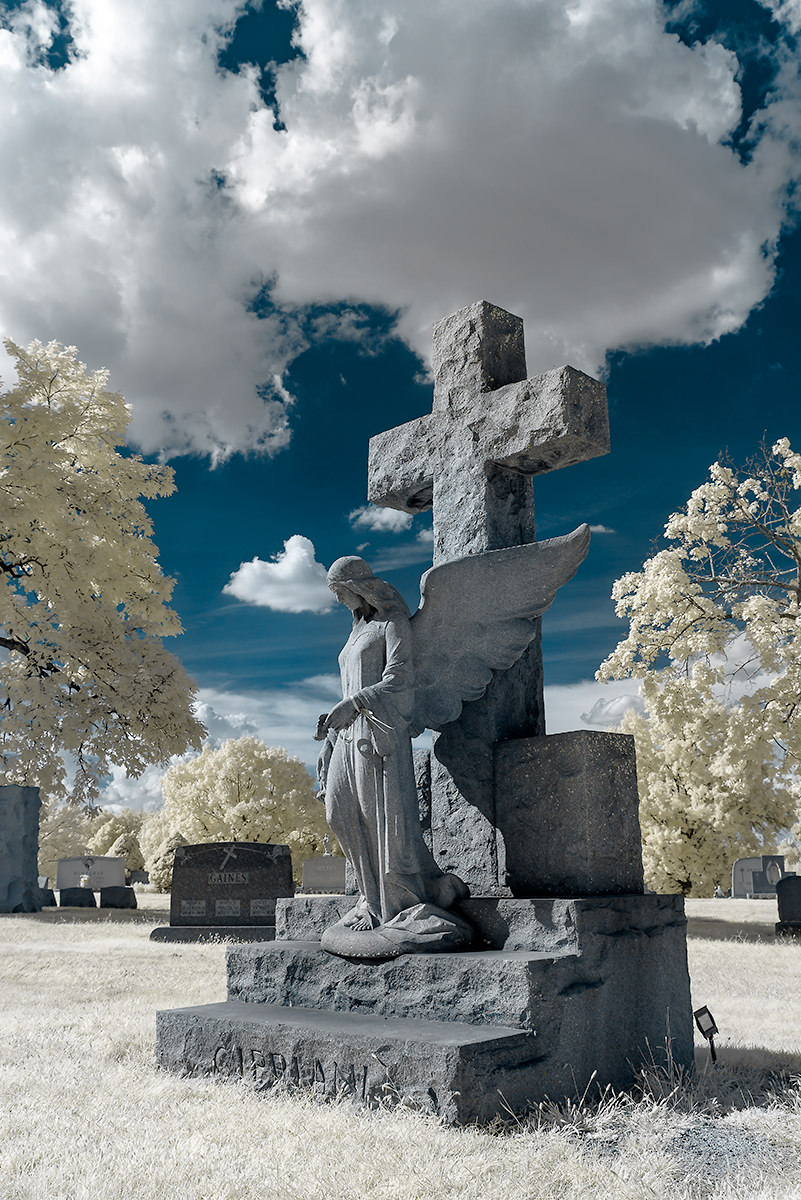
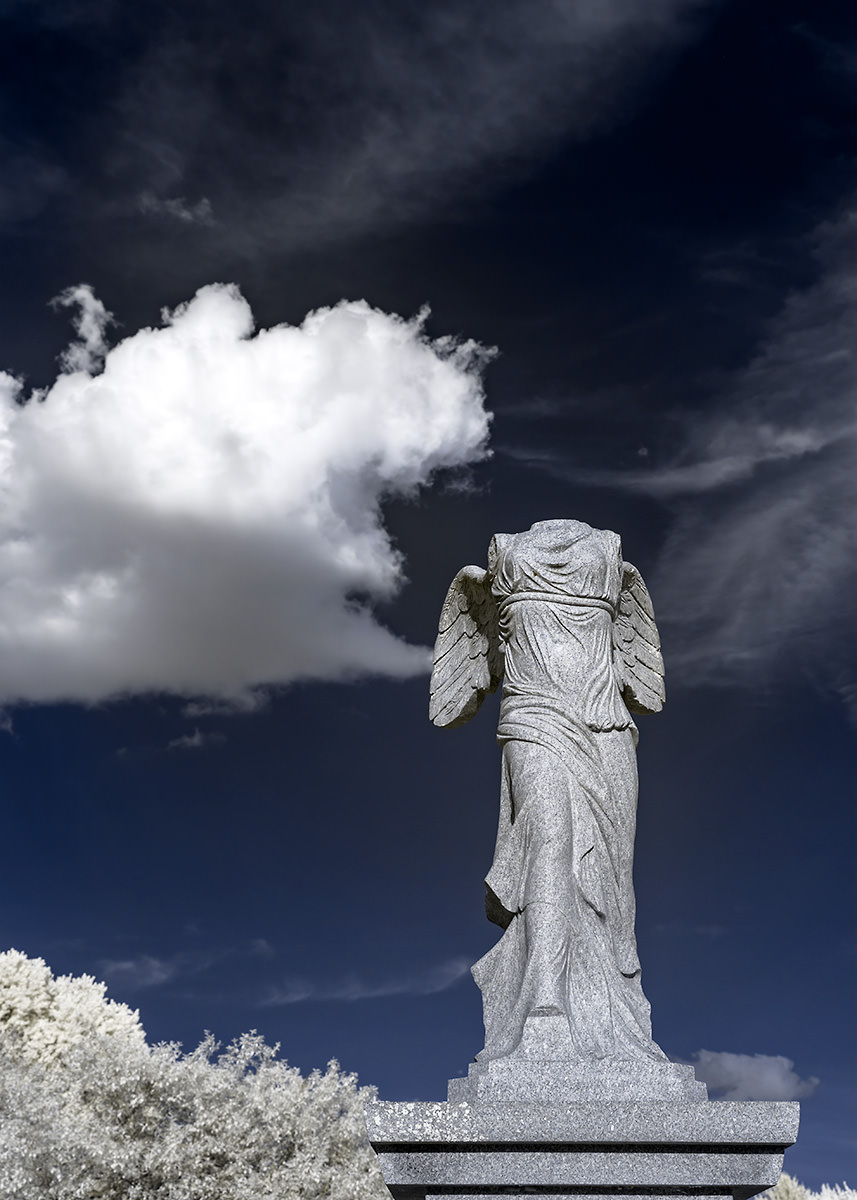
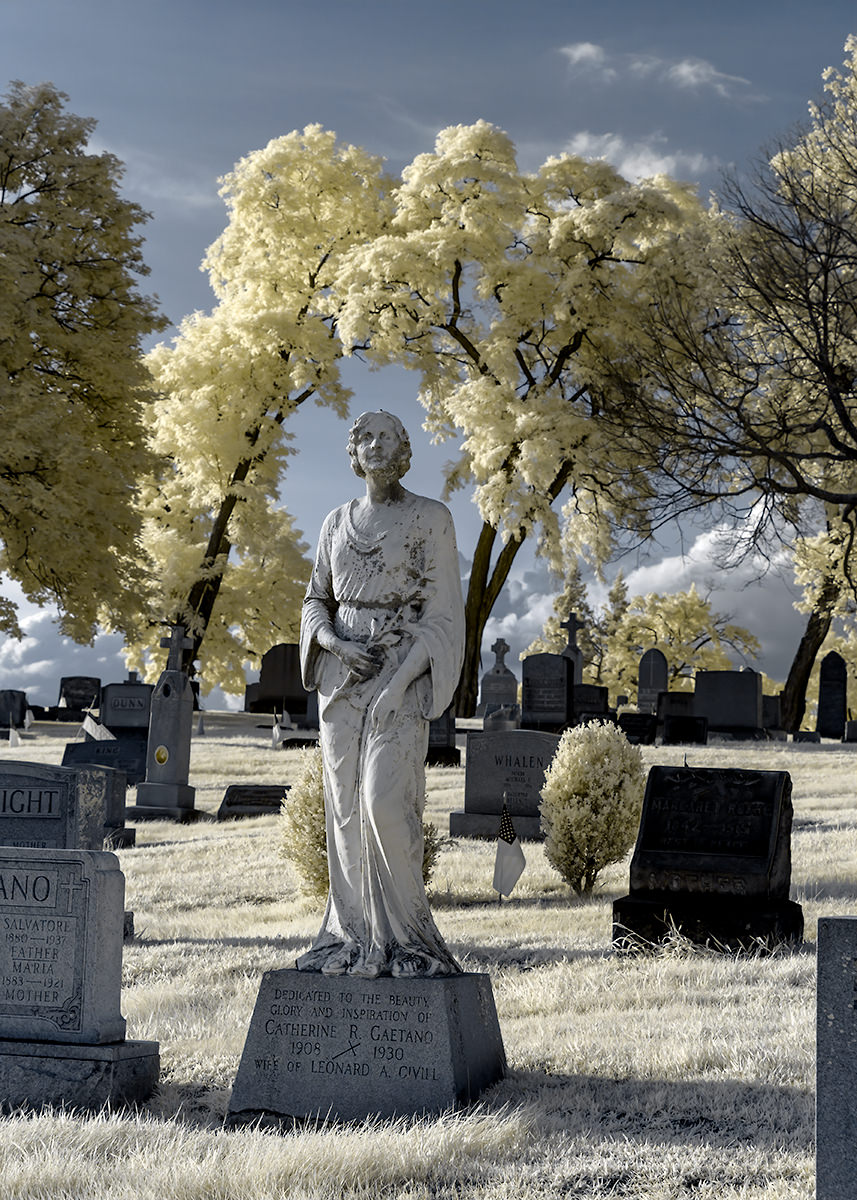
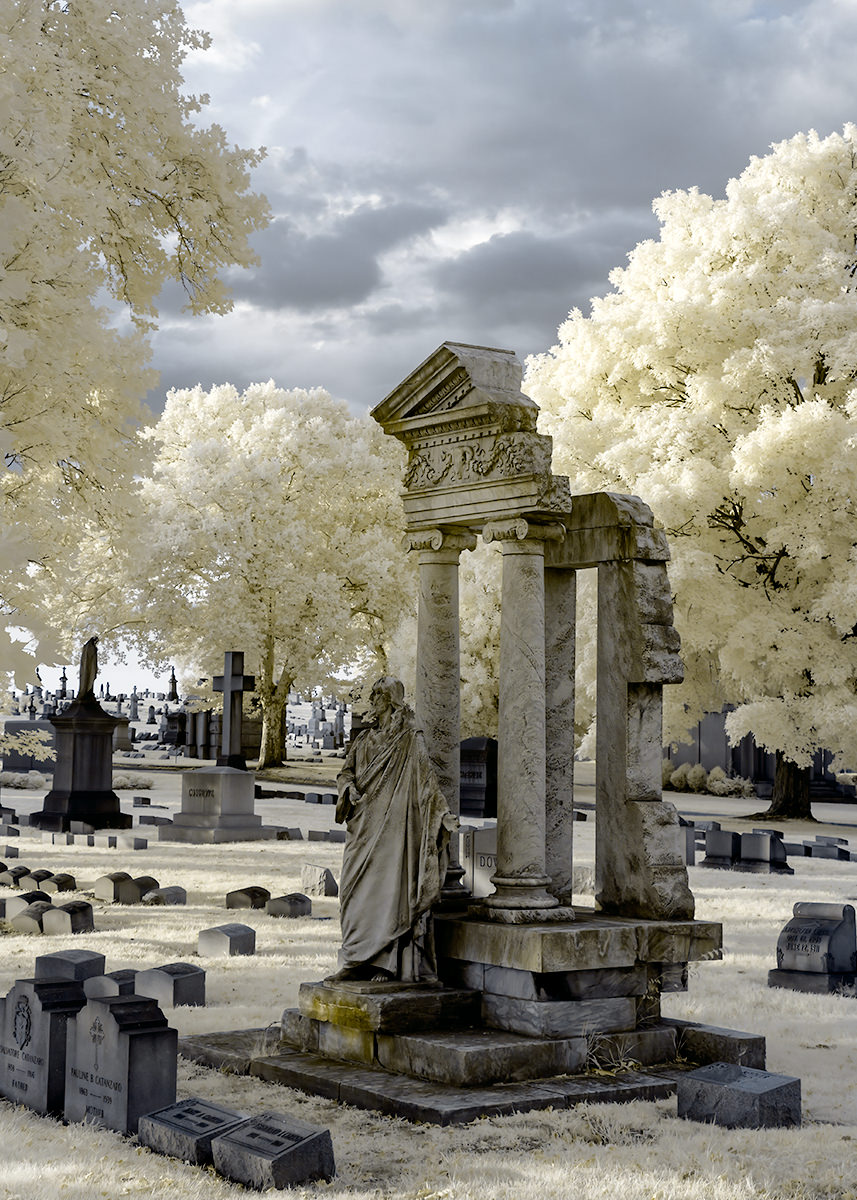
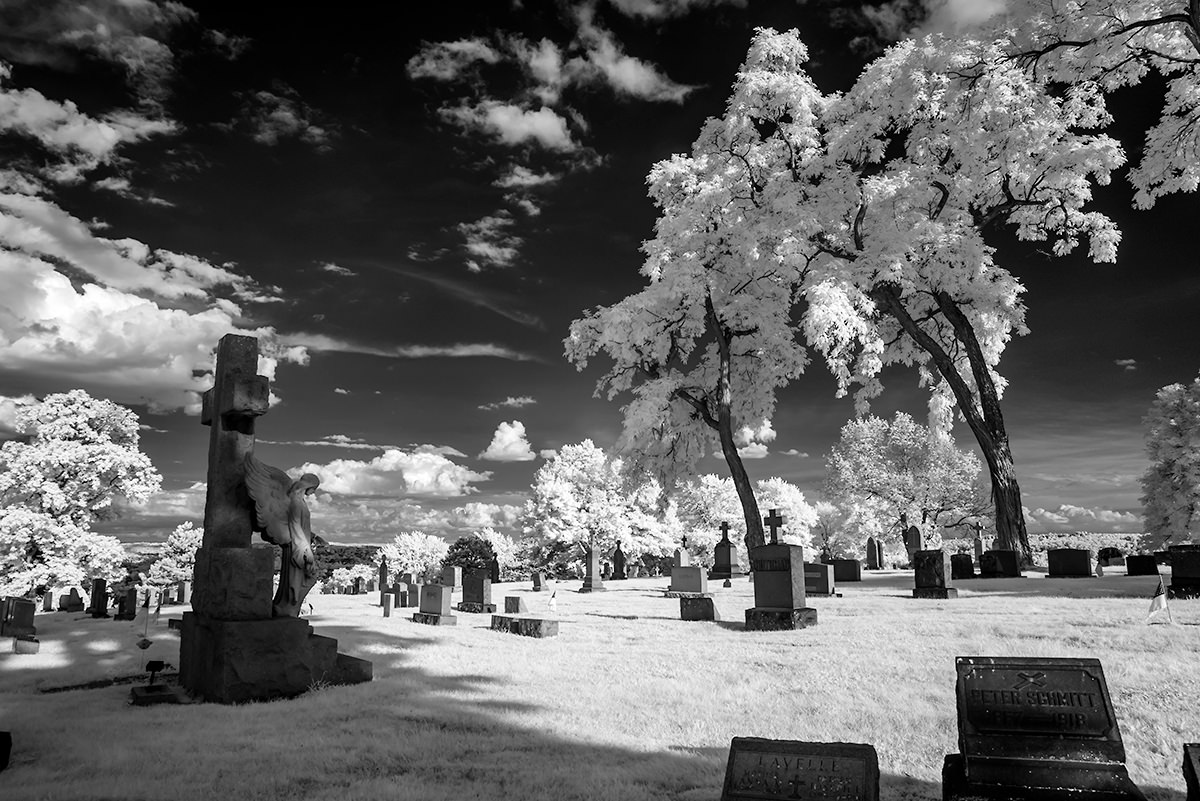
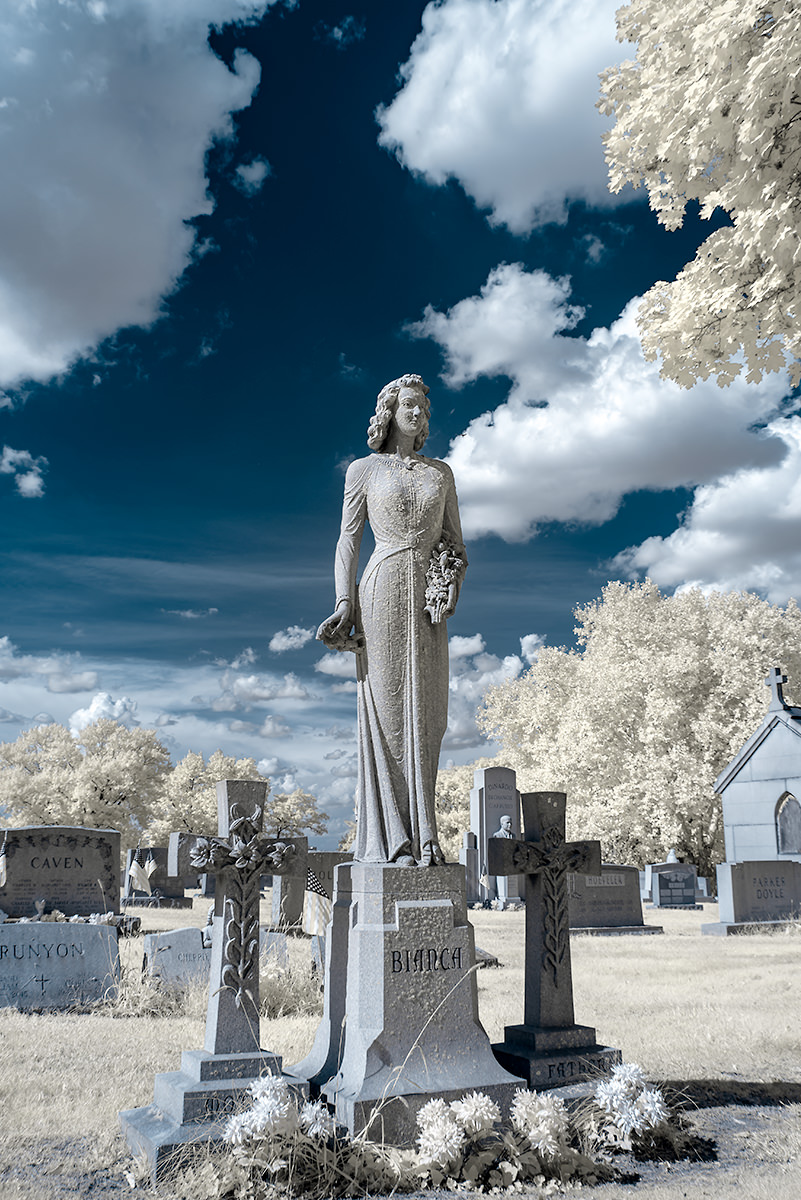
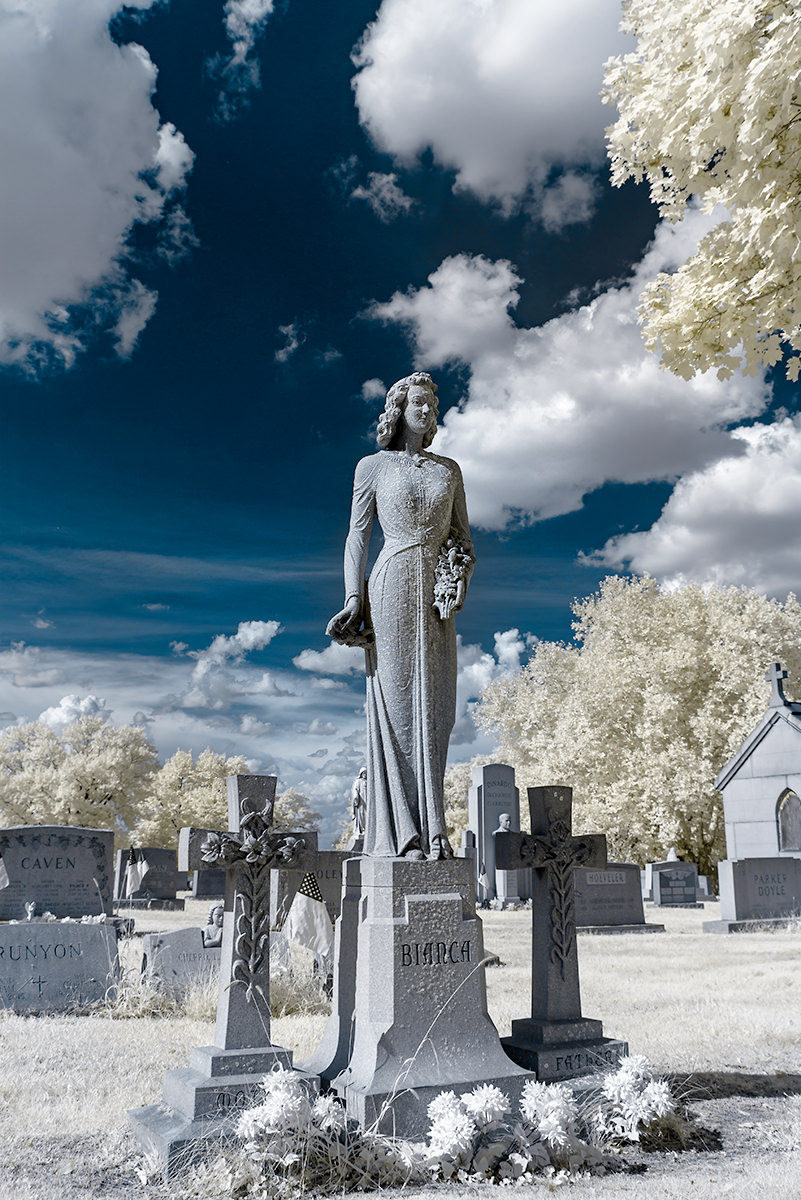
6.2 Calgary Catholic Cemetery

7. 720nm vs. 850nm
The 850nm filter produces brighter whites than the 720nm filter. But as these two photos below show, the 720nm, with some post-processing tweaks, can produce results very similar to those of the 850nm. Because the 720nm filter captures some visible light (the 850nm screens out all visible light), it offers more processing latitude (black and white layers and luminosity masks) than the 850nm filter. In the example below, I like the results of the 720nm better than those of the 850nm. The color present in the 720nm filter enabled me to adjust the tones associated with the blue channel in the black and white layer, achieving a richer, more dramatic effect.


8. 550nm or 720nm?
As I’ve indicated in other articles, the 550nm, with a bit of post-processing magic, can achieve results quite similar to those of the 720nm filter, but only in ideal lighting conditions. In bright sunlight (as in the pictures below), the distinction between the filters can be difficult to notice, especially to untrained eyes. However, the 550nm filter can never consistently mimic the results of the 720nm filter. If I was given a choice of shooting infrared but limited to a single filter? Despite the flexibility of the 550nm (or 590nm), I would pick the 720nm every time.
Can you tell which picture was taken with the 720nm vs. 550nm filter? Hint: Pictures taken with the 550nm filter will always add a creamy look to the yellow tones and it’s much more difficult (in some cases, impossible) to get bright, crisp yellowish-white tones in post-processing.
9. Summary
I have been extremely pleased with the results and quality of Kolari Vision’s Anti-Reflective external infrared filters. While these filters are priced higher than those from other manufacturers, they are extremely well-made and, with the proper care, should last you a lifetime.
Acknowledgements
My thanks to Ilija of Kolari Vision for supplying these filters.
Just getting into IR photography, and the pictures of the grave monuments are quite inspirational. Thank you for sharing them.
You are welcome. Hope the article was helpful.
Hello,
Is your camera full spectrum converted ? Or you just used the IR filters alone ?
Thanks for your reply
Frederic,
Converted using a 550nm IR filter. I then attached the 82mm external 720nm and 850nm filters to the lens.
Bob
Thanks for your post Bob
I am also aiming to delve into infrared photography, except I have decided to get a Z6 & have a full colour conversion. Then as I understand that Astronmik are working on clip filters for the Z mount, I will buy 2 or 3 of their filters, including one with an IR/UV cut.
I always like seeing pictures of Pittsburgh. Thanks for sharing.
Matt,
You’re welcome. Pittsburgh is a scenic town, full of interesting history and art, particularly if you know where to look.
Bob
Hi Bob,
Great article! Thank you mentioning me! ☺️
Thanks again for your help, Helen. I might have been a Sony shooter otherwise. ;)
Bob
I’ve never shot IR but love the look. And as one other person asked , is this an IR converted camera with filters used externally or just using filters on a regular dslr? I’m very interested thank you !
Troy,
My D750 is a converted infrared camera, meaning it now only takes infrared photos. I then put external infrared filters on the D750 to reduce the amount of visible light and produce the effects shown.
Bob
Well written article and beautiful shots. Great location for shooting and you really took advantage of the opportunity. I hope to get a bunch more IR shooting done when home over Christmas season. I work overseas and do not have my IR gear with me right now. One can hope.
I shoot a LifePixel converted D600 with the 590nm filter. I also use a 720 screw-on filter as an add-on and have had good luck with it. I primarily use it to shoot B&W using the Nik Suite for most of my conversions. I also use a custome profile to white balance in LRCC before moving to PSCC and Nik for the conversions. It has served me well.
I will have to be quite careful about patent infringement as my current hoodman setup looks a lot like the Fagan version. I may be OK because mine is attached in a slightly different manner and with wider rubber bands. Again, a well written post with beautiful shots. Thank you for sharing.
Thanks, Joe. “Home” must be down south or out west, as the leaves in the northeastern part of the US are just about gone. Unfortunately, the Fagans read your post above and have already hired a high-end legal team to vigorously defend their patent. ;)
Bob
Hi Bob, You call these “external” IR filters. I presume they simply attach to the front of the lens. Will that work effectively on most any camera (I am thinking of a Leica CL). I now use a Nikon D200 converted internally to IR (850) and am pleased with it most of the time. Thank you!
That’s correct. But this technique only works if the attached filter is a higher wavelength than the internal infrared filter. In your case, you don’t have much room to affect your infrared images since you are already at the upper end of the infrared filter range.
Thank you, Bob. So, for a Leica CL, would I simply secure an 850nm filter, put it on the lens, and see what result I get? Or, what advice would you give? Thank you again!
You could purchase any external filter and put it on a lens for your Leica. The downside with using an external filters on unconverted cameras is exposure time. Using a 720nm filter on my D300 used to take upwards of a minute. Not conducive to handheld shooting. An 850nm would require more time since it is pure infrared light. Kolari Vision has lots of helpful information on their site that explains the various infrared options.
Bob
kolarivision.com/why-g…onversion/
Bob, I think your W.B. is off… it looks like a nuclear holocaust! :-)
Just kidding, very informative.
Mark
Mark,
You need to discover your inner infrared photographer. ;)
Bob
Nice review Bob.
I would be interested to see how these filtered pictures come out when the in-camera Black & White option is applied alone, and with the Yellow, Orange & Red filters therein. The 550nm filter with in-camera B&W could be interesting.
Thank you. My rule is to always shoot in color, even when the intent is to produce a B&W image. B&W layers in Photoshop enable much more customization of the photo.
Bob