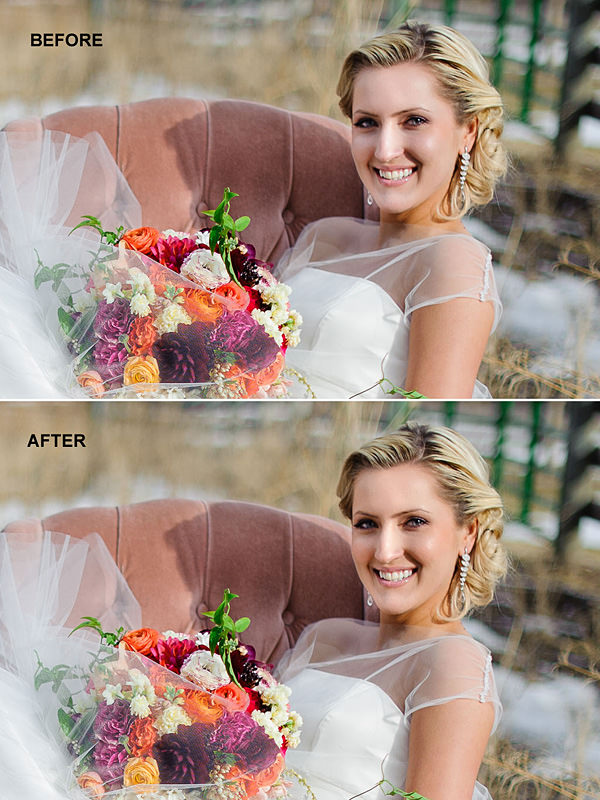
In my previous Lightroom Dodging and Burning Tutorial I chose a photograph that had multiple issues. I addressed most of them in that tutorial but specifically left out one major issue (which was quickly discovered by one of our readers) to be a subject for fixing selective color in Lightroom and Photoshop. If you take another close look at the photograph I chose in that tutorial, the face of the model is visibly brighter than the color of the rest of her body. While in many cases our facial color tends to differ from the rest of our body, it can look rather awkward in photographs. Especially in this particular photograph, it is obvious that the foundation on model’s face did not match to rest of her skin color.
If you have photographs like these, there are multiple ways of fixing them and these two methods could be used for a variety of other things. So, follow along to find out how I deal with such issues. First, I will show you how to do it in Lightroom, then I will also do the same in Photoshop.
1) Selective Color Correction in Lightroom
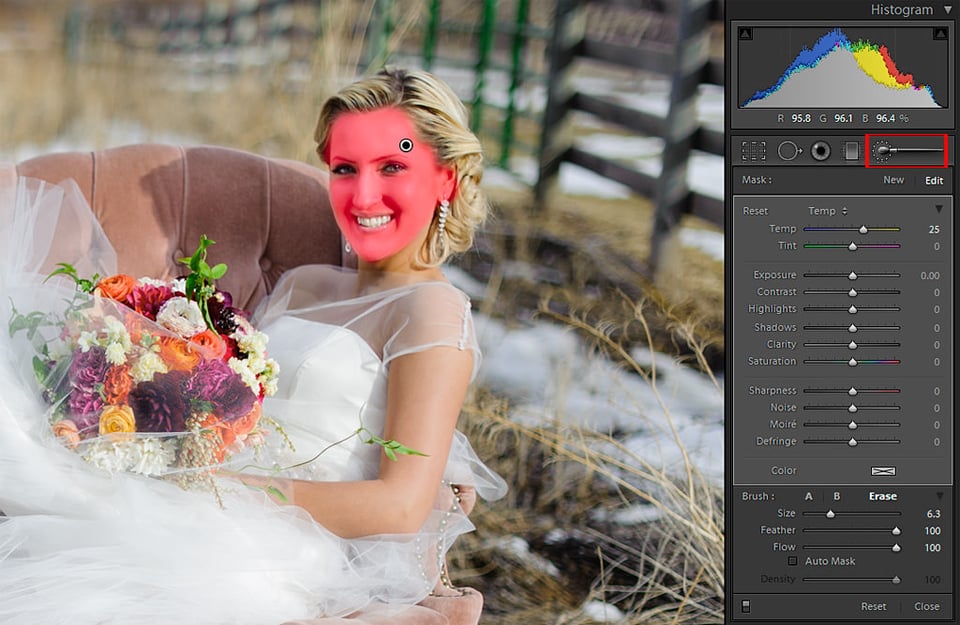
Thanks to Lightroom 4’s selective white balance correction, fixing colors in a certain area is a very easy and straightforward process. Start out by using the Adjustment Brush and painting the affected area. In this case, I carefully brushed the model’s face without touching her eyes and mouth. A quick tip: if you accidentally over-brush, do not forget that you can simply press and hold the “Alt” key, and the “+” sign in the adjustment brush will turn to a “-” sign, which indicates that you can erase the over-brushed area. Keep holding the “Alt” key and carefully un-brush the area that you do not want to touch. Here is my selection:
Once the area that needs color/skin correction is selected, simply start moving the “Temp” and “Tint” sliders until the color/white balance is adjusted to match the rest of the skin. In this case, values between 20 and 25 for Temp gave me the best results. If you have a dual display setup, the changes will be immediately visible on the second screen. However, if you work with a single screen, then the best thing to do is to press the “O” button on your keyboard, which will hide the color overlay on your adjustment brush. Then once you move the sliders, you will see the effect immediately.
Here is the before and after:
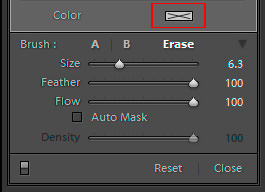
If you are using an older version of Lightroom with no selective white balance correction, then you can use another method, which also works quite well. Once you click the Adjustment Brush and the menu pops up on the right panel, click the X area right next to “Color”:
Once you do that, a new window will pop-up with a bunch of colors:
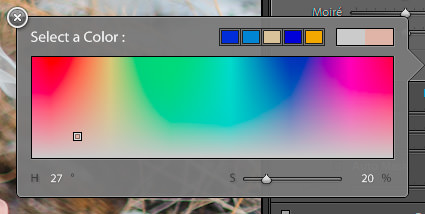
Now you have to select a color that you want to apply to the skin. The lower you go, the less the intensity/opacity of the color. Obviously, you have to be more careful with this tool, since you could introduce new colors to your photograph. However, if you do it right, you could achieve a similar result as the above method.
2) Selective Color Correction in Photoshop
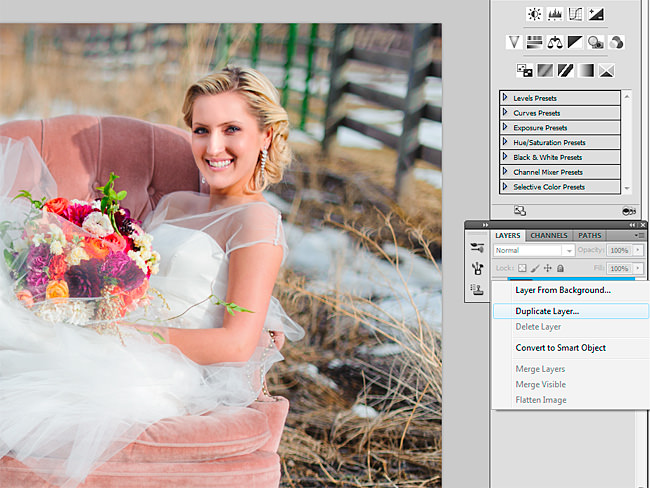
If you prefer to take this process to Photoshop, then here are the detailed steps to achieve the same or better result. First, start out by duplicating the existing background layer:
Now change the blending mode of the new layer to “Color” as shown below. This will allow you to paint over the affected area with a color of your choice and will make it easier to blend:
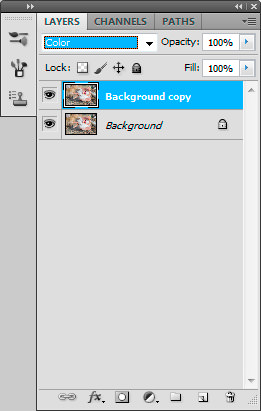
Now select the brush tool from the left menu:

Then Alt+Left Click the area you wish to copy from in order to pick up a sample pixel. In our case I chose the brighter side of the neck area, avoiding areas close to her face and avoiding shadows.
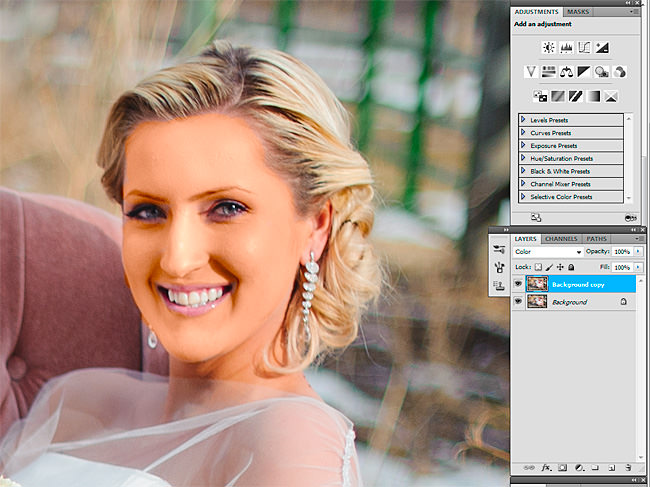
By choosing the right brush size carefully paint over the area you are working on, avoiding painting any other areas (eyes, teeth, eyebrows, earrings, etc.)
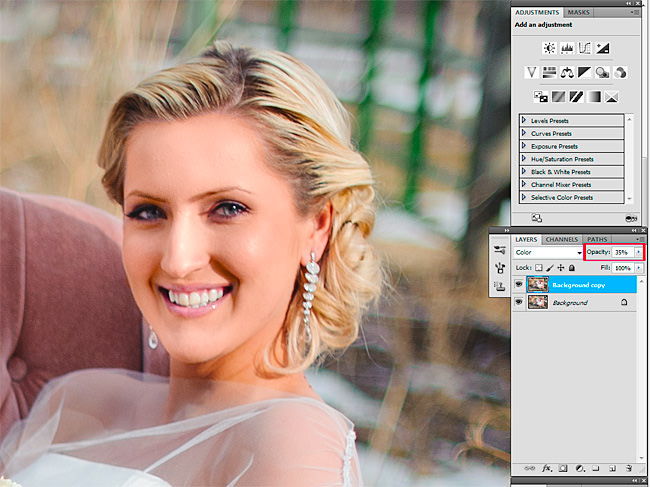
Once done, reduce the opacity to a number comfortable to your eyes, making sure you are close to the color of the overall skin color. I felt comfortable at leaving the opacity at 15% for this particular photograph. Finally, flatten the image and examine it for any potential problems with the newly colored area.
So here is the image before:
And here it is after the above changes:
Hope this helps you a bit at solving similar problems you might encounter.

This color correction work has done amazingly. Such perfect color tone you have put on the photo. The contents are also very informative and easy to understand.
This is a very good and more effective idea about color-correction. i have more benefited from this post. thanks for this best idea
I’m new to Lightroom found this really useful! Thank you!
Dear Nasim,
While processing in LR4, do you use the active D-lighting function in the camera ? I heard it under-exposes the image in LR4 compared to NX2. Your input is highly appreciated as I find the image processed in NX2 much more pleasing if I use ADL, but somehow I can’t get the same richness in LR4.
But as everybody knows Nikon’s software is a pain to use..
Gracias Lola: Por enseñarnos con estos ejemplo y aprender mas sobre fotografía,Saludos
Thank you so much for the informative tutorial. I would also add that Photoshop CS6 Color range now has skin tones option and can detect faces. That seems to make the process of correcting skin areas faster and even more accurate. Wonderful time we live in.
Mako, thanks for letting us know! I have not yet upgraded to CS6, but will do soon. We will probably work on a post that highlights all the features of the CS6 compared to CS5 then…
Love your website, learnt so much from it, I will want to donate for the efforts you guys have done, but can’t find a donating page, It would help if you would put up one because I am earning money from your techniques and it is fair if i share some with what i have learnt from your website .
Hassan, thank you for your feedback! We do not have a donation box, but we might add one in the future, since this is not the first time our readers are asking about it…
Hi, really like the site and use it for a reference – but looking at this article’s pictures the before/after double picture looks virtually identical on my PC but the one after photoshop is clearly improved on the before shot.
Is this deliberate accident or just that Lightroom can’t do as good as an improvement as photoshop ?
Steve
Steve, not sure why you can’t see the difference – it is pretty clear on my monitor. You should be able to achieve very similar results with both Lightroom and Photoshop…
this was a very useful tutorial. Thank you Lola.
You are most welcome Muddasir!
Thanks so much for bringing in photoshop solutions for those of us without lightroom. I have wanted to play with the new version but no time to read up on it. These quick tutorials are wonderful.
Thank you for your feedback Deana, glad you enjoyed the tutorials!