If you are an Adobe Photoshop user and you regularly work on large files, you are running Photoshop on an older or slower computer, or you just want to make sure that you are running Photoshop with maximum performance, then understanding scratch disks is important. Maybe you’ve even received a “Scratch Disk Full” error and you aren’t sure what that means or what to do about it. Today we’re going to look at scratch disks in Adobe Photoshop. We will learn what they are, how to set them up for the best performance, and how to empty them and deal with that pesky error message.
Table of Contents
What is the Photoshop Scratch Disk?
The first thing we need to know, before we learn how to setup and empty scratch disks is exactly what they are and why Photoshop uses them. Scratch Disks are temporary storage that Photoshop creates when it needs more storage than it has available on your computer’s RAM. Photoshop is a complex program, and because it is so powerful it is also it is very “resource intensive” meaning it uses a lot of your computer’s resources – from the processor, to the graphics processor, to the memory. When Photoshop needs more memory than your computer can provide it begins to use the computer’s Solid State Drive (SSD) or Hard Drive (whichever your computer has) for extra short-term storage. Essentially scratch space is hard drive/ssd drive space that Photoshop is using as extra RAM.
How to Allocate RAM to Free Scratch Disk Space
Before we get into how to make scratch disks more efficient, I want to start with a quick note about the RAM. In an ideal setup, Photoshop would have enough RAM to run everything without ever needing to use scratch disk space. While that is often not possible, it can be useful to know how much RAM is allocated to Photoshop and adjust that to reduce Photoshop’s reliance on scratch disks.
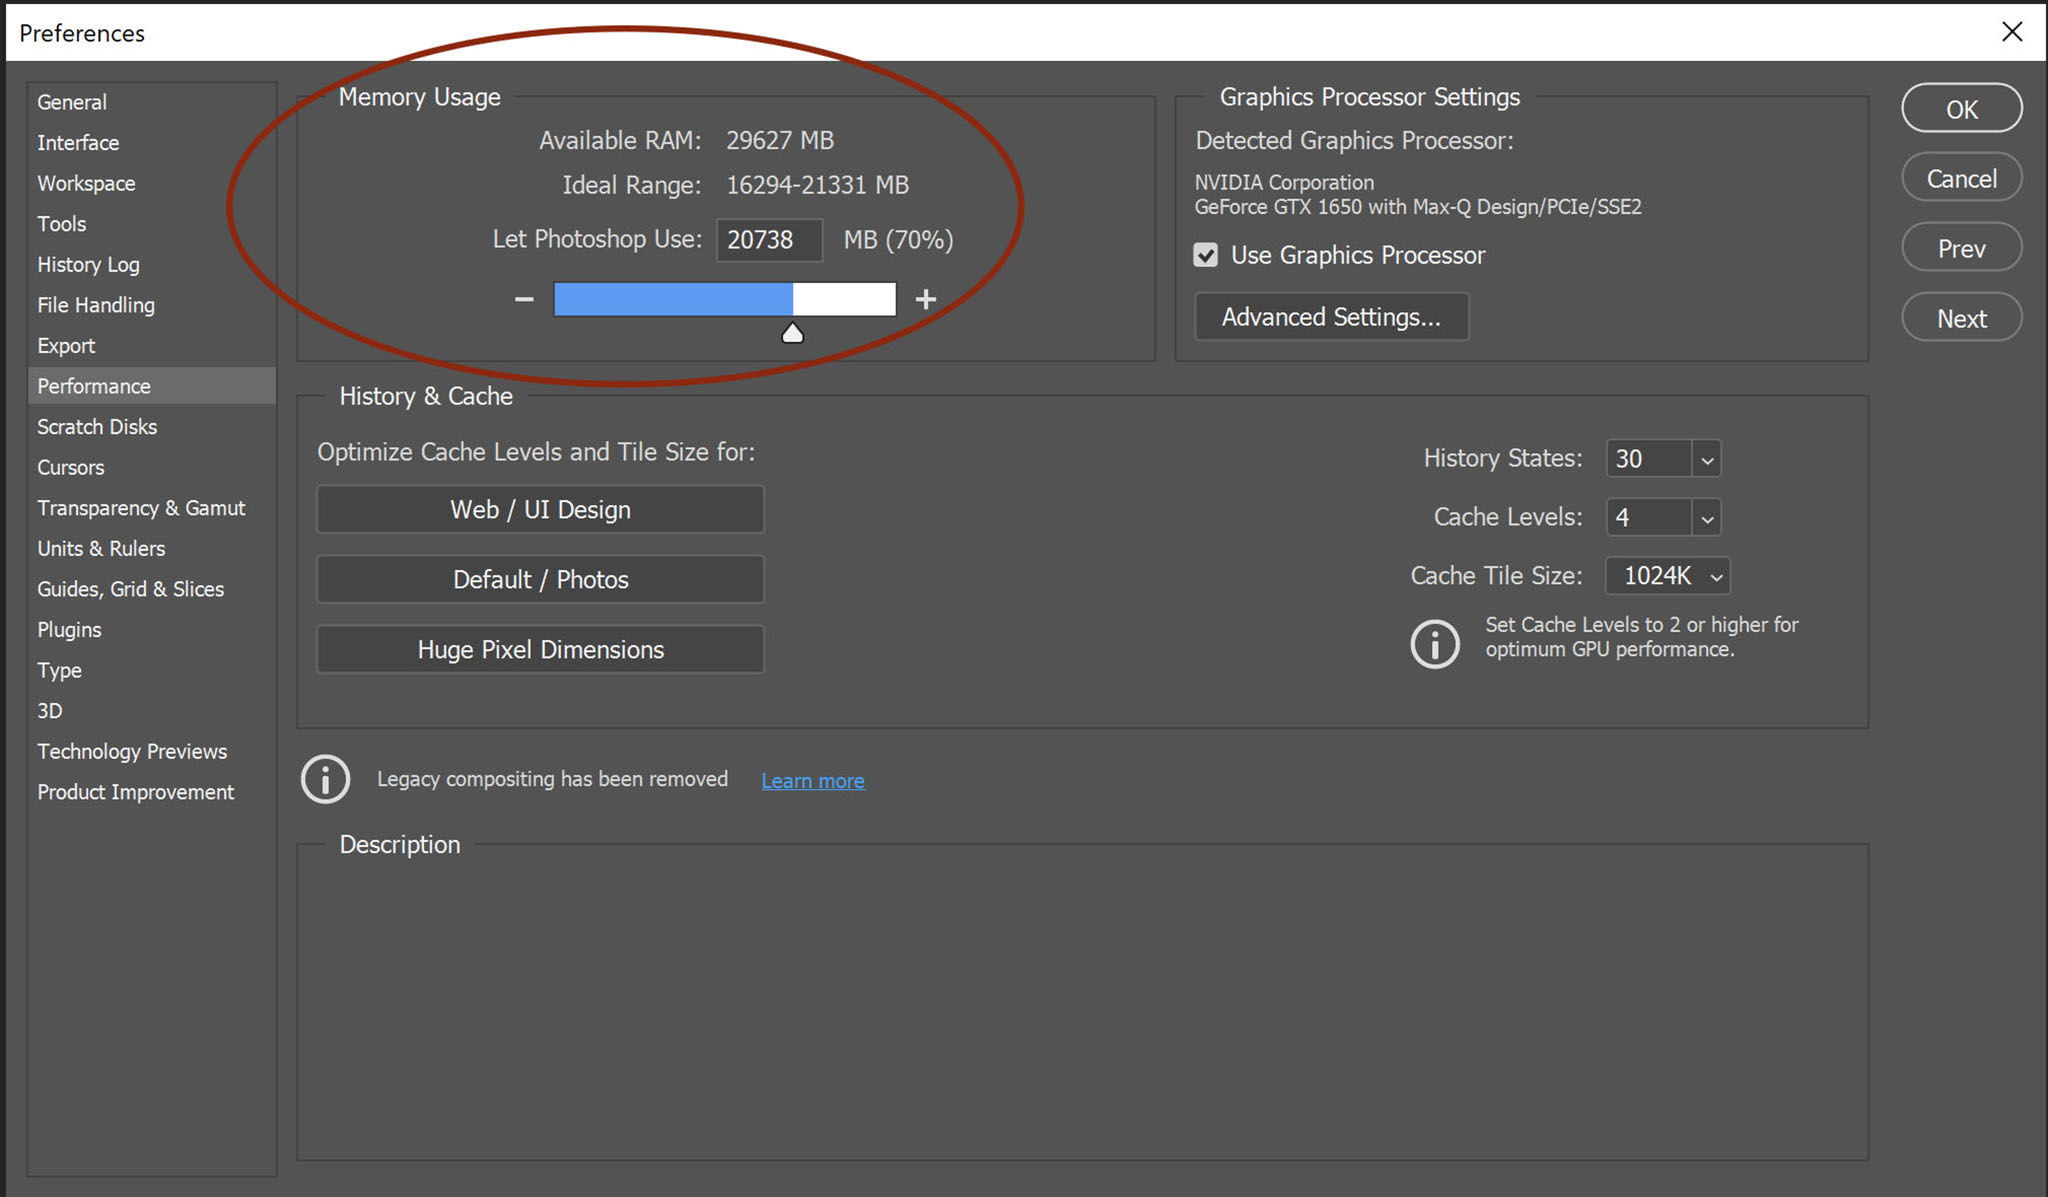
By default, 70% of your computer’s RAM is allocated to Photoshop. Because the computer needs RAM space to operate, Adobe warns against increasing the RAM allocation to greater than 85%. Depending on your computer set-up, how much RAM you have, and what processes your computer is running, the actual amount of memory your computer needs to operate efficiently will vary, so Adobe recommends increasing the RAM allocation in 5% increments. It’s a bit of a balancing act, though, because you do need to be careful not to allocate too much RAM to Photoshop. Still, since RAM storage is more efficient than scratch disk storage, making sure that Photoshop has the RAM it needs to operate can help with performance and also help keep the scratch disks from filling up too quickly.
Even with plenty of RAM, Photoshop will save some temporary files to the scratch disk, such as auto recovery files. But for the most part, increasing the available RAM either by adding more to the computer (often a simple and fairly inexpensive upgrade) or by allocating as much as necessary to Photoshop, will decrease scratch disk use and increase Photoshop’s performance.
How Much Scratch Disk Space Do You Need?
Hard drive/SSD Space can already be an issue for photographers (all those large RAW files start to add up), but it is essential that you leave enough room on your drive for Photoshop’s scratch space. If your scratch disk is running on your main system drive, Photoshop will automatically reserve 6 GB of space as scratch space. On non-system drives it reserves 1 GB of space. But how much you actually need is different than what Photoshop is reserving, and it varies drastically based on what you are actually doing in Photoshop.
For smaller processes and edits, Adobe says you will need 1.5 GB plus 2 times the size of all the files you have open at once. For large processes and complex edits, they say that you could need current document sizes multiplied by the number of history states (you can adjust the number of history states by going to Edit > Preferences > Performance).
Practically, file sizes add up quickly, especially when working with large files and multiple layers or multiple image files. So, it’s important to make sure you have plenty of available space on your drives.
Using the Status Bar to Check Efficiency and Scratch Sizes
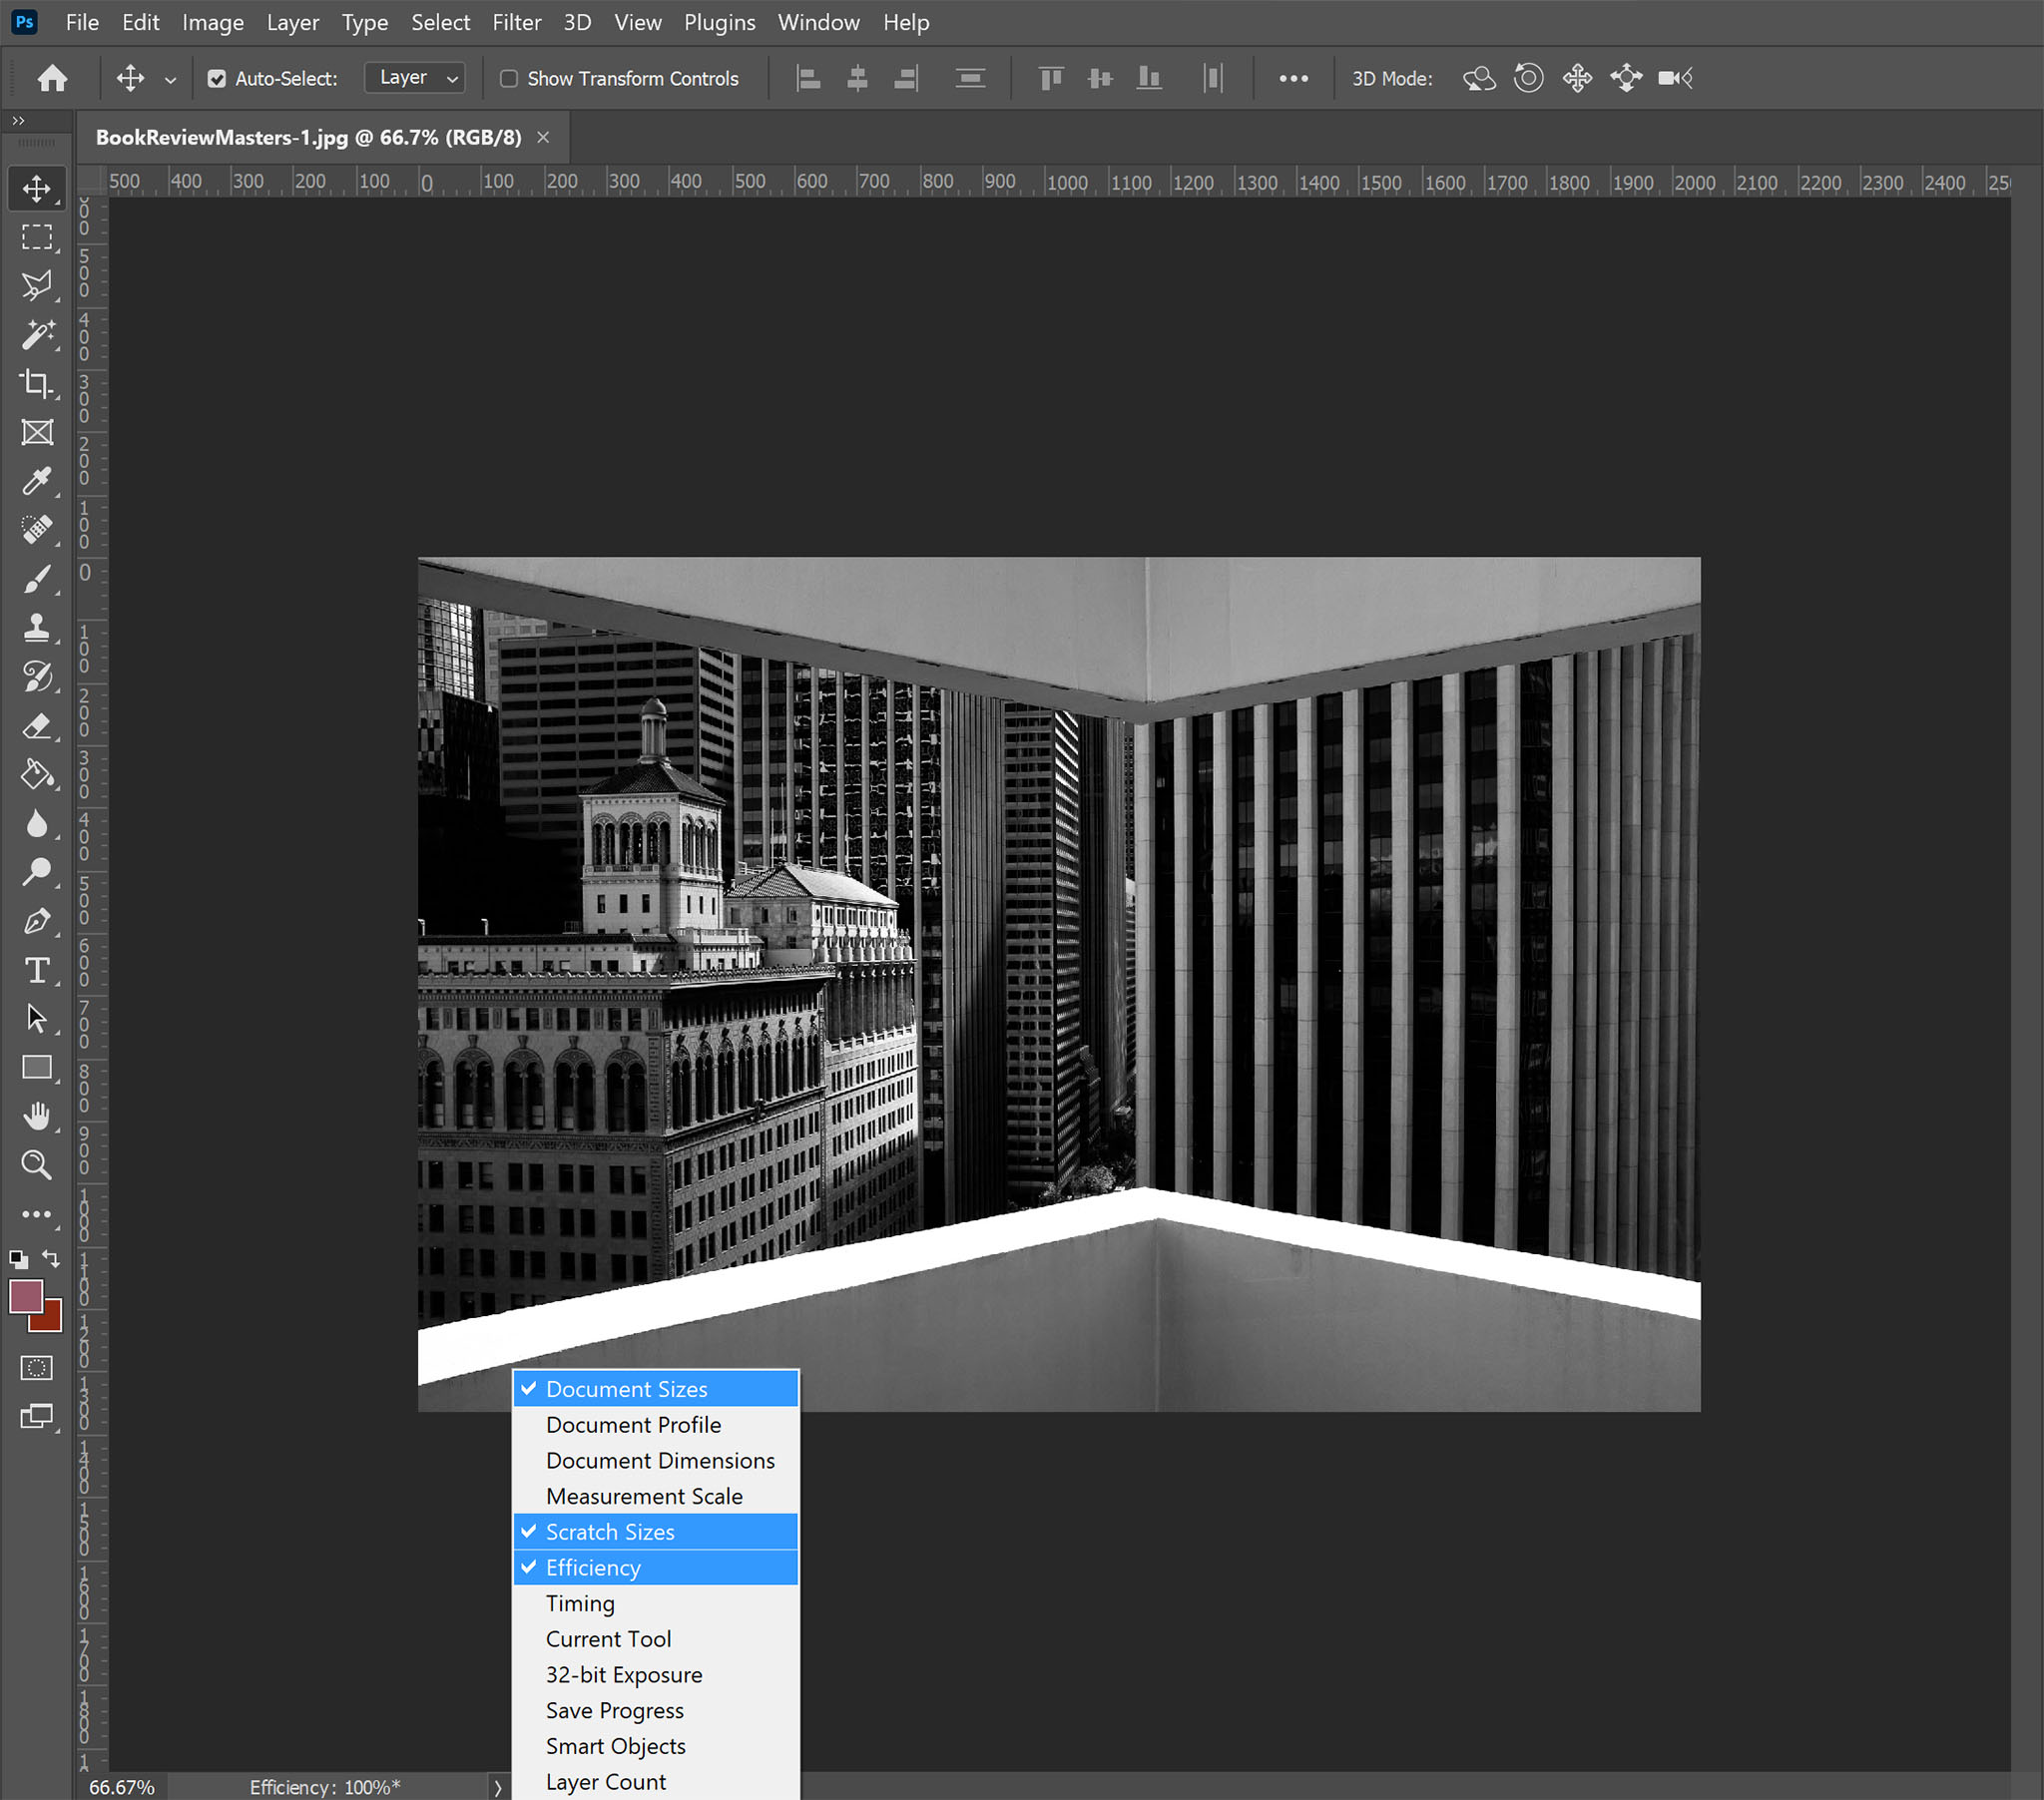
In the bottom left corner of your Photoshop documents, there is status bar that can display information about your image and about Photoshop’s efficiency and scratch sizes. By clicking on the arrow on the right-hand side, you can select the status option you would like displayed. Three of these can help give us a good indicator as to how Photoshop is running with regards to scratch disk space:
- Document Size gives you the file size of that particular document. There are two numbers displayed, with the number on the right being the actual document size as it is open in Photoshop (with layers and such) and the number on the left being the size if you flattened the document. Having an idea of the size of the documents you have open and are working on can help to give you an idea of the amount of memory Photoshop will need.
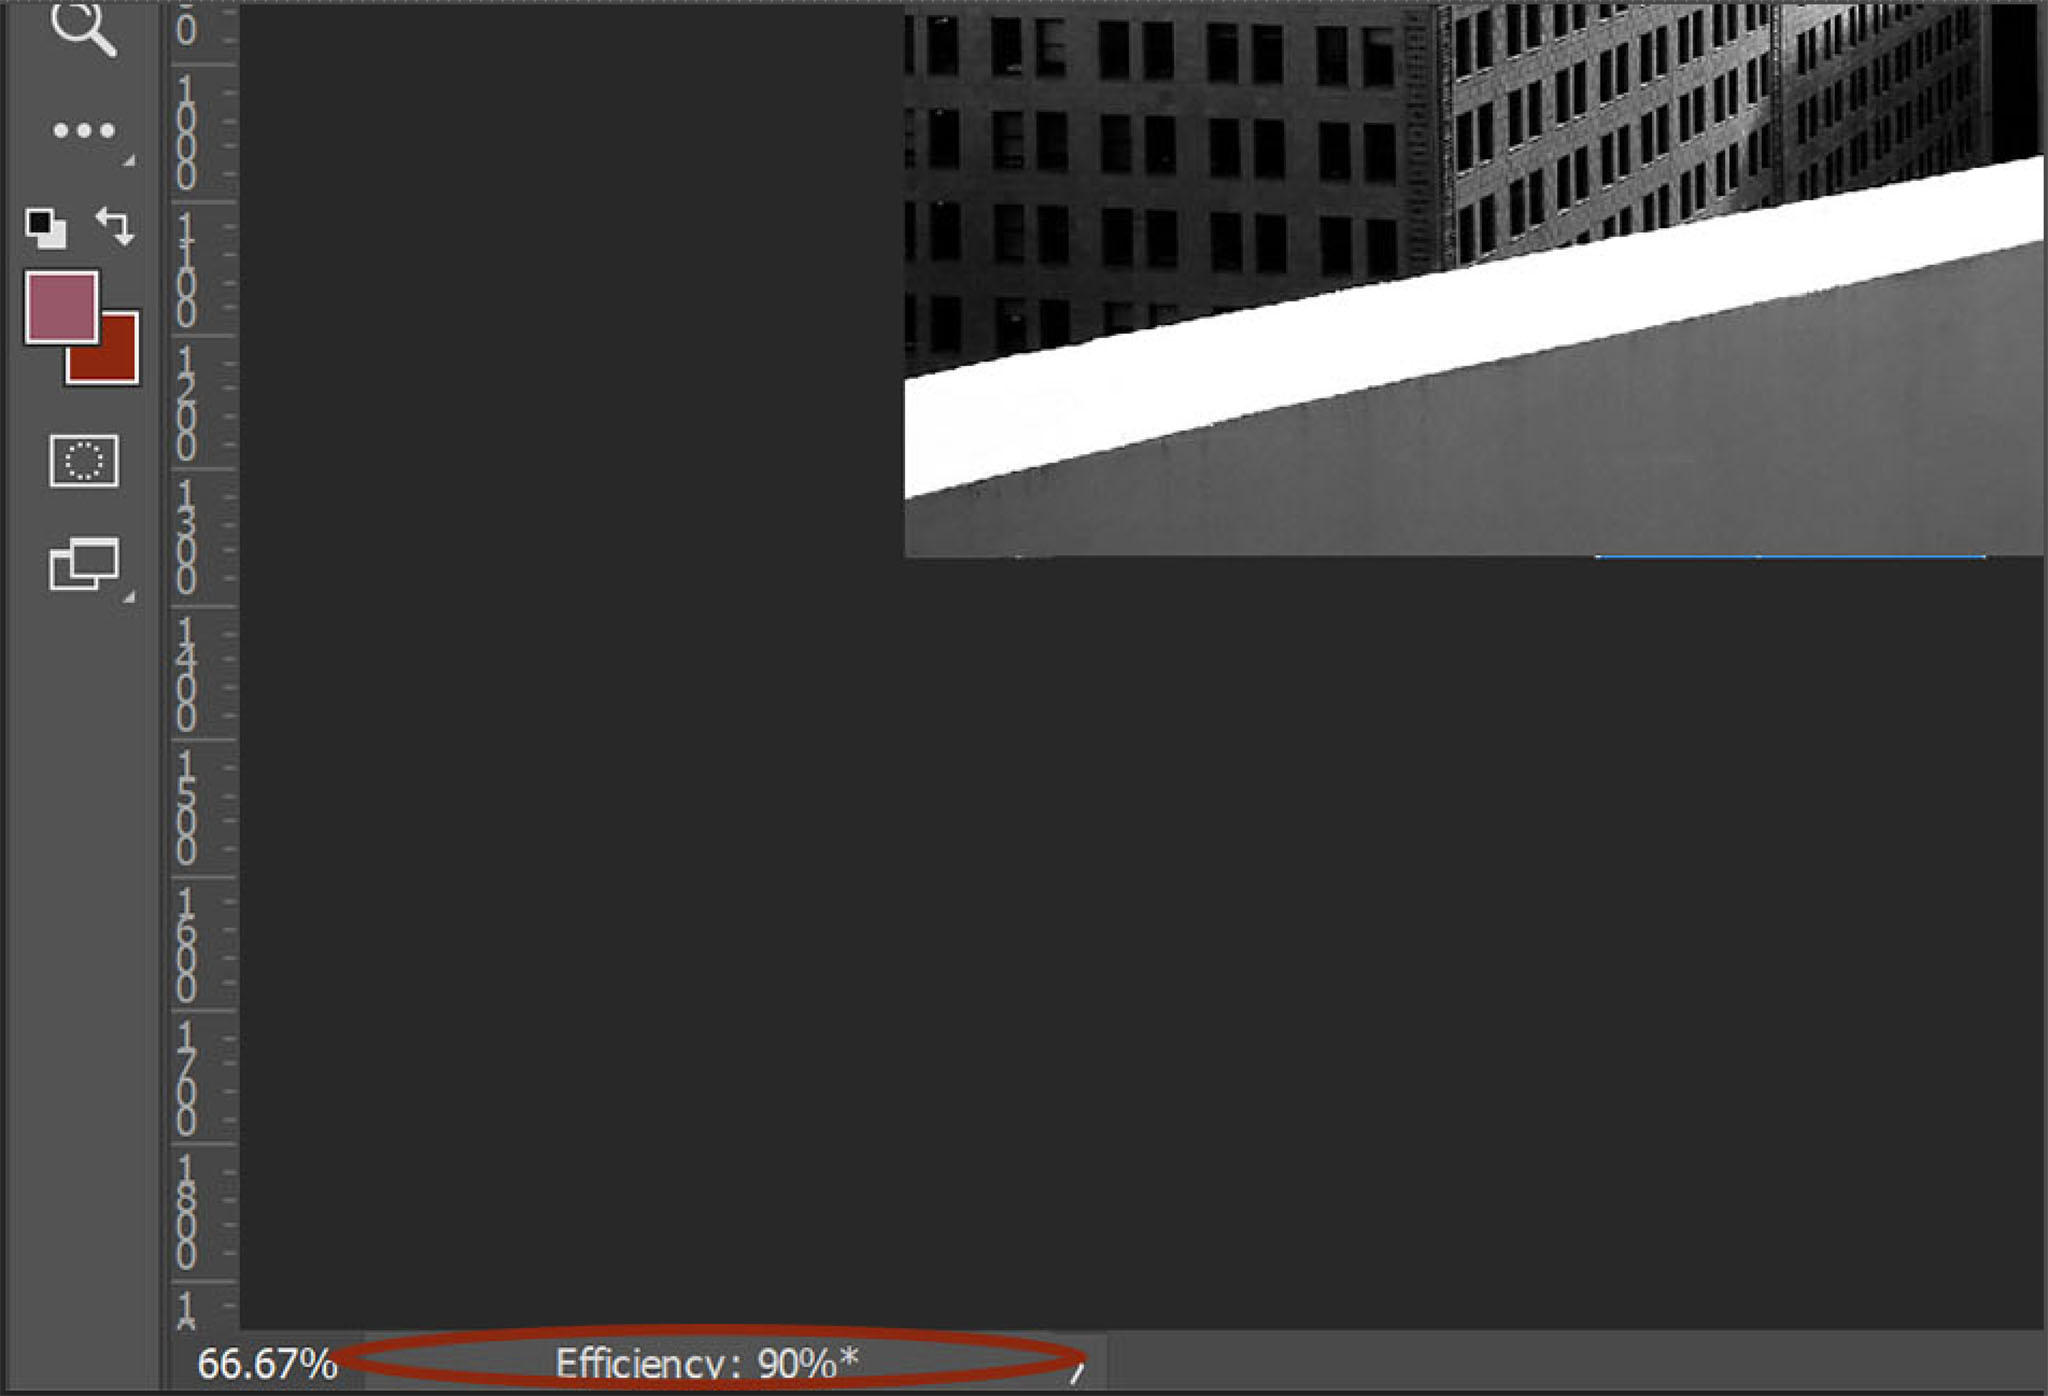
- Efficiency is displayed as a percentage. When the efficiency drops below 100%, it indicates that Photoshop is writing to scratch disks. The lower the percentage, the greater percentage of the time Photoshop is spending writing to scratch disks. Watching the efficiency number drop is a good indicator that you need to make sure you have plentiful scratch disk space available for Photoshop to use, and it’s also an indicator that Photoshop needs more RAM to run as efficiently as possible.
- Scratch Sizes displays the total amount of memory that all the open documents are using (left number) and the amount of RAM that Photoshop has available to use (right number). The less of the available RAM the open documents are using the less you will end up relying on scratch disk space and the better Photoshop will run.
How to Move Photoshop Scratch Disks to Another Drive
The information in the status bar can give you a good idea of how Photoshop is running and if you can expect your scratch disks to fill up, but how do you free up more space if you need to?
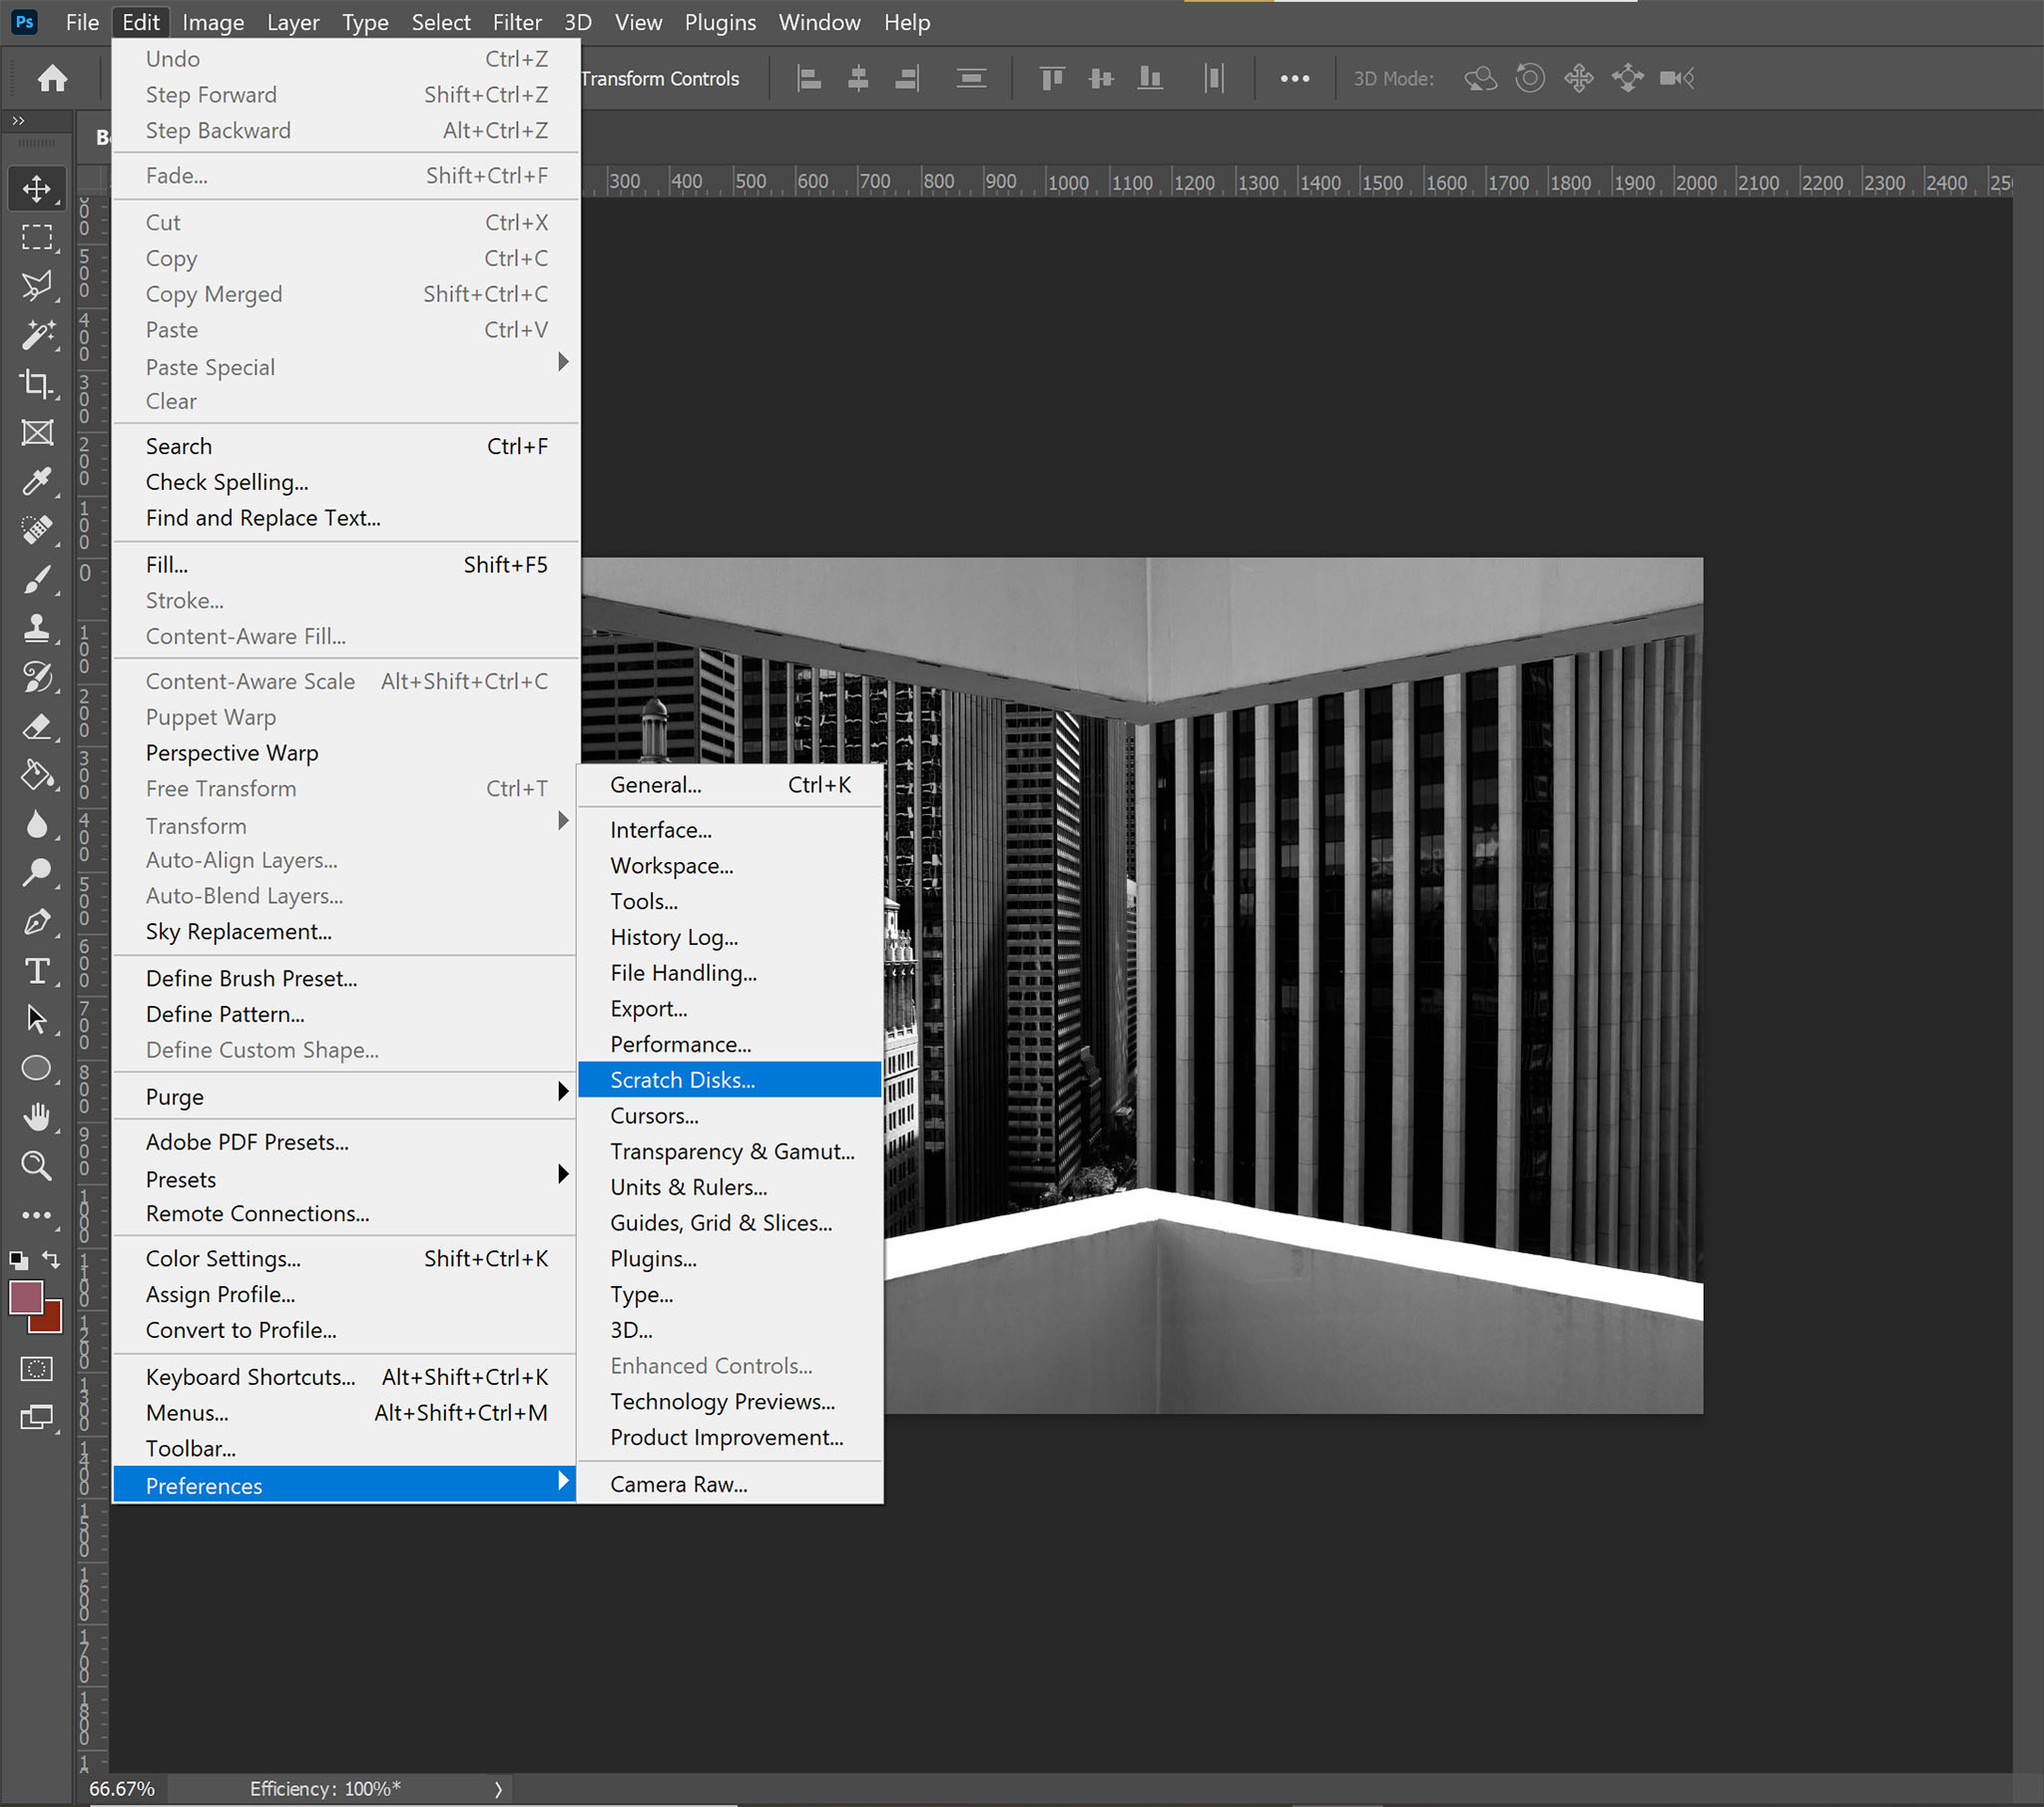
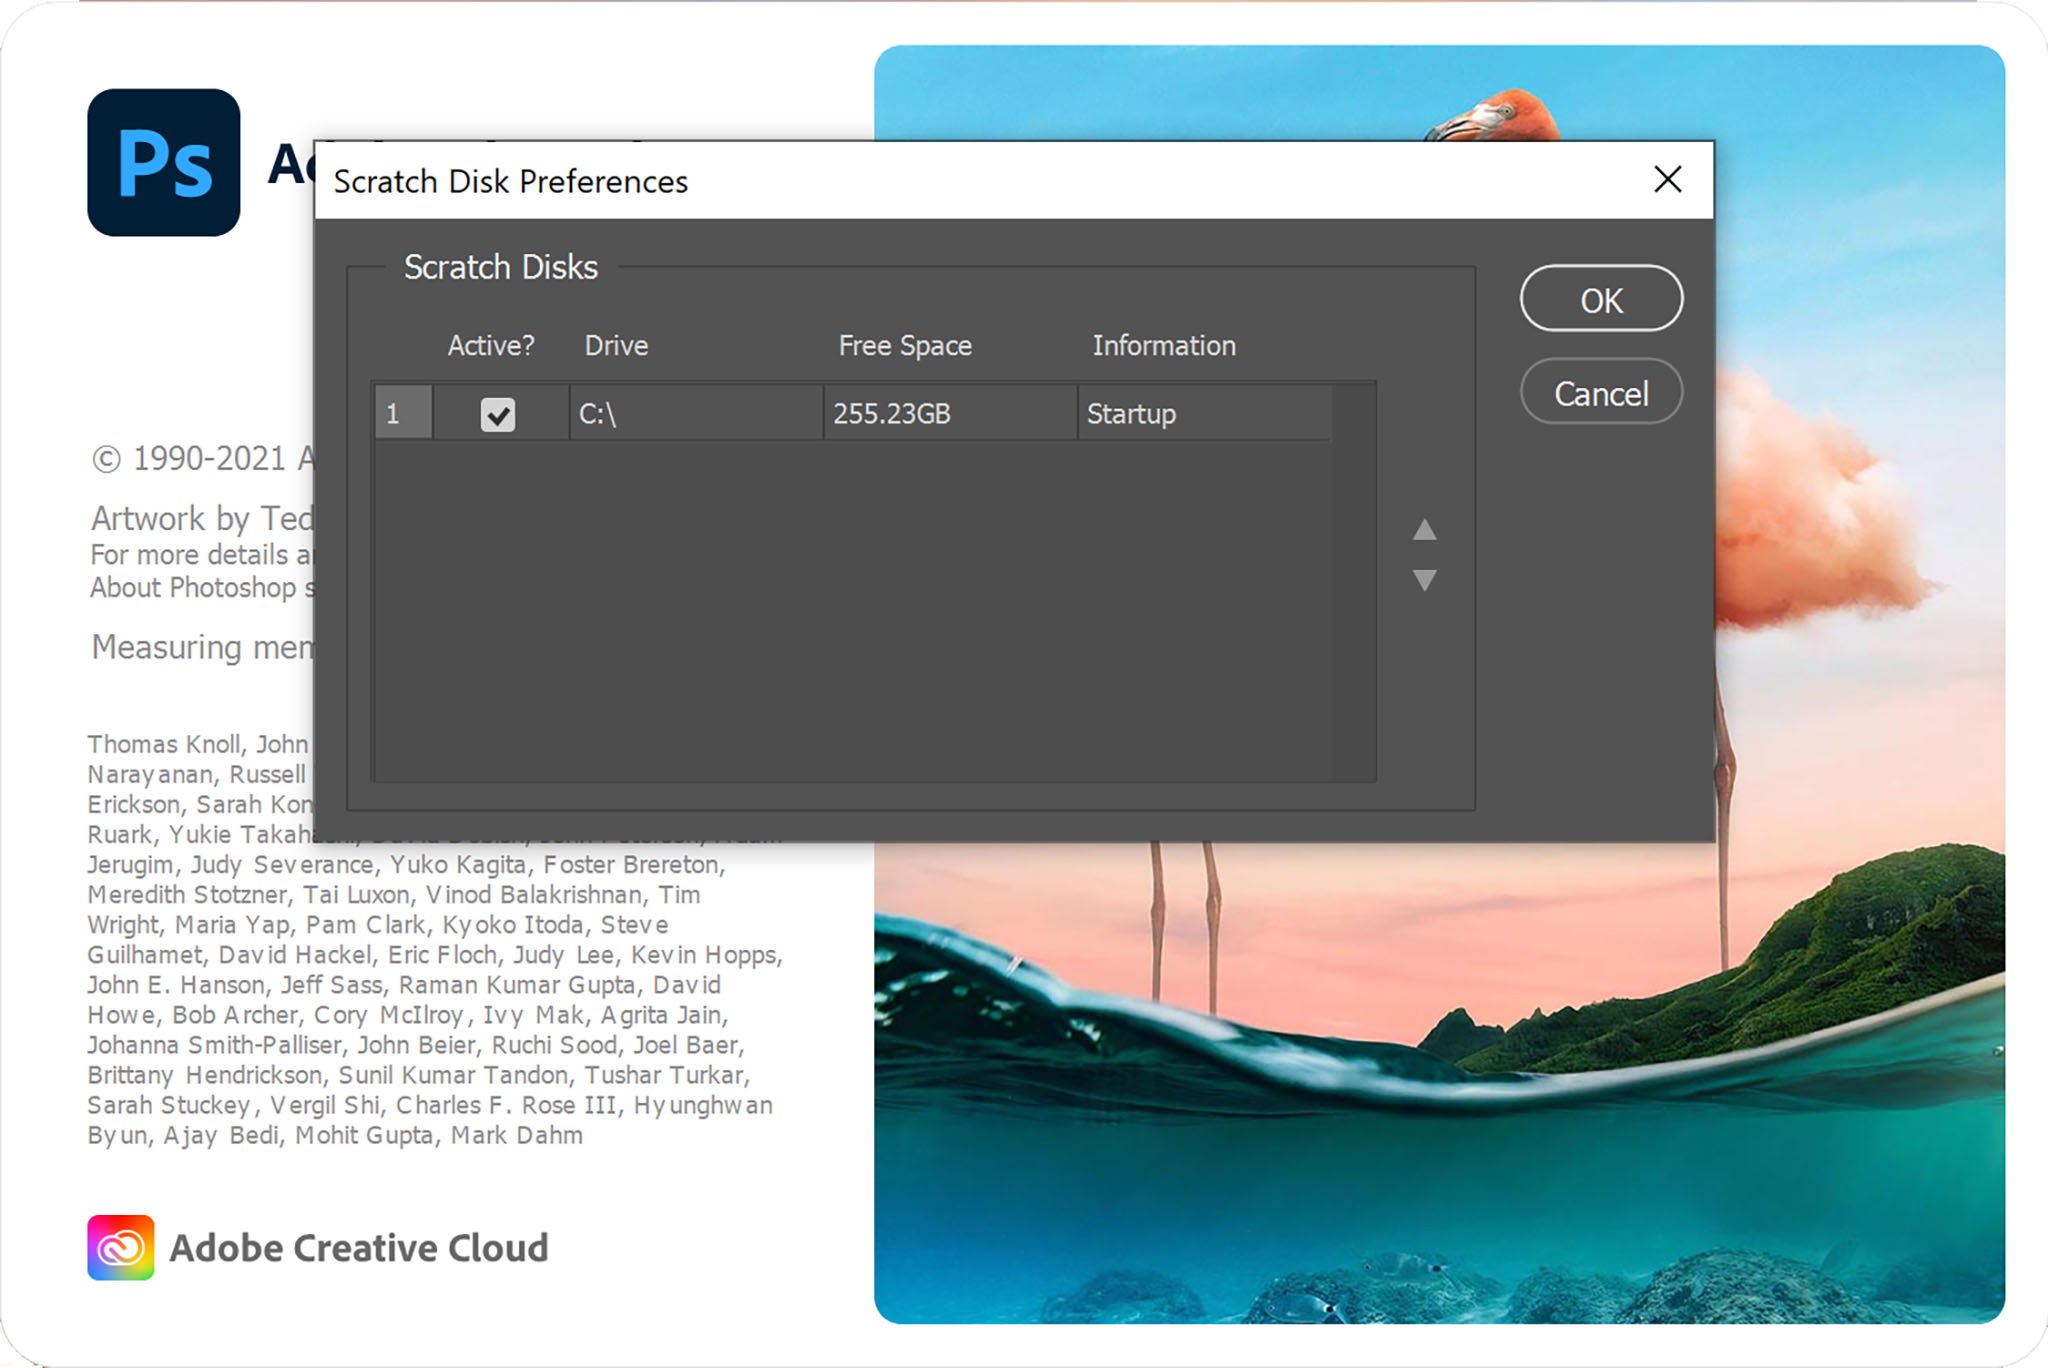
If you need more scratch space, one of the easiest and quickest ways to free up space is to move the scratch disks to another drive. By default your scratch disks will be stored on your system drive, but you can change that by going to Edit > Preferences > Scratch Disks and assigning a new drive, or additional drives. You can assign up to 4 hard drives or SSD drives to be used as scratch space.
If your main system drive is an SSD, you may as well use your main drive as your scratch disk drive; there is no performance penalty, as long as it has enough free space to run efficiently. However, if your main drive is a hard drive, then you will see a performance increase from moving your scratch disks to another drive. You can use a secondary drive as scratch disk space, either another internal drive or even an external hard drive/ssd drive as long as you are using a fast connection like USB 3.0 or Thunderbolt.

To change which drive Photoshop is using for scratch disks, go to Edit > Preferences > Scratch Disk. Then use the checkbox to select or unselect the drives you want to use. You can allocate up to 4 drives as scratch space. External drives using a high speed connection are fine, but if the drive wasn’t connected when you opened Photoshop, you will need to restart Photoshop before it will recognize it as an option. When you make changes to your scratch disk drives (adding or selecting new drives), you will need to restart Photoshop before they take effect.
Using Your System Drive for Scratch Space
If you can’t move your scratch disks to another drive then you want to free up space on the existing drive. If your scratch disks are stored on your system drive then Photoshop is automatically going to allocate 6 GB of space, but your operating system most likely uses your system drive for virtual memory as well, so you likely need more free space than that to make sure your computer is running well. If your scratch disks are on a hard drive as opposed to an SSD drive then you also want to make sure to defragment the hard drive regularly. Because of the way scratch disks are saved to the drive, hard drives uses as scratch disk require more regular defragmenting than they would otherwise.
Clearing Memory Within Photoshop & Purging Cache Files
If you are watching your scratch/document sizes climb and your efficiency drop, you may want to clear up some memory while you are in Photoshop. The absolute easiest (and least painful) way to do this is to simply close documents you aren’t using until you need them. Closing extra documents can drastically reduce the memory and the scratch disk size Photoshop is using.
You can also reduce the size of a large document you are working with by cleaning up any unnecessary layers. Duplicating the background layer of a photograph doubles the image size and increases it by the original image size again for every new duplicated photographic layer.
Decades ago, whenever possible, we were advised to make a selection and only duplicate the necessary selection of an image to a new layer to save space. Steps that drastic are rarely necessary now, but if you are dealing with an extraordinarily large file or a very slow machine, reducing your extra layers (or flattening layers when possible) can help. Make sure you don’t need to make changes to a layer before flattening it, though, as flatting an image is a trade-off between editability and space.
Reducing the number of History States (Edit > Preferences > Performance) can also drastically reduce the memory/scratch disk space that Photoshop uses. Of course, it is a trade-off between performance and the ability to undo/go back farther. But if you keep your History States to a number that you’d realistically need, rather than using something excessive, you can make a significant difference in the amount of memory Photoshop is using.
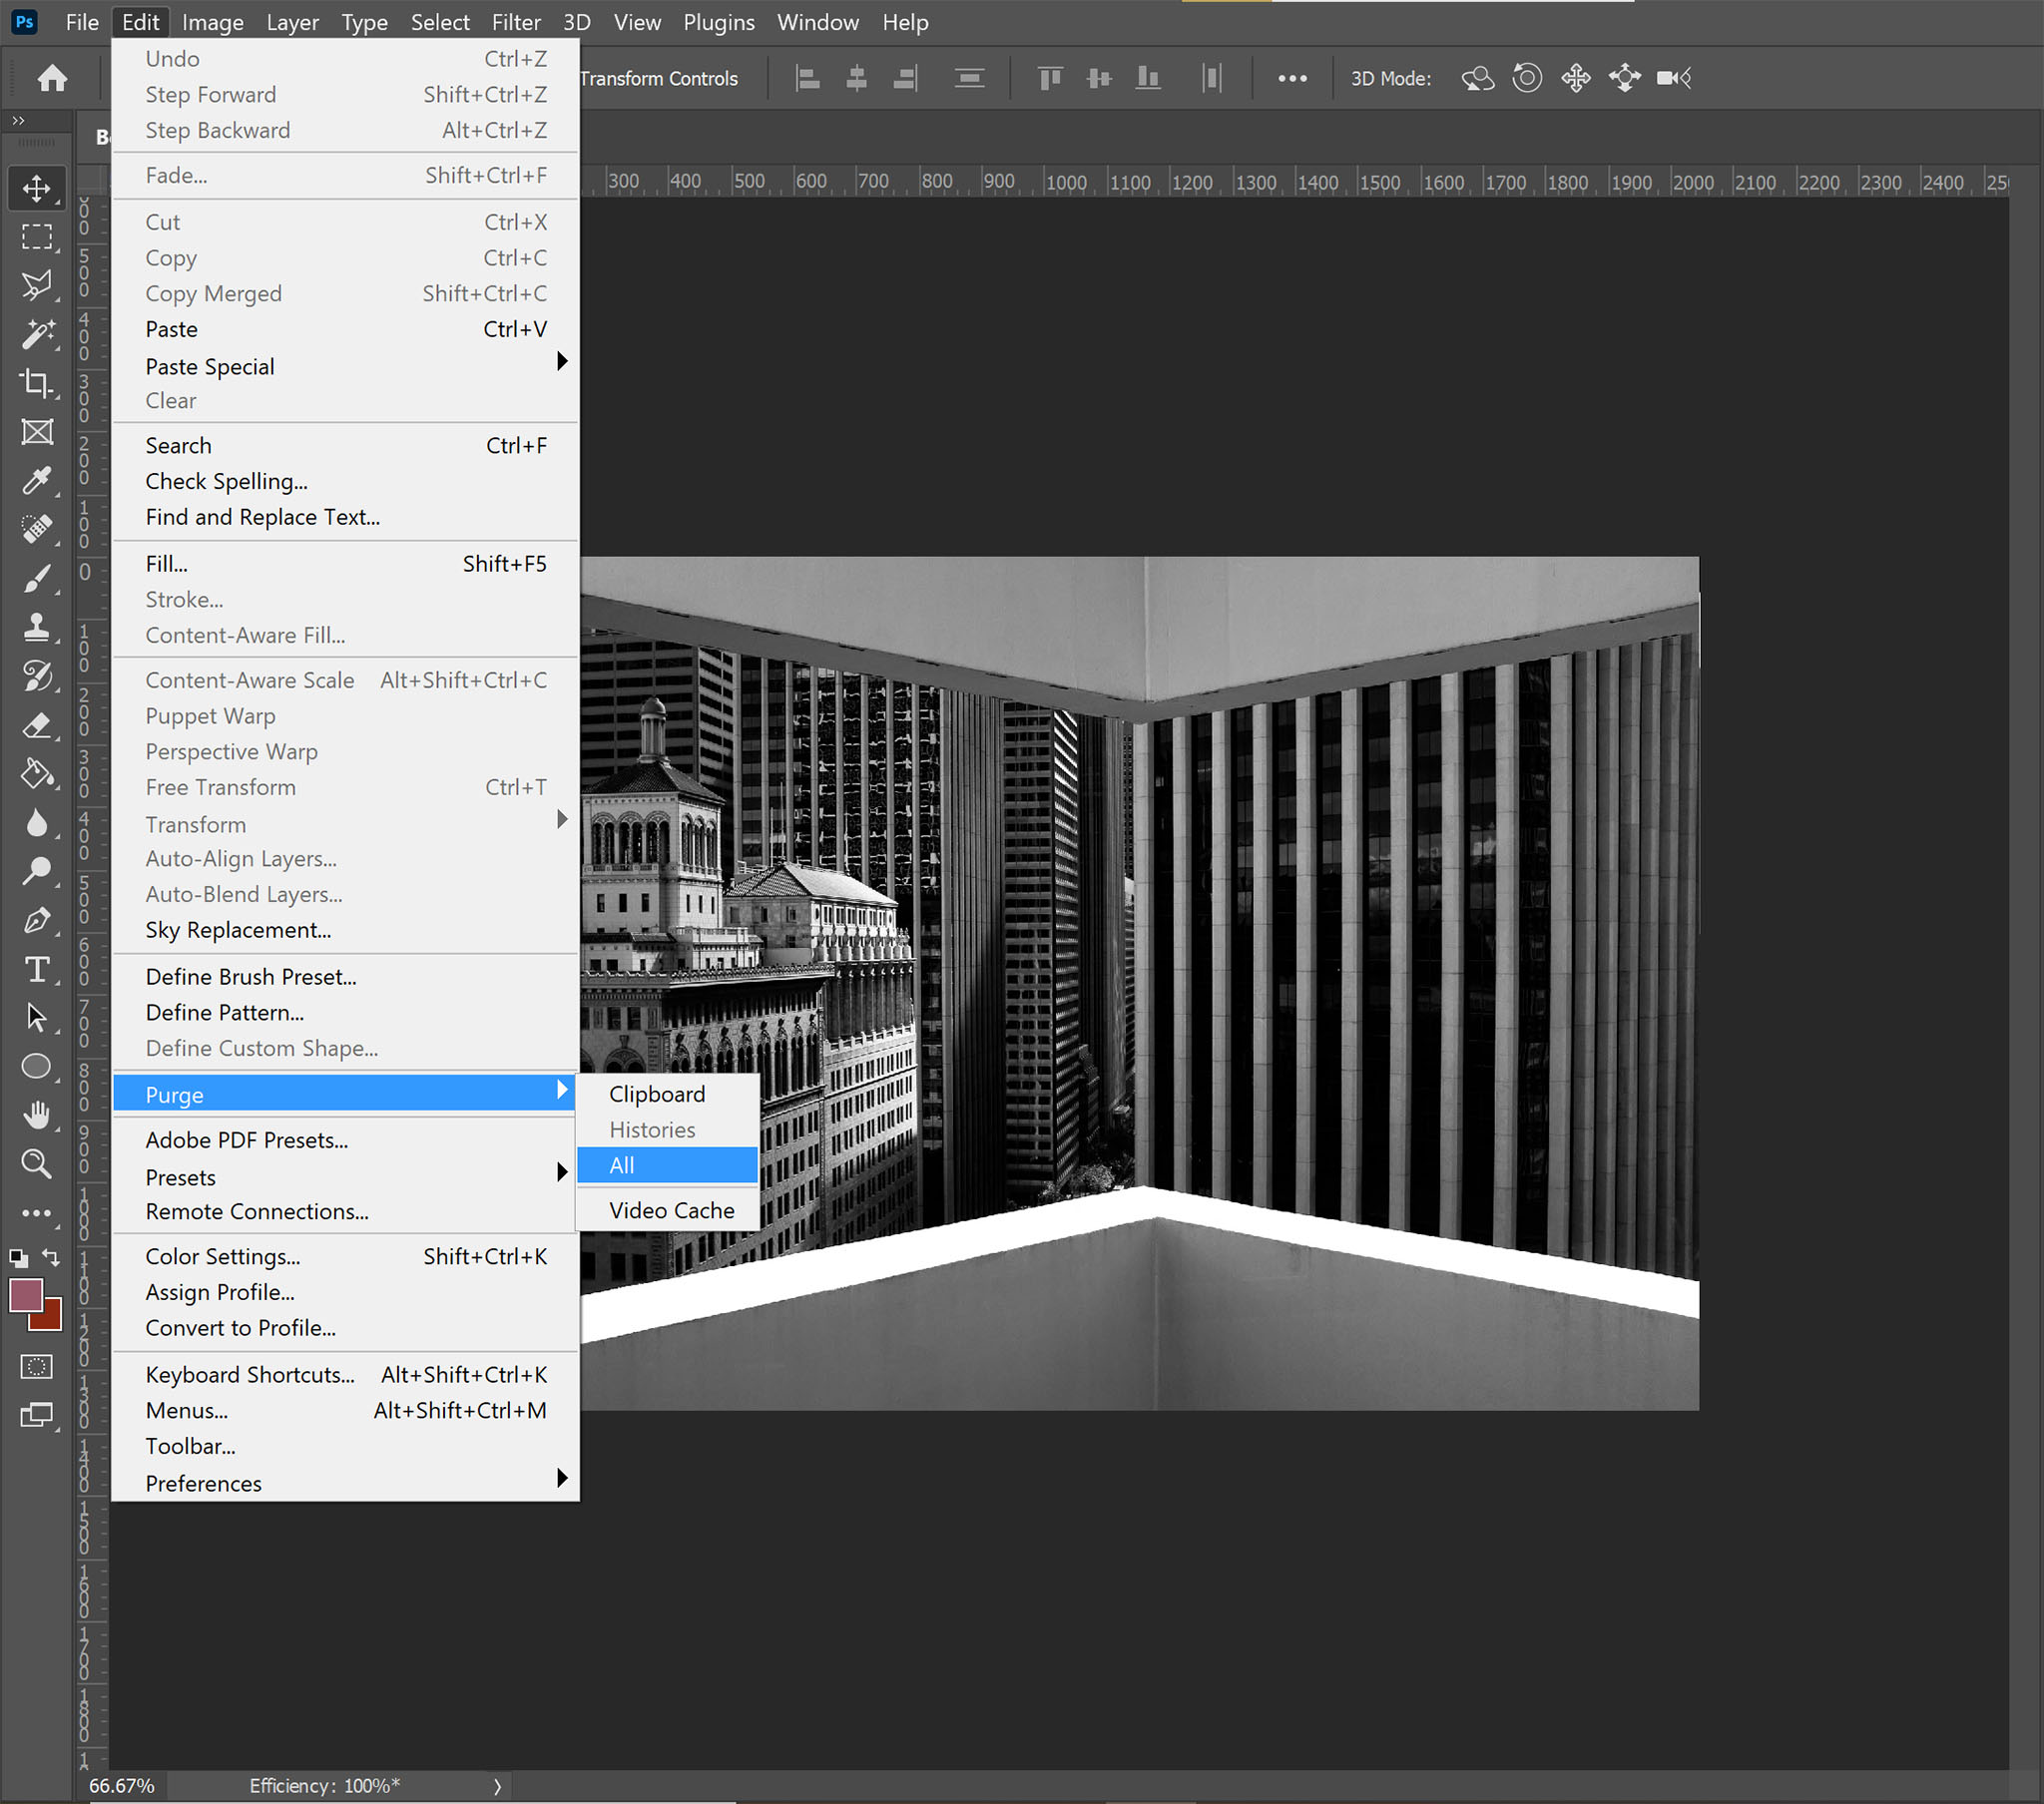
You can also purge your cache files to free up space, but this does come at a cost as well. If you go to Edit > Purge, you will have the option to purge the “Clipboard” or the “Histories” or “All.” Clearing the clipboard will clear anything you have copied to the clipboard. Histories clears all the history states, so even undo (CTRL/CMD +Z) will no longer be available. However, history states can take up a lot of memory, so this can be helpful if you’re sure you don’t need to go back. While purging these will free memory or scratch space, keep in mind that it cannot be undone.
What to do when Photoshop Cannot Open Because Scratch Disks Are Full
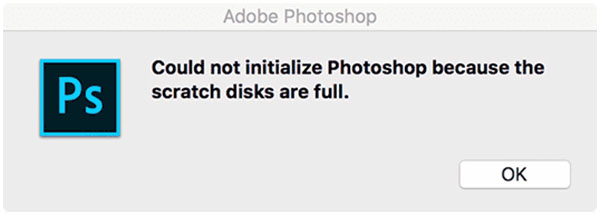
One of the most frustrating error messages Photoshop gives is the one that reads “Could not initialize Photoshop because the scratch disks are full.” If Photoshop can’t initialize then how can you deal with the scratch disks? Well, the first thing to do is to make sure that the hard drive that Photoshop is using for Scratch Space is not full. If you haven’t changed your preferences then that will be your main system drive.
If it is full, clearing space on the drive will help solve the problem. Move files to an external drive, delete unnecessary files, clear the recycle or trash bin on the computer. Anything you can do to free up Gigabytes worth of space should fix this error. If you can’t free up enough space – or, you simply want to select a different scratch disk drive, but Photoshop won’t open because the disks are full – then you can hold CTRL+ALT (Windows) or CMD+OPTION (Mac) while Photoshop is launching to select a new scratch disk drive.
Reset Photoshop Preferences
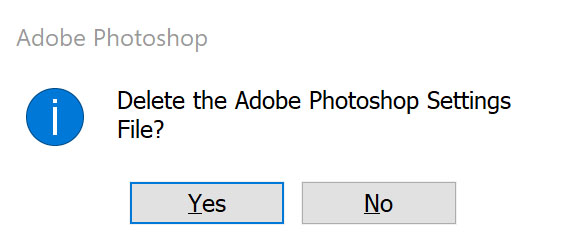
Sometimes an error or a corrupted preferences file in Photoshop can affect your scratch disks. Fortunately, resetting the preferences can be done on launch in much the same way as resetting the scratch disk drive. To reset Photoshop preferences, you can hold down CTRL+ALT+SHIFT (Windows) or CMD+OPTION+SHIFT (Mac) while Photoshop is launching. Because this will reset the preferences, you should back up your preferences before resetting them if at all possible .
Making sure that Photoshop has the memory it needs to run efficiently, and making sure your scratch disks are setup properly, can go a long way to keeping Photoshop working the way you need it to. It’s important for all Photoshop users to keep an eye on efficiency, know where their scratch disks are located, and be familiar with what to do if Photoshop encounters a scratch disk error. Hopefully this has simplified that process for you, so you can keep working on your images uninterrupted.
You claim there is an option to add scratch disks in the Preferences > Scratch Disks dialog.
Unfortunately that’s not accurate. There is no way to add disks in this location. I have four separate NVMe/SSD’s on this system, one being a boot drive, and yet there is no button or option to add a drive that is not already shown (identical to the screenshot you provided).
Your post makes no mention of how, specifically, you would go about choosing to add a drive, most likely, because that option doesn’t appear to exist.
Make sure you plug the drive that you want to use into your computer before opening Photoshop. Otherwise it won’t show up in the preferences box. If you do this, then the disk should show up in the list of drives in the scratch disk preferences and you can click the checkbox on the left side of that drive to make it an active scratch disk at which point you can use the arrows on the right to adjust the order in which Photoshop will use the drives.
Mine still doesn’t show up!
, it must be formatted as Mac OS Extended (Journaled) or it will not show up in the Photoshop Scratch drive list, even if it is showing up in the Finder or Desktop. If it’s already MacOS Extended, run Disk Utility First Aid on it.Gene
Having the exact same issue. My external SSD drive will not show up in the Scratch Disks Preferences box no matter how many times I restart Photoshop with external SSD hd plugged in. What am I missing?
I got a different SSD drive, which is my time machine drive and it shows up. I’ve used the other drive with AE as my scratch disk and it worked fine. Hmmm..
I still cant get anything to load. I tried clearing the drive that the scratch disk is in, and I tried everything else, but I still cant get it to open
How long is it necessary to keep scratch drive files on external HD? Should we ever delete them, besides when the drive is full? Thank you.
When Photoshop closes it should automatically clear the scratch disks, so you should be all set!
This is a great article and I appreciate the effort it took to write it. It is very well written.
I learned a lot.
Thanks for the education!
Nice clear discussion; learned a lot. Thanks!
Hi Meg
its almost like you read my post over on Nikonians :)
I was in all sorts of trouble with “scratch disc full” , was only making brushes for a snow scene when it happened
The only way I could find some help was on YouTube and even then there was only one option, (deleting cache files), had me confused as the SSD which was the scratch disc and had approx 350GB free?
Thank you so much for your post, will take this old timer (76), some time to ingest, keeping the old brain rolling on :)
Much appreciated,
Regards.
Gary
Hey Gary, glad this article is helpful for you! One thing to keep in mind is that presets (including custom brushes) can potentially use quite a bit of scratch space. If you are able to save out any brushes you don’t need and only load those you need for a particular project may help! This may or may not have been an issue in your case, but it is something to keep in mind.
Meg
Thank you Meg
………… Gary AU