When Ilija, owner of Kolari Vision, emailed me regarding his introduction of the 550nm infrared filter this past winter and shared some of the initial images taken with it, I was intrigued. I had used various models of Nikon DSLRs converted for infrared photography since 2007, relying primarily on the 720nm filter. Over the years, however, I slowly began to develop an appreciation for those filters affording more faux colors. In April, I took the leap and had Ilija convert my Nikon D750. What follows are my thoughts regarding the new 550nm filter, a description of post-processing techniques and settings, and examples of the results.
Table of Contents
1) Richard Mosse – Redefining Aerochrome
In my youth, I came across some infrared images displaying vegetation in strong reddish/pinkish tones taken with Kodak Aerochrome film. The military first used the film for surveillance purposes. It allowed airplane photography crews to cut through atmospheric haze and accurately identify man-made military structures designed to blend into the surrounding countryside vegetation. For some reason, these images made a strong impression on me.
Six years after beginning my infrared journey with a converted Nikon D40X, I discovered the photographs of Richard Mosse. His moving images of the Congo warlords and armies, village residents, conditions of destitute poverty, and stunning landscapes would have been compelling enough in visible light, but Mosse’s use of Kodak Aerochrome 120mm film made them appear all the more surreal. Below are just a few of his photos from the series.
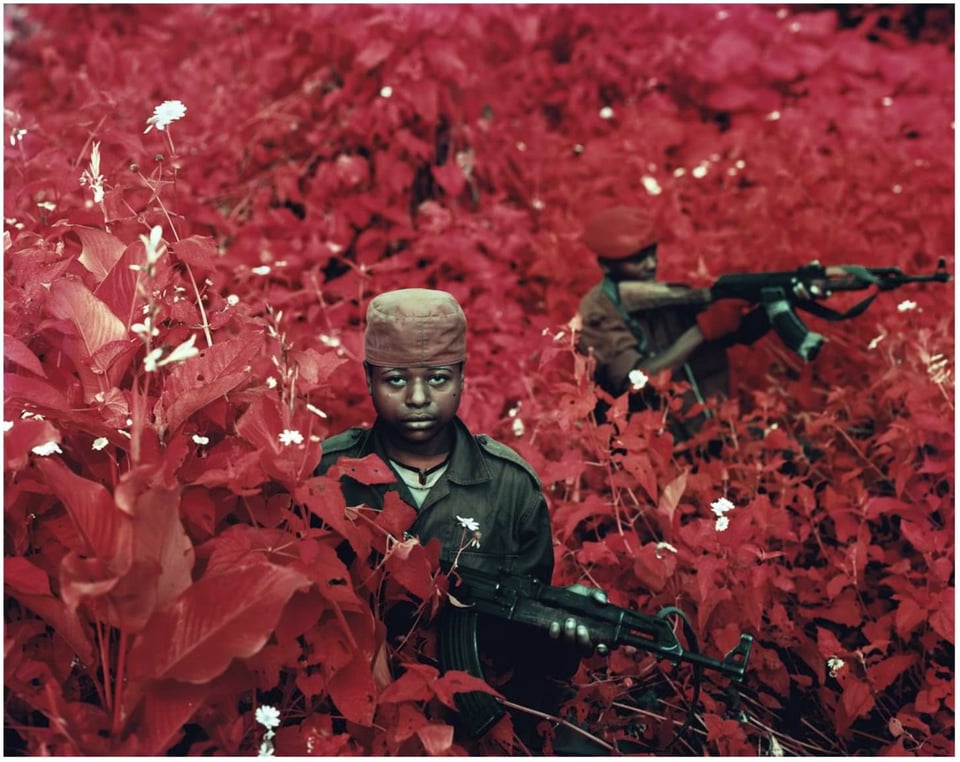
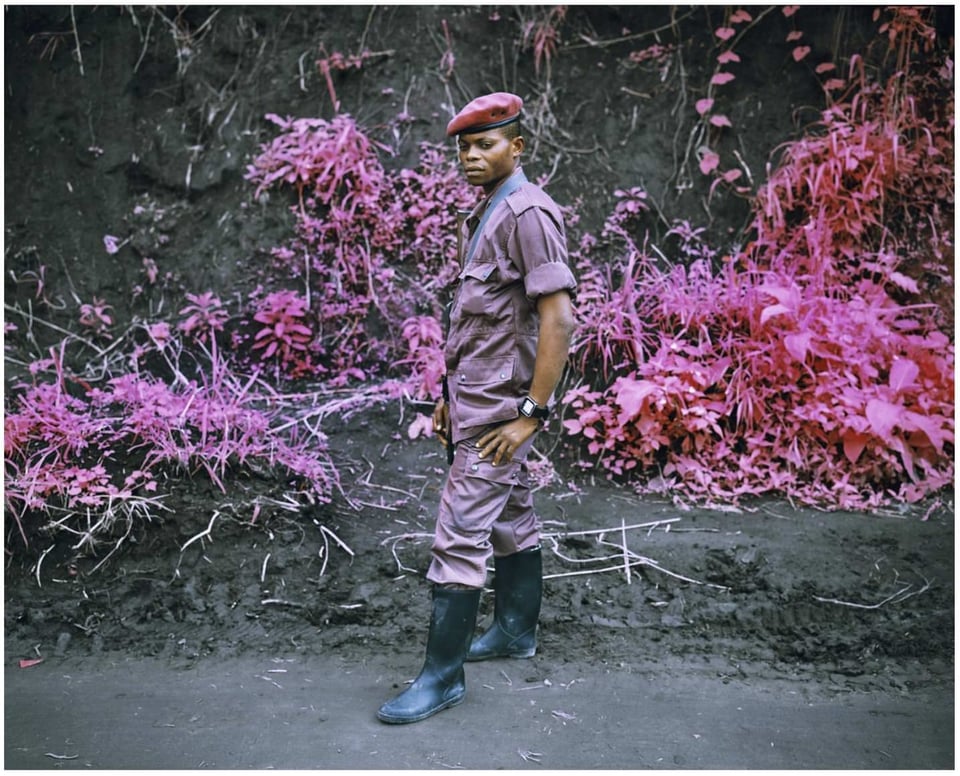
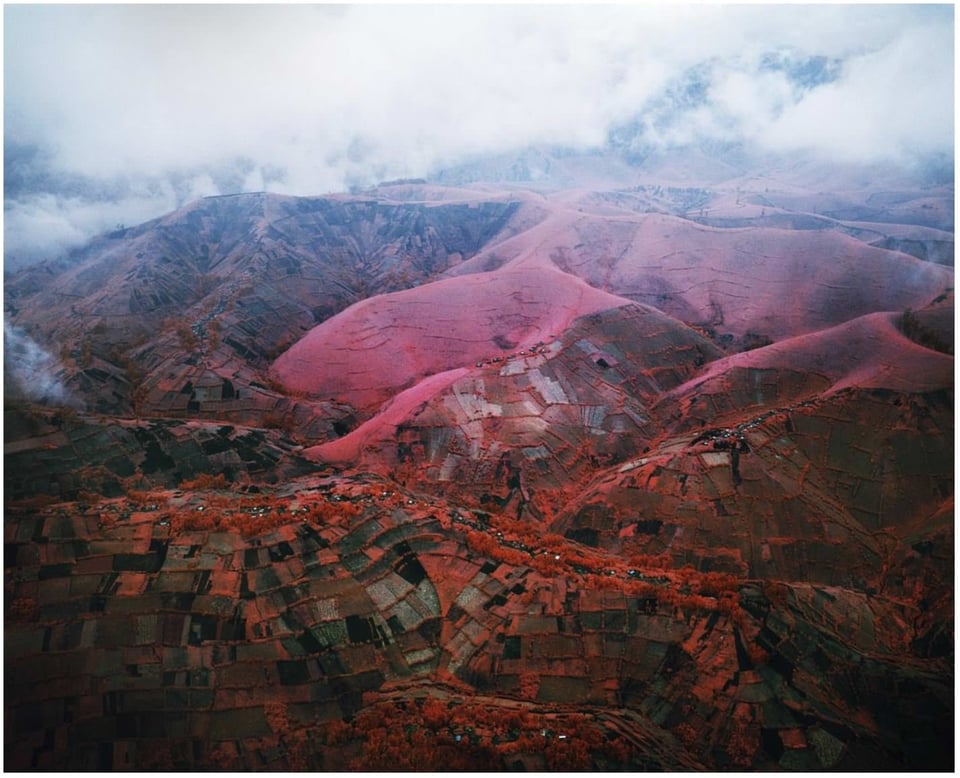
If you are not familiar with Mosse’s work, I strongly suggest you visit his website. The blood-red color of his infrared photos accentuates the tragedy in this part of Africa, while the pink tones in the soldiers’ uniforms create an almost fantasy-like aura surrounding this brutal and inhumane environment. His use of color also adds a haunting beauty to this troubled land. Even if you are not an infrared aficionado, you will likely be moved by these photos. My thanks to Richard for allowing me to include his photos in this post. You can find more of Richard’s impressive work here.
2) More Color, Please…
I have long relied on the 720nm filter because of its versatility and ability to capture bright white tones. Despite being pleased with the 720nm’s results, I sometimes found myself wishing I could squeeze just a bit more color out of my infrared images. With some experimentation, I indeed found I could do so under certain conditions. While I had to be careful not to introduce noise or blow out some of the channels by oversaturating the colors, I indeed found there was more color to be had from the 720nm filter than most people realized. I described my post-processing routine and results here.
I found myself warming up to vibrant colors produced by the 590nm filter. Some people claim the 590nm can mimic the results of the 720nm filter with the right post-processing routine, but I realized this technique only worked under ideal circumstances. The 590m filter simply captures less infrared light than that of the higher wavelength filters. If I wanted the colorful tones of the 590nm filter and bright white tones, I would need to use a 720nm or 850nm external filter on a 590nm converted DSLR. At the time, however, I was not enthusiastic about holding my DSLR a foot in front of my face and having to rely on Nikon’s LiveView feature. Thus, I held off on the 590nm conversion.
I continued to chat with Ilija about the 550nm filter during this past winter. He put me in touch with some photographers who had used the external version of the 550nm filter. They shared their photos, thoughts about the filter, and post-processing tips. Many of the images reminded me of Mosse’s Aerochrome photos, in some cases, mimicking the red, pink, orange and yellow tones quite closely. Everything I saw or heard about the 550nm filter confirmed it might be a good choice for my next infrared conversion. I also begrudgingly began to accept that if I still wanted great white tones, I would have to deal with a 720nm or 850nm external filter. Alas, life is full of such compromises…
3) Nikon D750 or Sony A7 II / A7 III?
I have always been very satisfied using Nikon DX DSLRs for my infrared work. Most recently, my D7200 and Nikon 16-85mm have proved to be a very reliable combination. More recently, however, I had considered moving to an FX DSLR, since, from late April through October, I shoot far more in infrared light than in visible light. Standardizing on one platform for visible light and infrared light photography would allow me to swap lenses. I also thought the FX sensor might hold a slight advantage relative to handling noise. Not a huge concern, but certainly a consideration.
After briefly toying with the idea of using a Sony A7ii or A7iii (Nikon executives close your eyes), I chose the Nikon D750 (more on this in the next article). Coincidentally, Nasim Mansurov was selling a gray market D750 with less than 3,000 shutter actuations for a very reasonable price and offered to throw in an extra battery and a Sunwayphoto L-bracket. Since the infrared conversion process invalidates the camera’s warranty, there was no reason to buy a USA model. Done.
I had to wait a few weeks for Ilija to receive the 550nm internal filters. Finally, after visiting four different post offices (none of which were mine), my 550nm converted D750 arrived at the end of April. Unfortunately, due to a longer-than-usual Pittsburgh winter (Thanks, Punxsutawney Phil!), I realized I was still a few weeks away from seeing any serious vegetation in our area and capturing anything remotely interesting with my new camera and filter.
4) Lens Selection
My trusty Nikon 24-120mm f/4 works great with visible light, so much so that I rarely feel the need to put another lens on my D810. When I used it on the 550nm with distortion correction (Lightroom) turned on, however, I noticed the corners looked particularly ragged, likely due to the combination of less-than-stellar corner performance and chromatic aberrations. If you are going to use the 24-120mm f/4 for infrared photography, I suggest turning distortion correction off. This is probably good advice in general unless you are shooting with a prime lens with minimal distortion.
I ordered a Tamron 24-70mm f/2.8 G2, which has been getting rave reviews. I began using the Tamron 150-600mm G2 lens yast year and impressed with its infrared performance. The 24-70mm f/2.8 G2’s performance is equally good. Despite the lack of appreciation some have for the Nikon 28-300mm lens, I have been pleasantly surprised at how well it performs.
I’m planning on taking each of my lenses out this summer and testing its infrared performance at commonly-used apertures. Surprisingly, the lens manufacturers still don’t bother to provide any infrared performance information for consumers, and finding reliable information on the internet is hit or miss. In years past, some manufacturers would provide an infrared adjustment marker, a practice long abandoned. I wish one of the lens manufacturers would step up and set the standard for the others by providing data that might help consumers evaluate lenses for infrared use (hint, hint).
5) In-Camera White Balance For 550nm, 720nm & 850nm Filters?
I tried setting an in-camera custom white balance for the 550nm, as I usually did with my 720nm filter (focusing on a patch of grass). This worked well for the 550nm filter, but with an external 720nm filter attached, the image on the LCD looked nothing like what I was used to seeing on the LCD of my 720nm-converted D7200. With the 850nm external filter, the 550nm’s custom white balance setting was completely unusable. It produced a terribly oversaturated blue and purple image, something akin to melting two crayons together and virtually unrecognizable. I realized I could create custom white balance settings for each filter, but the notion of changing the white balance setting every time I switched filters was not very appealing. Because I shoot RAW, however, I only rely on the white balance setting in my DSLR to help me judge exposure and how well a given scene is interpreted and rendered by the camera’s sensor. I do not care if the scene is pink, blue, green, or any other color. If I were shooting jpeg images, of course, I would have a different opinion on this matter.
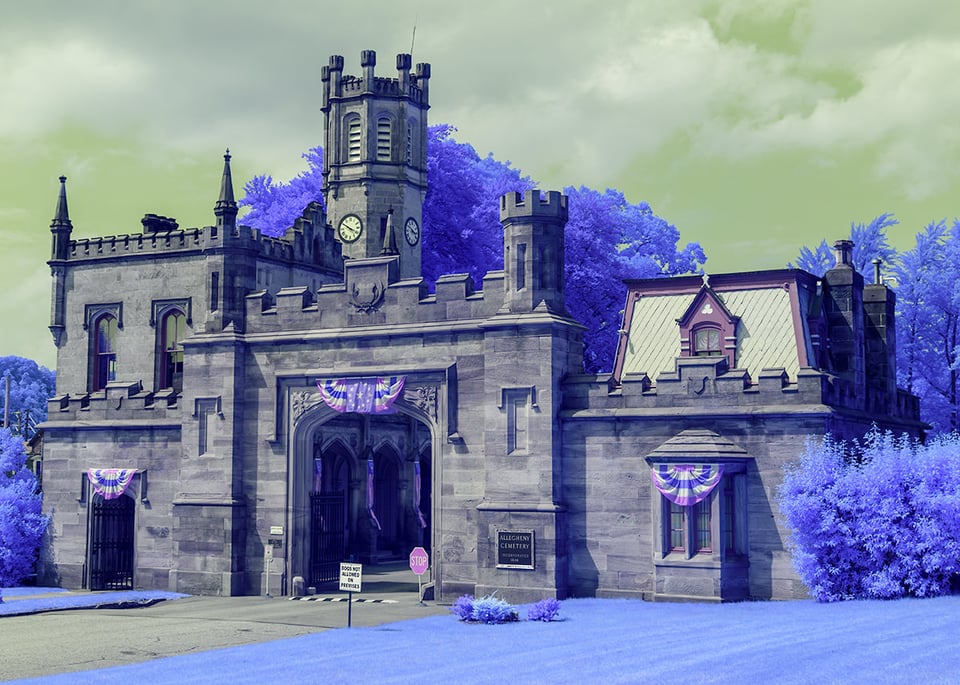
Based on little more than dumb luck, I tried an in-camera white balance setting of 2500 and tint of 6 (the highest Green value). I quickly snapped a few photos using the native 550nm. I liked what I saw. When I showed the image on the D750’s LCD to my wife, Tanya, she suggested I skip my post-processing altogether and just go with the image straight out of the camera (and presumably use that time to get more projects done around our house!). I then took a few photos with the external 720nm and 850nm filters. Surprisingly, they also looked crisp and clear, and I could easily judge how well the final processed image would turn out. Mission accomplished.
6) Post-Processing the 550nm Image
I followed my normal post-processing routine, creating a Camera Profile for the D750 using the Adobe DNG Profile Editor. I took a few shots of a gray card and used it as a starting point for creating a Lightroom Preset. I used Kolari Vision’s tutorial for creating two Channel Mixer Layers in Photoshop produced by Dave Hochleitner (Thanks, Dave!). You should check out Dave’s Instagram page. He is a master of infrared processing and takes some stunning photographs. I would probably have figured out how to create a Channel Mixer setting(s) on my own, but Dave’s tips helped jump start my efforts. My two most used white balance settings are 3775/+35 and 4400/+25 (temperature and tint), although early morning/evening light might require some additional modifications to these settings.
Spoiler Alert: Each camera sensor and the processing engine of the camera manufacturer (EXPEED in the case of Nikon) processes visible and infrared light differently than others. The settings recommended here will likely work perfectly if you use a 550nm from Kolari Vision on a Nikon D750 and are working on a calibrated monitor. If you are using a different camera or a 550nm filter from someone other than Kolari Vision, you likely require some modifications to the settings outlined.
After starting out with Dave’s tutorial, I made some tweaks to my initial Lightroom preset that resulted in the image below. I used this Lightroom Preset to produce all the images that follow. I then opened the image in Photoshop CC. Below are the settings that formed the basis of my final Lightroom preset. I used a 3775/25 temperature and tint combination.
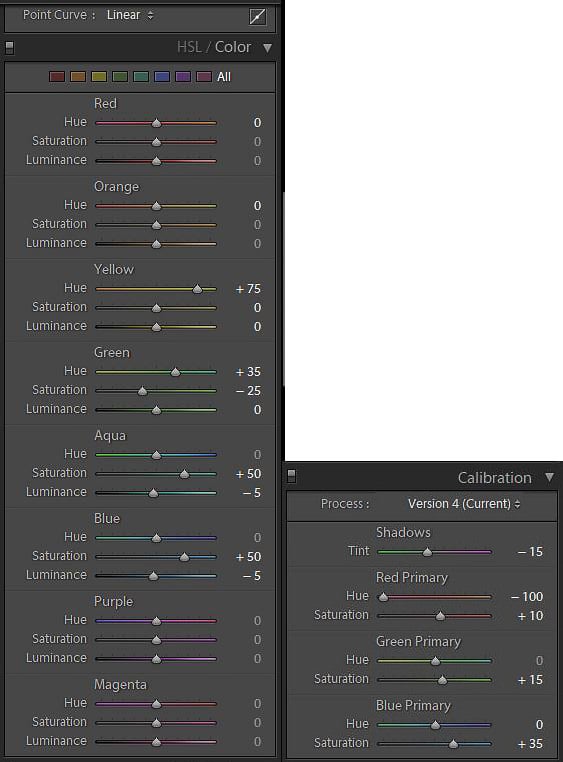
And this is the final preset I used as the basis of for the subsequent photos (other than those mimicking the look of the 720nm filter).

I then imported it into Photoshop CC. After using Kolari Vision’s two-channel swap method, my image looked like this.
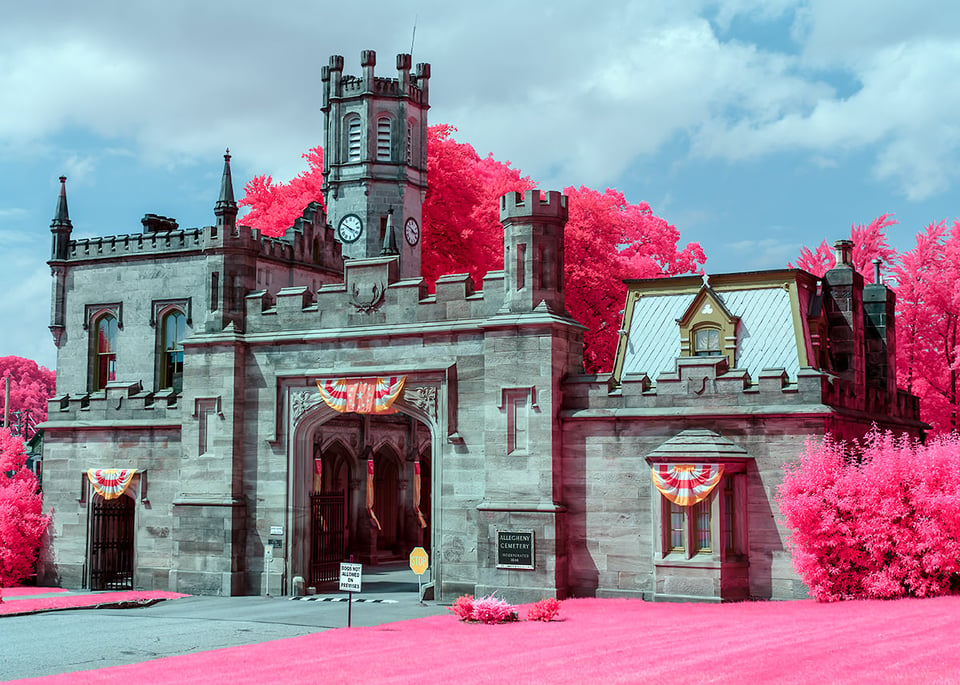
This image doesn’t look too bad. Some people who like pink/magenta infrared images might stop here. As you can see, this image shows some nice tonal distinctions between the reds and pinks, a nice touch. I spent some time experimenting with Hue/Saturation adjustment layers. With a few tweaks with the Hue/Saturation slider, I was able to get a look that is popular with those using LifePixel’s new HyperColor filter. I like the results of the two-channel swap better.
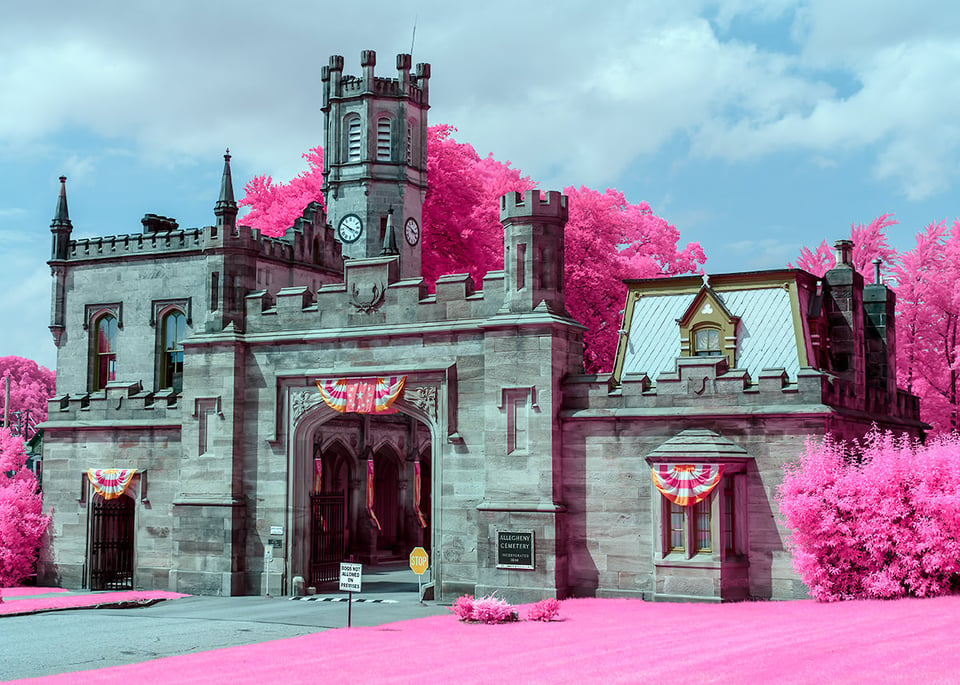
The latest trick in my post-processing bag is adding a Black and White layer and changing its Blend Mode to Luminosity. There are some colors and tones you simply cannot obtain by using the Hue/Saturation control alone. If you play with the Black and White Layer/Luminosity blend mode combo in conjunction with the Hue/Saturation slider, however, you can significantly broaden your ability to modify colors and tones.
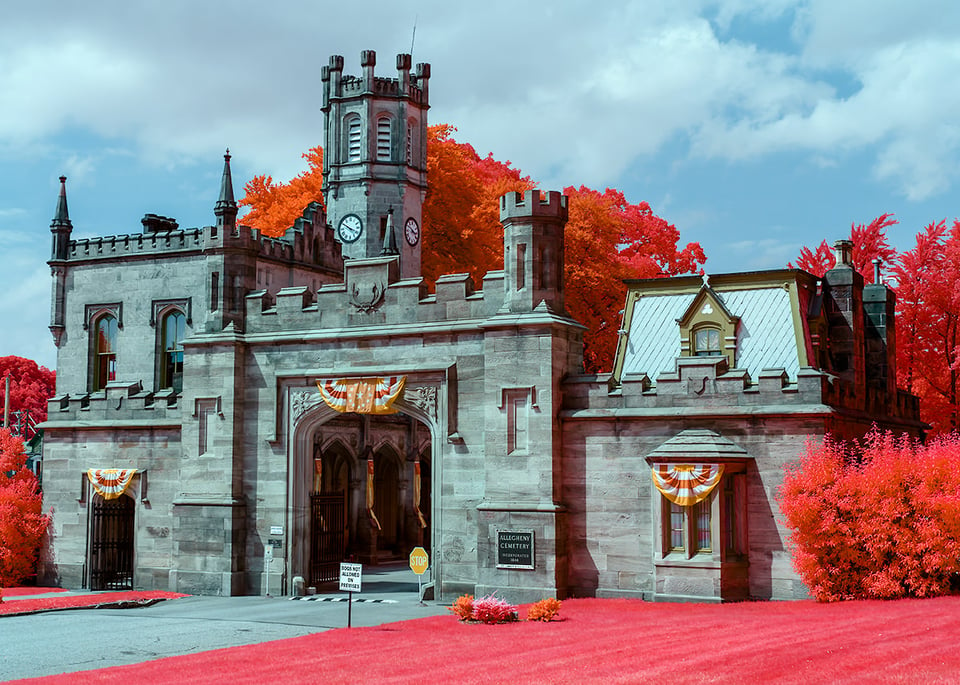
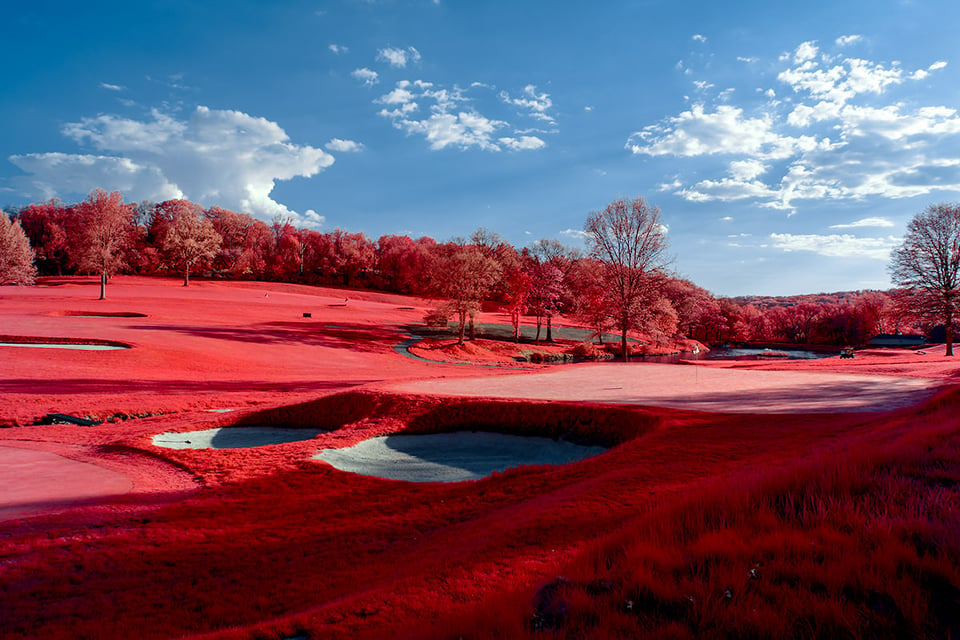
You can also affect the quality of the reds by using the Black and White Layer’s red and yellow sliders. It was not immediately obvious to me that changing the yellow slider in the Black and White Layer would impact the reds, but it does and sometimes in interesting ways. In particular, the Black and White Layer/Luminosity blend mode trick enabled me to create the “blood orange” look I typically associate with Aerochrome film (pinks are also a popular Aerochrome effect).
Since I learned this trick, I rarely rely on the Hue/Saturation slider alone to change colors. If you are frustrated in not being able to achieve the exact color you desire, try adding this technique to your post-processing routine. Here is the final image most closely matching the Aerochrome look I have long admired:
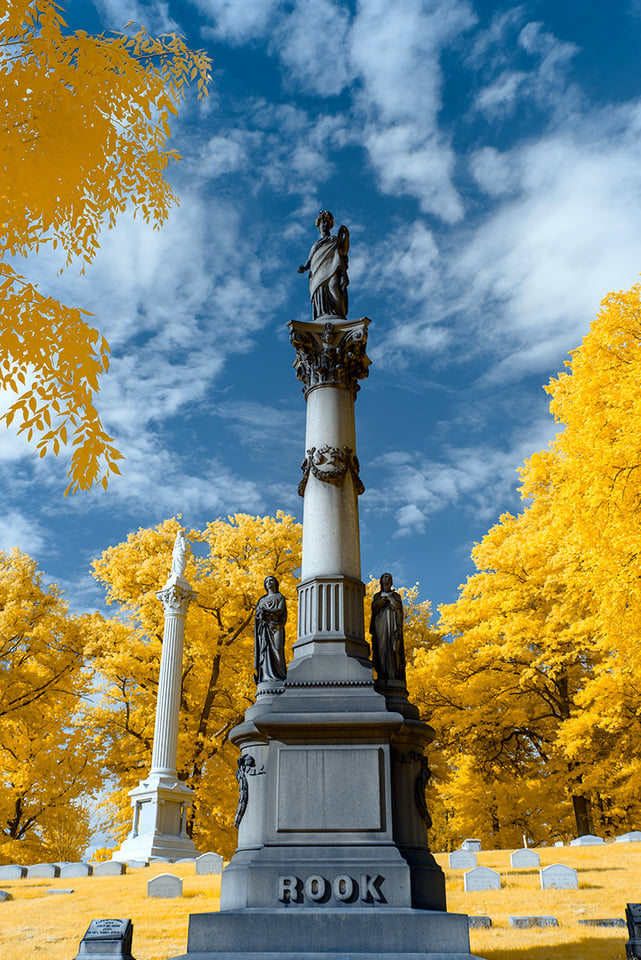
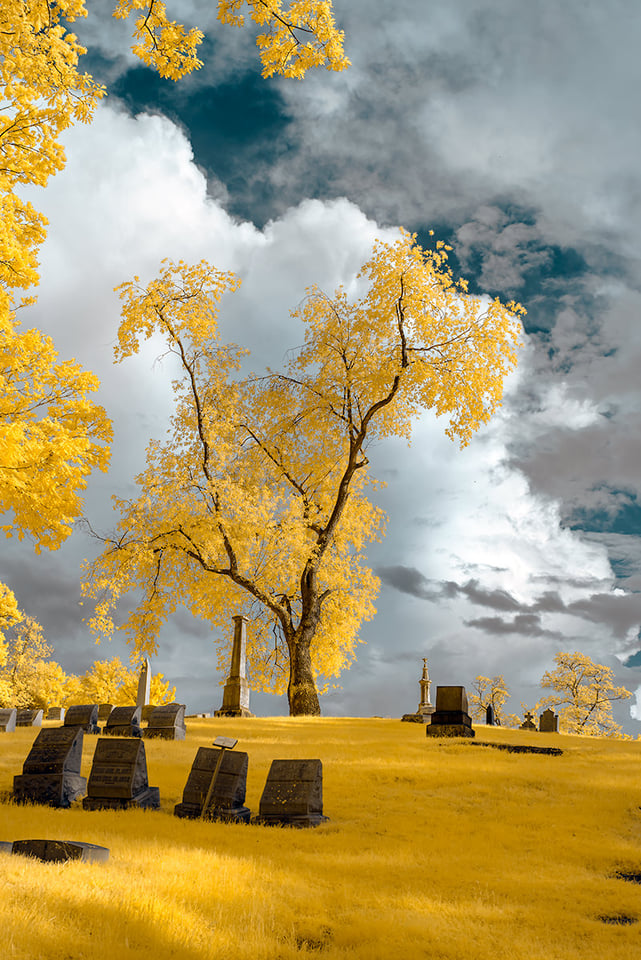
For a yellow or gold variation, popular with those using the 590nm infrared filter, I skip the two-step 550nm Channel Mixer technique above and run the base image through the basic channel swap I use in my 720nm post processing routine. With a few tweaks to the Hue/Saturation slider and another Black and White layer (using Luminosity blend mode), I get the following. Why don’t I simply use the Hue/Saturation slider to change the magenta/reds of the base image to yellow? Because getting good yellow/gold tones from the image produced by the two-step 550nm Channel Mixer is not always possible. While Photoshop’s tools provide significant opportunities to adjust images, depending on where you start (which colors are in your photo), you cannot always get from “here” to “there.” I realized if I wanted to get bright yellow/gold tones, I needed to pick a different starting point.
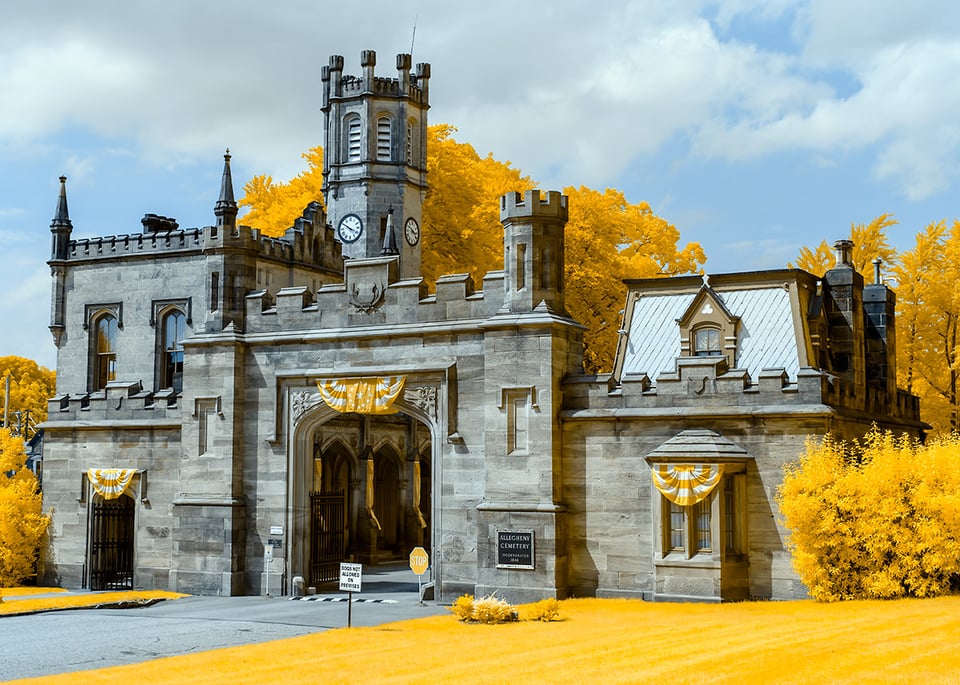
Same for producing images mimicking the look produced by the classic 720nm filter. I again used the standard 720nm post-processing technique and adjusted the Hue/Saturation slider and Black and White layer to achieve what you see below. Again, I would never claim the 550nm can replicate the results of the 720nm, but it can get close under the right conditions. For some of you, however, the 550nm’s capabilities in this regard may be enough to forego buying a 720nm filter.
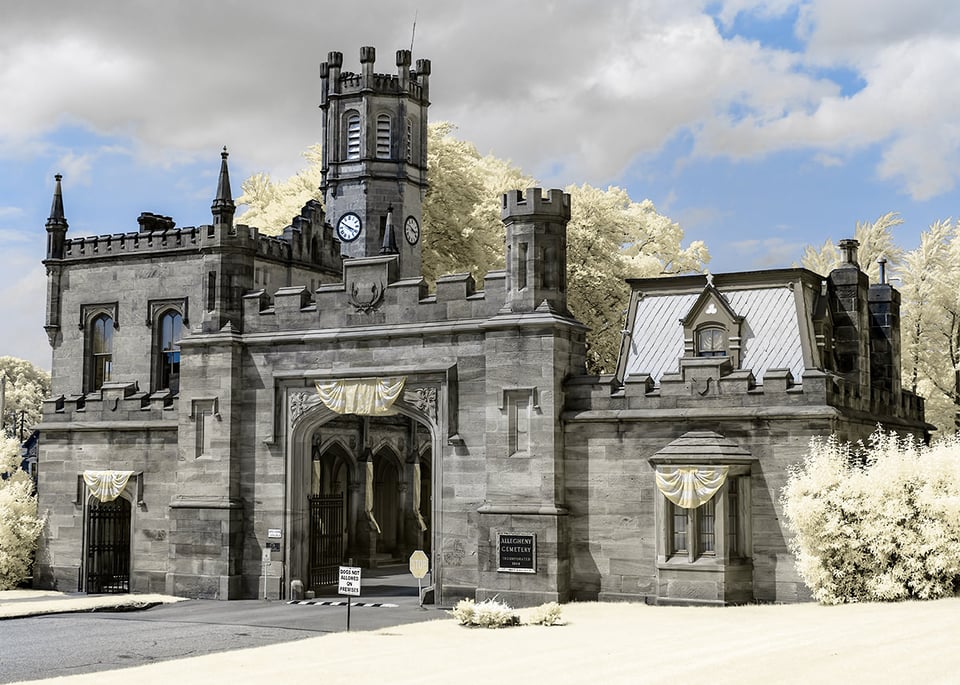
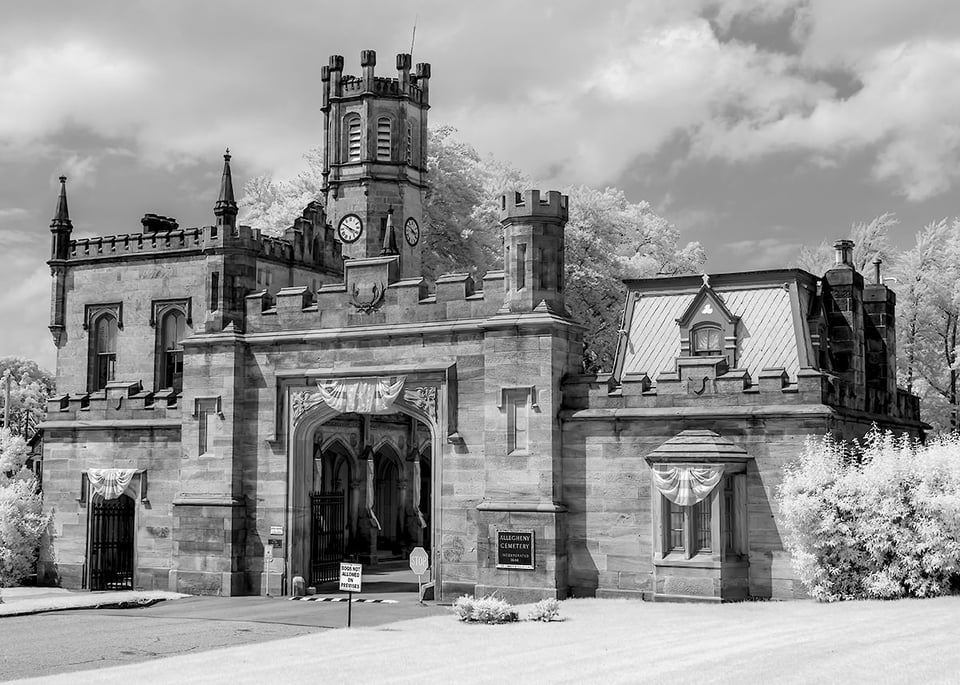
And finally, a black and white version.
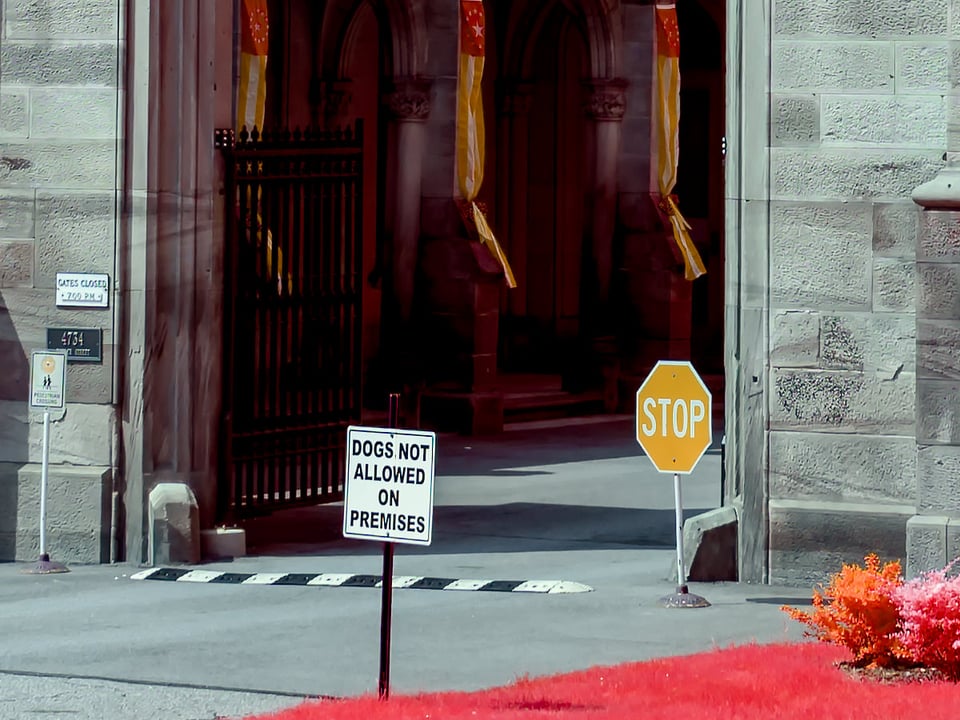
How about sharpness? Here are two 100% crops using my Tamron 24-70mm f/2.8 G2 after running it through my common noise reduction and sharpening process. No complaints here.
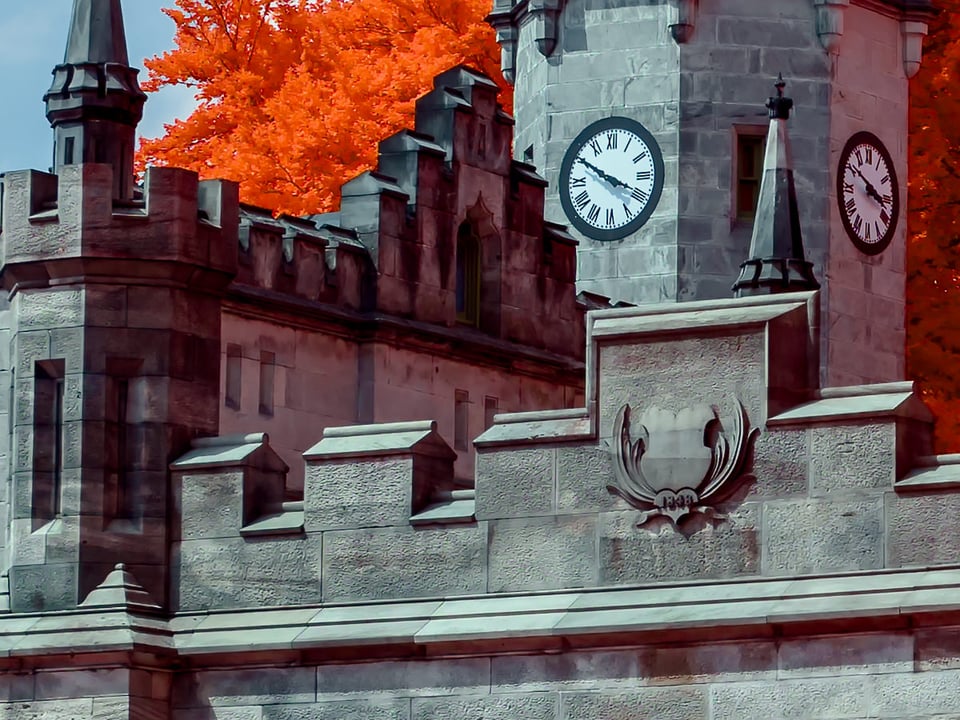
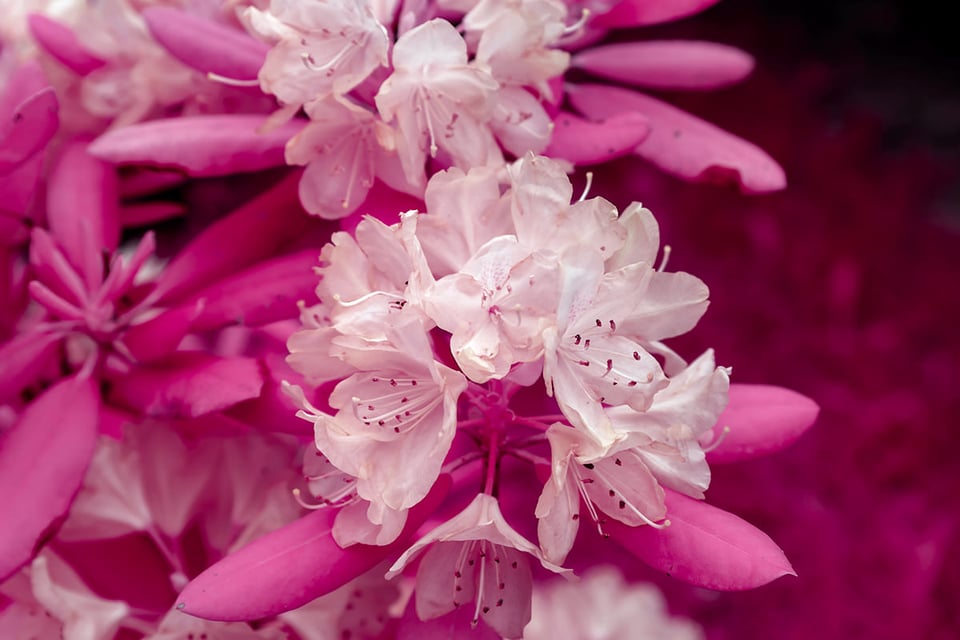
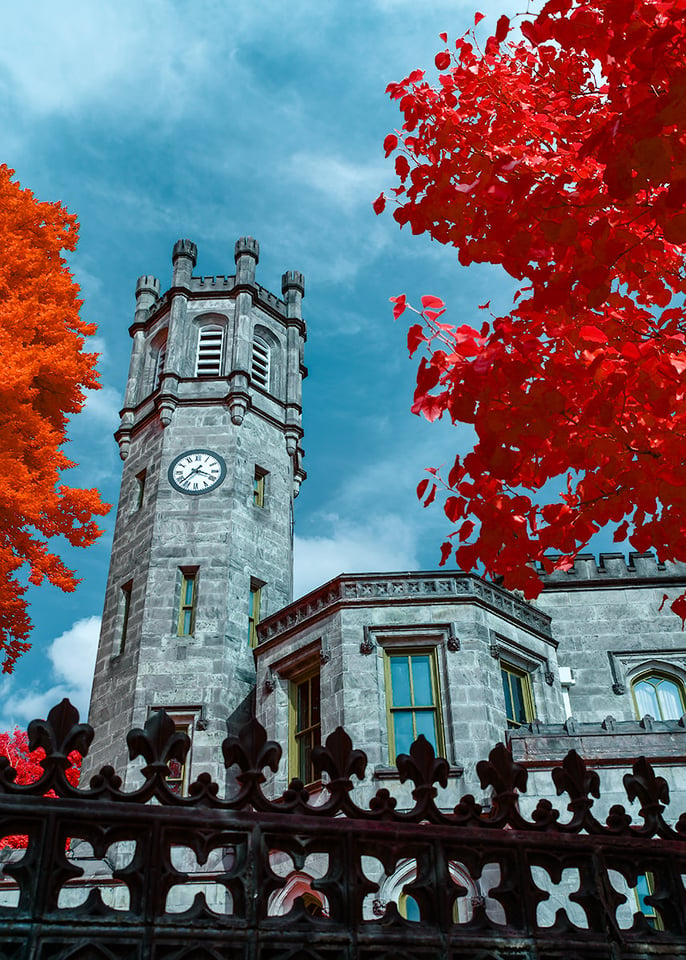
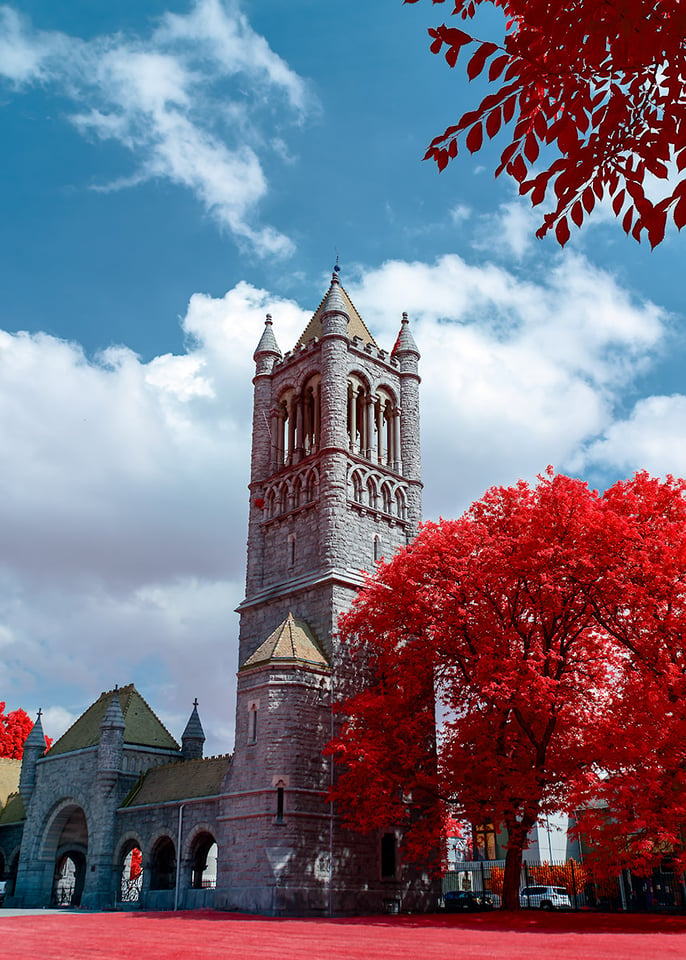
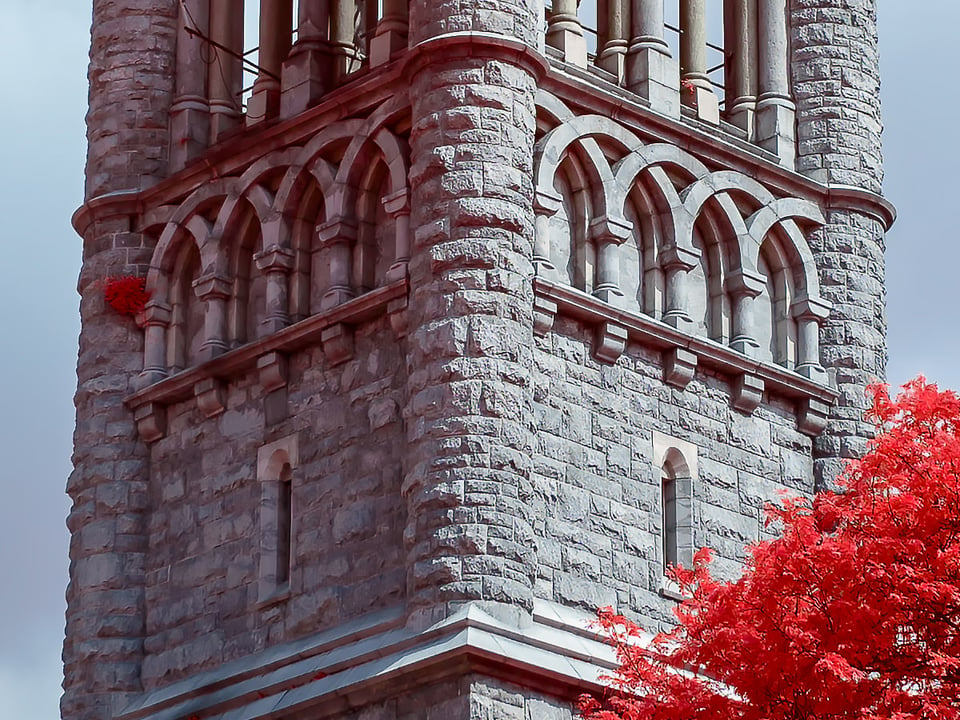
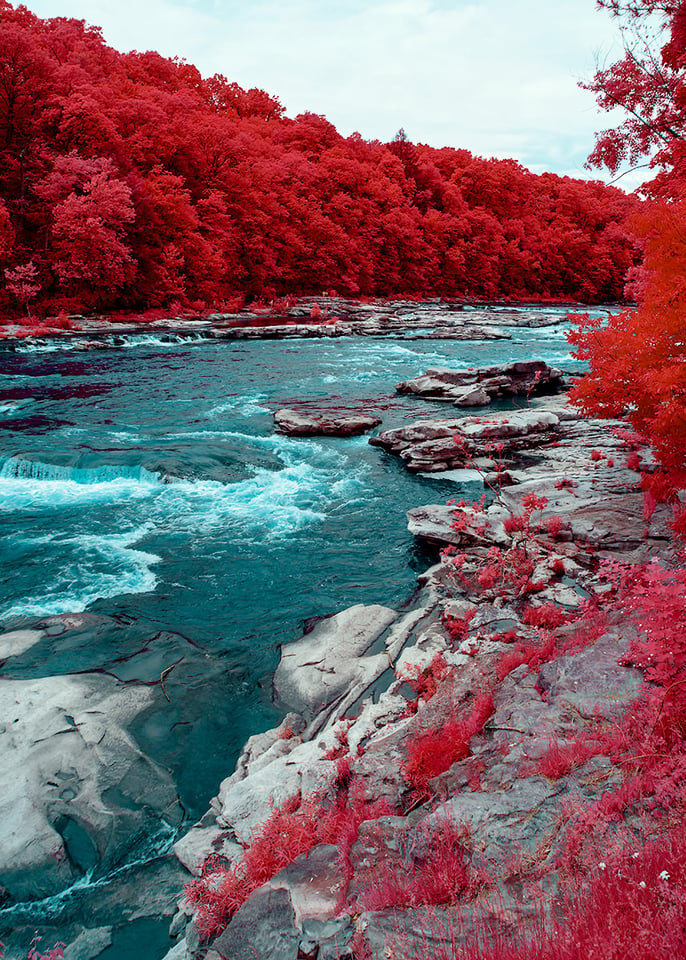
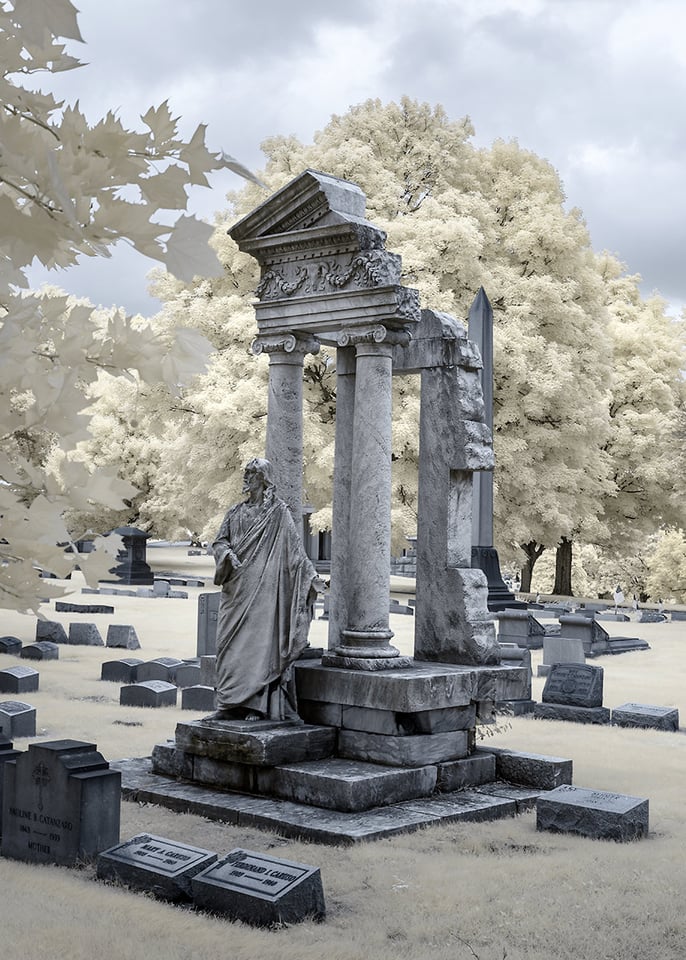
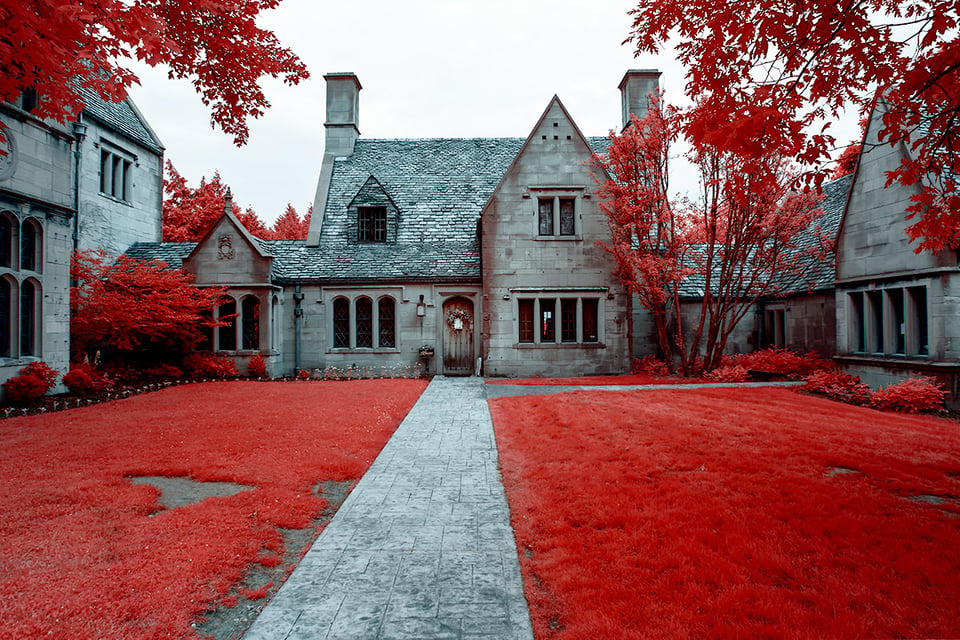
Here are a few samples of the range and flexibility of the 550nm filter. This is by no means an exhaustive representation of the many interesting color combinations you can produce. You are only constrained by your imagination when using this filter. As always, keep a close eye on your histograms and the edges within your photo to avoid oversaturation and fringing (exaggerated edges where two colors meet).
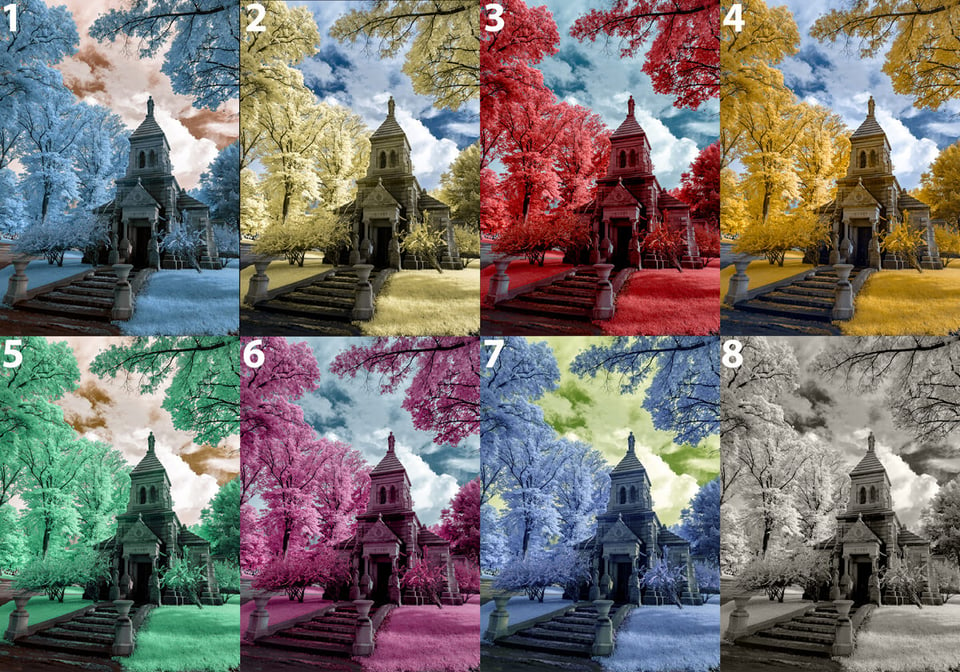
7) Some Brief Notes About Post-Processing
7.1) Some Lessons From The World Of Automated Software Testing
Relying on tools such as the Presets and Actions in Lightroom and Photoshop is critical for the digital photographer seeking to improve his or her post-processing skills. I have spent my entire career in the software development field. There is a good correlation between these Adobe-based features and the automated testing tools rapidly being adopted in the software development industry. The only way modern software applications companies can hope to continue to provide the myriad of updates of features and functionality customers expect (think about how many smartphone application updates you get every day) is to rely on automation to test their software every night (or more frequently).
Lightroom Presets and Photoshop Actions provide a similar capability for the modern digital photographer. They enable you to experiment with a given setting and then run a series of standard operations to determine how that one change impacted your results. Through some trial and error (and a cup of coffee or a glass of wine) and a bit of Adobe automation, you can experiment with a variety of infrared settings and quickly hone in on those providing the best results. As you find settings that work for you, you can save them as presets or actions. Once you have developed a stockpile of them, you can easily modify them for different lighting conditions, new sensors, infrared filters, lenses, etc. Given Adobe’s new Creative Cloud pricing model of $9.99/month for the Lightroom and Photoshop CC bundle, it’s hard to justify not using these tools for your infrared work. Despite the occasional bug or other issues inherent in software development and delivery, Adobe has been doing a phenomenal job of releasing new features and functionality to CC users on an accelerated timeline.
7.2) Don’t Get Discouraged
I get quite a few emails from people dabbling in infrared photography. Many are looking for help, advice, and, in some cases, a good reason not to throw their infrared camera out the window. Their frustrations stem from the post-processing routine and failing to achieve consistent results. Some of the emails are rather humorous. People will sometimes include links to RAW files and ask me to take a crack at processing the image. I love a challenge, particularly when it comes to infrared photography, so I always attempt to assist them if possible. Most of the time, I can fix their images in a few minutes by creating a custom camera profile and running the image through one or more of my set of infrared actions. Not all these emails are from newbies, by the way. Some are from very accomplished, knowledgeable photographers who struggle with nuances of infrared post-processing.
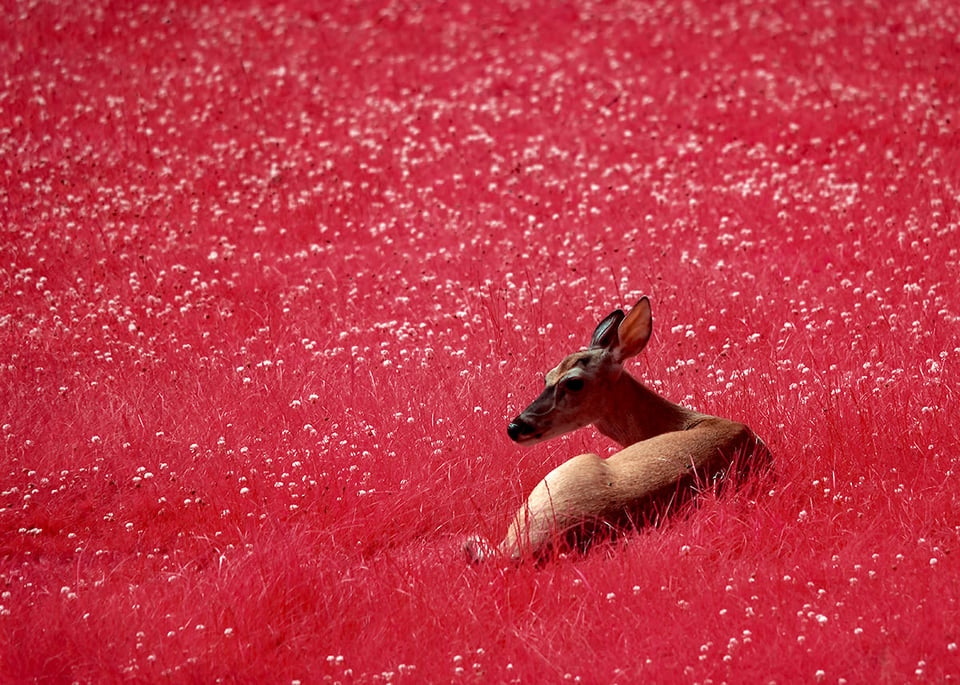
So if you are just beginning your infrared journey, don’t get too discouraged if your results fail to approximate what you see from others. Infrared post-processing takes some time to perfect, with more than its share of frustrations along the way. But once you get the hang of it, you will be amazed at how quickly and easily you can turn out consistent results and get a sense of accomplishment, perhaps like this little guy.
I am in the process of updating my earlier infrared articles such as How To Process Infrared Images. I have learned a few tricks since then and thought our readers might appreciate an update. So check back within the next month.
8) What About The 590nm?
Over the past six months, I have been poring over images from some of the best infrared photographers in the field. After viewing these images and chatting online with photographers who have shot with both filters, it seems the 550nm and 590nm are very similar in performance. In theory, the 590nm should be able to produce slightly brighter whites in vegetation, but a mere 40nm of additional IR light will still fall short of producing the whites of a 720nm filter. Likewise, the 550nm should squeeze out some additional color beyond what the 590nm can produce and portraits of people should suffer less from the problem infrared light produces (pronounced veins and ghoulish eyes).
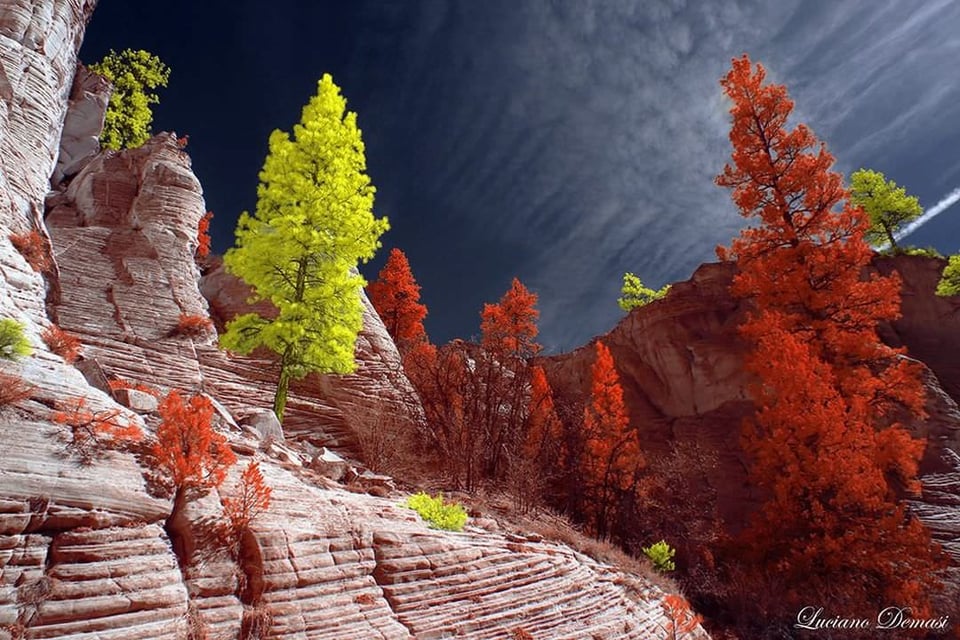
I suspect it would probably be difficult to distinguish between the two filters in the hands of someone skilled in post-processing techniques. If you want to get a feel for the range and flexibility of the 590nm filter, take a look at Luciano Demasi’s photos. He has taken some very impressive and creative infrared photos of Utah that should make anyone into infrared photography want to visit. You can also follow Luciano on Instagram at luciano.demasi.
10) Summary
For those seeking more color options in their infrared photography, the 550nm is a solid choice. It provides nearly inexhaustible opportunities for you to customize your images to suit your style and tastes, including the look of the legendary Kodak Aerochrome film. If you are leaning toward the colorful faux results of the sub-600nm infrared filters, I would suggest going with the 550nm over the 590nm, but not by much. The 550nm should provide some additional color depth and separation, more pleasant skin tones, and still deliver pleasant whites tones. If you wish to get those pearly whites, however, I would still recommend an external 720nm or 850nm filter.
A special thanks to Ilija of Kolari Vision who handles my conversions and patiently investigates and responds to my many infrared-related questions. Please feel free to share your thoughts and feedback in the comments section below.
Coming up next:
Shooting With The Kolari Vision 720nm and 850nm External Filters
11) Examples
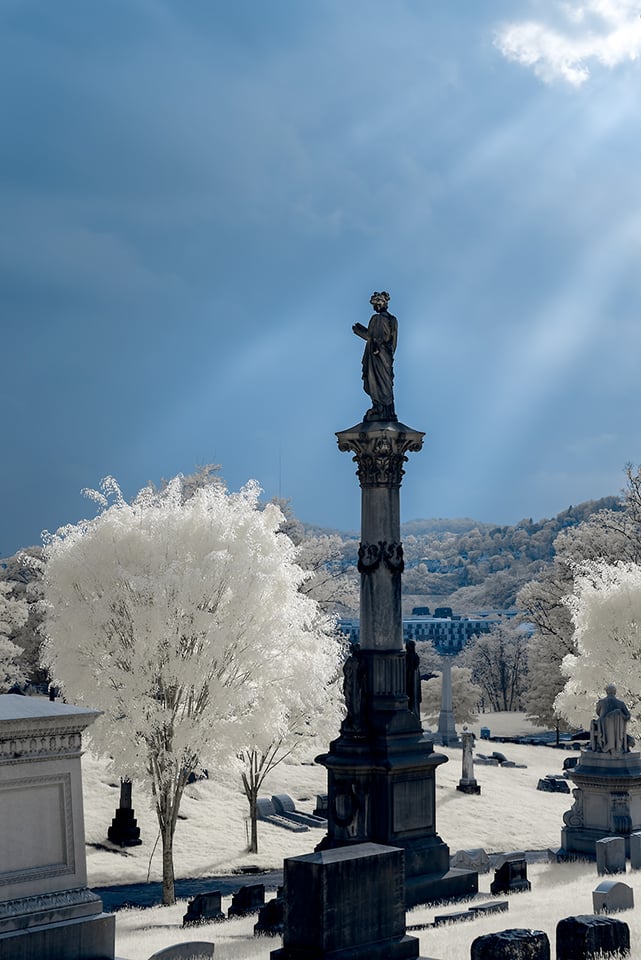
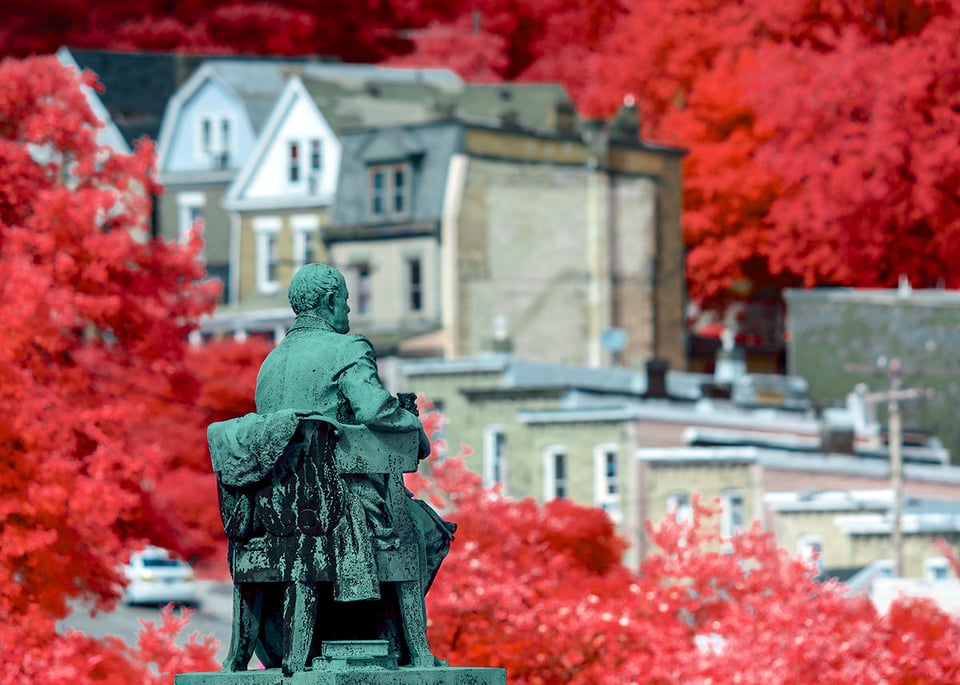
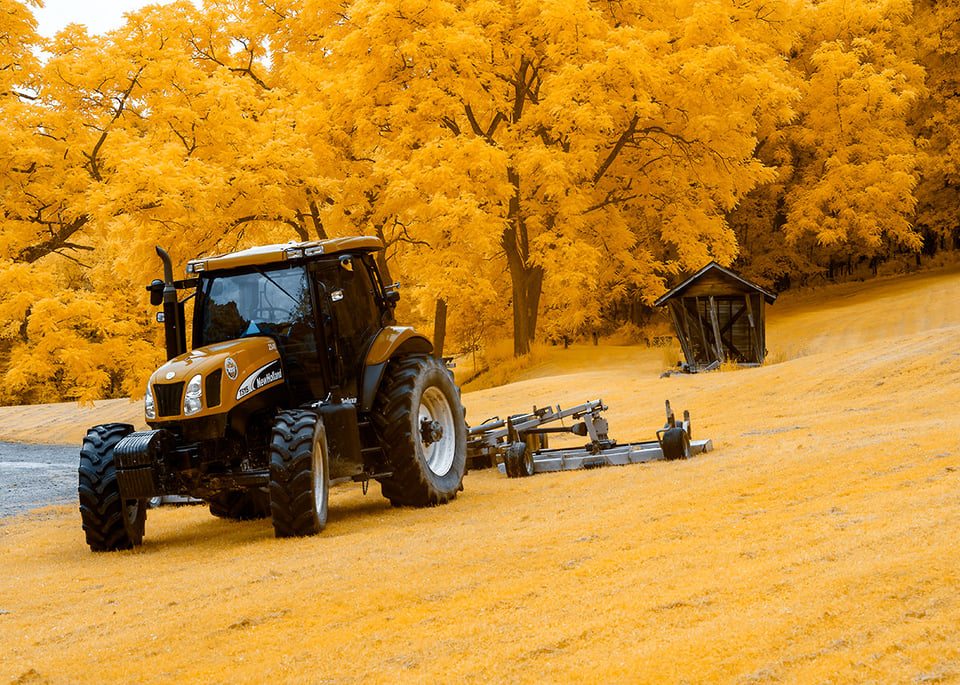
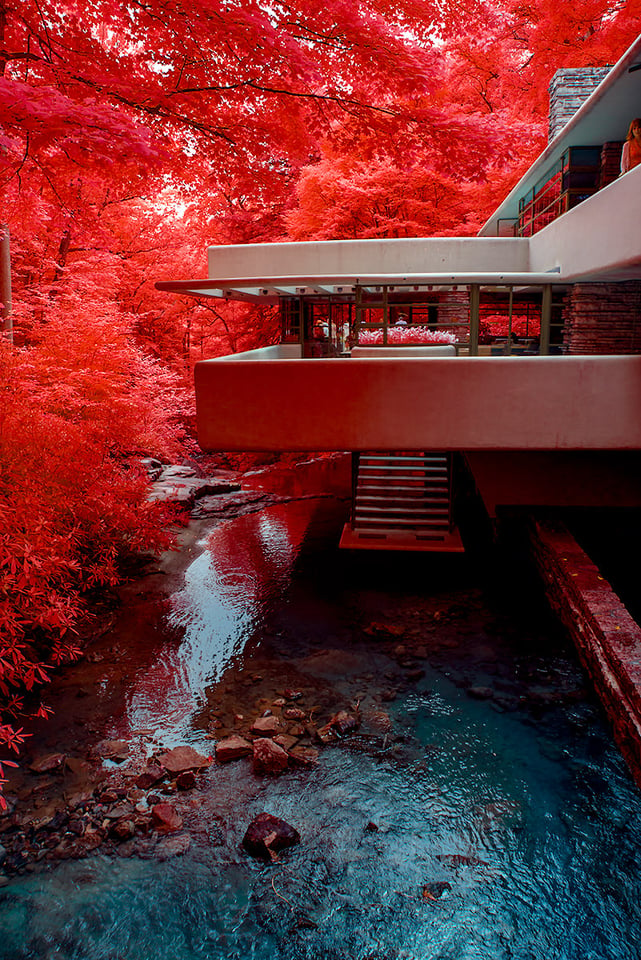
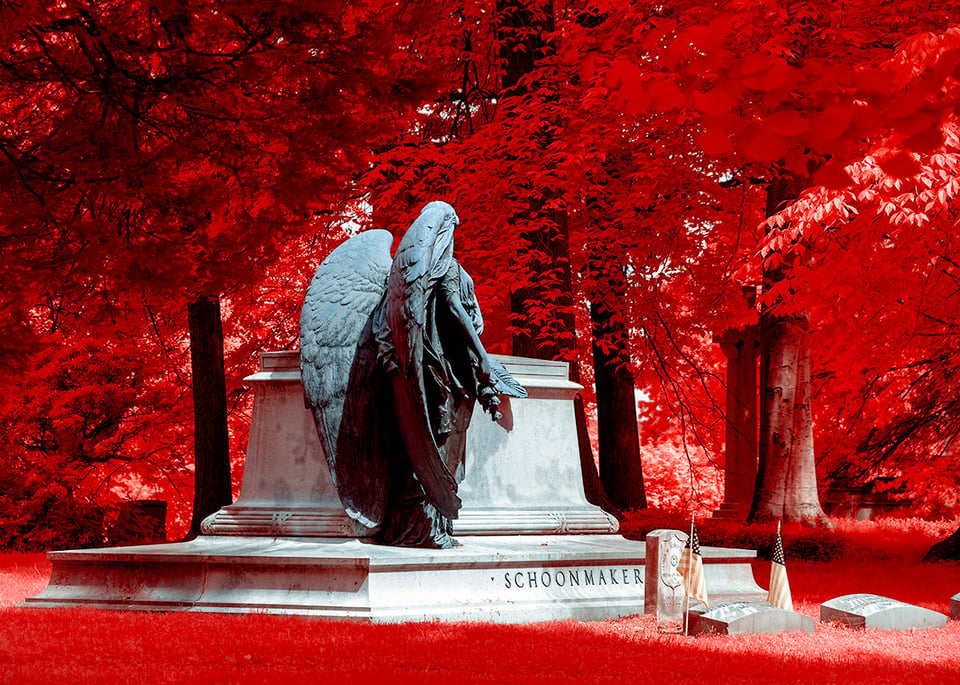
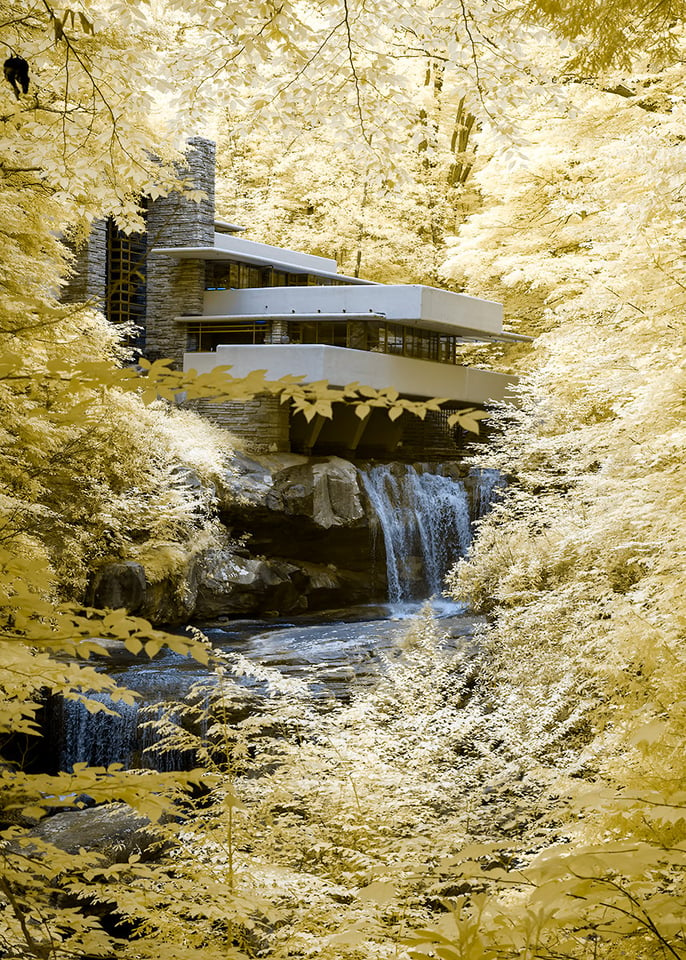
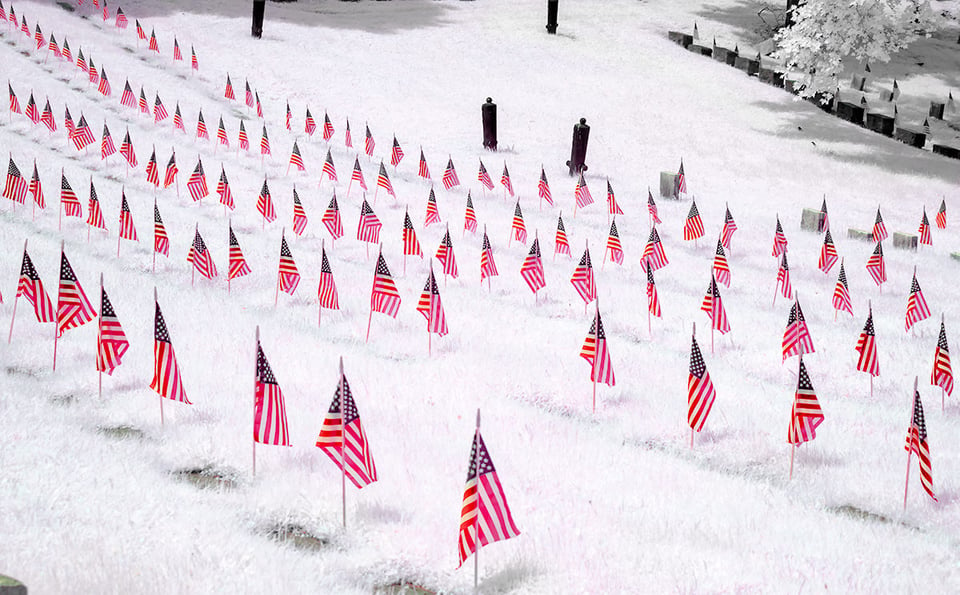
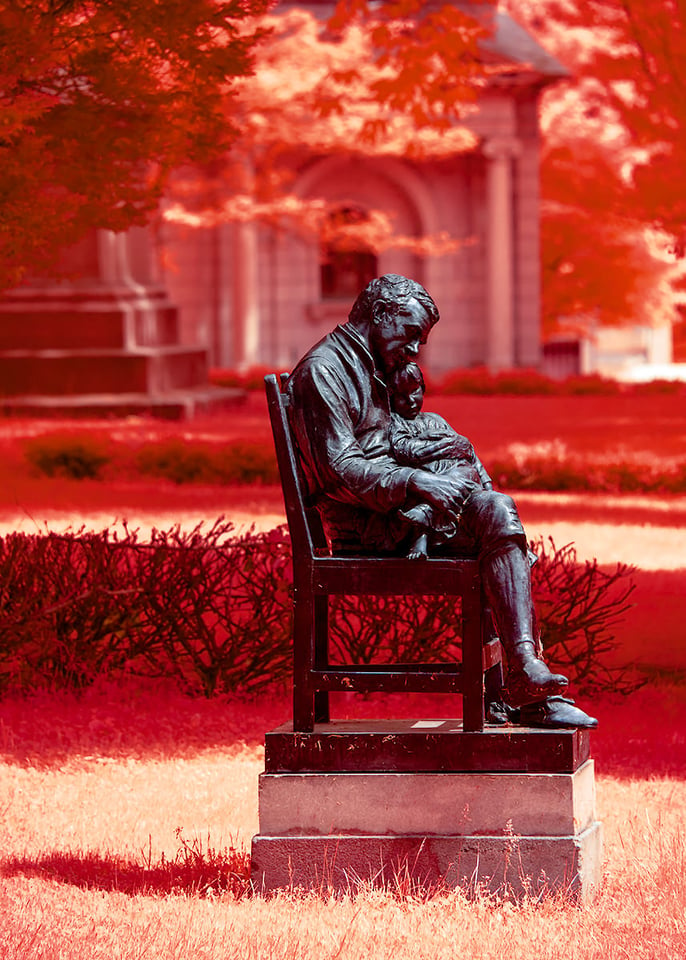
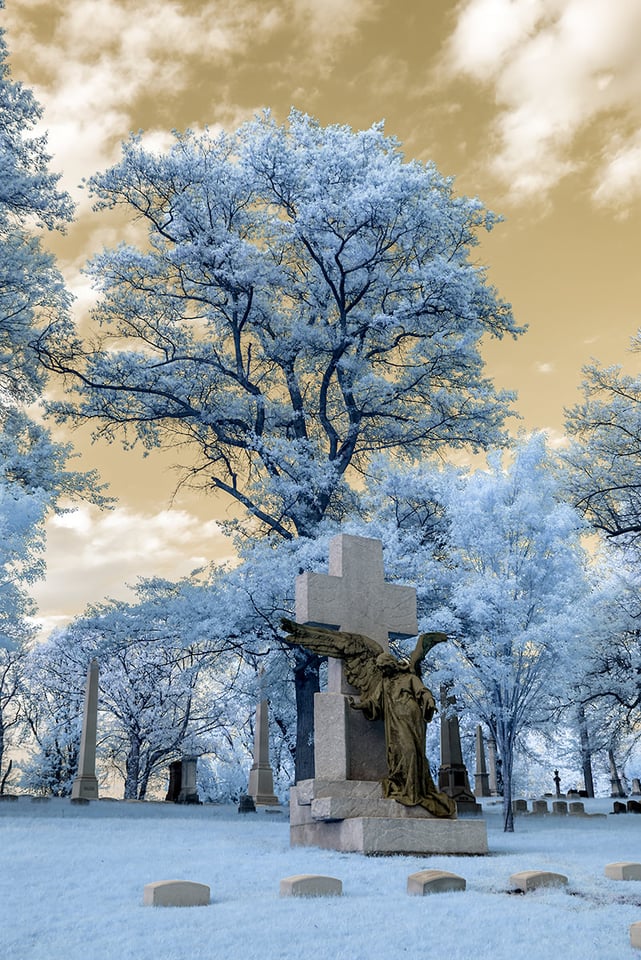
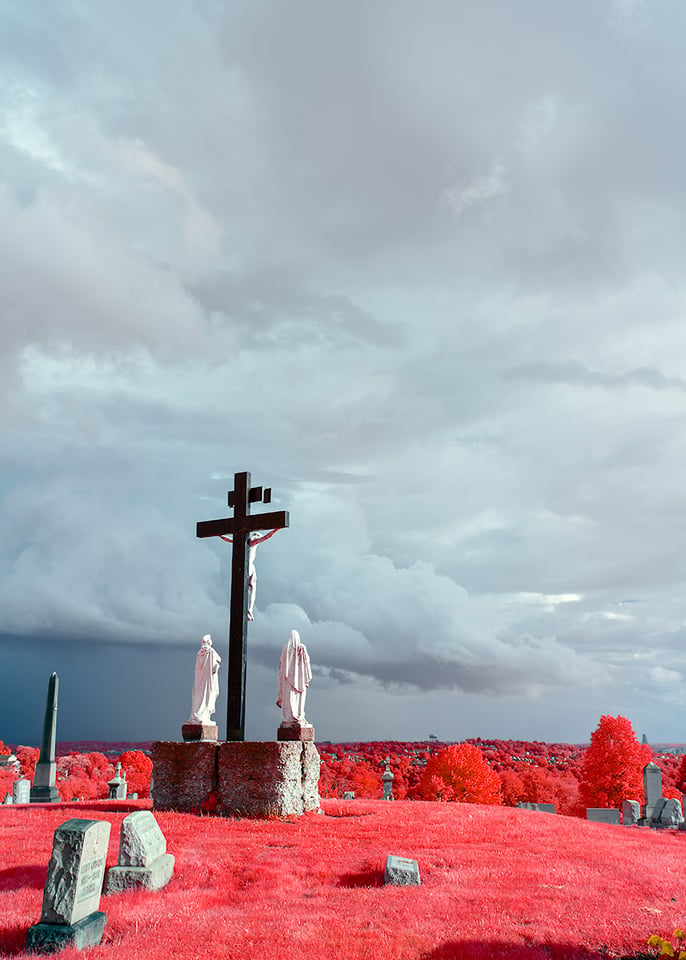
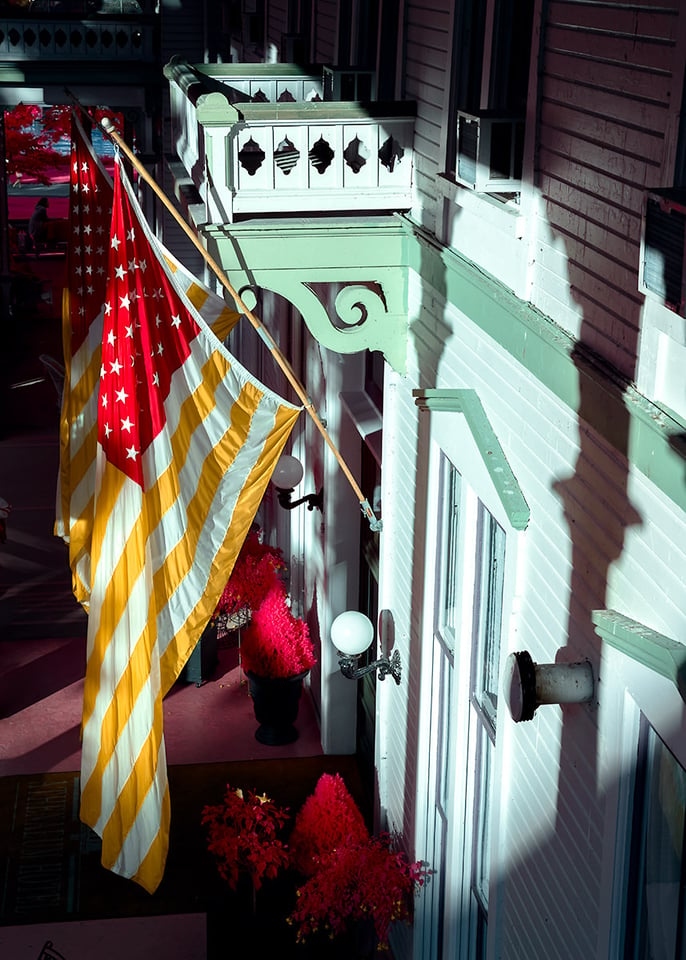
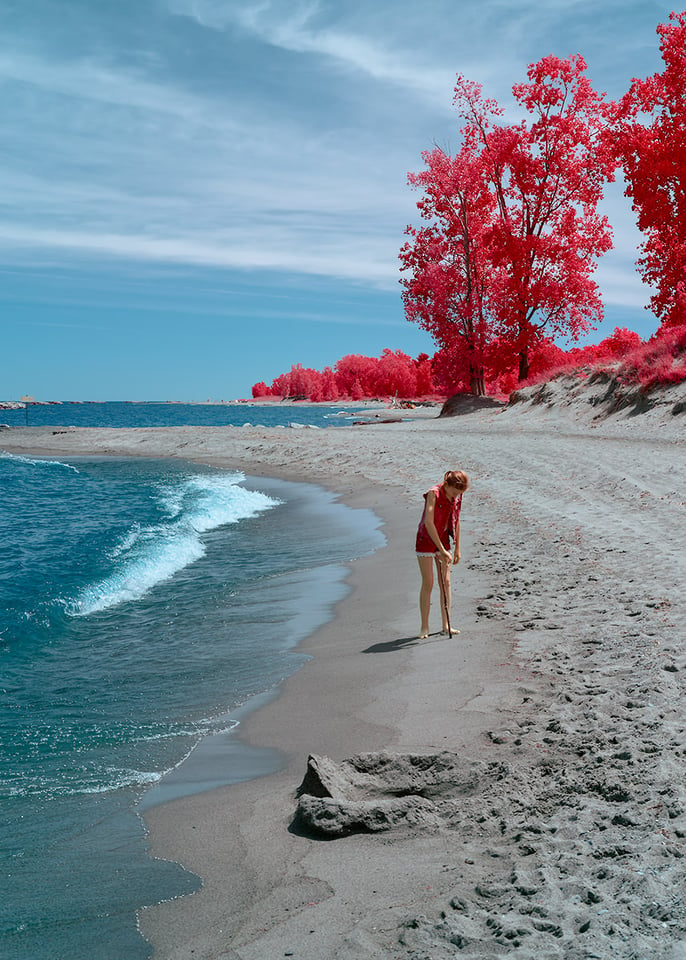
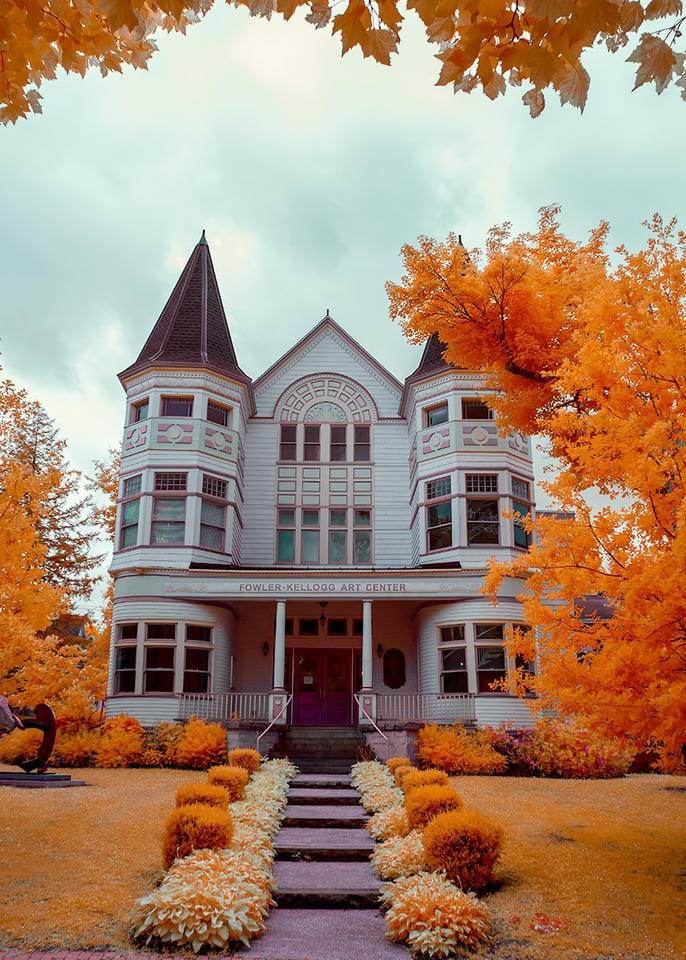
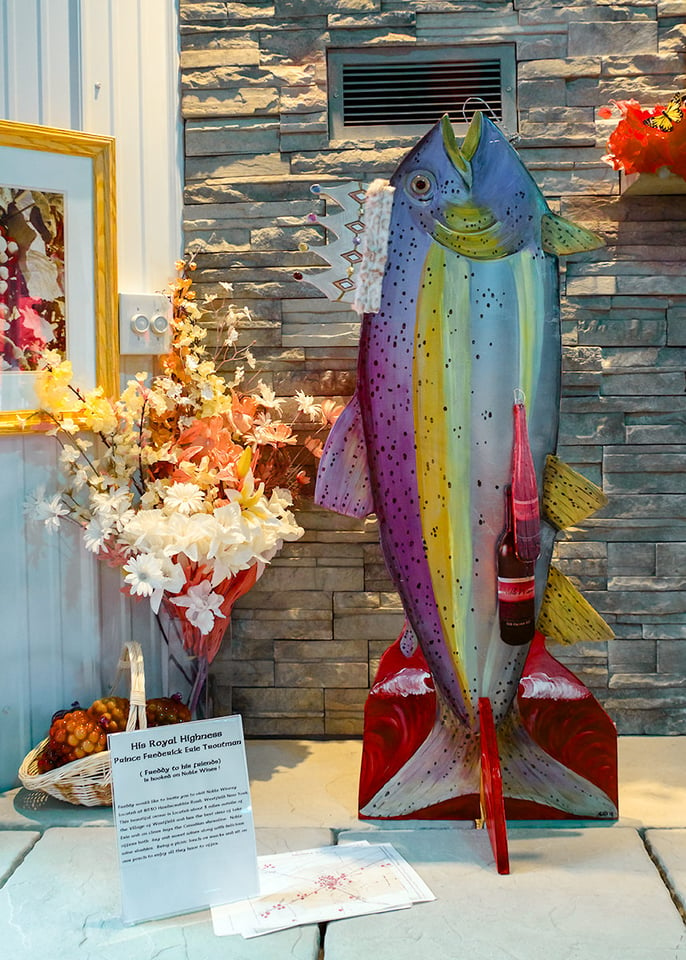
Here are some additional photos. I will update the photo selection below from time-to-time as we travel and encounter more interesting infrared photography opportunities.
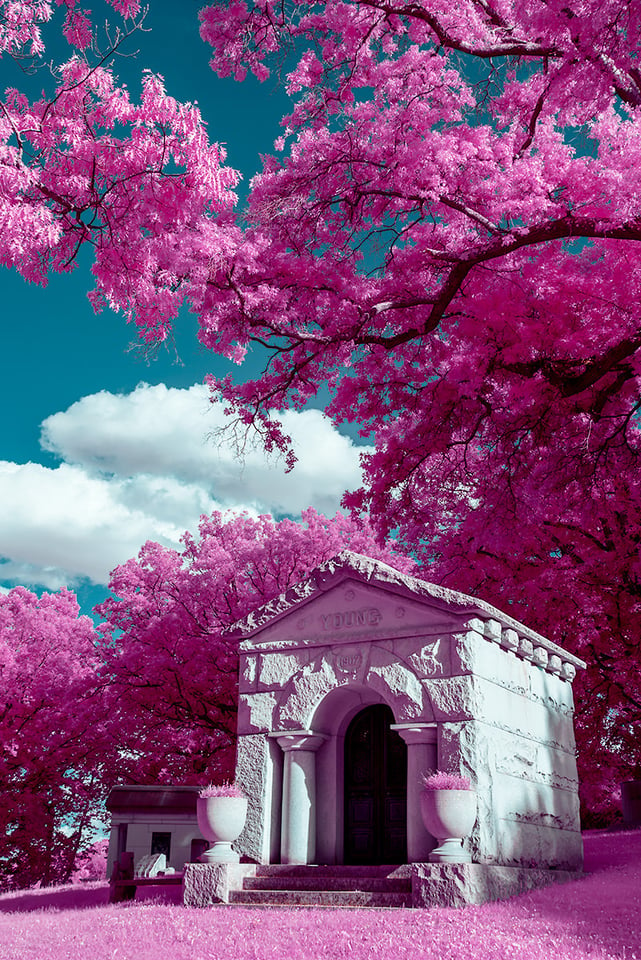
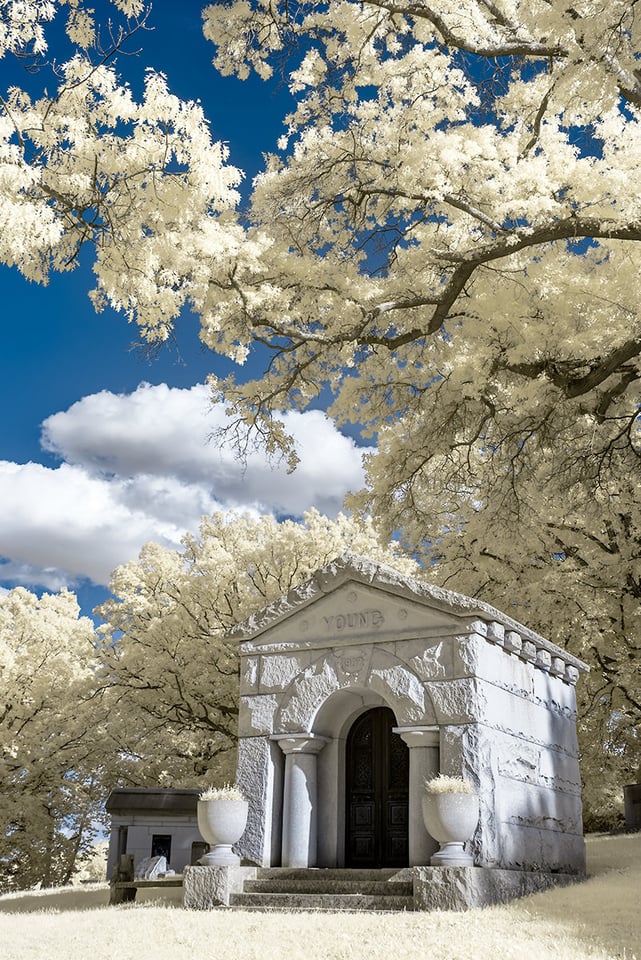
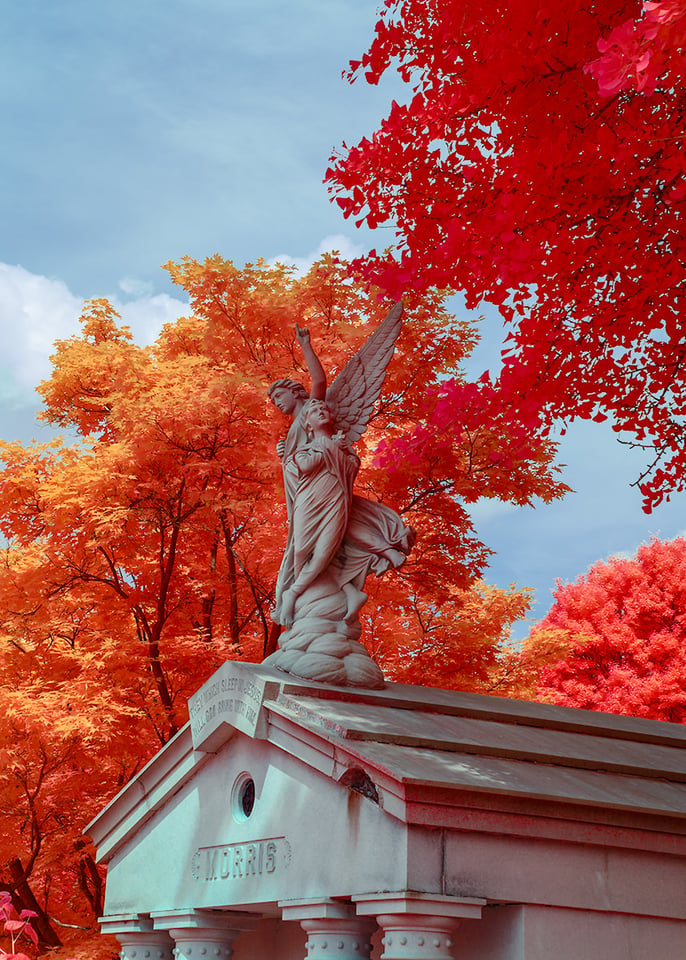
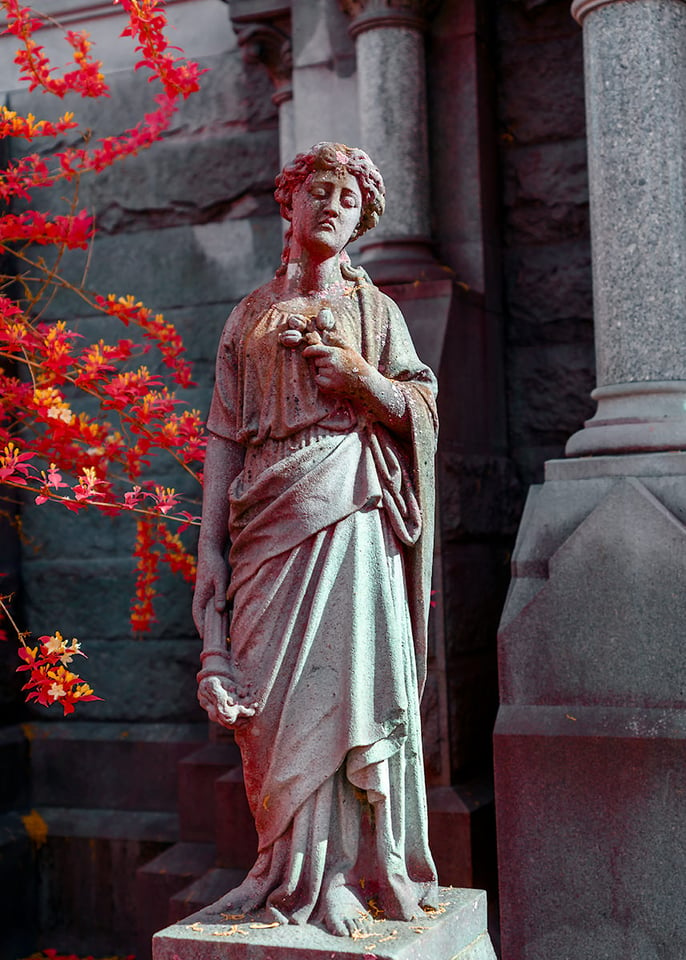
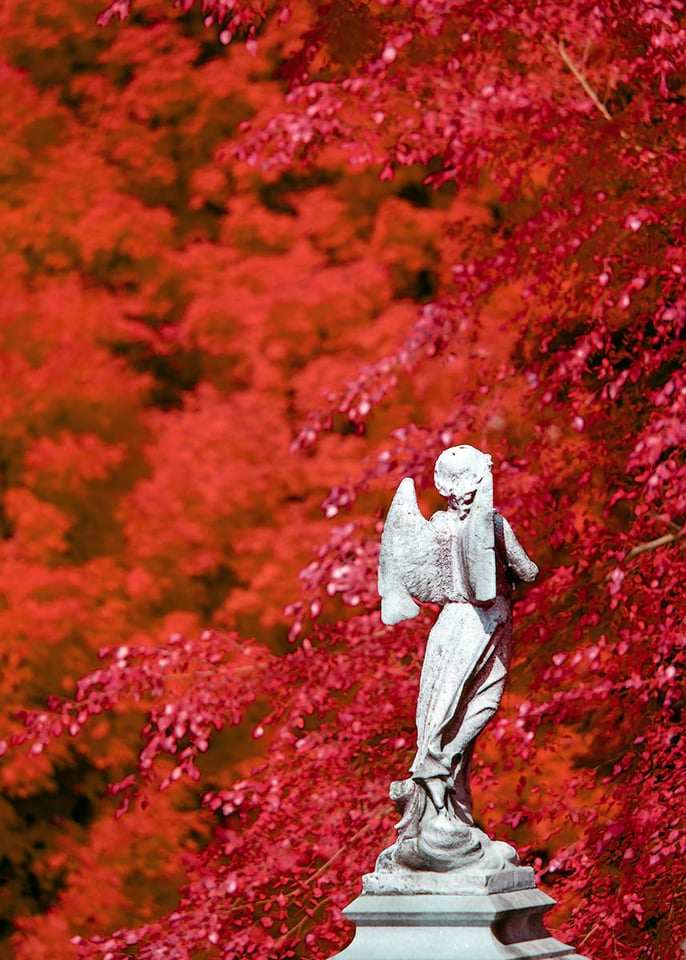
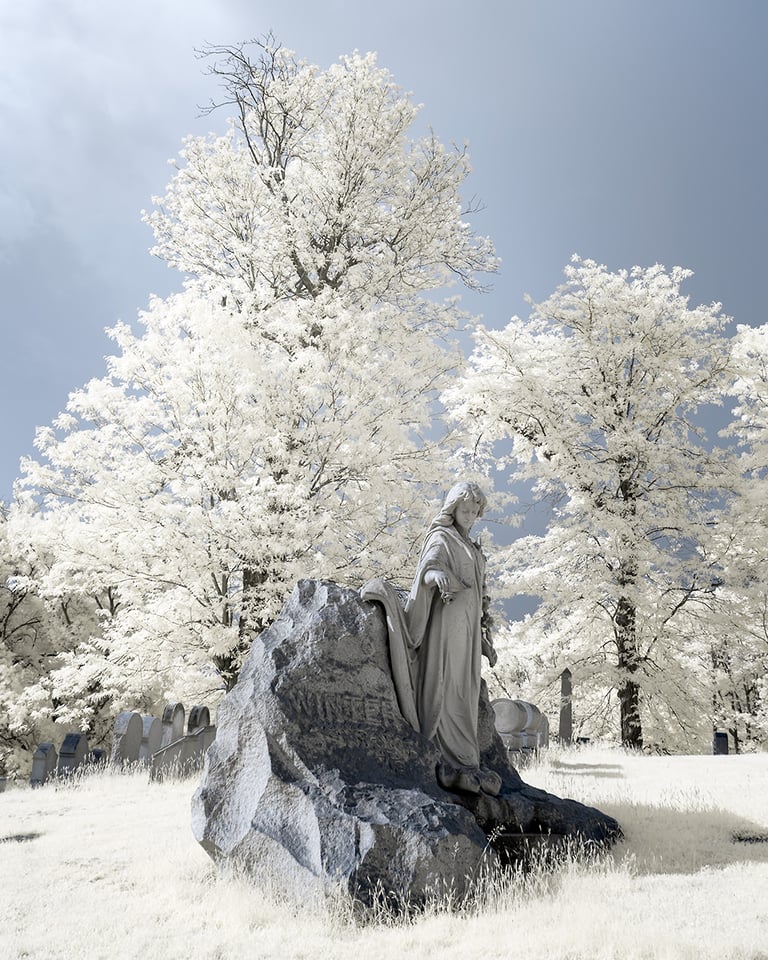

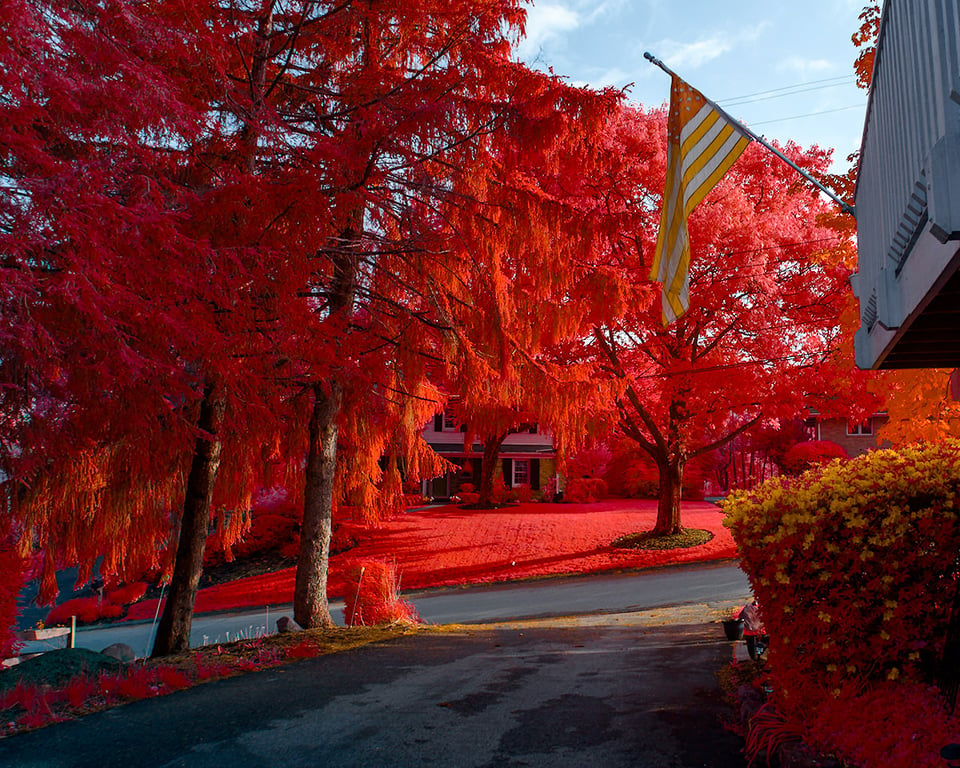
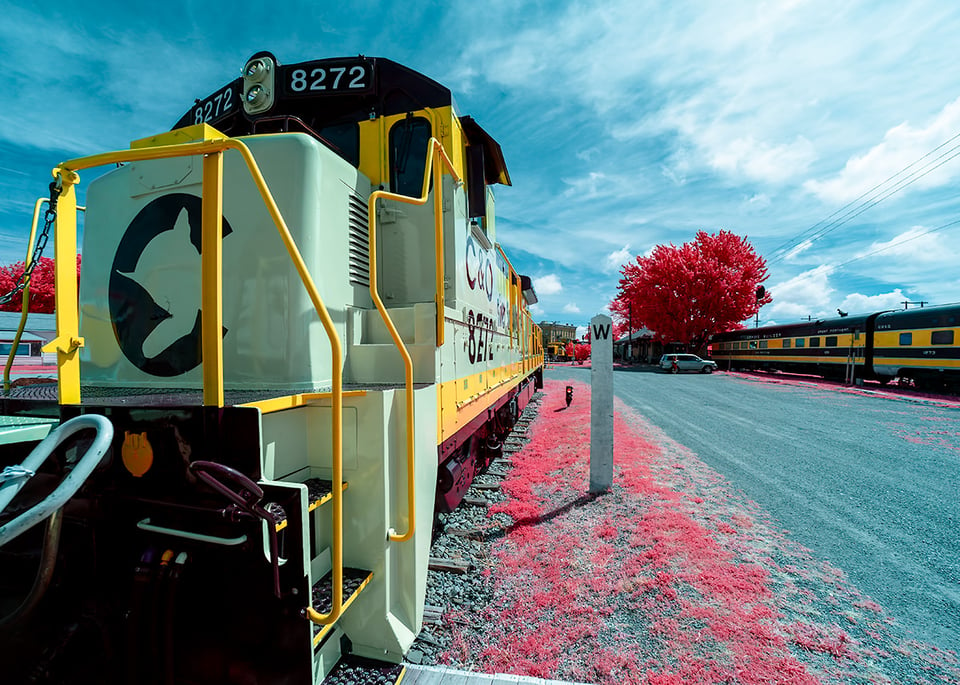

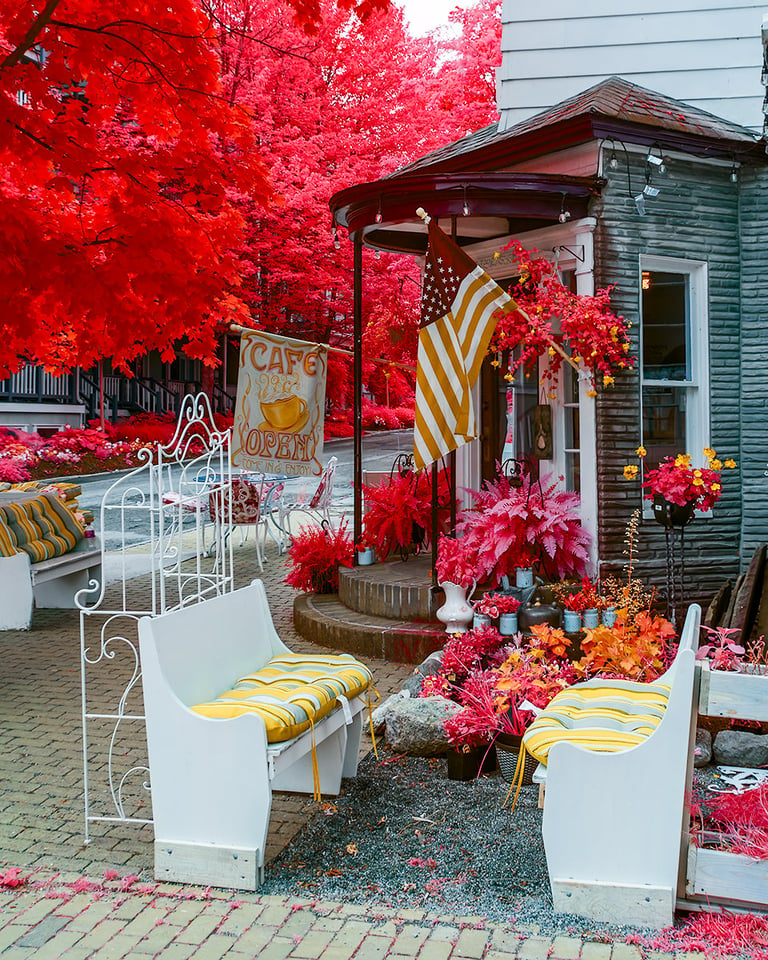
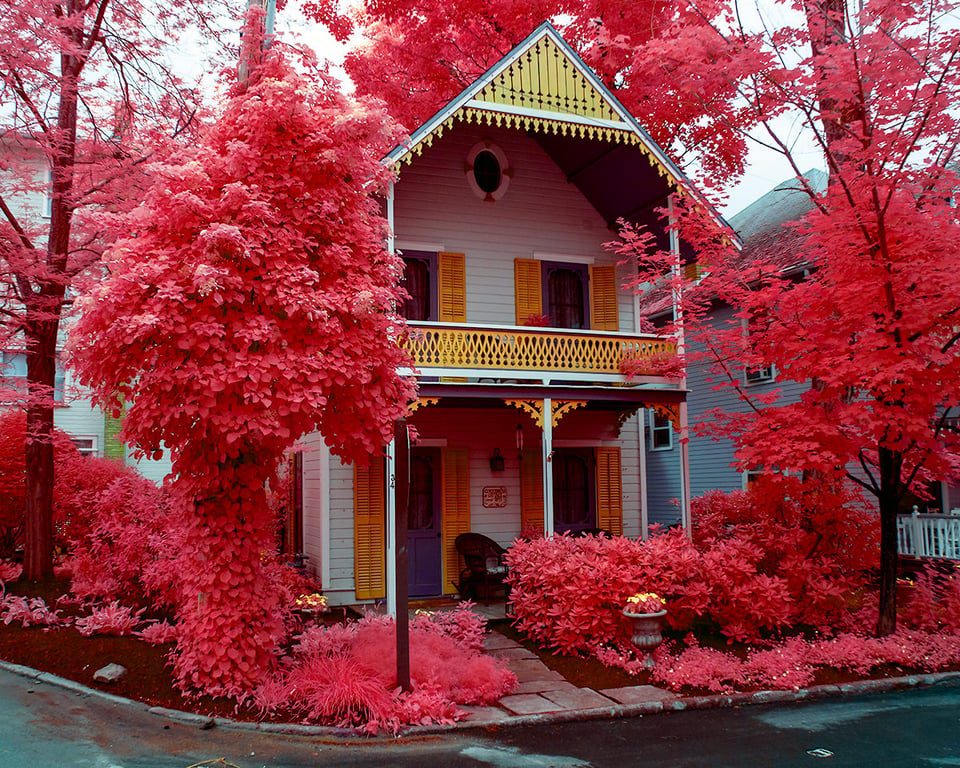
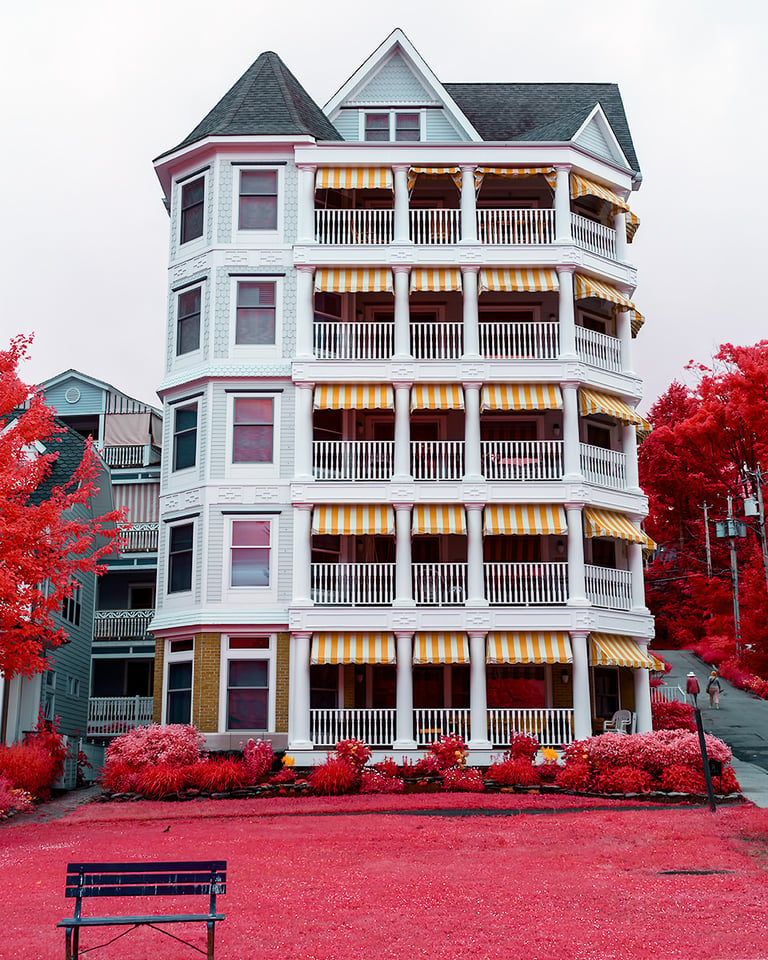
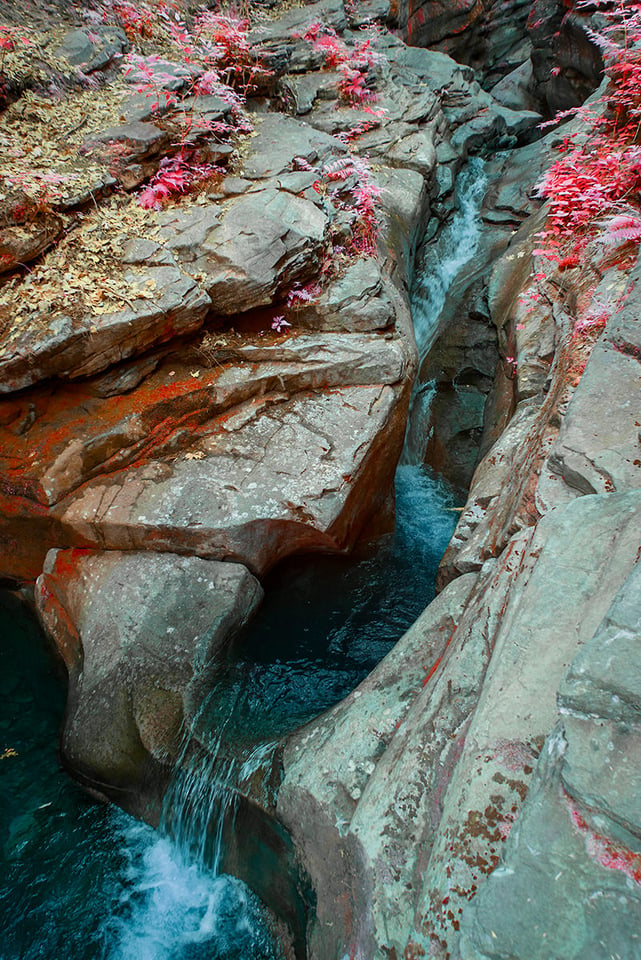
Kolari Vision 550nm Infrared Filter
- Build Quality
- Metering and Exposure
- Ease of Use
- Value
Photography Life Overall Rating
So, I decided to get a new IR mirrorless converted Camera to full spectrum(it was my third conversion). I did lots of research because I did not understand this type of conversion and sent at least 20 emails regarding this. One of the main discussions was with regards to horizontal banding produced with a Nikon Z7( i had prior experience with this and was using a D850).
I did decide to go with a Canon R5 based upon their recommendations and issues with horizontal noise. I also KolariVision about the lenses I would purchase and shipped the lightly used R5 camera off to them. I was relying heavily on their expertise and knowledge at this point.
Two days later I decided to read up more on the conversion to full spectrum of an R5. And then it hit me…In the middle of the page discussing conversion, there was a disclaimer/warning about light leaks with the R5 and new glass. So, if effect, I bought new technology and would have to use “old glass”. NOT GOOD. Actually, it was really messed up if you ask me.
At no time did Kolari Technical support tell me about the light leaks although they new what lenses I purchased.
Yes, ultimately it was my fault for not reading the information thoroughly. But, it would of been nice to get some assistance with the matter. The tech support agent they pawned off to me, was not trained properly.
FYI- I sent to subsequent emails to the same tech support agent that were not answered correctly.
Jon,
Sorry to hear about your issue with the R5. Researching IR issues indeed requires more time and effort due to the relatively small user base and limited information.
I went through a similar exploration in moving from a Nikon D750 to a Sony A7IV. I reached out to Ilija, owner of KV, to discuss the IR performance of the A7IV. He indicated that the A7IV had a minor IR light issue, but it only manifested itself at ISO 25,600 in 30+ second exposures. I’ve used the A7IV since April and found it performs very well in every situation.
You may want to reach out to Ilija to clarify the conditions under which your R5 will exhibit light leaks. He’s very good at getting back to customers. Because both KV and LifePixel are offering IR conversions for the R5, I am wondering aloud if the R5’s issue might be similar to that of my Sony A7IV – long exposures.
If this is the case, your R5 may perform just fine, even with new lenses.
Bob
Tanya is such a great model she takes cute pictures, some people are naturally photogenic
Hi… interesting article and great set of images, however, I would be interested to know as a scientific sort of guy, how Kolari, are redefining the Electromagnetic Spectrum with their 550nm filter. As we all know, the colour ORANGE, according to the EMS, begins at 590nm, and the colour YELLOW, begins at 570nm… This being the case, how does their light orange filter get a 550nm wavelength, when in fact a 550nm wavelength value is in the GREEN spectrum wavelength on the EMS ?
Mal,
I was curious as to the answer as well knowing it had something to do with particular combination of visible and infrared light. I reached out to Ilija, of Kolari Vision. Here a paraphrasing of his response:
If you examine a 550nm single wavelength filter, it would indeed be green. Because these are longpass filters — allowing all light above 550nm to pass through — however, the resulting appearance of the filter is light orange.
Bob
I can’t decide between 550 and 590…. speaking of exposure, the 550 let’s more light in so do you have to use a small aparture all the time? I love the aerochrome look but also the other options.. it probably doesn’t matter that much
Nina,
I’ve seen similarly processed photos with both filters. I’d give the edge to the 550nm if you want a bit more color in your processing, because it allows more visible light to strike the sensor.
Bob
When comparing the 590 to the 550 you’re saying:
“In theory, the 590nm should be able to produce slightly brighter whites in vegetation, but a mere 40nm of additional IR light will still fall short of producing the whites of a 720nm filter.”
What do you mean?
The 590 blocks everything below 590nm (visible part of the spectrum) while the 550 blocks everything below 550nm. So this has nothing to do with an extra 40nm of IR, it just blocks more of the visible spectrum. With the 590 you’re missing yellow, not extra IR.
Ther reason a 720nm filter produces brighter (IR) whites is that it blocks more visible light, it doesn’t pass more infrared light.
John,
Perhaps a better way of saying it is the resultant ratio of infrared to visible light striking the sensor, while higher with the 590nm (less visible light/more IR) vs. the 550nm (more visible light/less IR), is still not enough to produce bright white vegetation produced by the 720nm filter.
Bob
Hi! Great article and great pics!
I wonder how this filter works in human skin. Have you done some test on this?
THanks!
All the best,
Alberto.
Alberto,
In general, the more color the IR filter lets in, the more exaggerated the color of the skin will be. Take a look at the photo of the young girl on the beach in my examples above. As you can see, her skin tones look quite natural.
Hope this helps.
Bob
“The 590m filter simply captures less infrared light than that of the higher wavelength filters.”
That’s not correct. It captures as much infrared light as any other (non-IR blocking) filter but it also captures more visible light, therefore the Infrared effect gets less visible.
Hi Bob,
I’m very interested in IR Photography, I have a Sony A7R III and don’t want to completely convert my camera just yet… if I buy a filter from Kolari such as the 550nm will I still achieve the same look as the old AeroChrome Film or do I need to convert my camera fully?
Thanks, Lachlan
Lachlan,
You can buy an external Kolari 550nm filter. The issue, of course, is that you will need to use a tripod since your A7RIII (and any other unmodified DSLR) has a filter that blocks infrared light. Depending on the specific camera model and sensor, exposures on unmodified cameras can take 30-60 seconds. Thus any movement of anything in the frame will be blurred, even clouds. The advantage of an IR-modified camera is that you can shoot with regular shutter speeds.
Bob
A 550nm filter is just an orange colored filter on an unconverted camera. Your advice is not valid. Unconverted cameras need filters from 720nm upwards to have infrared effect.
Michael,
Not quite. An orange filter would not capture infrared light.
Bob
I have been searching for this information everywhere and couldnt find much about it. I have seen 1 star reviews on some brand filters saying the same. I wonder is it the bad brand that creates colored ND filter and market it as IR or it is impossible to have 590nm IR filter?
I am looking to get some filter to try IR (without ruining my only camera by converting).
So is it only option 720nm like Hoya filter? I have also seen brand ICE with good reviews and 3 times lower cost. Any advice on this?
Marko,
I’ve tried some of the cheap IR filters. Most have a very strong color cast that require more adjustments in post-processing. I would try a Hoya or Kolari Vision 720nm filter.
Bob
Dear Bob,
Thank you for a great, inspiring and informative article.
After moving back and froth from color infrared, I am back to it again, going through a nostalgic moment for the old Kodak EIR.
My main camera is a Nikon D7100 with internal 720nm.
I have a second camera, Nikon D5100, converted to Full Spectrum, which I wanted to sell. But, I decided to keep it for this “nostalgic” moments.
Would you happen to know which of the two filters capable to cut visible light at 550nm, namely the Wratten 23A Light Red and 22 Deep Orange, is better suited for “Aerochrome”.
I have been searching and searching for differences, without success.
Cheers
Nic
PS … Here’s a picture I took a couple of weeks ago with the D5100 and Wratten 25A, processed in Lightroom, Nik Viveza and Photoshop. Unfortunately, I feel it’s not quite there, though.
www.instagram.com/p/Bmn…_copy_link
Nic,
The IR community remains fairly small, so it is very difficult to find helpful information once you get beyond a certain level. Any of the filters in the 450-590nm range should allow you to mimic the Aerochrome look, although the specific filter will guide the settings you use. The trick is in the post-processing routine and tinkering with it to get a consistent collection of settings (Hue/Saturation, Black & White Luminosity mask, etc.) that produce the look you like.
The picture you posted is not too far off from the Aerochrome look. A few more tweaks and I think you could be there.
Best Regards,
Bob
Bob, really great text and wonderful pics.! Congratulations! Currently, I am at the state of information gathering and I want to try it out soon. I learned in your text that it is a combination of filters, camera settings and RAW conversion settings to produce this exciting pics. But I also read that it is necessary to convert the camera by itself (deleting the IR filter). Could you comment? Thx, Michael
MIchael,
You don’t have to convert your camera and can instead use an IR filter over the front of your camera lens. This technique requires a tripod and long exposures, however, and is good only on windless days and/or static subjects.
A converted camera is far more flexible and functional for IR, however, as it acts/behaves just like a regular camera, with the exception being the type of light hitting the sensor. I always urge people to go the converted DSLR route, since one can pick up a used one for a reasonable cost.
Bob