This is a review of the Impact Two Monolight Softbox Kit. If you’re interested in learning studio photography and have looked at purchasing some gear, you know that once you start purchasing lights, light stands and modifiers, it can get expensive very quickly. Fortunately, there are some inexpensive options available out there, but are they worth it? While I don’t consider myself a master in the studio, I do have quite a bit of experience with different types of lighting equipment and, with a little use, can tell if I’d use something on a regular basis or not. Want to know what I thought of this Impact kit? Read on…
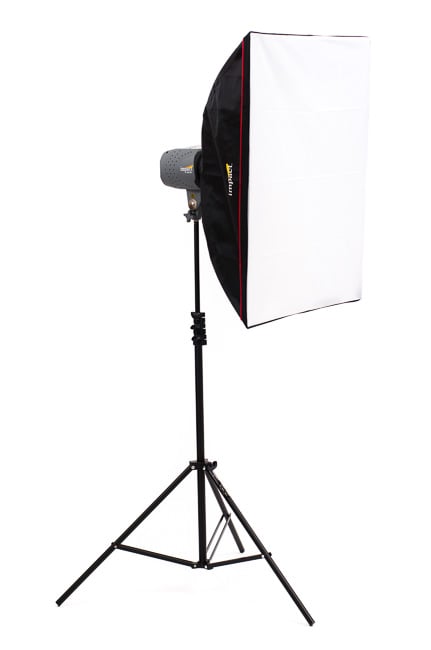
Table of Contents
1) Product Specifications
What’s Included
2x 300 W/S Monolights
2x 24×32″ Softboxes
2x Reflectors
2x Sync Cords
2x Stands
Monolights
Maximum Watt/Seconds – 300
Guide Number – 182 in feet, @ ISO 100
Recycle Time – 2 sec @ full power
Flash Duration – Not Specified by Manufacturer
Flash Variability – Full to 1/8 power in 1/10 stop increments
User Replaceable Flashtube – Yes
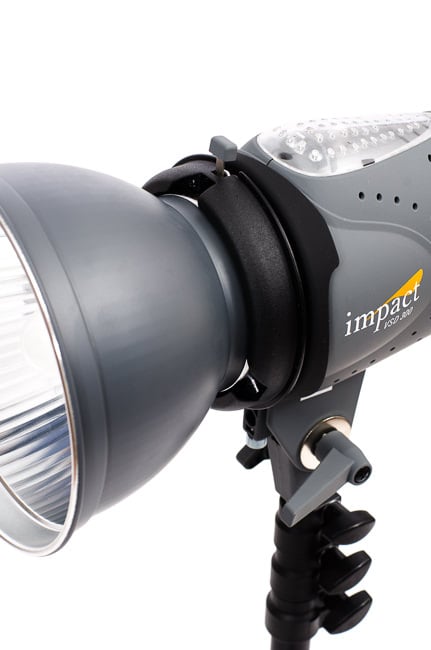
Changeable Reflector – Yes
Modeling Light Wattage – 100
Voltage Stabilization – specified by manufacturer
Flash Ready Indicator – LED on test button
Operating Voltage – 110-120VAC, 50/60Hz
Built-in Slave Cell – Yes, 10 m range
Circuit Protection – Fuse
Fan Cooled – No
Auto Dump – limited – strobe fires automatically as power is turned down
Dimensions – 11.6 x 8.5 x 6″ (29.5 x 21.6 x 15.2 cm) with 6″ reflector
Weight – 3.5 lbs (1.6 kg)
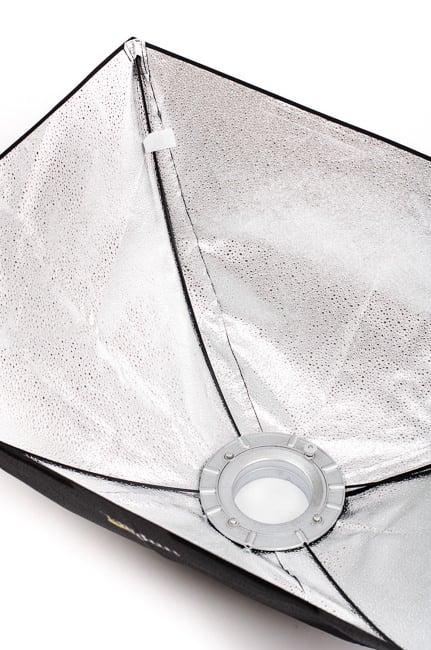
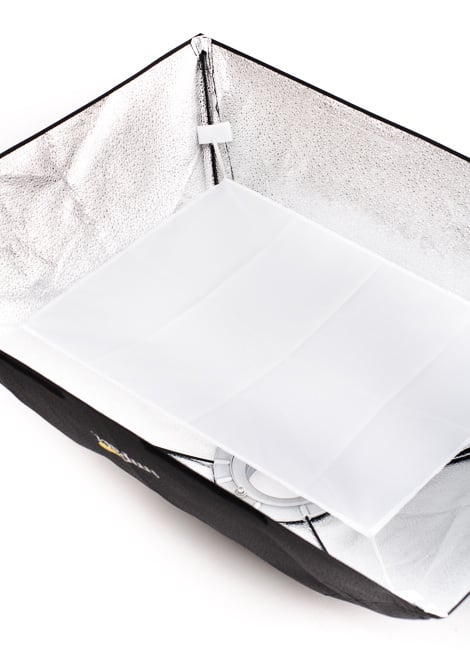
Softboxes
Size – 24 x 32″ (60 x 80 cm)
Shape – Rectangle
Compatibility – Any standard monolight (not hot lights)
Removable Face – Yes
Removable Baffle – Yes
Accepts Grids – Yes
Required Speed Ring – Bowens style – included
Light Stands
Minimum Height – 32.75 in (83.1 cm)
Maximum Height – 10 ft (305 cm)
Closed Length – 34 in (86.3 cm)
Footprint Diameter – 34 in (86 cm)
Leg Tip – 20mm
Weight – 3.1 lbs (1.4kg)
Maximum Load – 8.5lbs (3.6kg)
Attachment Size – 5/8 in (1.6 cm) stud with 1/4-20 in threaded tip
Accepts Wheels – Yes
Air Cushioned – Yes
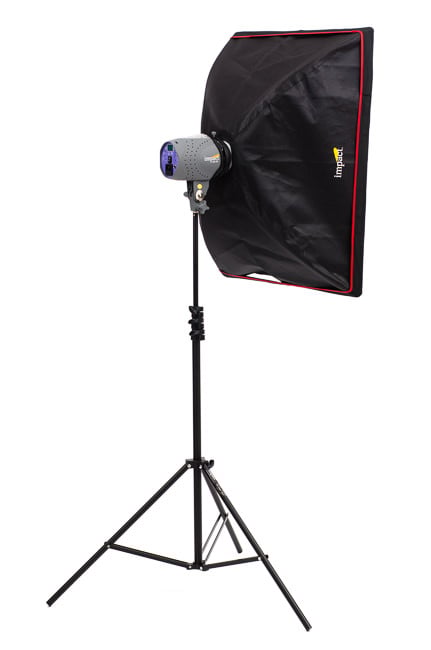
2) Packaging and Field Use
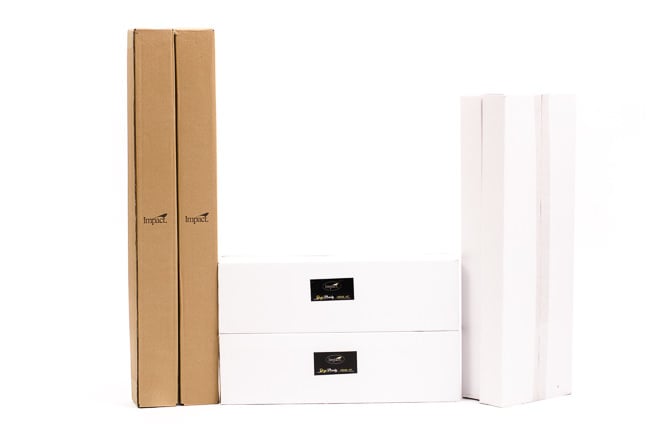
This kit is shipped in six boxes containing the light stands, softboxes and monolights. The stands slide right out of the boxes and are ready to use. The softboxes aren’t as quick to setup. They require assembly, but it isn’t difficult. Plan on just a few minutes per softbox. The monolights also require some assembly, but again, it’s not difficult. I think I was ready to start using the lights to take photos within 15 minutes of opening all of the boxes.
The stands are sturdy and well made, although they’re not as sturdy as many of the heavy duty stands that are available. They seem to be the appropriate stands for these lights and I didn’t ever feel like they would tip over. I don’t know if I’d want to raise them to the full 10 feet without securing the base with a sandbag, but for normal studio use they’re fine. They are air cushioned, which is a nice feature to have in a light stand.
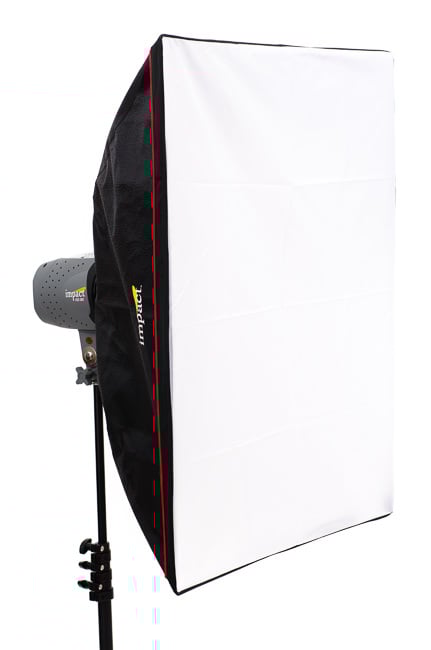
The softboxes are a great size for portraits. They’re not so big that they’re awkward to use and handle, but not so small that they produce a harsh light on your subject. The inner diffusion baffle is a feature I prefer in softboxes that I use. It diffuses the light before it hits the outer diffuser and eliminates a severe “hot spot” in the middle of the softbox. The softboxes feel like they are well made. The material is quite sturdy, but not so sturdy that it’s heavy and rigid. I also like the fact that the outer diffuser material simply slips over the softbox and is held in place with velcro.
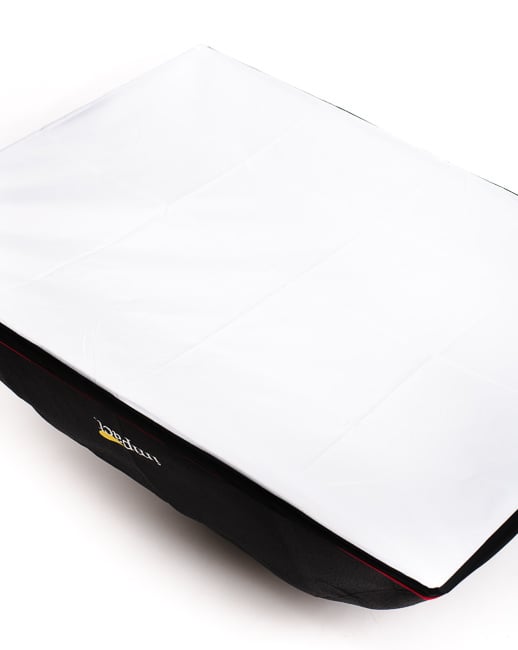
While using the softboxes, I found a few things that I didn’t like. When I took them out of the box I noticed a very musty odor. Unfortunately, after months of use it has not yet completely gone away. It’s not so strong that your clients won’t be able to stand it, but it is definitely strong enough that they will notice it. Another thing I would change if I could is the fact that in order to collapse the softboxes, they have to be completely disassembled. This means that you’ll have to decide if you want to store them assembled and taking up a large amount of storage space while you’re not using them or if you want to spend the extra time putting them together and taking them apart every time you use them.
The monolights look and feel quite sturdy. The shell is plastic with what feels like a light rubber coating, making them easier to handle. The base that mounts to the light stand is quite solid, verging on being bulky. The part of the unit that feels the least sturdy is the front section where the softbox mounts to the light. The tab that locks the softbox in place feels flimsy, like it could be easily bent or even broken. I didn’t have any problems with it though, so I can’t say with any certainty that it will ever be an issue. One other gripe I have with the lights is the overall size, especially when the cover is mounted for storage. They are much longer than I’m used to (I’m comparing them to my Alien Bees units). With the addition of the bulky base, the storage footprint is quite large, which means you might have to shop around a bit before you can find a storage case that will hold these lights.
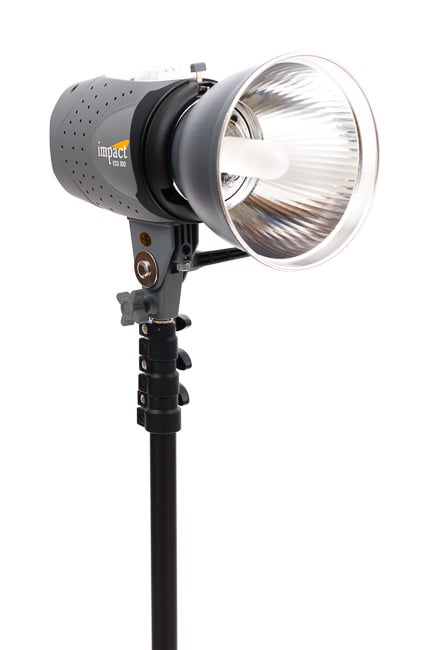
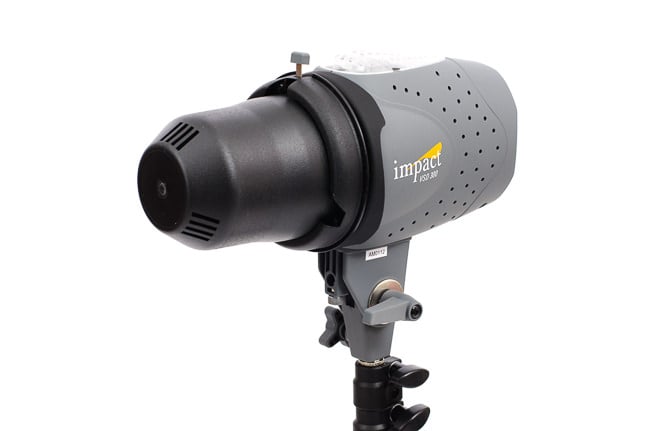
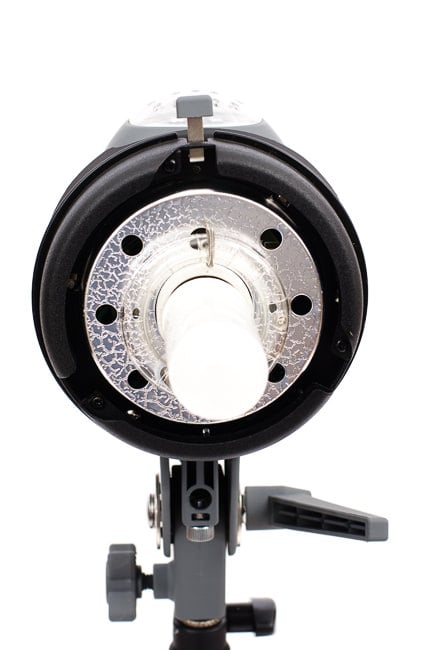
Both the flashtubes and modeling lights are replaceable on these units. Although the modeling lights look like they might be some type of special bulb, they can be replaced with a standard incandescent light bulb. The protective covers still fit when an incandescent light bulb is used as the modeling light.
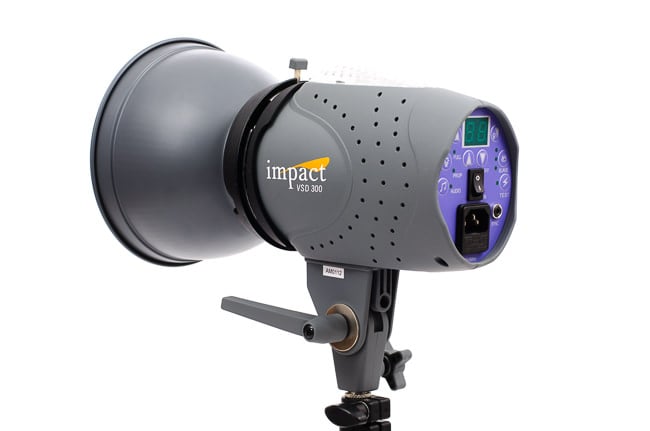
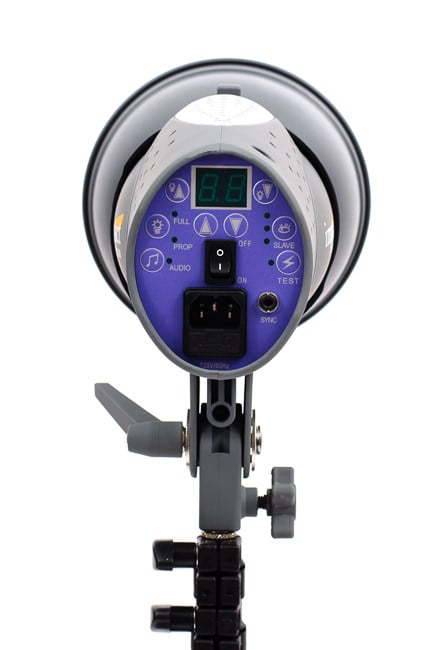
The back of the unit has all of the controls as well as a digital display that shows the power level. These include power adjustment, modeling light brightness, audible tones for recycle power, slave mode, test button, sync port and power switch. To me, not all of the symbols and labels are self-explanatory, so be sure to keep the manual nearby until you become familiar with the lights.
Using the lights is straightforward. Once you have the light mounted on a stand and either the softbox or reflector attached, just plug them in and turn them on. You can connect them to your camera using the included PC sync cord or you can use another triggering option of your choice. I prefer to use Pocket Wizards. The rear sync port uses a 3.5mm jack.
There are a few nice features that I noticed while using these lights. First, when you decrease the power of a light, it will automatically dump the charge. On many lights that don’t have an auto-dump feature, your first shot after dropping the power of the light will be too bright because the light was, for example, charged to f/11 instead of f/8. With the auto dump feature your first shot after adjusting the light should be the correct power.
Another feature that I initially found annoying but can appreciate is that the lights will not fire until they have recycled. This means that if you’re shooting and quickly fire two shots in a row, the lights won’t fire on the second shot because they can’t recycle that quickly. Initially this annoyed me because I sometimes like to grab a quick second shot, especially when someone is laughing. With some other lights this is possible, and although the second shot is underexposed, it’s usually salvageable. With these that second shot is just black. The reason I came to appreciate this feature is because often I’ll get a little carried away and shoot before the lights are fully charged, meaning my exposures aren’t always consistent. With these it just won’t fire and will force me to slow down a bit.
Speaking of consistent exposures, the output of these lights isn’t always consistent. While shooting at higher outputs, I noticed that my both my color temperature and exposures were inconsistent. The exposure varied up to 0.5 stops between shots and the color temperature tended to shift between images. This is definitely something that can be corrected during processing, but it’s not convenient. Fortunately, at lower powers both the color temperature and light output seemed to be very consistent.
The slave mode is somewhat confusing. Next to the slave button (the eye), there are three lights. Pushing the button cycles through four modes (off, bottom light, middle light, top light). During testing I noticed that the middle and top light don’t do anything. When I consulted the manual, I discovered that those lights “are reserved for future features”. Once I figured that out it was easy enough to remember that the bottom light means slave mode is turned on, but I was confused on more than one occasion as to why slave mode wasn’t working even though the (wrong) light was turned on.
Finally, I feel that there is a safety issue that you should be aware of. While tightening the light onto the light stand, my thumb got caught between the thumb screw and the base of the light (on the photo of the back of the light above this text, it’s the screw on the right). My thumb was sore for the next hour or two. Fortunately, it didn’t bruise, but it did put a big scratch on my thumbnail. People with slender fingers might not have this issue, but definitely be careful when tightening that screw.
3) Samples
Here’s a headshot that uses both lights. It’s been cropped, color and exposure corrected.
Here is a series of shots that were all taken within 5 seconds of each other. You can see that the lighting is not consistent across all three images. It’s an easy enough thing to fix, but it does make batch processing more difficult.


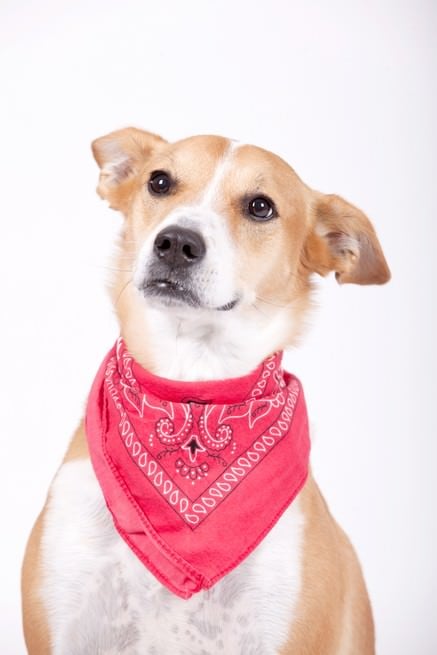
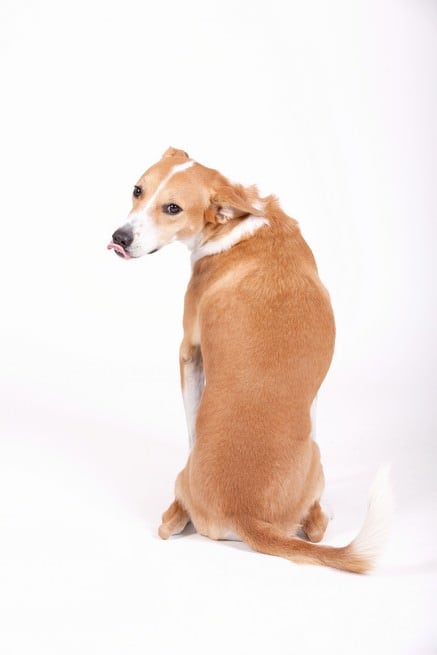
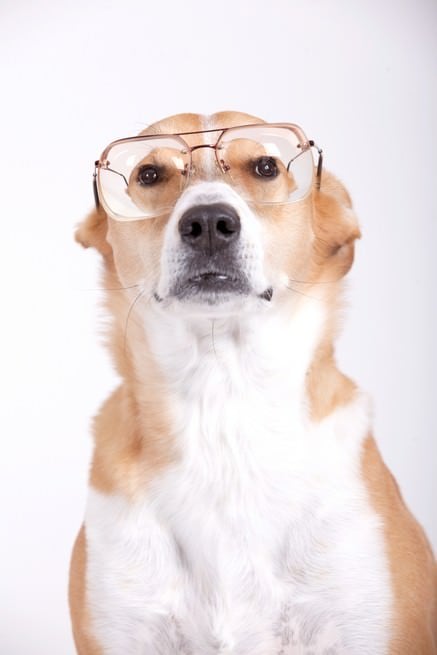
The next three images are of one of my studio mate’s dog, Boomer, who came in for a photo shoot. Images courtesy of Tess Polivka with Love n Joy Photography.
4) Summary
If you’re interested in learning studio photography but don’t have a huge budget to purchase a bunch of lights, modifiers and stands, this is a great kit to consider. After getting over a very short learning curve, I felt quite comfortable using these lights. When I ran into an issue or was confused, I found the manual to be well written and helpful. Would I buy them if I needed to use them every day? Probably not. The inconsistency would drive me crazy and would take up too much of my time. Would I buy them if I was just getting serious about learning studio lighting or just used them occasionally? I sure would! This kit is a great value and includes everything you need to get started in the world of studio photography.
5) Pricing and Where to Buy
The Impact Two Monolight Softbox Kit is priced at $458.95 and is available at B&H Photo Video.
Impact Two Monolight Softbox Kit
- Features
- Build Quality
- Handling
- Value
- Size and Weight
- Packaging and Manual
Photography Life Overall Rating
Hi how do i change the fuse in this Impact VSD 300 ??
Thanks for the complete review, from boxes to the flashes!
I want to buy these kits and now I have a complete guide from the shipping boxes to the ease of use!
The last part about uneven light and color temperature is giving me some second thoughts…
Thanks for the great review. The light output inconsistency is such a big shame, and it’s a deal-breaker for me. The whole package looks like a great deal, but I guess you get what you pay for. :(
I’m going to be making my first foray into portrait lighting. I did enjoy this review but ended up going with another kit, one from ADORAMA, the flashpoint II kit.
Thanks for taking time to write such a well thought our review! It helped me a lot.
I start learning to use studio lights…i am planning to open my small home studio. i am very please if you write also about the technique and the light set up…
Hi Yuan, how exciting that you’re opening up a home studio! I’ll see if I can write an article in the future about lighting technique. Thanks for the suggestion!