Artificial intelligence, or rather machine learning, is now a permanent part of many photo editing programs. I recently tested one such machine learning program for noise reduction and sharpness, called DxO PureRaw 2. In the meantime, however, the French company DxO reworked their de-noising module called DeepPRIME (which is part of PureRaw 2) and introduced a new version called DeepPRIME XD.
The suffix XD stands for “extra detail.” This gives us a hint of what to expect from the new algorithm. But how does it perform? That’s what I wanted to cover in today’s quick review.
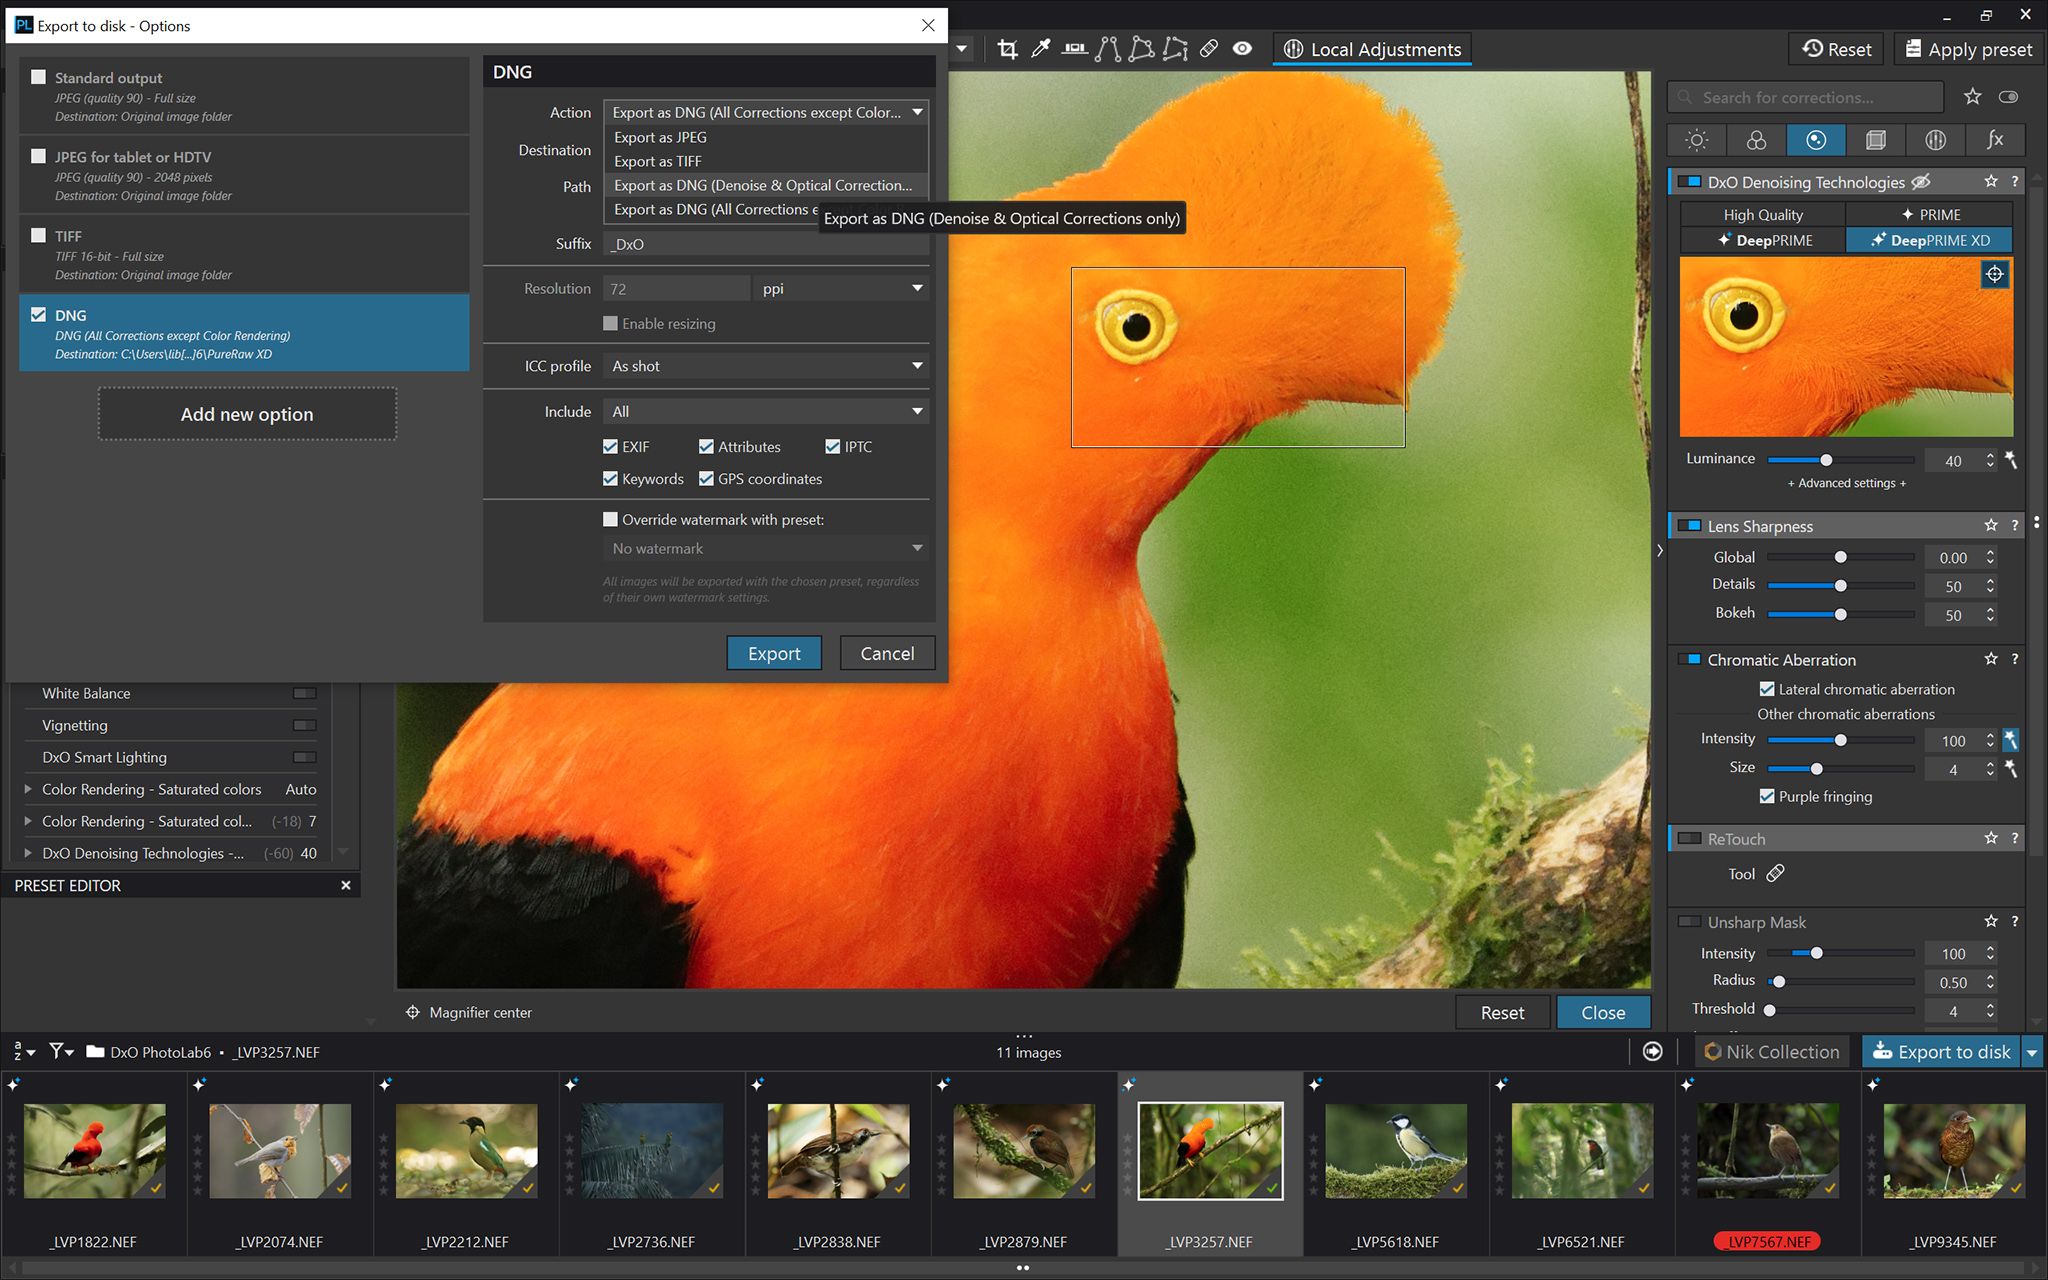
To start, I should say that I was hoping to see DeepPRIME XD integrated into DxO PureRaw 2 via an update. In fact, PureRaw 2 has become almost an integral part of my editing workflow. Unfortunately, it didn’t happen. So maybe in PureRaw 3? In any case, for now, it’s only found in DxO PhotoLab 6.
As such, DxO PhotoLab 6 has taken up temporary residence in my computer. Only time will tell if it will stay there permanently. I have left all its editing and cataloguing features aside and focused my attention solely on DeepPRIME XD.
Table of Contents
Processing Speed
I selected a set of eleven photographs for editing, taken mostly with Nikon D500 and Nikon D750 cameras. The lenses used were a Nikon 400mm f/2.8 G or a Nikon 200-500 f/5.6 zoom lens. I mention this fact because both the camera and the lens must be in the program’s database in order to use its full potential. That’s why I didn’t include the Nikon Z9 with the new telephoto lenses in the test. While the Nikon Z9 is familiar to DxO, the Nikon 400 f/4.5 and 400 f/2.8 TC S lenses were not yet in the database at the time of my testing.
I processed the entire series of photos twice to minimize any possible error. The resulting processing times were different for each method, and not by a small amount. DxO PhotoLab 6 processed the photos the fastest, at 1 min. 12sec., when I set the older DeepPRIME algorithm. The same algorithm, but in DxO PureRaw 2, completed the job in 1 min. 52 sec. And finally, my computer’s processor had the most work to do with the new DeepPRIME XD. It took a long 3 min. 56 sec. – so, the new XD algorithm is hardly fast.
But what matters the most is image quality. Does it fare better there?
Noise Reduction Quality
DxO claims that the standard DeepPRIME algorithm should reduce the noise level by 2 stops, while DeepPRIME XD will show a difference of 2.5 stops or more. These are marketing numbers, of course, but they at least show that DxO considers the XD version of the algorithm to be superior.
How does this difference be reflected in the photos themselves? In my opinion, the difference is noticeable immediately, if you zoom in enough.
Take a look at the 100% crops below. DeepPRIME XD (the image on the right) clearly has the edge over the older algorithm on the left.

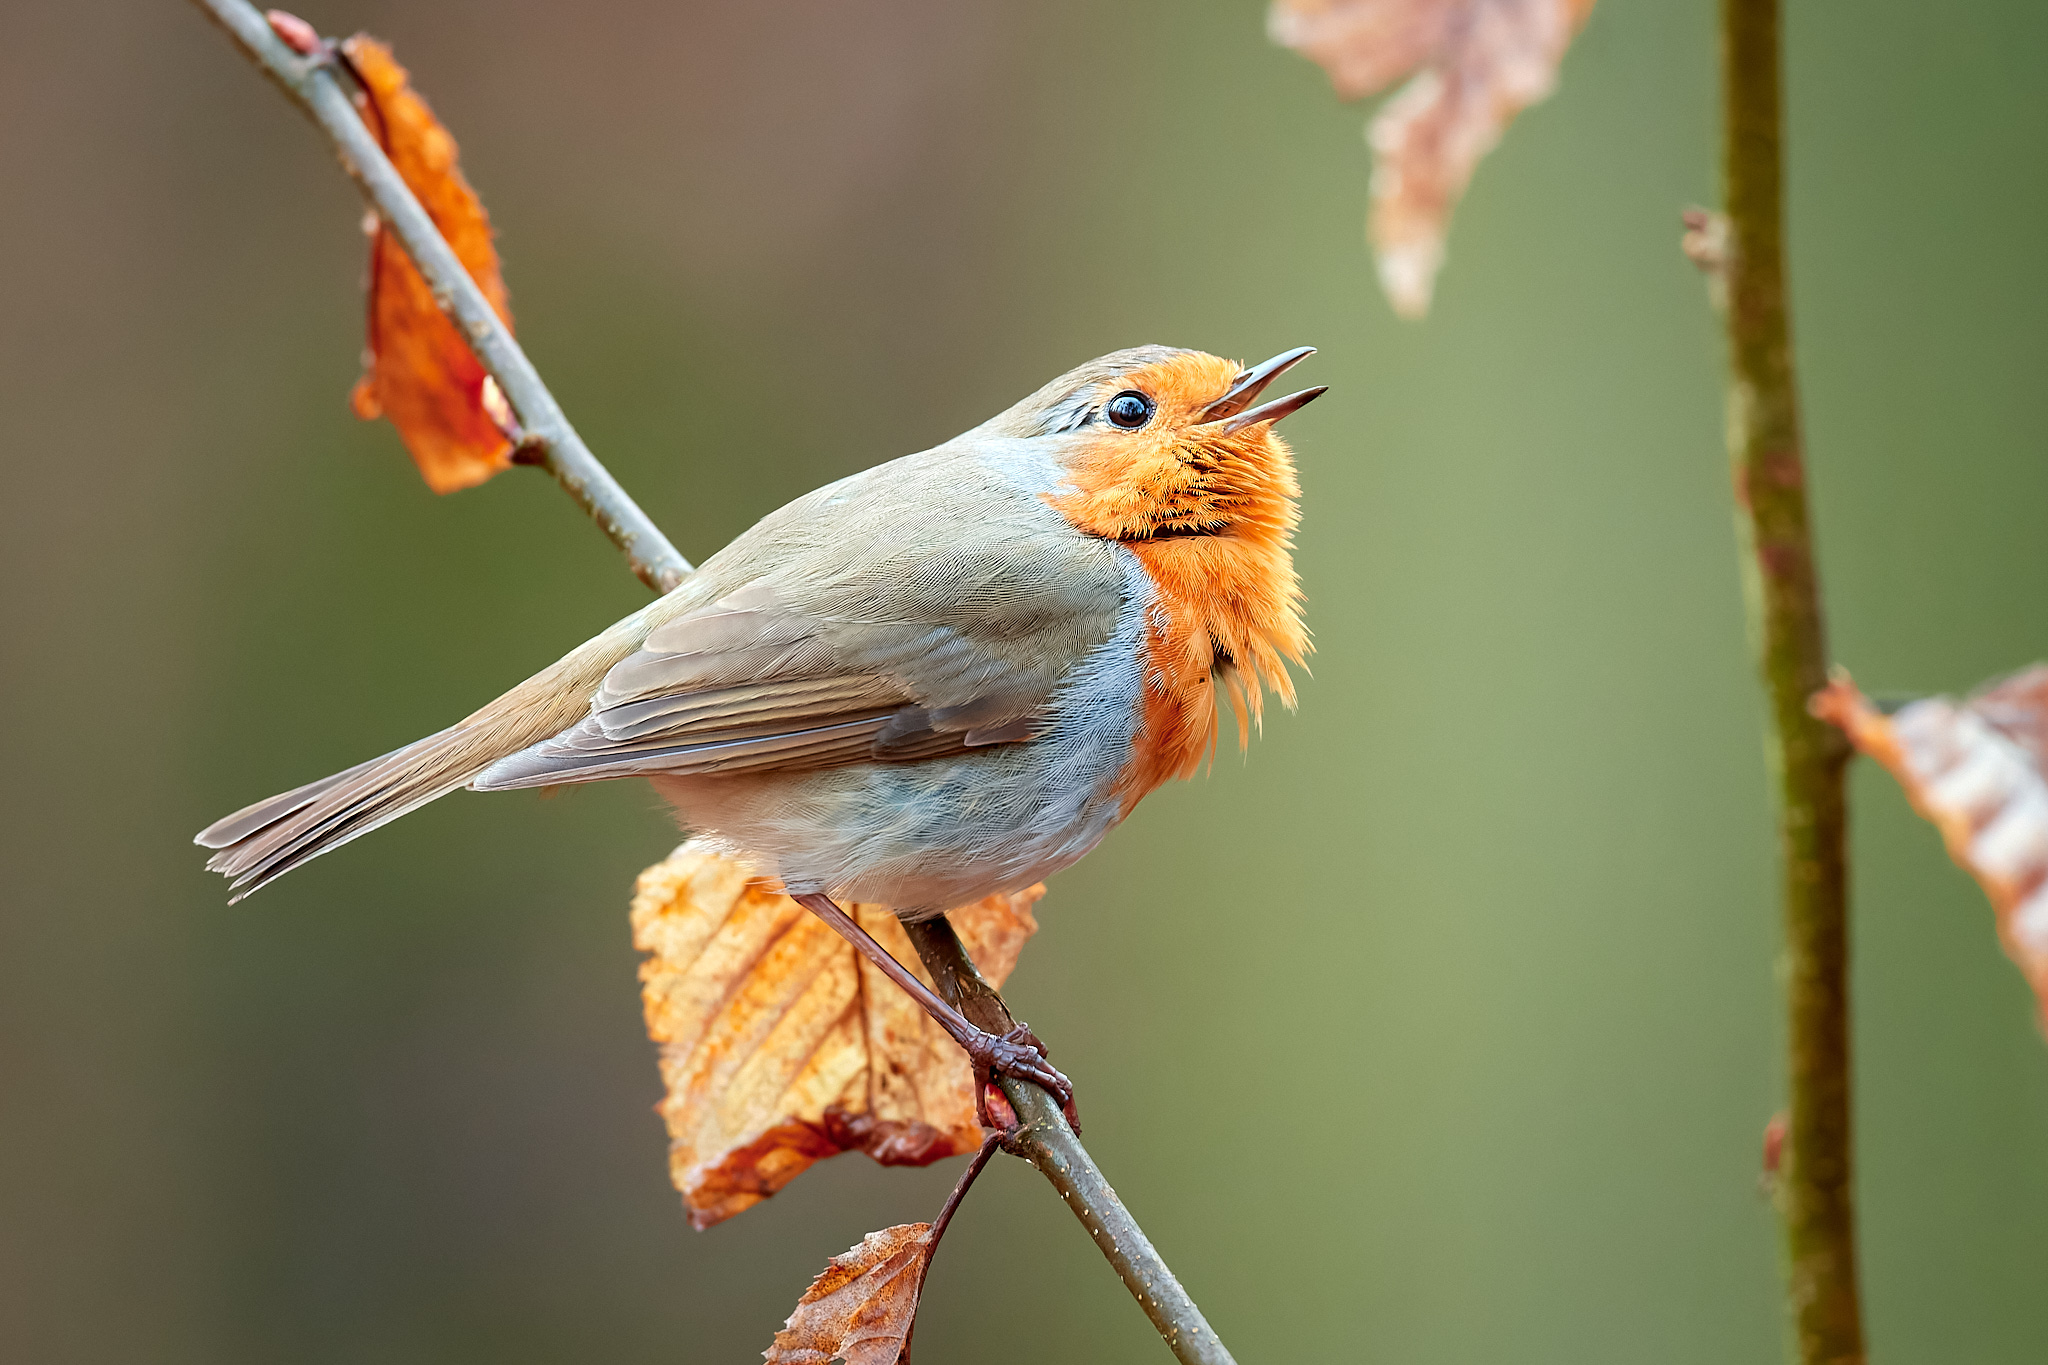
What ISO did I use for this photo? A whopping ISO 20,000! I don’t shoot at ISO 20,000 every day, but I can imagine situations where it comes in handy, especially in dense forests.
Although the DeepPRIME XD algorithm looks cleaner and less “blocky” at first glance, note that it also created some artifacts under the bird’s beak and behind its head. The older DeepPRIME algorithm may not look as clean, but the artifacts are not as obvious in the image.
Preservation of Details
The usual choice in noise reduction is pretty simple: Either you get a photo with minimal noise and minimal detail, or more detail but more noise. If you want both, you typically need to use masks and apply noise reduction only where it’s the most needed, like out-of-focus regions.
Artificial intelligence algorithms have improved this tradeoff, but it’s still an unavoidable part of photography. This is where I was most curious to see how DeepPRIME XD would compare to the previous version.
The original DxO DeepPRIME is on the left, and DxO DeepPRIME XD is on the right:

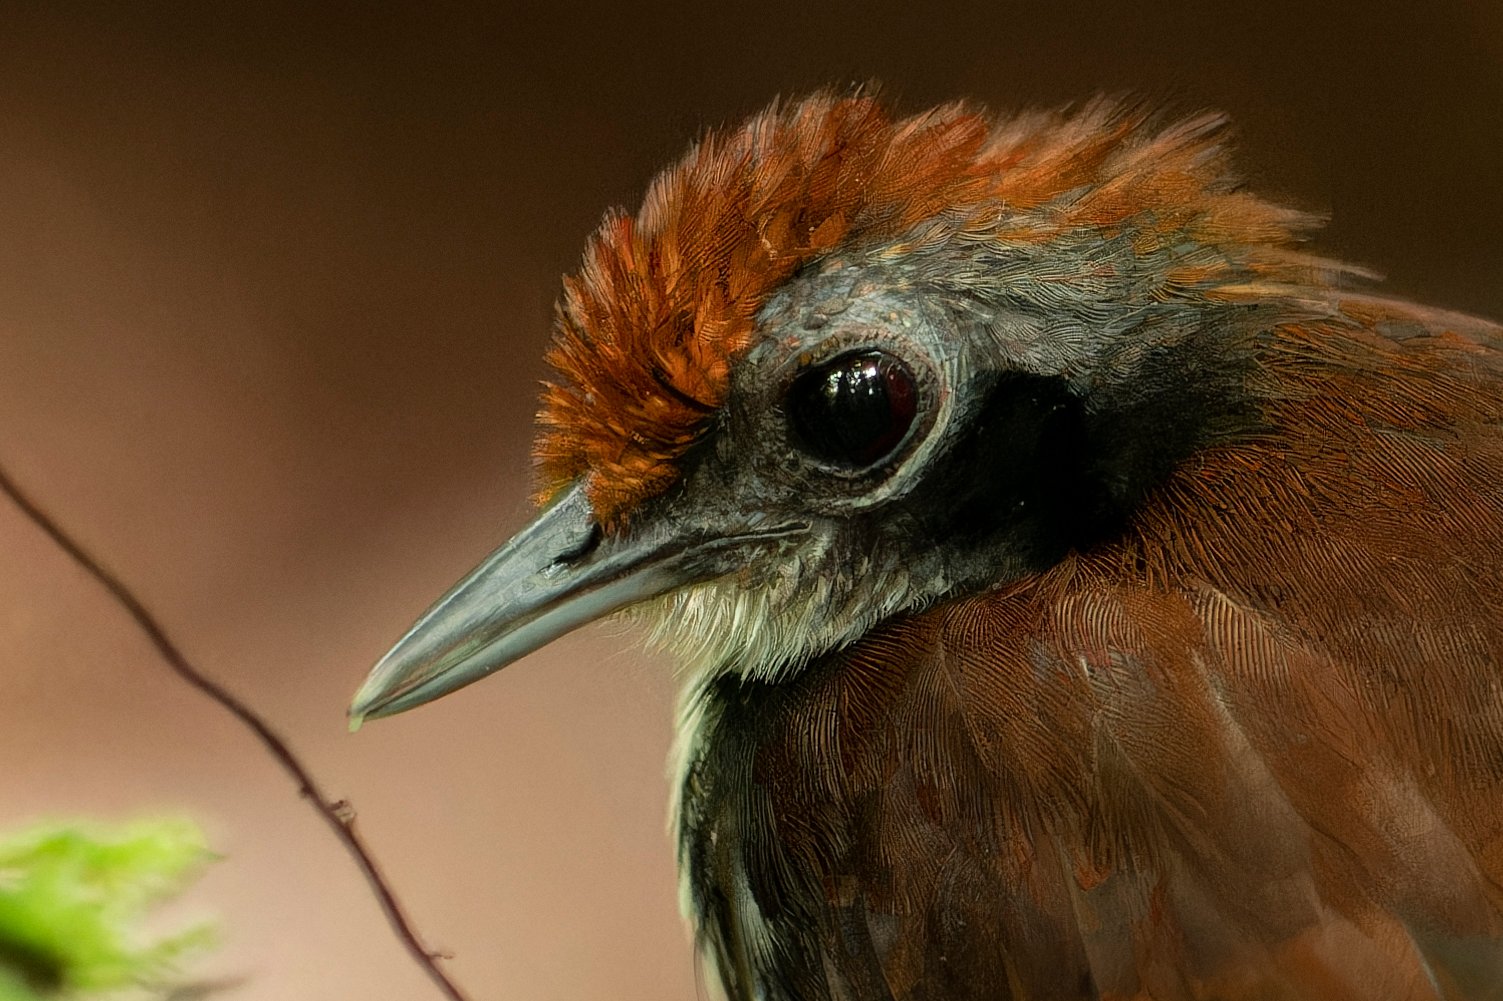
When I compare the results, I’m not disappointed. You can see that the edge sharpness has increased slightly in the XD version, and the amount of noise in the out-of-focus background has decreased. Unlike the prior test, this is definitely a win for the newer algorithm.
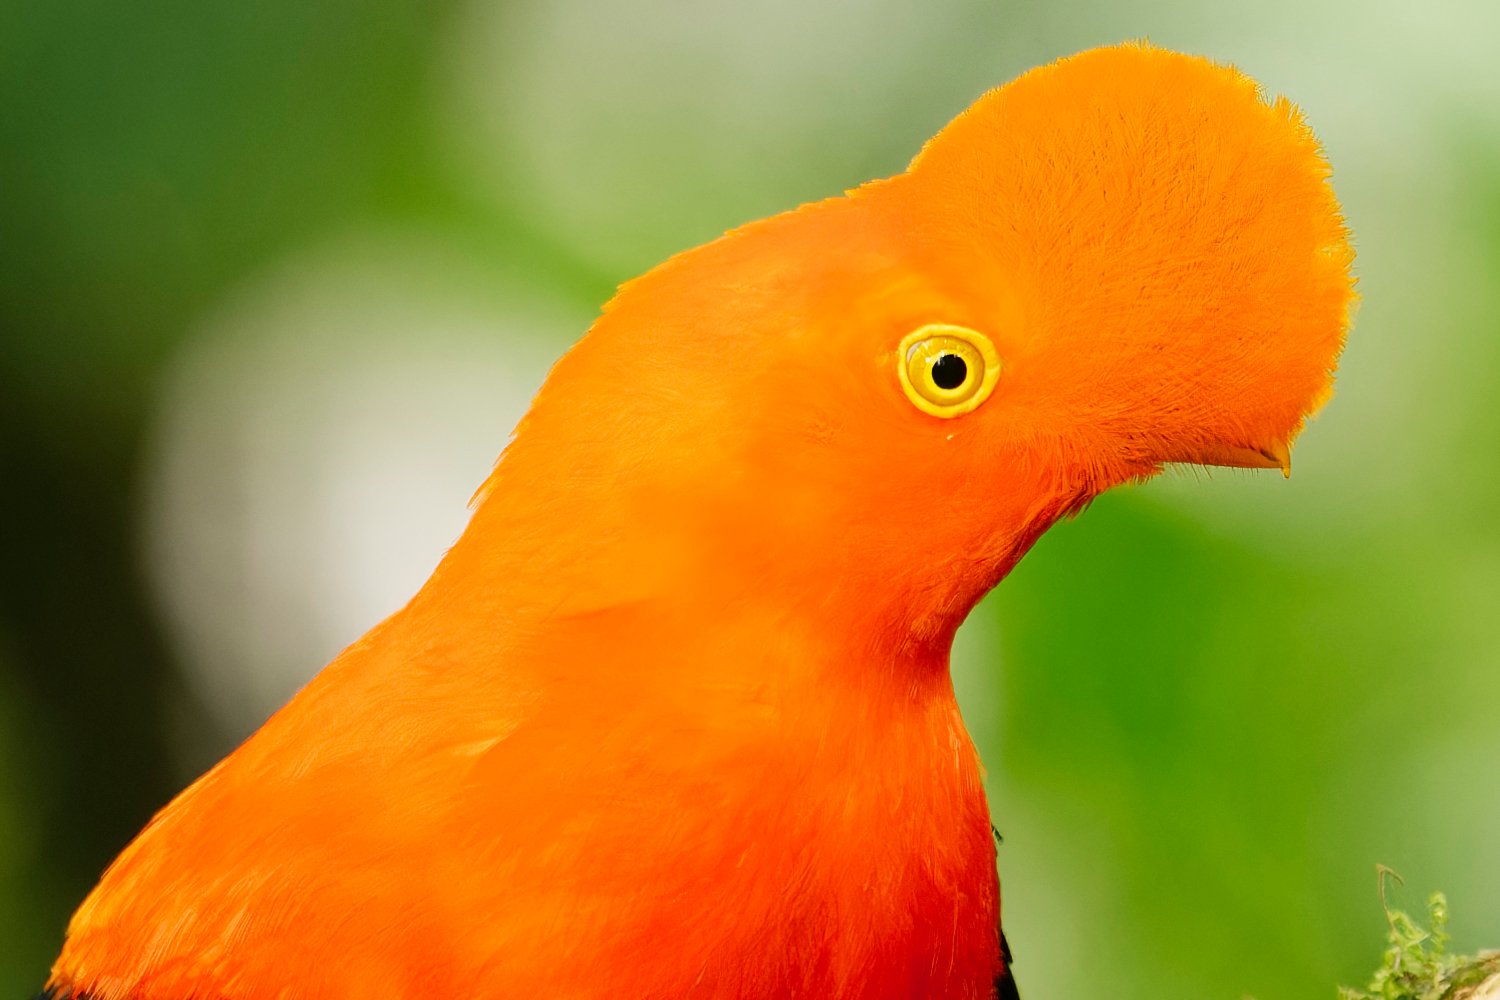
Here’s another example below. Check out the crest of the Andean Cock-of-the-rock. I think the difference is really visible. (As before, the older algorithm is on the left, and the newer XD is on the right.)

Color Preservation
This is where things get a little complicated. I exported the photos from DxO PhotoLab 6 and DxO PureRaw 2 by converting to a DNG file. With most photos, this caused no issues, but the Andean Cock-of-the-rock was a different case. Its deep orange color is a tough test for cameras and editing programs alike.
For point of reference, here’s how the orange color should look, as shown prior to exporting the image:
But here’s how it actually looked upon export to a DNG:

It almost looks pink, like a tamer version of a flamingo! At first I thought this was a problem with the XD algorithm, but upon exporting it with the original DeepPRIME algorithm as well, the problem persisted.
Only when I exported as a TIFF file instead of DNG did the color look normal again. I don’t know why that is exactly, but it was something I wanted to note in case you are noticing similar issues with the colors in your DNG files.
Summary
DxO has taken a step forward with its new way of pre-editing RAW files. DeepPRIME XDdelivers what its name promises. It actually manages to extract a slightly higher level of detail from files shot at high ISO than its predecessor DeepPRIME.
However, there are a few minor issues. The first problem I’ve encountered is that at very high ISOs, the new algorithm can create artifacts in areas that are out of focus. The second finding is color shift when converting to DNG, although this isn’t necessarily worse than with the previous DeepPRIME algorithm.
Summing up all the positives and negatives of the new DeepPRIME XD, the positive feelings prevail for me. If you frequently shoot at high ISOs and routinely face heavy noise, getting some software with the XD noise reduction algorithm could be useful for your work.
That said, at the moment, it’s only in the DxO PhotoLab 6 Elite software, which is fairly expensive at €219 (note that the cheaper ESSENTIAL Edition does not include the DeepPRIME XD). I hope that DxO adds this feature to their PureRaw software or PhotoLab Essential, because although it’s a useful improvement, it may not be worth the price if you wouldn’t use the other features of PhotoLab Elite.
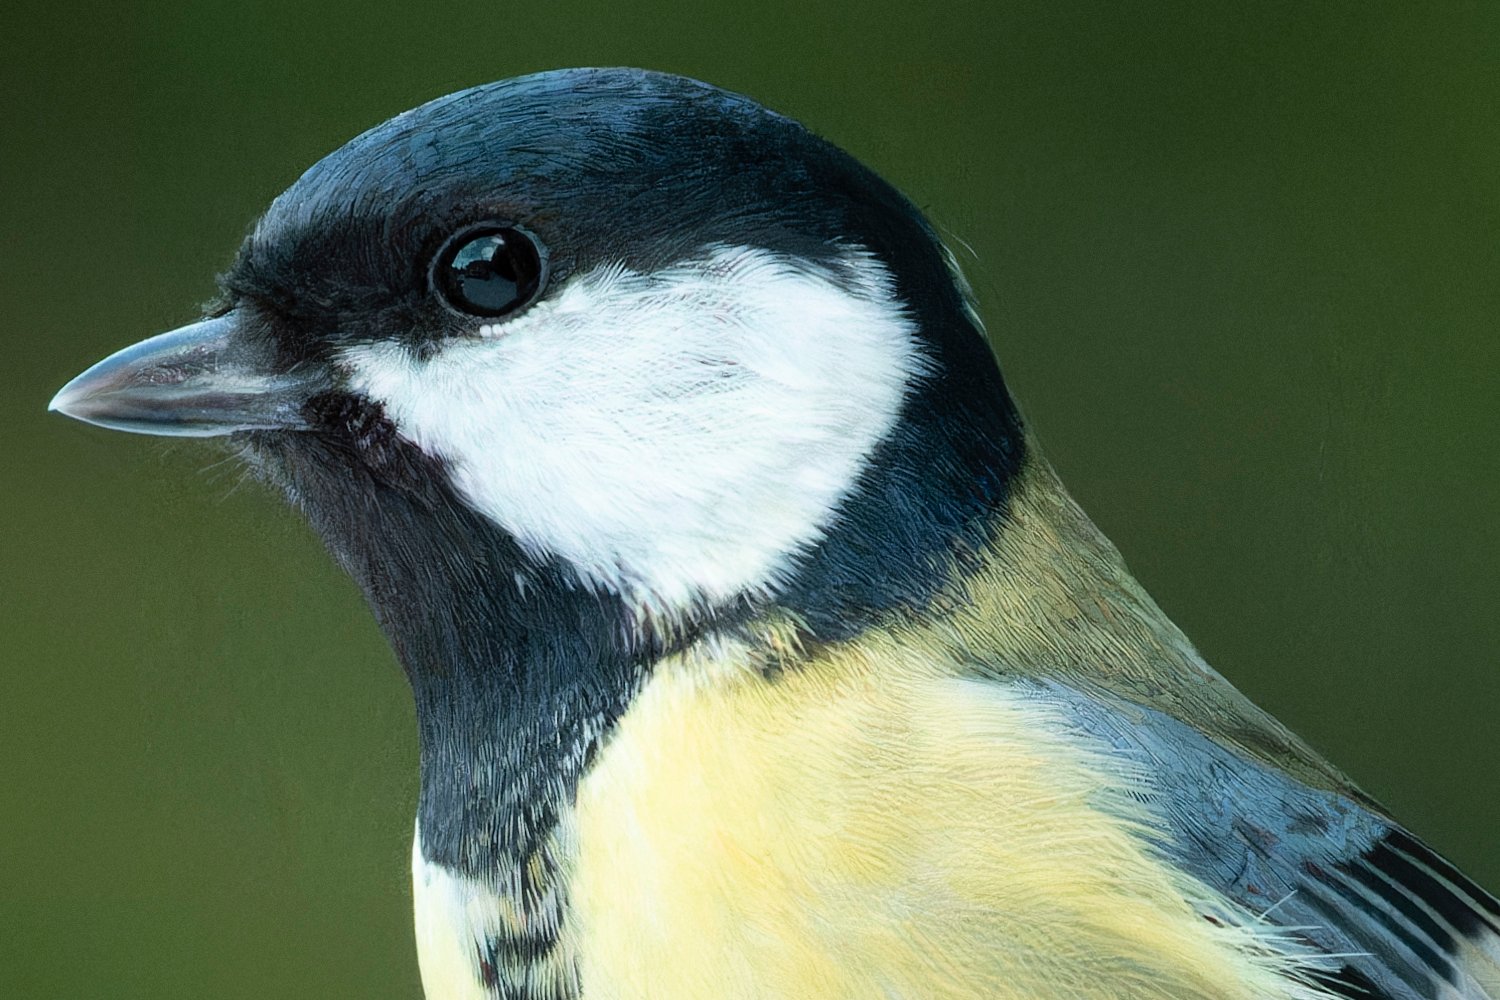
Libor, can you comment on the blue hue Deep Prime imparts to the black/white/yellow songbird?
(If you did not have the control image on the left half I’d have thought this blue tint was from diffraction of sunlight by structures within the feathers.)
Hi Richard, thanks for the question. The blue hue has three causes. The first is that Great Tit’s photo was taken in deep shadow. Almost in the dark. That’s why the colours are rather cold. The other cause are microscopic structures on the surface of the feathers that absorb some wavelengths and reflect others (in this case blue). And the last cause is the most trivial, color profiles. DxO PureRaw produces DNG files that both Capture 1 and Photoshop read correctly without having to touch the color profiles. However, PhotoLab 6 needs to be tweaked (see my reply below) to make the colors match the original.
I think the slow speeds are a reflection of your computer. I have deep prime XD and for a z9 NEF file it is scarcely 2 seconds to process – almost fast enough to not see it happen. I also have Topaz DeNoise and there are times when I feel that does a better job with just a small of sharpening added to the brew.
The times I give are valid only for the computer I used and the sample of photos I tested. Differences in processing times should be seen as relative rather than absolute.
Libor
Nice comparison. As a long time DxO Photolab (and DxO Optics Pro prior to that) user, I have some remarks for you:
1. DeepPrime and DeepPrime XD benefit extremely from a GPU in one’s computer. Please check your preferences if you have that set up properly – you will see a really huge decrease in computing times!
2. DxO Photolab 6 has introduced a wide gamut colour space which was previously not supported by the DxO Photolab 5. This has created multiple issues with strange colour casts for some users.
3. Generally, colour management was somewhat lacking in DxO Photolab (no problem for me, since I base on sRGB) and during export proper colour profiles were either not attached or not properly indicated in the file’s metadata. When you cross this point with te previous one, you may end up in colour shifts in DNG files whereas the TIFF files were OK. Also, please take into consideration that DNG files exported from DxO Photolab are linear DNGs.
Thank you Marcin for your useful comment. As for the speed, it will always be lower with the new DeepPrime XD than with DeepPrime. So more than absolute values, readers might be interested in relative values. Each computer handles the task differently in terms of speed, but the relative difference in times should be similar.
The matter of colour profiles is indeed somewhat confusing. Perhaps more than inconsistent colors, there is the problem of inconsistent color profile management. First of all it is essential to set the correct color profile in the “Color rendering” in DxO. But then it is also necessary to select the correct profile when importing the DNG file into the editor. In Photoshop, I achieved the most correct color rendering when I selected “camera neutral”.
Preserving color is, besides the grain, a real problem with high ISO.
On a Nikon d850 i find the color acceptable up to 6400 asa without using DXO.
Does DXO extend the ISO-range in terms of color?
Hi Pieter, you are right that at higher ISOs there is a problem with the colours. But this is not just a matter of the file taken, but also the subject itself. Where there is no light, there are no colours. But to your question. I wouldn’t say that DxO improves colors at higher sensitivities in any significant way (if at all). Of course you can tweak them further with additional adjustments. In any case, I wouldn’t be afraid to go higher than ISO 6400 with DxO. Of course in cases where it makes sense.
I just tried deeprime XD (DXO pure raw 3) and on my computer it takes almost 1 minute for each 45MP file !( without XD it was 10 sec)
at ASA’s above 6400 The XD version starts to get better than the non XD. You can use 512.000 ASA ! wow! Artefacts- al over the place, but a usuable file without grain and strong but not perfect colors. Compare that with the normal developed LR version and it is night and day… well done DXO ! you have made my camera far better in the dark, more than hardware could do.
Unfortunately, Pieter, this is a result that matches mine. I’m about to reinstall my PC, so I’ll put DxO PureRaw 3 on it and test the speed again. Fortunately, I don’t edit a lot of photos, so it’s not such a problem for me. I’ll just have a whole lunch instead of coffee while I’m editing in DxO. By the way, I was also wondering if an investment of around 100 usd would end up being more useful than buying a new camera for thousands of usd. What if you combine a top-of-the-range camera with top-of-the-range software? That’s one hell of a ride.
I tested DXO DeepPrime as well and I agree for noise reduction it is really good and makes older and M4/3 cameras more usefull. I compared with the other AI noise reduction software that is on the market and found it to be superior. There is only a color problem if you send the file back to LR as dng (only optical corrections and NR) but only if you use their new working color space (wich has became useless for me). Using the classic working colorspace the problem does not occur. It is only a pity that the dng file becomes much bigger than the original raw file.
can you explain what colorspace you mean- adobe color profile?
No, this is a new, what DXO calls a new extended working space. What it exactly means I do not yet know but in the program you can choose between the new and the classic working space. As long as I choose classic I do not have problems with the colors.
No, DxO has implemented some proprietary colourspace. In the DxO forum you can find charts comparing the new wide gamut space to ProPhoto RGB etc.
Which programs did you compare to? I’ve been using Topaz Denoise.
I tried and compared Topaz and On1 NoNoise with DXO.
Yes, the colour profiles need some experimentation. For Nikon files, a usable approach is to open the photo in Nikon NX Studio, which displays the colors correctly. Then open Adobe Camera Raw (or another editor) and there, by selecting the appropriate profile, try to find a match between the two views of the same file. You then save that profile as the default for that particular camera.