The Sony A7R IV is the fourth generation high-resolution mirrorless camera designed for landscape, studio and architecture photographers. Thanks to its rich set of features that includes an advanced 61 MP sensor, fast 10 fps shooting, in-body image stabilization and state of the art hybrid focusing system, the Sony A7R IV is without a doubt one of the best camera releases of 2019. All Sony A7-series cameras, including the A7R IV, have a myriad of different settings and buttons, which can be confusing to understand, especially for first-time Sony users. So, in this article, we will explain the complex menu system on the A7R IV and provide our recommendations for every important camera setting. Although these are just our personal recommendations (there are surely other ways to set up the Sony A7R IV), the settings below are a great place to start if you are trying to get a hang of this advanced camera.
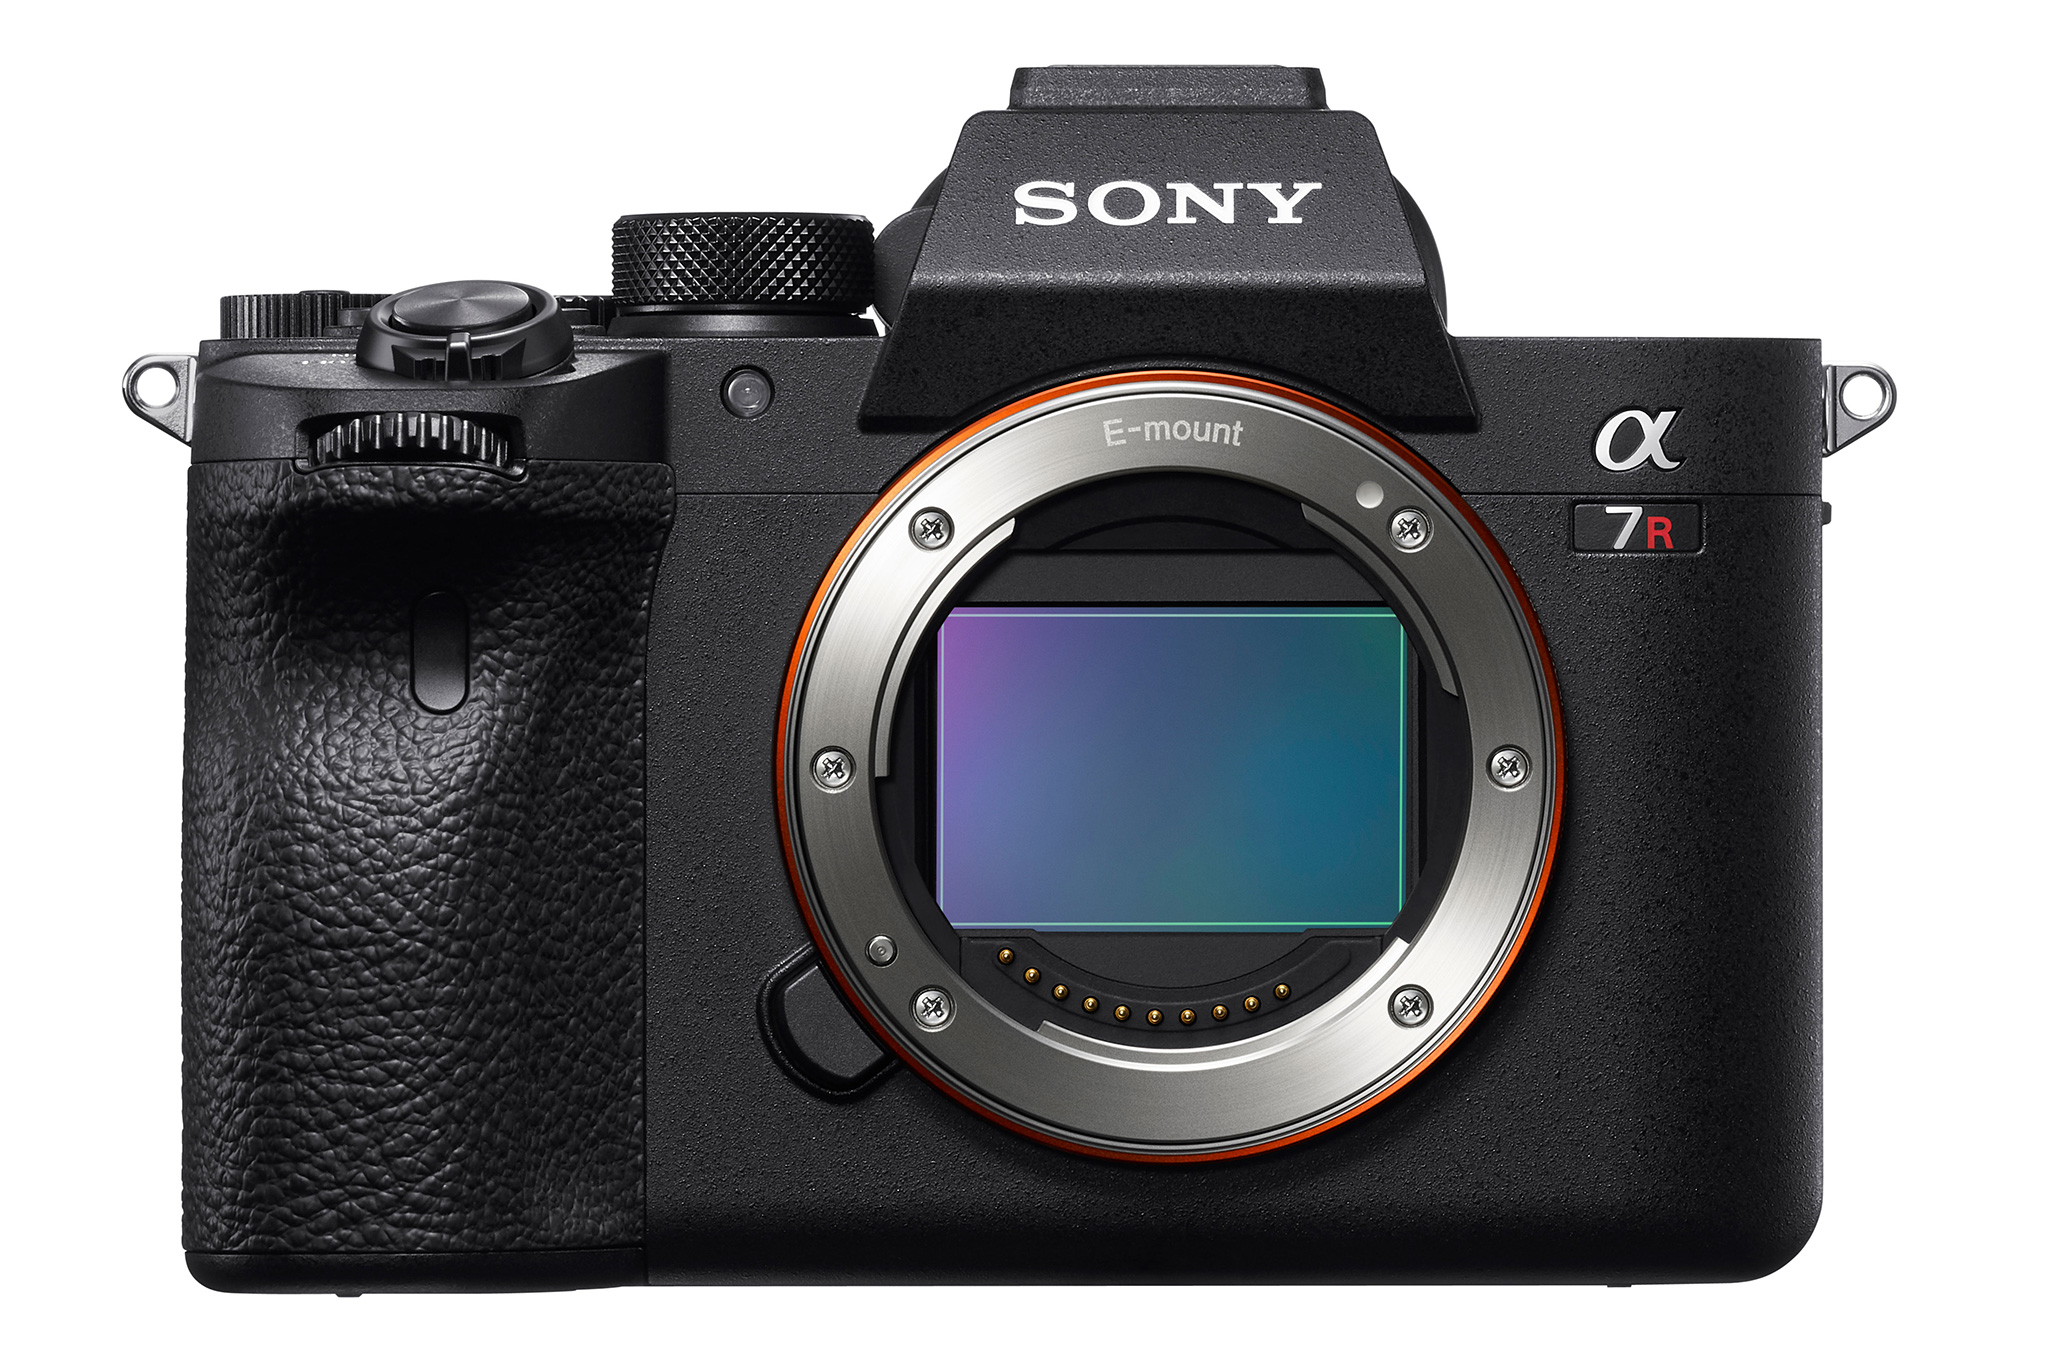
Before going into the camera menu, let’s first get acquainted with the exterior controls. The Sony A7R IV has a myriad of menu options, but there are some things you can only do with external controls.
1) Camera Mode Dial, C1 and C2
Similar to the Sony A7R III, the Sony A7R IV has a rather simple layout on the top plate. Aside from the hot shoe and the PASM dial, there are three other dials and two function buttons you will be dealing with.
The first dial close to the flash unit is the camera mode / PASM dial. This is where you set the main camera operating mode, whether it is Program, Aperture Priority, Shutter Priority, Manual or one of the Auto or Scene modes. As explained in my understanding camera modes article, I usually shoot in Aperture Priority mode, since it gives me control over the most important camera setting – aperture. The camera does the rest of the exposure calculation work quite well.
This leaves three modes that I find to be the most useful on the A7R IV: Aperture Priority, Manual and Memory Recall. Although the Memory Recall (MR) mode is targeted at more advanced photographers who want to store settings for different situations, I would encourage every A7R IV owner to explore this mode, since it can be very useful when changing from one shooting scenario to another. All you have to do is access “Shoot Mode / Drive1” section in the camera menu, then save your settings in one of the three MR memory banks.
If you don’t want to go that route yet, I would encourage you to try using the Aperture Priority mode instead of the Program Mode, Auto or Scene modes.
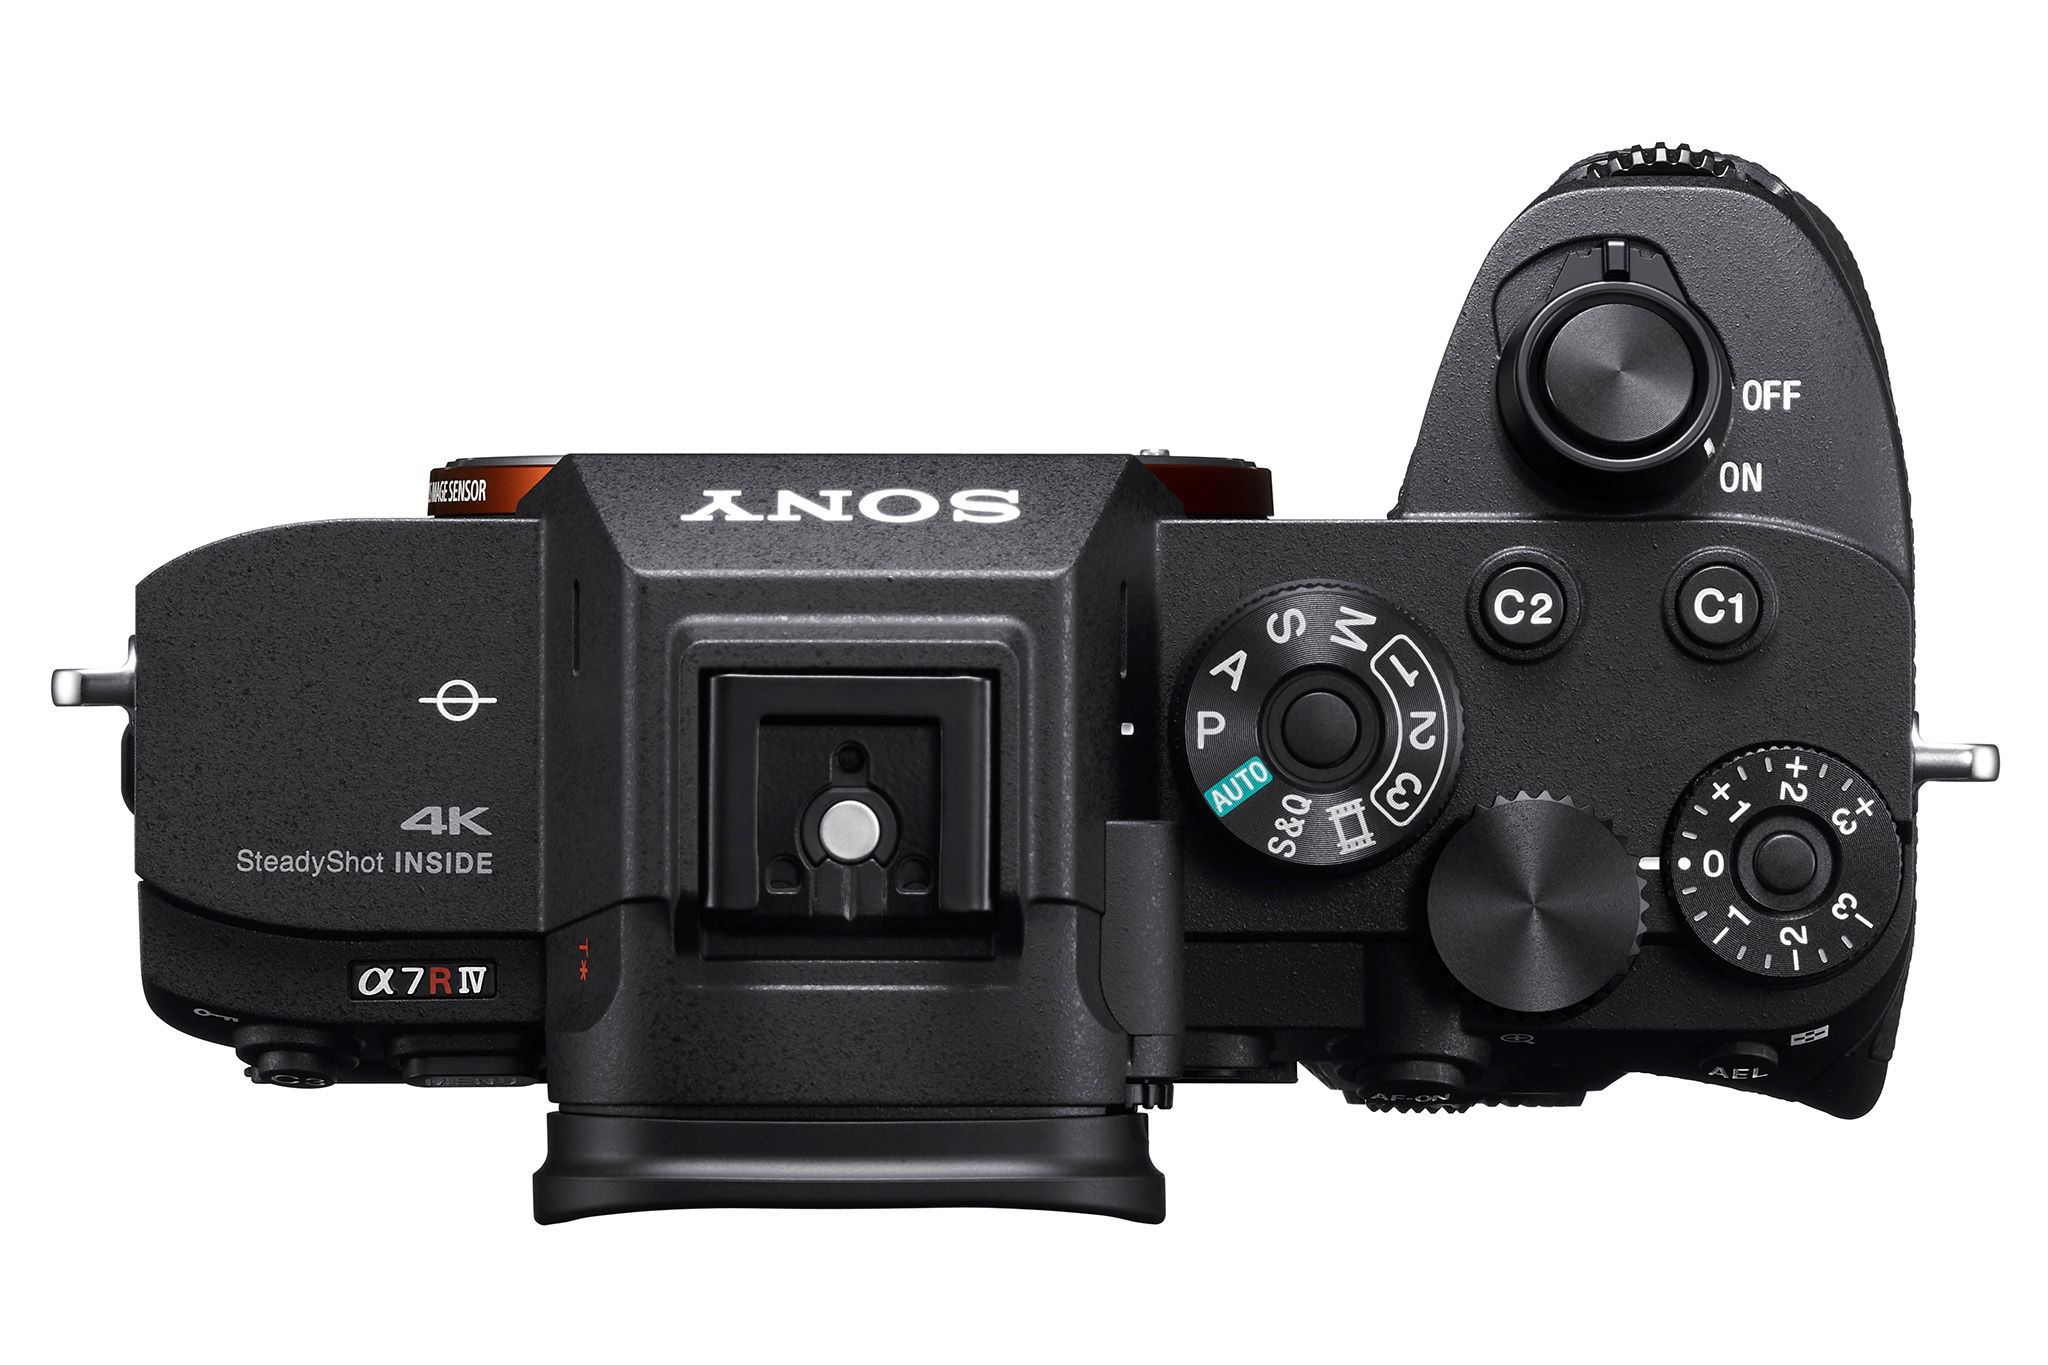
The dial on the top right corner is the exposure compensation dial. This one is used in situations when the camera does not yield a proper exposure in modes like Aperture Priority, Shutter Priority or Program and you want to adjust the exposure manually by dialing either a negative (darken) or a positive (brighten) value. You can go from -3 to +3 on the dial. If you want to lock the exposure compensation dial to a particular value, simply set it to what you need, then press the small button on the top. The same button needs to be pushed again to unlock the dial.
Similar to its predecessor, the Sony A7R IV is equipped with two function dials on the front and the rear of the camera, except this time Sony put the rear dial on the top, next to the exposure compensation dial. While these two dials are primarily used for adjusting the exposure during shooting, their functionality can change depending on what you are doing. For example, when you are in Manual mode, the rear dial will adjust the shutter speed, while the front dial will adjust the aperture (default behavior, which you can flip through the menu). In Aperture Priority mode, both dials will adjust the aperture, whereas in Shutter Priority mode the functionality of both will shift to adjusting the shutter speed. When playing back images, both dials can be used for moving between images – you get the idea.
The C1 and C2 function buttons next to the camera mode dial by default are used for setting White Balance (C1) and Focus Area (C2). Personally, I like keeping C2 for changing the focus area, but I change C1 to “Focus Magnifier”, so that I can instantly zoom in to the scene and verify focus accuracy. This way, I also subconsciously know that the two custom buttons on the camera are used for focus-related operations. Further down in this article, I will walk you through the process of customizing the different custom buttons.
2) Rear Buttons
The rear of the Sony A7R IV is a lot more functional compared to other parts of the camera, thanks to a number of different navigation and function buttons. Just like other Sony mirrorless cameras, the A7R IV is definitely “right-heavy” on the back, with most of the buttons located to the right of the camera LCD. The C3 button located to the left of the electronic viewfinder is programmable just like the other custom buttons and by default is set to change camera’s focus mode (AF-S, AF-A, AF-C, DMF and MF). I keep it at its default value and program the three main custom buttons to focus-related tasks. The Menu button right next to the C3 button is obviously used for accessing the camera menu – that’s where you make changes to the camera. Here is how the back of the camera looks:

Similar to the A7R III, the video recording button is located to the right of the viewfinder, and there is a dedicated AF-ON button next to it that is used for back-button focusing. On the far right of the camera’s back, you will find the AEL button for locking the exposure. I personally always set my cameras for back-button focusing and I will walk you through the process further down below.
The joystick on the A7R IV is identical to the one on the A7R III, which works really well for quickly moving the camera’s focus point, navigating the menu, etc.
2.1) Fn / Function Button
The Fn (Function) button is a very useful button that you will be using to make quick changes to the most important camera settings such as ISO, White Balance, Drive and Focus modes, etc. Although you can modify and customize the function menu when the button is pressed, I rarely touch the default values. Let’s go through these real quick:
Drive Mode: I mostly keep it at “Single Shooting”, but sometimes switch to Self-Timer (when photographing on a tripod to avoid camera vibrations) or Bracketing (I typically select Continuous Bracket with 1.0 EV, 3 Images).
Focus Mode: The default “AF-A” (Automatic AF, which is a combination of AF-S and AF-C modes) should work well for most scenarios, but if you need to switch to continuous or manual focus, this is where you do it from.
Focus Area: Flexible Spot: S. This mode works great for selective focusing. By default, the quickest way to move the focus point is to engage the joystick, which works really well.
Exposure Compensation: 0.0, I prefer to use the exposure compensation dial on the top of the camera to change the values.
ISO: Set this one to “ISO Auto”, so that the camera chooses ISO automatically for you. The “ISO Auto” feature works really well and has all the features of modern Auto ISO implementations found on Nikon and Canon cameras. I usually leave Minimum ISO at 100, while setting Maximum ISO to 3200 – anything above ISO 3200 is too noisy for my taste. While you can only see the minimum and maximum ISO options within this setting, you can also navigate to the camera menu and set the minimum shutter speed in ISO Auto mode (ISO Setting -> ISO Auto Min SS option in Exposure1 sub-menu). By default, the camera will set the shutter speed using the reciprocal rule, but you can change values from “Slower” all the way to “Faster”, as well as being able to set a particular shutter speed you want to stick to.
Metering Mode: Multi, but sometimes I change to Spot metering when a situation calls for it (see my article on metering modes).
Flash Mode: Auto
White Balance: AWB (Auto White Balance)
Creative Style: Standard. Don’t bother with creative styles, as they are irrelevant when shooting in RAW.
SteadyShot: On, unless you are shooting on a tripod.
Prioritize Rec. Media: Slot 1. Since the A7R IV is equipped with two SD card slots, you can choose which SD card to write to by default.
Shoot Mode: Aperture Priority (changes depending on your shooting mode)
2.2) Navigation and Other Rear Buttons
The multi-function navigation dial on the back of the camera is very useful and can be used to navigate through the camera menu, make quick exposure changes, as well as access specific functions by pressing each of the four corners. “DISP” switches between different views on the camera LCD; “ISO” allows changing camera ISO; the left side is used to access camera drive mode, while the bottom side can be configured for accessing other functions.
There are two extra buttons beneath the multi-functional navigation dial – Playback and C4 / Trash. Playback is obviously to play back images on the LCD and the C4 / Trash button can be used to delete unwanted images during playback. When the camera is not in Playback mode, the C4 serves as another programmable function button. I set the C4 button to “ISO AUTO Min. SS” to be able to quickly adjust the minimum shutter speed when using Auto ISO.
3) Camera Menu
Unfortunately, Sony’s menu system is a big mess and it is far from being user-friendly or intuitive, even in the fourth iteration. In fact, the menu system has only grown in size! Be prepared to see a myriad of menus and sub-menus to access, scattered all over the place. Let’s go through each menu setting, one at a time.
3.1) Shooting Menu 1 (Page 1, Quality/Image Size1)
- File Format: RAW
- RAW File Type: Compressed. Unfortunately, there is still no “Lossless Compressed” option, so you will either have to live with losing some image quality in RAW files by choosing “Compressed”, or you will end up with massive “Uncompressed” RAW files. Personally, I change mine to “Uncompressed”, as I want to take a full advantage of the camera. But for most photographers out there, Compressed will work just fine and they probably won’t be able to tell the difference between the two.
- JPEG Quality: Extra fine. Not relevant for RAW files anyway, but if you occasionally shoot JPEG, might as well get the highest quality.
- JPEG Image Size: L:60M. Keep at the highest resolution, but again, this is only when shooting JPEG instead of RAW.
- Aspect Ratio: 3:2
- APS-C/Super 35mm: Don’t change, only relevant for cropping images.
3.2) Shooting Menu 1 (Page 2, Quality/Image Size2)
- Long Exposure NR: On
- High ISO NR: Default (-), grayed out in RAW
- Color Space: Although color space does not matter for RAW files, I use AdobeRGB because it gives a slightly more accurate histogram to determine the correct exposure (since the camera shows histogram based on camera-rendered JPEG image, even if you shoot exclusively in RAW).
- Lens Comp.: Irrelevant when shooting RAW
- Shading Comp.: Off
- Chro. Aber. Comp.: Off
- Distortion Comp.: Off
3.3) Shooting Menu 1 (Page 3, Shoot Mode/Drive1)
- Drive Mode: Single Shooting
- Bracket Settings:
Selftimer during Brkt: 2 Sec
Bracket order: – -> 0 -> + - Interval Shoot Func.: This is how you access the camera’s intervalometer. Only use this when shooting timelapses.
- Pixel Shift Multi Shoot.: Off. This setting allows the A7R IV to shift pixels in sequence in order to capture a very high resolution image.
- Memory Recall: Only available when MR 1, MR2 or MR 3 mode is selected on the top of the camera.
- Memory: Allows quickly saving current settings to a memory bank. An excellent way to create different presets for different shooting conditions. I usually toggle between two presets – Landscapes and People. For landscapes, I set camera mode to Aperture Priority, Manual Focus, ISO to 100, turn Auto ISO off and turn off other irrelevant settings such as face registration. For portraits, I set the camera to AF-A focus mode, ISO to Auto, and tweak other relevant settings. You can create up to three different presets.
3.4) Shooting Menu 1 (Page 4, Shoot Mode/Drive2)
- Select Media: Slot 1, for selecting which memory card to write to.
- Reg Cust Shoot Set: An advanced menu option that allows creating up to three Custom Hold presets, which can be assigned to different buttons on the camera. I personally don’t use this feature, but it could come in handy for making quick changes to the camera without having to switch to different camera modes.
3.5) Shooting Menu 1 (Page 5, AF1)
- Focus Mode: Automatic AF (AF-A)
- Priority Set in AF-S: Balanced Emphasis
- Priority Set in AF-C: Balanced Emphasis
- Focus Area: Flexible Spot
- Focus Settings: Allows moving and changing focus modes and points
- Focus Area Limit: Here, you can enable or disable particular focus areas, so that only the ones you truly use show up in the camera.
3.6) Shooting Menu 1 (Page 6, AF2)
- Switch V/H AF Area: AF Point Only. This setting allows storing focus points by orientation, a useful feature when switching from landscape to portrait mode.
- AF Illuminator: Auto
- Face/Eye AF Set.:
- Face/Eye Priority in AF: On
- Subject Detection: Human
- Right/Left Eye Select: Auto
- Face/Eye Frame Display: On
- Animal Eye Display: On
- AF Tracking Sens.: 3(Standard)
- Aperture Drive in AF: Standard
- AF w/ shutter: On – if you want to use the back button focusing (AF-ON) to focus and recompose, set it to Off and use the AF-ON button on the back of the camera, as explained earlier.
3.7) Shooting Menu 1 (Page 7, AF3)
- Pre-AF: Off
- Eye-Start AF: Off – do not enable this, as it could drain the battery. This setting will automatically detect if you are using the viewfinder and try to focus. And if you put it against your body, the camera will indefinitely try to acquire focus.
- AF Area Regist.: Off – allows saving a focus point to a particular area of the frame. You will need to program a button to recall the focus point.
- Del. Regist. AF Area: If you want to delete the registered focus area.
- Focus Frame Color: White
- AF Area Auto Clear: Off
3.8) Shooting Menu 1 (Page 8, AF4)
- Disp. cont. AF area: On
- Phase Detect. Area: Off
- Circ. of Focus Point: Does Not Circulate
- AF Micro Adj: Off, don’t do this unless you want to calibrate a lens
3.9) Shooting Menu 1 (Page 9, Exposure1)
- Exposure Comp: 0.0
- Reset EV Comp.: Reset
- ISO Setting:
- ISO: ISO AUTO
- ISO Range Limit: 50-25600
- ISO AUTO Min. SS: Standard, but you can change it to “Fast” or “Faster” if you have shaky hands
- Metering Mode: Multi
- Face Priority in Multi…: On
- Spot Metering Point: Focus Point Link
3.10) Shooting Menu 1 (Page 10, Exposure2)
- Exposure Step: 0.3EV
- AEL w/ shutter: Auto
- Exposure Std. Adjust: Don’t touch this unless you know what you are doing
3.11) Shooting Menu 1 (Page 11, Flash)
- Flash Mode: Fill-flash
- Flash Comp. 0.0
- Exp.comp.set: Ambient&flash
- Wireless Flash: Off
- Red Eye Reduction: Off
3.12) Shooting Menu 1 (Page 12, Color/WB/Img.Processing1)
- White Balance: Auto
- Priority Set in AWB: Standard
- DRO: Off
- Creative Style: Standard
- Picture Effect: Off (grayed out in RAW mode)
- Picture Profile: Off
3.13) Shooting Menu 1 (Page 13, Color/WB/Img.Processing2)
- Shutter AWB Lock: Off
3.14) Shooting Menu 1 (Page 14, Focus Assist)
- Focus Magnifier: Used for zooming in while focusing. I set my “C1” button to do this, as explained above.
- Focus Magnif. Time: No Limit
- Initial Focus Mag.: x5.9
- AF in Focus Mag.: On
- MF Assist: On – a great feature that automatically zooms in when you move the focus ring in manual focus mode.
- Peaking Setting:
- Peaking Display: Off (can be useful in some situations, so you might want to turn On and experiment with manual focusing)
- Peaking Level: Mid
- Peaking Color: Red
3.15) Shooting Menu 1 (Page 15, Shooting Assist)
- Anti-flicker Shoot.: On
- Face Registration: Access this to register people’s faces
- Regist. Faces Priority: On
3.16) Shooting Menu 2 (Page 1, Movie1)
- Exposure Mode: Aperture Priority, only available in Movie mode
- Exposure Mode: Aperture Priority, only available in S&Q mode
- File Format: XAVC S 4K
- Record Setting: 24p 60M
- S&Q Settings:
- Record Setting: 24p
- Frame Rate: 120 fps
- Proxy Recording: Off
3.17) Shooting Menu 2 (Page 2, Movie2)
- AF Drive Speed: Normal
- AF Track Sens: Standard
- Auto Slow Shut.: On
- Initial Focus Mag.: x1.0
- Audio Recording: On
- Audio Rec Level: 25 (change depending on needs)
3.18) Shooting Menu 2 (Page 3, Movie3)
- Audio Level Display: On
- Audio Out Timing: Live
- Wind Noise Reduct.: On
- Marker Display: Off
- Marker Settings: All Off (depending on your video shooting needs)
- Video Light Mode: Power Link
3.19) Shooting Menu 2 (Page 4, Movie4)
- Movie w/ shutter: Off
3.20) Shooting Menu 2 (Page 5, Shutter/SteadyShot)
- Silent Shooting: Off
- e-Front Curtain Shut.: On. Good idea to keep Electronic Front Curtain Shutter turned On to avoid shutter shock.
- Release w/o Lens: Enable
- Release w/o Card: Disable
- SteadyShot: On. By default I would recommend to keep this setting On, but if you shoot from a tripod, you should turn SteadyShot Off.
- SteadyShot Settings:
- SteadyShot Adjust.: Auto
- SteadyS. Focal Len.: – (grayed out in Auto, but if set to Manual, it is possible to dial a specific focal length)
3.21) Shooting Menu 2 (Page 6, Zoom)
- Zoom: Default (-), grayed out in RAW
- Zoom Setting: Optical zoom only
- Zoom Ring Rotate: Default, only available with some lenses
3.22) Shooting Menu 2 (Page 7, Display/Auto Review1)
- DISP Button:
- Monitor: “No Disp Info”, “Histogram”, “Level” and “For viewfinder” checked. Display All Info is too cluttered and Graphic Display occupies too much of the screen.
- Finder: “No Disp. Info”, “Histogram” and “Level” checked.
- FINDER/MONITOR: Auto – will automatically switch between viewfinder and LCD.
- Finder Frame Rate: Standard
- Zebra Setting:
- Zebra Display: Off
- Zebra Level: 70
- Grid Line: Rule of 3rds Grid
- Exposure Set. Guide: On
3.23) Shooting Menu 2 (Page 8, Display/Auto Review2)
- Live View Display: Setting Effect ON
- Cont. Shoot. Length: Not Displayed
- Auto Review: 2 Sec
3.24) Shooting Menu 2 (Page 9, Custom Operation1)
- Custom Key (Shoot.):
- Control Wheel: Not set
- AEL Button: AEL hold
- AF-ON Button: AF On
- Custom Button 3: Focus Mode
- Custom Button 4: ISO AUTO Min. SS
- Multi-Slc Center Btn: Focus Standard
- Center Button: Eye AF
- Left Button: Drive Mode
- Right Button: ISO
- Down Button: Px. Shift Multi Shoot.
- Custom Button 1: Focus Magnifier. Once you do this, you will be able to use the C1 button to zoom in while focusing. Pressing the same button several times will allow you to zoom in up to 11.9x (pixel level).
- Custom Button 2: Focus Area
- Focus Hold Button: Focus Hold
- Custom Key (Video): The custom buttons can be set to behave different when recording videos on the camera. I personally don’t care for these, so I leave them at their default values
- Custom Key (PB): The custom buttons can be set to behave differently when playing back images on the camera. I personally don’t care for these, so I leave them at their default values.
- Function Menu Set.: This is what controls what the menu looks like when you press the “Fn” button on the back of the camera. Function Upper and Lower – leave these at default, unless you know what you are doing
- My Dial Settings: This is to control what the dials do in Manual Mode. Keep at default unless you want to swap the dials.
- Dial Setup: Av / Tv
3.25) Shooting Menu 2 (Page 10, Custom Operation2)
- Av/Tv Rotate: Normal
- Dial Ev Comp: Off
- Function Ring(Lens): Off
- Func. of Touch Oper…: —
- MOVIE Button: Always
- Lock Operation Parts: Off
3.26) Shooting Menu 2 (Page 11, Custom Operation3)
- Audio signals: Off
3.27) Network1, 2 and 3
I don’t care for or use these, but if you are planning to transfer images to your smartphone from the camera, this is where you would do it all from. If you are not planning to do that, it might be best to keep “Airplane Mode: On” to save battery life.
3.28) Playback1, 2, 3 and 4
- Display Rotation: Off – I don’t like it when the camera flips verticals and ends up with all that dead space – I would rather rotate the camera myself and see the whole image.
- Other settings are used for accessing specific playback functions
3.29) Setup1
- Monitor Brightness: Manual
- Viewfinder Bright.: Auto works pretty well
- Finder Color Temp.: 0
- Gamma Disp. Assist: Off
- Volume Settings: 7
- Delete confirm: “Delete” first – don’t want to scroll when I need to delete something
3.30) Setup2
- Display Quality: Standard
- Pwr Save Start Time: 1 Min
- Auto Pwr OFF Temp.: Standard
- NTSC/PAL Selector: Don’t touch unless you know what you are doing
- Cleaning Mode: used for cleaning the camera sensor
- Touch Operation: Off (change depending on your requirements)
3.31) Setup3
- Touch Panel/Pad: Touch Panel Only
- Touch Pad Settings:
- Operation in Vertical…: Off
- Touch Position Mode: Absolute Position
- Operation Area: Right 1/2
- Demo Mode: Off, grayed out
- TC/UB Settings: Don’t touch unless you know what you are doing
- IR Remote Ctrl: Off (turn on for remote control via a smartphone / tablet)
- HDMI Settings:
- HDMI Resolution: Auto
- 24p/60p Output: 60p
- HDMI Info. Display: On
- TC Output: Off
- REC Control: –
- CTRL FOR HDMI: On
3.32) Setup4
- 4K Output Sel.: –
- USB Connection: Auto
- USB LUN Setting: Multi
- USB Power Supply: On
- Language: English
- Date/Time Setup: Set up Date/Time
3.33) Setup5
- Area Setting: Set up Timezone
- IPTC Information: Don’t touch, unless you know what you are doing
- Copyright Info: For adding copyright info metadata to images
- Write Serial Number: Off
- Format: for formatting SD memory card
- Rec. Media Settings: This is where you can set how images or video are recorded to the two SD card slots
- Prioritize Rec. Media: Slot 1
- Recording Mode: Standard
- Auto Switch Media: On
3.34) Setup6
- File/Folder Settings:
- File Number: Series
- Set File Name: DSC
- Select REC Folder: Skip this
- New Folder: Skip this
- Folder Name: Standard Form
- Movie File Settings: Leave Default
- Recover Image DB: Skip this
- Display Media Info.: Shows what’s on the card
- Version: Displays firmware version
3.35) Setup7
- Save/Load Settings: For saving or loading settings to / from a memory card
- Setting Reset: will reset the camera settings or reinitialize the camera
3.36) My Menu Setting
If you have certain menu options that you access often, this is where you can add those from.
Download the Settings File
Starting from the fourth generation of Sony cameras, it is now possible to save / load camera settings. The file for the Sony A7R IV with the above settings can be downloaded from here. Once the file is downloaded, place it in the following folder on the memory card: PRIVATE -> SONY -> SETTINGS -> 7RM4 -> CAMSET. After you put the file there, you will be able to navigate to Menu -> Save / Load Settings -> Load -> CAMSET01. It will ask you if you want to overwrite the settings – select OK and the settings will be imported.
I hope you found this article useful. Please note that the above settings work for me and they might not necessarily suit your needs. It is best that you explore your camera and learn about each setting as much as you can in order to take advantage of all the available features and customizations!
very good, thanks so much. way better than sony owners manual
Are most of these settings okay for the Sony A7r5?
I can’t find any published settings for the new camera asy yet.
I had the same question. It would be great if Nasim could do a A7R5 update. Thanks for the A7R4 settings!!!
Thank you from the bottom of my heart for such a detailed and complete rundown of this camera. It helps so much.
it is simply great !
such a detail and complete one.
naturally the auther taken a great efforts
Are you going to review this camera?
YOUR SETTINGS FILE DOES NOT LOAD ON MY A7RIV. SUGGESTIONS?
Does NOT load in mine either. Anyone had success in loading this file ?
Being a left-eye dominant “long”-nosed western person I could perfectly control the camera settings on the back with my nose. Who needs a thumb then. I see this masterstroke design still exists in generation IV, does the firmware in gen. IV now allow special settings for nose-users or do I have to wait until generation X…
Regards,
Marc
P.S. I returned an A7II for that reason, I am having a regular nose, actually. Would love to see more camera reviews mentioning the ergonomics for left-eye dominant users with “long” noses, as the Asians say….
Hello, Nasim – – Thanks for this useful article.
I have a couple of comments/suggestions:
1) You propose to set AF w/ shutter: On – [adding] “if you want to use the back button focusing (AF-ON) to focus and recompose, set it to Off and use the AF-ON button on the back of the camera …”
In fact, you can leave this setting ON even if you want to use back-button focusing (some of the time) … it then works such that you can focus via a half-press of the shutter button – but back-button focusing, when used, will *override* the shutter button. It provides the best of both worlds.
2) You propose to set AF Area Regist.: Off – [explaining that it] “allows saving a focus point to a particular area of the frame.”
I’ve found this to be a very handy feature when used with back-button focusing – especially as one of the customisation options allows a button to be assigned to “Reg.AF Area + OF-ON”. It works like this;
I usually have Focus Area set to Expand Flexible Spot – – but, when I am back-button focusing it’s typically because I want to concentrate on a specific focal point, which (for me) is via Flexible Spot.
So, I have Flexible Spot stored as my registered AF area … and pressing the Custom button assigned to “Reg.AF Area + OF-ON” does everything for me. Again, it’s the best of both worlds.
Regards, John TKA
Thank you Nasim. This helps.
Hi Nasim,
Would these recommendations be suitable for the A7R111 and A911 also.
Michael
We have a separate post on Recommended Sony A7R III Settings. The Sony A9 should be pretty close to the settings of the A7R IV.
Upload file is corrupted ) your file is 9k size vs normal size 122 K, Could you please if you do not mind to upload the CAMSET01.DAT file again, thank you in advance
Is the current download the best version of the settings file or is it still the corrupted version?