Although it can be tough to take good macro photos, it doesn’t have to be expensive. In fact, a full kit of macro photography necessities can cost less than $100. This article covers my recommended equipment for taking great macro photos, from good values to high-end gear.
Table of Contents
Camera Recommendations for Macro Photography
You don’t need a top-of-the-line DSLR or mirrorless camera in order to get great macro photos. It’s still important to get a camera with interchangeable lenses, but beyond that, the differences between cameras aren’t as pronounced as they are in other genres of photography.
The reason is twofold. First, for most macro photography, you’ll be at narrow apertures like f/11 or f/16 in order to get enough depth of field. Those apertures have enough diffraction that your sharpness is already limited no matter what lens or camera you use. The differences between, say, a 24 megapixel camera and a 45 megapixel camera are much smaller at these apertures.
The other reason is that crop sensors work great for macro photography, at least if you’re going for extreme closeups. A 36 megapixel full-frame camera and a 16 megapixel APS-C camera have about the same pixel density, which means they have about the same capability to resolve close details. In other words, it’s similar to the situation for wildlife photography; many wildlife photographers prefer a 24 megapixel crop-sensor camera over a 24-megapixel full-frame camera in order to get a higher pixel density.
I’m not saying a crop sensor is better for macro photography than a full-frame sensor, but the differences are less pronounced than in other genres like portraiture. Same goes for a lower-resolution sensor. Whatever camera you already have is almost certainly enough.

Macro Lens Considerations
Rather than the camera, the most important piece of equipment for macro photography is the lens. Here are the things I recommend thinking about when deciding on a macro photography lens.
First, get a lens with a high maximum magnification. Some lenses (especially cheap zooms) claim to be “macro” when they only go to 1:3 or 1:2 magnification. Look for a lens that can reach 1:1 magnification or more. (If you’re not familiar with what this means, check out our article on magnification.)
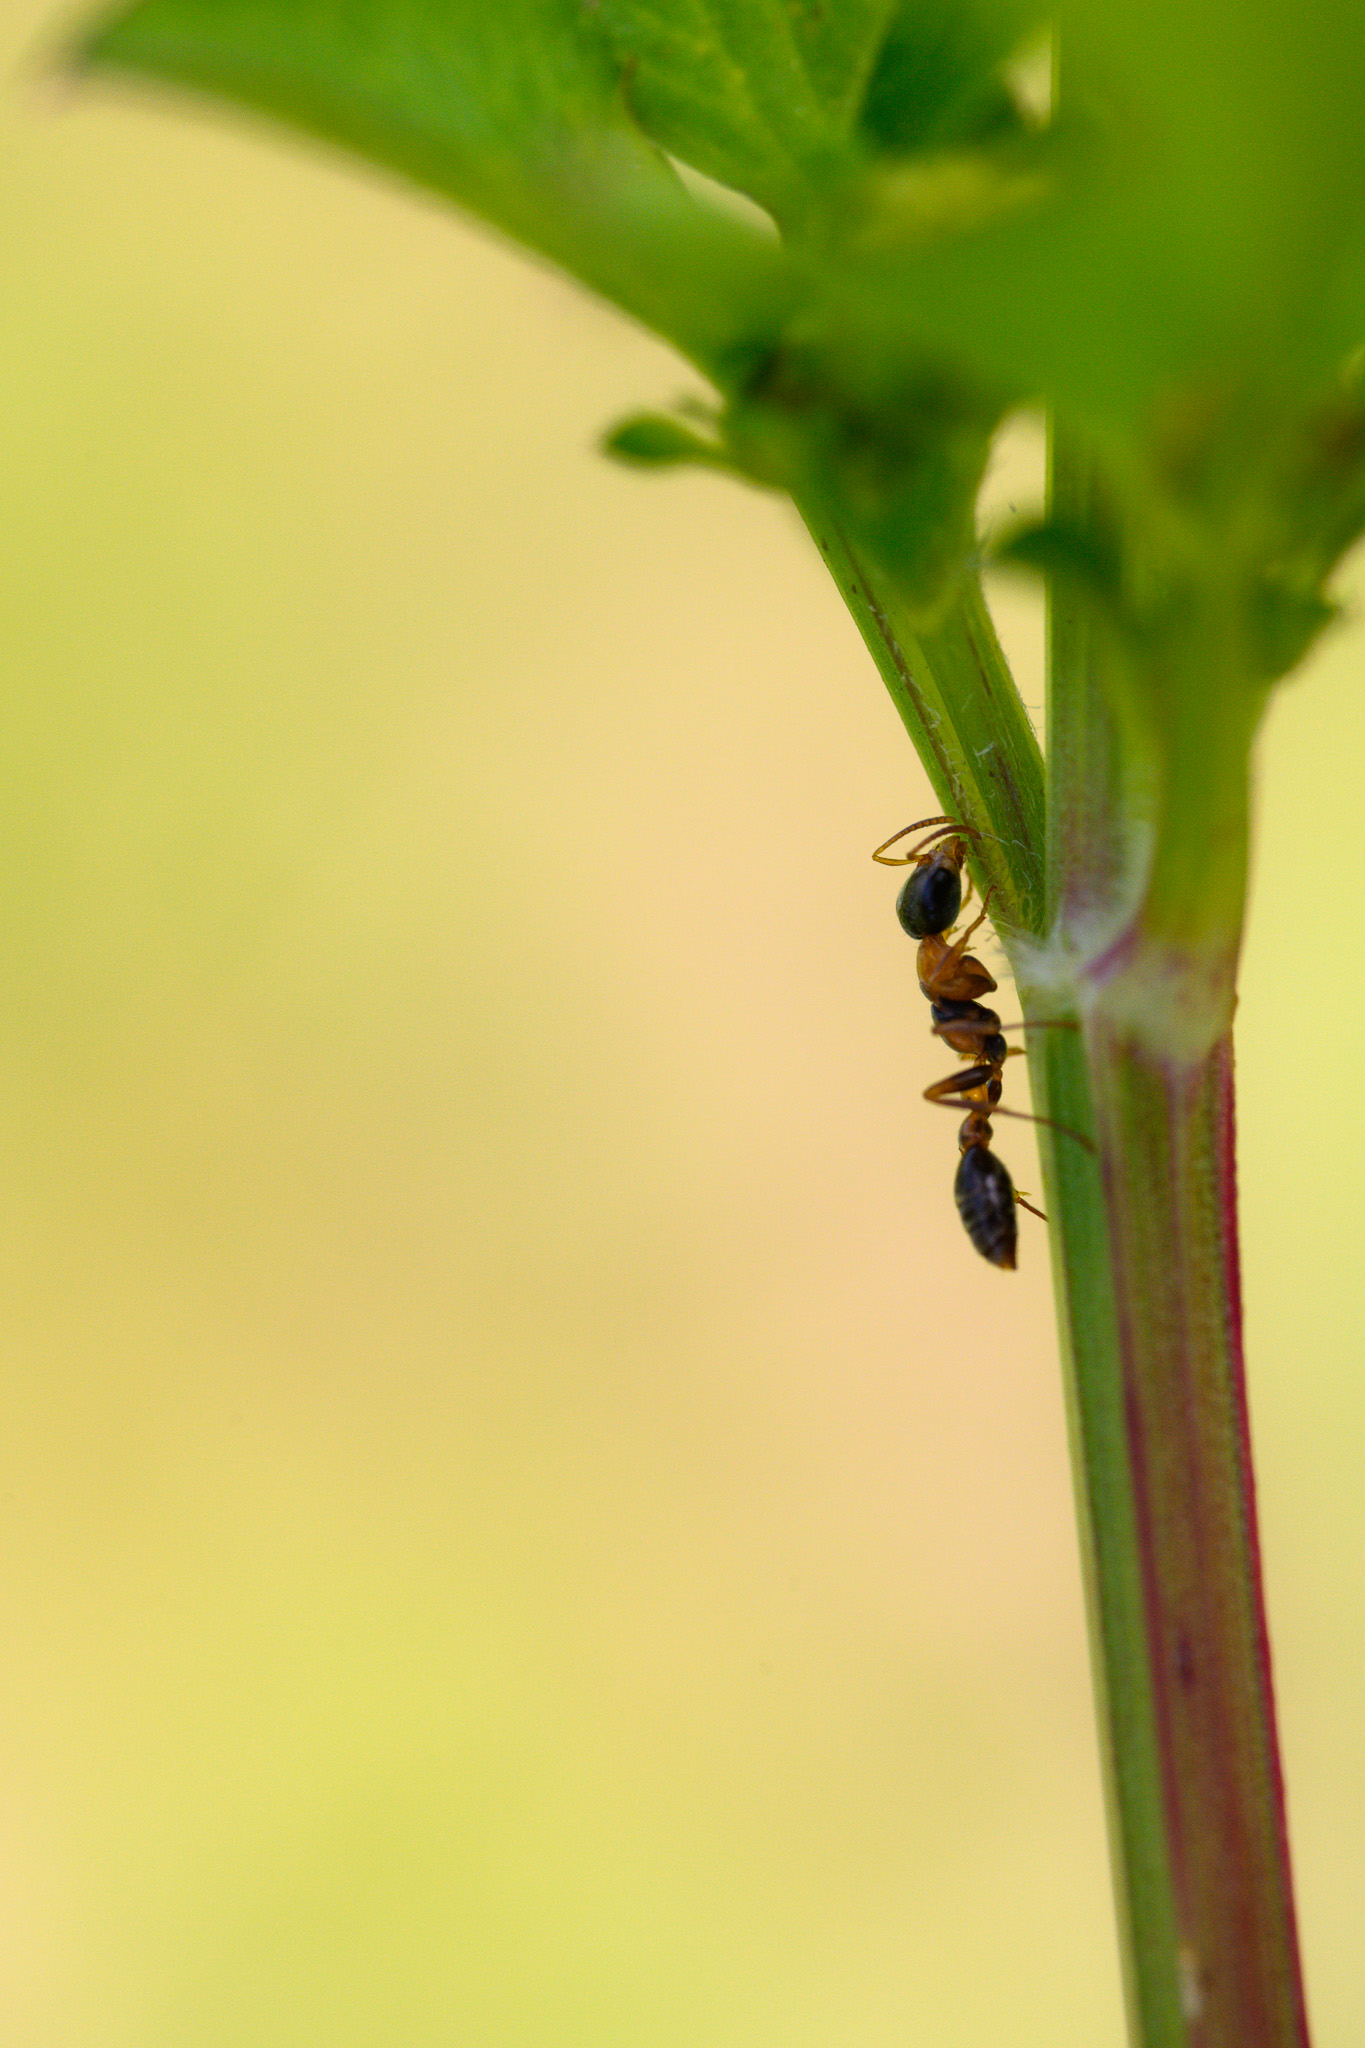
Second, prioritize lenses with a good working distance. Working distance is how much room you have between the front of your lens and your macro photography subject. Many macro lenses only have a few inches / centimeters between your lens and your subject. This makes it easy to block natural light or scare away your subject. Lenses with a longer focal length almost always have more working distance. That’s why I recommend a 90mm lens or longer.
Third, decide between a manual focus versus autofocus lens. Autofocus lenses are still nice if you plan to use the lens for non-macro work (or more general closeup photos of bigger subjects like lizards). But at higher magnifications, autofocus often results in fewer keepers than manual focus. You can read more about the focusing technique I recommend in this article: how to focus in macro photography.
Fourth, figure out if the lens you’re considering has electronic contacts or not. Some third-party macro lenses (like those from Venus Optics) are totally mechanical. This means you cannot change aperture with the command dial on your camera – only the aperture ring on the lens. It also means you don’t get full EXIF data (i.e., your aperture will be recorded as f/0.0 in the image’s metadata). And, most importantly, it means that the image in your viewfinder or live view will be very dim when using apertures like f/11, f/16, or f/22. Given that those are common apertures for macro photography, this can be a significant problem, especially on a DSLR rather than a mirrorless camera. It’s like holding down the depth of field preview button constantly. It makes manual focusing much more difficult.
Fifth, think about the various incidental features of the lens. Does it have image stabilization or not? (Though image stabilization usually doesn’t work well at high magnifications anyway.) How heavy is the lens? Is it internal focus, or does the barrel extend as you focus closer? How well does the lens perform in terms of sharpness, bokeh, chromatic aberration, and other image quality features? All of these things are important, although usually not as much as the other four considerations.
Now let’s take a look at the different classes of macro lenses available.

How to Get 1:1 Magnification – Different Types of Macro Lenses
There are many ways to get 1:1 magnification in macro photography. While the most obvious solution is to use a dedicated macro lens, you could also:
- Use extension tubes or bellows on a wide or normal lens
- Reverse a wide or normal lens
- Reverse a wide or normal lens onto the filter threads of a telephoto
- Use teleconverters on a lens that already has good close-up capabilities
- Use a macro filter with a strong enough diopter strength to reach 1:1
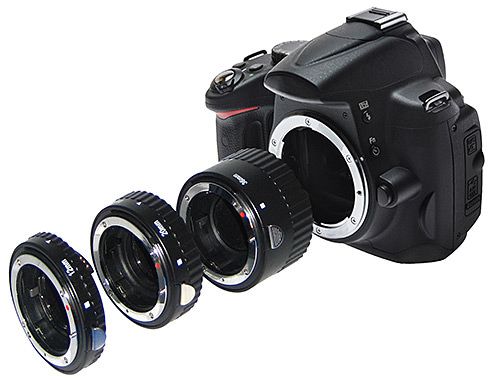
Extension tubes have the fewest drawbacks of these methods, with no image quality penalty thanks to the lack of glass elements. They’re also on the cheaper side (even if you spend extra to get one with electronic contacts) and should work with almost any lenses you have. The other methods still have their place, but unless you have something against extension tubes, that’s where I’d start.
This leaves four tiers of recommendations for your macro photography lens:
1. Extension Tubes
Pros:
- Cheap. About $20 for a set without electronic contacts, $80 with electronic contacts (allowing autofocus, auto aperture control, and EXIF data)
- Good image quality. No glass elements means no loss in sharpness. Your photos will have the same image quality as the lens usually does at its closest focusing distance
Cons:
- Loss of infinity focus. When an extension tube is attached, you lose the ability to focus in the distance.
- Potentially small working distance. The wider-angle the lens you’re adapting, the easier it is to get high magnification with extension tubes, but also the less working distance you’ll have (i.e., the distance between the front of the lens and your subject).
- Build quality issues when stacking extension tubes. If you need more than two or three tubes, your setup can get pretty wobbly.
2. Old Macro Lens
Pros:
- Fairly cheap. Good 1:1 macro lenses can sell for $200, $150, or even less depending on which one you pick. Old, manual focus macro lenses are the best deal.
- Good image quality. These lenses are made for macro photography, and even the oldest ones still hold up great today (especially at common macro photography apertures like f/11 or f/16).
- Good working distance. The longer the focal length, the more working distance you’ll get.
Cons:
- Usually manual focus only. For macro photography, manual focus isn’t always an issue, but it’s annoying if you want the lens to double as a general-purpose telephoto.
- Expensive if autofocus. If you buy a macro lens that has autofocus but is still one or two generations old, you can expect to pay more in the range of $300.
3. Modern Third-Party Macro Lens
Pros
- Usually cheaper than a Nikon/Canon/Sony/etc. macro lens.
- Sometimes has unique features. For example, the Venus Optics 100mm f/2.8 macro lens goes to 2× magnification rather than 1:1.
- Good working distance and image quality.
Cons
- Potential compatibility issues in the future. For example, the Tokina AT-X 100mm f/2.8 PRO macro lens has worked perfectly on most of Nikon’s DSLRs for years, but it doesn’t autofocus on the Nikon Z mirrorless cameras.
- Price savings may not be huge compared to first-part lenses. Many photographers are willing to spend an extra $100 or $200 to get a Nikon/Canon/Sony/etc. lens rather than a Tokina/Sigma/Tamron/etc. lens. The reasons could be anything from resell value to better features on the first-party lens (such as faster autofocus).
4. Modern First-Party Macro Lens
Pros
- Good image quality, compatibility, resell value, and working distance. These lenses are usually the top-of-the-line options for macro photography.
Cons
- Usually the most expensive of the options here.
- May not have the specifications you need (such as greater than 100mm or greater than 1:1 magnification).
Lenses Summary
Ignoring price, the best lenses for macro photography tend to be the newest-generation first-party macro lenses from Nikon, Canon, Sony, and other camera companies themselves. Or, for some photographers, the best lenses (again ignoring price) may be specialized third-party lenses that have unique features like a longer focal length or higher magnification.
However, macro lenses like this routinely cost $600-1000. Extension tubes have many of the same benefits, including great image quality, yet cost orders of magnitude less. So, my recommendation for first-time macro photographers is to save the money and start with a set of extension tubes. I highly recommend getting a set with electronic contacts. These from Vello are a good option, as are these from Kenko.
Recommended Lighting Equipment
Much of macro photography is done with artificial light, especially flashes. It’s simply the best way to get enough light on your subject when shooting at apertures like f/16 and f/22. Even if you’re shooting from a tripod, so long as your subject is moving in the breeze, a flash is helpful for freezing motion. (If you only do macro photography of static subjects, you can get by with constant lights instead, but that’s not the norm, so I’ll be focusing on flashes below.)
Here are my tiers of lighting recommendations for macro photography:
1. Ring Light
Not recommended for stills! Ring lights are usually not nearly bright enough to work well for macro photography, except for filling in shadows on your subject. A typical flash is hundreds of times brighter. Don’t be fooled by the flash mode on some ring lights, either; all it does is set the light to maximum brightness for a second or so. It’s still nowhere near as bright as a flash. (Ring lights can be expensive, too.)
2. Manual (non-TTL) Flash Head
A great value option. There are tons of $50 manual flashes that are far brighter than any ring light. If you don’t mind buying used, you can find some old, manual flashes for $10 on eBay. Put it on the hotshoe of your camera, figure out a good flash power, set up a diffuser on the front of your lens, and your light will look great.
3. TTL Flash Head
You can follow the same steps as above with an automatic (TTL) flash for a bit more flexibility in macro photography, though a higher price. Not all macro subjects are equally reflective, and a TTL flash can raise and lower the flash power to compensate. A downside with a TTL flash is that the pre-flash used to judge exposure scares away some types of fast bugs. In the fraction of a second between the pre-flash and the flash, the bug could fly away, and your photo will be an empty frame!
4. Dual or Multi-Flashes
While a single flash on your camera’s hotshoe can lead to some good light, you can sculpt the shadows more easily when using multiple flashes. You can find some crazy contraptions with multiple flash heads, alongside more reasonable – though expensive – options like the Nikon R1 system or cheaper Bolt system. Once again, diffusion is critical if you want good light (and a bit trickier when the flash is so close to your subject).
5. Fast-Recycle Flash
One of the biggest problems with a flash is how long it takes to recharge. If you’re firing at full power, you may need to wait several seconds before the flash can fire again. Every macro photographer knows that time is of the essence, and some subjects may only stay in the perfect spot for a few moments before moving on. The cheap solution is to use a higher ISO and a lower flash power. The expensive solution is to power your flash with an external battery pack like the one from Bolt, Canon, or Quantum so the flash recycles more quickly, and you can fire multiple frames per second with flash. Beware of melting your flash if you go too far.
The Importance of Diffusers
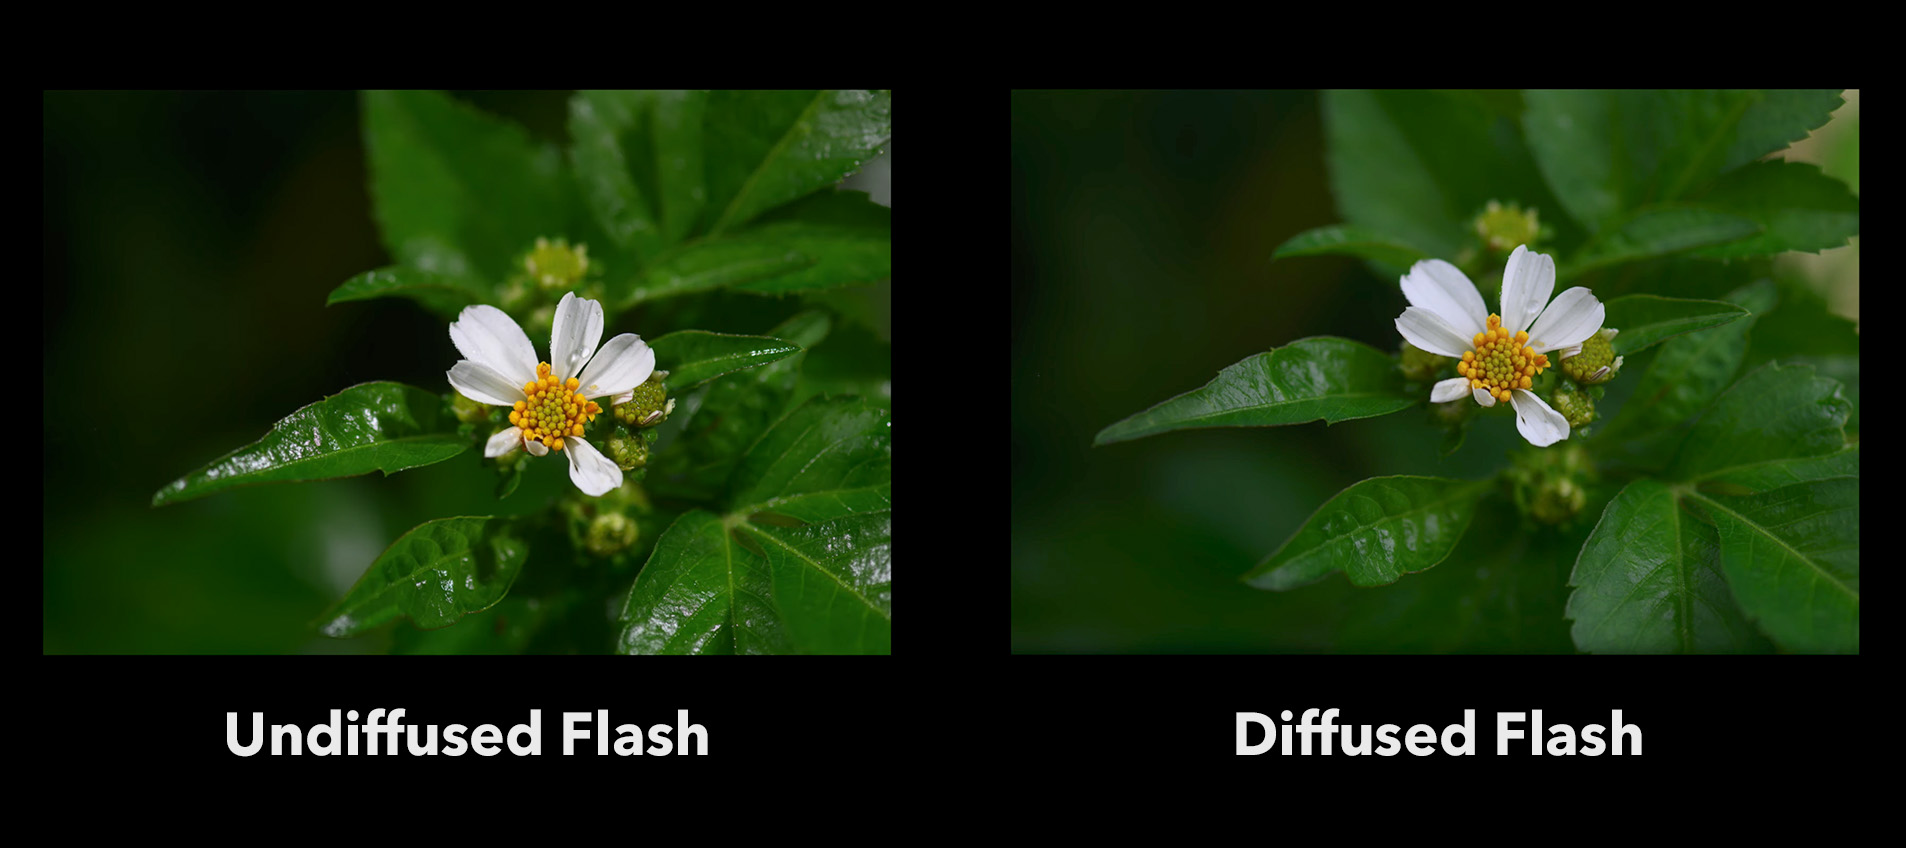
No matter which of the flash options you choose, it’s critical to diffuse your flash to soften the light. You can make your own diffuser out of plastic and duct tape, which gives you tons of customizability, or buy one for $9, which looks more respectable but is kind of one-size-fits-all.
You can see the difference below between a flash without and with a diffuser:
Recommended Lighting Summary
The best value for lighting your macro photos, by far, is to get a cheap manual flash and put a diffuser around the front of your lens. Alternatively, if you already have a TTL flash for portrait or event photography, you can just co-opt it without any issues for macro work. I only recommend jumping up to a multi-flash setup or using an external battery pack if you don’t mind spending much more money on marginal improvements.
You can read more in detail about lighting macro photos in our full guide here.
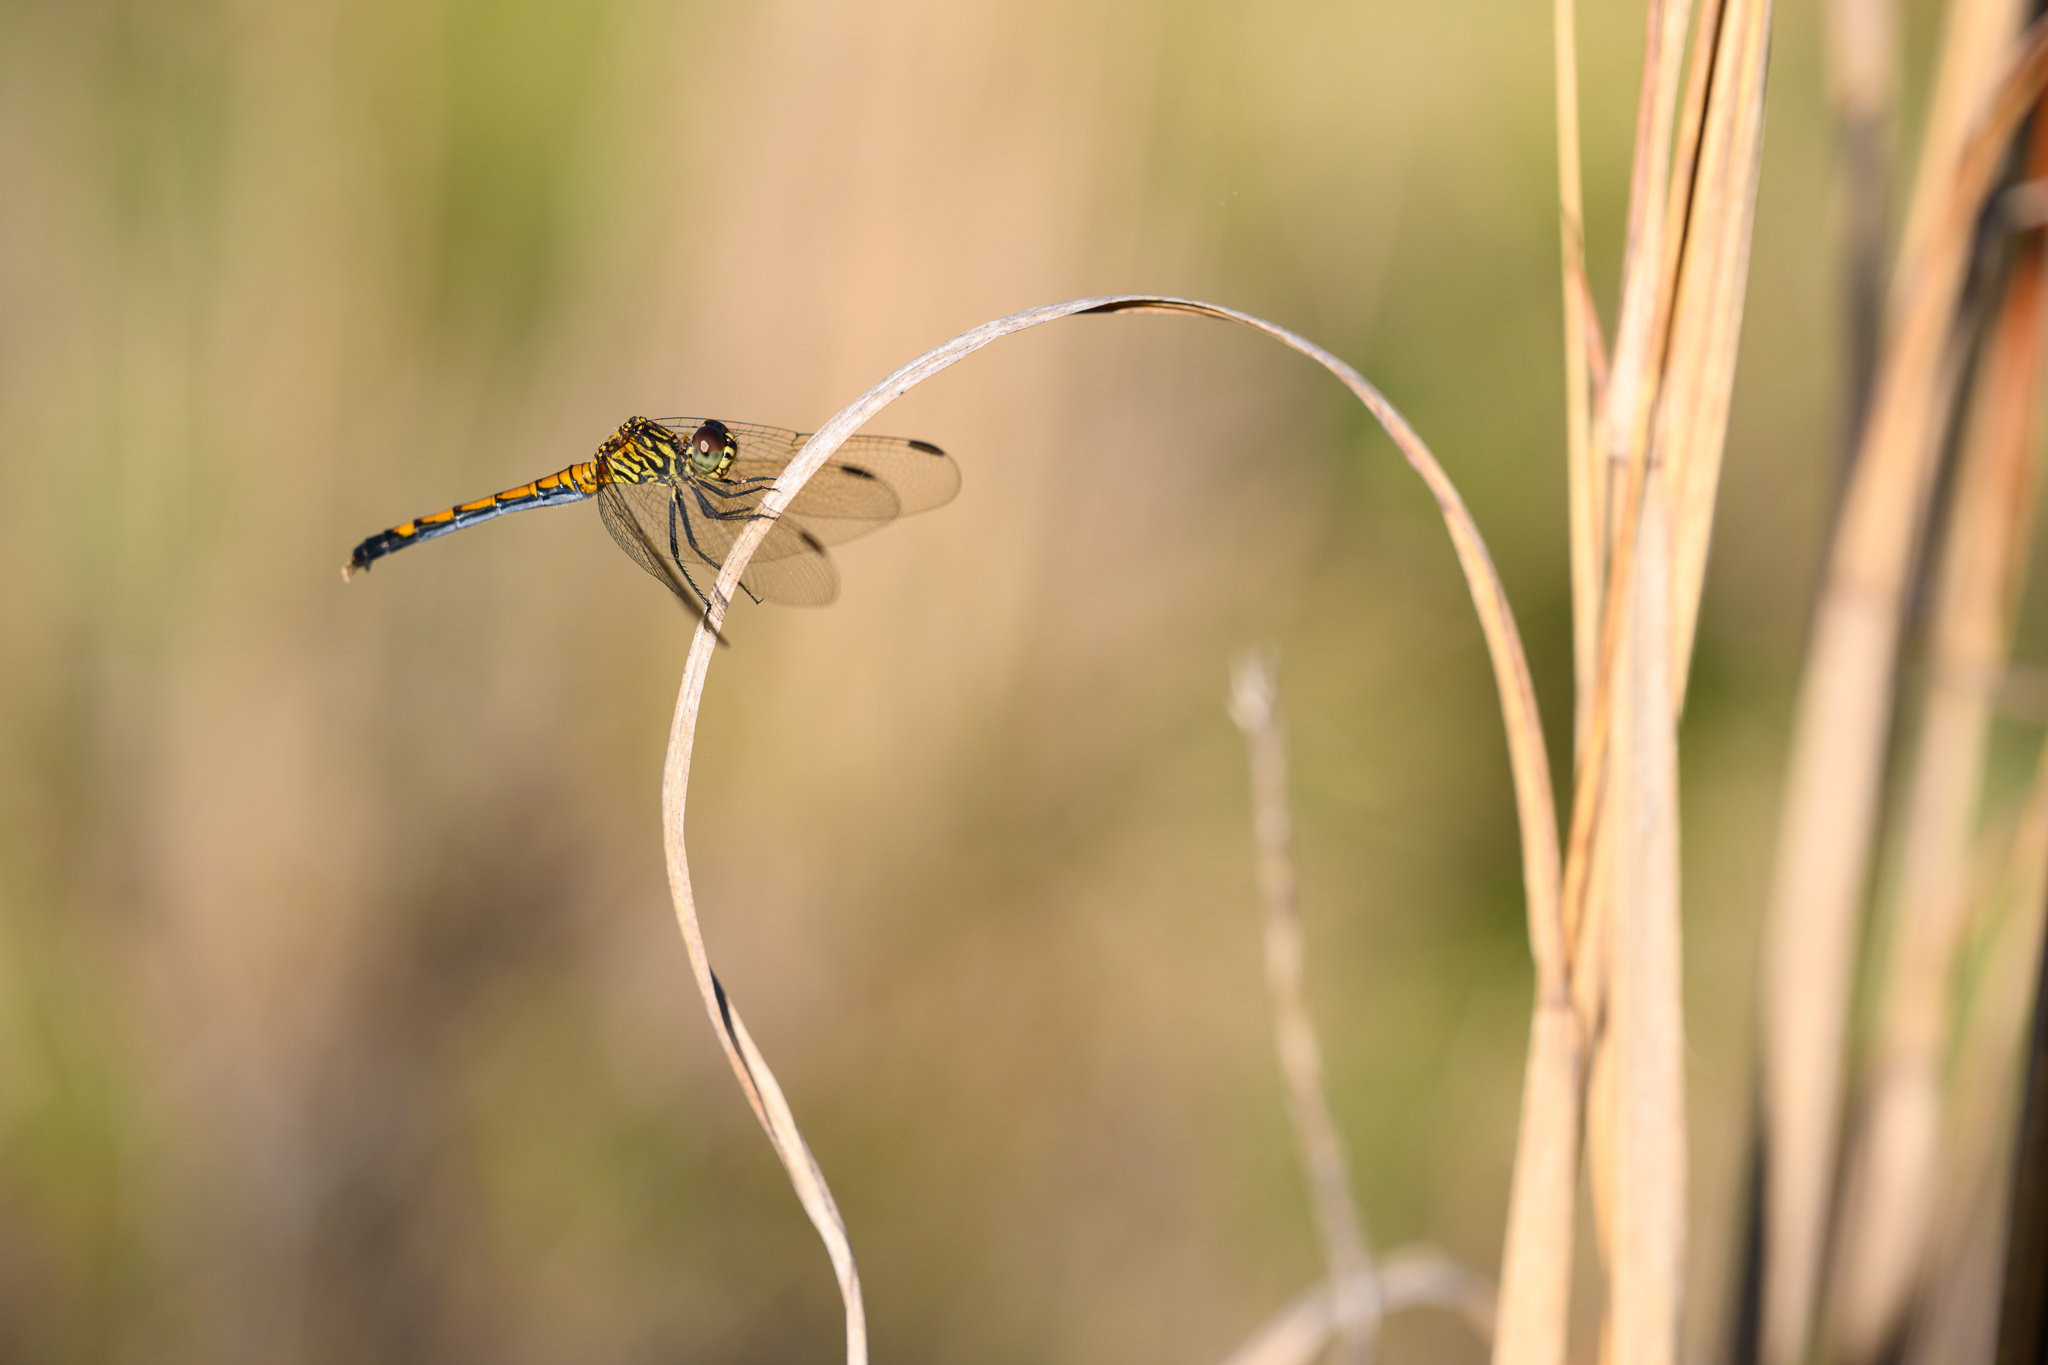
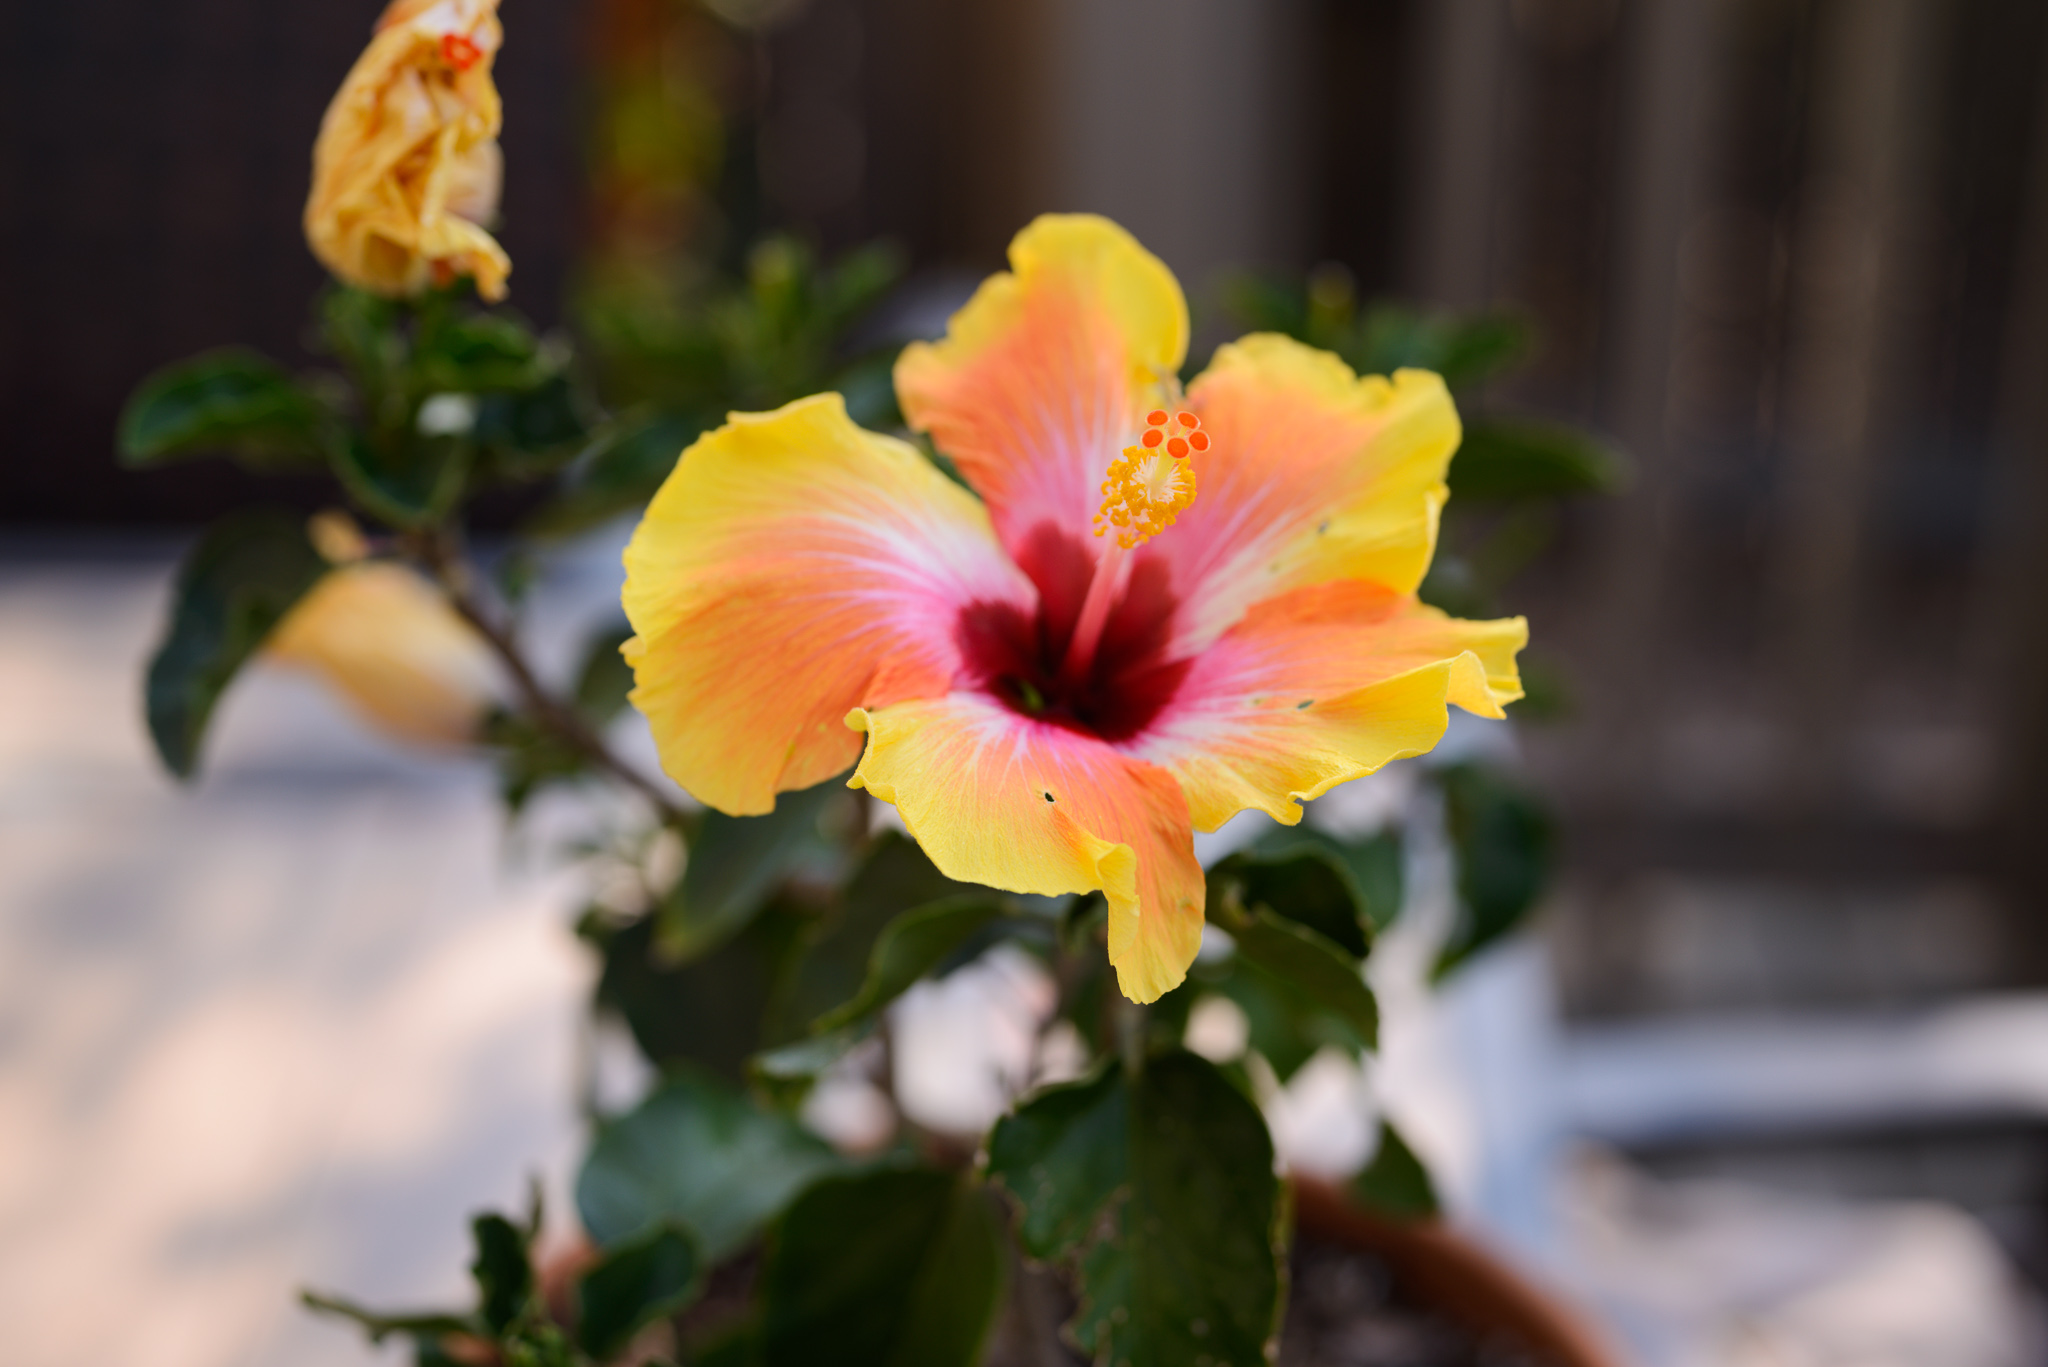
At longer focusing distances like this (which doesn’t technically qualify as macro, but still as a close-up), natural lighting is much easier to use. You don’t have to deal with apertures like f/16 in order to get enough depth of field, and you’re not blocking much light.
Other Useful Accessories
The equipment above is everything that many macro photographers will ever need. However, if you go into more specialized areas of macro photography, some other equipment and accessories can also be helpful. Here’s a brief list.
Tripod
It’s probably no surprise that a tripod can be helpful for macro photography. If you photograph a lot of nonmoving subjects (or those that only move in the breeze, like flowers), a tripod is essential. It also allows you to use natural light more easily, rather than relying on a flash. Of all the “other useful accessories” I’m listing here, a tripod is the only one I regularly use for my personal macro photography.
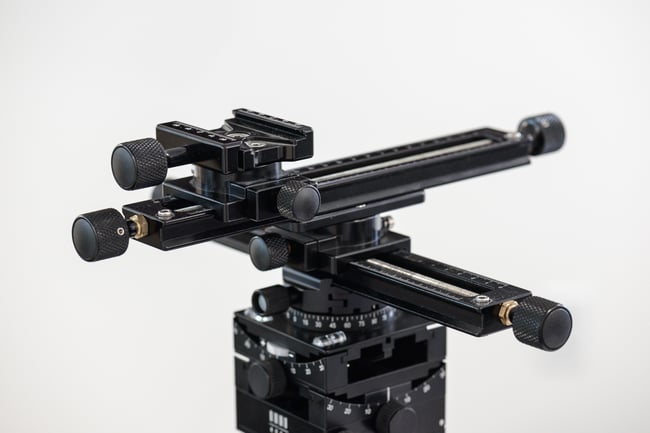
Macro Rails
If you photograph a lot of static subjects, especially in the studio, you should consider getting a set of macro rails. These let you focus and change composition by moving your camera in very small increments, as opposed to spinning the focusing ring on your lens. Macro rails are especially helpful if you want to do focus stacking for macro photography. There are even some automated focus stacking rails that can make the process smoother for photographers who routinely shoot 100+ image stacks and don’t mind spending hundreds of dollars.
Helicon Focus / Zerene Stacker
Along similar lines, if you do a lot of focus stacking for your macro work, the tools in Photoshop and other general-purpose photography software may not be good enough. Dedicated software like Helicon Focus and Zerene Stacker are meant for this type of photography, including with some tools to minimize errors when your subject moves during the stacking process.
Studio Equipment
Studio-based macro photography gives you maximum control over how your photos look. If you prefer it rather than photographing outdoors, you can add things like studio lighting, flash gels / filters, and backdrops to the list of helpful equipment.
Specialized Gear
If you want to specialize even further, there are dedicated accessories for all sorts of macro photography sub-genres. Look into microscopes, timelapse gear, camera triggers, and whatever else suits your specialty. Some photographers spend their entire photography career taking pictures of water droplets falling in midair, with amazing results. Things like this usually require specialized gear, though.
Conclusion
I hope this tour of common macro photography gear gave you a good idea of where to start. The amazing thing about macro photography is that you can take world-class photos with a minimal investment in extra gear – say, your existing camera and kit lens, an $80 extension tube set, a $15 manual flash, and a homemade diffuser. It’s one of the most accessible genres of photography out there.
That said, there are plenty of traps you could fall into if you’re not careful. Instead of the setup mentioned above, maybe you decide to go with the reverse-lens technique and a ring light. You’d end up with a dark viewfinder, lots of chromatic aberration, a small working distance, and excessively high ISOs.
So, pay attention to the pros and cons listed throughout this article, and remember to have fun! Macro photography isn’t always easy, but when you get a good photo, it’s hugely rewarding.
About focus stacking… There are cameras with focus bracketing and can take photo to do focus stacking! Photoshop has tools to make very good focus stacking… It”s a question to check what is good for your needs!
One further point in favour of choosing a longer focal length macro lens is of course that such a lens gives a narrower field of view which helps in excluding distracting peripheral elements from the composition. A big plus.
Also, a longer focal length being accompanied by shallower depth of field, helps to isolate the subject from its background although this can be a two edged sword if the aim is to get more of the subject in sharp focus!
Yes, very true! There’s also the rarer but occasionally true opposite situation, where the photographer wants to capture “environmental macro” photos with a lot of the background in the shot. Lenses like the Laowa 15mm f/4 or 24mm f/14 give pretty unorthodox results, but I’ve seen some great shots from both.
Thank you for another excellent article! However, I would appreciate your opinion on three points:
1) You say the extension tubes add no glass elements, so no loss in sharpness. I wonder about the latter: your subject is now much closer to the lens, so the rays which enter the lens are more inclined to the optical axis. So I would expect additional aberrations and a loss in sharpness, as you are using the lens in a mode that is out of the manufacturer’s specifications.
2) One of the solutions is a diopter you attach in front of the zoom lens. This additional lens makes these inclined rays more parallel to the axis, so the camera works as usual. Diopter sets which sell for 20$ are problematic, but I enjoy using the Raynox DCR-250, which should sell for 80$ or less.
3) Just about every article on macro photography mentions Helicon Focus and Zerene Stacker. I tried both, but I really enjoy the Focus Stacker (focusstacker.com) written by Olga Kacher, which is also much cheaper.
Thanks for the mention of FocusStacker – hadn’t heard of it, I need to try it out!
Good diopters won’t have a huge impact on image quality, but there’s no way around the fact that they’re adding glass to the imaging chain. It increases the lens aberrations and decreases sharpness. Whether by a big amount or a negligible amount depends on the diopter in question.
As for extension tubes, the extra distance from the camera sensor doesn’t really cause any optical problems. However, a lot of lenses are softer at their closest focusing distance anyway (which is the focusing distance you’ll use with an extension tube), so it’s true that you won’t always see the best of image quality with extension tubes. It depends on the quality of the lens you’re adapting.
Another cheap option is to buy a reversal ring ; 15€
With that you can turn around your lens and attach it with the filter thread on the bayonet. Some lenses work really well : i have an old 20mm f3.5 nikkor that gives enlargements far beyond 1:1.
Glad you found a good lens to reverse, but I’m not a huge fan of reversing lenses most of the time. A lot of reversed lenses have high chromatic aberration. Plus the lack of electronic contacts (aside from a niche reversal ring for Canon) means you’ll get a dark viewfinder and no EXIF data. It can work, but it’s hit-or-miss.
That’s a really nice looking focusing rail. I tried finding that model in a search but no luck so far. Who makes it?
It’s from Hejnar. That’s our lens testing setup. photographylife.com/revie…-accessory