Do you know what the Nikon D5, D6, Z8 and Z9 have in common? Yes, you’re right, these are the most advanced models from Nikon since 2016, placing speed above all else. And, I’m not talking about the speed of the autofocus or the continuous shooting, but the speed at which you can change the camera’s settings when the shooting conditions change. You can do this with the inconspicuous Recall Shooting Function, which has huge potential for unpredictable photography scenarios.
What is Recall Shooting Good For?
In short, Recall Shooting is for those situations where you need to change your camera settings very quickly. I don’t just mean small adjustments to aperture or shutter speed, but complex and extensive changes that would otherwise take so much time that it might mean missing a shot.
With recall shooting, you can use a single press of a programmable button to change shooting mode, metering, the entire exposure triangle, exposure compensation, white balance, complete AF settings, and shutter release mode all at once!
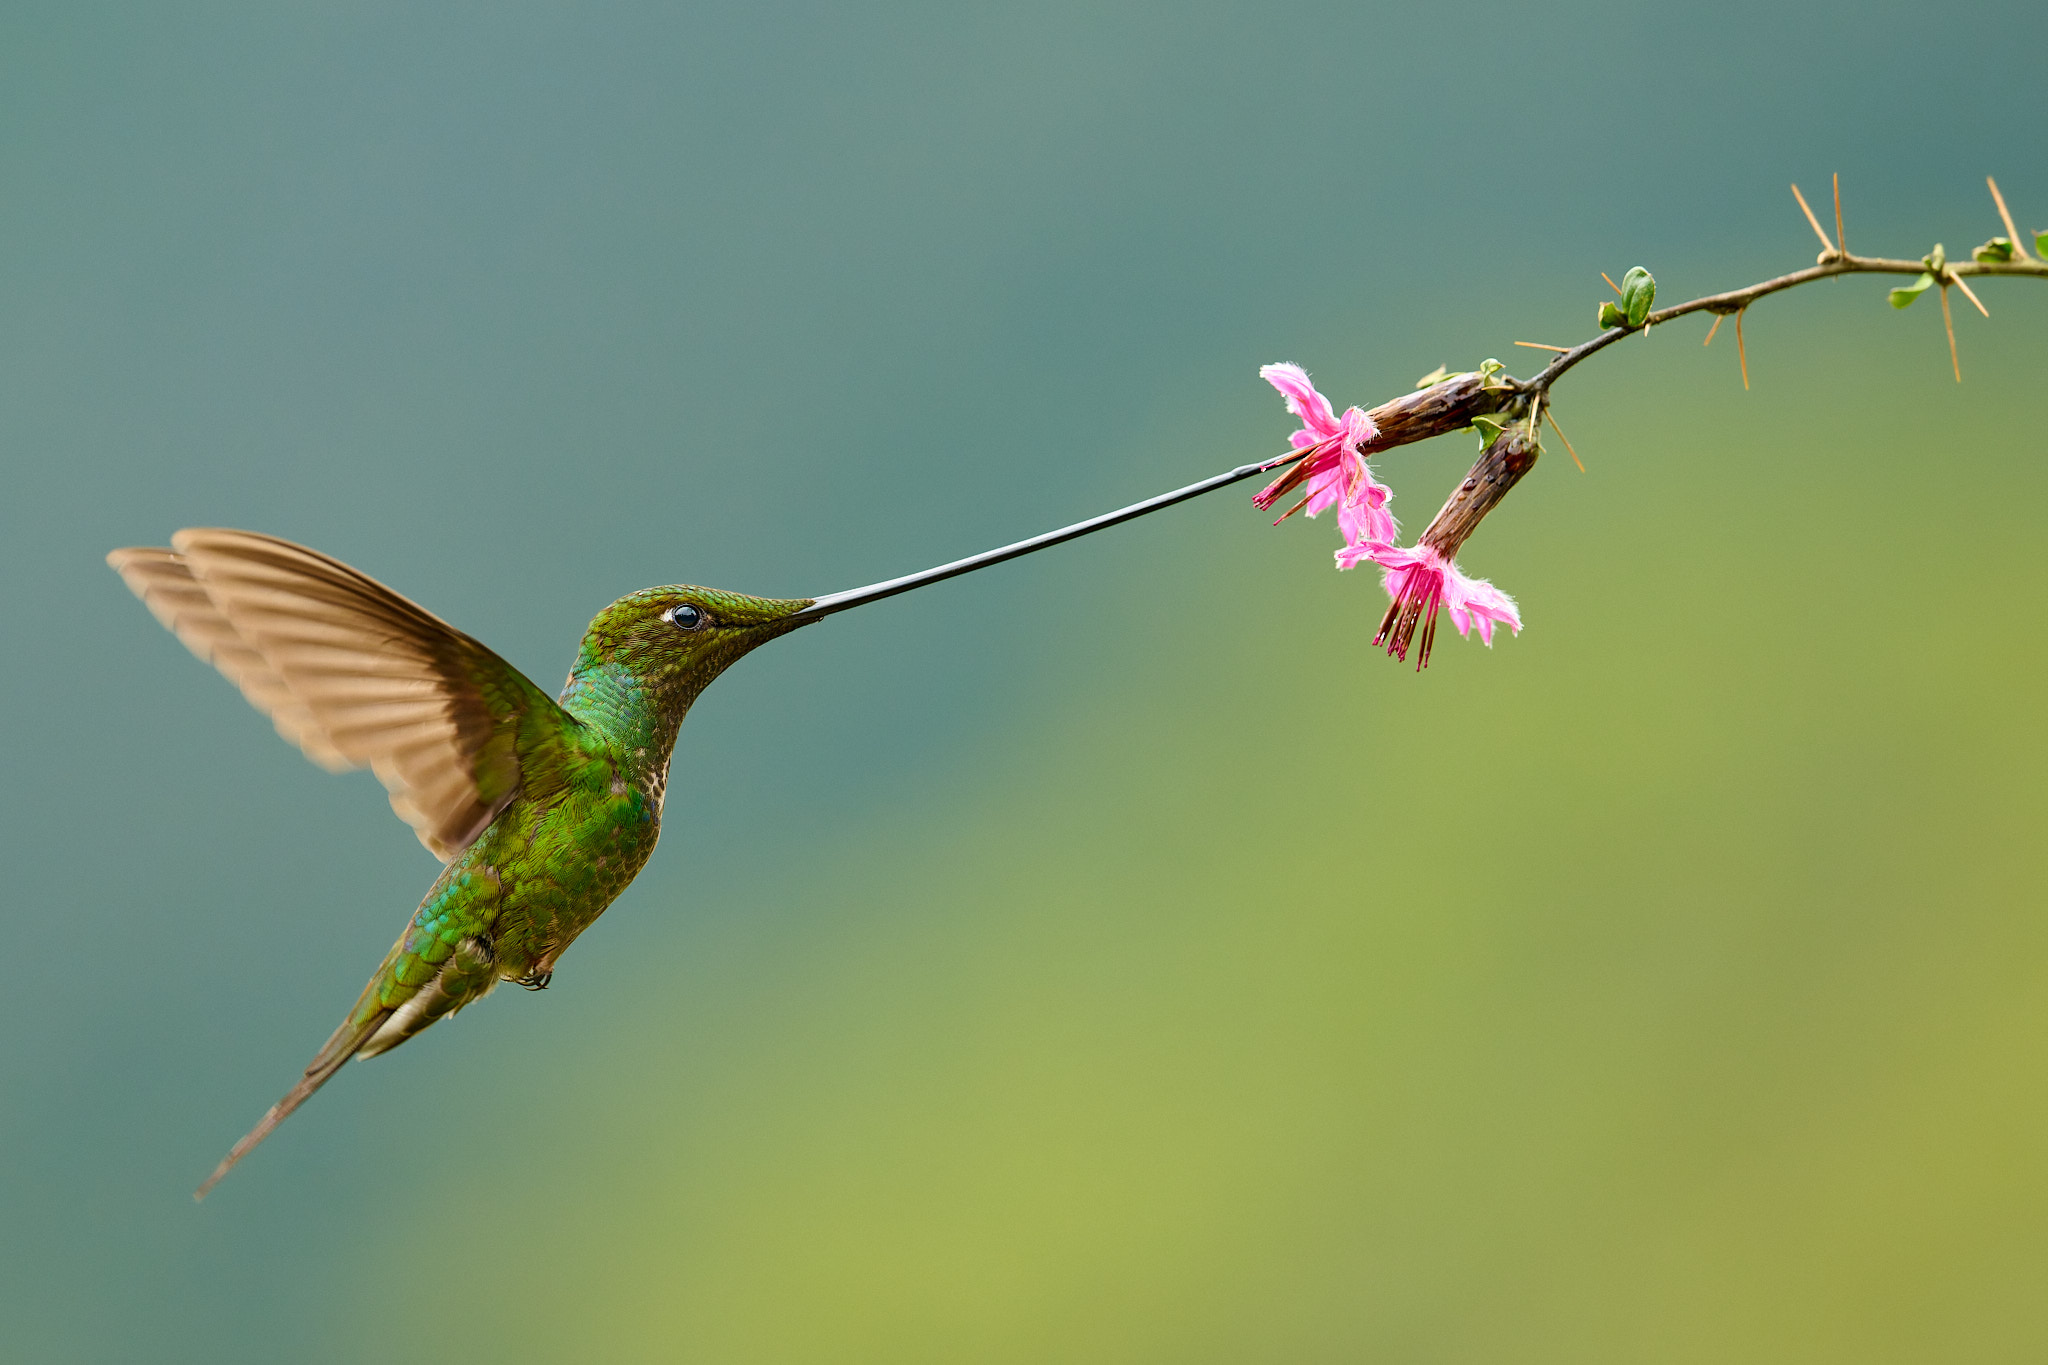
The possibilities for this feature are endless. For example, in wildlife photography, typically there are long static moments followed by very dynamic ones. The transition between these states often takes no more than the blink of an eye—and recall shooting can change your camera settings just as quickly.
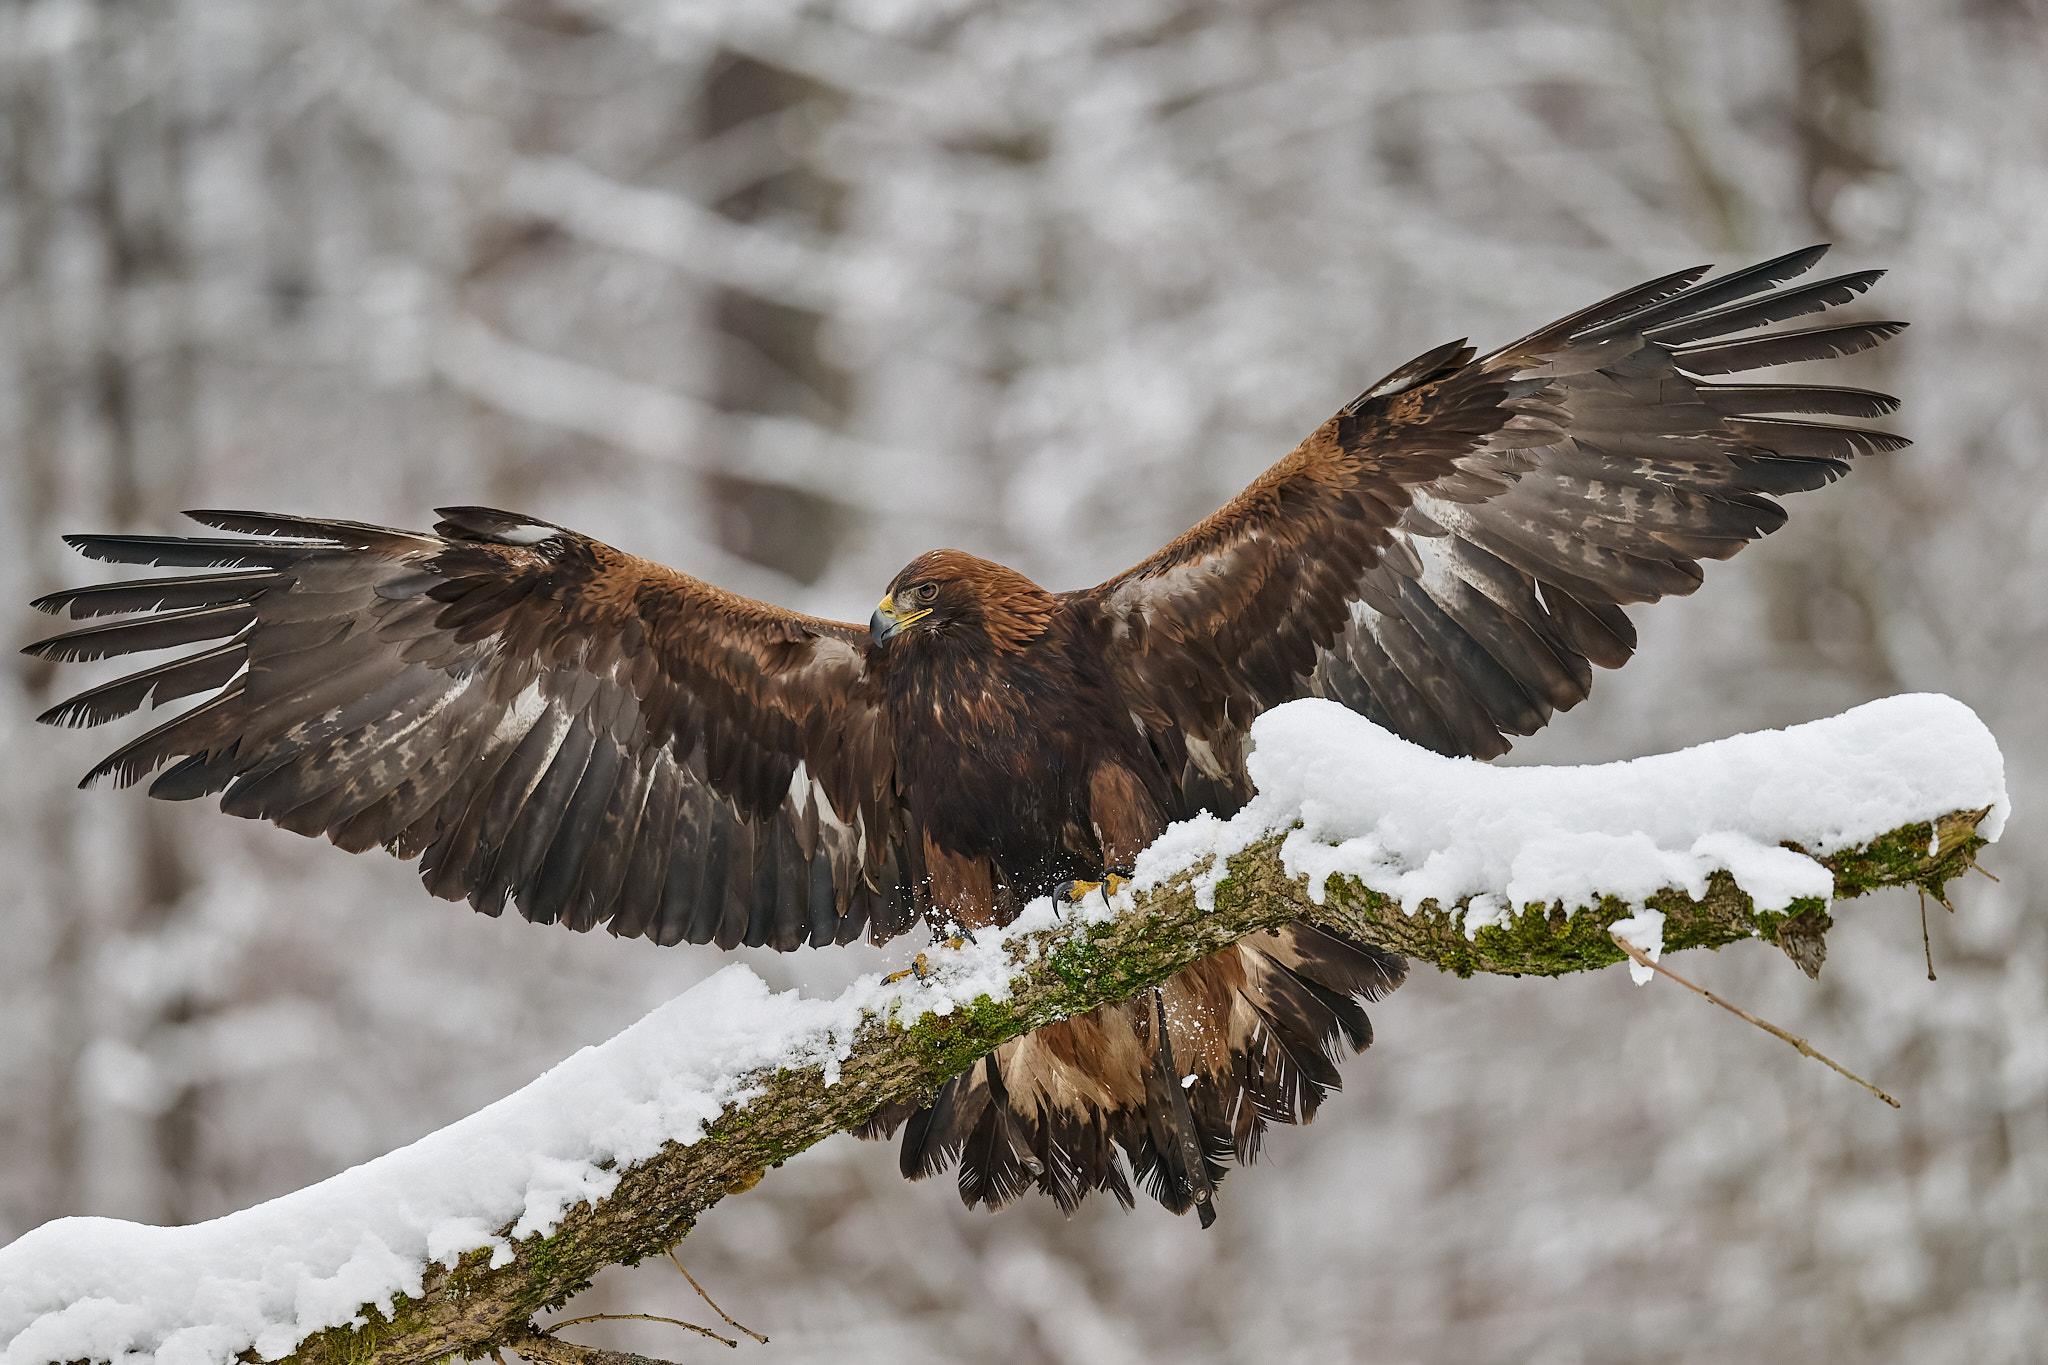
For example, imagine a raptor sitting on its perch, watching for its prey. Such birds can stay like this for a very long time, which is a great opportunity to take environmental portraits. Since they often sit on a branch like statues, there is no need to use fast shutter speeds. Instead, I often use speeds of around 1/60s in combination with the self-timer. I usually set the camera to take a sequence of three shots at 0.5 second intervals. This gives me more light and therefore more dynamic range, better sharpness and colors, and less noise.
I also sometimes set the AF area mode to cover a smaller portion of the viewfinder. Especially in dense vegetation, this makes it easier for the camera to find the subject’s eye.
However, everything changes radically when the previously static raptor decides to act. Then, you have to change pretty much everything on the camera in a second. To freeze the motion, you need a shutter speed of at least 1/1000s, preferably faster. Even a “portrait” aperture of f/4 will not be ideal. For birds in flight, it will be better to stop down a bit. Of course, you will also have to react to all this by changing the ISO.
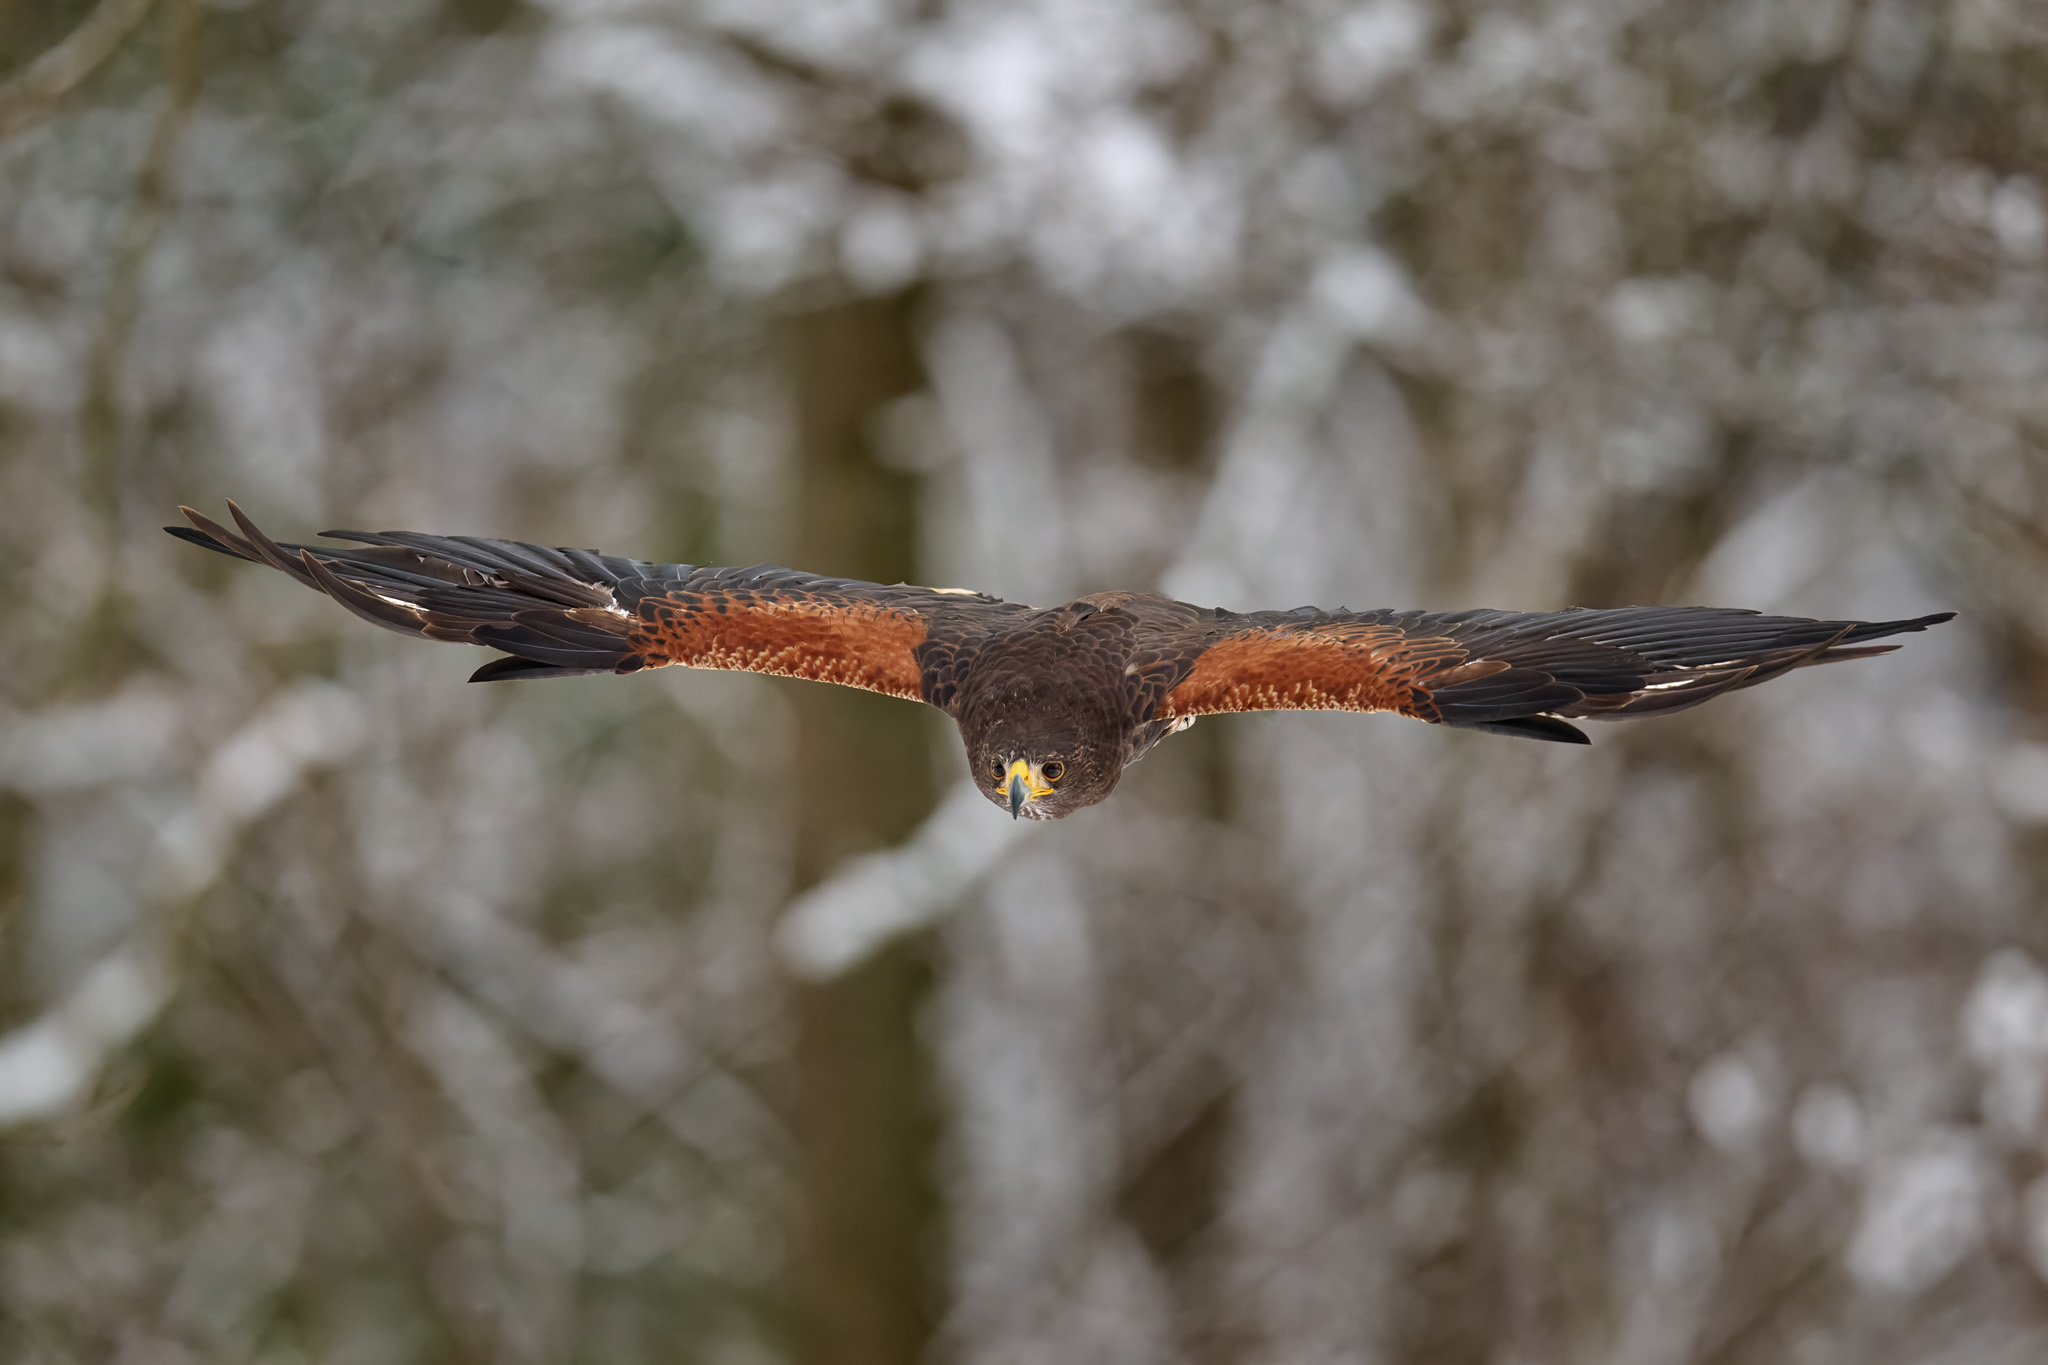
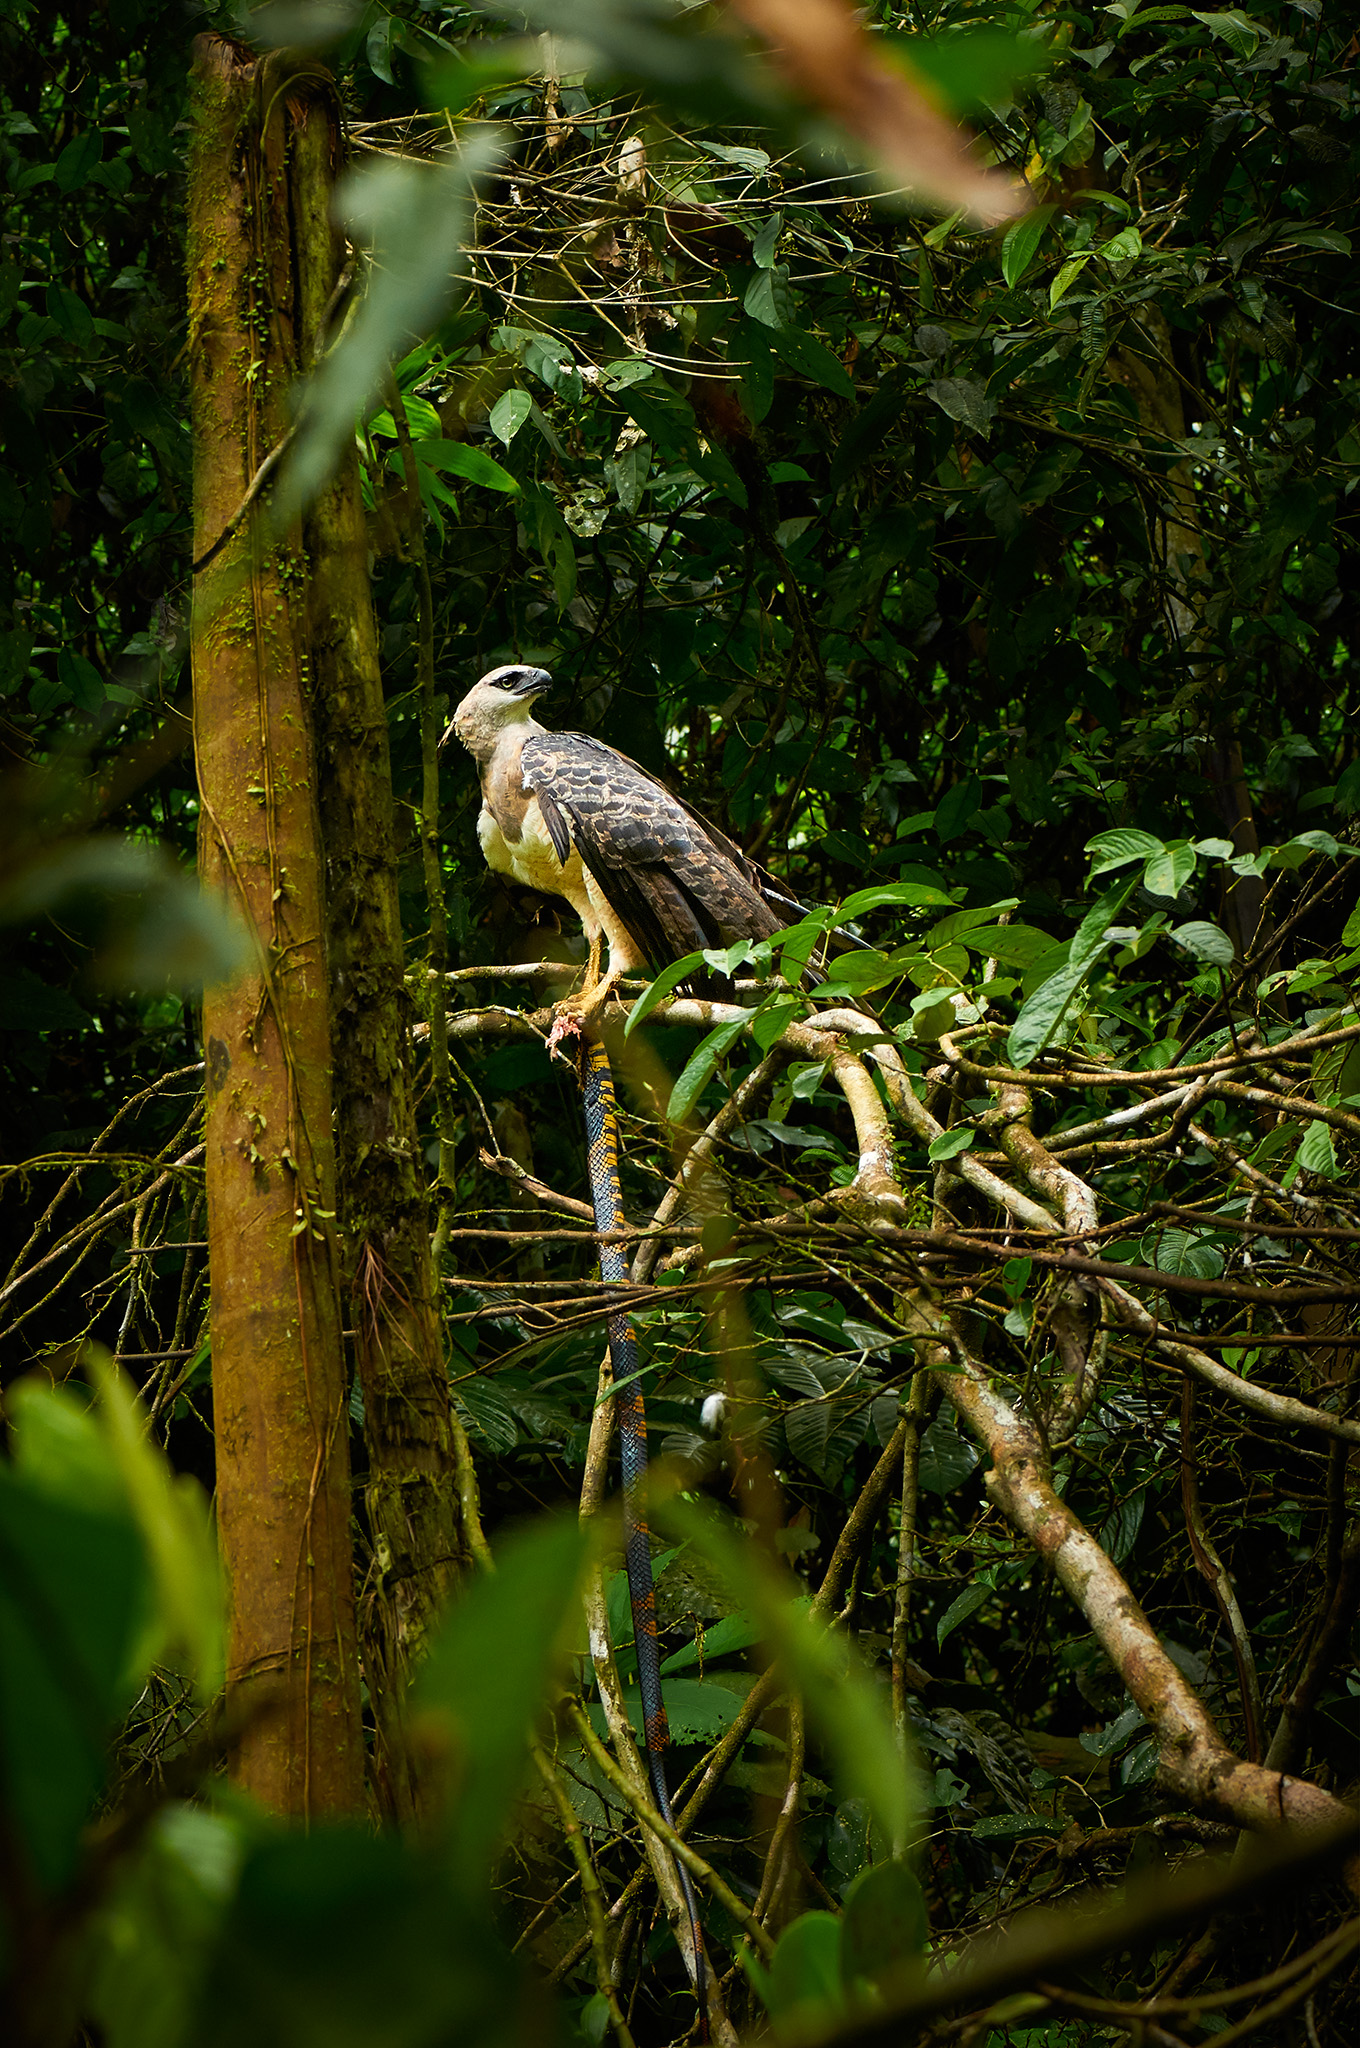
You will probably also need to change the AF area to 3D-tracking or a custom, larger area. Oh, I almost forgot, using the self-timer to shoot birds in flight is not the best idea either! I’ve verified this a few times (most painfully when shooting a Harpy Eagle) and believe me, something like continuous shooting at 15fps or 20fps is much better.
Manually changing all that in a split second is a challenge bordering on the impossible. There are basically two solutions. The first is the Shooting Menu Bank and the second is the Recall Shooting Function.
The Shooting Menu Bank is not a bad option, but it has two problems. First, you have to do two things: press the function button and then turn the command dial. More importantly, if you had the self-timer set in Bank A (bird on branch), you will also have it set in Bank B (bird in flight). Beep, beep, beep… the Harpy Eagle disappears into the canopy… click, click, click. It still hurts. Recall Shooting changes everything at once, with a single press of a button. So, how can you activate it?
How to set up Recall Shooting?
Before we get into that, it’s important to note that Recall Shooting is only used to quickly and temporarily switch between the basic camera settings (A) and the alternate settings (B). Any changes you subsequently make in B will be forgotten when you return to A. This makes Recall Shooting fundamentally different from Shooting Menu Banks, which always remember the last setting.
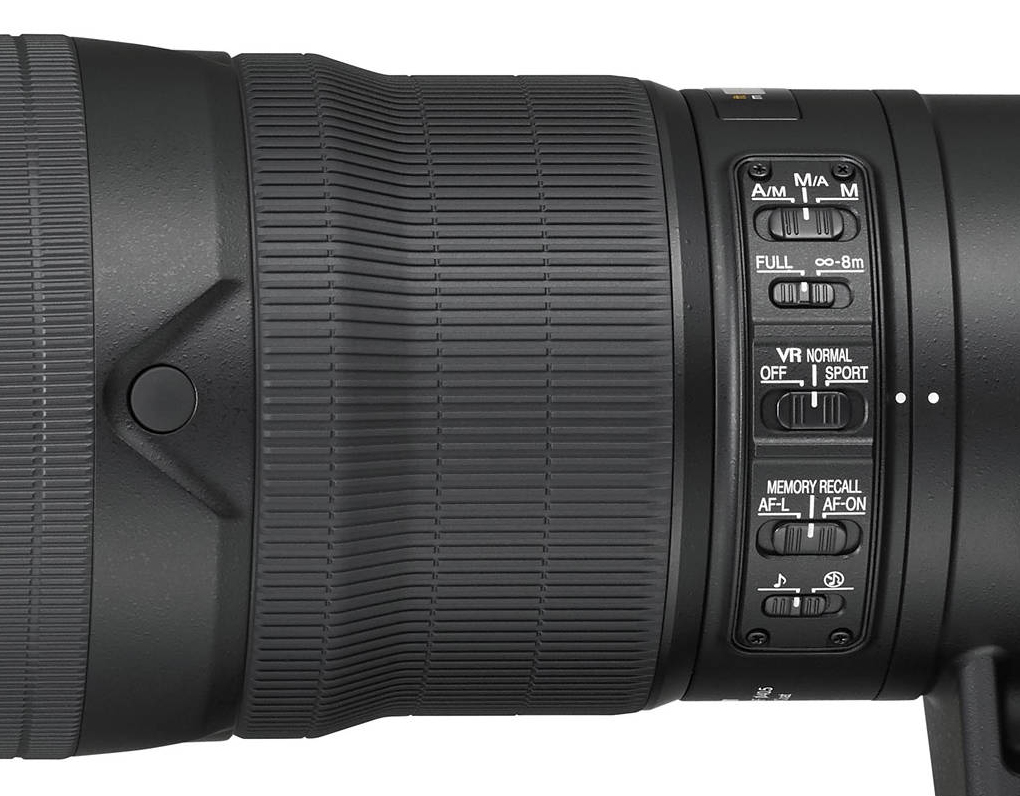
For Recall Shooting, you must assign it to a button that is easily and quickly accessible, even with your eye on the viewfinder. Buttons such as the DISP, sub-selector, video-record button, or any of the Fn buttons on the front of the camera are perfect for this purpose.
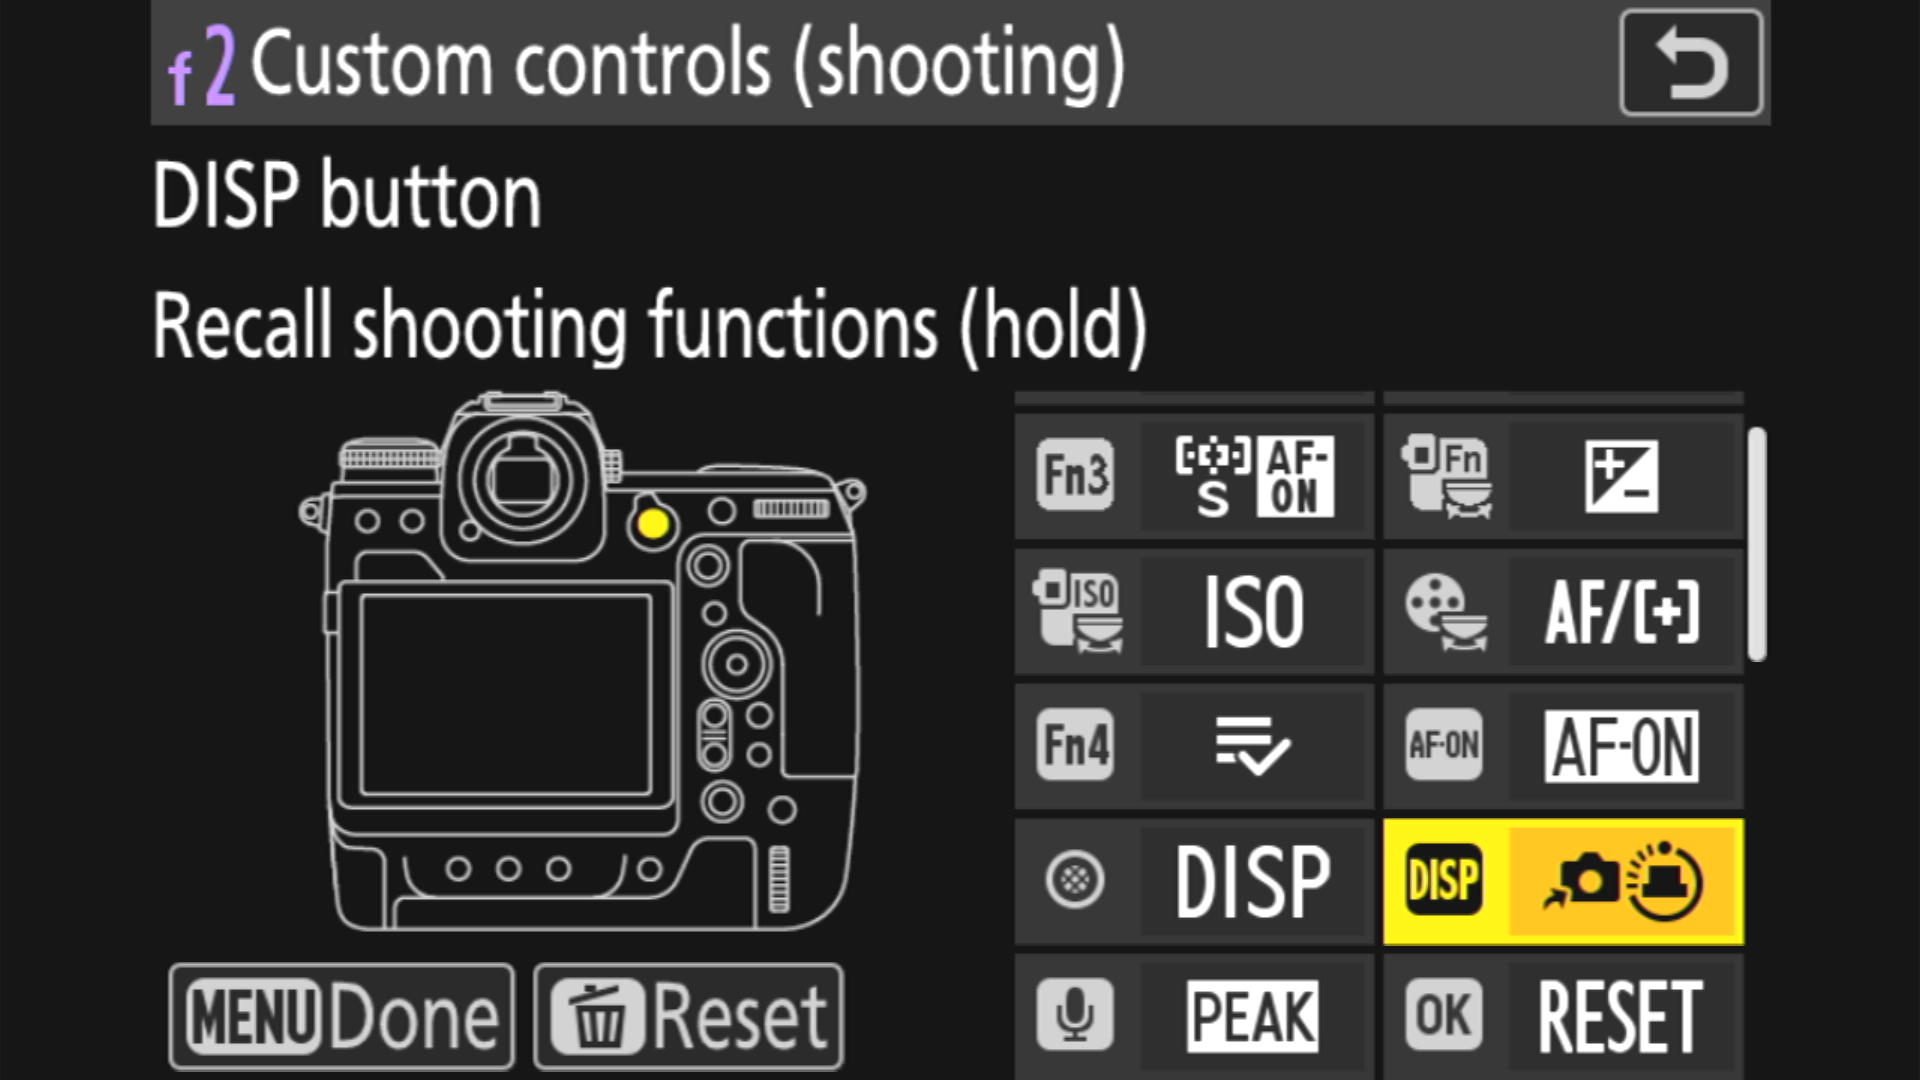
On the Z8 or Z9, go to f2: Custom Controls (Shooting) in Custom Controls (Shooting). On the D5 and D6, you’ll find the same under f3. From the menu, select the button to which you want to assign the function. You can also choose from the buttons on the lens. No surprise with Z-mount lenses. But interestingly, the function can also be assigned to the four buttons on the front of the F-mount exotics (under the L-Fn button). As I found out experimentally, you have to select “AF-L” on the switch on the side of the lens. This is great because you don’t lose the otherwise very useful Memory Recall function.
There are two types of Recall Shooting Functions you can select:
- Recall Shooting Functions: This first option works by maintaining the camera’s alternate settings only as long as the function button is pressed and held.
- Recall Shooting Functions (Hold): This second option is basically a classic switch. When the button is pressed, the camera switches to the alternate mode (B), where it remains until the button is pressed a second time. The camera will also return to the default mode (A) when the standby timer expires or when the camera is turned off and on again.
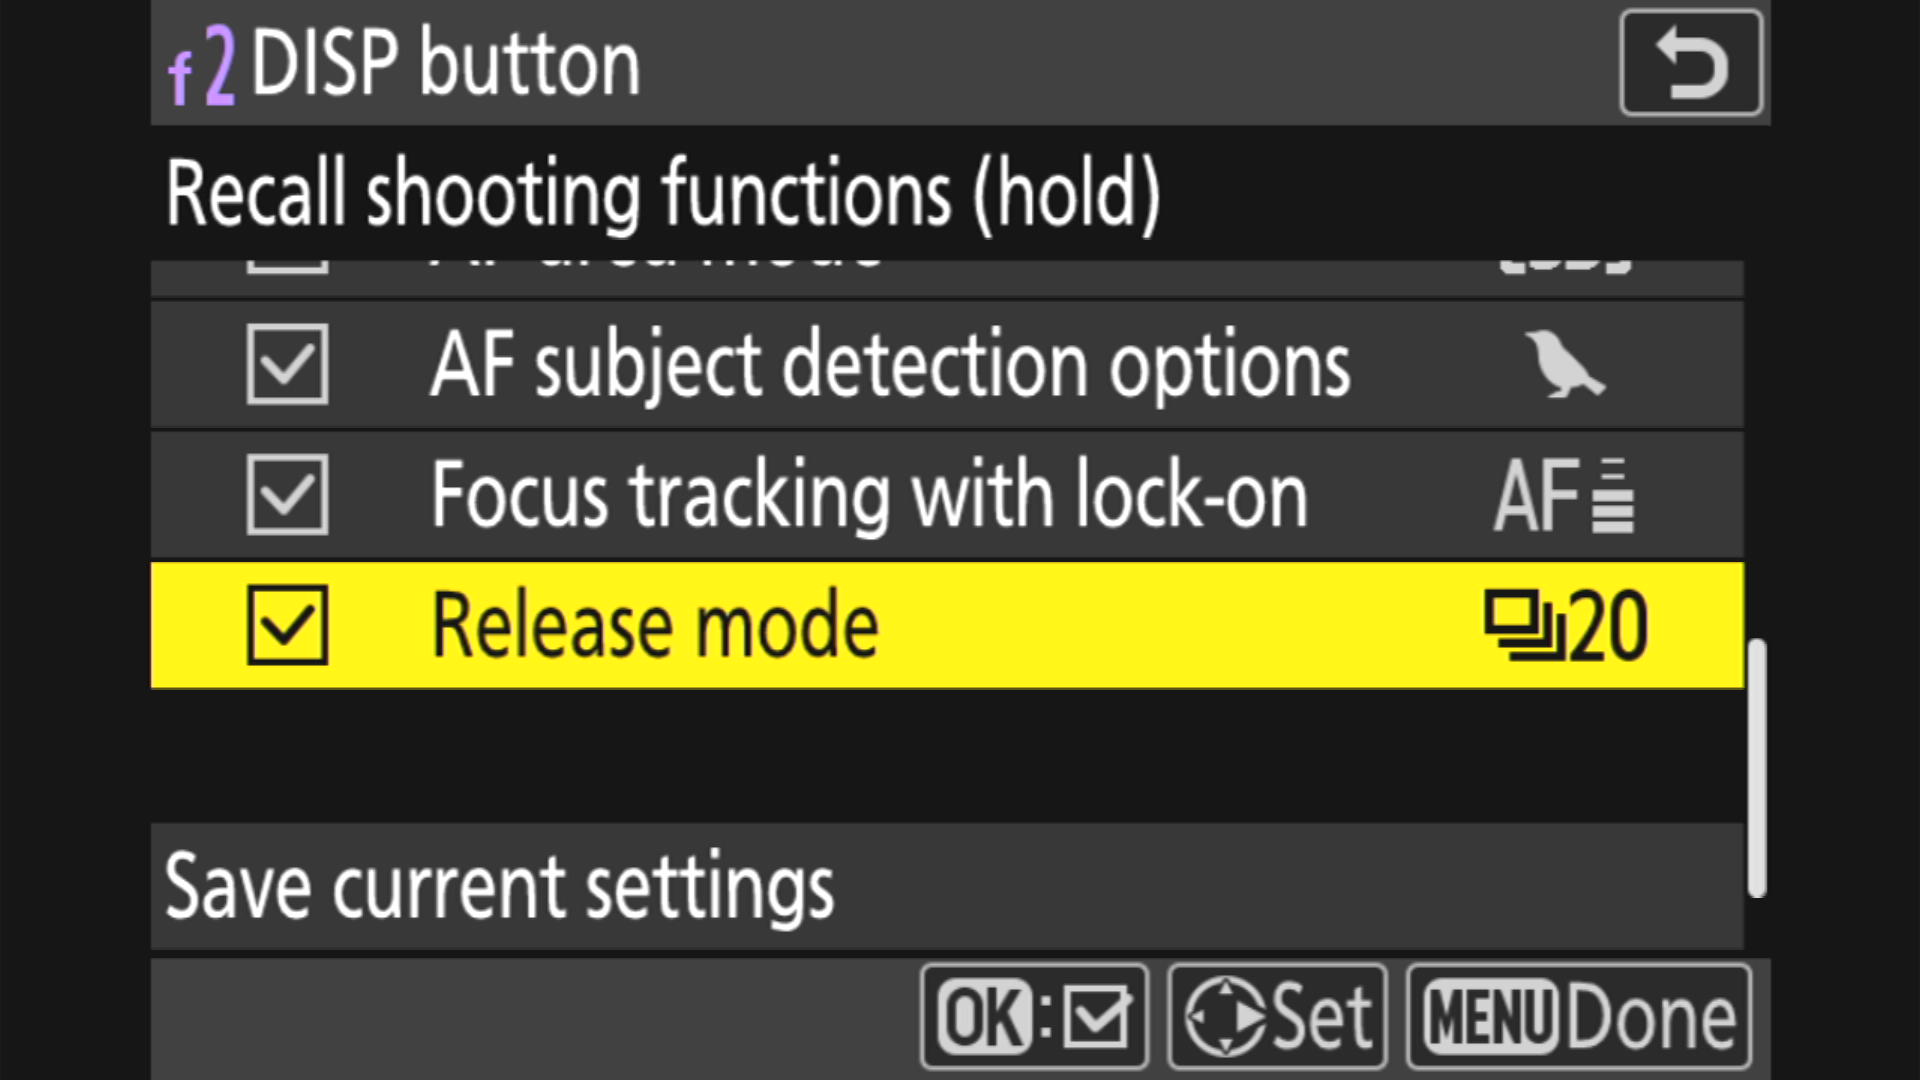
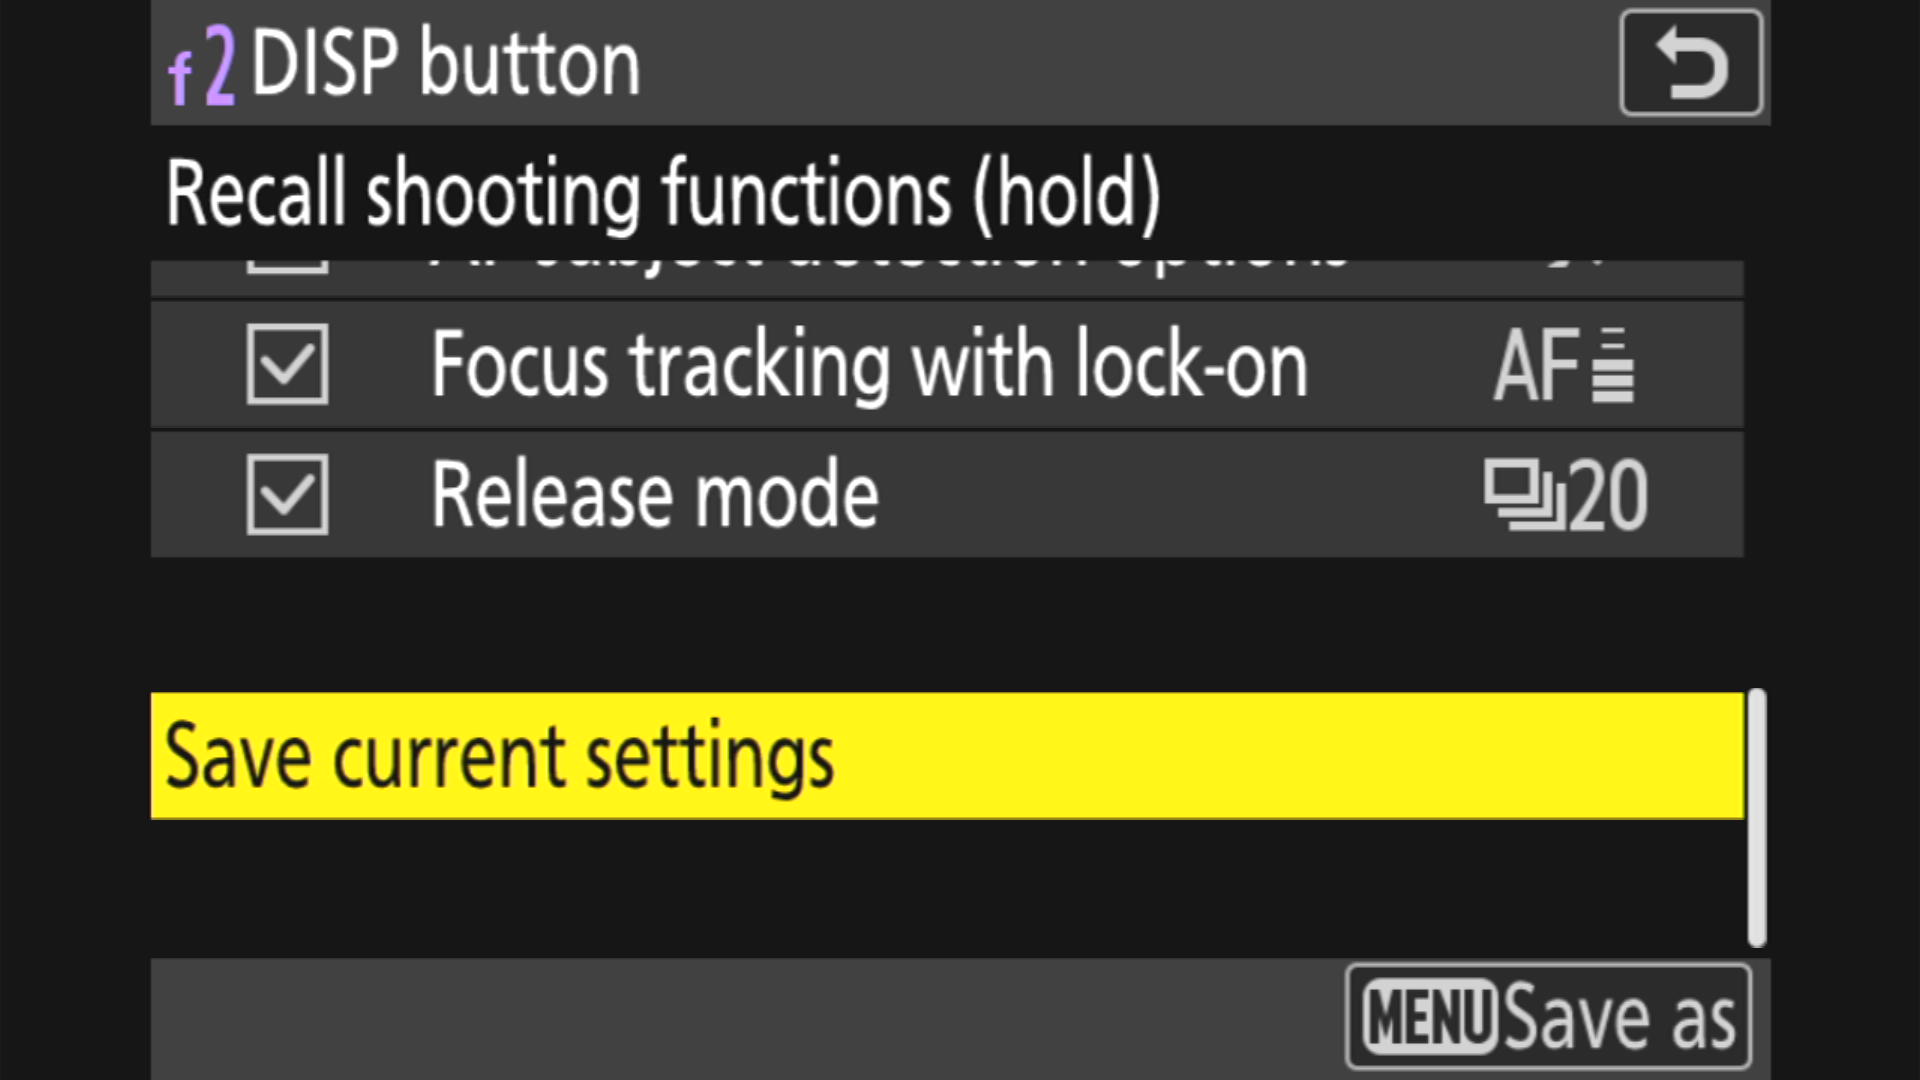
When you open Recall Shooting Functions, a menu appears of parameters that can be stored in the alternative settings. Check the boxes for the settings you want to set differently in mode B. For each of these parameters, a value must be set and saved at the end. Another option is to set the camera in the usual way, as it should be in alternative mode B, and save these settings with the “Save current settings” command. Press the Menu button to save your settings. You are now ready to go into the field with another virtual camera.
A few tips:
- The cameras mentioned above allow you to configure up to four Custom Settings Banks. So if you feel that having only two options (the basic setting A and the alternate setting B) is not enough, you can configure a unique alternate setting in each of the banks. However, I recommend keeping it simple so you don’t get lost in the combinations of settings.
- Put f2: Custom Controls (Shooting) near the top in My Menu. If you want to change the parameters of an alternate setting, it will be immediately accessible.
- Recall Shooting Functions do not have to be used with every setting. For example, do you only need to quickly switch between AF detection of birds and people? Leave only the AF Subject Detection options checked.
- If you use the back button technique to focus, it’s better to select Recall Shooting Functions (hold). That way, you don’t have to hold down three buttons at the same time.
- Don’t have a D5, D6, Z8 or Z9 and still want to quickly switch between camera settings? No problem, the User Settings or Shooting Menu Banks work very similarly. Switching between settings isn’t as fast, but it’s usually perfectly fine.
Conclusion
Classic photojournalists used to carry two cameras on their shoulders. Most of the time, they had a different lens on each one, and they immediately grabbed the camera they needed. The Recall Shooting function is a bit like a second camera. You can’t change the lens at the push of a button, but you can change just about anything else with Recall Shooting. This feature has made its way discreetly into the D5 without attracting too much attention. It also escaped my attention on the Z9 for a couple of years. Not anymore.
Hello Libor,
Just wondering why you use the self timer for environmental portraits instead of, say, a short burst? In your example I assume you’re handholding the camera, but perhaps not?
Nikon Z9 Reference Manual
Custom Settings
c2: Self-Timer
Choose the length of the shutter release delay, the number of shots taken, and the interval between shots in self-timer mode.
onlinemanual.nikonimglib.com/z9/en…4_c02.html
Hello Photofan, I sometimes use the self-timer when the light is really low. I always have the camera on a tripod at that moment. My typical setup is that the delay between pressing the shutter button and the first shot is 2 seconds, followed by 3 to 5 consecutive exposures with a 0.5 second delay between each one. This is how I shot Long-tailed Potoo in Ecuador or Serendib Scops-Owl (3 second exposure) in Sri Lanka.
This is why I buy Thom’s guides as soon as they are available. Thom’s guides explain all of the features in detail and when I read about this one I assigned it to the Fn2 button on both my Z8 and Z9.
I guess that explains why almost no one has taken a decent wildlife photo before 2016.
Well said, Pat. I always think of the excellent photography featured in The National Geographic Magazine (latterly National Geographic) over the decades.
Note to Libor: I think you will find that Recall Shooting was added to the Nikon D5 via firmware update 1.3, 2018.
Sometimes we get too focused on the features of our cameras and lenses and forget that the most important thing that makes a great photo happens in front of the lens. That is, if it’s not locked in a closet at that moment. No feature in the camera and no lens are a guarantee of a good photo, but they can make the journey to it easier.
Amateur photographer: current technology still isn’t anywhere near good enough for them, so they bewail its limitations while they wait for the manufacturers to catch up with their (evergrowing) list of desiderata.
Professional photographer: doesn’t actually need the advanced features, but is able to leverage them as and when appropriate.
Well said, Pete. I agree.
I hate to disagree, but… Who am I kidding? :-D
Amateur photographer: does it for love.
Professional photographer: does it for money.
I did it for money a long time ago and started to hate it! No thanks!
This would be really wonderful on my Z5 but the option doesn’t seem to be there. Am I missing something? (Firmware 1.43)
It is not a feature available on the Z5, only on the flagships and Z8.
As said before, this is a pro camera feature. However, the Z 5 has three user setting modes, which do something similar. Access is not as quick, as you need to turn the mode dial (U1/U2/U3), but otherwise, it does pretty well as recall replacement.
That’s right. Pressing one button may be faster, but shooting menu banks or user settings aren’t far behind either. In any case, the biggest help in the field is the ability to anticipate. For example, if a bird has just pooped, it will probably fly in the next few seconds. There is usually enough time to turn the dial in this case.
Fantastic info.
This is what I have been looking for but missing.
I’ve set up my Z8 already… Does exactly what it should.
Day/month/year brightener!
Thanks.
I’m so glad, Dave, that I could reveal something that will make your shooting more enjoyable and your day brighter :-)
Thanks Libor, a really useful article. I have a Z8. I have been using recall (hold) to toggle between my subject recognition default (bird) and animal. While I don’t wish to lose that instantaneous shift, what I want even more is to toggle my release mode, so that I can switch rapidly from high speed RAW to pre-release mode (C30). The release mode menu in f2 Recall shooting functions (hold) does not offer above H20. What am I doing wrong? Is there any other way, without resorting to the release mode button, which is too slow? Using the shooting menu does not help, since the current release mode is carried over. Help!
I’m afraid, Robin, that H20 is all you can squeeze out of it. I can’t think of any way to shorten the process of toggling between H20 and C30 (pre-capture).
The shortest way I have found is to use an i-shortcut. Place release modes in your i-menu. Highlight the button. Then whether or not you’re using the LCD or the view finder, just spin the back dial. Going between H20 and C30 is 1 click. Cool thing is, after you shoot, hit the i-menu button and the switch back is active, so just spin the dial back. It’s a good method if you normally shoot raw and want to use pre-release. Going from H20 to C30 automatically switches to jpeg.
Thanks for the summary of RSF. As you suggest in the article, I have found this to be a big help in capturing sudden bird-in-flight scenarios. I use the lens function button since my left hand is already in the vicinity when holding a long lens. This really is a game changer.
Yes, this button is a perfect fit for this function.
Great Funktion I did not know about till I read your article.
I’ve been several times in such situation you describe and forgot to switch one of the needed parameters, being too slow to get shot I wanted. Now I set it up, works perfectly.
Thanks a lot!
Great, Werner! I wish this will lead to some great photos in the future.
Libor, thanks for this geat article. I did not know that my camera has this very helpful feature.
It was my pleasure, Patrick. I’m glad I could help. Sometimes it’s worth leaving the beaten path in the tangled jungle of camera menus. There are often hidden things that can be really useful.
I seem to recall the common criticism of rookie wildlife photographers taking their photos with excessive shutter speed and ISO, and getting suboptimal results with their aperture and sensor noise limited gear. But maybe noisy but otherwise serviceable wildlife portraits and action shots are preferable to the same pictures with less noise but motion blur, without a good way to change settings on the fly.
Recall Shooting function seemed useful to have. If only non-pro bodies have this feature, but mode dial with user settings does seem to do enough of the same.
You are absolutely right, user settings or shooting menu banks will do a similar job. It just takes a second longer to set them up. And that’s exactly the difference between pro and consumer cameras – speed. Not just AF speed, but also camera settings.