Like many photographers I like to experiment with my camera gear and push it to see what will happen. Today I went to RaptorFest 2017 in Grimsby Ontario to view the displays and catch some of the animal presentations. The indoor lighting was less than ideal and I decided to do a little test with my Nikon 1 V3 and push its small 1″ sensor to its limits by shooting at ISO-12800 (please see the Reader Note at the end of this article)
Although I never hesitate to shoot my Nikon 1 gear up to ISO-3200 I typically don’t use it very often beyond that camera setting. Obviously when pushing a small 1″ sensor to ISO-12800 one can expect to lose a significant amount of image quality and fine details. The high ISO images in this article certainly aren’t ‘award winners’ but they do represent a sampling of what can be achieved when shooting at high ISOs like ISO-12800 with a small 1″ sensor camera.
The point of this article is not to recommend that people actually use a small sensor camera like Nikon 1 at these high ISO settings on a regular basis. Rather it is simply to demonstrate that while overall image quality and details will suffer, the resulting images may still meet the specific needs that a photographer may have should circumstances dictate shooting at ISO-12800.
For example, using small sensor photographs captured at high ISOs may be acceptable when posting smaller sized images on social media or on the internet. The images in this article are 2048 pixels in width.
Photographs that are planned to be displayed on smaller sized digital photo frames can often be shot at higher ISOs. If you will be printing some of your photographs, limiting your high ISO images to smaller sized prints is advisable.
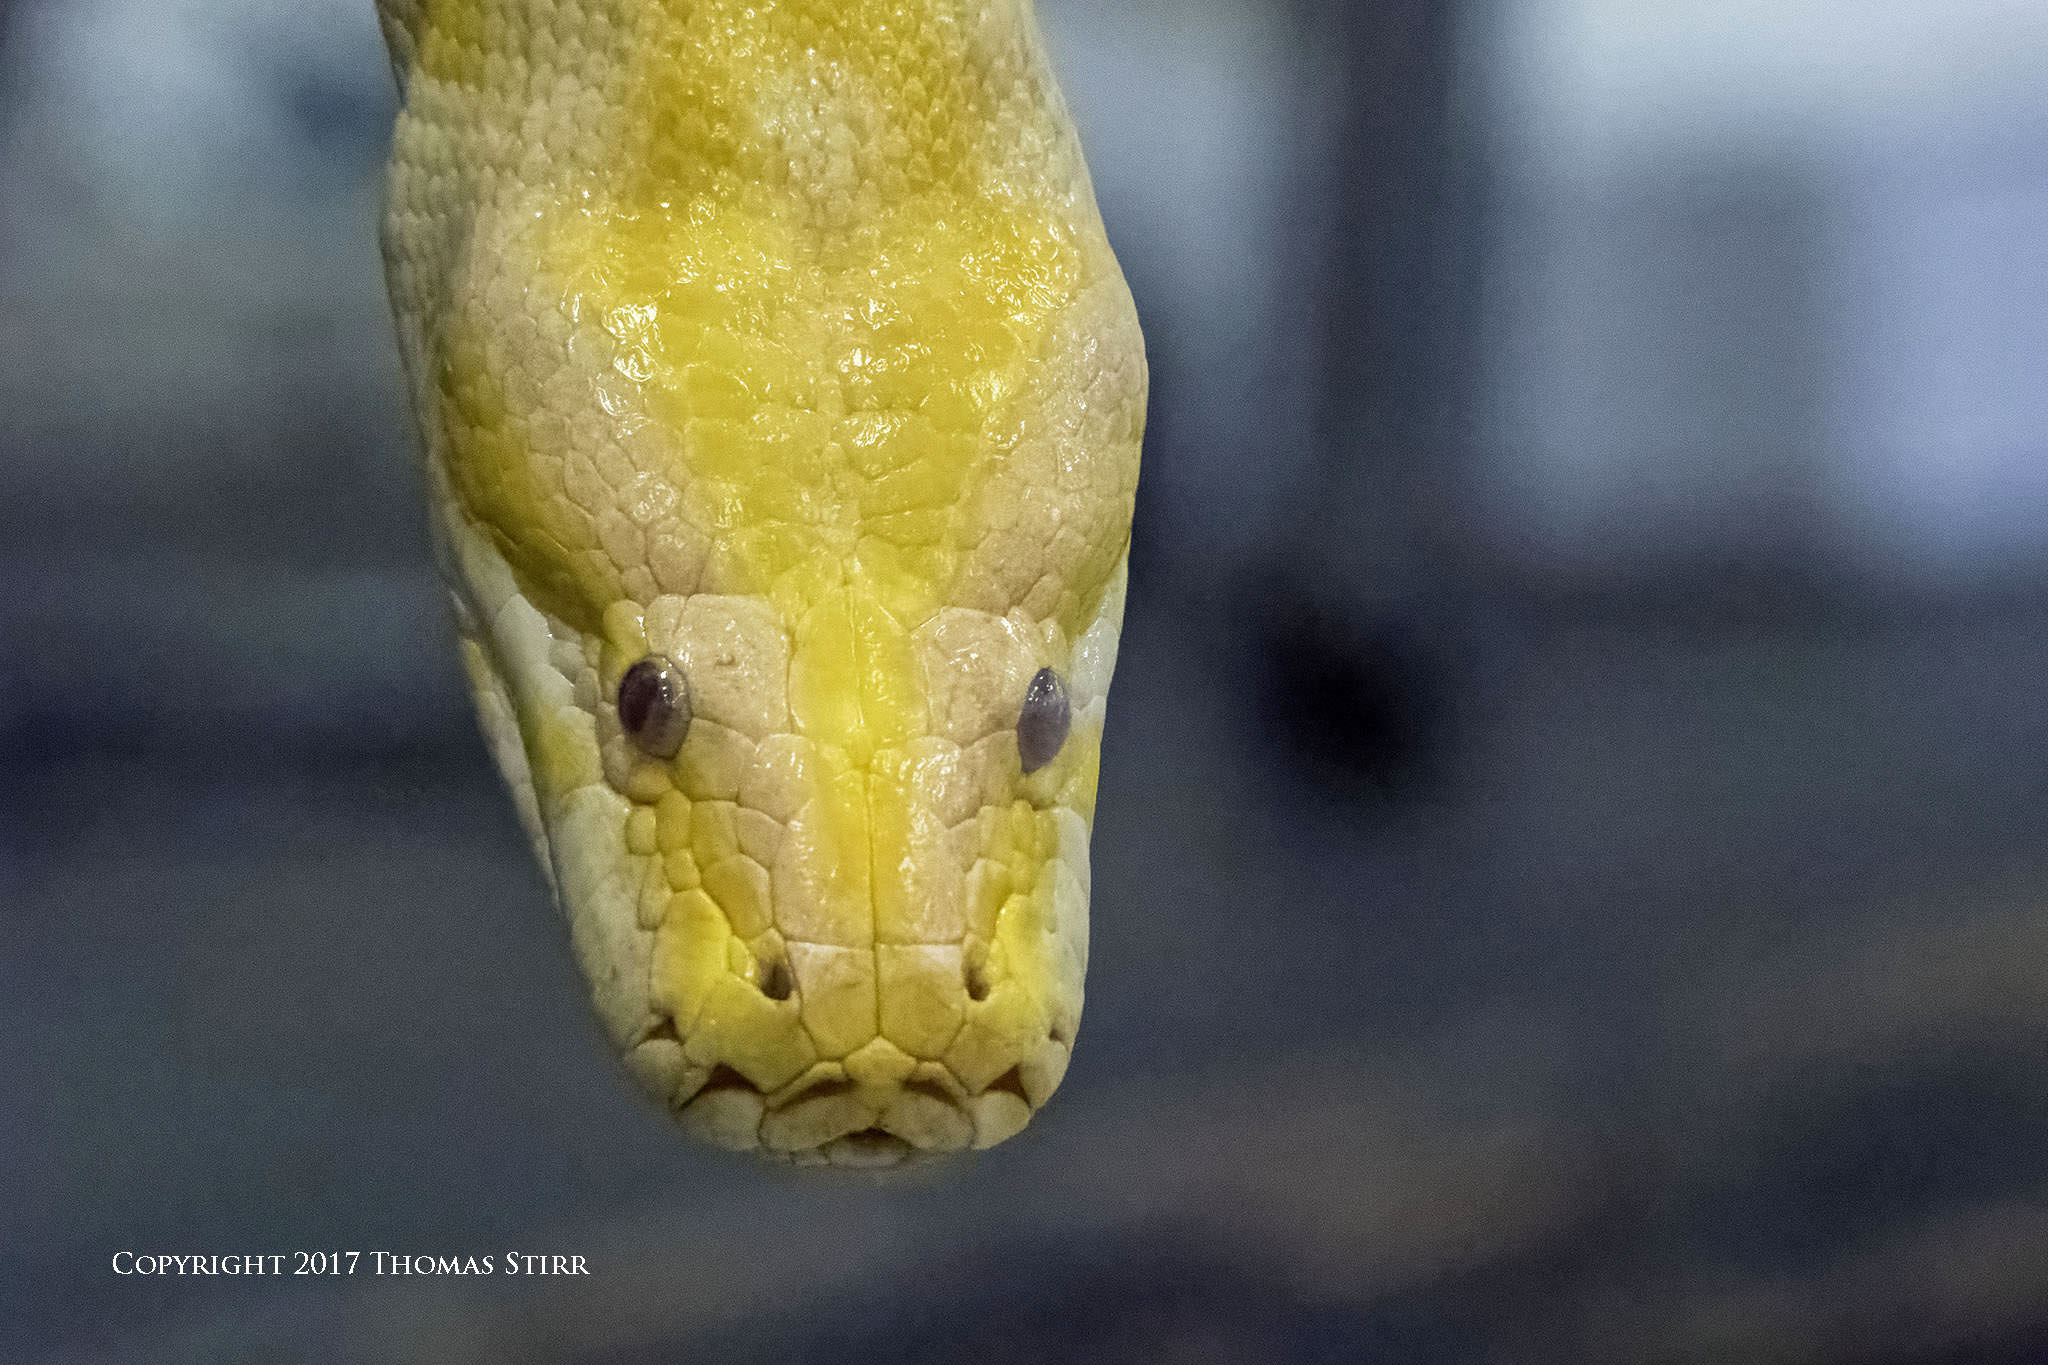
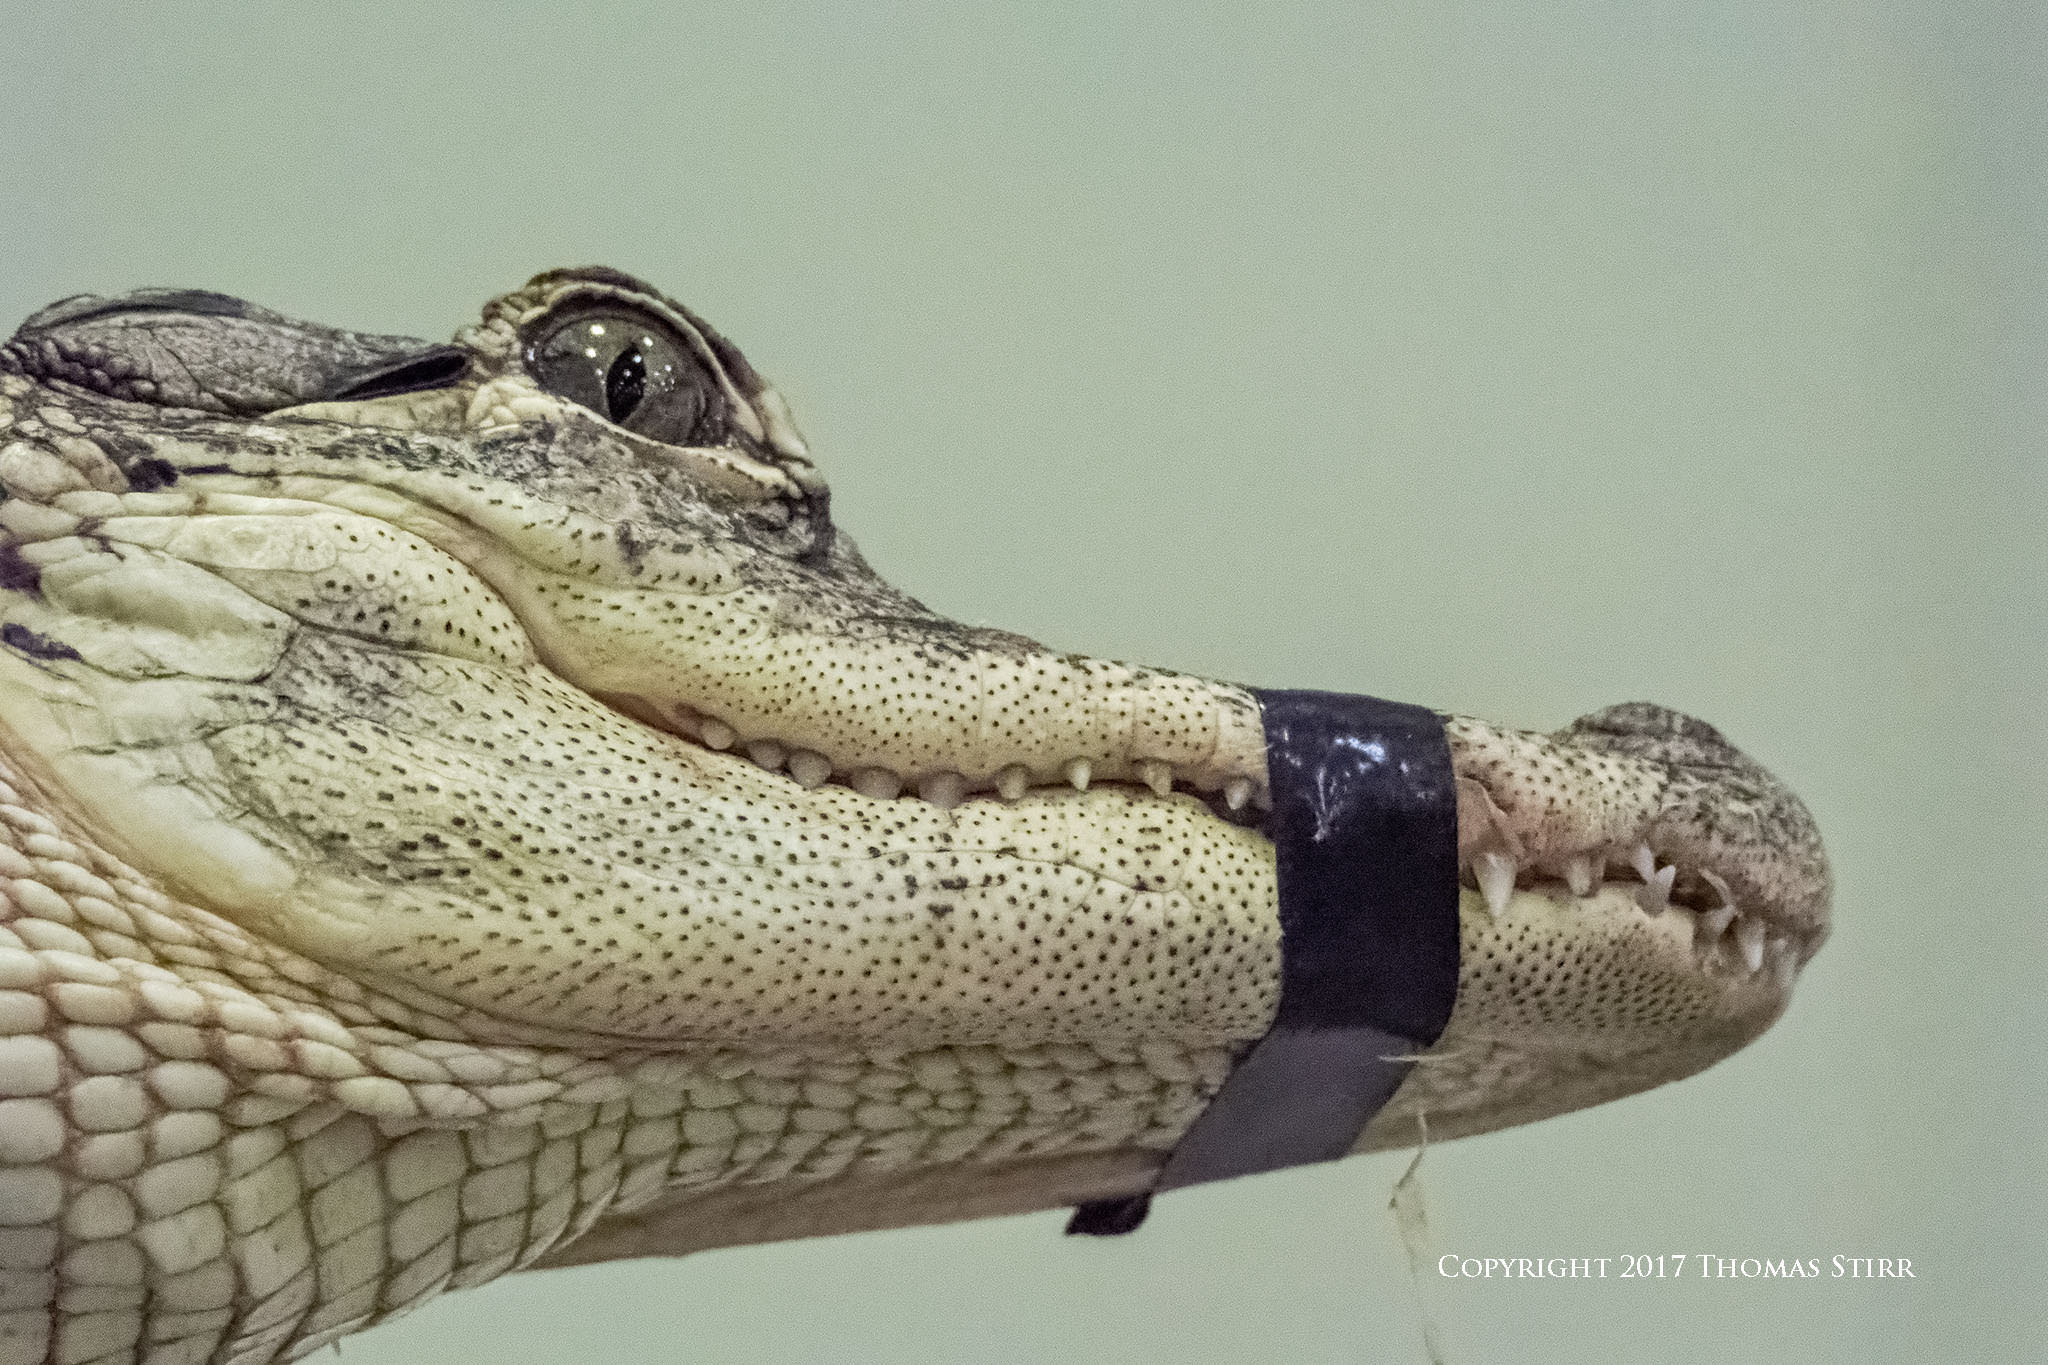
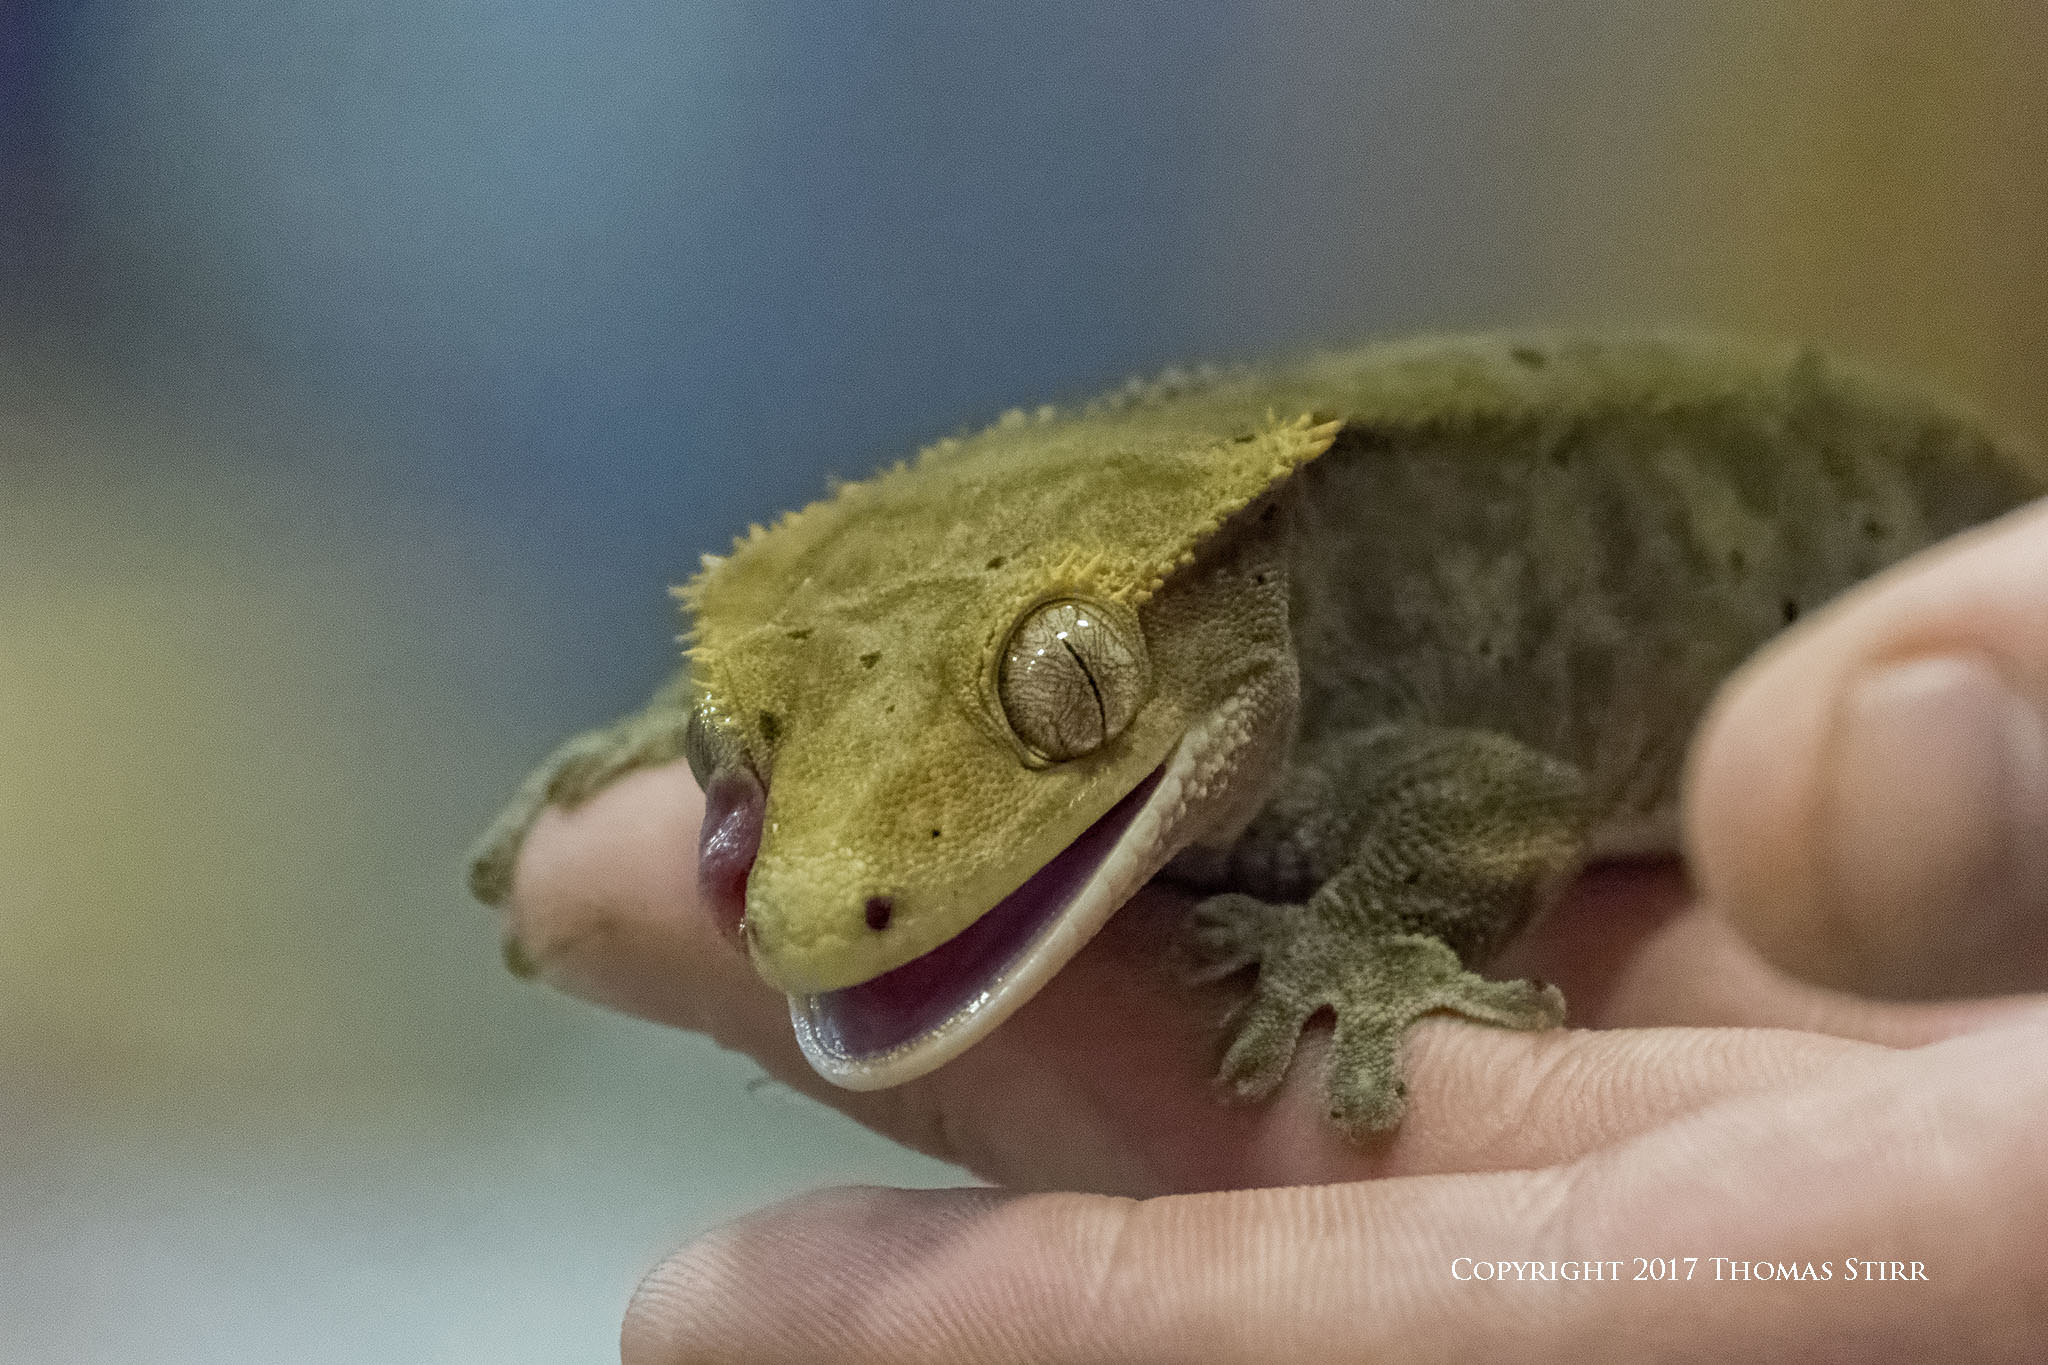
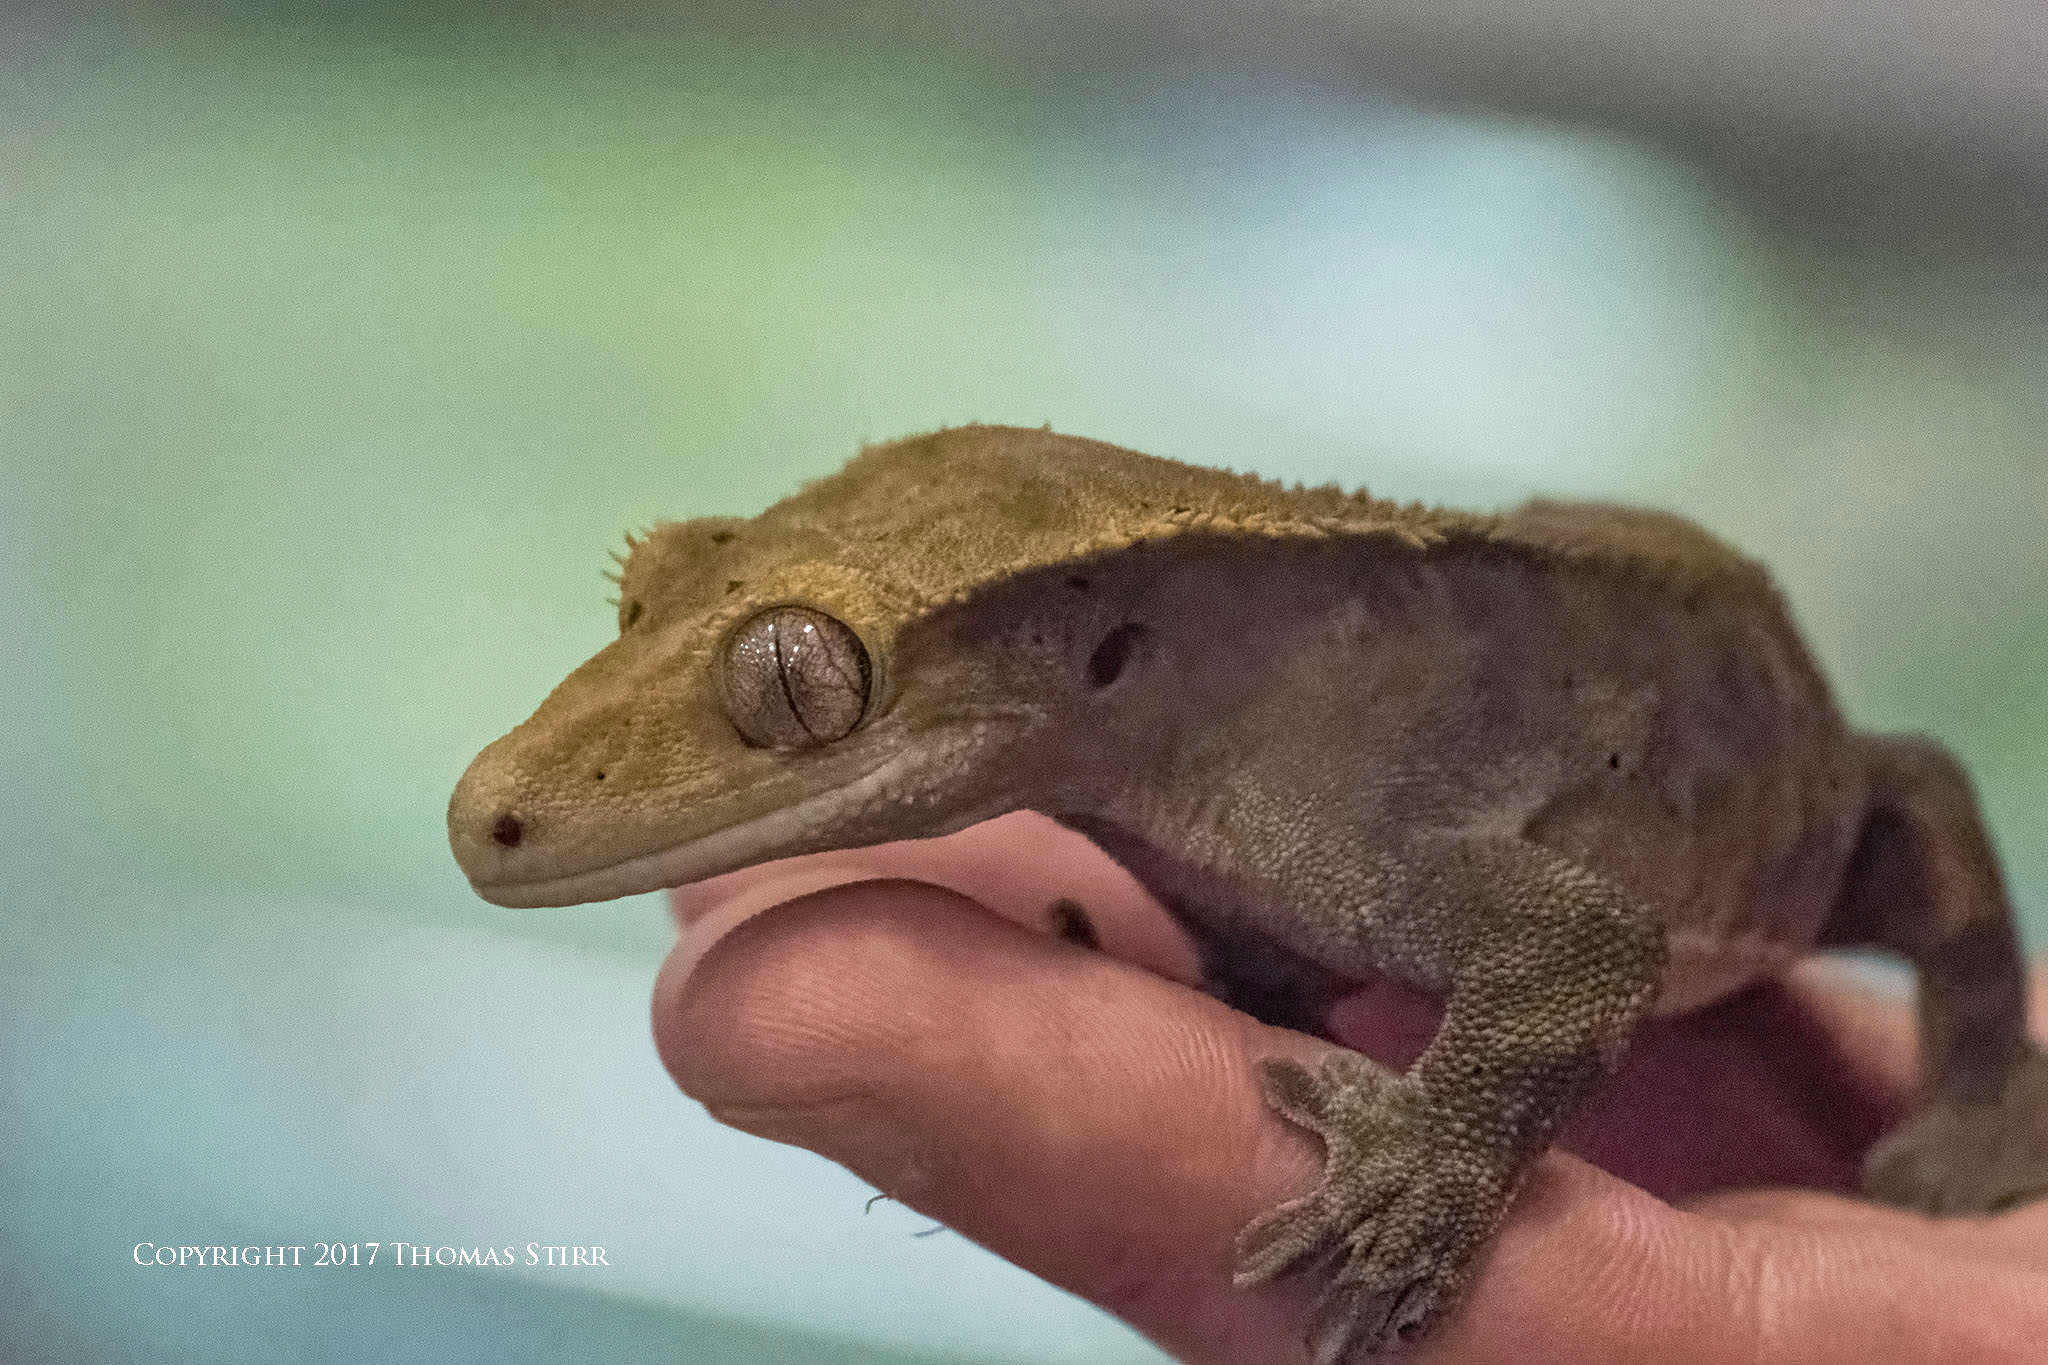
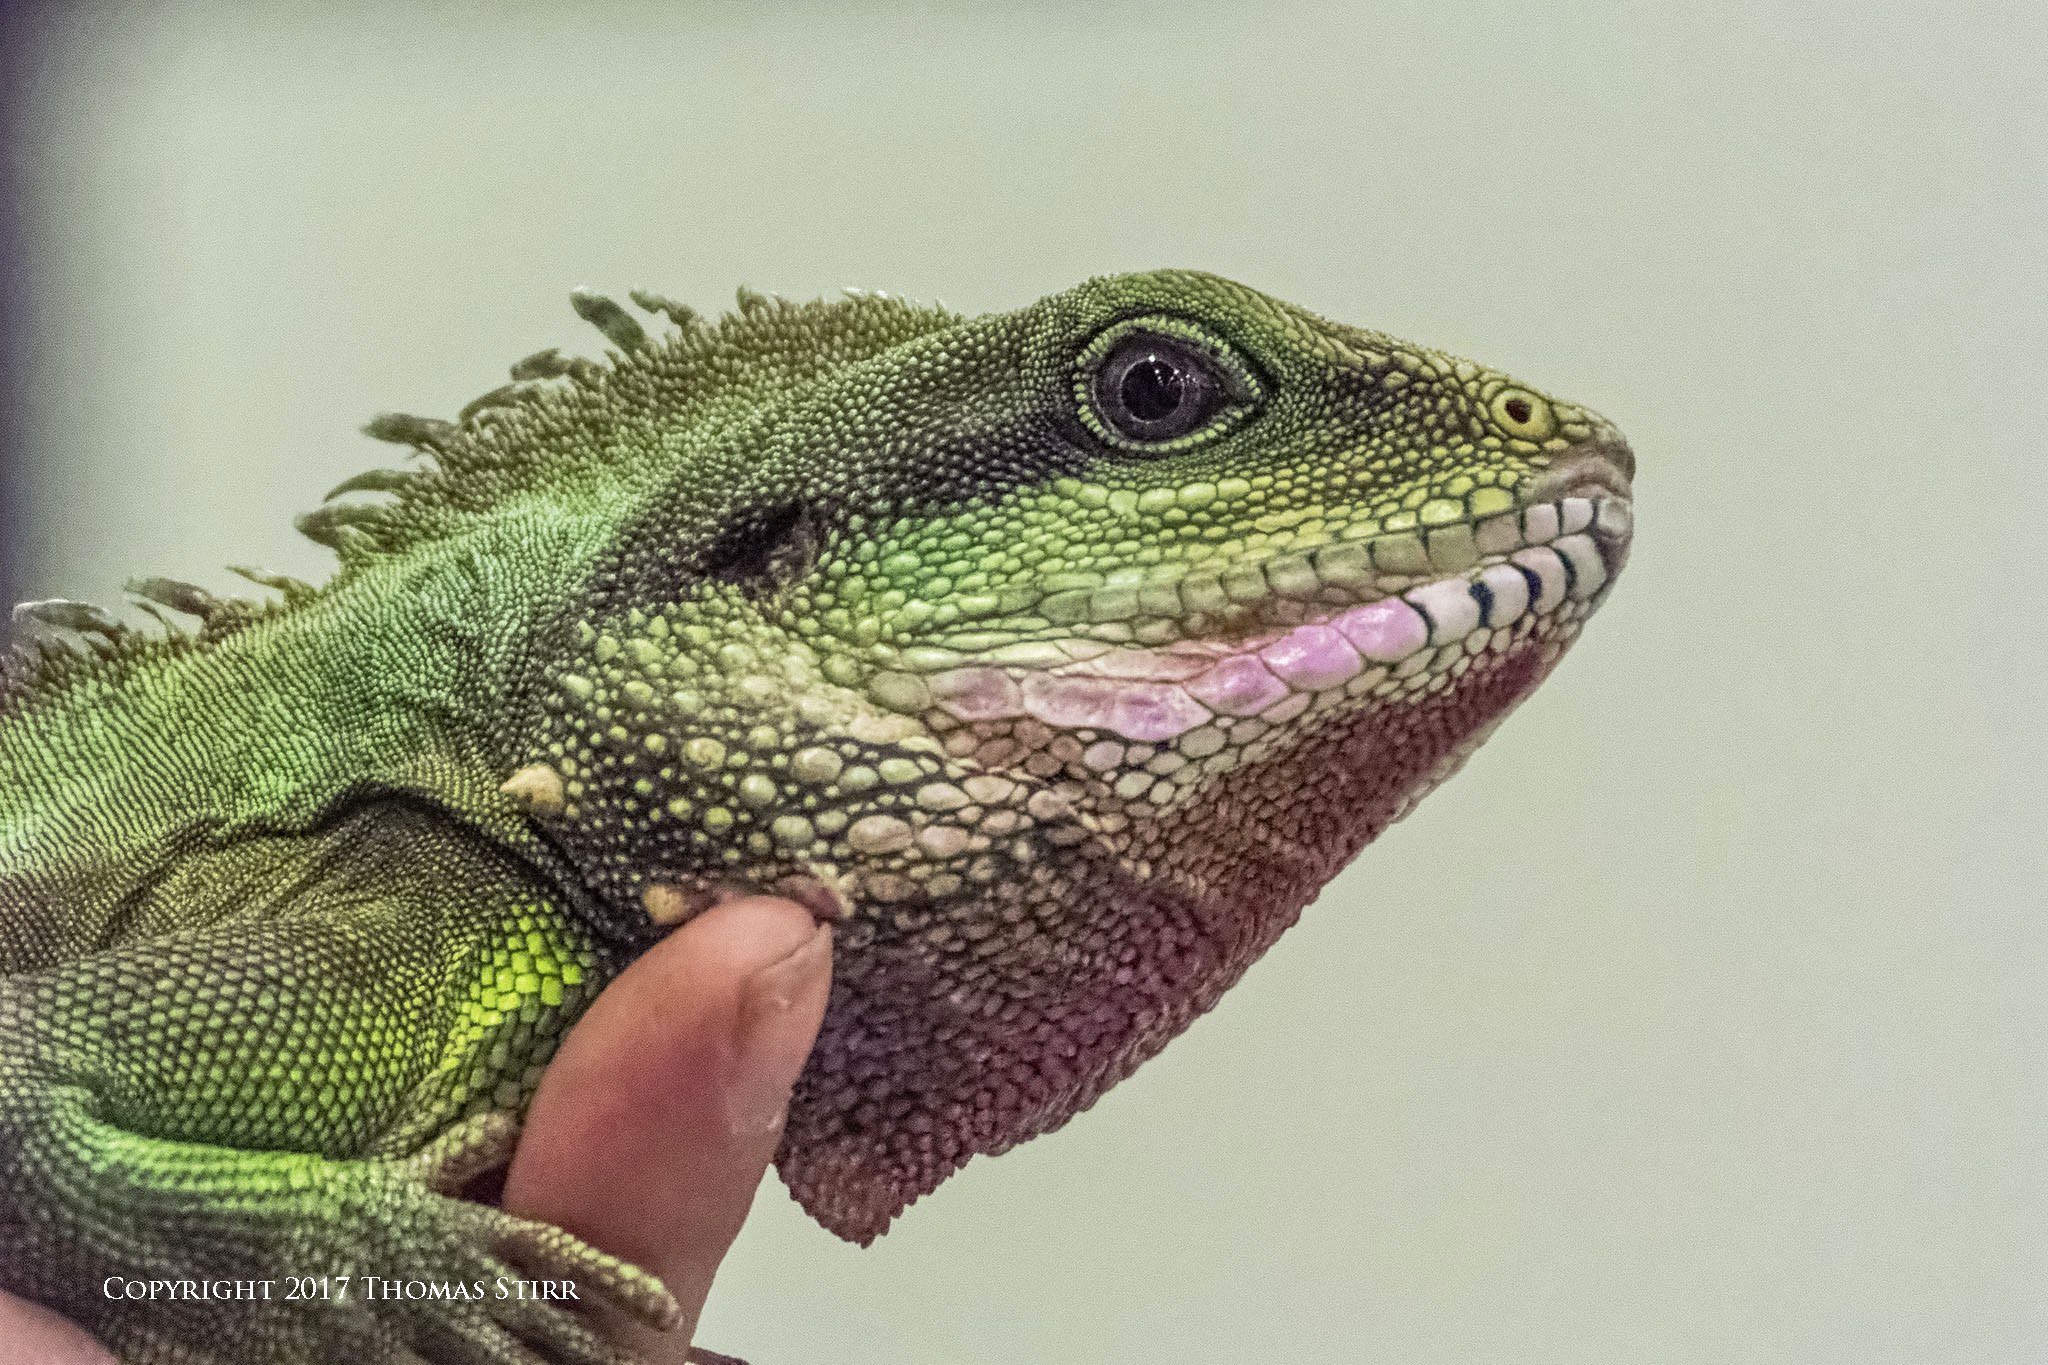
Your choice of subject matter can have an impact on the relative success of your high ISO images. As you view the small selection of photographs in this article you will likely find that the reptile images look a bit ‘sharper’ and on an overall basis appear to have more details in them than do the bird images.

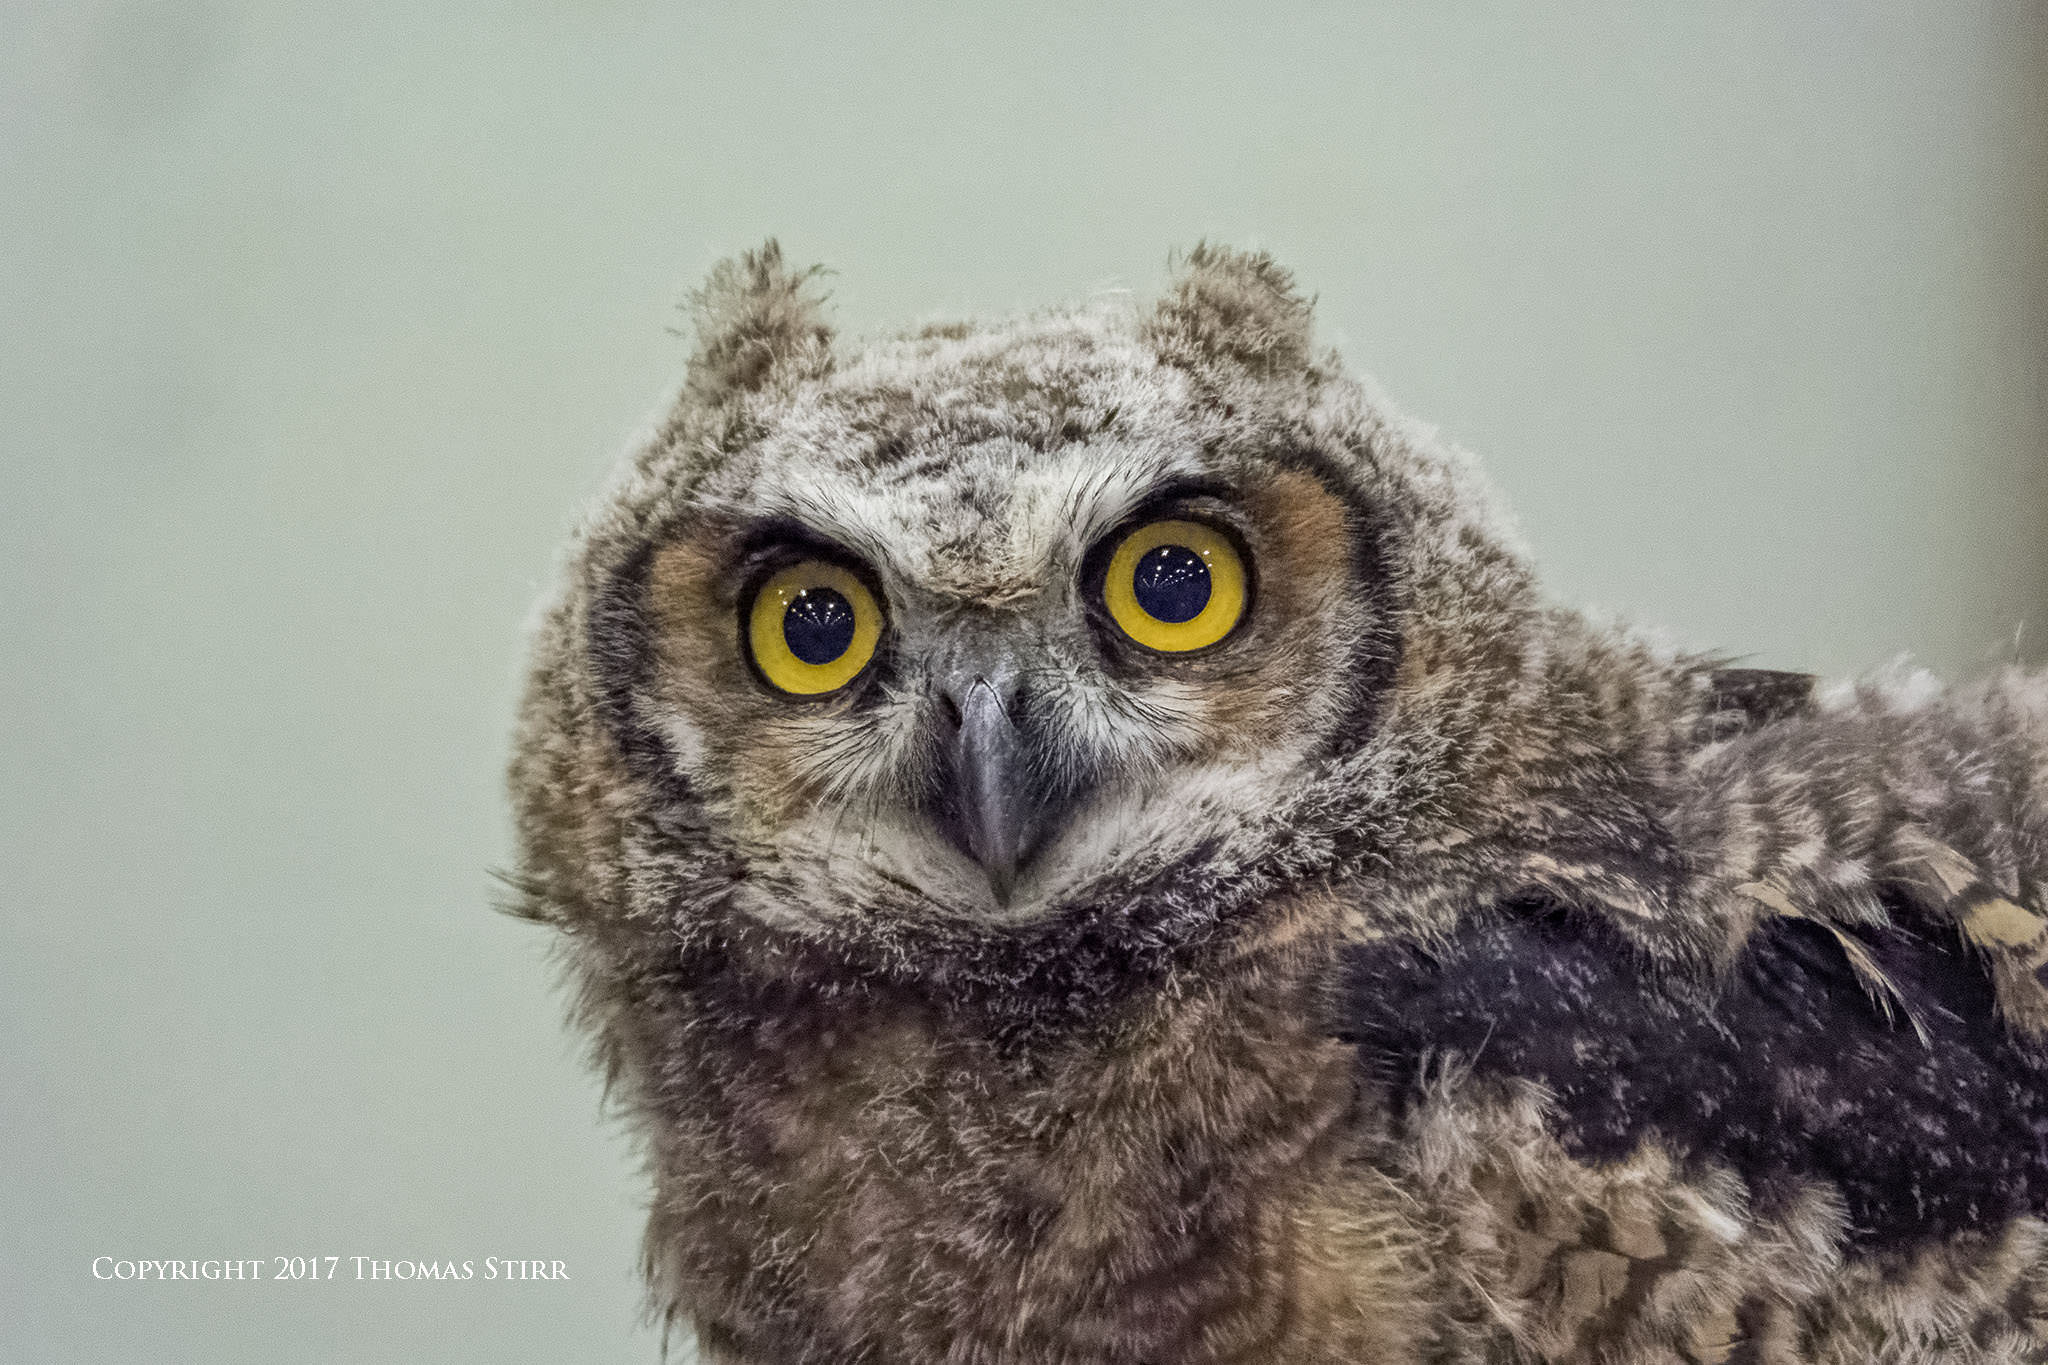
This is because bird feathers typically have far more fine details than do the scales on the skin of a reptile. Since the scales tend to be sharply defined they typically respond better to noise reduction and adjustments that affect edge acuity in post processing than do feathers.
If you find that lighting conditions are dictating that you shoot your small sensor camera at a higher ISO do your best to get in tight with your subject so you can avoid doing any cropping of your photographs in post. Whenever possible use your photos 100% as captured as I did in this article.

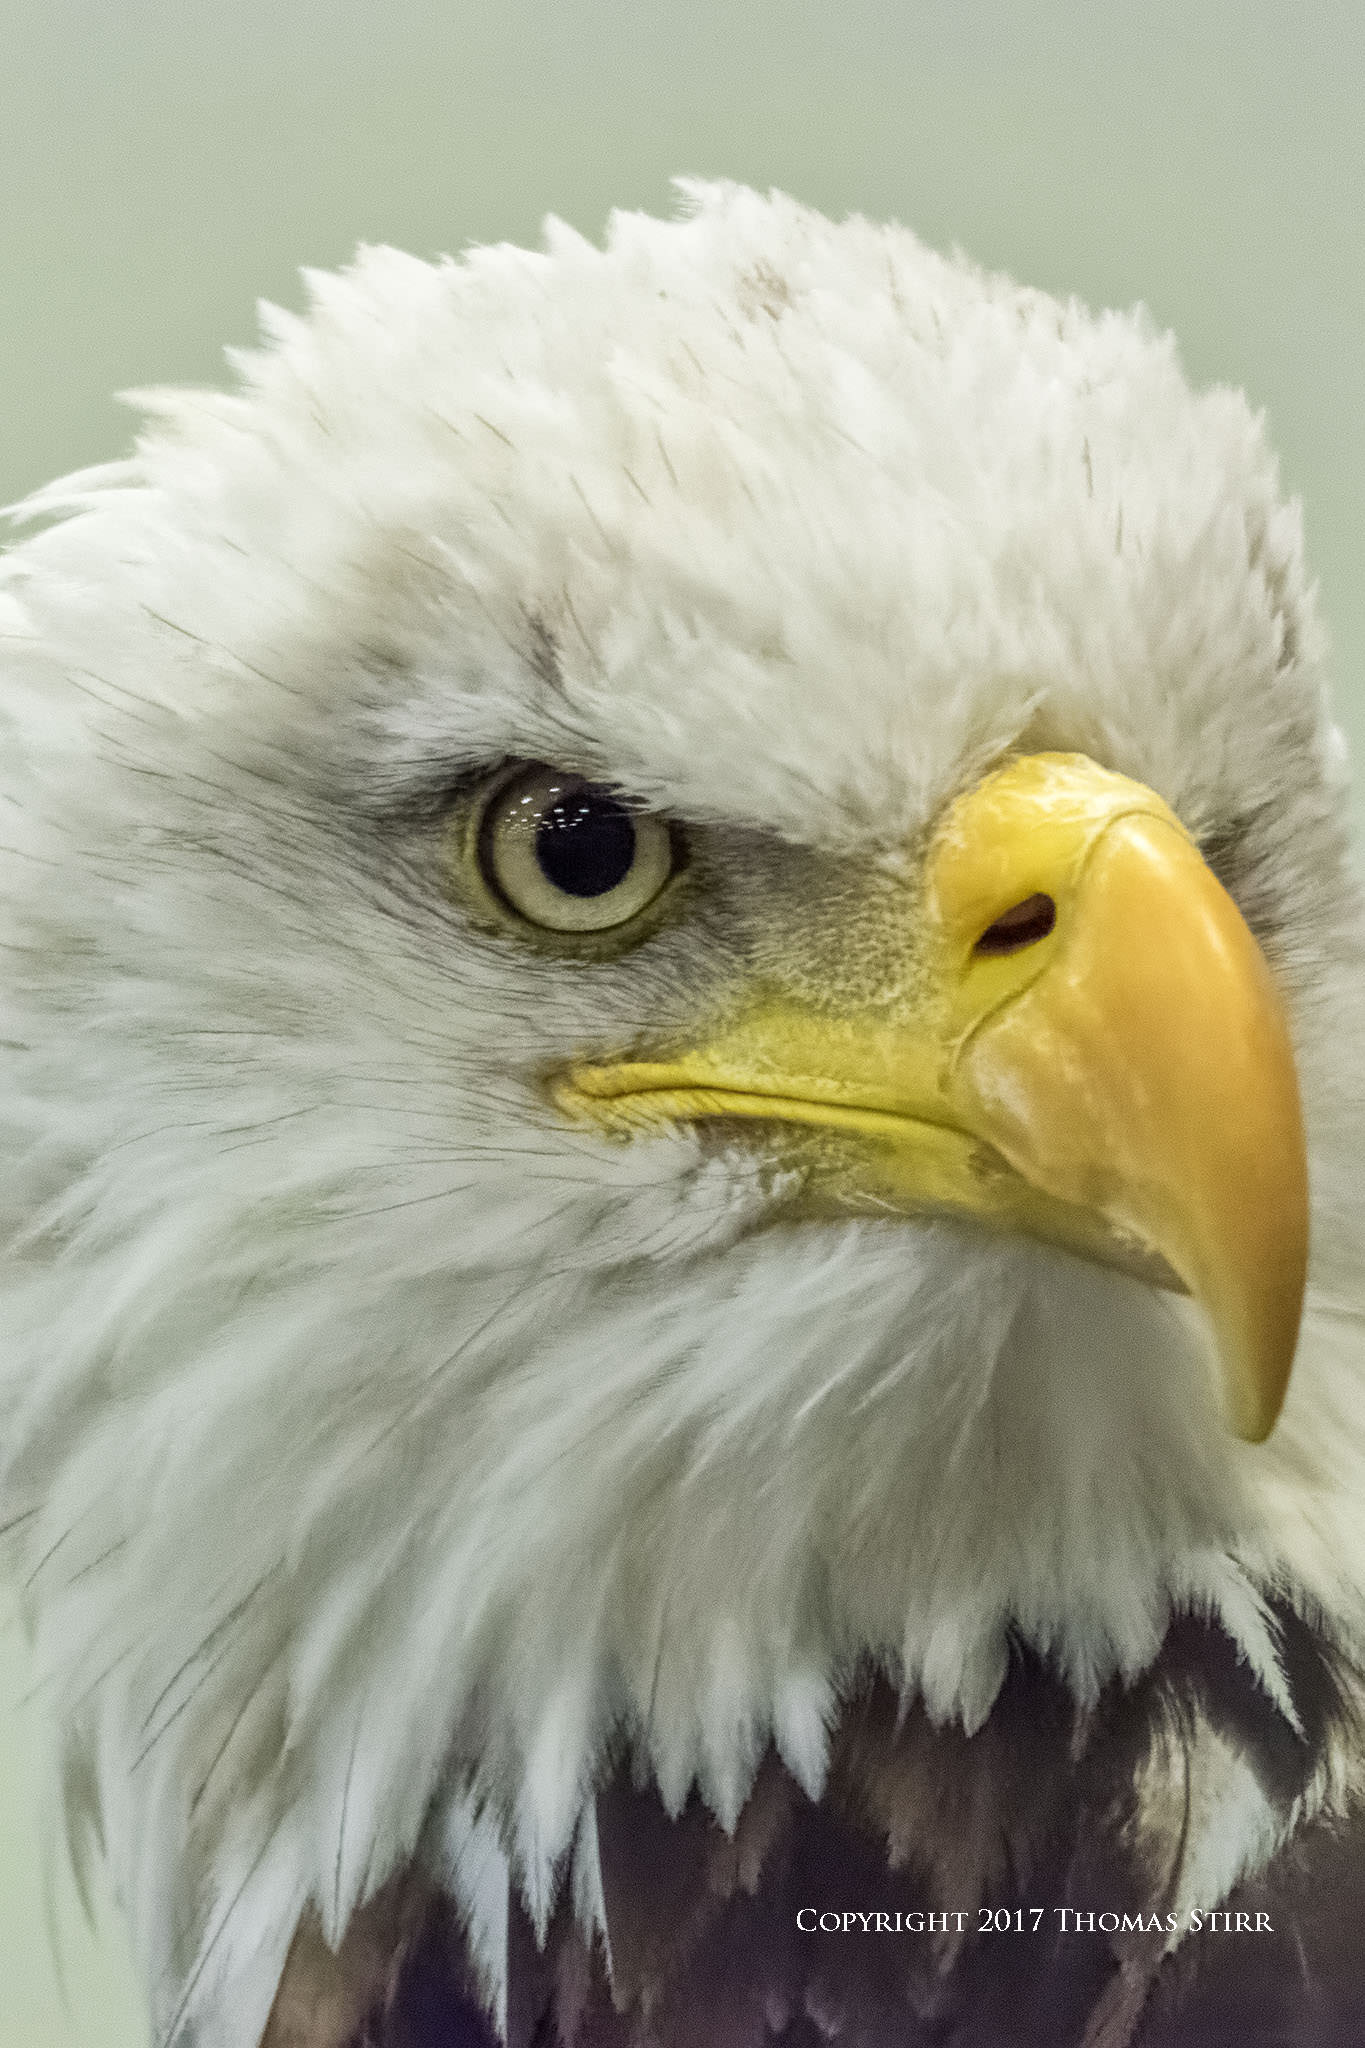
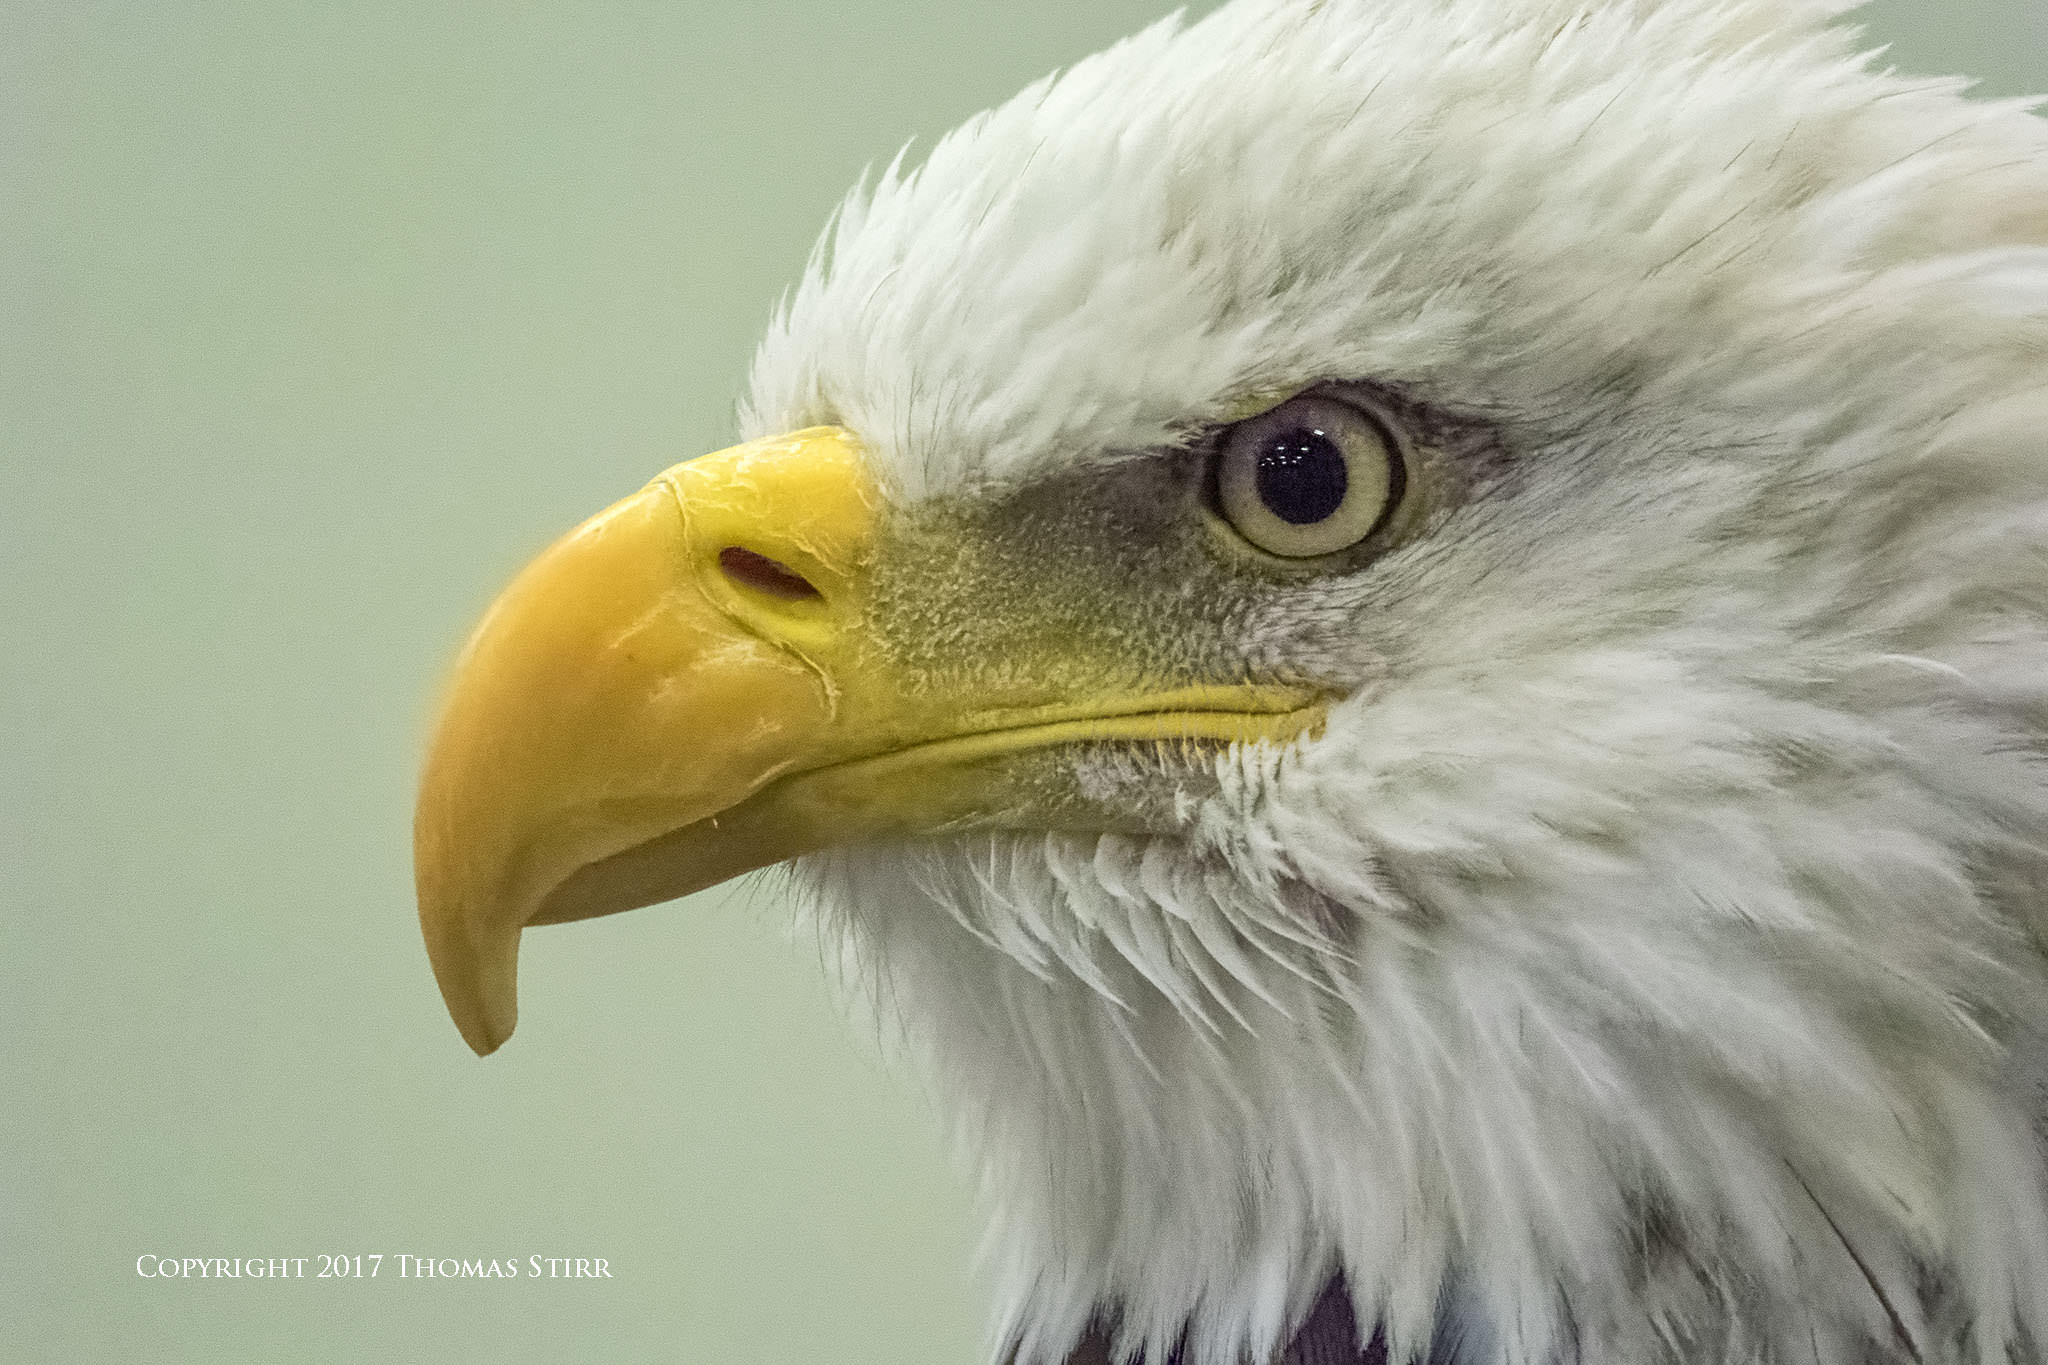
Compose your image with the intent of directing the viewer’s eye to a key point in the frame. For example, you’ll notice in the parrot image above and in the two Bald Eagle images below, the eyes and beaks of the birds grab your attention quickly and tend to hold your gaze. It may have taken a couple of seconds for you to notice how much of the feather detail on the birds’ necks has been lost. The backgrounds in your high ISO images can be almost as important as the subjects themselves. As you can see with the selection of photographs in this article, purposely composing your images with lighter, pastel backgrounds when possible can help to lessen the visual impact of noise in your high ISO photos.
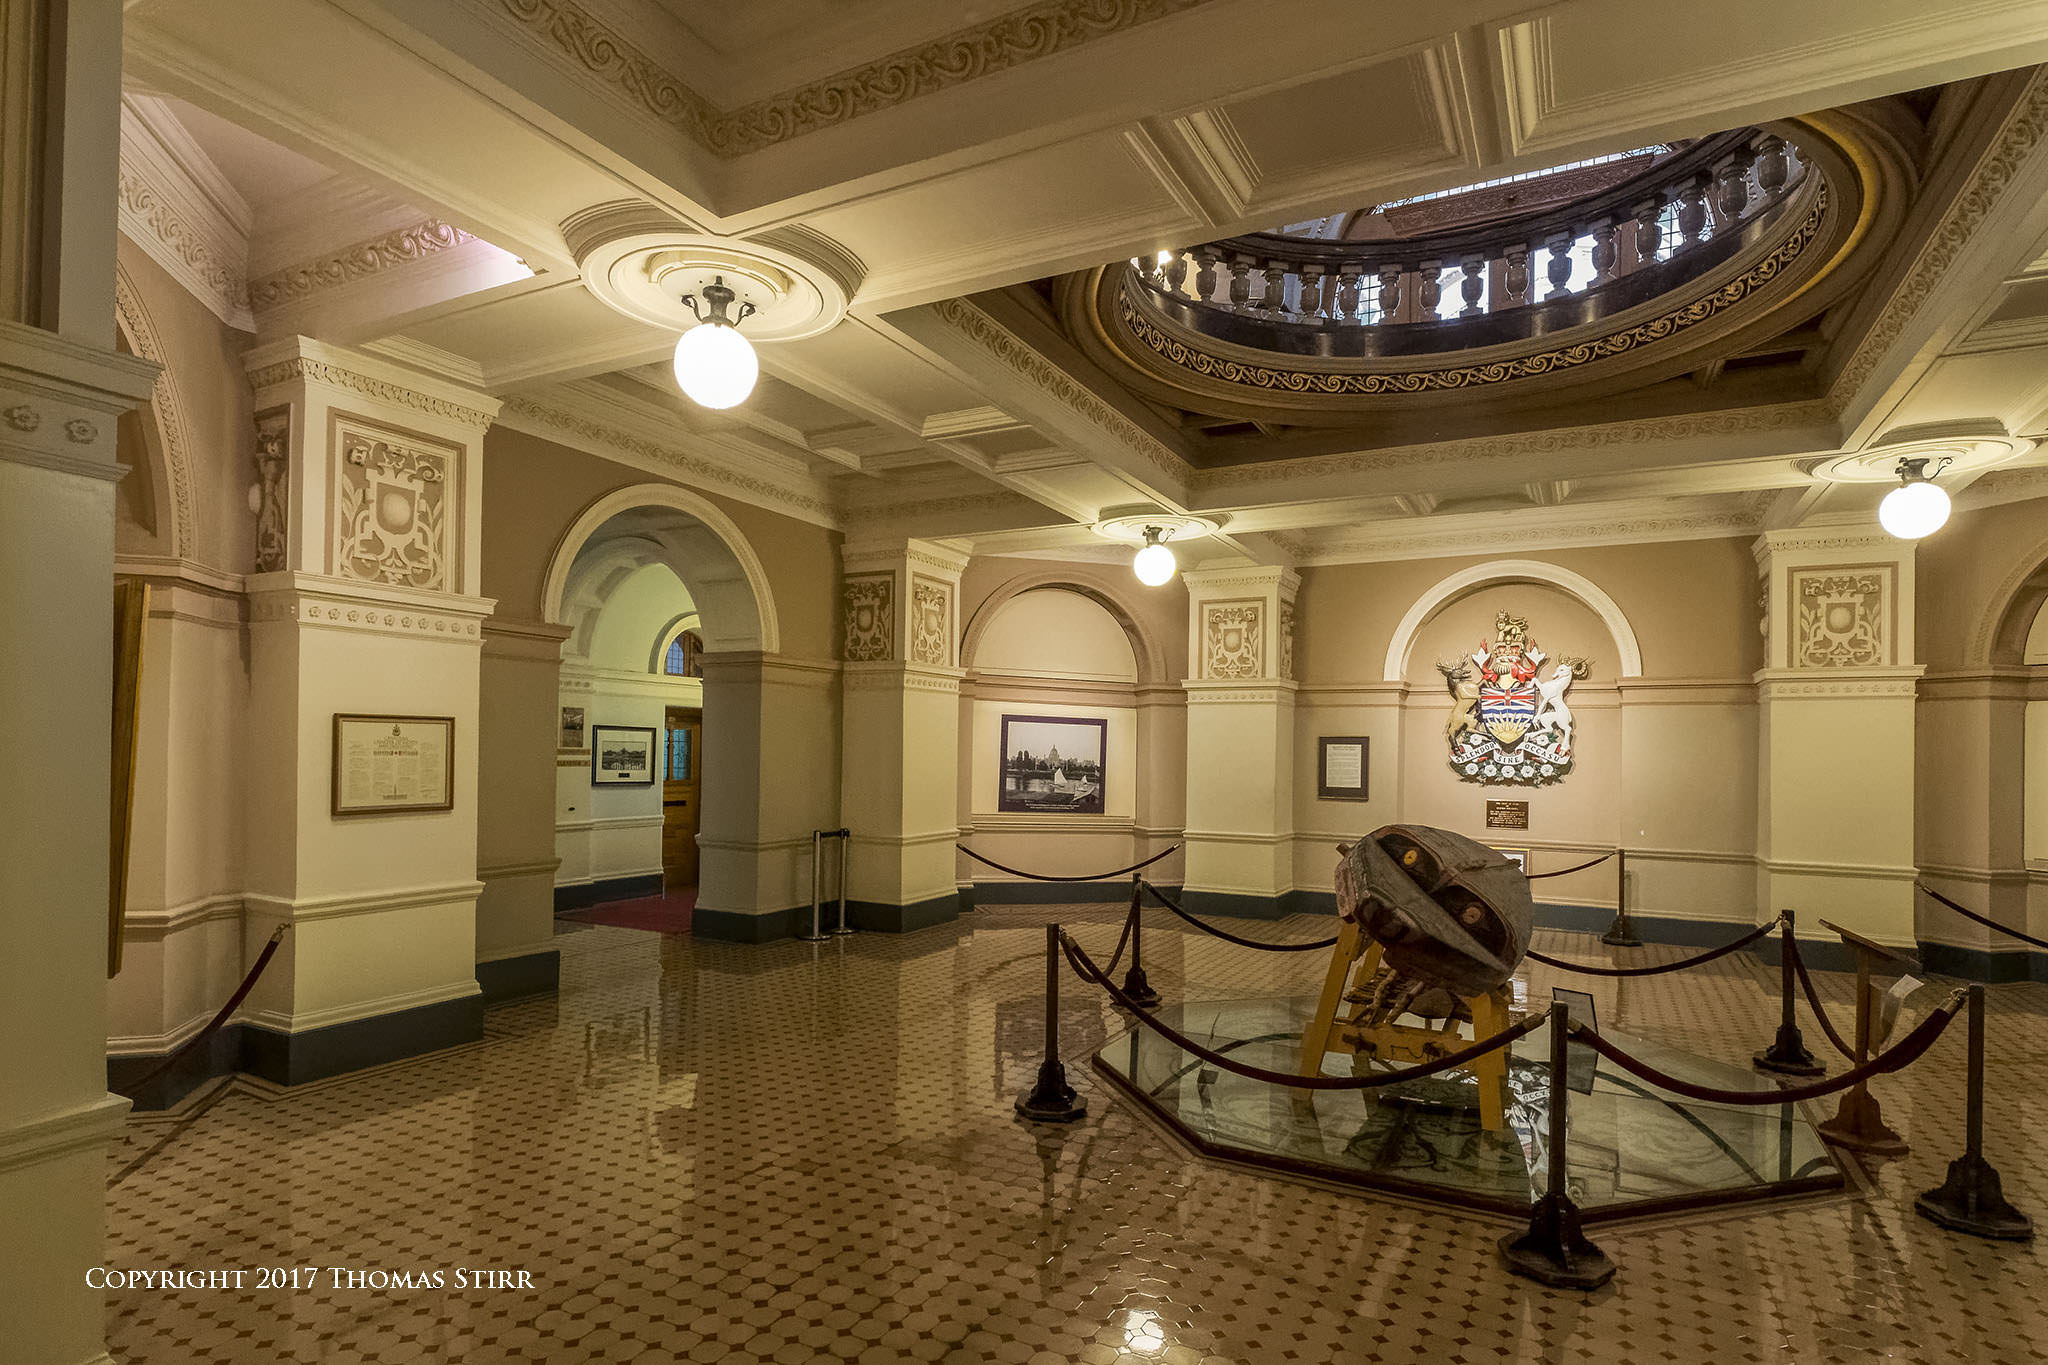
Generally speaking I will avoid photographing complex scenes with a lot of fine detail in them at high ISOs when shooting hand-held. When faced with this kind of challenge I will choose to shoot hand-held at quite slow shutter speeds, and use a lower ISO to try to maintain image quality. The image below captured at the British Columbia Legislature building is an example of using a slower hand-held shutter speed combined with a lower ISO.
Single subjects that allow me to fill much of my image frame usually are the best candidates for using high ISOs. From a pragmatic perspective we sometimes are faced with a very simple choice – capture an image at a high ISO – or not at all. Under this type of situation I’ll capture the image, then see what I can do with it in post. Sometimes it ends up being acceptable, sometimes not.
Shooting in RAW and learning how to use the noise reduction function in your photographic software will be important factors in your success when shooting at high ISOs with a small sensor camera. It is also important to become very familiar with sharpening, clarity, contrast, micro-contrast, structure and various other adjustments in your software programs. In my experience using a ‘heavy hand’ when processing high ISO images is usually not very successful. Making a series of smaller, incremental adjustments usually yields better overall results.
No doubt you’ve run across people on the internet that will state adamantly and unequivocally that you can’t shoot a smaller 1″ sensor camera at settings over ISO-400 or at best ISO-800 because of “horrendous amounts of image noise”. While noise can certainly be an issue when working with jpeg images, shooting in RAW will give you much more latitude in post. Whether you are successful shooting at high ISOs with a smaller 1″ sensor camera will depend in large part on how you plan to use your image. As long as you use your photographs at modest sizes you may be surprised at how well your smaller 1″ sensor camera can perform at high ISO settings when shot in RAW. As I mentioned earlier in this article, I never hesitate at all to shoot my Nikon 1 gear up to ISO-3200 when needed, even when doing still image work for my industrial clients. That’s two or three stops faster than is cited by naysayers that lurk on the internet.
There is no single ‘right way’ to process high ISO photographs. The specific software that a photographer uses to process their high ISO images is a personal choice. It really doesn’t matter what software you use or the adjustments you make – as long as you can achieve the results you envision.
Your personal shooting style will have a direct impact on how often you face high ISO situations. Regularly using a tripod will allow you to use lower ISOs than someone who prefers to shoot hand-held most of the time.
A camera with a 1″ sensor will never perform up to the level of a larger sensor camera in terms of image quality. Shooting your 1″ sensor camera at ISO-12800 is the worst possible thing you can do in terms of potential image quality. You’ll lose a significant amount of dynamic range and colour depth from an already challenged sensor. If you keep your image use to a smaller size, compose your images to minimize noise impact, shoot in RAW, and do some work in post, it still may be possible to get a useable image when shooting at ISO-12800.
Note to Readers:
In response to requests from readers to see the original unprocessed RAW files that correspond to the images used in this article, I have published a supporting article on my photography blog: ISO-12800 Comparison. This article shows each ISO-12800 unprocessed RAW file followed by the jpeg used in this article, and in the same order as the photographs in this Photography Life article.
Technical Note:
All images in this article were captured hand-held with Nikon 1 gear as detailed in the EXIF data. All images are presented as 100% captures without any cropping. All photographs were produced from RAW files using my standard process of DxO OpticsPro 11, CS6, and the Nik Collection.
Article and all images are Copyright 2017 Thomas Stirr. All rights reserved. No use, adaptation or reproduction of any kind including electronic and digital is allowed without written consent. Photography Life is the only approved user of this article. If you see it reproduced anywhere else it is an unauthorized and illegal use. Readers who call out offending websites that steal intellectual property by posting comments on those offending websites are always appreciated!
This was really helpful. Thanks for this tips, cheers from Destination Wedding Photographer.
I’m glad you found the article helpful.
Tom
Hi Fred,
Nice work!
fotograf botez
Outstanding.
Much thanks for the unprocessed images. The noise is about on par with what I expect from Nikon in current generation cameras. Was starting to think I made a mistake in the FF sensor choice :D
In my opinion, this really shows how well your software package of choice works when it comes to post-processing as well as your mastery of it.
I’ve kicked around the idea of adding additional systems vs what I use now ( Lightroom CC ), and your examples above only provide me with more reason to give it some additional consideration.
Hi nehumanuscrede,
I’m glad the follow up article on my photography blog showing the unprocessed RAW photographs and comparing them to the images in this article was helpful for you! There’s no question that a larger sensor camera will always have a significant advantage over a smaller sensor camera when it comes to image quality, especially when shooting at higher ISOs. Every piece of camera gear comes with some sort of trade-off and the key for each of us is to select gear that best meets our needs, and also allows us the best opportunity to work around its trade-offs.
Tom
Given all of the interest shown in the comments for this article, as well as the many personal emails I received from readers, I prepared a quick article on my photography blog that shows all of the images in this article along with corresponding unprocessed RAW files. Interested readers can view this new ISO-12800 Comparison article here: tomstirrphotography.com/iso-1…comparison
Tom
A favor.
Would it be possible to see one of the images in Raw format before any post-processing has been applied ?
While I’m likely doing it wrong, I look at an ISO-6400 image taken on a Nikon D4s / 70-200mm f2.8 combo and the raw image is terribly noisy and I ask myself: ” How the hell is a 1″ sensor shooting such a clean image @ 12800 ?! ”
When comparing cameras and / or sensors, I try to compare the Raw image captures across various sensors vs a processed one so as to remove the post-processing software abilities from the equation.
In my opinion ( and it is only that ) only then can you see what the sensor is truly capable of and how much magic post-processing software is applying.
Hi Nehumanuscrede,
Based on some of the comments I will need to consider some kind of follow up or related article in the future.
Tom
Pictures are well taken. However, the small sensors just struggles when looking at details. No chance this can match output from let’s say D800…
Hi Mpe,
I agree 100% and stated that in the article.
Tom
Hi Thomas, yes, you can use such ISOs regularly. I do it all the time, with my Nikon J4, Sony RX1000 III, newly acquired Canon G9 X Mk II, M4/3 Panasonic GM5, and even with my Nikon D600 (ISO 25600). The keys, as you’ve noted, are in exposure settings and in judicious use of post processing.
How an image is lit has a lot of bearing on how the noise will look. These images here are all well-lit images, and that goes a long way towards giving a decent image with high ISO. Images shot in dark environments will not look as good, no matter how much you tweak them in post, although there will still be improvement to the point of usability.
The out of focus backgrounds here show DxO’s Prime noise reduction’s weak point, and that is the mottling of relatively planar areas. Not too bad in the lighter backgrounds, but more so in the darker ones. That is why I went back to Lightroom for my NR, it keeps areas like that smooth.
The most important thing for people to take away with all this is to never hesitate to push your ISO to the max, because it will allow you to get an image you otherwise would miss, and possibly missing a critical moment, either in your own life, or in the history of man! Push, and push hard! :-)
Hi Spy Black,
Thanks for your comment and adding to the discussion! Always appreciated!
I will need to revisit my approach with some of the darker background images to see if I can do a better job in post – there’s always something new to learn!
Tom
Thanks Mihai!
Tom
Is there any way to use noise reduction post in any of the Nikon imaging products?
Hi Fred,
Could you clarify your question for me? My old, porous brain is having a ‘senior moment’
Tom
Once again Thomas you have shown we amateurs how to improve our results. Whilst I am using an old Canon Eos 400 with the same 70 to 300mm
is lens as mentioned above, noticed your results using high ISO, so tried ISO 800, and DXO 11Pro. the raw processing Prime noise reduction gave
me surprising results. Keep camera on Iso 800 and adjust f stop according to light. Keep up the good works, and thanks,
P.S. will be 78 next birthday, Interest in Photography, Music, and Computers, is helping to keep Alzheimer’s at bay.
Thanks for the supportive comment Old Coot! I’m glad you are getting good results with the PRIME noise reduction in OpticsPro 11.
Tom