Rather than taking a deeper look at an image, those of us who are just getting into photography might get carried away with thoughts of major post-processing. If given enough consideration, most photos do not need major editing or hardly need any editing at all. Before venturing into piling on every single editing trick you’ve learned on the photo of your choice, I call you to consider these basic tips to make your workflow faster and hopefully easier.
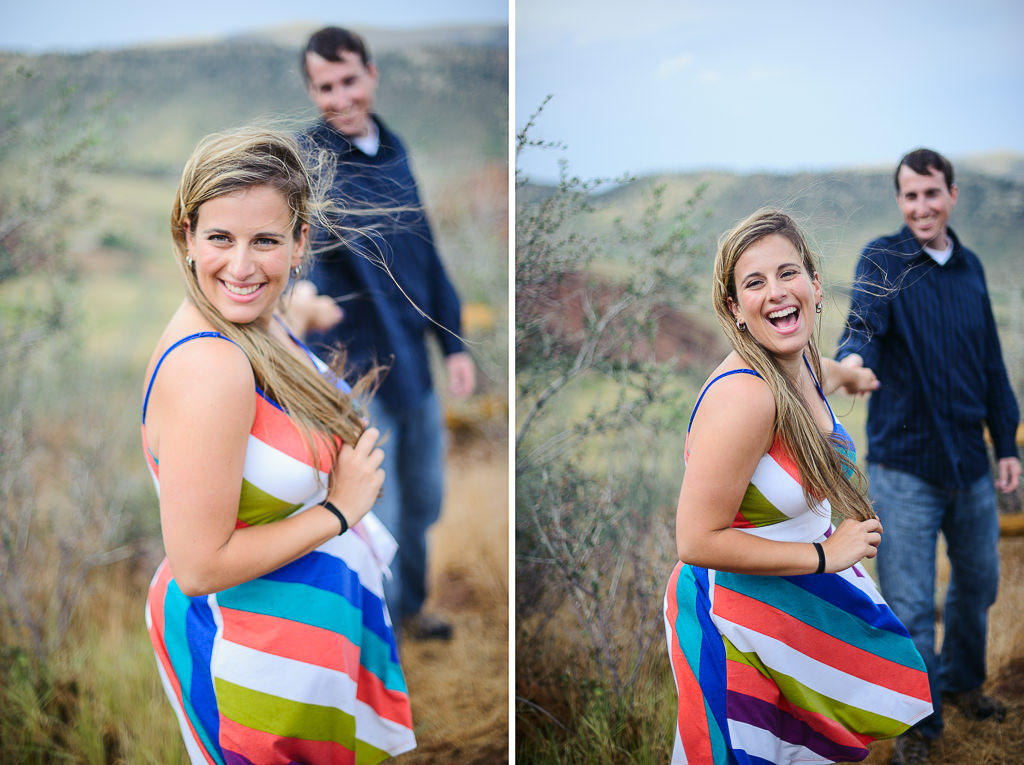
I remember when I first got into photography, Nasim would ask me to go through the photos I loaded into Lightroom and pick my favorites among them. When my favorites were chosen and editing ideas brewed in my mind, he would stop me right there and then, suggesting that I take another closer look at the images before I edit them so drastically. If you can imagine me throwing a fist like a little baby and pretending that I know exactly what I am doing, that’s how I would resist his suggestions. After a couple of “battles” with Nasim, I decided to give his suggestion a try. What he wanted from me was pretty simple – I was given a suggestion to un-clutter my mind, un-clutter my screen and take a look at the photos in full screen mode without any distractions. Ultimately, his suggestion lead me to look at photos with a different set of eyes and to give them a chance to speak to me. In turn, this helped me analyze what’s best for every photo and allowed me to use simple tools and techniques to simplify my image editing process.
Clean up your work area
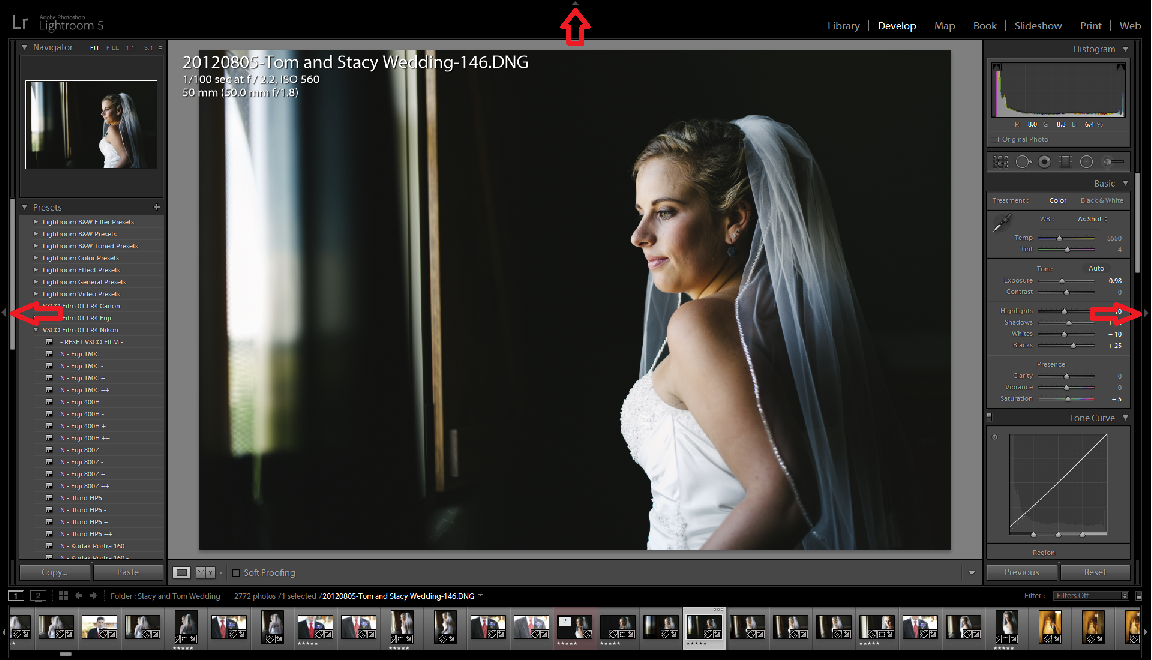
Depending on the editing software you are using, try to concentrate on the image itself by removing all the distractions from your screen. In Lightroom or Photoshop you can do this by using shortcuts or by utilizing the Menu bar. Since we have a dual monitor setup, creating a clutter-free environment in Lightroom is pretty easy by assigning one screen for editing and the other one for viewing. By pressing the F11 key, I know that I can render a full view of a photo of my choice on the viewing screen. If you work with a single monitor, remove all the distractions from the screen by hiding all the side menus. In Photoshop this can be achieved by simply choosing “Full Screen Mode” from the Menu Bar.

Clean up your mind
I always thought of editing as something that needs to be done with a sober mind and mostly with a well-rested brain. Editing volumes is not an easy task, especially for those of us who photograph weddings. While batch editing might be an option occasionally, I still end up going through every single image several times. As hard it might sound, you can make it a breeze by choosing the right time to edit. Early mornings could be best for some, while late nights could work wonders for others. Whatever it is, choose the time when you are the most productive.

The next step to clean up your mind would be to simplify your vocabulary while identifying problem spots of any given photo. Instead of concentrating on terms like curves, saturation, gradient, etc, pick up something more subtle and simple like: lighter, darker, added color, etc. Analyze the photo and try to understand what it needs minimally to look its best. Sometimes a small boost of contrast is all it takes to make a photo look great, without piling layers and layers of filters. Let the image speak to you, so that you understand the story behind what you shot. Highlight the areas needed in your mind and choose the appropriate editing tools to achieve your final result.
Make it less destructive
If you choose to shoot JPEG instead of RAW (see RAW vs JPEG) like some of the wedding photographers do, keep in mind that you might potentially overwrite the original file with your changes, especially when editing in Photoshop. That’s because Photoshop is a destructive editor, meaning it writes changes to the opened file when you save it. Lightroom, on the other hand, is a non-destructive tool that will never modify the original image, no matter how much you edit it. I would suggest to always make sure to keep the original, unedited files, in case you choose to go back and re-edit them. Some photographers edit their images, export them and delete the original files to save some space. Since storage is cheap, there is really no need to do that! With each new version of Lightroom, Photoshop and other third party editing tools, there are new and better ways to edit images. Lightroom 2 had no built-in lens profiles to correct distortion and other aberrations, and now the latest version of Lightroom comes with hundreds of different lens profiles. This means that you can go back to your old images and make them look even better with just a few clicks.
This is very expensive hobby, i think consideration should be given on to go for reduced cost for real buyers.
Completely agree with your comments. In my work flow, as amateur, lot of times think that you need to do something complex with some specific photo, when the reality is that you only need to do a couple of corrections to boost that photo.
Congratulations for this article.
Unfortunately lightroom still does not give you the ability to have all editing tools on one monitor without an image and then the image being edited on a second monitor devoid of all clutter.
Surely if Nikon / Nik software can achieve that simple task with Nikon Capture NX2 then a$obe with their vast resources should be able to implement it.
That is the ONE reason I still not use lightroom.
Hi Lola:
I love your article. I suggest you , always you show a picture, indicate what the aperture, speed are and what kind of flash (inner or external) was used, if is the case. This can be very helpful to understand the decisions made by the professional photographers.
Wow,amazing pics…I like your pretty blog.
Maybe follow each other on bloglovin?
Let me know follow you then back.
Lovely greets Sebnem.
sebnemorhun.blogspot.com
1. I completely agree. Your/Nasim’s suggestions – simply stated as “clear your mind” – underscore the truth behind gems like: keep it simple; less is more; improve your photography first and your post processing last; a really good photographer/photo won’t need the sophisticated software that cost an arm and a leg; etc.
2. However, I remain humbled by the great photographers of the past and their work who didn’t have the option to resort to the magic and speed available in Lightroom and Photoshop and the best digital equipment available today. I still hold them in awe because all the “new and great, complicated and expensive stuff” tell me that they had a better understanding of photography and art (a) that I will ever have and (b) that lessor mortals like us can now appreciate better and even emulate precisely because we have resort to the hardware and software they never had.
3. Your acknowledgment of Nasim speaks volumes about his own greatness as a photographer and artist and your own integrity as a human being. The world is a better place because of both of you. Thank you for this article…which is more beautiful than you think. God bless you both.
Great perspective!
Wonderful thought process to follow. Thank you. I just downloaded the free trial of LightRoom 5 yesterday to test it out, and these tips will help me all the more now. (Although I’m a little overwhelmed with LightRoom – any suggestions for the best way to learn it from the start? A book? I find the Adobe video’s do not cover it when I am looking to start from the basic beginning and move upward.)
Cheers!
adobe/tv.com has all the tutorials you can ask for on LR5
Cheers! Thank you!
Sorry Lola..I of course meant editing JPG’s in PSE 11..
Lola..when editing in Photoshop (PSE 11) and save as a copy, are you saying your still are being destructive to the original image?
Thanks