In this article, I will show you an example of how I process portraits (before and after) and what my portrait editing workflow is like. Many of our readers ask how I post-process my images for my wedding blog and I decided to put together a quick example. Obviously, every image is different, so while some photos take very little of my time in Lightroom, others might take a while to process in Lightroom and Photoshop. This image in particular is from our recent “Bridesmaids Photoshoot”, a collaborative effort by many talented individuals in Colorado.
For any portrait work, it is best to shoot RAW. First, because the skin tone is very important and any white balance issues can be quickly taken care of in post-processing and second, because you can recover a lot of details from a RAW file. For me it all starts in Adobe Photoshop Lightroom. If I cannot get something done in Lightroom, I import images to Photoshop for further processing. Both Lightroom and Photoshop are very powerful applications – you can get a lot done without using any plugins or other third party software. Do not be afraid to experiment with either Lightroom or Photoshop, as it will only help you broaden your knowledge and build up your post-processing skills.
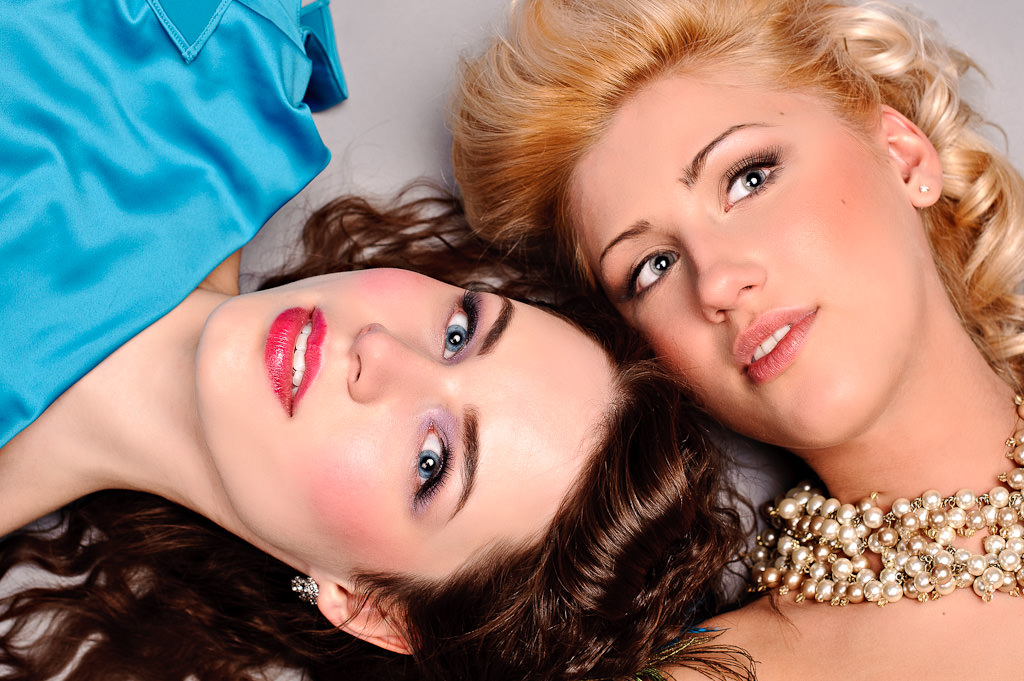
The close ups usually require a lot of work, due to the abundance of details and features. But the amount of time you put in all depends on the type of look you are trying to achieve. Here is the original image SOOC (straight out of the camera):
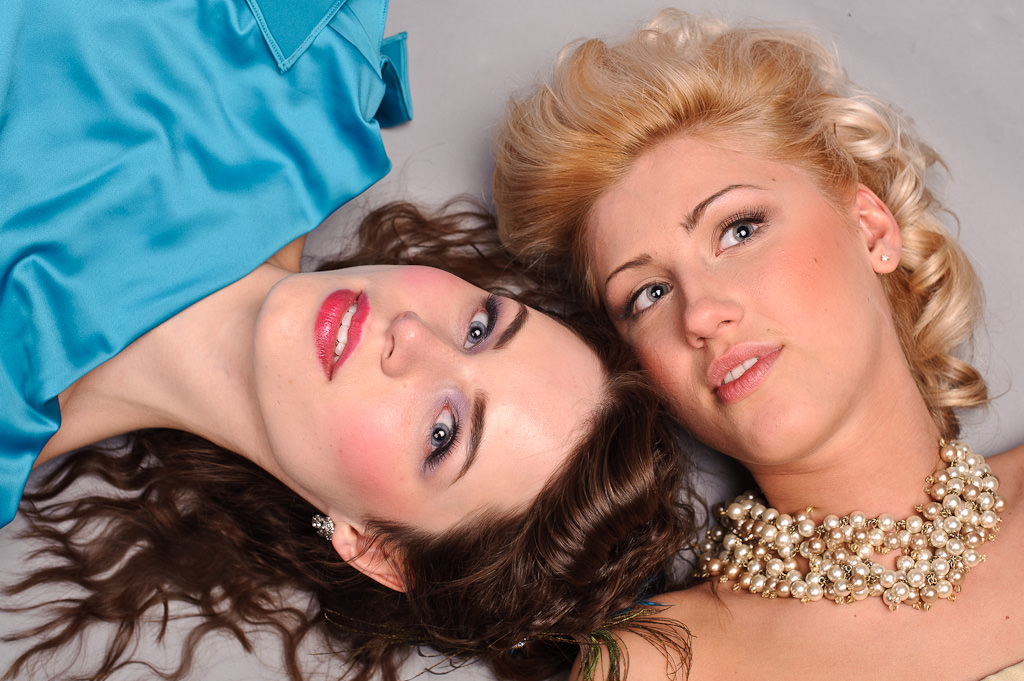
Camera Equipment: Nikon D700, Nikon 50mm f/1.4G
Studio Lighting Equipment: Elinchrom Ranger RX with 53″ Elinchrom Octa and 39″ Elinchrom Softbox.
Camera Settings: Manual Mode, 1/160, f/7.1, ISO 200, RAW, Auto WB
Very simple steps in Lightroom going down from the right menu bar in the Development Module:
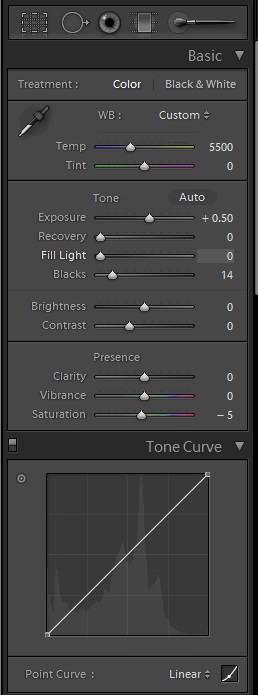
- Set White Balance to: Daylight
- Increased Exposure: +0.50
- Increased Blacks: +14
- Decreased Saturation: -5
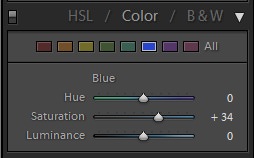
- In Color sub-module Boosted Blues: +34
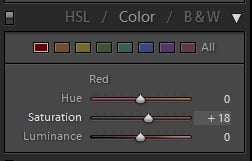
- Boosted Reds: +10, as shown below:
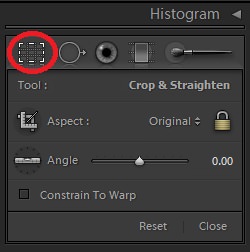
- To make the frame a little more pleasing to the eye, I slightly tilted and cropped the image as shown below:
- Next, I imported the image into Photoshop to take care of the blemishes. For this purpose I usually use the spot healing brush and/or the patch tool.
- Next, I took care of the darker spots under the eyes with the clone tool. I selected “Lighten” from the menu box and carefully fixed the dark spots.
- The next task was to brighten up the eyes a little.
- Sometimes you will need to even up the skin tone to give the portrait more of a glamorous look. Evening out the skin tone also smoothens pores and blemishes to some extent. There are many ways to do this and a few presets you can use. Or, you can do it manually by utilizing the masking tool along with Highpass and Gaussian blur filters, as explained in my how to smoothen skin and get rid of blemishes article. Also, Nik Software has a plugin called “Dfine”, which not only does a great job at reducing noise, but also for evening out the skin tones.
- For this particular image I also used the Liquify Filter to give my model’s neck a little more curve.
- After that I boosted the contrast a little via Image->Adjustments->Brightness/Contrast.
- Lightly sharpened the image with Smart Sharpen under Filter->Sharpen->Smart Sharpen.
- Saved and closed the image to go back to Lightroom.
- Exported the image with default settings and set “Sharpen for: Screen” and “Amount: Standard” in Lightroom Export window.
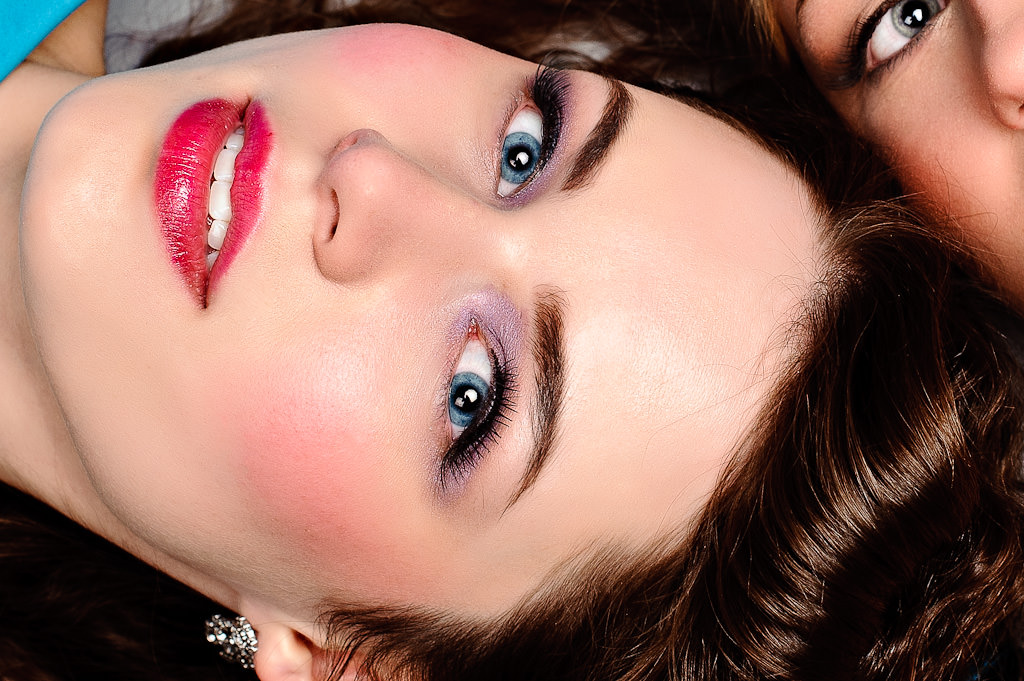
And here is the final result:
Click the “Next” button on the image to see the before look. You can toggle between the first and last images by pressing the Left and Right arrow buttons on your keyboard as well, once the large version of the image is opened.
Please let me know if you have any questions!
P.S. Here is a crop of the above image to better examine the effects of the post-processing. As you can see, skin texture and pores are preserved. You can always back it off and apply the process lightly to your liking.
Hi Lola, I just came across this tutorial (in 2019). Good work!
One little thing I would like to share, it’s just the chin on model on the right, I would have preferred if it would be the same as the model in the blue dress. I will check newer articles now :D
Thanks
Hi Nasim,
I am new to photography and trying to find out everything about it, how to shoot, how to edit etc.,
Can you please provide some guidance on the approach?
I am reading through all your blogs but wanted to see if there is a systematic approach you propose. Also, do you provide any workshops?
Thanks,
Kurinji
Lola & Nasim,
You have a great site! Thought both of you (and others) might be interested in this post on dpreview as it relates to your article on portrait editing. It takes courage to post “how to” articles in this day and age where everyone is an expert. Keep up the good work!
www.dpreview.com/artic…retouching
;- )
Jim
hello
can u tell me how to open raw files with adobe lightroom
when i try to open it they say its not able to read the file
whats my mistake??
Haseeb, try to update Adobe Camera RAW + Lightroom to the latest versions. If Lightroom still doesn’t read the RAW file, then your camera is not supported yet.
I read your blogs frequently and really appreciate the input you have for beginners and professionals! I have some workflow questions regarding RAW image processing and file management for my wedding clients. Please email me regarding these questions. I wasn’t sure where else to post this on your site.
1. What RAW image quality is best considering file size and manageability (Nikon D700)? I noticed that RAW Fine creates a NEF file as well as a JPEG file. Is the JPEG necessary for all the NEFs if I’m editing the NEFs and resaving as JPEGs anyway?
2. Should I ever save changes made to a NEF file? Or should the edit always be saved as a JPEG (so I always have the backup unedited NEF)?
3. What is the most efficient way to mass convert all NEFs to JPEGs for the client’s final product (assuming edits had been saved as NEF rather than as JPEG)?
4. What is the significance of the XMP file? Do I need to retain this file?
5. Can image editing tweaks in Camera Raw be set to an action? Or is that counterproductive as each individual image usually requires separate specific tweaking (doesn’t this lengthen the editing process)?
6. What size (GB) CF memory card is recommended for shooting weddings in RAW (if I don’t want to change out my card during a shoot)?
Thanks so much for your input!
Amanda, sorry for a late response.
1) Shoot RAW. While importing images into Lightroom, choose to convert images to DNG. DNG is a common format from Adobe that is supported by many applications. It only creates one file and all changes within Lightroom are written to this file, so it saves you both space and number of files. If you see JPEG images, then you are probably importing both NEF and JPEG (check your camera settings and see if you have RAW+JPEG enabled) from your memory cards. Or perhaps you are exporting from Lightroom in JPEG format and placing the files in the same folder. If you are, then change your export settings and extract to a different folder on your PC.
2) Whether you modify NEF or DNG, this format is non-destructive. This means that you can work on your NEF files in Lightroom or Photoshop and never worry about losing anything or destroying existing images.
3) You export all your images out of Lightroom in JPEG format.
4) XMP file retains changes you have made in Lightroom/Photoshop. If you delete the file, all of your settings are lost for that image
5) I am assuming you are talking about importing many images into Camera RAW in Photoshop. If that’s your process, then I recommend using Lightroom instead. There is a way to automate the process through scripts and other ways, but it is not efficient.
6) As for the size of a CF card, I would get something like SanDisk Extreme 16GB, which is a cheap way to get to 16GB, plenty of memory. There is an SD version of the same memory as well.
Sincerely,
Nasim
Hi MarkL. Let me guess. You are the webmaster of christyschuler.com site and try to get some more traffic to her site. It is not the best way to do so… I wonder if she knows what you are doing :)
Tomasz, let me pay you back with a guess: you’re a webmaster who uses similar tactics. Just kidding.
You’re wrong, I’m not affiliated with her nor does she need any publicity or traffic — she’s a well-known retoucher. Overdoing eyes and skin is the most common problem and a couple of free tutorials that are found on her site will most definitely benefit everyone.
:) he he, ok It is because I really think that it is a great edit so this was my guess – I am sorry. I like very much the bright pastel colors on Christy pictures and have no idea how she was able to achive it. I watched many tutorials and no one went so far to achive such effects. I think that it is a good chalenge for everyone. I believe that it needs more that moving couple of sliders in lightroom :)
Tomasz, working with layering masks has a great deal to do with pastel colored pictures. Soft shadows, less contrasty images are always a pleasant thing to look at. Hopefully, we will get to write about them in Mansurovs soon.
Thank you. I will check your advises. I think that a lot of people would be interested to see this kind of edit, so why not to do such post sometime in the future…
All you have to to do is, reduce the opacity of any certain effect to your liking. There is always at least three ways of utilizing photoshop to achieve a certain look. Whichever you choose, using it as you intended and according to your imagination should not be any problem.
Sorry, this is pretty average at best. Your end result are two lifeless dolls. Overly blurred skin with no texture and unnaturally brightened eyes (check christyschuler.com for some good tips on touching up the eyes) spoil the shot right from the get go.
I like the one on the left!
Dear Mark,
Thank you for a comment and a remark. Her work is absolutely beautiful, but she has a different style. While for many, my above image may not be the measurement of a natural beauty, everyone is welcome to pick out the method they like from the tutorial. However, I value your feedback and very much welcome a balanced criticism.
I agree.
P.S. I posted the wrong link (tutorials are here: www.christygutzeit.com/ and she shows some glamor retouching techniques there.
I agree.
P.S. I posted the link to her portfolio and not her retouching tutorials; sorry. Proper link with her glamor retouching techniques: www.christygutzeit.com/
Technically beautiful photo ( and so are the women), but the pose struck me as confusing and hard for me to maintain focus.
I guess I just didn’t like the composition. Too contrived. The “eyes” have it…focus on them.
Hi Peter, thank you for your comment. This is just an example of what I might do while post-processing a certain picture. This is just the sample image I picked to show the intended task. Next time I will lay out some images already edit and ask our readers if they are interested in seeing the post-process. I think that will be fair. What do you think?
Lola,
I’ll put in my request. I really like the skintones you achieved in this set of images:
arbuz.com/
I shoot with a Nikon D300, but have been frustrated when working with Lightroom 3 trying to get similar skintones. They either seem orange and dark in comparison, or if I try to push the exposure when I capture the image, the skintones look “hot” to me, with strange pinks showing up around the diffused highlights. I’ve such a hard time with this, and notice other shooters in my area are able to get nice skintones but use Canon 5D MkII. I’m wondering if there is some skintone issue with Nikon NEF format and Lightroom that the Canon shooters don’t have.
Since I know you guys shoot Nikon, could you share some details on the skin post-process you applied to this session?
Rob, I will ask Lola to write a tutorial for correcting skin colors.
Sounds great Nasim, I look forward to it!
Hi Lola, thank you for the great tutorial. I have a question about boosts for red and blue you made for this picture. I wonder if it is common practice in your work or you felt it is right for this particular picture. I also need to check Liquify Filter it gives really cool effect. Thank you for the answer in advance.
Tomasz, no, I very rarely ever touch that panel in Lightroom. I just felt that boosting the colors would look cool for this particular picture :)