Understanding how to make selections quickly, easily, and accurately is a fundamental Photoshop skill. Over the last few releases of Photoshop, however, Adobe has shaken up the selection paradigm. Some of the newer tools are claiming that one-click selections are now possible. What are the best selection tools in Photoshop, and how can you make effective selections? In this guide, I’ll work through the pros and cons of each selection tool, so you can choose the right one for every task and subject.
Table of Contents
Understanding Selections
Making an accurate selection is critical to so many tasks in Photoshop. There are endless examples, to the point that anyone who frequently works in Photoshop will need to make selections almost every day – from constraining brushstrokes to selectively applying a layer mask.
To that end, Photoshop features dozens of ways to make a selection, some with very small differences. Broadly, the methods fall into a few categories: manual, semi-automated, and automated.
Fully manual options, like the Lasso tool, are entirely within your control. They’re good for making quick, rough selections, or for selecting subjects with very clear geometric shapes. But some of the more automated choices are usually better for irregular subjects.
Next are semi-automated selection tools like the Magnetic Lasso tool, which has a similar interface as the Lasso tool but snaps to your subject as you make a selection. The semi-automated tools vary in how of a “helping hand” Photoshop offers, but all of them are a mix between your manual selection and Photoshop’s selection. Other examples of semi-automated selection tools include the Quick Selection tool and the Object Selection tool.
There are also fully automated selections like the Select Subject button. It’s a one-click procedure, and while you can subsequently refine it with other selection tools, the fundamental procedure is basically instant. Other automatic selections include sky selection tools and people selection tools in Camera Raw.
Every Tool has a Role
One of the most important things to take away from this article is that every selection tool has a purpose, and each tool can combine with others in interesting, synergistic ways. For example, you can start with a fully automatic selection, like the Select Subject button. Depending on the accuracy, you could then refine it by slicing out errant areas with the Lasso or Magnetic Lasso tools.
Having a comfortable working knowledge of the applicable areas for each tool can help you identify when to combine various functions. The following list isn’t going to cover every tool and variation in Photoshop, as there are too many for one guide. Instead, I’ll be taking a look at some of the most important ways to perform a wide variety of selection tasks.

Fast Selections
Select Subject
The ability to select a subject with one click sounds like the Photoshop user’s dream. In reality, this feature can get pretty close, at least for some types of photographers. If you shoot portraits, products, or other genres with a clearly defined subject, the Select Subject tool can do a remarkably good job of pulling them off the background, even dealing with tricky areas like hair automatically.
Because the tool is literally one click, there’s not much to say. If you’re trying to grab a subject, and they’re clearly recognizable in the frame, this tool is usually the quickest option, or at least a great starting point.
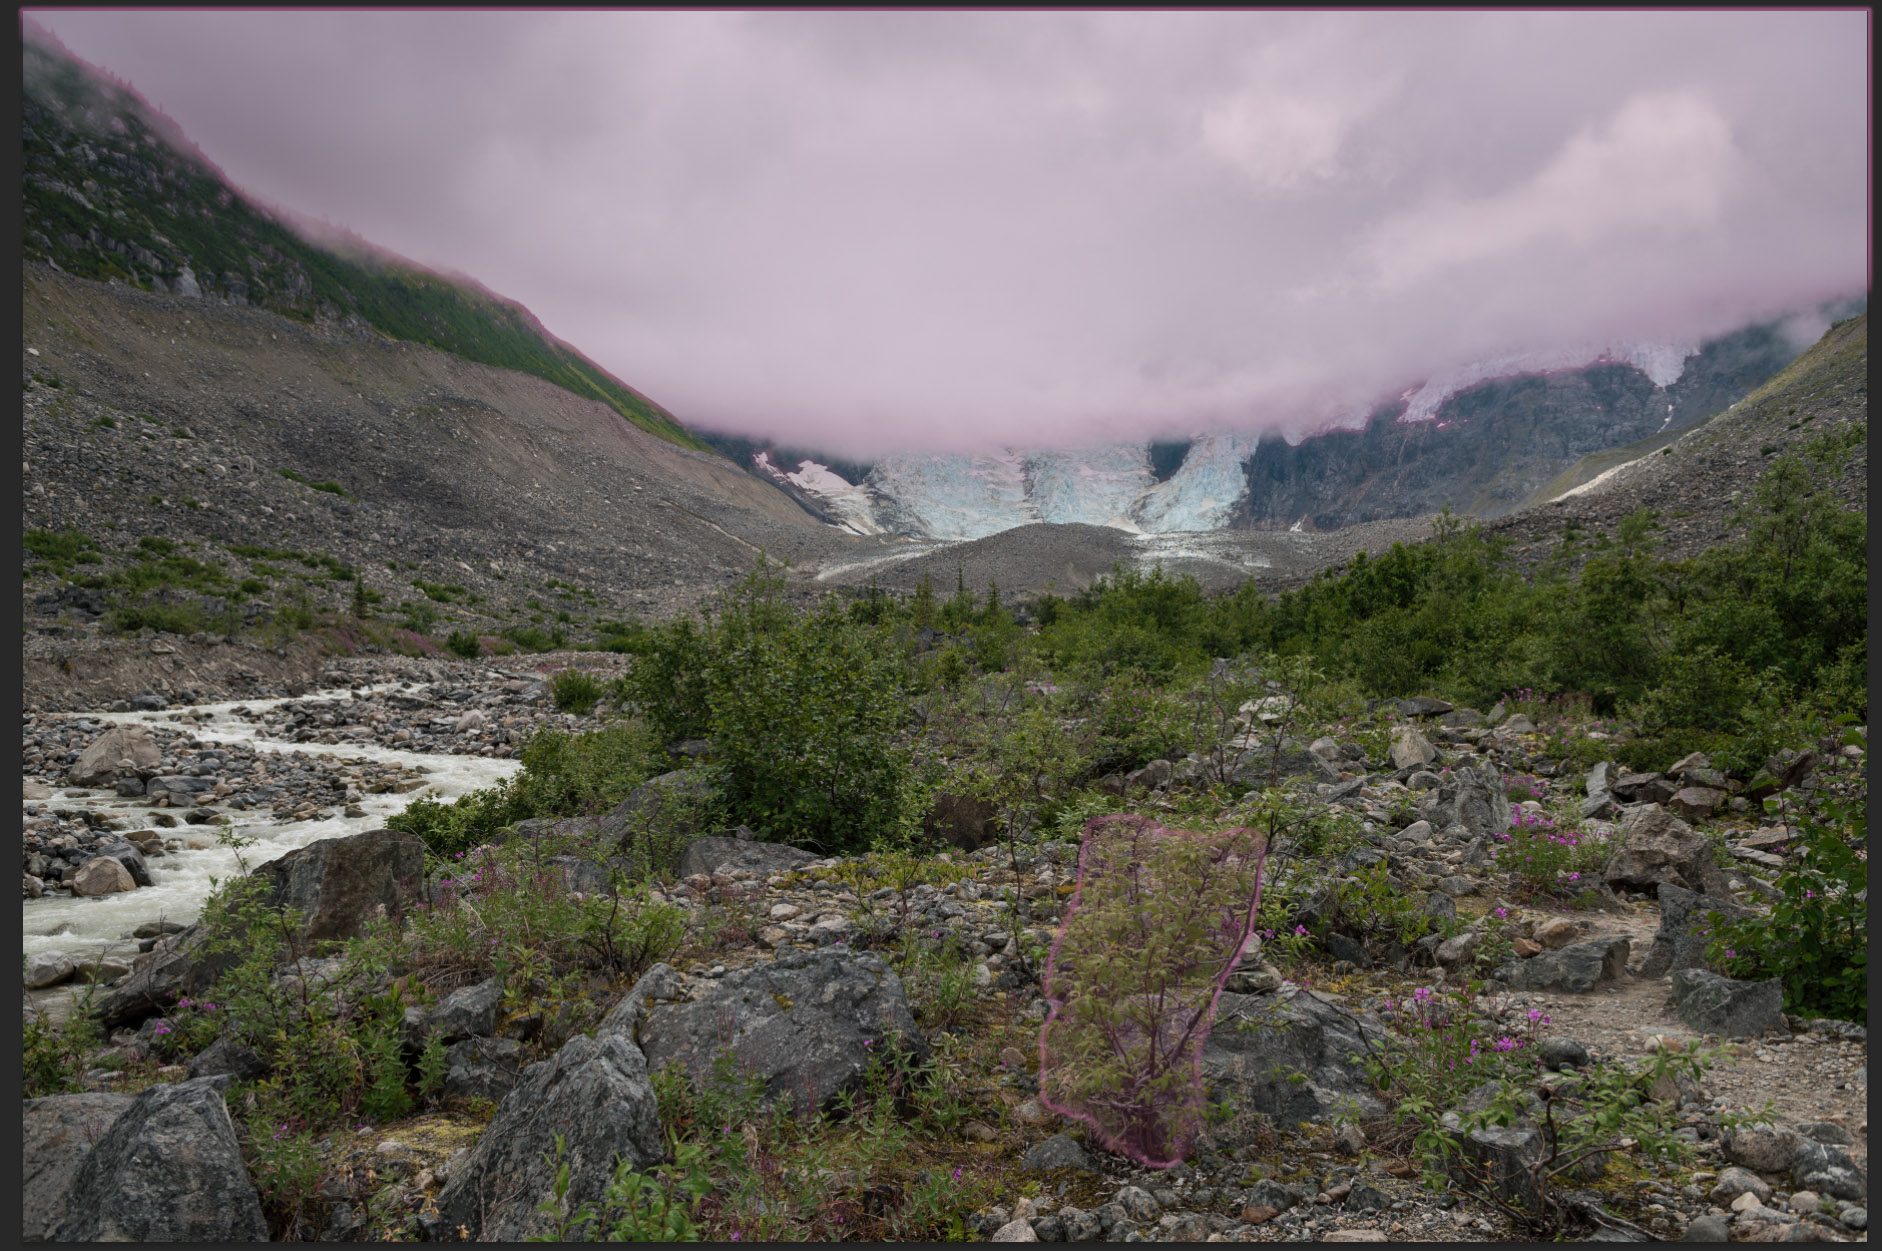
For subjects like landscapes, where the concept of a subject is a bit more nebulous, the tool is a much weaker choice. As you can see below, the tool had a very hard time picking out a subject (shown with purple lines).
Select Sky
For landscape photographers, Select Sky is a more useful brother to Select Subject. Accessible via the Select menu, Select Sky makes a quick and mostly accurate selection of the sky with just one click. This can serve as a great starting point for layer masks, targeted sky adjustments, or anything else like that.
Select Sky is my personal favorite tool for near-instant selections, thanks to the accuracy and ease of use. While you can occasionally need to tweak small missed areas, it’s a great way to grab the sky in complex scenes.

Object Selection Tool
The Object Selection tool is a version of Select Subject with a bit more control. In essence, Photoshop identifies various objects, and by default, denotes them with purple overlays. With the tool active, you can click these objects and quickly get an accurate selection.
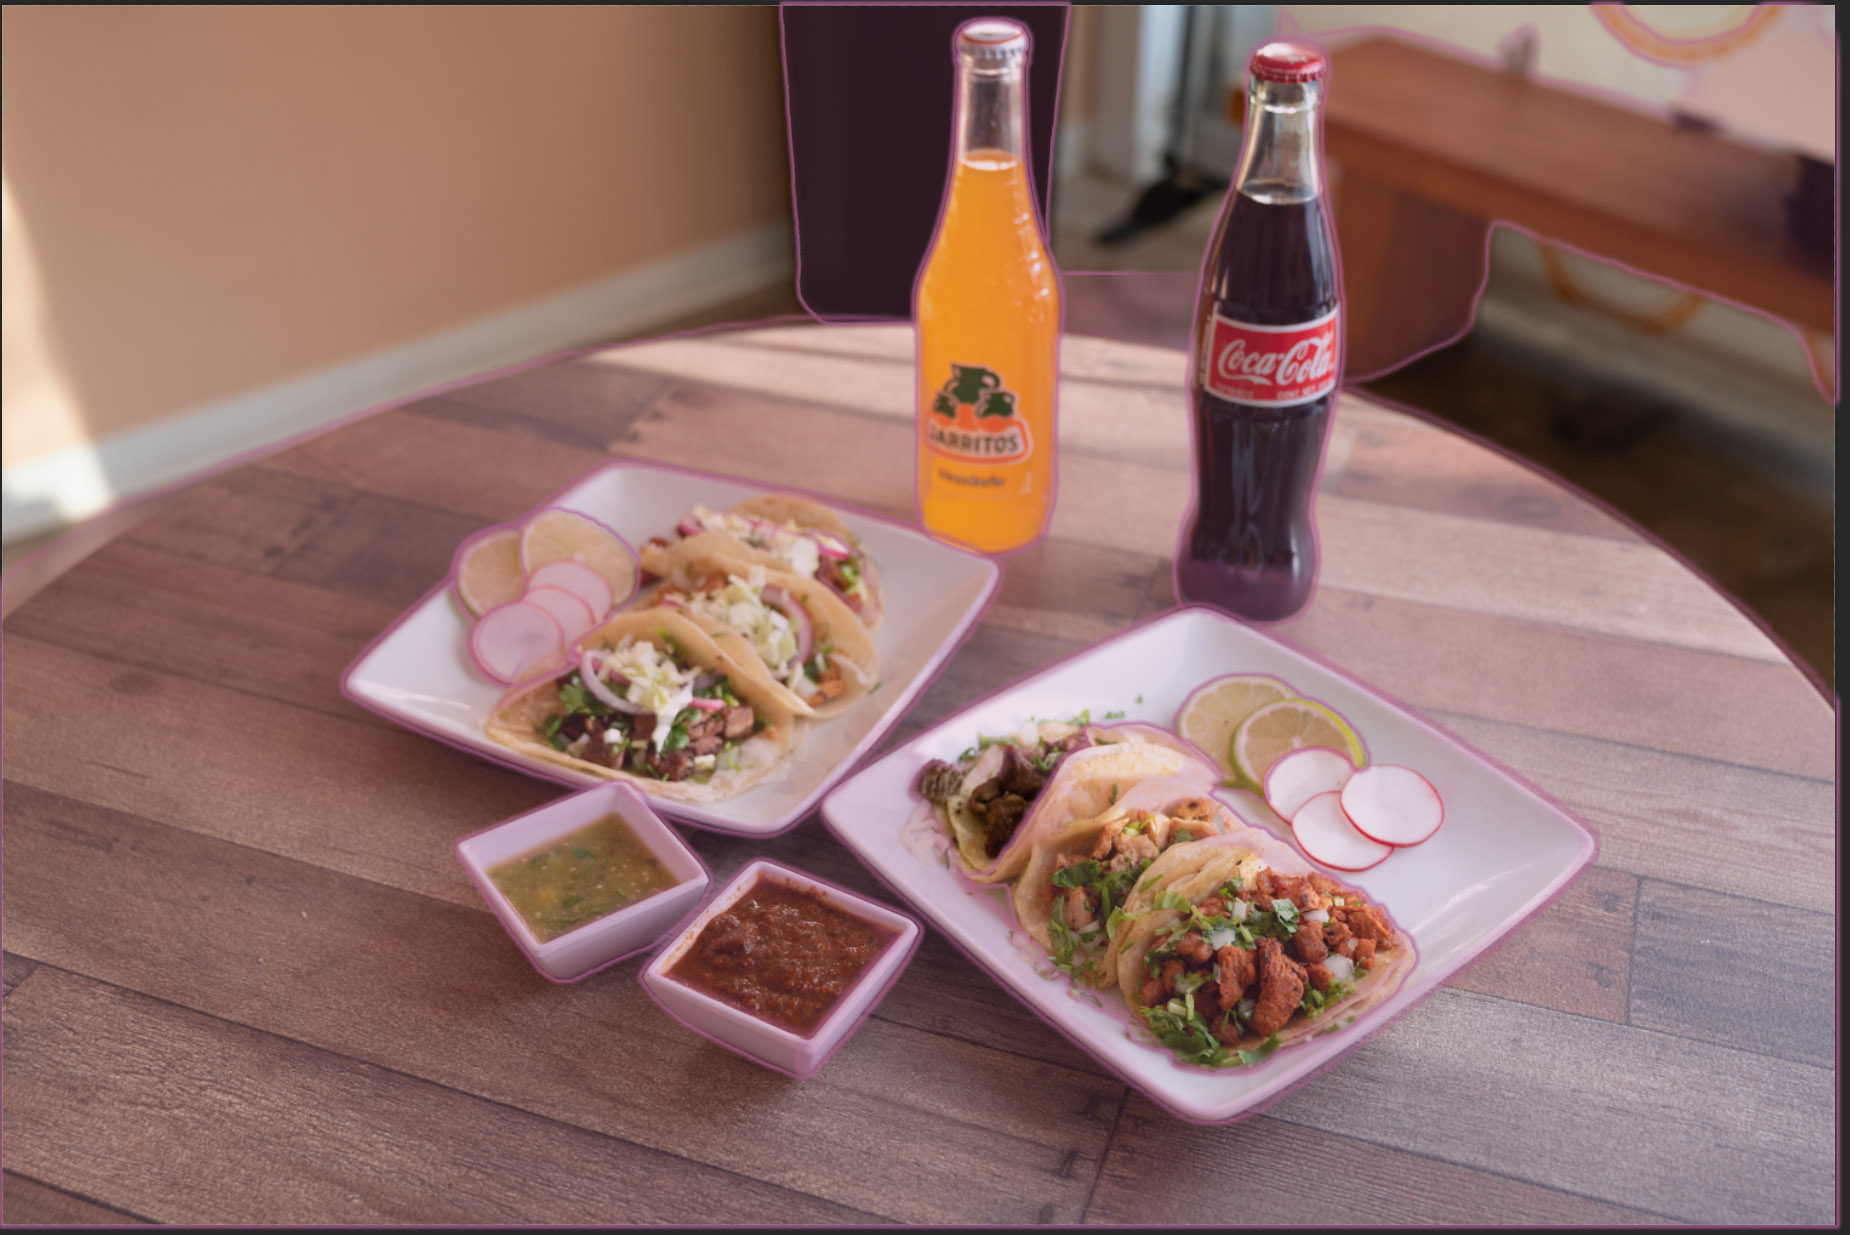
Many of the same limitations as Select Subject apply here. For clear-cut objects, Photoshop can do a good job of recognizing them. In many cases, it can do an impressive job discerning between discrete objects, like in the example photo below of food on a table. While some margins aren’t perfect, it’s easily refined into a good selection.
More nebulous subjects, like landscapes, present issues with this tool. While it can often recognize the sky, it’s left guessing at other objects in the foreground.
Color Range
Selecting by Color Range, accessible via Select>Color Range, might not be the most common method, but it’s got a surprisingly useful niche: being able to select scattered elements that share a color.
Like the other “quick” selection methods so far, this one often benefits from some refinement, either manually or via something like Select and Mask. Color range selections can be a great starting point for adjustments akin to HSL, but with the additional benefits that come from a dedicated selection. This is almost never my first-choice method of making a selection, but it’s very useful with a narrow range of subjects.

Lasso Tool
The Lasso Tool is a great option for quick and rough selections, particularly those where the Quick Selection tool isn’t going to have enough contrast to work with. I love the Lasso Tool for quick cleanups of dust spots, litter on the ground, or other minor visual distractions – draw a quick circle around each point, then fill via Content Aware Fill for a rapid cleanup of small annoyances.
The Lasso Tool, thanks to the quick deployment and high level of manual control, is also great for refining errors in automated selections. Often, the automatic selection will grab a small unnecessary bit, and being able to quickly lop it off with the Lasso takes just seconds.
Quick Selection Tool
The aptly named Quick Selection Tool is perfect for making casual selections where speed is more useful than perfection. A great example is constraining a brush, or testing an adjustment without having to make a more complex selection. The Quick Selection tool can deliver perfectly usable results, particularly with Enhance Edge enabled and with a bit of care in use.
This tool works well with subjects that have sharply-defined edges, like a person’s shirt against a contrasting background. However, selecting that person’s hair is better suited for the Select and Mask workflow that I’ll cover next.
Accurate Selections
Select and Mask
The Select and Mask Workspace isn’t a single tool, but instead a separate interface that you can access within almost any other selection tool. (You’ll see a button labeled “Select and mask…” near the top of Photoshop once you’ve clicked on a selection tool.)
Depending upon how you use it, Select and Mask can be used for some very complex selections. For example, if you need to do something tricky like isolate hair or select the sky through trees, it can be the best possible option.
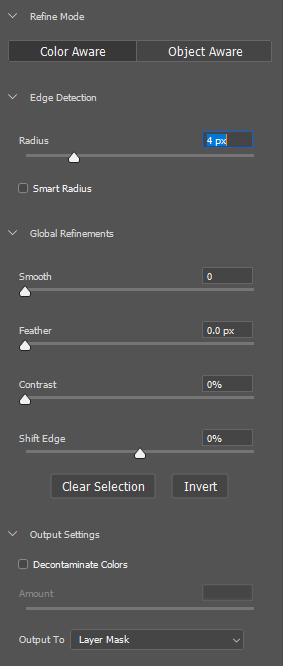
Select and Mask can be used for quicker selections, but the real power is in its complexity. This means it isn’t the quickest tool out there, but it is one of the most powerful. It lets you adjust the selection’s contrast, feathering, and other controls to fine-tune the edge of your selection (or the edge of your mask, if you choose to directly create a layer mask).
Making accurate selections of hair or complex organic objects can present a significant challenge with many of the “accurate” methods that I’ll describe next. Select and Mask, however, is able to quickly pull hair from the background, and even offers a one-click option just for that. For non-portrait photos, this workflow is still useful, like the photo below.

Magnetic Lasso and Polygonal Lasso
These two versions of the lasso tool, as opposed to the regular Lasso listed above, put a greater emphasis on accuracy over speed.
The Magnetic Lasso functions similarly to the regular Lasso, allowing you to draw a line of any shape, but with the added “snapping” of your selection to the underlying subject. For some subjects, this helping hand can make for greater accuracy in selections, assuming you’ve configured the tool properly. To use the magnetic lasso optimally, you’ll want to set the width of the path, the contrast of the edge, and the frequency that the tool should drop anchor points. There’s no single best value for these settings; it varies from image to image.
I’ve found the Magnetic Lasso helpful when working with subjects that have a strong contrast with the background, but where I need a crisp edge. It can also be used in combination with the Select and Mask tool to make more refined selections. It’s slower than many alternatives, though.
The Polygonal Lasso tool is just a regular Lasso bound to straight lines between points. This is one of my most rarely used tools, but if you’re doing any graphic design work, this may be helpful. Otherwise, there aren’t many cases in photography where you need a truly straight line in your selections.
Pen Tool and Variants
No list of selection methods would be complete without the Pen Tool, but I’m going to argue that for many photographers, it’s not a necessary addition to their toolbox. The Pen Tool, along with its various alternate forms, requires pages of explanation from Adobe – put simply, it creates a selection based on lines and curves that are very precise and mathematically based.
This precision can be exceedingly important in graphic design work, allowing you to create vector images from scratch. However, it is a time-consuming tool that is too specialized for most photographic applications. Some recent refinements of the tool, like Content Aware Tracing, have made it more user-friendly, though.
Conclusion
Despite Adobe’s efforts, there’s no such thing as a singular, automatic selection tool in Photoshop for every situation. Some of the automatic tools can deliver impressive results with just a click, yet fall flat in other scenarios.
Right now, the best approach to selections is to learn and understand the most important methods out there. Sometimes, you’ll just need a quick selection – other times, you’ll need a highly accurate selection. The key is to tailor your approach to the photo at hand.
When you approach a selection, do you use any methods that aren’t on this list? Let me know below if you have any questions about these selection methods or others.
I’ve been using Photoshop to select and mask since Ps version 3 way back when it first came out for Windows. Just finished a big poster for my grandson’s birthday and thought back to the days when I had to do all of this by ever so carefully clicking hundreds of points. I had to laugh a bit about that. So incredibly fast and simple now with the new tools not to mention fantastic results. Thank you Adobe.