Arguably the most versatile adjustments in Photoshop are the layering and masking tools. Together, layers and masks make up a large portion of the work most photographers do in Photoshop, both for subtle and complex edits. However, if you are just beginning to work in Photoshop, these two irreplaceable tools may not be completely intuitive. In this article, I will cover the basics of using layers in Photoshop and discuss layer masking – laying the groundwork for far more advanced post-processing adjustments.
Note: This article is specifically written with Photoshop in mind, but nearly all photography programs that use masks (such as GIMP, among others) work in similar ways. I use Photoshop CS6, but all of this information applies to any modern version of Photoshop as well, including Photoshop CC.
Table of Contents
1) Introducing Layers
In order to visualize layers in Photoshop, it helps to think of a physical, paper print. If you have several prints, you can stack – or layer – them on top of each other easily. Layering in Photoshop works the same way, although your stack is made of digital images rather than physical prints.
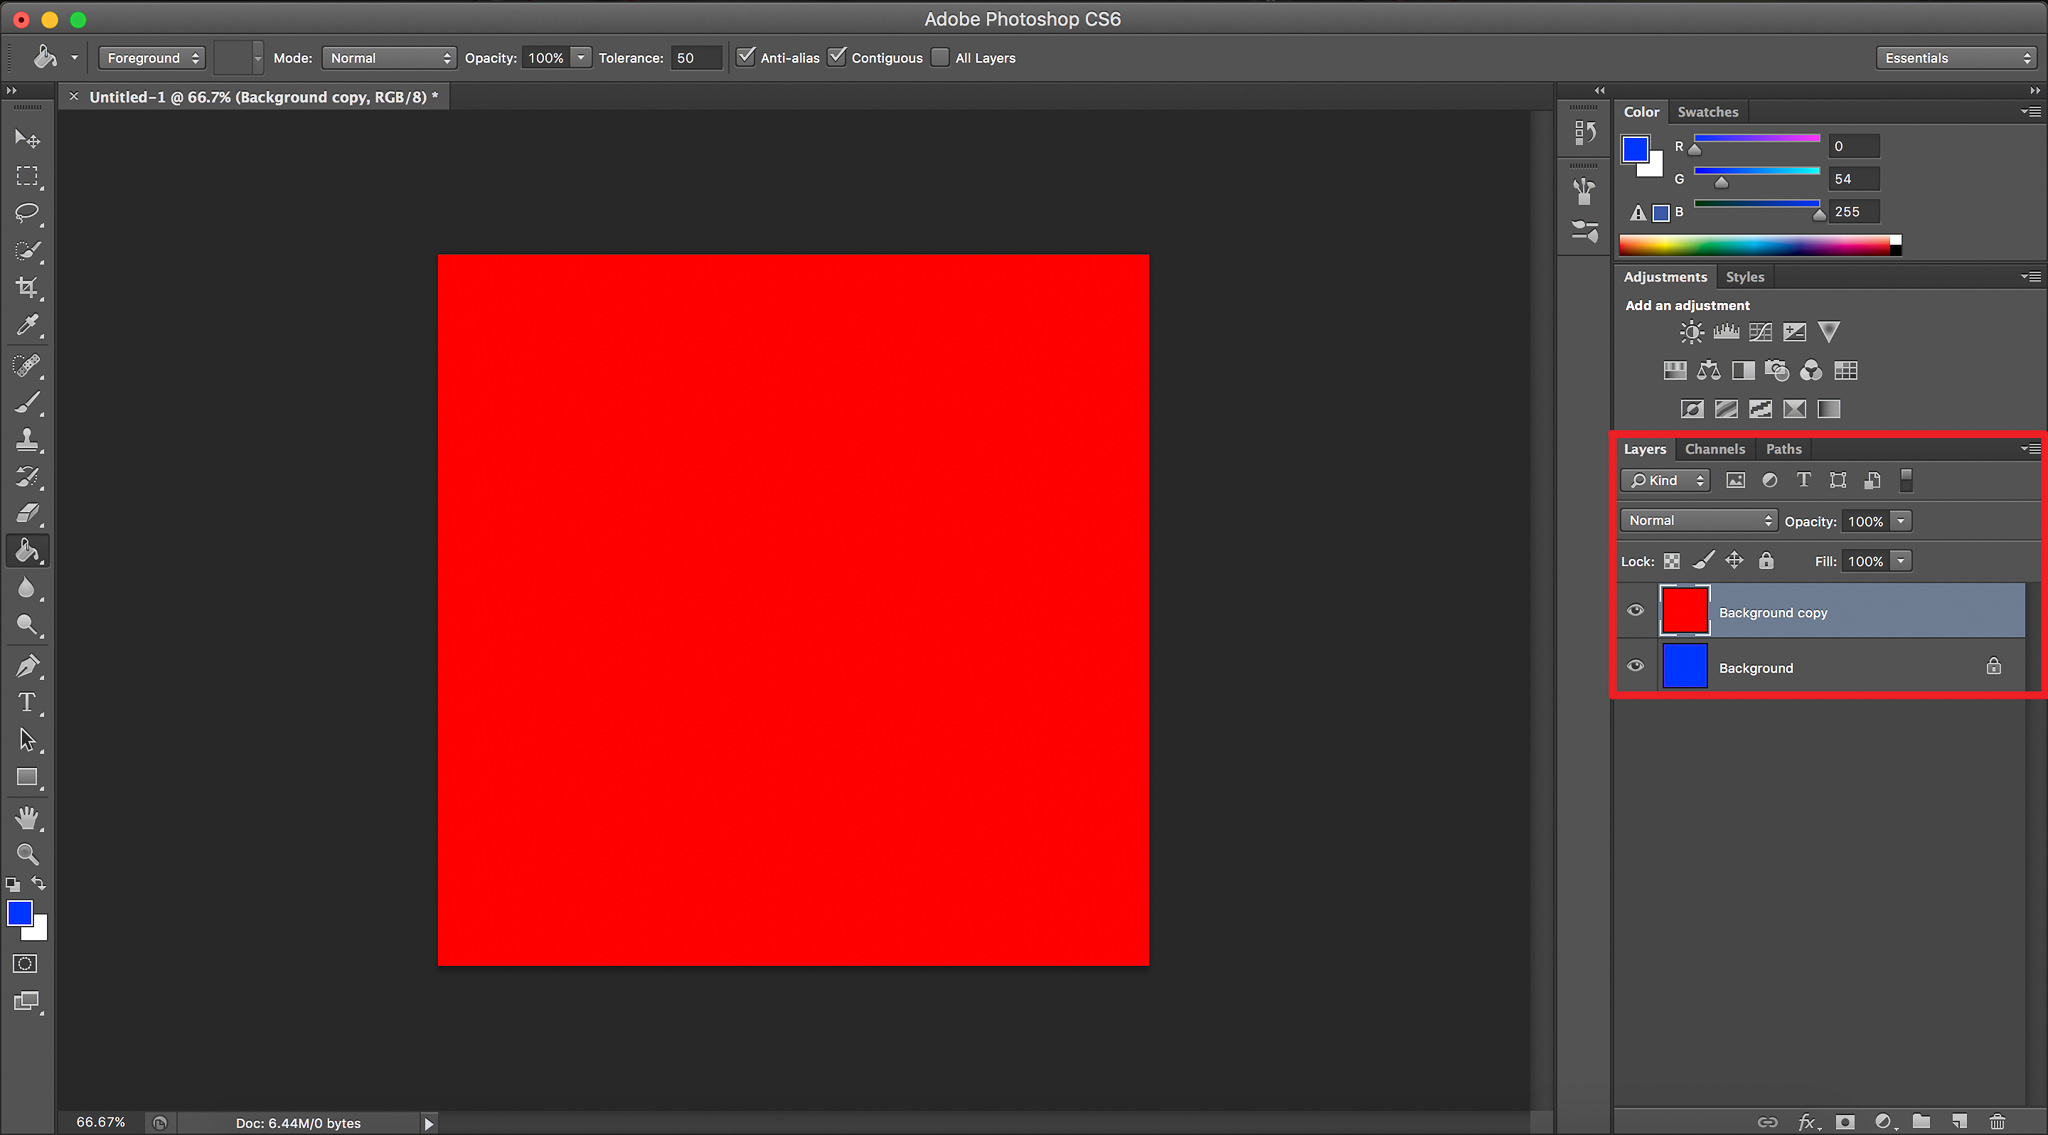
Both in print and in Photoshop, the first rule of layering is simple: the layer on top is the one that’s visible. In other words, if I stack a red print on top of a blue print, I’m only going to see a red print. The same is true with the layers in Photoshop (the layer tab is highlighted in red):
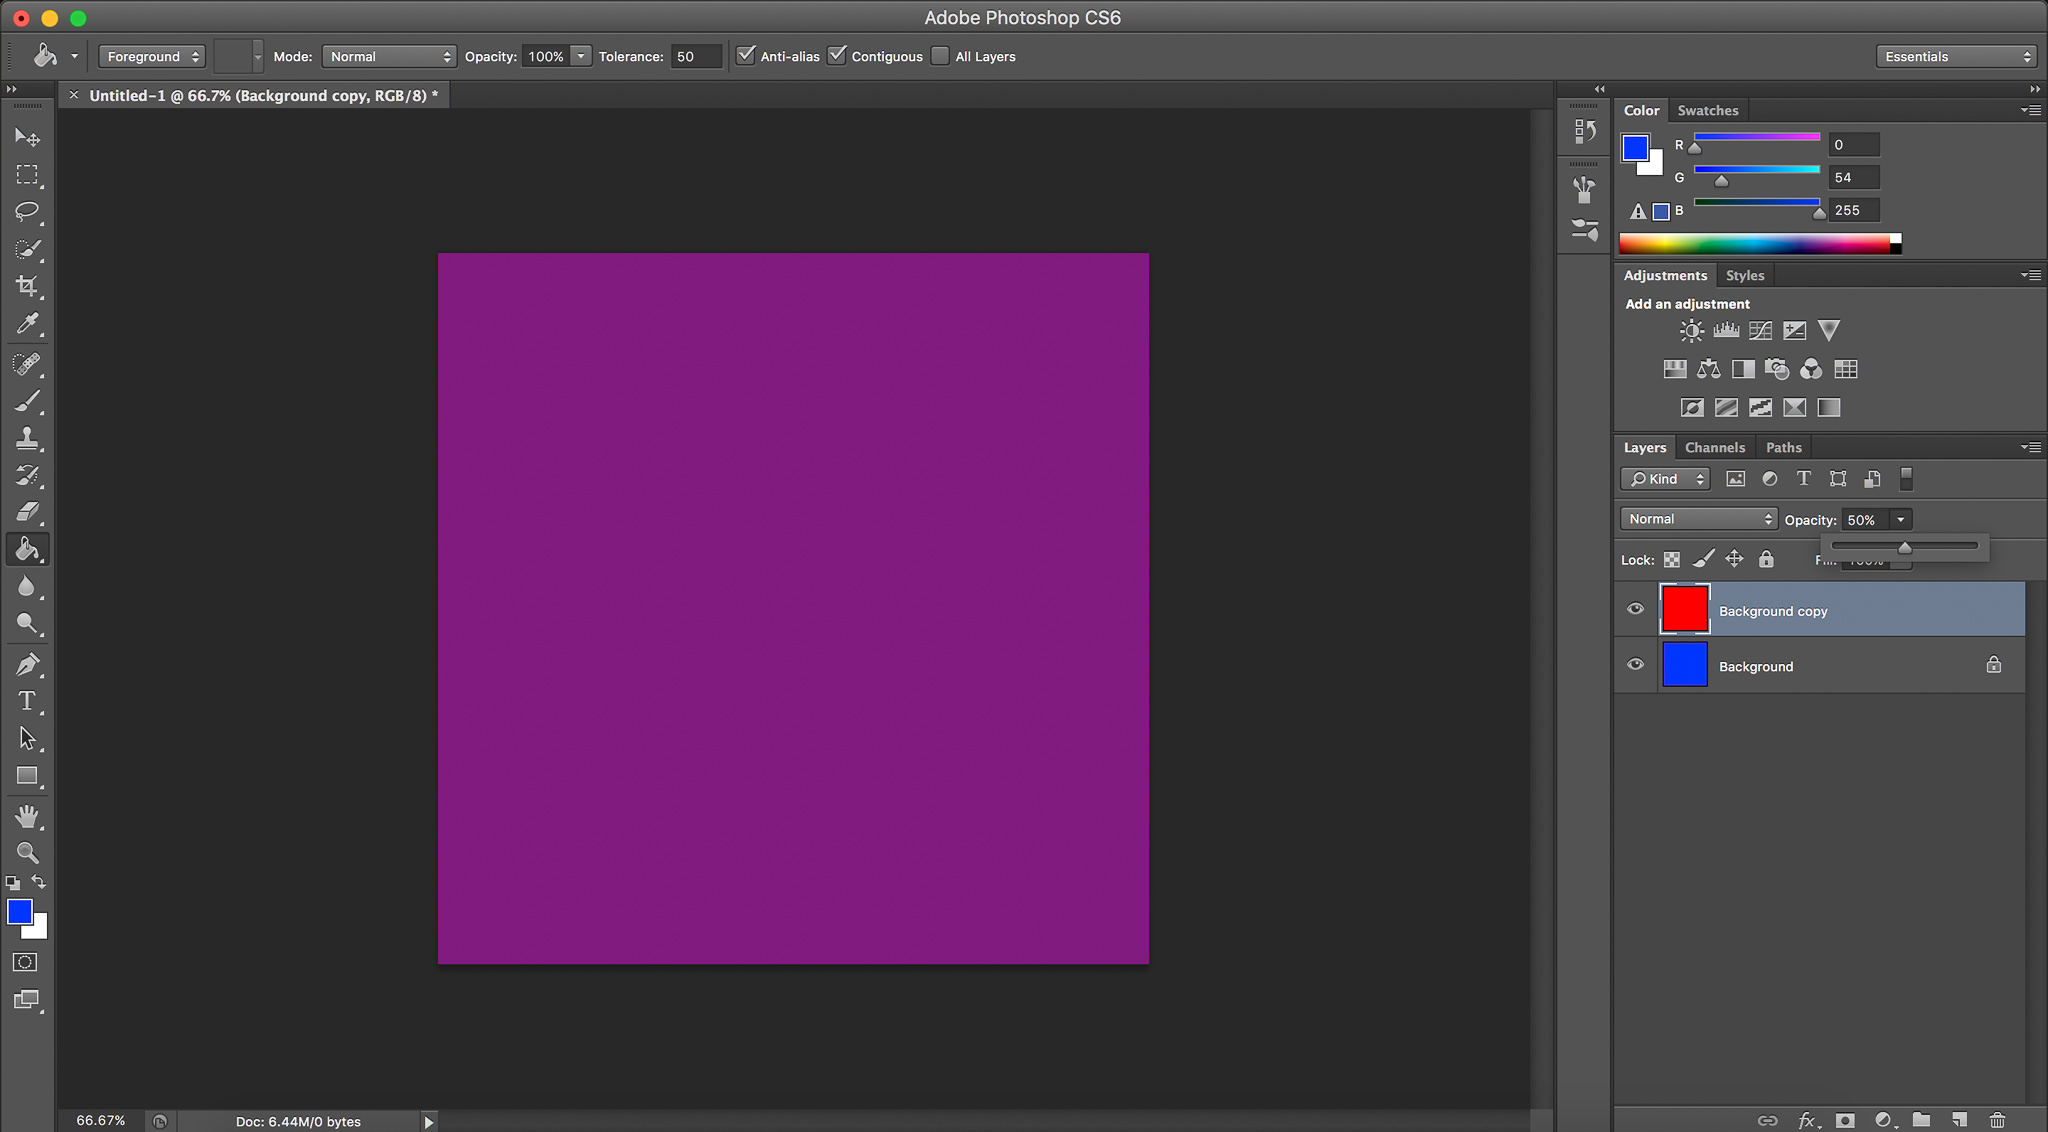
The versatility of digital layers, though, is that you can change their strength using the opacity option in Photoshop. The lower the opacity, the more you can “see through” the top layer. So, as I reduce the opacity from 100% to 0%, this photo becomes progressively more and more blue. At 50% opacity, for example, the image is purple, halfway between red and blue:
Opacity is incredibly useful for any work in Photoshop, since it lets you change the strength of your adjustments. However, there are more variables at play than appear at first glance.
2) Putting Layers into Practice
Every time that I open Photoshop, my first step is to duplicate the background layer – the one that has the lock symbol next to it – with the shortcut Control + J (Command + J on a Mac). Why do I do this?
The main reason is simply because I want to avoid making changes that I can’t undo easily. For example, if I make ten edits to a single layer, I can’t delete the first without undoing all the others. However, if each edit is its own layer, it is easy to delete the one I don’t like (or simply reduce its opacity).
Adobe knows all this, and that’s why they put a “lock” on the background layer in the first place. This lock makes it impossible to do certain edits to the background layer, since there would be no way to undo them selectively. If you want to unlock this layer, it’s very easy – just double click, then hit “enter.” However, it’s a good safeguard that reminds you to use layers whenever you can.
Another important part about layers is the ability to change their names. This might not matter when you only have two layers – red and blue – but it is crucial if you have dozens, or even hundreds of layers. The title “Background Copy 14” doesn’t tell me anything, but “Sharpening Layer” does. To rename a layer, just double click on the layer’s current title and type the new name.
Lastly, the opacity tool is far from the only way to adjust a layer’s transparency. Instead, Photoshop has another valuable tool up its sleeve: the power of layer masking
3) Layer Masking
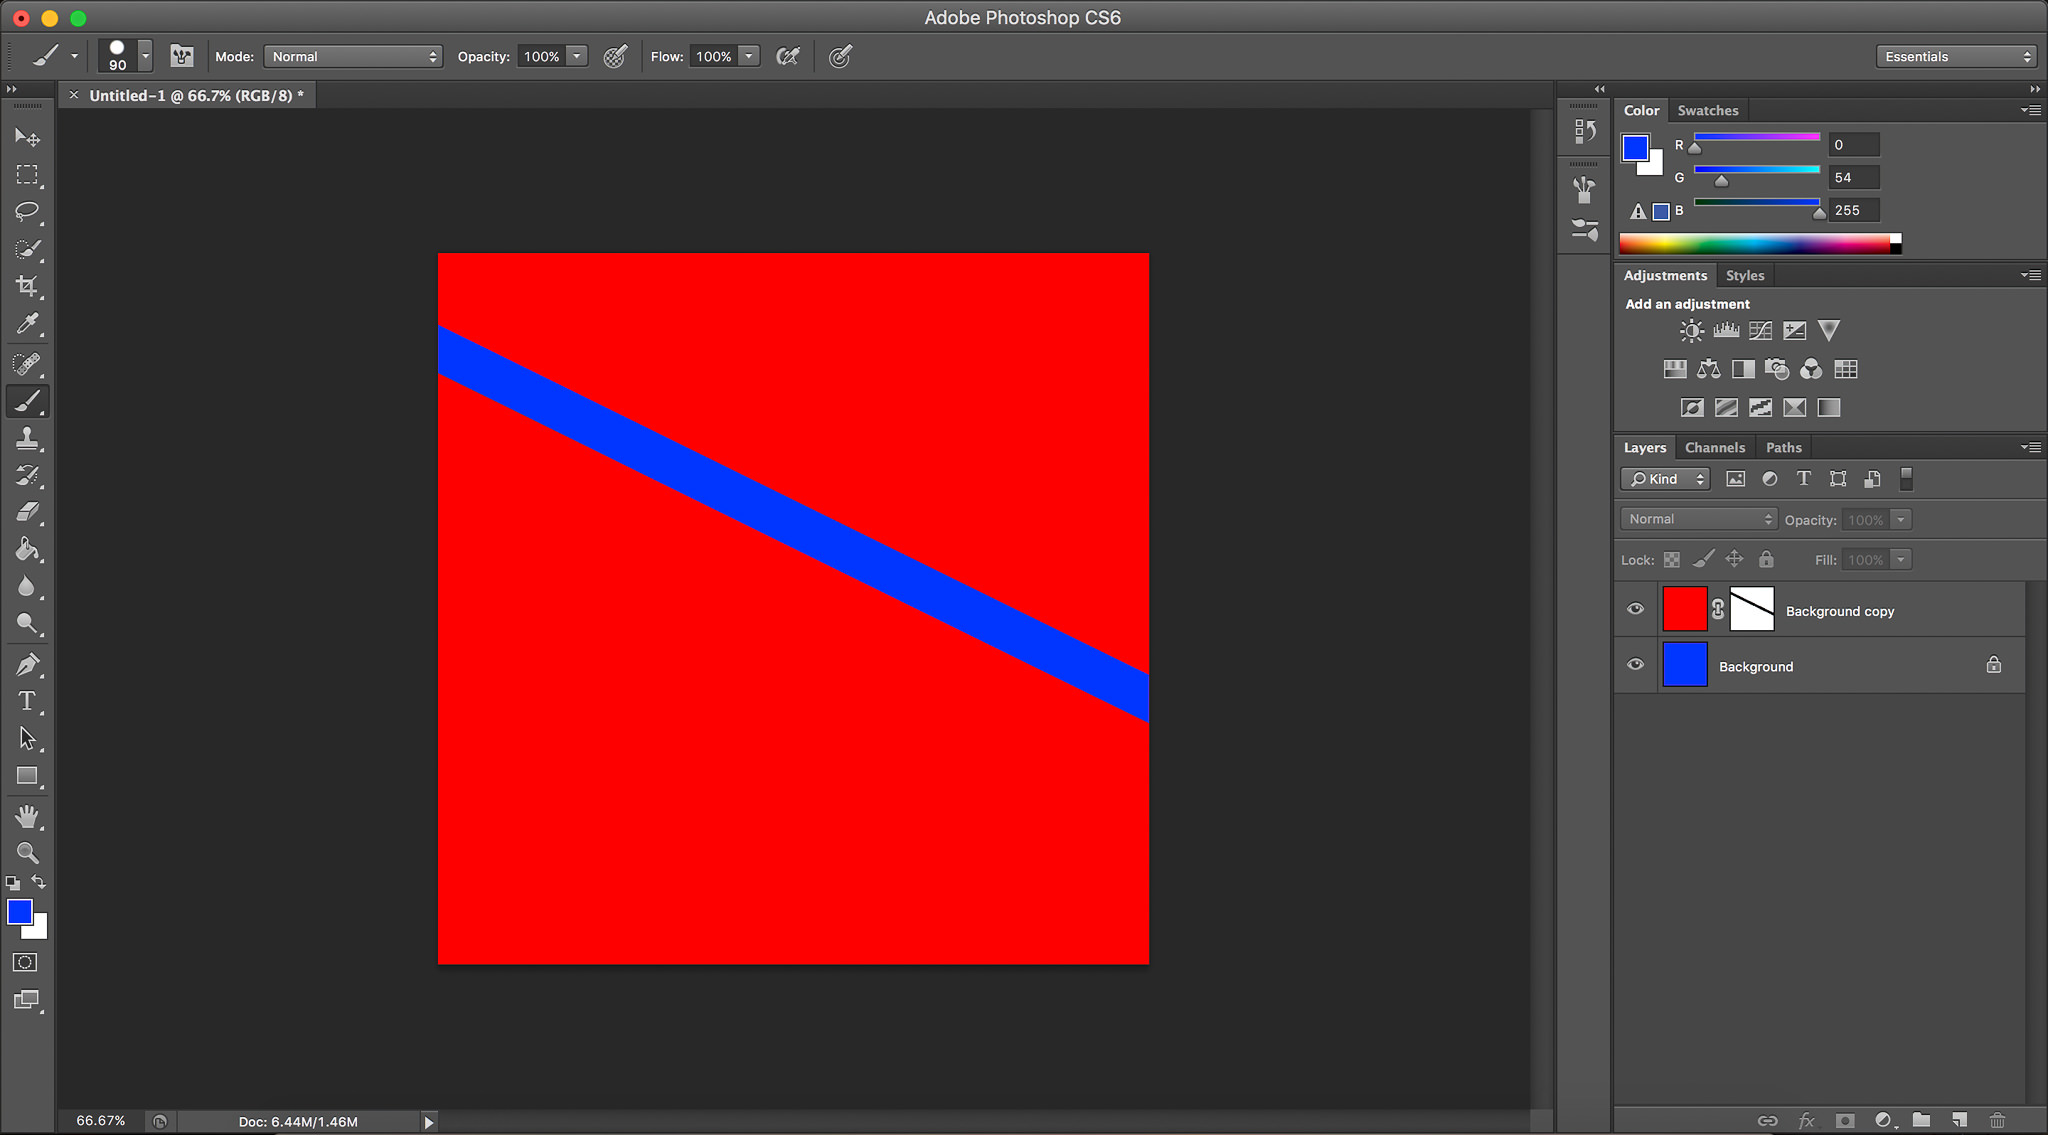
At its simplest, layer masking gives you extreme flexibility in deciding which portions of a layer are important or not. It’s easier to show an example than to describe one, so I’ll include a screenshot of a layer mask in action. Here, I “masked out” part of the red layer, revealing the blue layer below:
It’s clear that this is a dramatic change, and it proves that masking is a powerful tool. Using this technique, I can make selective edits to individual portions of the photo. Do I want to brighten a person’s face, but leave the rest of the photo unchanged? No problem – layer masking does the job. So, how does it work?
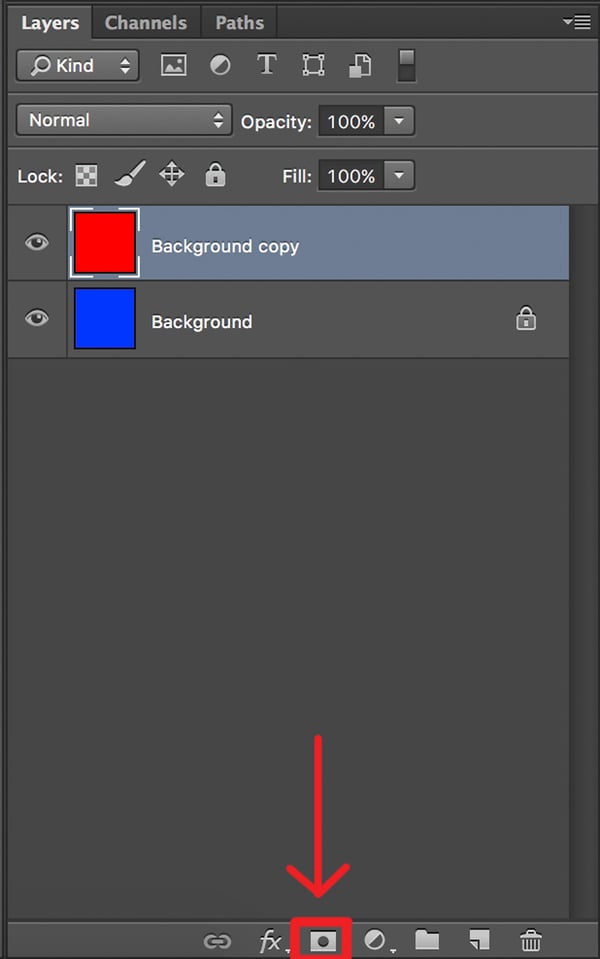
Layer masking isn’t that difficult, but it helps to follow along while you use it. The first step is to click on the layer where you want a mask. Then, create a mask by clicking on the “Add Layer Mask” tool.
In the world of Photoshop, a mask does absolutely nothing if it is completely white, which is how it appears at first:
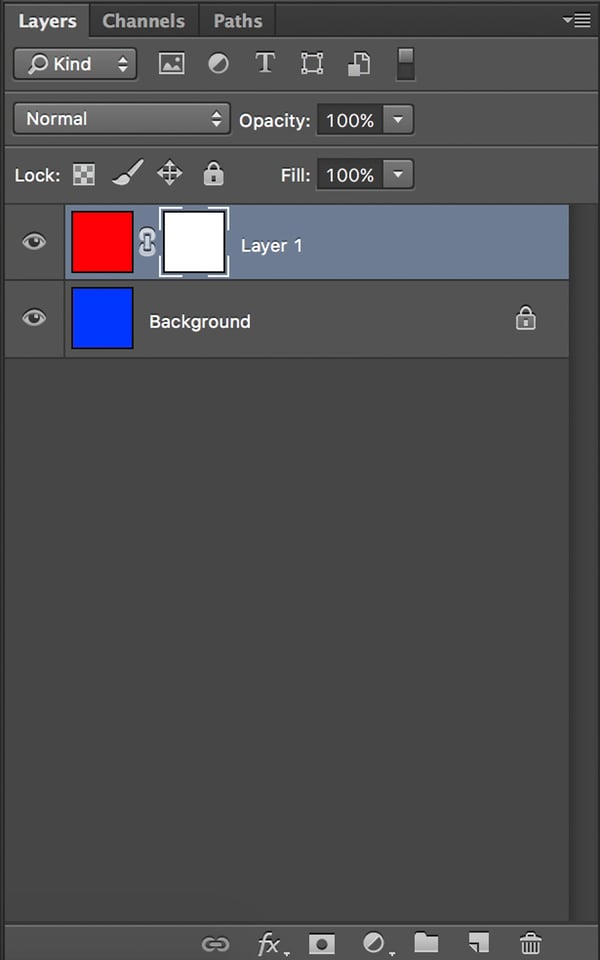
When a mask is perfectly black, the opposite is true; a black mask is the equivalent of using 0% opacity, resulting in a transparent layer. For example, notice the black line painted on the mask in this section’s first screenshot; that line corresponds to the blue that shows through the top layer!
You aren’t confined just to painting white and black when you work on a mask; in fact, you can paint in any shade of gray. A dark shade of gray leads to a nearly-transparent layer, while a light shade of gray only shows a faint impression of the layers below. As you might expect, a 50% gray mask corresponds to a 50% level of opacity.
However, masking is much more flexible than the opacity tool, since it lets you adjust specific parts of the layer, rather than the entire layer. As I mentioned earlier, a mask lets you brighten just a small portion of the photo, such as someone’s face, which would be impossible with the opacity slider.
Finally, note that it is impossible to paint any colors other than white, gray, and black onto a mask. This makes sense, since whatever you do to a mask doesn’t directly appear in a photo; it simply tells Photoshop which portions of a layer to reduce in opacity.
4) Masking on Adjustment Layers
The sections above cover most of the basics of layers and layer masking. However, there is one other important aspect to cover: adjustment layers.
If you want to make color, contrast, brightness, or many other changes in Photoshop, adjustment layers are one of the quickest tools at your disposal. The process is quite easy. First, click on the adjustment layer tab at the bottom of your Photoshop window:
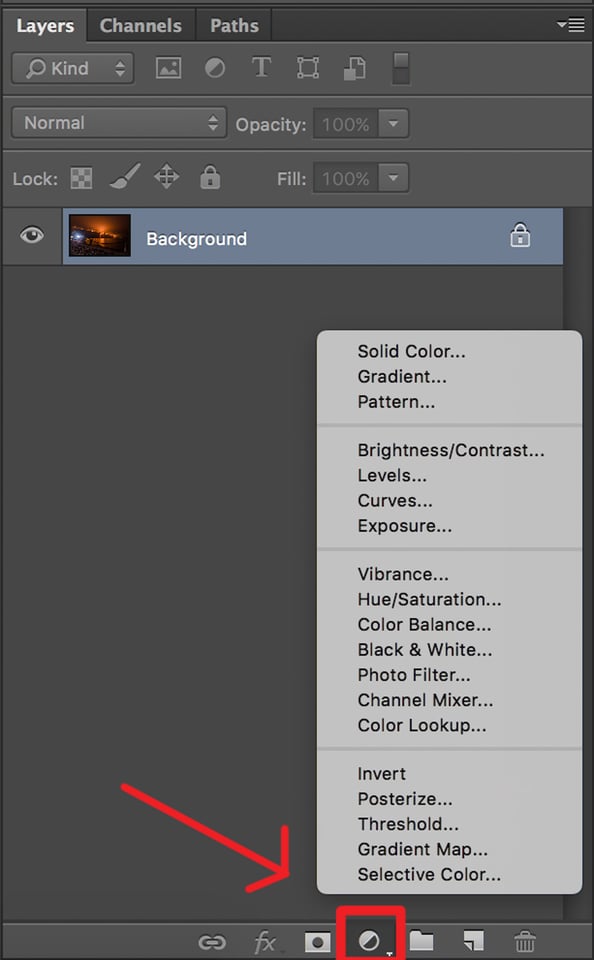
Say, for example, that we want to increase the brightness of the sky in this photograph. Let’s add a brightness adjustment layer:
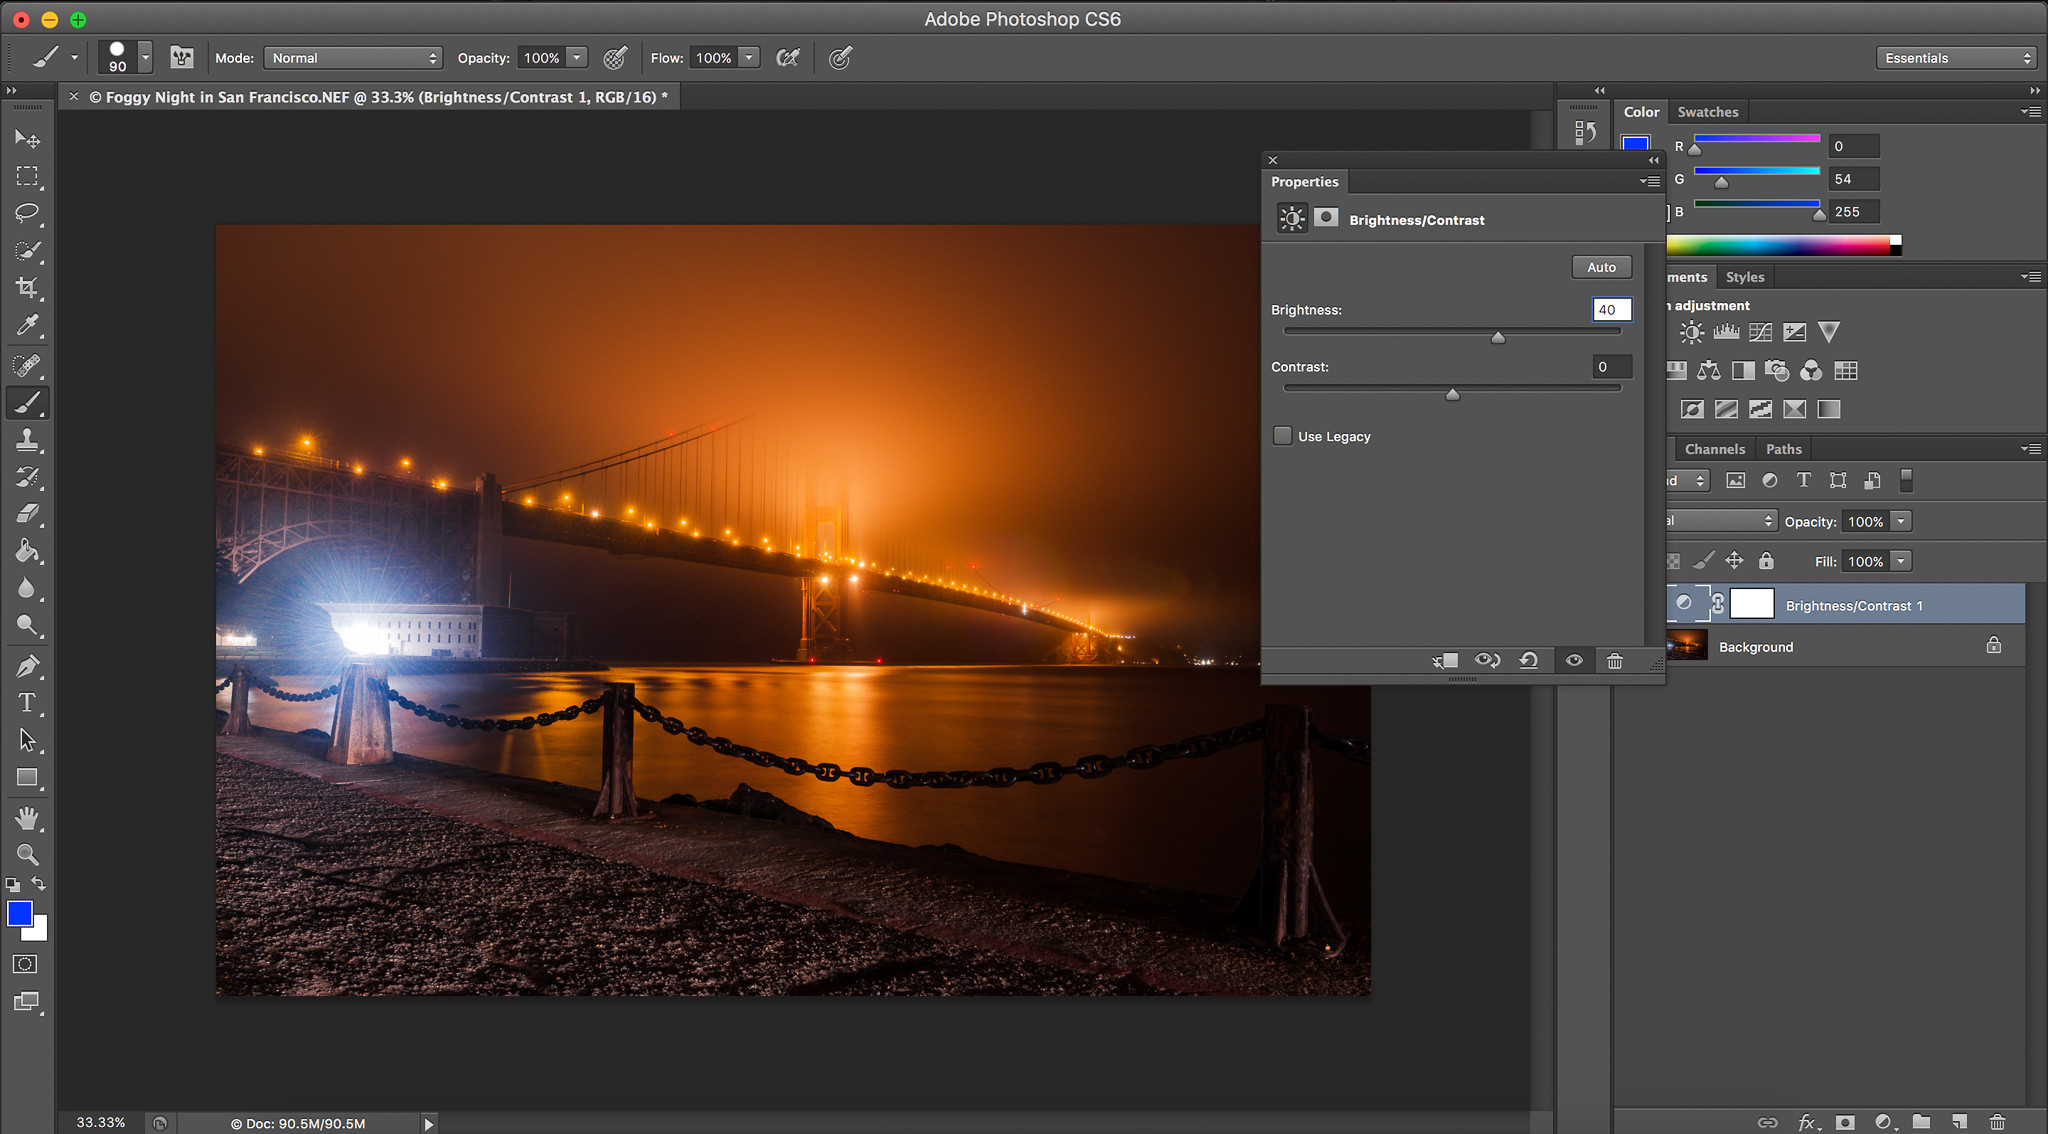
Notice something interesting? The brightness adjustment layer is already a white mask. Notice what happens when you paint black on portions of it:
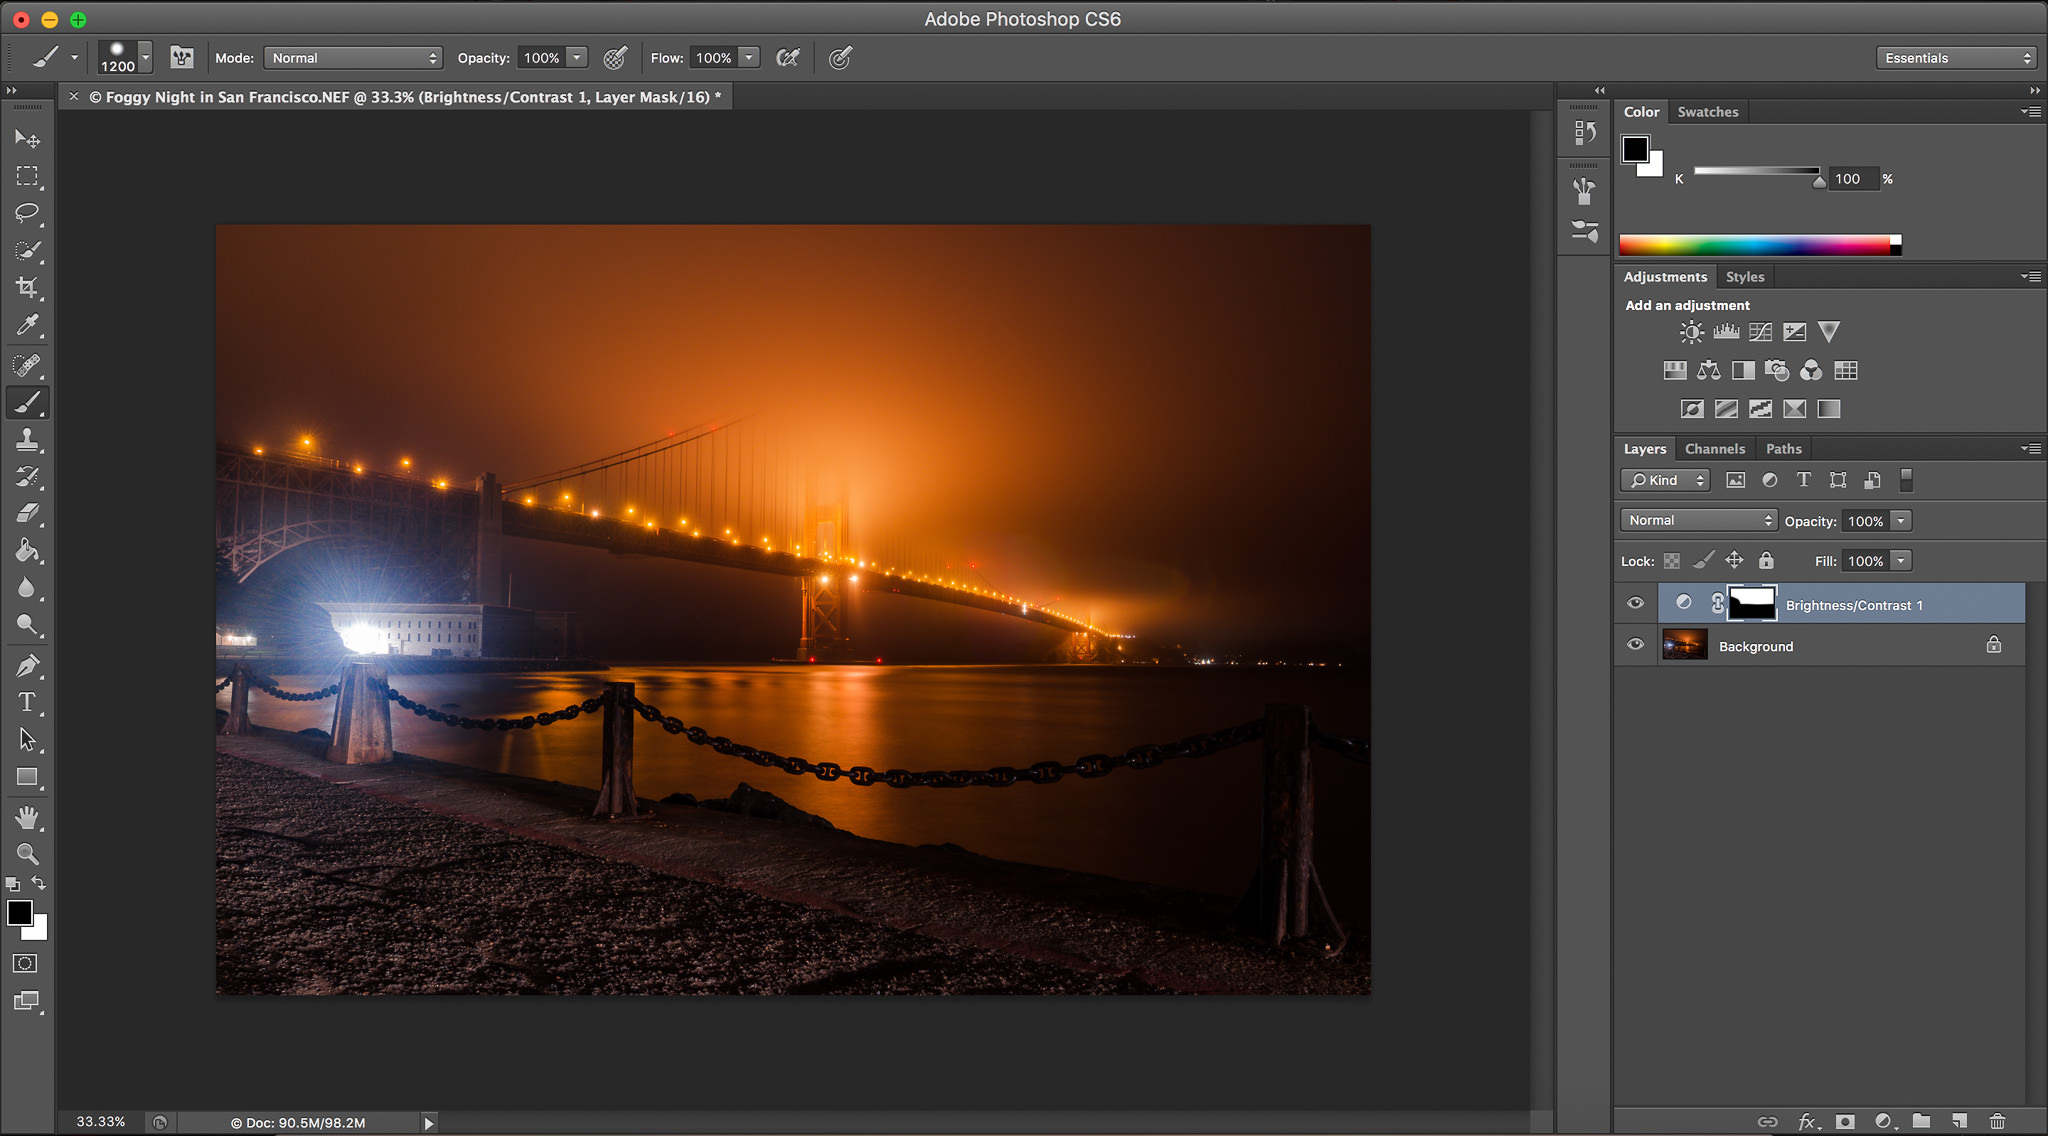
Now, the sky has gotten much brighter, but the black part of the mask eliminates all effects on the ground and water. They stay just as dark as they would without any adjustment at all. That’s the power of layer masks!
(Note that I mentioned earlier that I always duplicate the background layer upon import. This is usually true, but in this particular case there was no need; the adjustment layer is already separate from the background, so I can delete it whenever I want.)
5) Conclusions
This article is only the briefest of introductions into layers and masking. The more time you spend in Photoshop, the more you will learn about masking techniques, tips, and tricks. However, a comprehensive article on masking would be the length of a book, and it still wouldn’t cover everything there is to know. The best way to learn about advanced masking techniques is to practice in Photoshop yourself, then look up new strategies online if your old methods are insufficient.
Just new to this whole thing and I see there is much to understand. This is well written and makes things very easy for truly beginners.
Thank you so much for this tutorial! I’ve been looking for a reliable one for quite a while and yours was extremely helpful!
This is an amazing tutorial, Thanks for sharing!
Awesome tutorials you have put in this article. It is well written and well described at the same time. Playing with masking layer is kind of difficult. But, you showed it here an easy way.
your layer masking post is really awesome and more effective. i have got more idea.thanks for this best idea.
your layer masking content is very good and your this tutorial is very easy for a beginner. I have more benefited from your website. thanks for this good article.
Thank you so much this information was much helpful now am able to analyse my photography
Great article Specer, actually I like all of your articles, you are very talented… One question I had though, was what do you think about Phase One’s software for post proccessing? I’ve been using Capture One Pro 9 for about one month now and I am really amazed. I do have Lightroom CC which does include Photoshop, but I’m a photographer not a graphic artist and I can tell you from my experience for post work it’s a real winner. For sure it lacks landscape stitching and photo merge (for now) but if you haven’t tried out Phase One maybe give it go. I and many others no doubt would like to see what you think. Anyway, best wishes, keep up the good work…
Hi Philip, thank you for the comments! I haven’t tried Capture One yet, although I definitely will move to it rather than Lightroom if Adobe releases a CC-only version of Lightroom 7 (which appears to be where they are headed). I’ll definitely post about it when I try it out.
Thank you, Spencer, those explanations do help.
What I see now that I didn’t previously realize is that an ‘Adjustment Layer’ is essentially a ‘Mask’ that allows you to make the corresponding adjustments based on the type of Adjustment Layer you chose – e.g., if it’s a Hue/Saturation Layer you can make Hue/Saturation adjustments only. By creating a Hue/Saturation Layer, making a selection of a red flag and then choosing Select/Inverse and painting everything except the flag with Black, I was then able to change the Art Association flag in the image from Red to whatever color I wanted.
That definitely opens up my eyes a good bit on the nature of ‘Adjustment’ layers and how you can work with them as well as the painting with Black on an Adjustment Layer or a Layer Mask. Gratias!
Thank you, Jerry, glad that this helped!
Thank you for this great article. I found it very helpful as I am very new to Photoshop. Do you intend expanding to include other areas like choosing the best brush, removing items with healing brush etc?
Thank you, glad you found it useful. There are countless potential Photoshop articles, and I do plan to write more in the future. However, I think it will be a while before I can cover all the basics with this level of detail.