Light is everything in photography. It might be a cliché, but without light, there would be no image! Sometimes, you’re dependent on natural light; other times, you’ll have more control. In this article, I’ll explain a variety of lighting setups – from modifying natural light, to adding your own lights to a scene.
Regardless of your subject or composition, the way that light casts upon your subject can make or break an image. Some genres of photography, like landscape photography, are usually at the mercy of the environment to yield good light. Other photographers – like studio, product, and portrait photographers – must become familiar with modifying the light. It’s simply unavoidable.
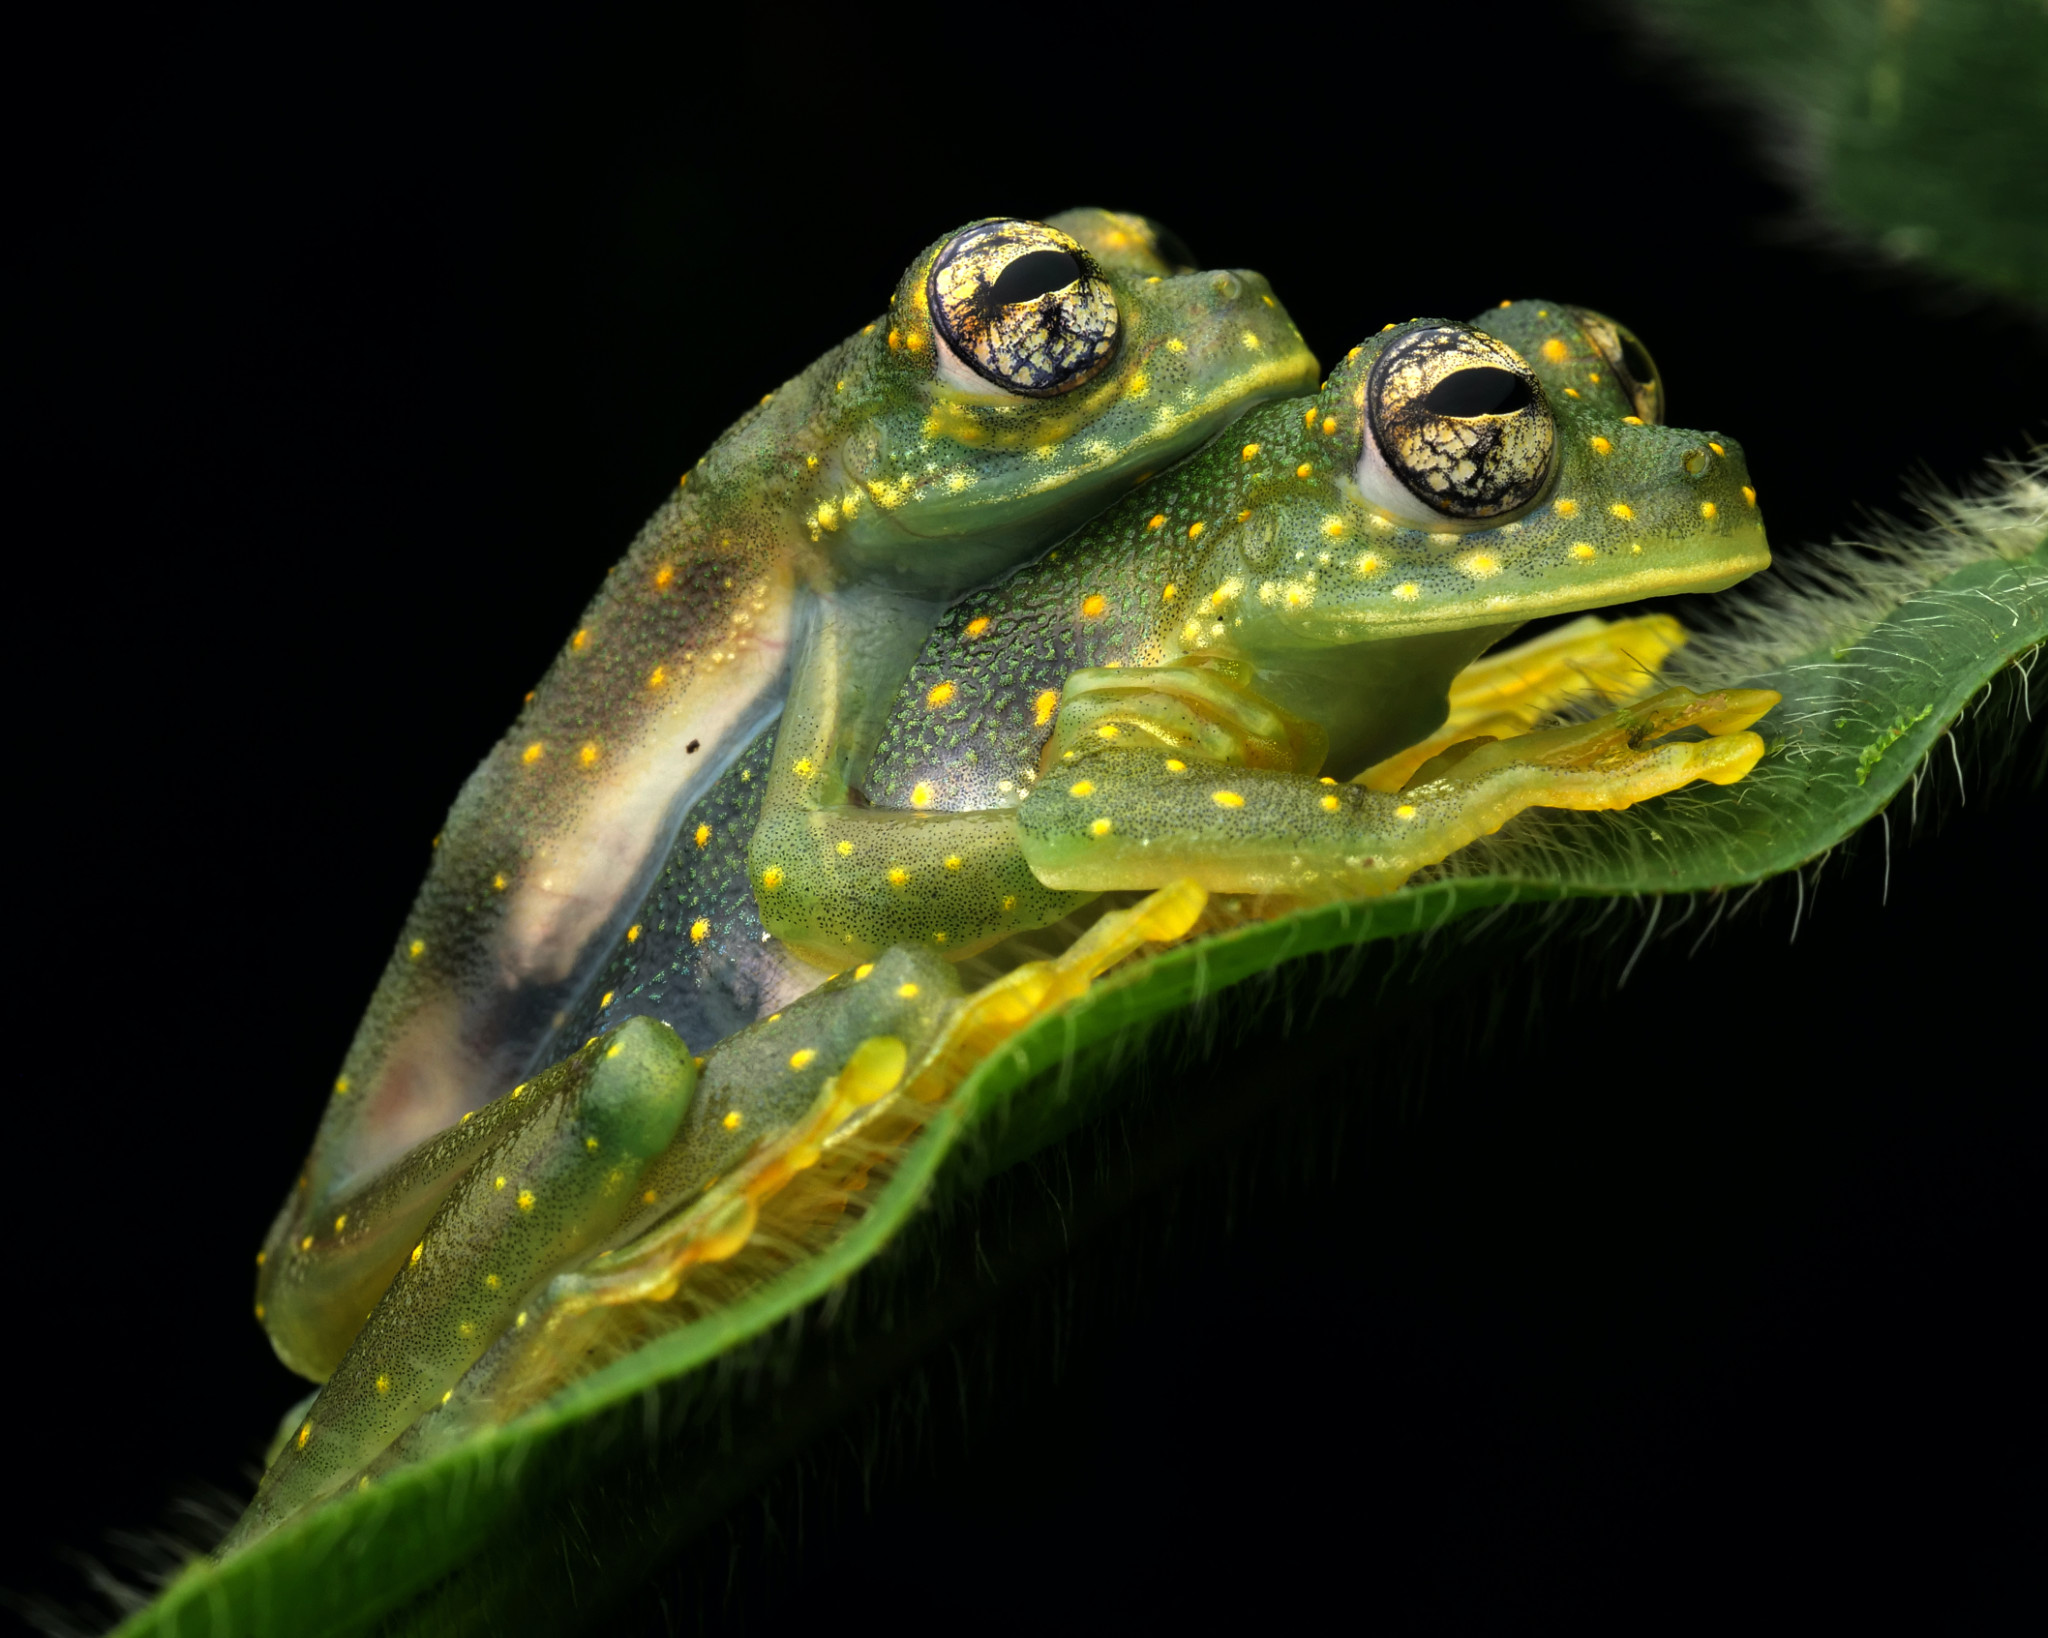
Even as a wildlife photographer, I use a variety of different lighting setups. Any time that I’m photographing smaller subjects like snakes or frogs (which, for me, is all the time) my first thought as a photographer is about light. Natural light can be manipulated, and artificial light can be cast. Which one suits the photo I’m taking? Answering that question is the key to taking better photos!
Table of Contents
What Is Good Light in Photography?
The best lighting in photography depends on the photo. There is no one size fits all. Sometimes soft light (gentle shadows and highlights) is desired, sometimes harsher light is preferred. Sometimes natural light is perfect, sometimes you need to take control into your own hands. Either way, I strongly believe that you should make this decision intentionally. Figure out what suits the subject. Don’t just use the same lighting setup every time, unless you want all your photos to look similar.
In terms of specific lighting setups, I’ll be diving into those one-by-one below. Note that the size of the subject plays a role in the specific equipment you should take along. For example, a small 1-foot diffuser may be fine for macro photography, but portrait photographers will want something larger like an umbrella diffuser. However, the basic mechanisms outlined below will apply no matter what your subject is – just use larger or smaller lighting modifiers depending on the size of your subject.
Modifying Natural Light
In many genres of photography, natural light is usually not quite perfect for the scene you’re photographing. But sometimes it only requires a little bit of tweaking to look just right. Photographers use diffusers, reflectors, shaders, and other modifiers to shape natural light. Modifiers like this are usually inexpensive and portable, and they don’t require batteries, so they’re extremely convenient.
1. Diffusers for Natural Light
When the sun is out, it casts harsh shadows and often causes bright, specular highlights to appear on your subject. You could move to the shade, but that may give a gloomier look than what you intended. That’s where diffusers come in.
A diffuser can soften sunlight, but not so strongly that it blocks all of the sun’s rays. This way, you retain the “daylight” look, while eliminating the harsh shadows and specular highlights.
Diffusers can take many forms, and the right one depends on the size of your subject. For portraiture, a larger popup disk is a good way to go. This may require a stand (or an assistant) to position correctly when taking an image. For smaller subjects, a translucent white umbrella can soften the light, and you can potentially hold it yourself while taking the photo.
Example:
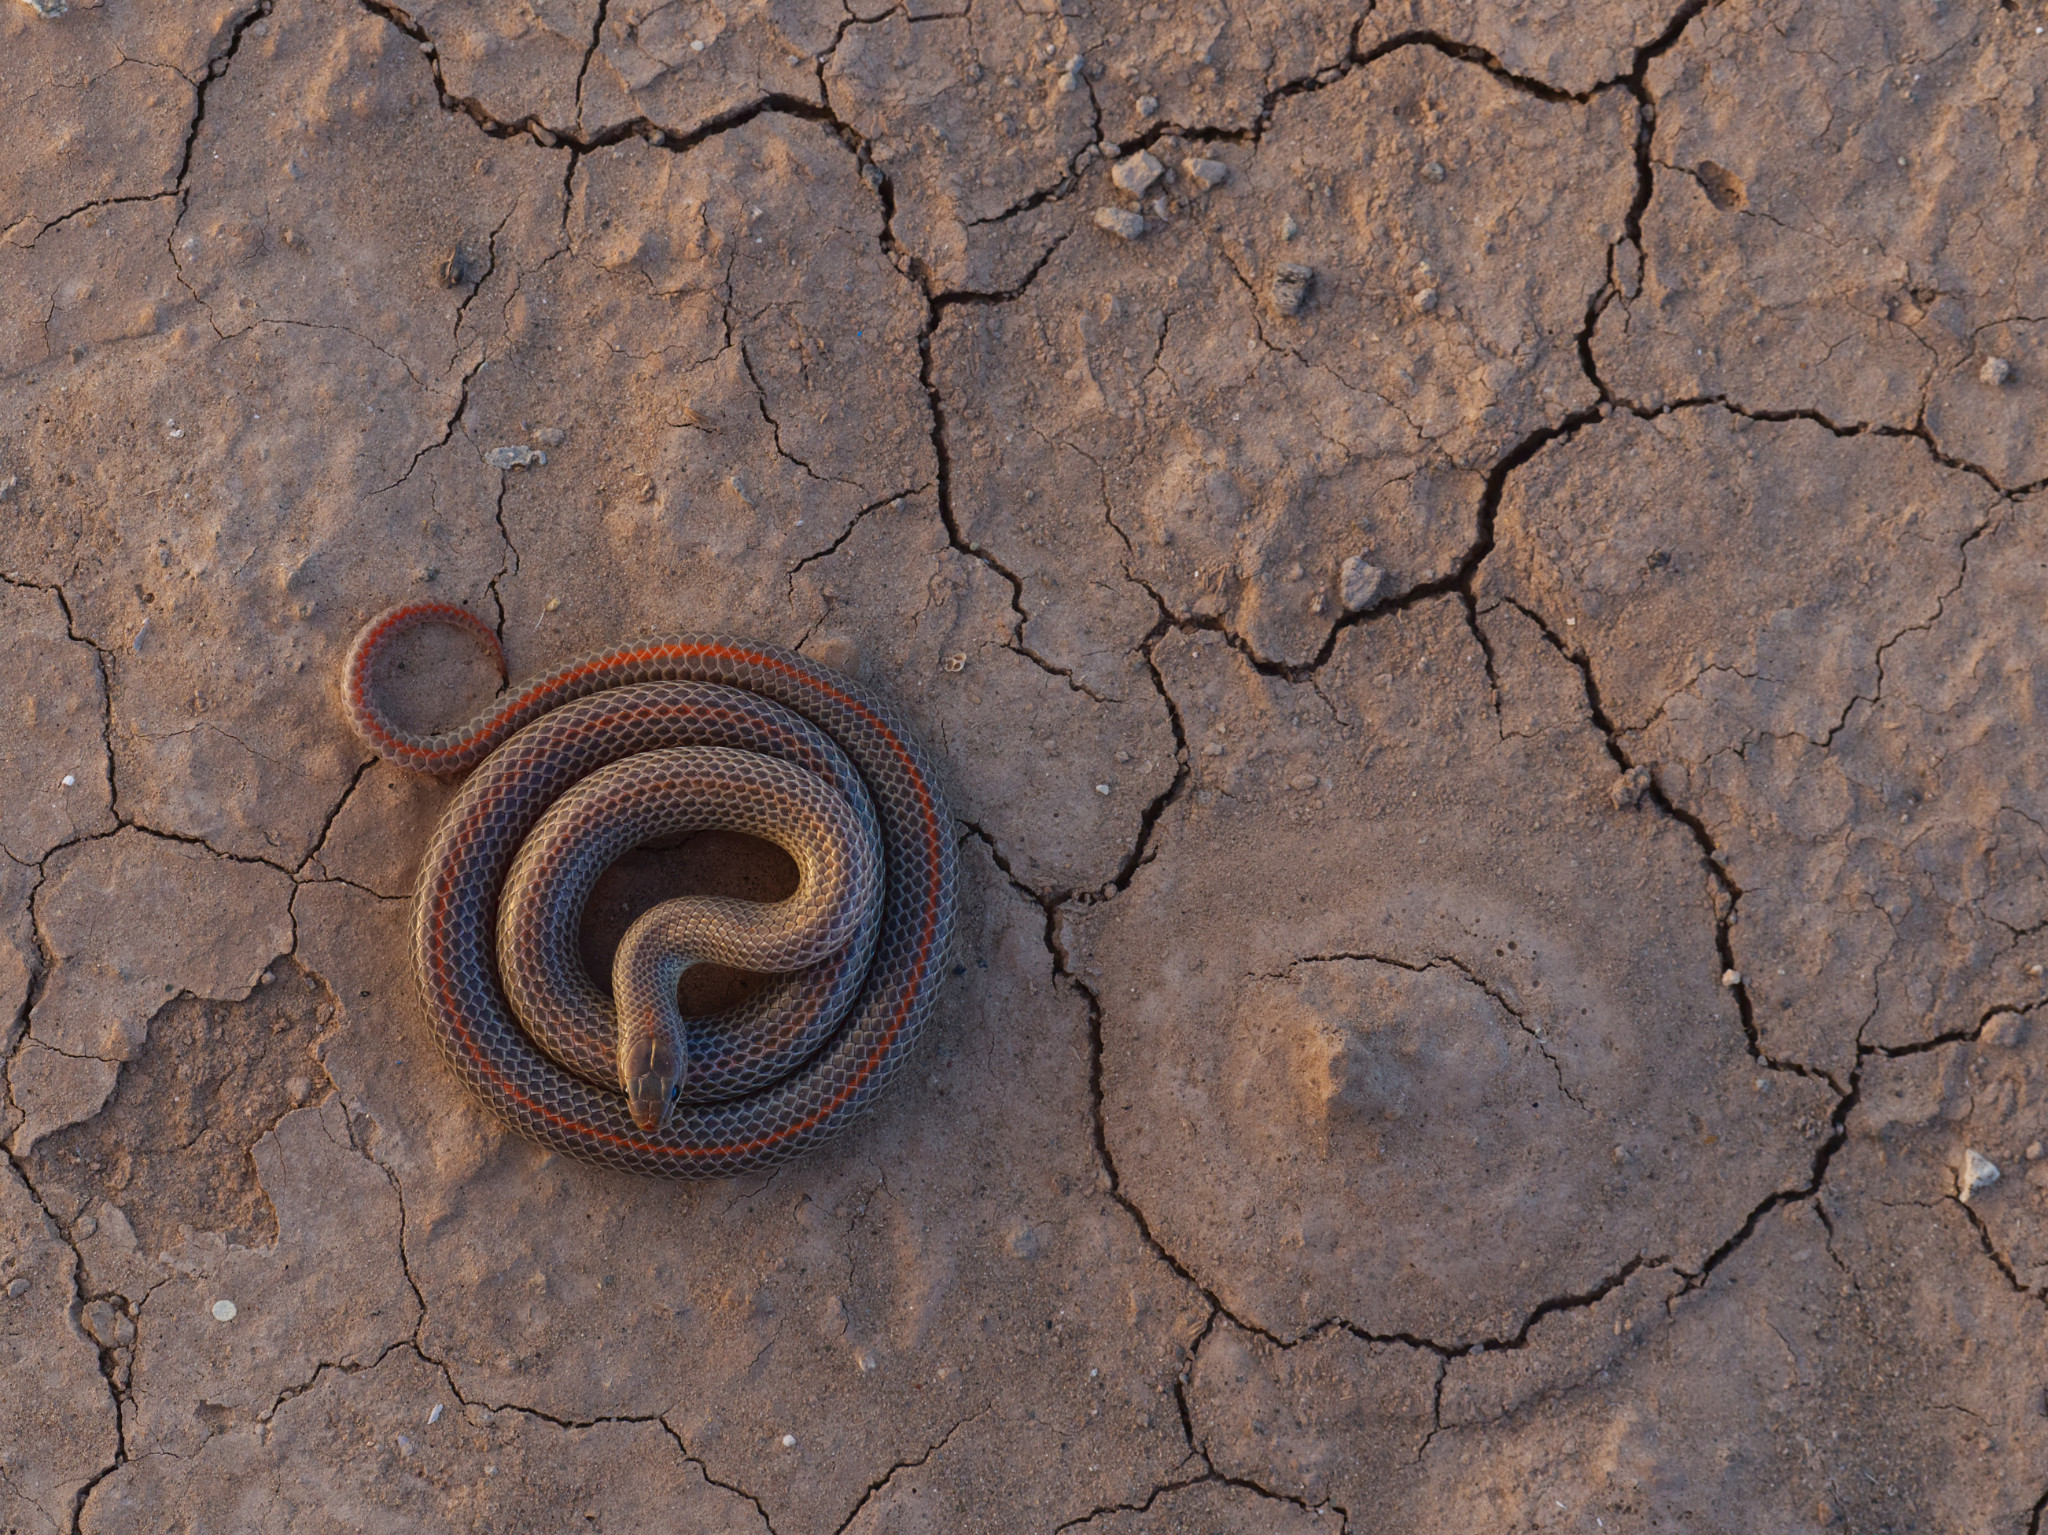
For the following photo, the low-angle sun coming from the left was very nice in color, but it was a bit too harsh on the snake in this photo. So, I diffused the light by putting an umbrella-shaped diffuser between the sun and my subject! Here’s the photo:
And here’s my lighting setup:
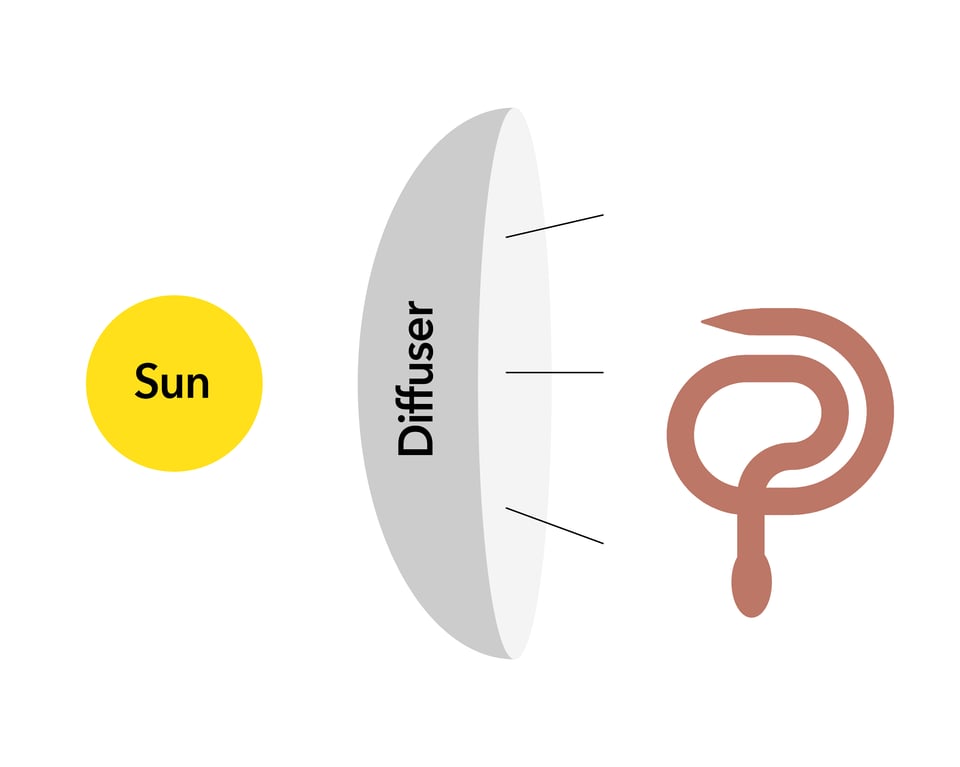
You can imitate the setup above any time that you’re taking pictures at sunset, simply by putting a sufficiently large diffuser between the sun and your subject. I highly recommend it for portrait photographers.
2. Reflectors
The second main way to manipulate natural light is by reflecting it. A reflector can fill in the shadows on your subject, simply by bouncing sunlight from a different angle.
Reflectors work much like a mirror, although they usually have white (or sometimes metallic) surfaces, so that you’re reflecting slightly softer light onto your subject than what a mirror would do. Like the diffusers, using a reflector may require a stand or an assistant to be positioned correctly.
Not only can a reflector light up a shaded region, but they can add a bit of color if desired. Some reflectors have a slight golden tinge, for example, which is a popular look among some portrait photographers.
Example:
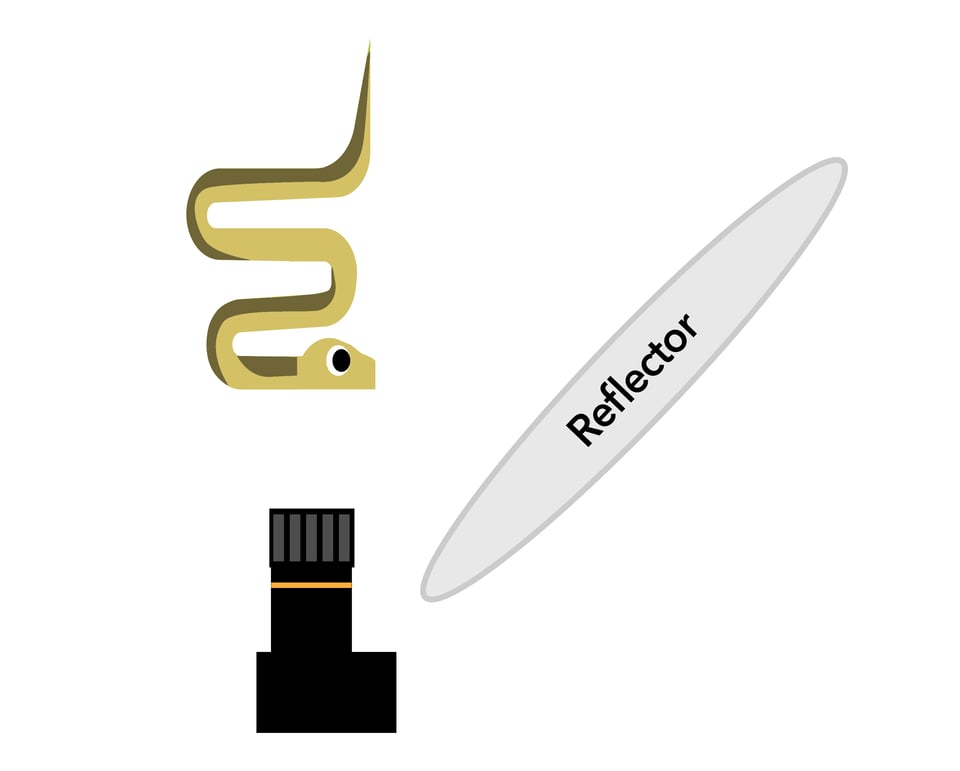
For the following photo, the sun was behind a thin cloud, so there wasn’t much in the way of harsh shadows on my subject. However, the snake was still a bit darker than what I would have liked, with some dark shadows facing my direction. I placed a reflector to my right, angled it toward the snake, and filled in the shadows.
Here’s an illustration of my lighting setup. Very simple this time!
Introducing Flashes
Sometimes you need a flash when the ambient light just won’t cut it. A bare flash typically casts awful light on its own, especially if it’s on-camera flash. Thankfully, there is an endless array of flash modifiers to improve the situation!
1. What to Look for in a Flash
Your camera may have an on-camera flash, but for better control, you need to invest in a separate flash head as a photographer. There are many options to consider.
First, make sure that you have a way to control the flash through the camera automatically using TTL (through the lens) mode, as well as manually. Most advanced flash heads will have both of these features. Typically, I use manual flash for my own photography. But the TTL option is very useful for some genres of photography, such as fast-moving event photography.
The other consideration is that you should be able to fire the flash off-camera. There are a variety of ways to accomplish this, ranging from a cable to a radio trigger. For studio and portrait photography, a radio trigger is helpful so that your flash can be placed far away from the camera, and you don’t need to worry about cables between them.
I recommend a Godox TT685N II as a good flash for beginners. This flash has TTL, a quick refresh rate, and remote triggering options (so long as you also get a flash trigger like this one). More advanced flash photography may require more complex flashes, but this is everything you need to get started.
2. Connecting the Flash to the Camera
The flash can be used either mounted directly onto the camera using the hotshoe, or used off camera. Sometimes it is convenient and preferable to shoot with the flash mounted to the camera, but you’ll open up a lot of room for creativity by using the flash externally.
If you’re on a tight budget, you can find cheap fully-manual flashes on eBay and then connect them to your camera via a simple flash cable. The total cost can easily stay under $50. But using a wireless trigger is definitely more convenient if you’re shooting a more complex scene.
In any case, I absolutely recommend taking the flash off the camera to play with shadows and allow complete control of the lighting.
3. Dual Flash
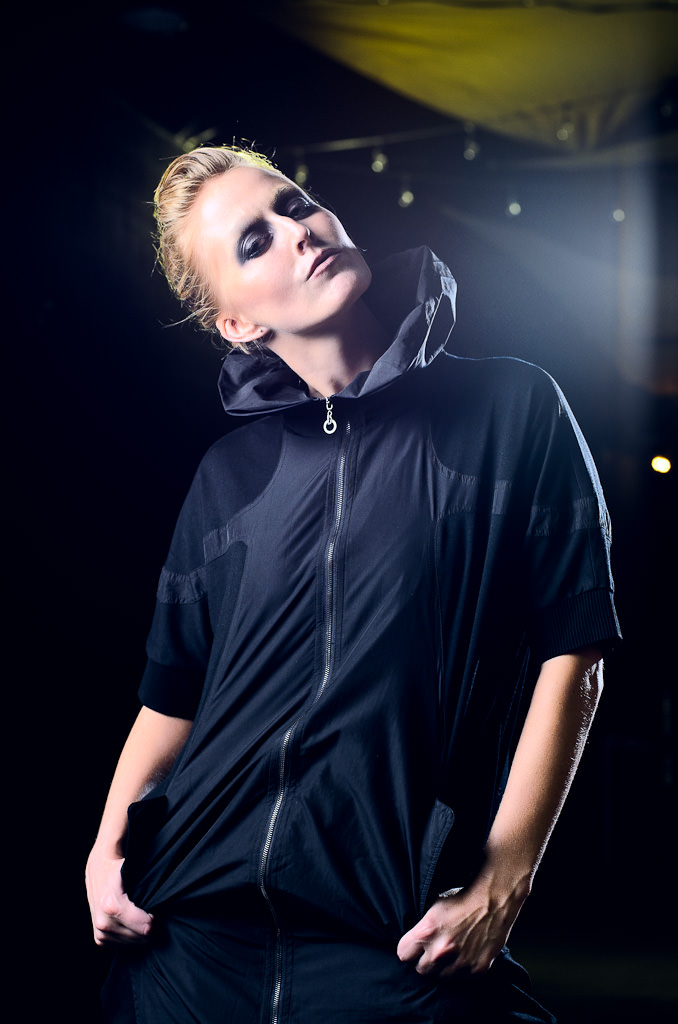
You can fire two flashes at once to add even more dimension to your artificial light. For example, positioning one flash directly toward your subject, and one for backlighting, can create a dramatic, outlined look. There are many variations to explore.
There is a common misconception that slapping on an additional flash will eliminate shadows and equate to soft light, but really this is not the case. You still need to soften the flashes with a diffuser or reflector, or you’ll just be shining two harsh flashes at your subject instead of one! It might eliminate shadows, but you’ll still get harsh reflections and catchlights on your subject.
4. Constant Lights?
I highly discourage the use of any constant artificial light source for still photography. The idea is attractive to beginner photographers because it seems easier to get the settings right and plan out what the shot will look like.
The major downside of any constant light is that they are usually nowhere near bright enough, and they don’t freeze motion like a flash does. They may be good for video, but usually not for still photography!
Example Artificial Lighting Setups
1. Firing the Flash Through a Diffuser
Diffusers eliminate the harsh shadows and highlights that a naked flash casts. Diffusers for flash work similarly to those for natural light, although some are built to conveniently attach in front of the flash. My diffuser is the most important light modifier for my photography! Simply adding a diffuser on top of a flash can do wonders.
There are some simple principles that should be followed when using a diffuser in combination with flash. You can read about them in much more depth in my all-about-diffusers article. But in short, the larger your diffuser is – and the closer it is to your subject – the softer the light will be. I prefer the diffuser to be several times the size of my subject.
Example:
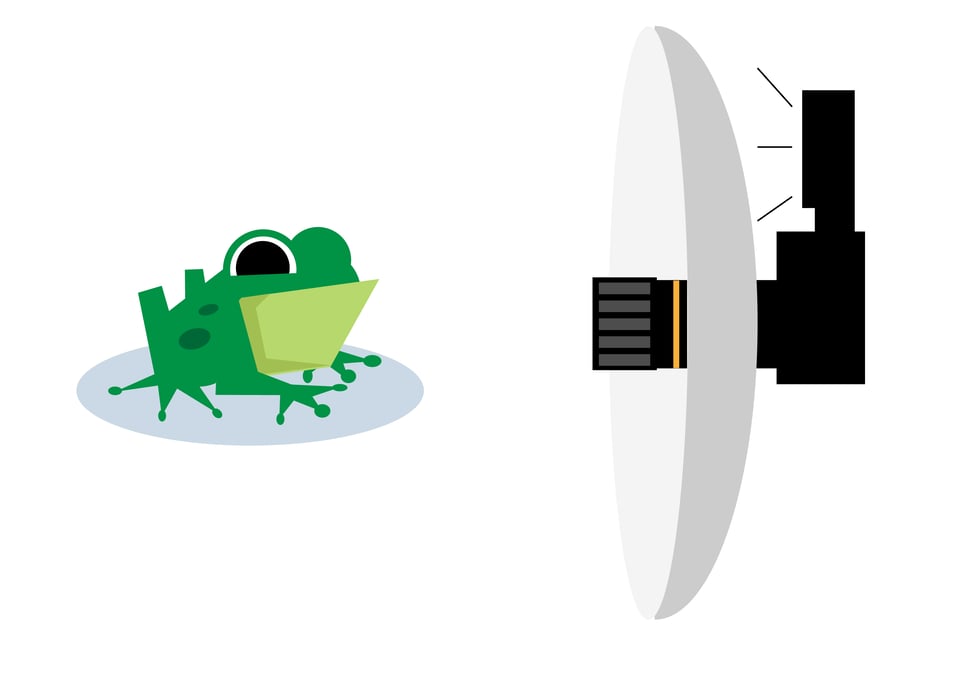
For macro photography, I often shoot with on-camera flash combined with a large, circular diffuser wrapped around my camera lens. This gives exceptionally soft light that you can hardly recognize as artificial! It’s what I used for this photo:
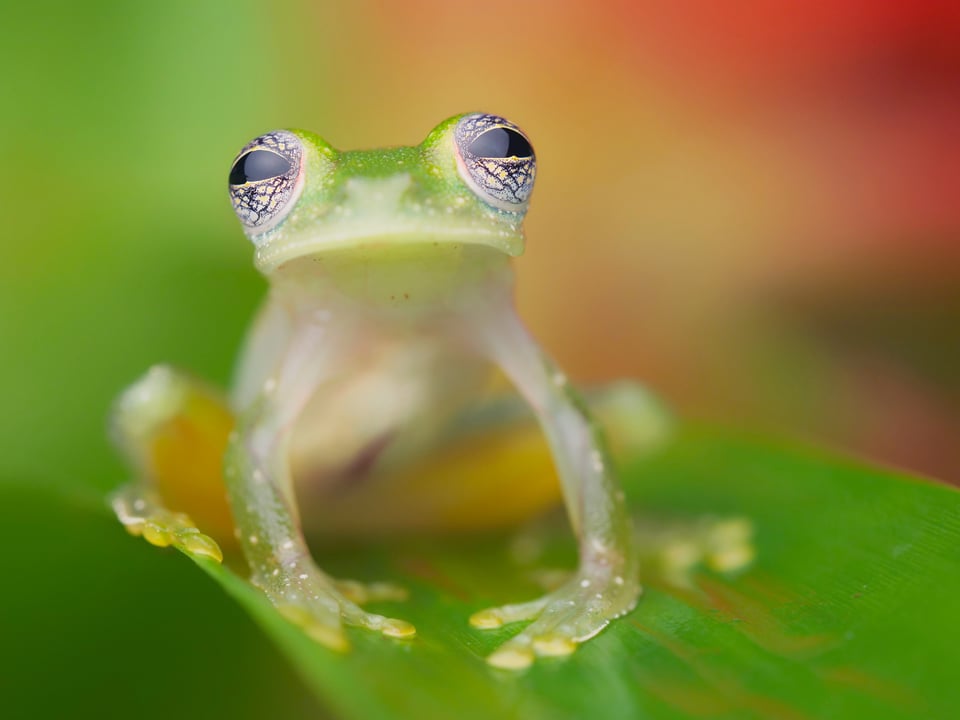
And here’s an illustration of my very simple flash/diffuser lighting setup for the photo above:
Firing the Flash at an Umbrella / Reflector
No surprise, reflectors can also be used in flash photography! A simple yet effective method is to shoot a flash straight into an umbrella, which is pointed at your subject. This disperses the light and makes it nice and soft.
You can also use makeshift reflectors such as walls, ceilings, and any outdoor structures like buildings or large boulders. If you don’t have a diffuser with you, this is the best way to soften the light from your flash. Note that you’ll need to bump up the flash power based on how reflective your reflector is!
Example:
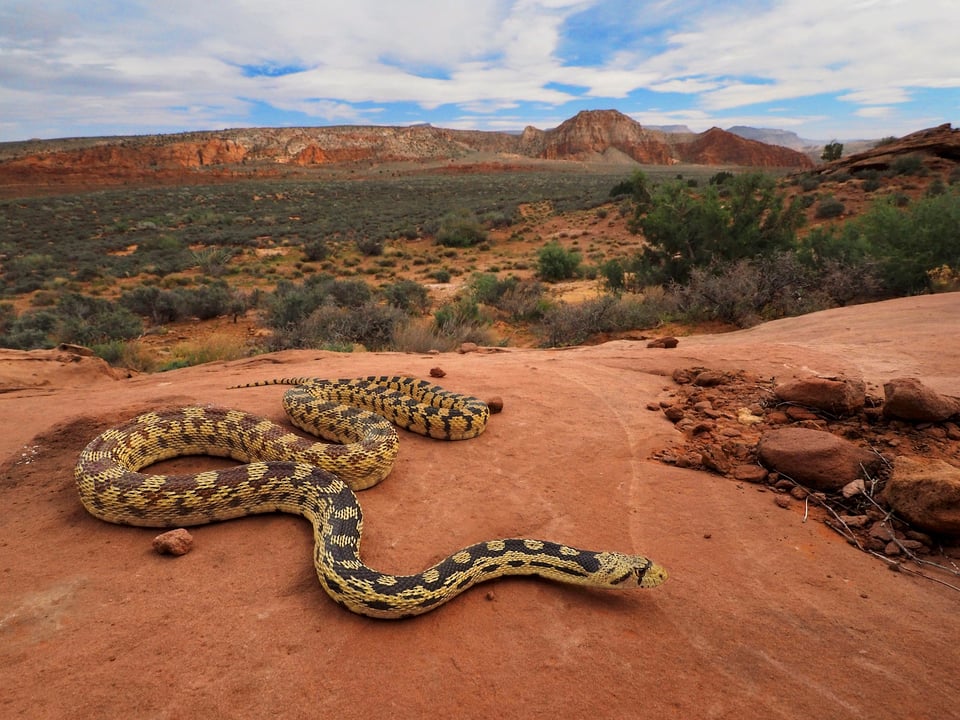
For the following photo, I loved the subject, but the sunlight on this lizard was too harsh. I couldn’t remedy the problem simply by putting a diffuser above the subject and relying on natural light, because then the lizard would have been too dark compared to the landscape in the background! Instead, I fired an on-camera flash upward toward a reflector held above the subject.
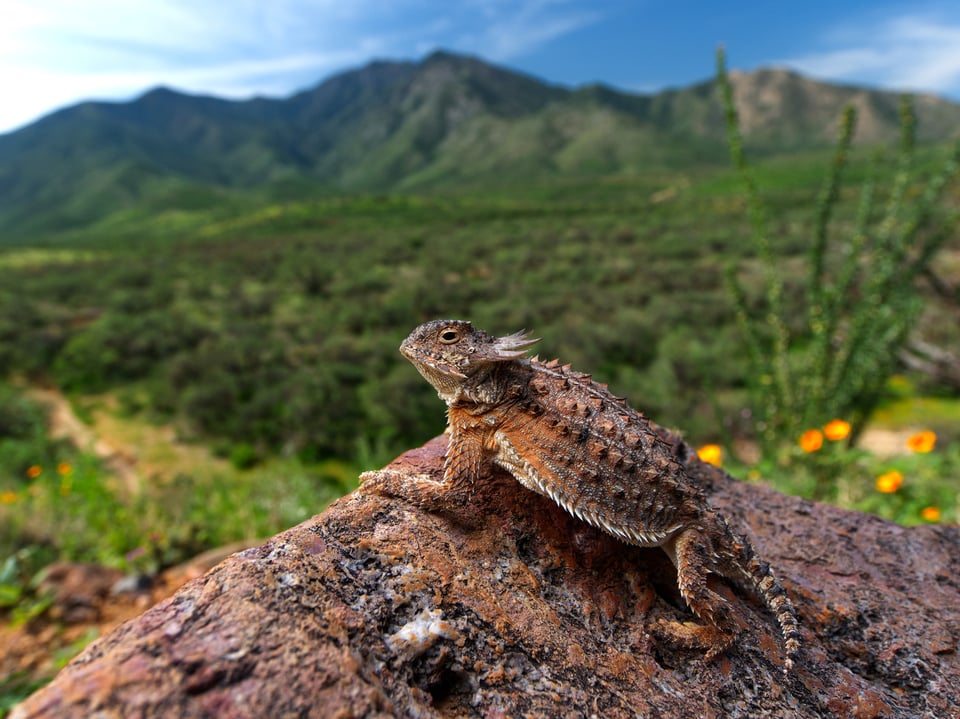
Here’s an illustration of my lighting setup for the above photo:

This is also a great setup for indoor event photography, so long as the ceiling is white and relatively low. You can point your on-camera flash upwards at the ceiling, and it acts like a huge reflector! It leads to much better light than what you’d normally get with on-camera flash.
3. Combining Diffusers and Reflectors
To take full control of the light, you can use diffusers and reflectors together. For example, you can fire a flash through a diffuser onto your subject, while placing a diffuser below the subject to fill in the rest of the shadows. There is limitless room for creativity available here!
Example:
For the photo below, I wanted soft light on the snake, but it was difficult because the snake was in some deep shadows. My solution was to put my flash off-camera and shine it through a diffuser, while holding a reflector under the snake to brighten up the shadows beneath its body. Here’s the photo:
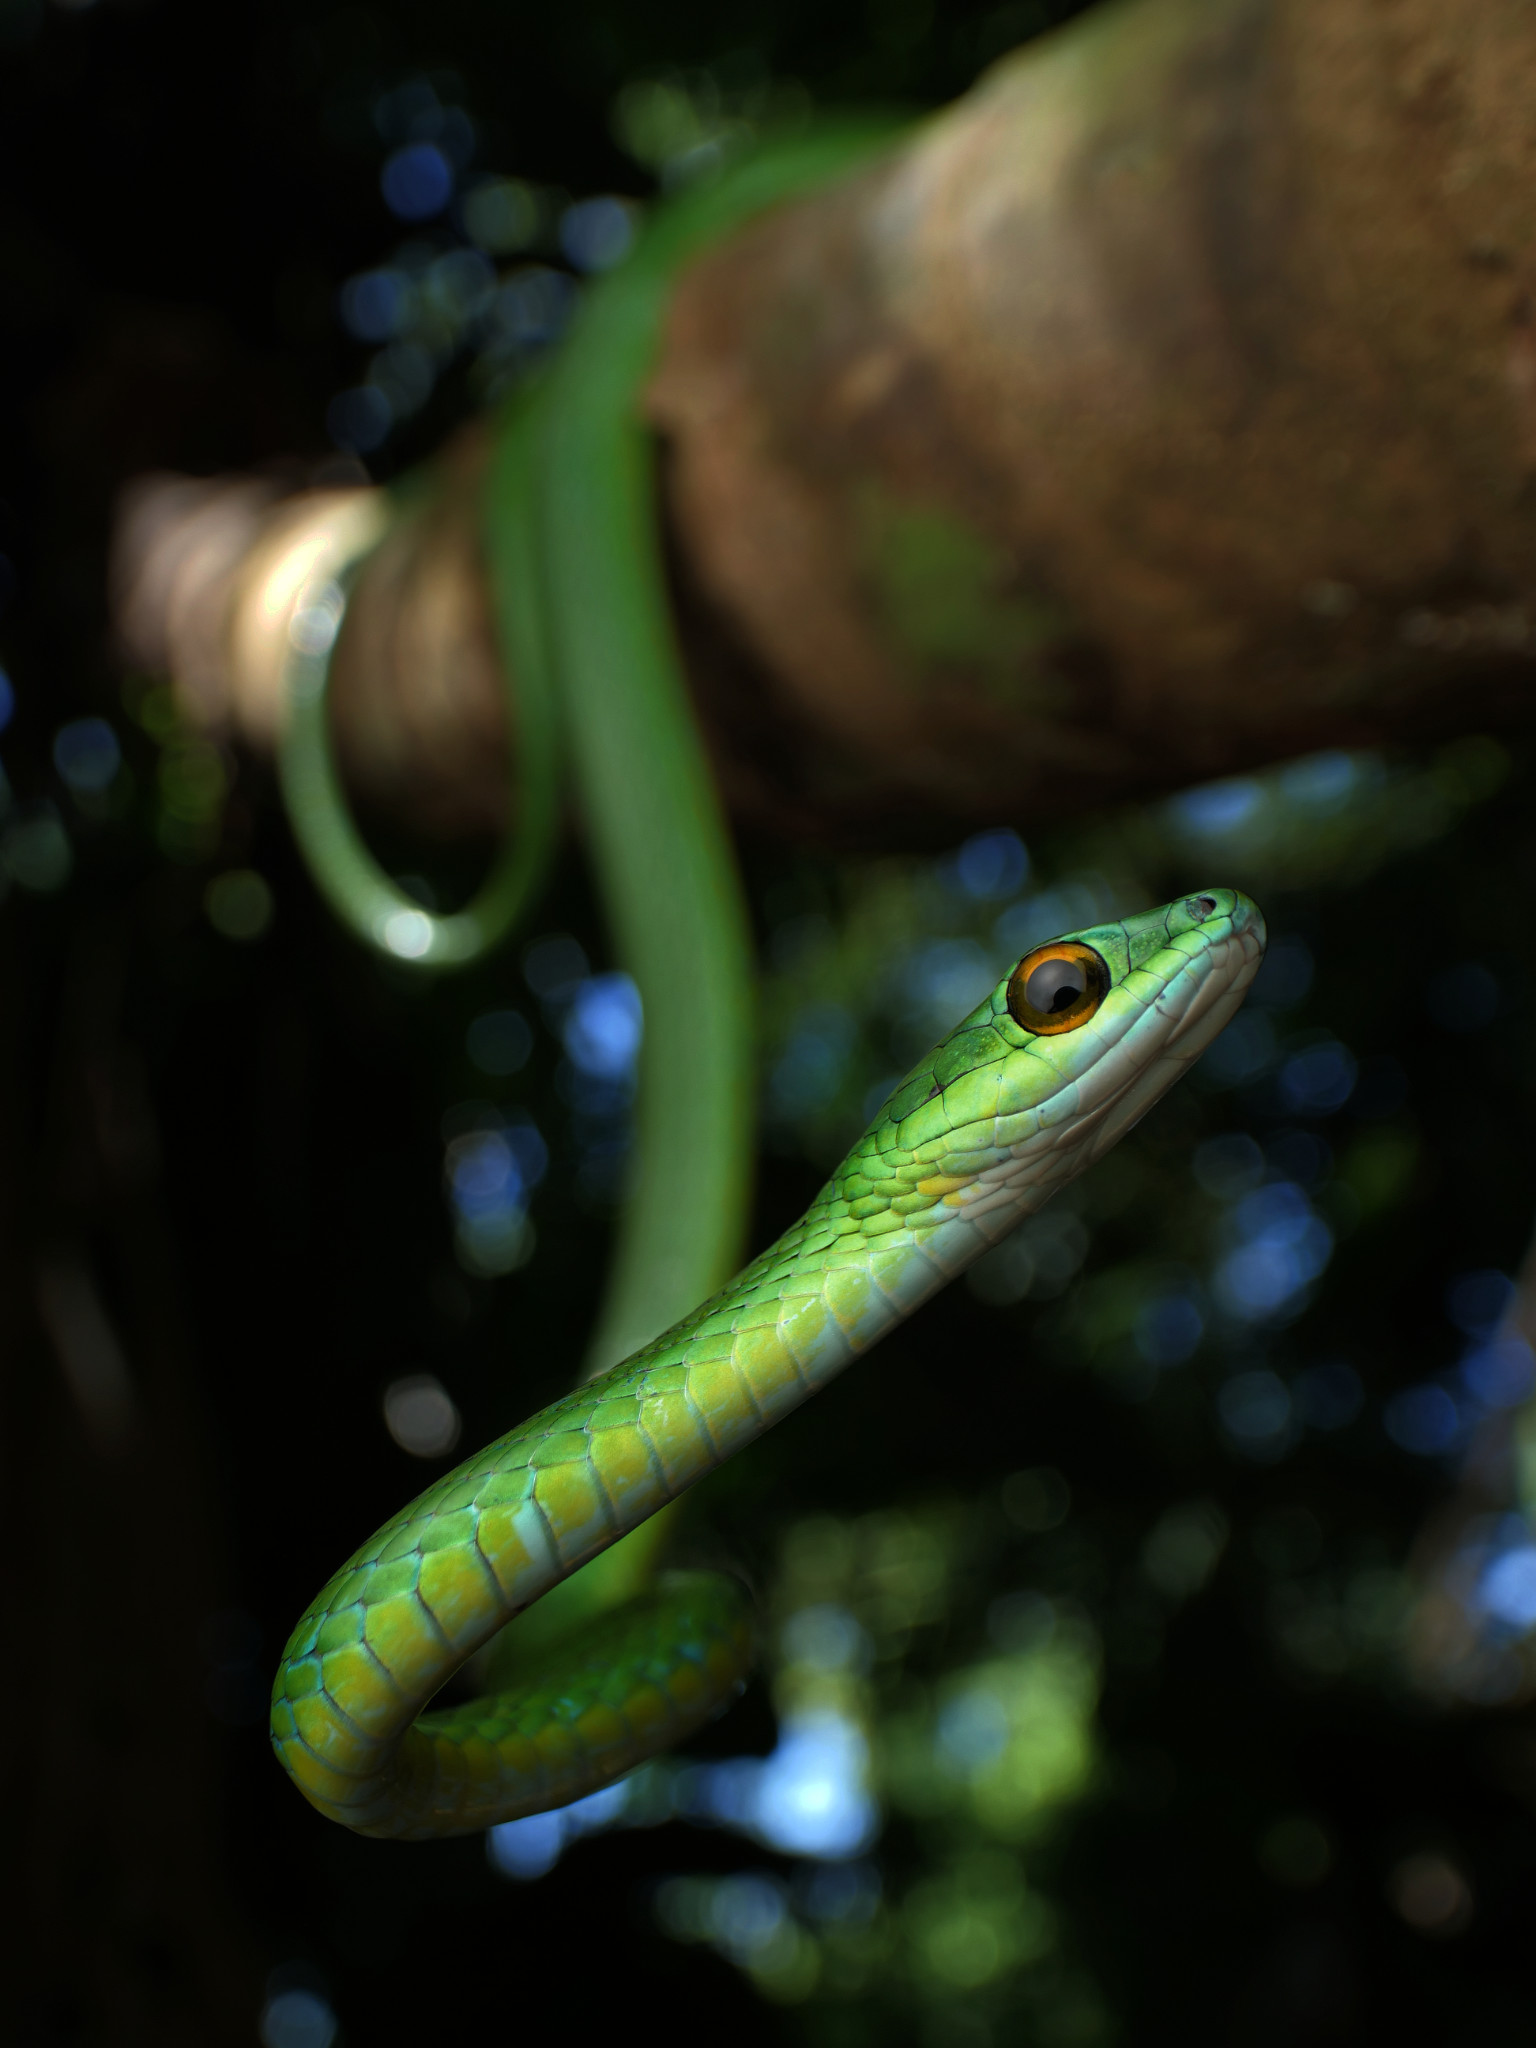
And here’s the lighting setup that I used:
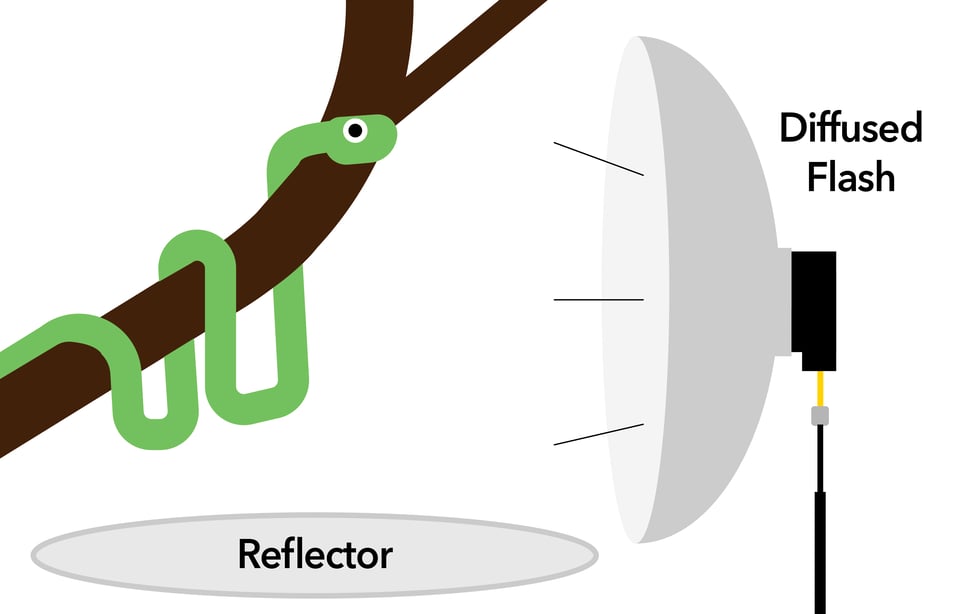
This is definitely a more complex lighting setup and works best in a studio environment, where you have full control over the light and subject. But it’s also possible outdoors, especially if you have an assistant helping!
Other Lighting Modifiers
The setups that I’ve discussed so far are the most common and important ways to modify light in photography. However, there are several other ways to get creative with lighting equipment.
1. Gels
Gels are colored films that can be placed in front of a light source (usually a flash) to alter the color of the light. You can get very creative using gels to make surreal-looking images in any color you like.

Gels are also extremely useful for balancing the color temperature of the flash with the color temperature of the ambient light. For example, if you’re taking portrait photos at sunset, your flash will be much more neutral in color compared to the golden color of sunset. If you want the color of the artificial light to match the color of natural light, you need to put a warm-colored gel in front of your flash.
2. Snoot
A snoot casts light on a narrow spotlight, brightening only a small part of the image. Snoots are great for creating a black background, or bringing attention to a particular spot in the frame. I’ve found snoots to be a nice look for my underwater macro photography.

3. Other Lighting Modifiers
There are countless other lighting modifiers, including grids, barndoors, ring lights, flash extenders, and more. All of these exist for a reason, but they are more specialized in nature, and I wouldn’t recommend them at first. Instead, start with a couple of diffusers and reflectors of different sizes, and maybe add a snoot and some color gels as well. As you gain more experience, you’ll have a good sense of what other, specialized lighting modifiers you may want to get next.
Conclusion
I hope this has been a useful introduction to different lighting setups you can explore! What I love about developing a lighting setup is that is doesn’t need to be expensive. None of the gear is very high tech, and a lot can even be made at home.
The more you learn about lighting setups as a photographer, the more your photography will improve. That applies both to modifying natural light, and to creating your own light with flash setups. Over time, your light controlling skills will improve and you will only find your photography getting better and better.
Hi Nicholas
Great article coming just at the right time for me. I’m a wildlife photographer currently looking into my gear for an Amazon Rainforest trip. The trips is only in 5 months, but I figured now is the time to analyze the gear and if I need to buy something new I will have the time to go out with it and get familiar.
There’s a lot of interesting little critters in the rainforest (frogs, snakes, spiders, insects…) and I’m excited to try and photograph them. I’m not at all familiar with macro photography having been mainly spending time with bigger wildlife the last couple of years. After reading some articles on this and other websites I think I’ve understood the basics of macro photography. I’m a bit worried about the lack of natural light in the rainforest (I’m not planning on night time photography, but the canopy can be so dense there’s hardly any light filtering through), but I’m not sure if I’m willing to bring a dedicated flash setup, so I was wondering if this is actually necessary?
Is it possible to replace a dedicated flash by a bright flashlight with a diffuser on top and have someone shine it on the animals?
Hi Elias,
My honest answer to your question is yes, a flash setup (it can be small) is necessary for photographing the macro subjects you list above. Unless you are happy with simple documentary images of the animals, which can be captured with just a flashlight, you will want to invest in a flash.
The reasons why a flash so crucial, and why a flashlight (even a diffused one) cannot compare are a) the flash freezes motion, reducing motion blur, b) a flash is much brighter, c) flashlights are often introduce a yellow or blue cast that ruins colors.
Photos taken with flash will be much sharper because motion blur is reduced, plus since it is brighter a low iso can be used, and closing the aperture allows for a greater depth of field and more detail (if desired). Often when I don’t feel like setting up a flash and think a flashlight will do, I still have to up the ISO, and shoot at the maximum aperture which is too narrow of a depth of field for my liking. I should note my flashlight is very bright. One more issue with shining a flashlight through a diffuser is that it will significantly dim the light, so now you have to push iso/open the aperture more. Lastly, the colors are always a bit off.
I hate to complicate things for you, but that is my honest advice for capturing sharp, pro looking shots of small wildlife in the rainforest. I’ve written a couple articles that should help you figure out exactly what to do in your situation. Sounds like an awesome trip!
photographylife.com/wildl…aphy-flash
photographylife.com/what-…o-use-them
Of course, feel free to hit me with any more questions!
Thanks Nicholas!
Seems like I’m gonna have to readjust my expectations I’m afraid. I still might take a close focussing lens to do some pseudo-macro shots, but as far as the real 1:1 magnification shots go, I don’t believe I have the space (and skills) to pull them off.
Thanks for the extensive reply!
PS: I had already found those articles indeed, you and your colleagues write some very informative stuff on this website :)
No doubt a macro lens can still be a lot of fun without an extensive light setup! I don’t mean to discourage exploration into more close up photography, the rainforest would be a great place for it. I hope you still give it a go!
Hello Nicholas, thanks for the article, I enjoyed reading it but there is one thing I do not understand. You discourage using constant light for product photography. In my studio I find using led panels highly convenient. Easier to use and quicker to setup. As the objects don’t move and because I use a tripod longer shutterspeeds are no problem at all. Playing with depth of field and color (by changing color temperatures sightly) is easy as you see the results realtime, especially with modern mirrorles camera’s. For small objects I do not use my studio flashlights anymore.
LED panels definitely have their place. Though you need to be careful with the diffuser so you don’t get the hundreds of hard point light grid shadows. Yes, they are less powerful but often times you don’t actually need that much power.
I also use them at the opposite end: taking pictures of fire performers. They don’t blow over as often as an umbrella. They don’t distract the performer as much. I can shoot 20 fps without worrying about recycle time. I like textured fire which requires at least 1/360 and preferably 1/500: sync speed just won’t keep up and HSS loses a lot of the power of the flash. The power can be a bit of an issue, but the fire should be your key light so you just need enough to fill in the shadows and compress the dynamic range a bit. (I also occasionally shoot with someone with epilepsy and flash quickly gives them a horrible headache)
Certainly constant light has its place. At least when shooting critters that may be on the move, or when I am not in the most sturdy position, I much prefer using flash because it freezes any motion blur induced by myself or the subject moving. As Will mentioned, the spotty LEDs can also cause the light to be very un-diffused with many pinpointed and bright reflections. I can see how it can make product photography run more smoothly though because it is more intuitive!
What I really want to know is how you got the frog, snake, and lizard to stand still while you set up your lighting.
It’s a good question! It’s helpful to have a friend who can hold onto them temporarily. This is why I often stress that the best lighting setup is also the most convenient and quick to setup. At least when working with wildlife. Although several stands and multiple light sources may improve my photography, I simply don’t have time to set all that up when working with wild animals. It is extremely important to me to minimize setup and handling time with the animals to ensure a safe interaction.