One of our readers, Steven Ross, was kind enough to send an image to me as a Case Study. He is wondering why his image did not come out sharp, with some light spill and overexposure. Here is what he sent me:
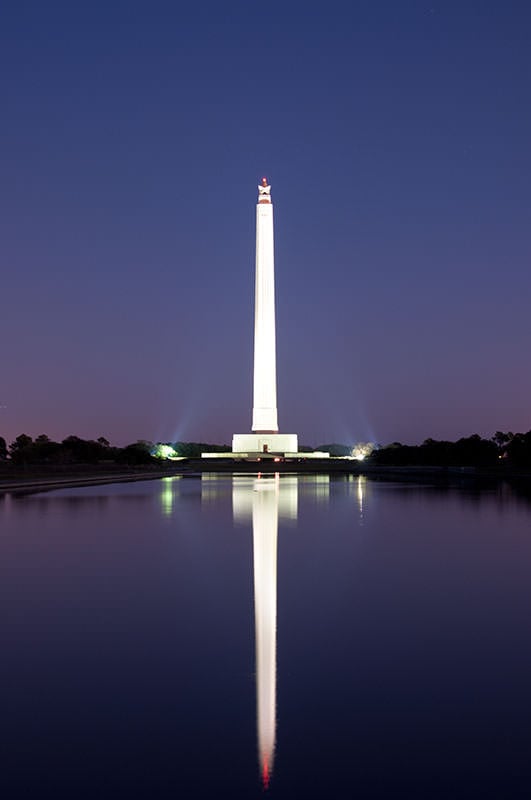
And his comments:
I used the camera on aperture priority mode and on a tripod but it appears that since the monument was being lit by spotlights the shutter speed was too long and the monument seems much brighter/overexposed compared to the rest of the scene.
I was just curious how to get the monument sharper when it is so much brighter than the surrounding dark area. It was roughly 20+ mins after sunset and pretty dark.
Here is a 100% crop from the above image (unprocessed):
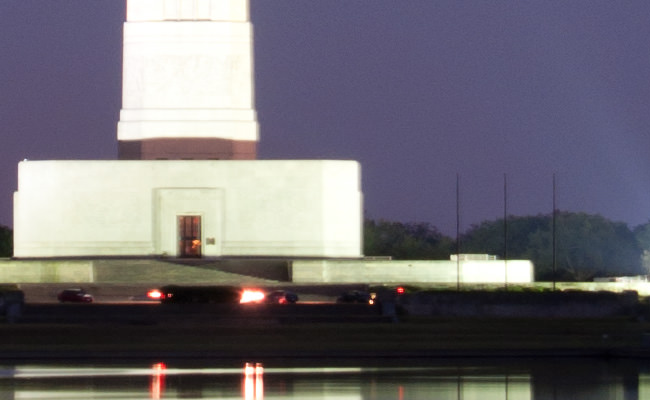
As you can see, the image is indeed not very sharp. In addition, the monument is overexposed and there is that extra white line on the right hand side that does not look very appealing. So, what happened here? Here is the basic exposure information (the rest is preserved in EXIF):
Camera: Nikon D5000
Lens: Nikon 24-120mm f/4G VR
Focal Length: 34mm
Aperture: f/5.6
Shutter Speed: 15 Seconds
ISO: 200
White Balance: Auto
My Analysis: When dealing with very long shutter speeds (in this case it is 15 seconds), you have to make sure that the camera stays absolutely still on a sturdy tripod, from the beginning of the exposure, to the end. In the above case, the reason why there is an extra line on the right side of the monument, is because the camera was slightly moved from right to the left, most likely due to camera shake. Why from right to the left? Because the extra line is on the right side and not on the left. Steve probably did not use a remote camera release and his hand caused the camera to vibrate when he squeezed the shutter and then released his hand from it. Or perhaps he accidentally touched the tripod while the shutter was open. So sharpness in this case suffered due to camera shake. If I were shooting a 15 second exposure, I would have used a remote camera release, set my camera to “Mirror Lock-Up” or used a timer to minimize vibrations.
The second problem is overexposure on the monument. Now this one is a little tough to address in this kind of a situation. First of all, what is the right exposure? Steve shot on aperture priority mode and used Matrix Metering, which looks at the entire scene and tries to compute the exposure. The problem with Matrix Metering, is that it is not always very smart, since its purpose is to balance the whites and the blacks. To expose the monument correctly, I would have used Spot Metering and pointed at the monument, which would have given me a better exposure for the monument. But at the same time, a shorter shutter speed would have caused another problem – the sky and the reflection would have looked a little darker. There is really no “sweet middle” for these kinds of situations, but one thing you could do, is take two separate exposures – one at 15 seconds to expose for the sky, then another shorter exposure for the monument. Then, you could combine the two in Photoshop and using simple masking tools, get a balanced image. The good news, Steve shot the image in RAW, so not everything is lost – the overexposed areas are easily recoverable by just dialing -1 Exposure in Lightroom:
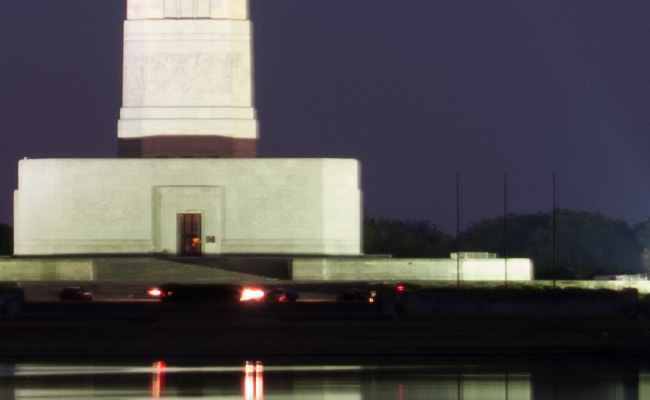
Also, you do not necessarily have to shoot two separate exposures in similar situations. The color of the sky can be changed through White Balance in Lightroom/Photoshop (by moving the temperature towards the blues) and its brightness could be adjusted a little by using “Fill Light”.
In terms of composition, it is typically tough to get creative with scenes like these. If he moved the horizon down a bit, it would have cut the reflection. Moving the horizon up would have been too boring. Obviously, moving the monument off the center would not have produced a good shot either, unless there were other buildings/objects around to be used for a better composition.
Here is the processed version of the image that I adjusted in Camera RAW:
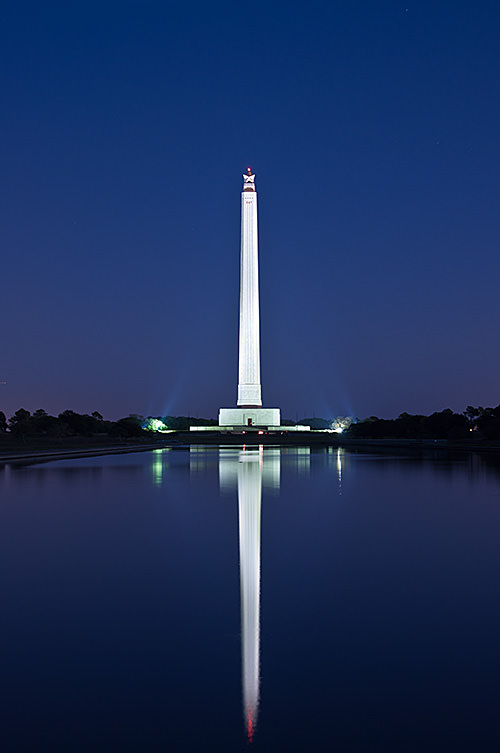
And 100% crop:
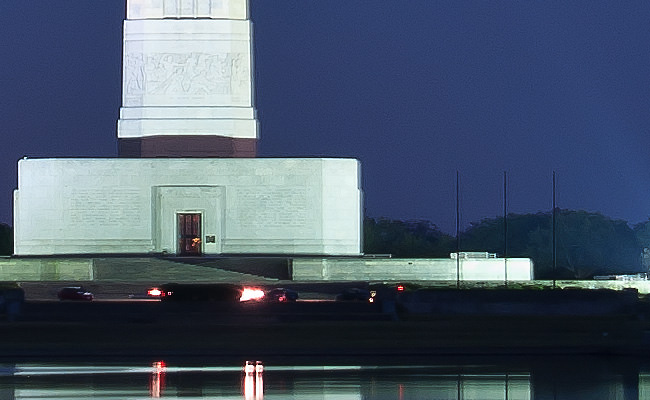
Now the white line on the right hand side is still there, but with 5-10 minutes of additional work in Photoshop, it could be easily removed.
Here is what I did in Camera RAW:
- Temperature: from 4150 to 3400
- Tint: +15 (as shot)
- Exposure: -1
- Fill Light: 15
- Blacks: 2
- Clarity: 25
- Tone Curve: Medium Contrast
- Sharpening Amount: 75
- Sharpening Radius: 1
- Sharpening Detail: 50
- Noise Reduction Luminance: 50
- Noise Reduction Luminance Detail: 100
- Camera Profile: Adobe Standard
Everything else is default.
Before and After:
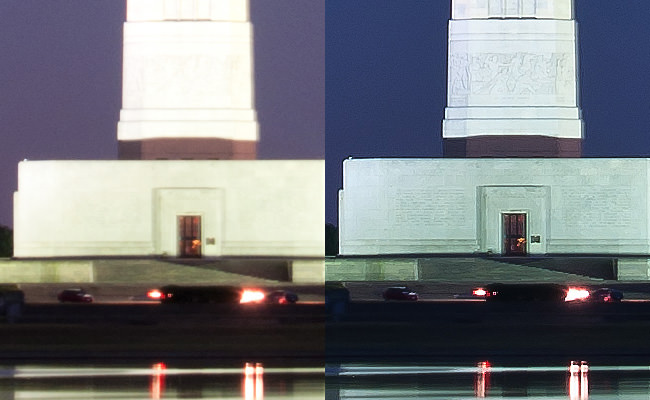
If you would like to send your picture for a case study, please send me an email through our Contact Us page. I will reply to your email, so that you could attach the original RAW/JPEG file.
Hope this helps! Please let me know if you have any questions.
Table of Contents