A week ago I got the opportunity to spend a long weekend in South Africa’s Cederberg Wilderness Area. While there, we enjoyed two cloudless nights, during which the stars were exceptionally bright. In fact, in this remote part of the world the stars are always exceptionally bright compared to the cities we may be used to.
Here is one of my favourite shots, stitched from 16 individual photographs to cover the Milky Way from horizon to horizon:
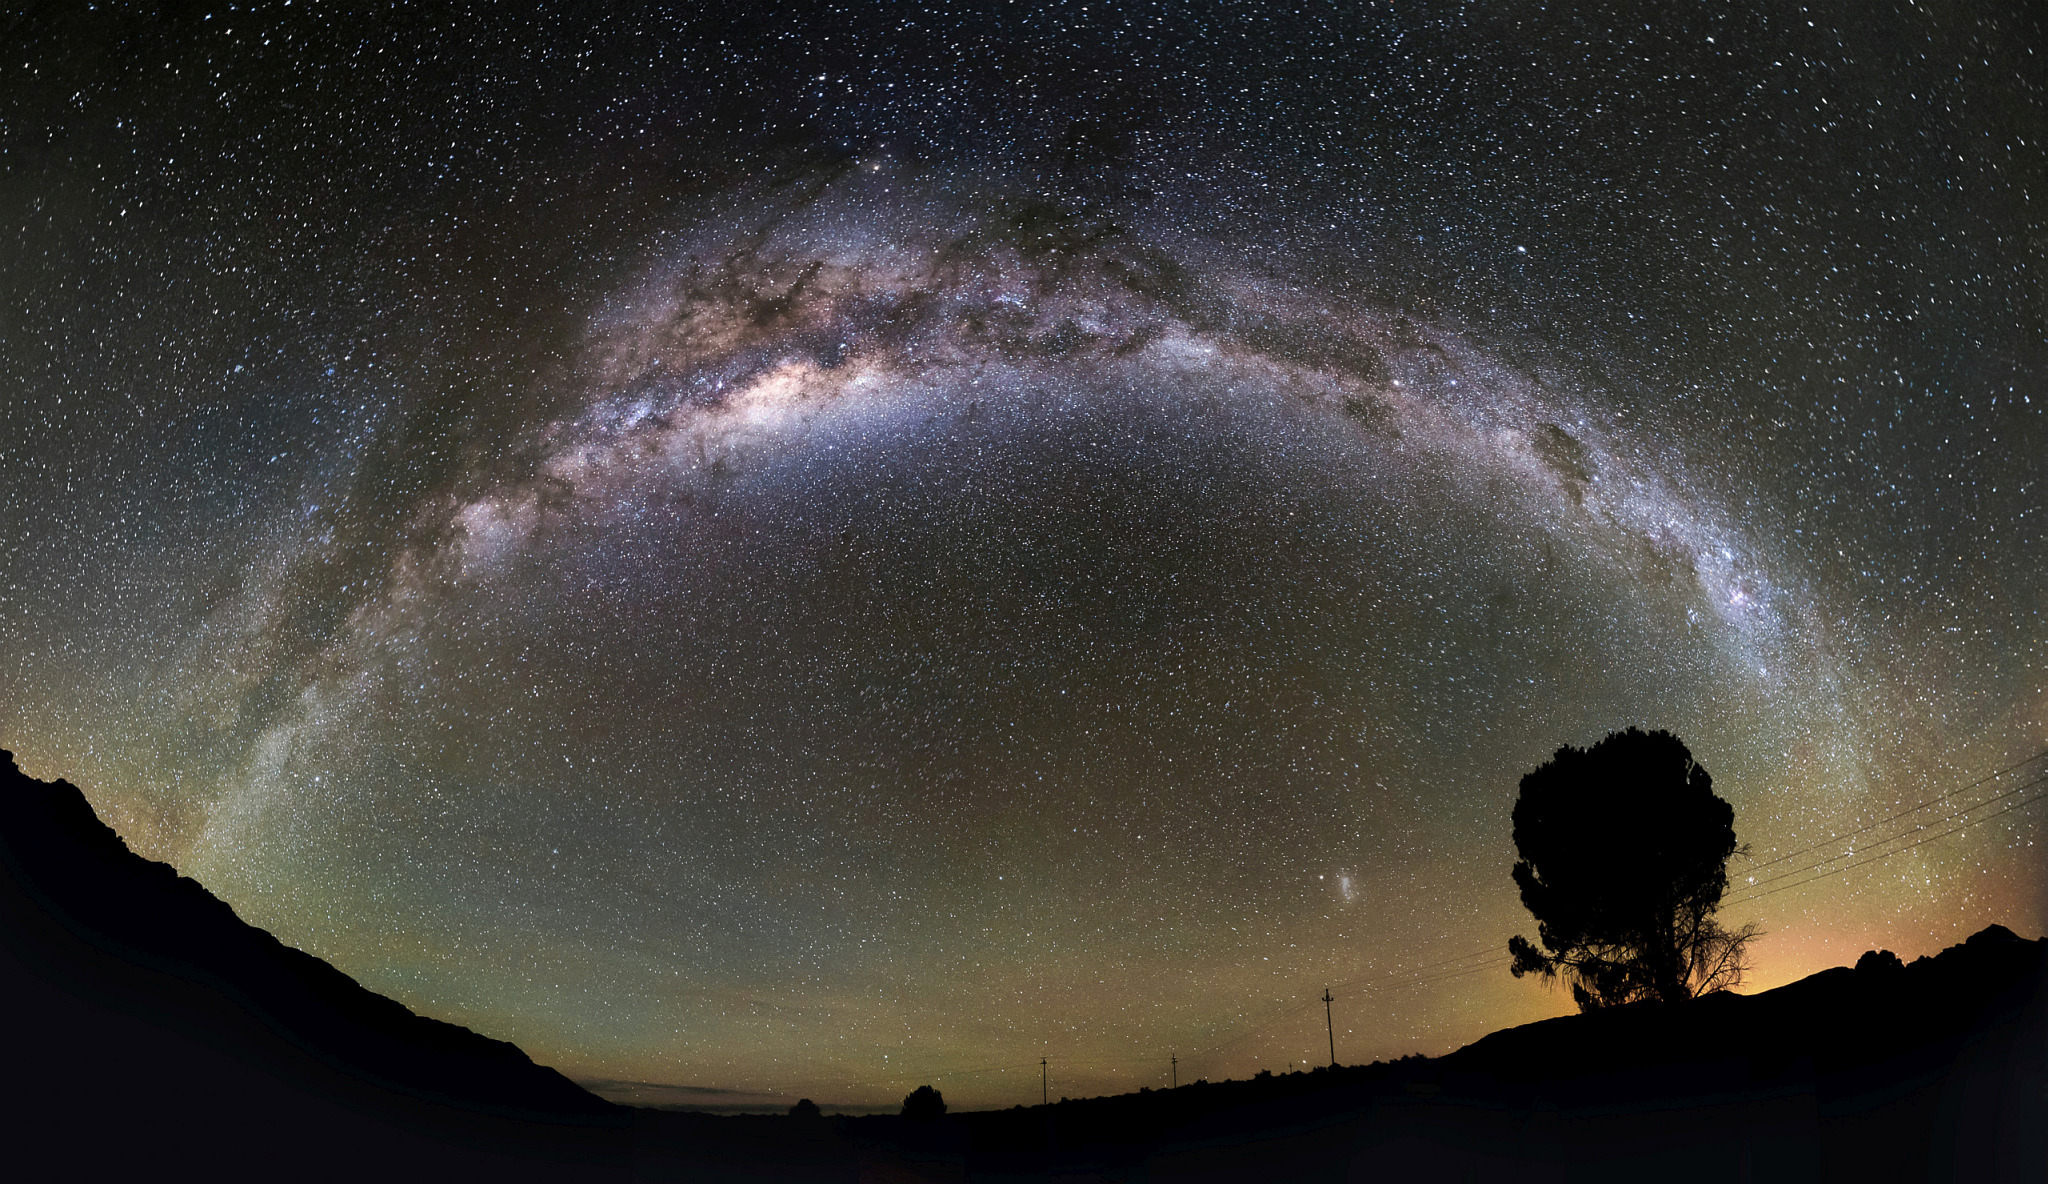
The bright yellow glow on the horizon, to the right, is the town of Ceres. Even though it is a small city of 33,000 people, and hidden behind a mountain, its light was enough to affect this photograph. You really, really, need to be far away from the cities to get any good astrophotography done. This is, sadly, becoming more and more difficult as humans fill up the Earth’s surface.
This photograph proves that one can get great results, even when working with gear that isn’t the very best that money can buy. In a previous post I talked about how certain DX lenses can be used in FX mode: this photo is proof of how this can work in practice. The lens I used was the Tokina 11-16mm f/2.8, set to 15mm where it (barely) covers the full FX frame. To be sure I would have been better off with the Nikkor 14-24mm f/2.8; a lens I desire. As it is I do not own this lens, and got al result that I am still very happy with.
Pointing the lens straight up towards the sky and setting it to its absolute widest setting (11mm), one clearly sees that it does not cover the whole FX sensor. Futhermore, one sees that even in the areas that are illuminated the image quality and light falloff suffer as one approaches the edge.

When one reaches 15mm the situation improves markedly, and even gave very good results from an overall photographic standpoint.

Pixel peeping in the upper-right corner of the photograph above, we see that the lens’ performance suffered and created some funky cross-shaped artifacts.

One also sees the high amount of noise that the sensor inevitably captures at ISO6400. This will probably not be useful for large printing. However, looking at the complete result on typical viewing sizes, the result was breathtaking. This isn’t the Hollywood silver screen, or a Pixar animation studio. This is the real night air, close and simultaneously infinitely far and real. With our naked eyes we see light years to the core of our own giant spiral galaxy. Despite its vastness, this galaxy represents just a tiny tiny fraction of the sheer vastness of the known universe. It gives a clear reality of us being part of the cosmos – right here where we are; without having to go into space.

When you photograph heavenly bodies, you need all the light you can get. This is why I used F/2.8 lenses, shot wide open at F/2.8. You may ask why one would not then use a lens with even faster aperture. Indeed, I took out my 50mm f/1.4, and took the following shot:

The longer focal length enabled more detail of the Milky Way’s central region to be visible. The downside of the longer focal length is losing the horizon that gave some context of what we see in relation to us, the viewers. The larger aperture enables a lower ISO value and/or shorter exposure time, but also magnifies the motion of the stars. Because the Earth rotates, the stars seem to move from East to West across the sky. This movement may look slow to the naked eye, but with a high resolution camera one can see this motion as blurring in an exposure as short as 10 seconds. If you double your focal length (e.g. from 25mm to 50mm) you need to halve your exposure time for the same amount of motion blur, negating much of the advantage of the larger aperture.
Even though I shot the 50mm at f/1.8 where it performs better than at f/1.4, you still see that the stars in the image corners are distorted due to the lens’ astigmatism. Luckily, when you create a panoramic image like at the top of this post, the corners matter less than you may think.
Let’s get back to how I created that big-picture panoramic image at the top of this post. For this I first took a series of 16 photographs, each in itself a 15mm wide angle photo:

The next step was to use the excellent, and free, panorama stitching software called Hugin to stitch the images together. Although Adobe Photoshop and Lightroom contain panorama stitching functionality, it is not capable of handling such a complex panorama spanning a very very large field of view spread out over multiple rows.
After determining the relative orientations of the images, Hugin allows you to select the intended projection, and then warps each image to match the chosen projection and its final position in the panorama:

These sixteen warped images overlap significantly, allowing the final image to only include the more central parts of the images where the lens distortion is manageable. Hugin is very clever software, and can also correct for differences in image exposure between the input images. The end result is the image at the top of this page.
I’d like to end with a video created by Ian Norman and Diana Southern where they reflect on the process of capturing the Milky Way and night sky through astrophotography. Beautifully montaged, it was recently featured on National Geographic. I hope this leaves you inspired, and willing to try your own hand at this type of photography. These heavens are out there, accessible to us all. Every cloudless night.
hey Francios
i will be going to cederberg in jan 16
and have a few questions
1) where did you stay and was this taken from the accommodation? if not here was it taken and can suggest a good place to stay for a night?
2) i have a samyang 12mm f2.8 – would this work for this kinda photography
3) this will be my 1st time doing this kinda photography so i’m quite nervous – do you have any tips?/?
thanks in advance
hashim
Amazing shots. Love them all. :)
Very nicely done! I plan to do my Milky Way shots and pano during my next visit to Death Valley.
Beautiful! I still have to try to do a Milky Way panorama.
Francois,
Thanks indeed for the hint about Hugin. I have several Milky Way shots to stitch and I’ll give this software a try. PS provides just an ok result and LR6 indeed came to mind (I haven’t upgraded to it yet).
Thanks.
Lightroom and Photoshop don’t give you manual control over alignment or control points, and that many stars really confuses it! If Hugin doesn’t work for you, give PTGui a look; it has an align to grid feature that works well if you shot on a panning head and documented your horizontal and vertical degrees.
François/Aaron, thanks a lot for the hints.
Two weeks ago I tried my V3 with the 6.7-13mm lens @6.7 (18-35mm equiv) just for fun but mainly for time lapse though. Kinda curious to the end result. If you guys have any suggestion for time lapse software, I’d be glad to hear it. I’ve been using Time Lapse Assembler, which is not bad, but I’d like to have a bit more control, perhaps like a varying frame rate.
My older stuff is with the same Tokina lens which is a great lens, together with my (APS-C) Canon 40D (yes, these things still exist). While doing the time lapse, using this combo in different ways came to mind, so this post is a nice cosmic coincidence.
By the way, it’s impressive how things like omega Centauri stand out in your nice shots, François, in addition to other features.
Thanks.
I shoot a lot of timelapses. They generally all get edited with LRTimelapse and Lightroom. You can render with it too (though I usually use After Effects): www.aaronpriestphoto.com/lrtimelapse
Hi Antonio
I have Lightroom 6 (CC), and tried its panorama stitching mode. It managed to align the images okay, but provides fewer options for choosing the projection or the horizon. The end result wasn’t very good. Hugin is a bit less intuitive to use but not horrible either — it has a sensible user interface with dumbed-down options for people who don’t like to read manuals. Give it a try!
Nice work. I’m going to be in Big Bend (Texas) this weekend using the same setup. I’ve never used the Tokina on my D610, but you’ve verified that it works at 16mm, which is the same as 11mm on the DX, so it’s a wash no matter which camera I use.
It certainly works. It isn’t as good in the corners as a dedicated FX lens would be, but it gets the job done, and doesn’t cost you and arm and a leg. Just be careful of the lens hood – it was designed for DX and can obstruct the view somewhat. Rather leave it off.
Francois, I’ve heard of people using that lens in FX mode at 15-16mm, but I’ve never see the results before for night shots. Thanks for sharing! You had some incredibly dark skies indeed, you captured some great details in the Milky Way bands.
Nikon’s newer 50mm f/1.8 is quite a bit better than it’s big brother at controlling coma in the corners with it’s aspherical lens element, but I still haven’t found anything longer than Sigma’s 35mm f/1.4 ART that’s really great at it (and chromatic aberration as well).
Hi Aaron
Thanks! Yes I was a bit disappointed with the 50mm f/1.4. Even though it is generally good at f/1.8 for general work, the stars really show a lens’ limitations as they are basically ideal point sources.
Maybe the Zeiss Otus 55mm should be a great performer, but then you need to be able to afford it first! I know I’m not going to spend that kind of money of a 55mm lens anytime soon.
Hi Aaron
Yes, I bought that 50mm before the 1.8 came out. Although it is nice to have the bit of extra aperture, I tend to use it at 1.8 or smaller anyway most of the time. The /1.8 is surely a better investment for most uses.
Nice!
I’d love to see such a dark sky some day.
Can you spot Saturn and the “Small Magellanic Cloud” in the first picture?
Yes I can :)
Unfortunately the Large Magellanic Cloud is hidden behind the tree — an oversight at the time, when I was awed by the Milky Way itself.
Where is saturn in the photo?
Muhammad,
You can find Saturn more easily in the third photo from the top. Look above and to the left of the Milky Way; you’ll notice two bright objects.
The redder one below is Antares, or alpha Scorpii. The upper one is Saturn, which is currently sitting next to the three bright stars at the top of Scorpius.
You’ll then recognize Saturn also in the first photo of the post.
Thanks. Its inspiring that planets can be captured on camera like this. I would love to get into this more
I thought I’d missed a “Next Page” button! This story, while interesting to start with, just seems to peter out without an ending.
Jim, I apologize – that was my fault for publishing the article prematurely. Francois has edited it and added the missing pieces…
Aha! Yes, it is much better now. Thanks.