Once the good weather breaks, from the late spring through to the fall, many small towns in Ontario hold festivals. Quite often displays of antique and custom cars are featured at these types of events and represent great opportunities for photographing automotive details. This past weekend the town of Smithville held its annual PoultryFest, which I had the opportunity to attend. The day started out with bright, sun-filled skies…a significant change from the torrential rains that had hit much of Southern Ontario on Friday. The heavy rains caused quite a bit of flooding in the areas north of Toronto and resulted in many owners of custom cars changing their display plans and bringing their vehicles to Smithville instead.
The abundance of vehicles meant that the automobiles were parked in close proximity to each other. This made photographing them more challenging as it was very difficult to get decently framed images of whole cars, or even partial external views, as unwanted reflections were commonplace. Photographing outside under bright sunlight also presented its own challenges.
While the situation was frustrating for a good number of photographers who were at the event, it didn’t really bother me at all. I much prefer photographing automotive details, rather than entire vehicles.
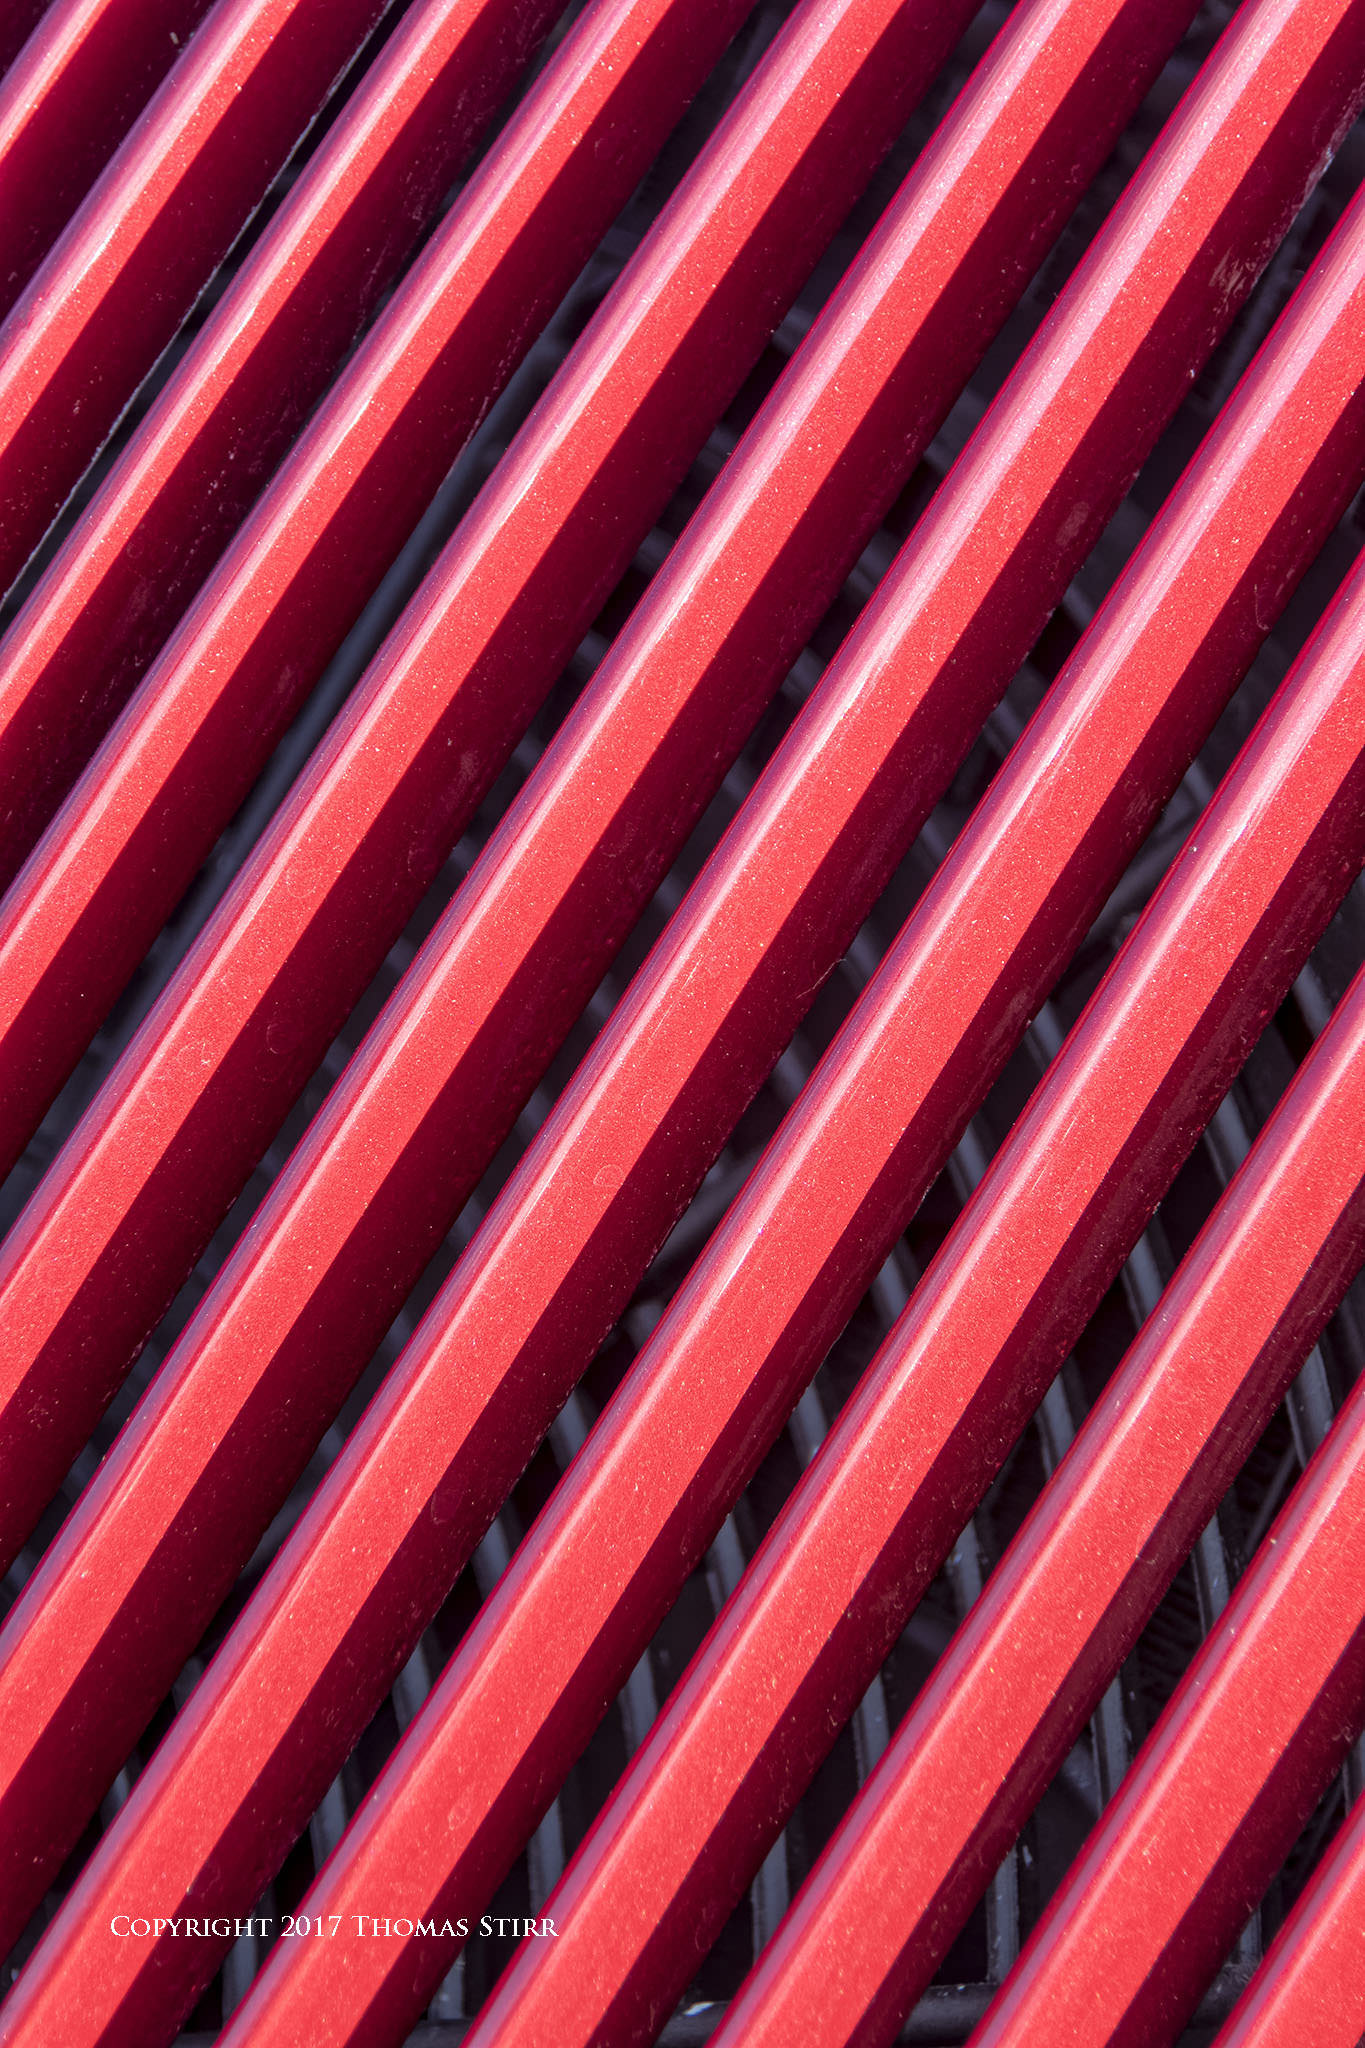
When working in bright sunshine the lighting can be quite harsh causing high contrast and numerous ‘hot spots’ with the sun’s rays bouncing off hoods, windows and other parts of the vehicles. I specifically looked for situations where I could shoot on the shaded side of a subject automobile. The image above of a red front grill, is one example of purposely avoiding strong, direct sunlight. Rather than compose the image with a traditional vertical orientation, I angled my camera to create a ‘corner to corner’ flow and add a bit more drama.
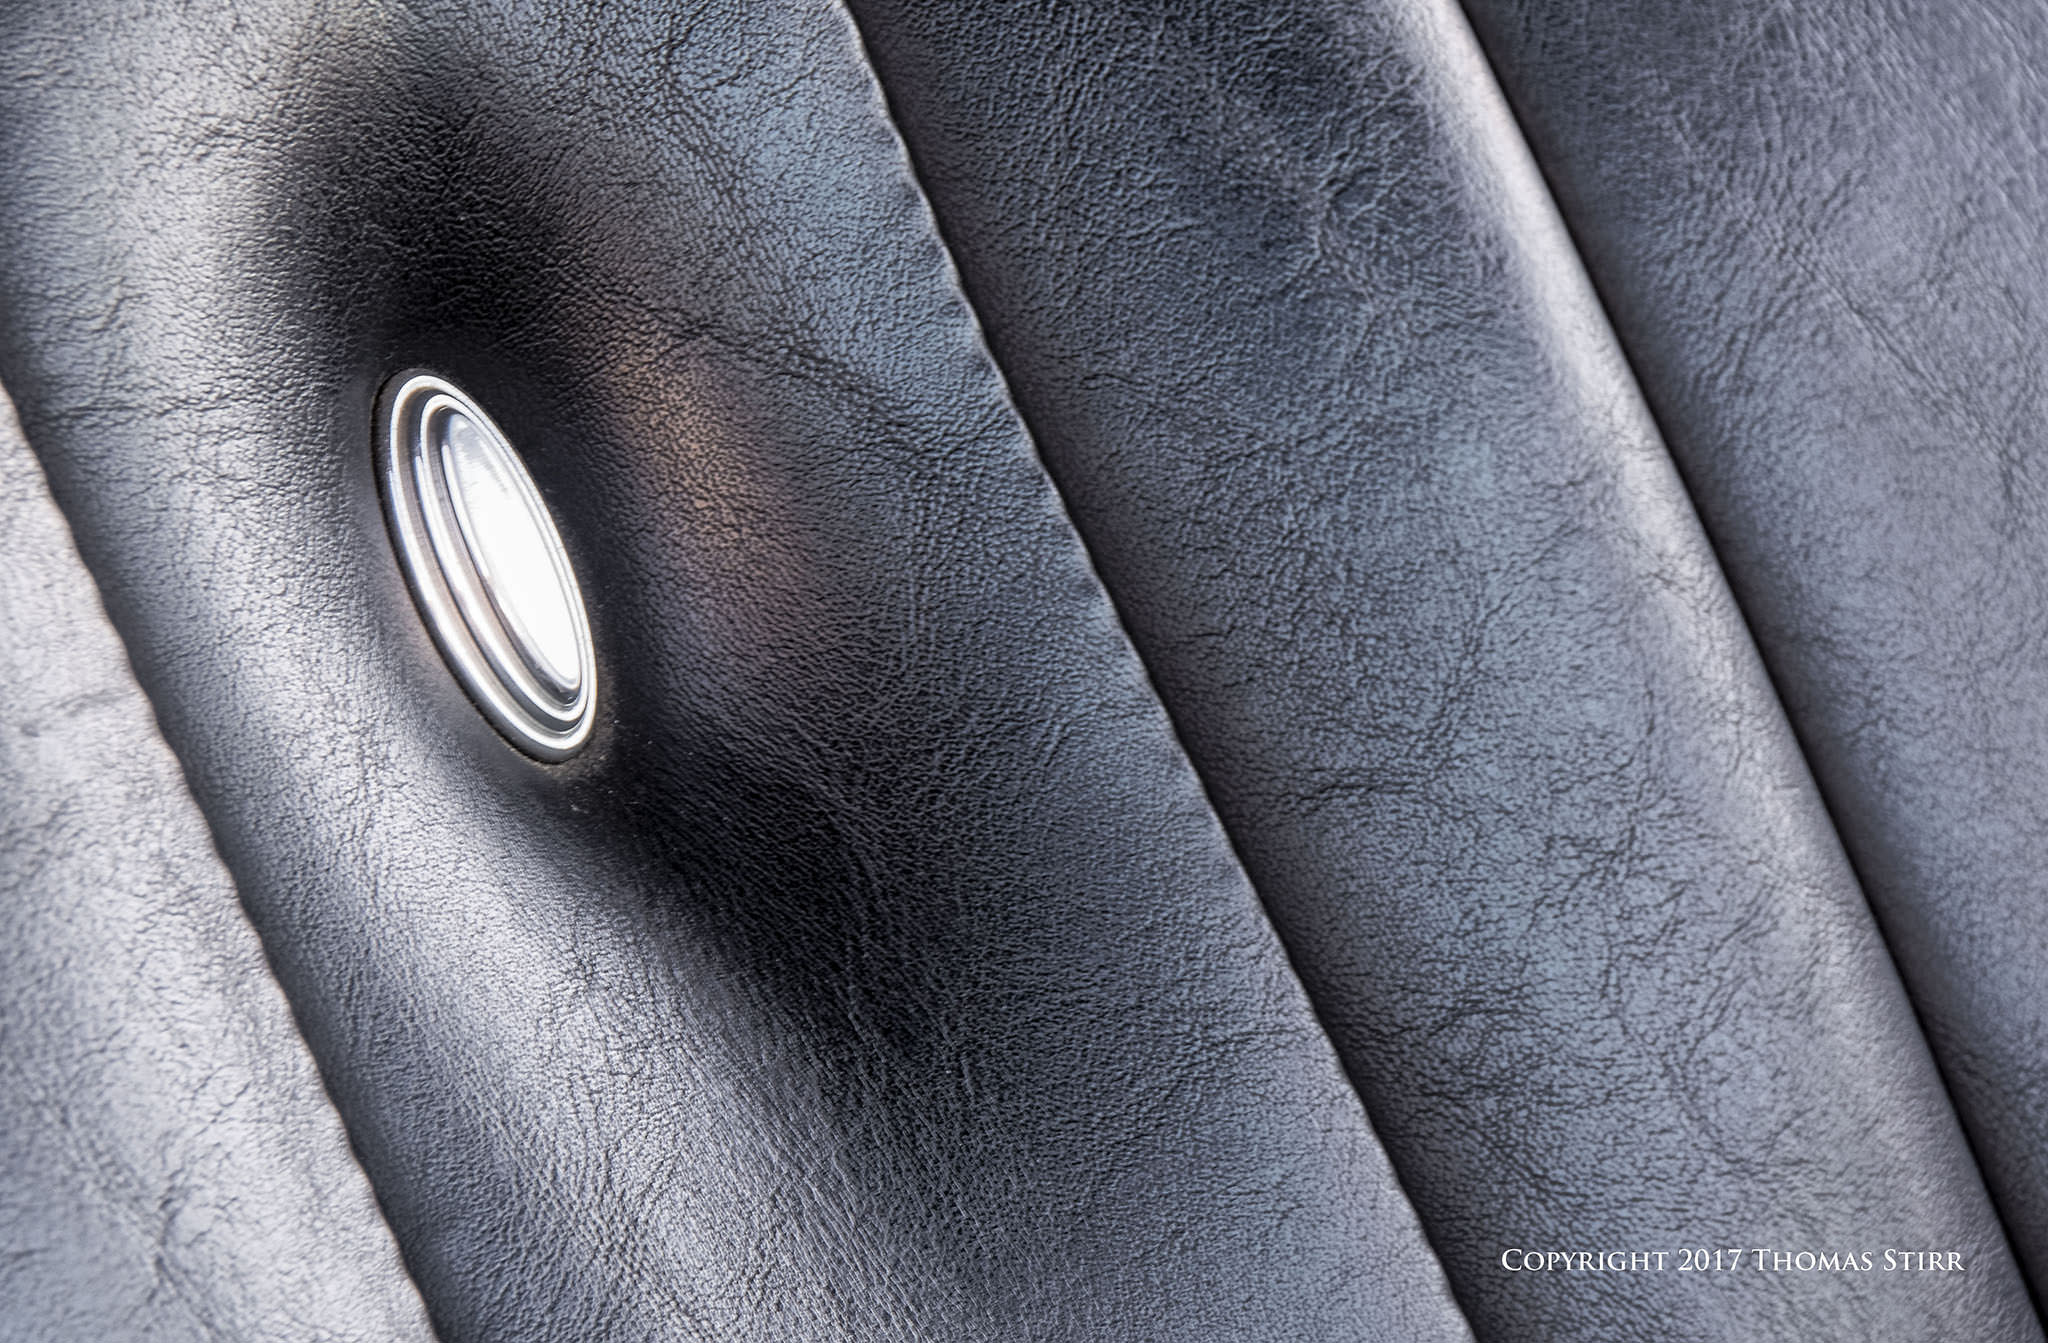
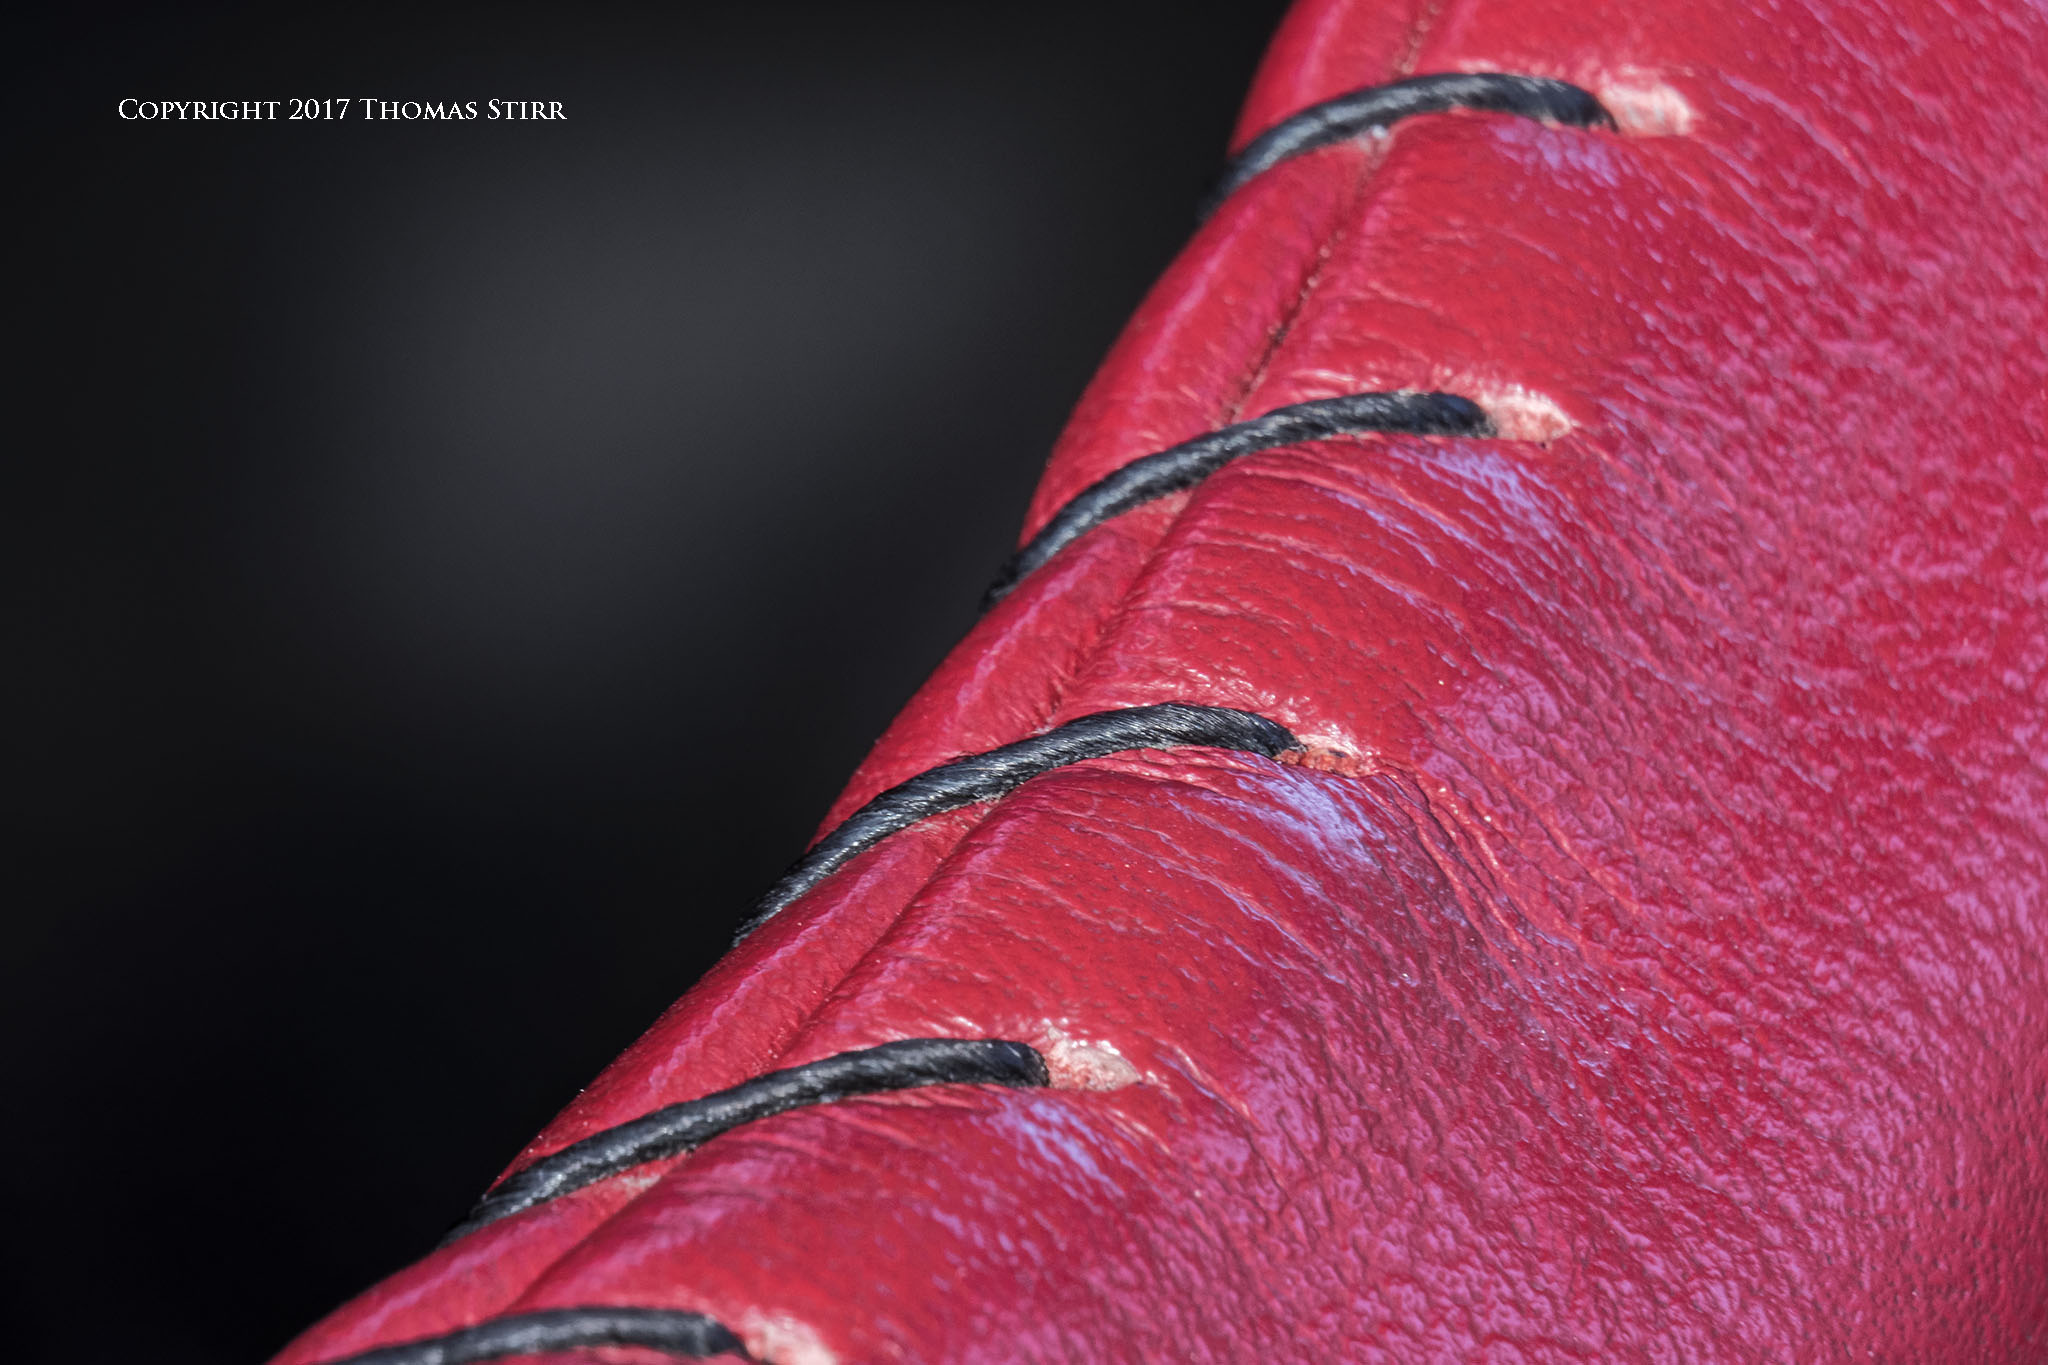
I spent some of my time photographing a few of the interiors of the cars on display, like the upholstery image above. I looked for some interesting lighting on the seat and framed my image so one of the pleats in the upholstery would form a corner exit.
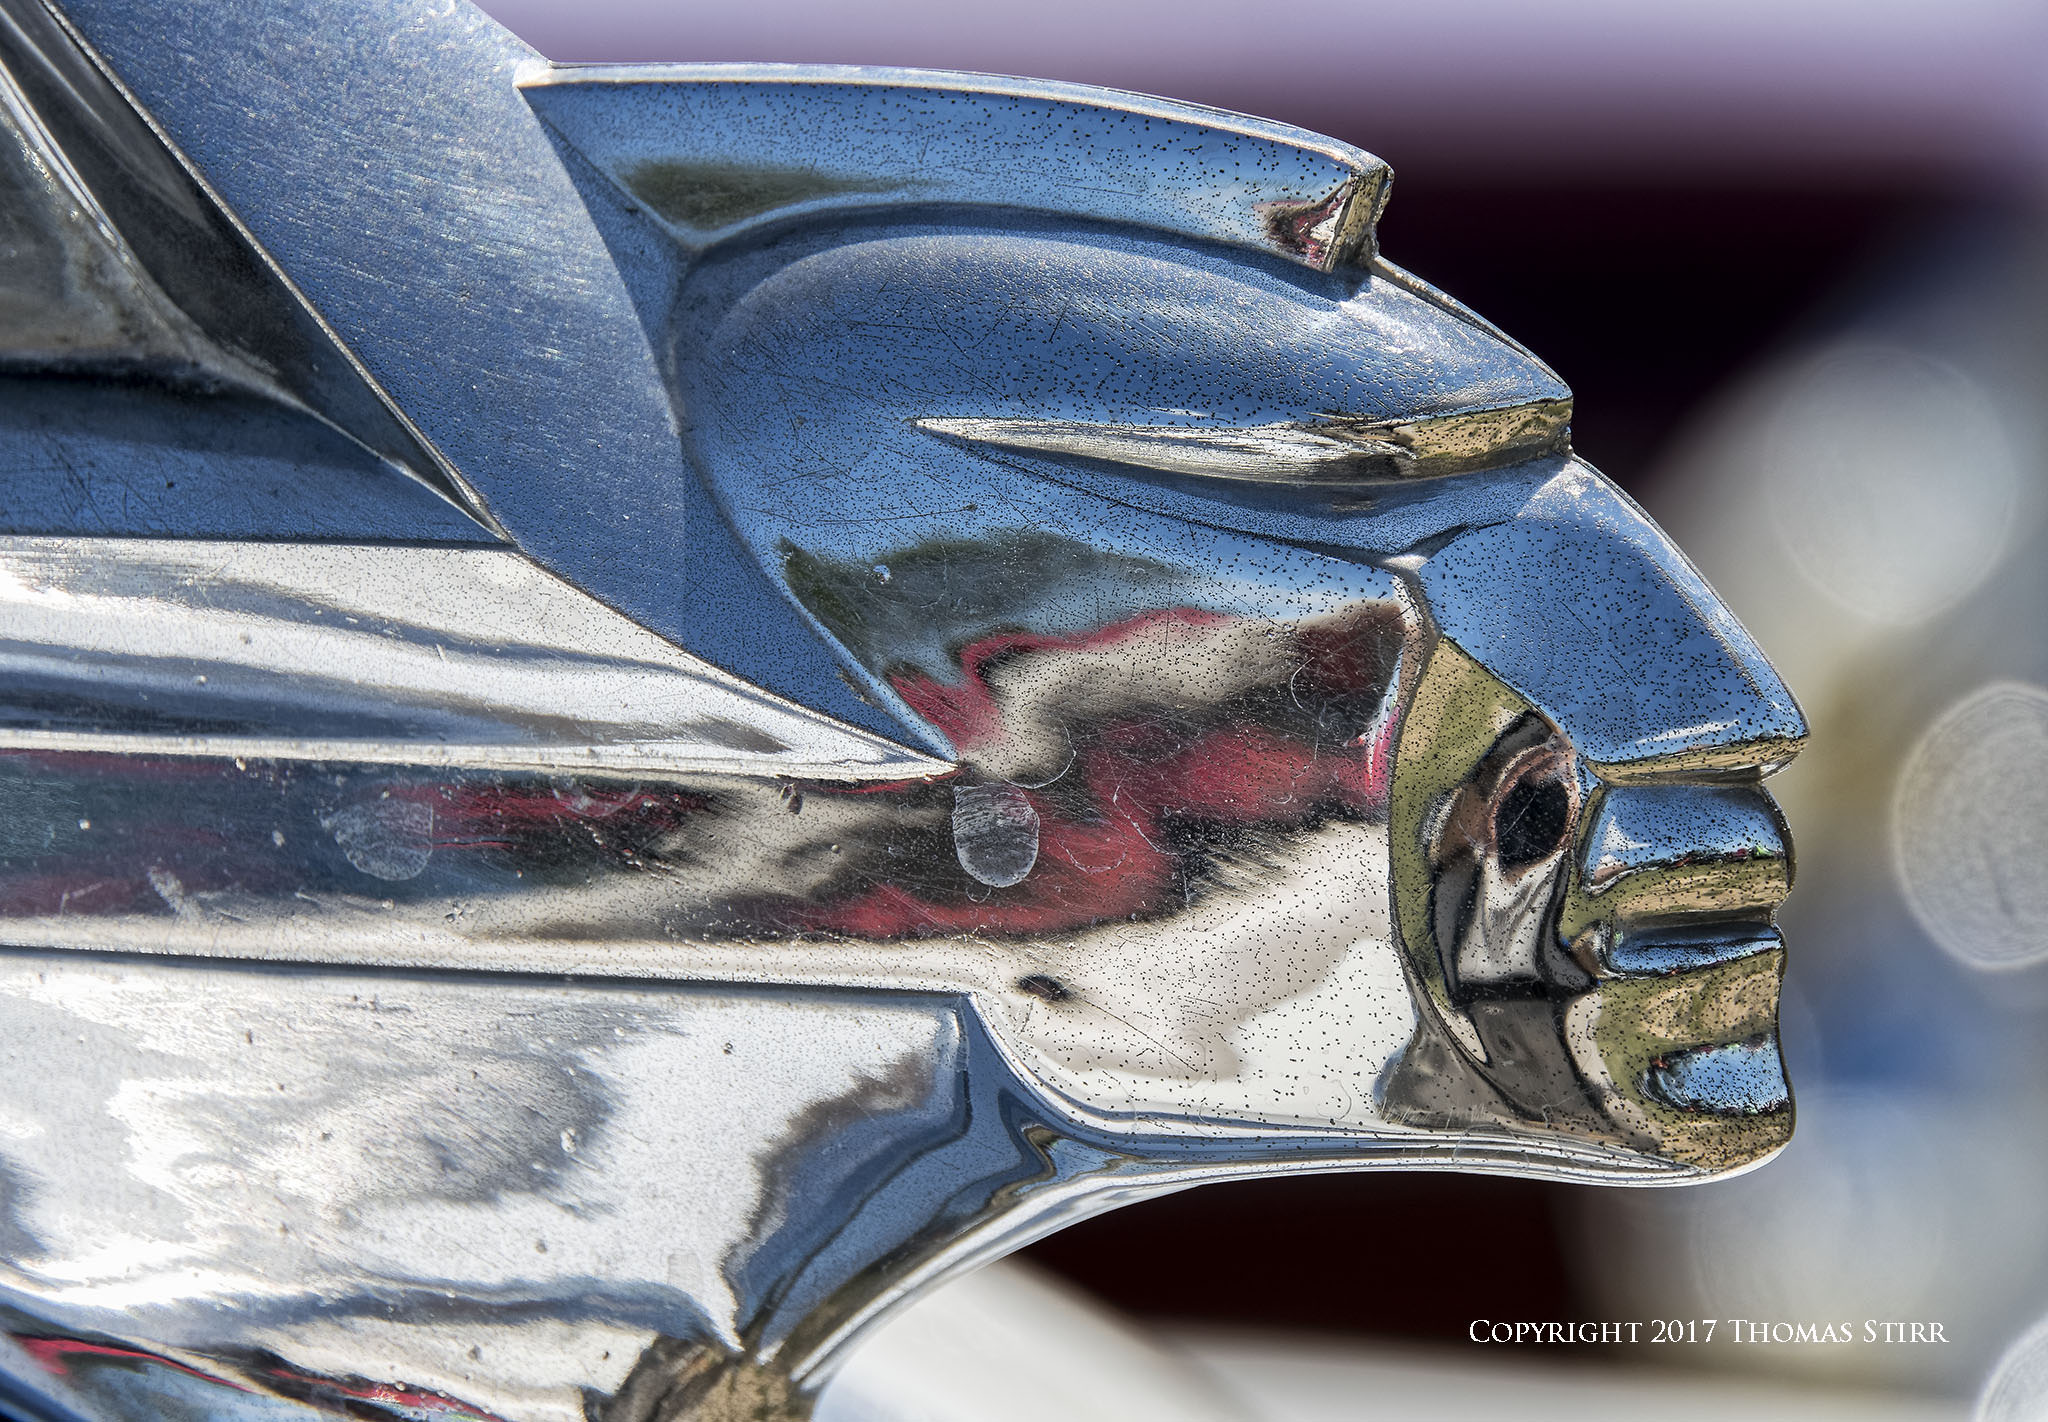
Many of the older cars had very interesting hood ornaments. In these situations I shot with the sun at my back and used a long focal length to try to limit my depth-of-field. This helped to soften the background in the images.
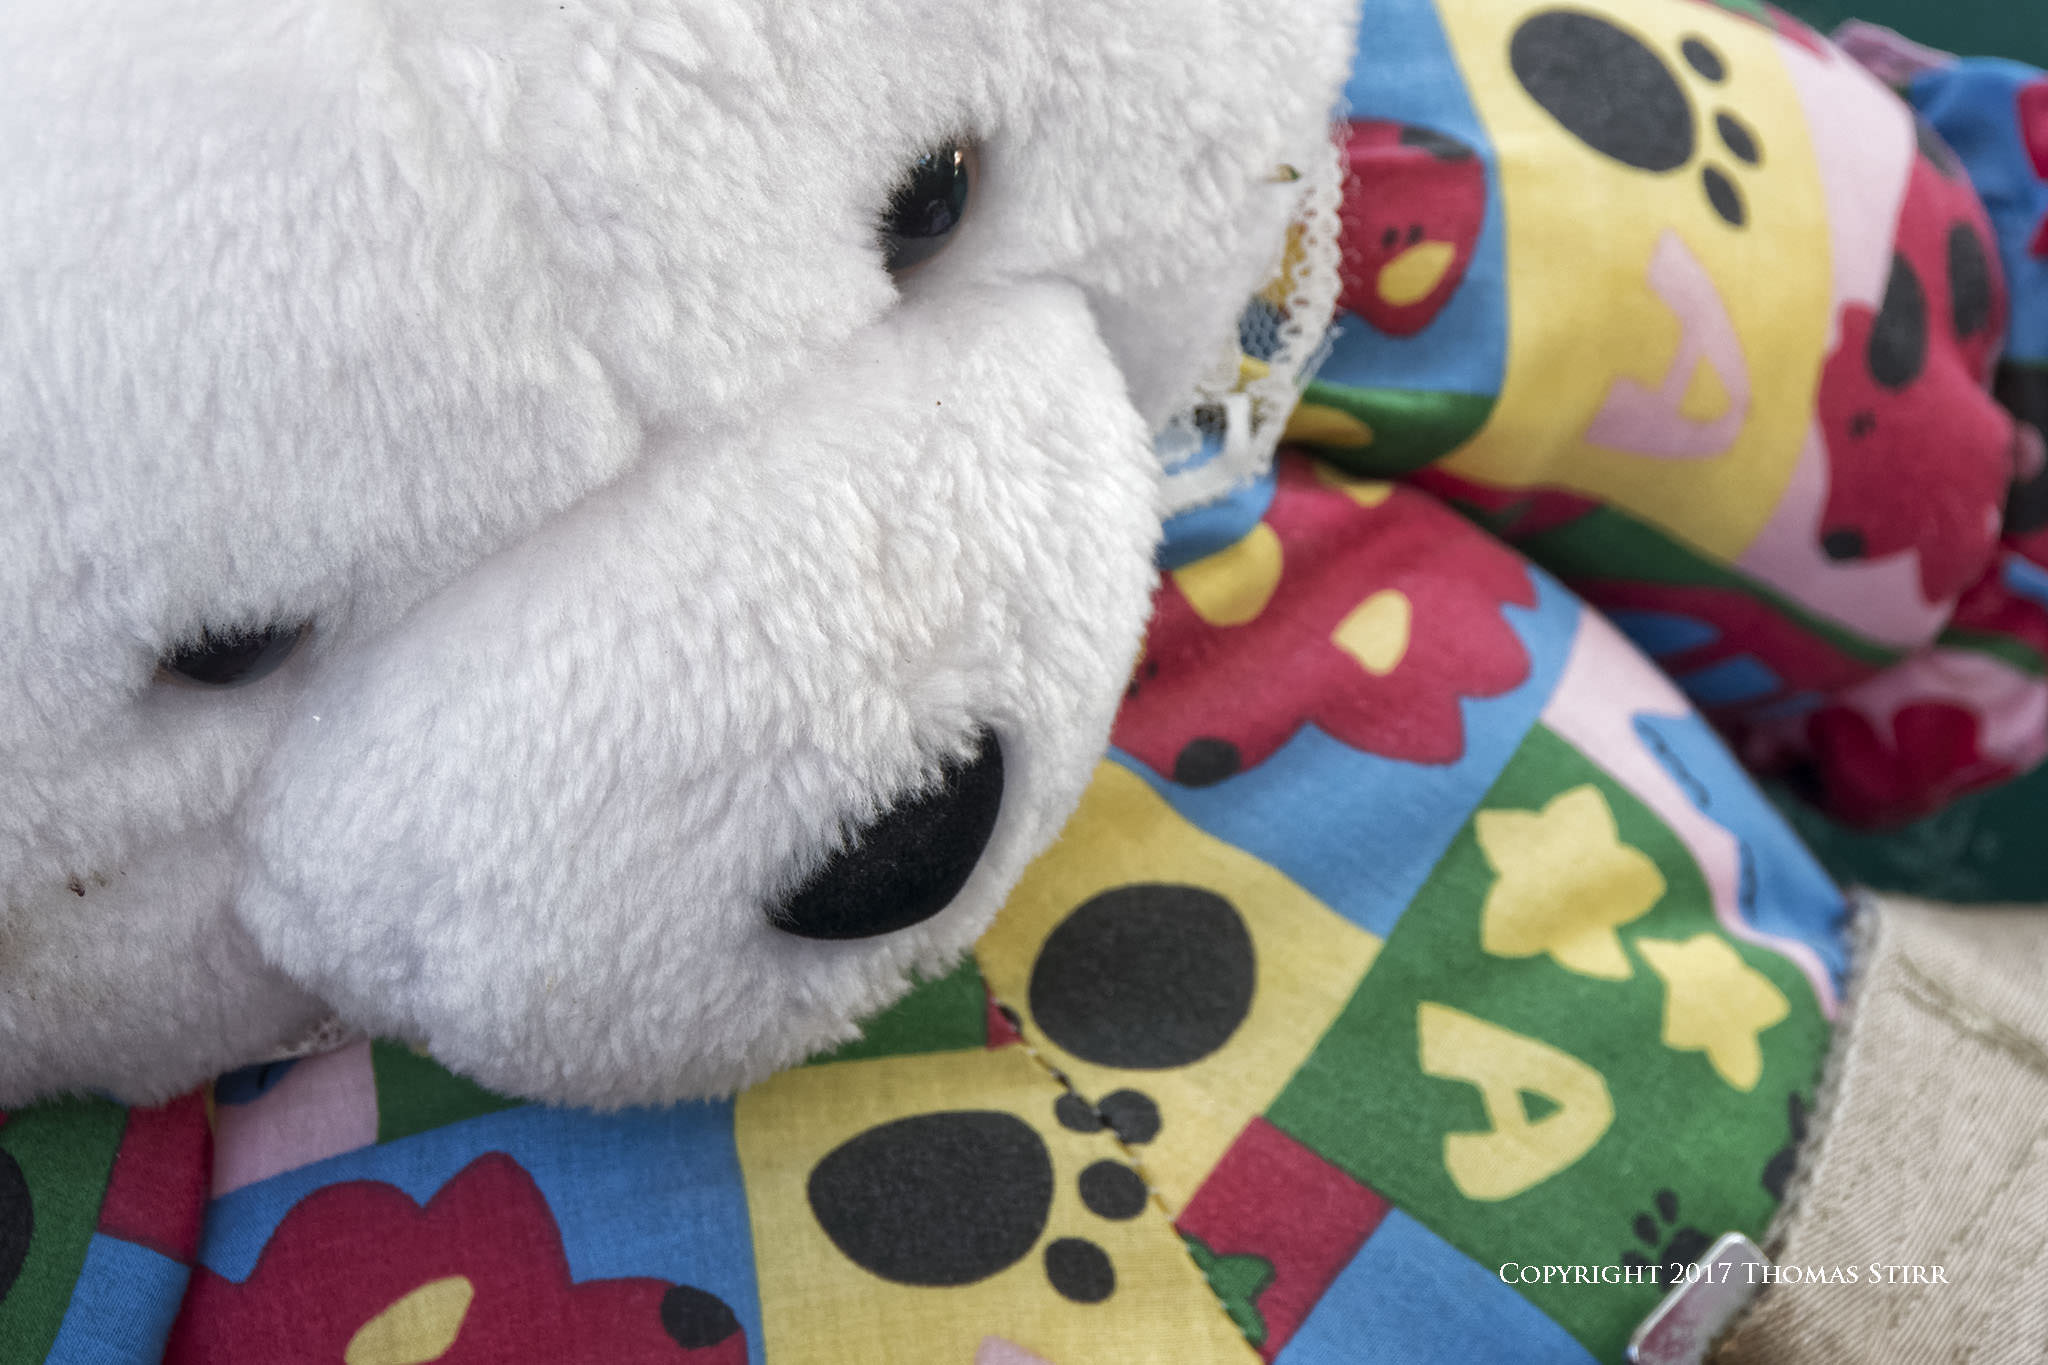
A few of the cars had mascots in them, like the white, plush bear in the photograph above. I used a subject bleed on the top and left hand side of the photograph to create a feeling of intimacy. This also helps to direct a viewer’s eye to the face of the bear and the triangle formed by its nose and two eyes. I framed the image to keep the two eyes of the bear equidistant from the top and left-hand edges of the photograph.
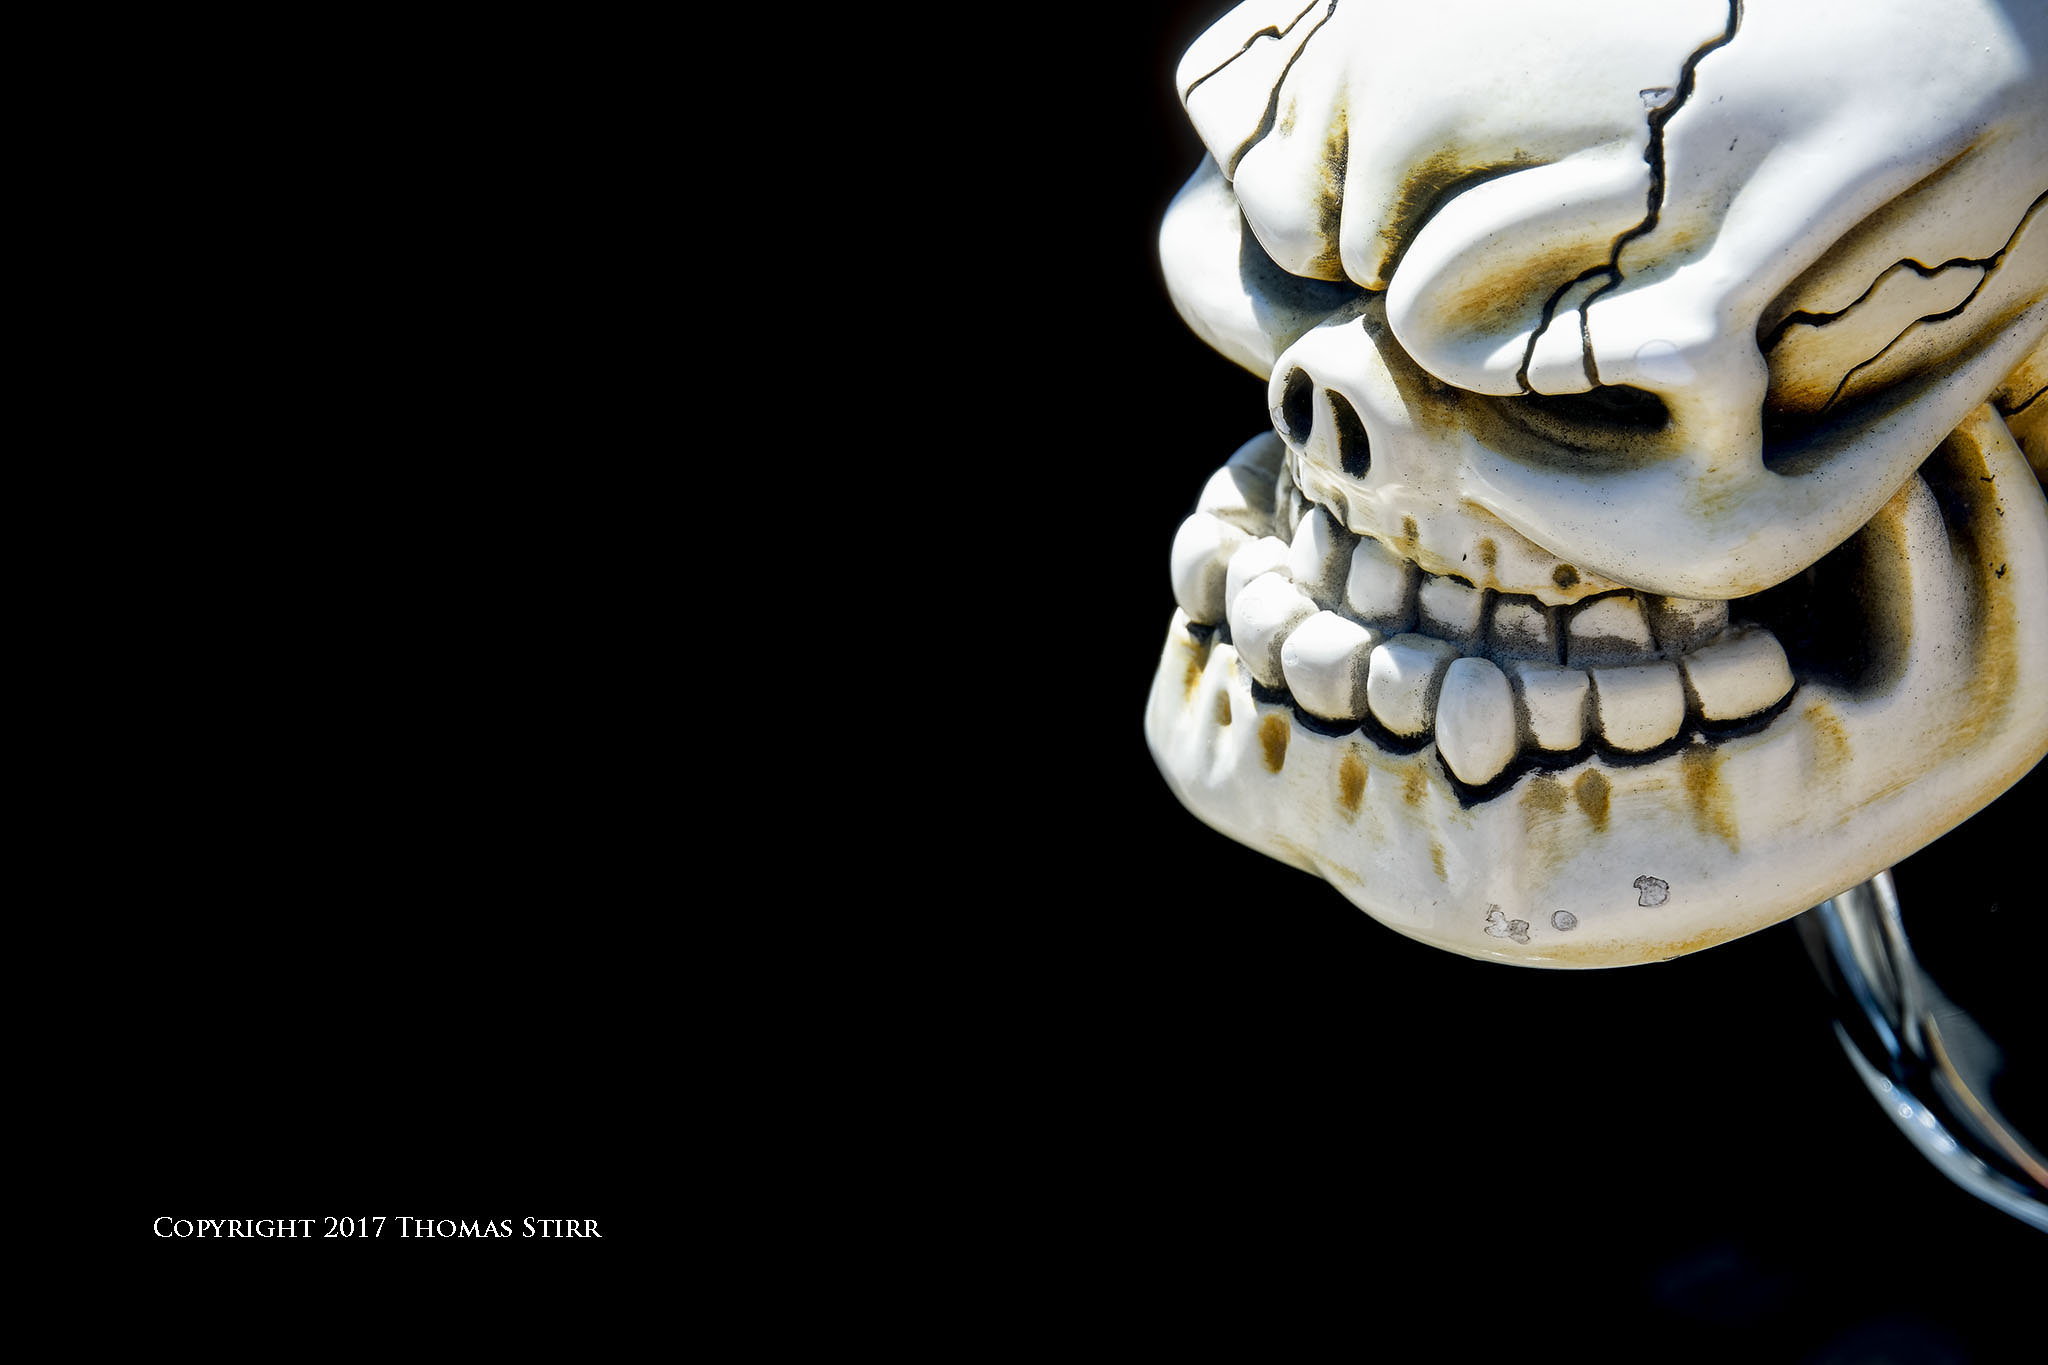
Whenever I found an interesting detail I would also look for the best shooting angle to capitalize on the available lighting. The ‘skull gear shifter’ subject in the photograph above was in bright sunshine, but I was able to position myself so that my shooting angle put it against the dark shadows of the floor and door of the vehicle. I increased the shadows and black in post to try to create a very dark background for the image.
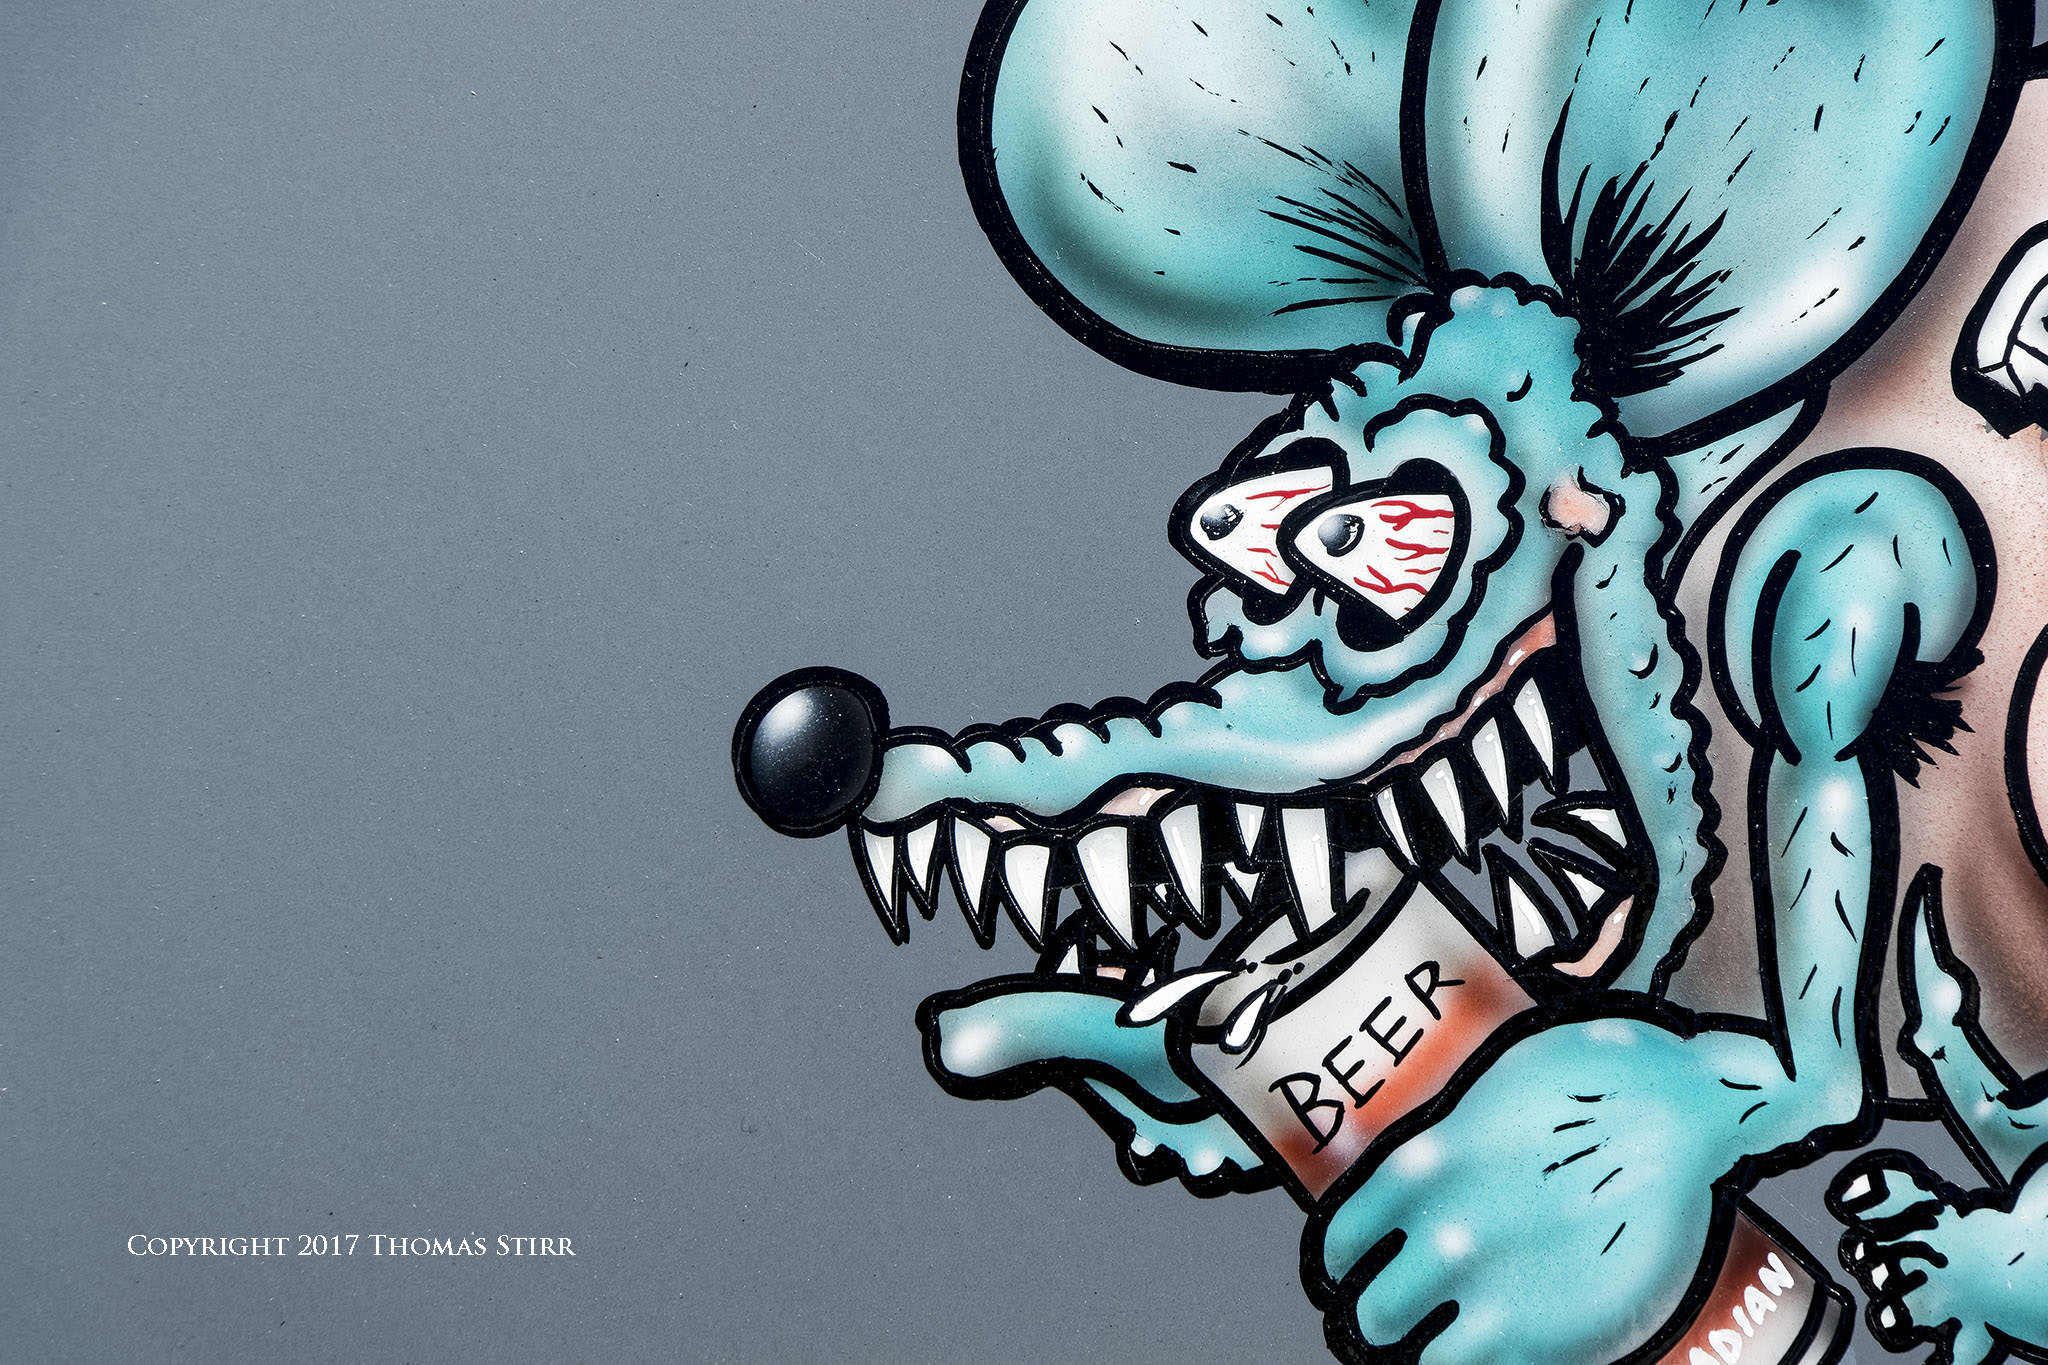
Many of the vehicles on display had wonderful examples of artwork. Some were original airbrushed pieces, others seemed to be decal kits. Unfortunately most of these pieces of artwork were on the hoods and trunks of cars, and thus in very strong sunlight. Photographing them was pretty much pointless as it was almost impossible to eliminate ‘hot spots’ blasting out part of the artwork. I did find a few nice samples that were on the shaded sides of vehicles. I used a three sided image bleed with the photograph above to help accentuate the face of the character.
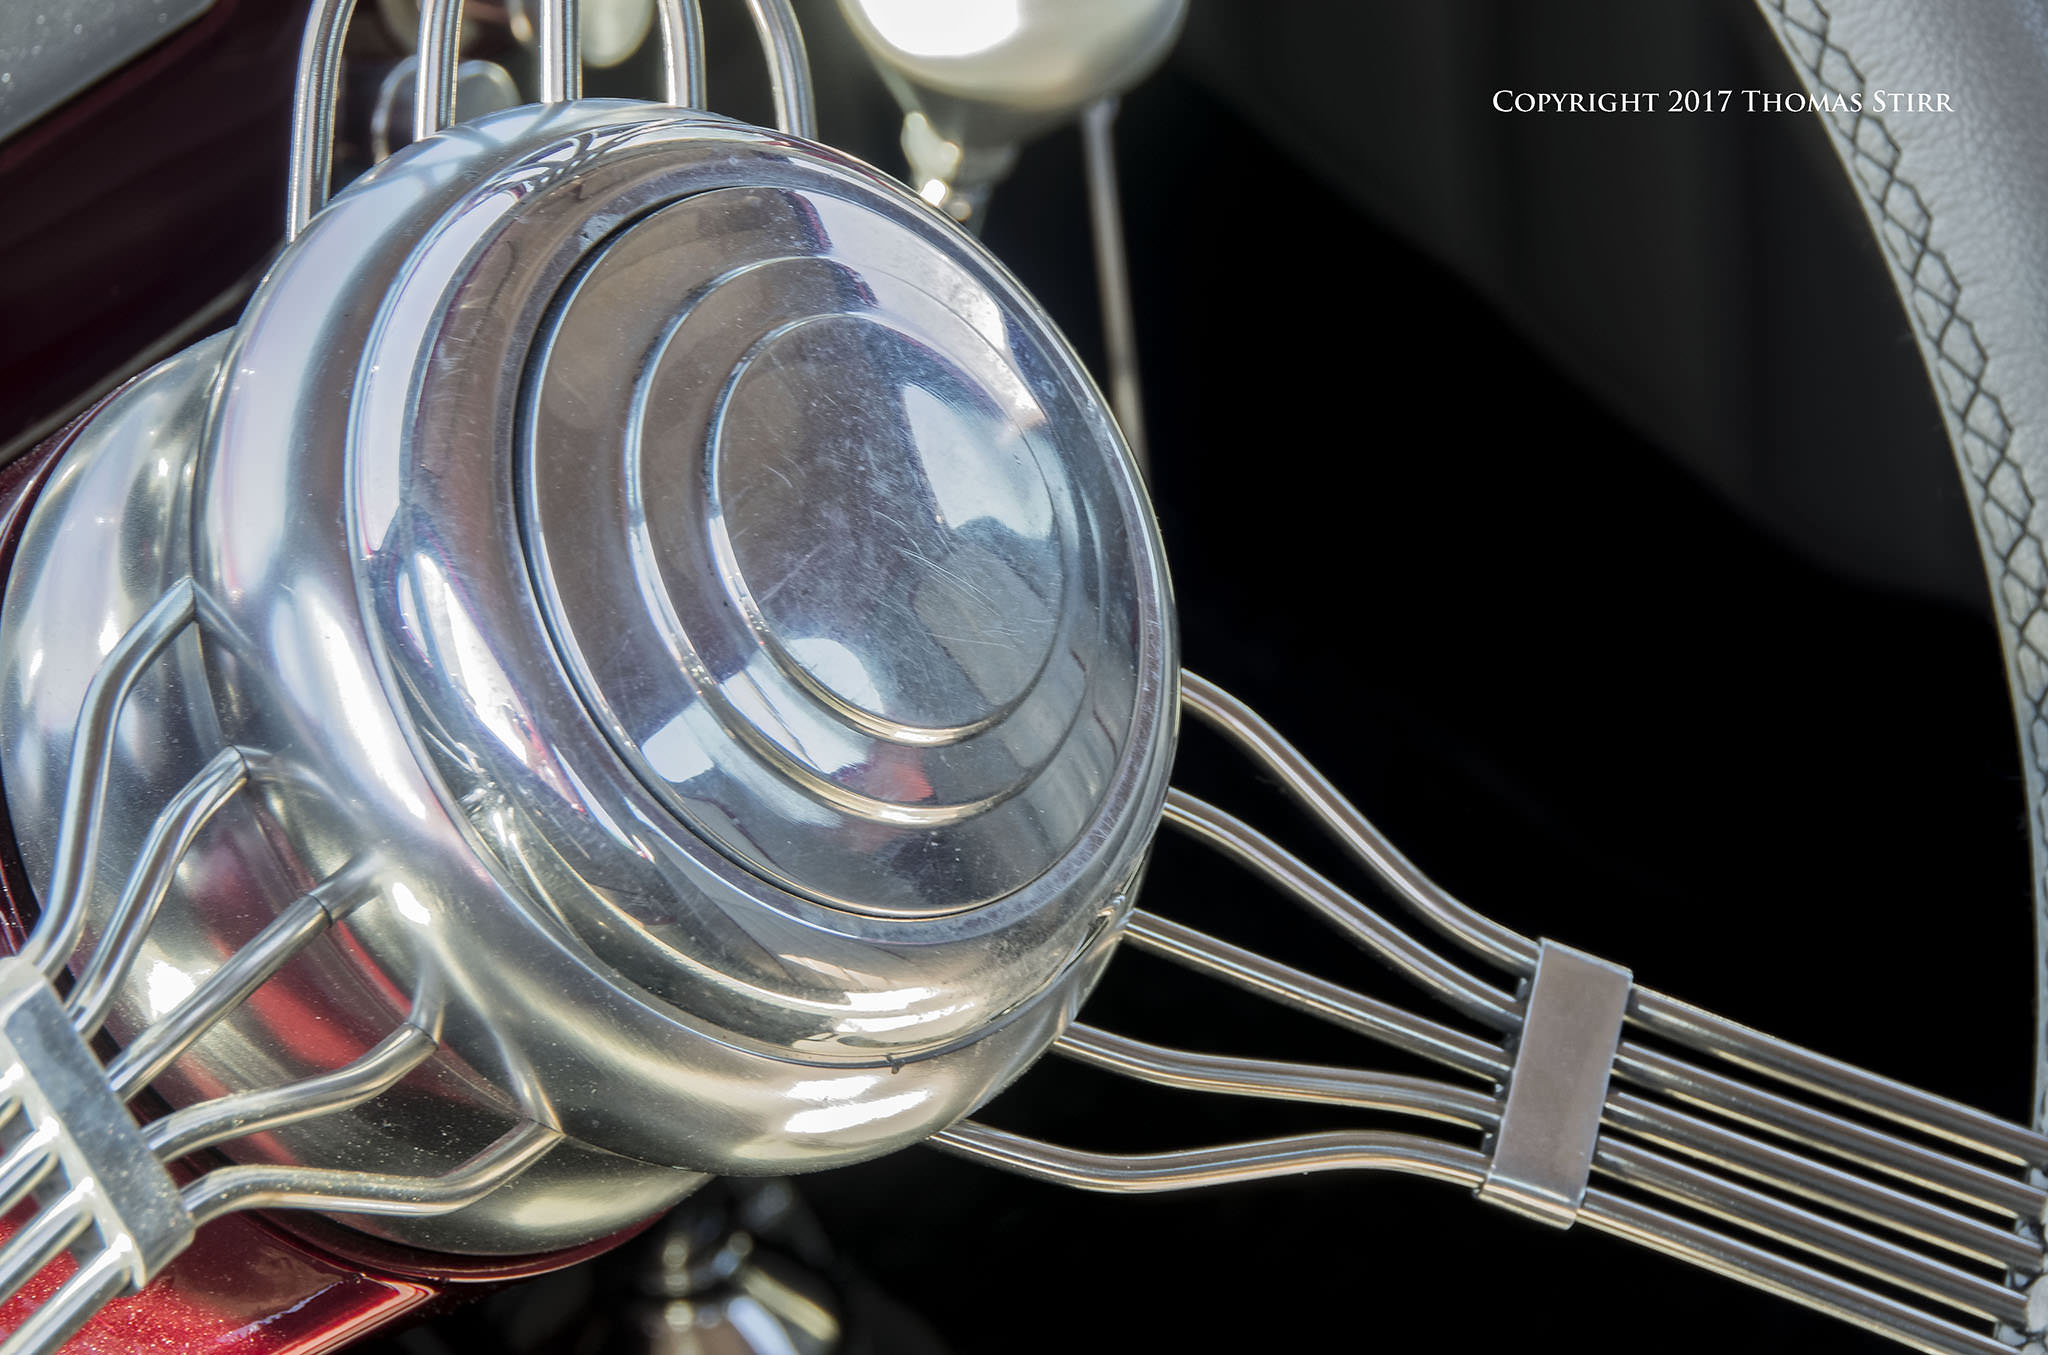
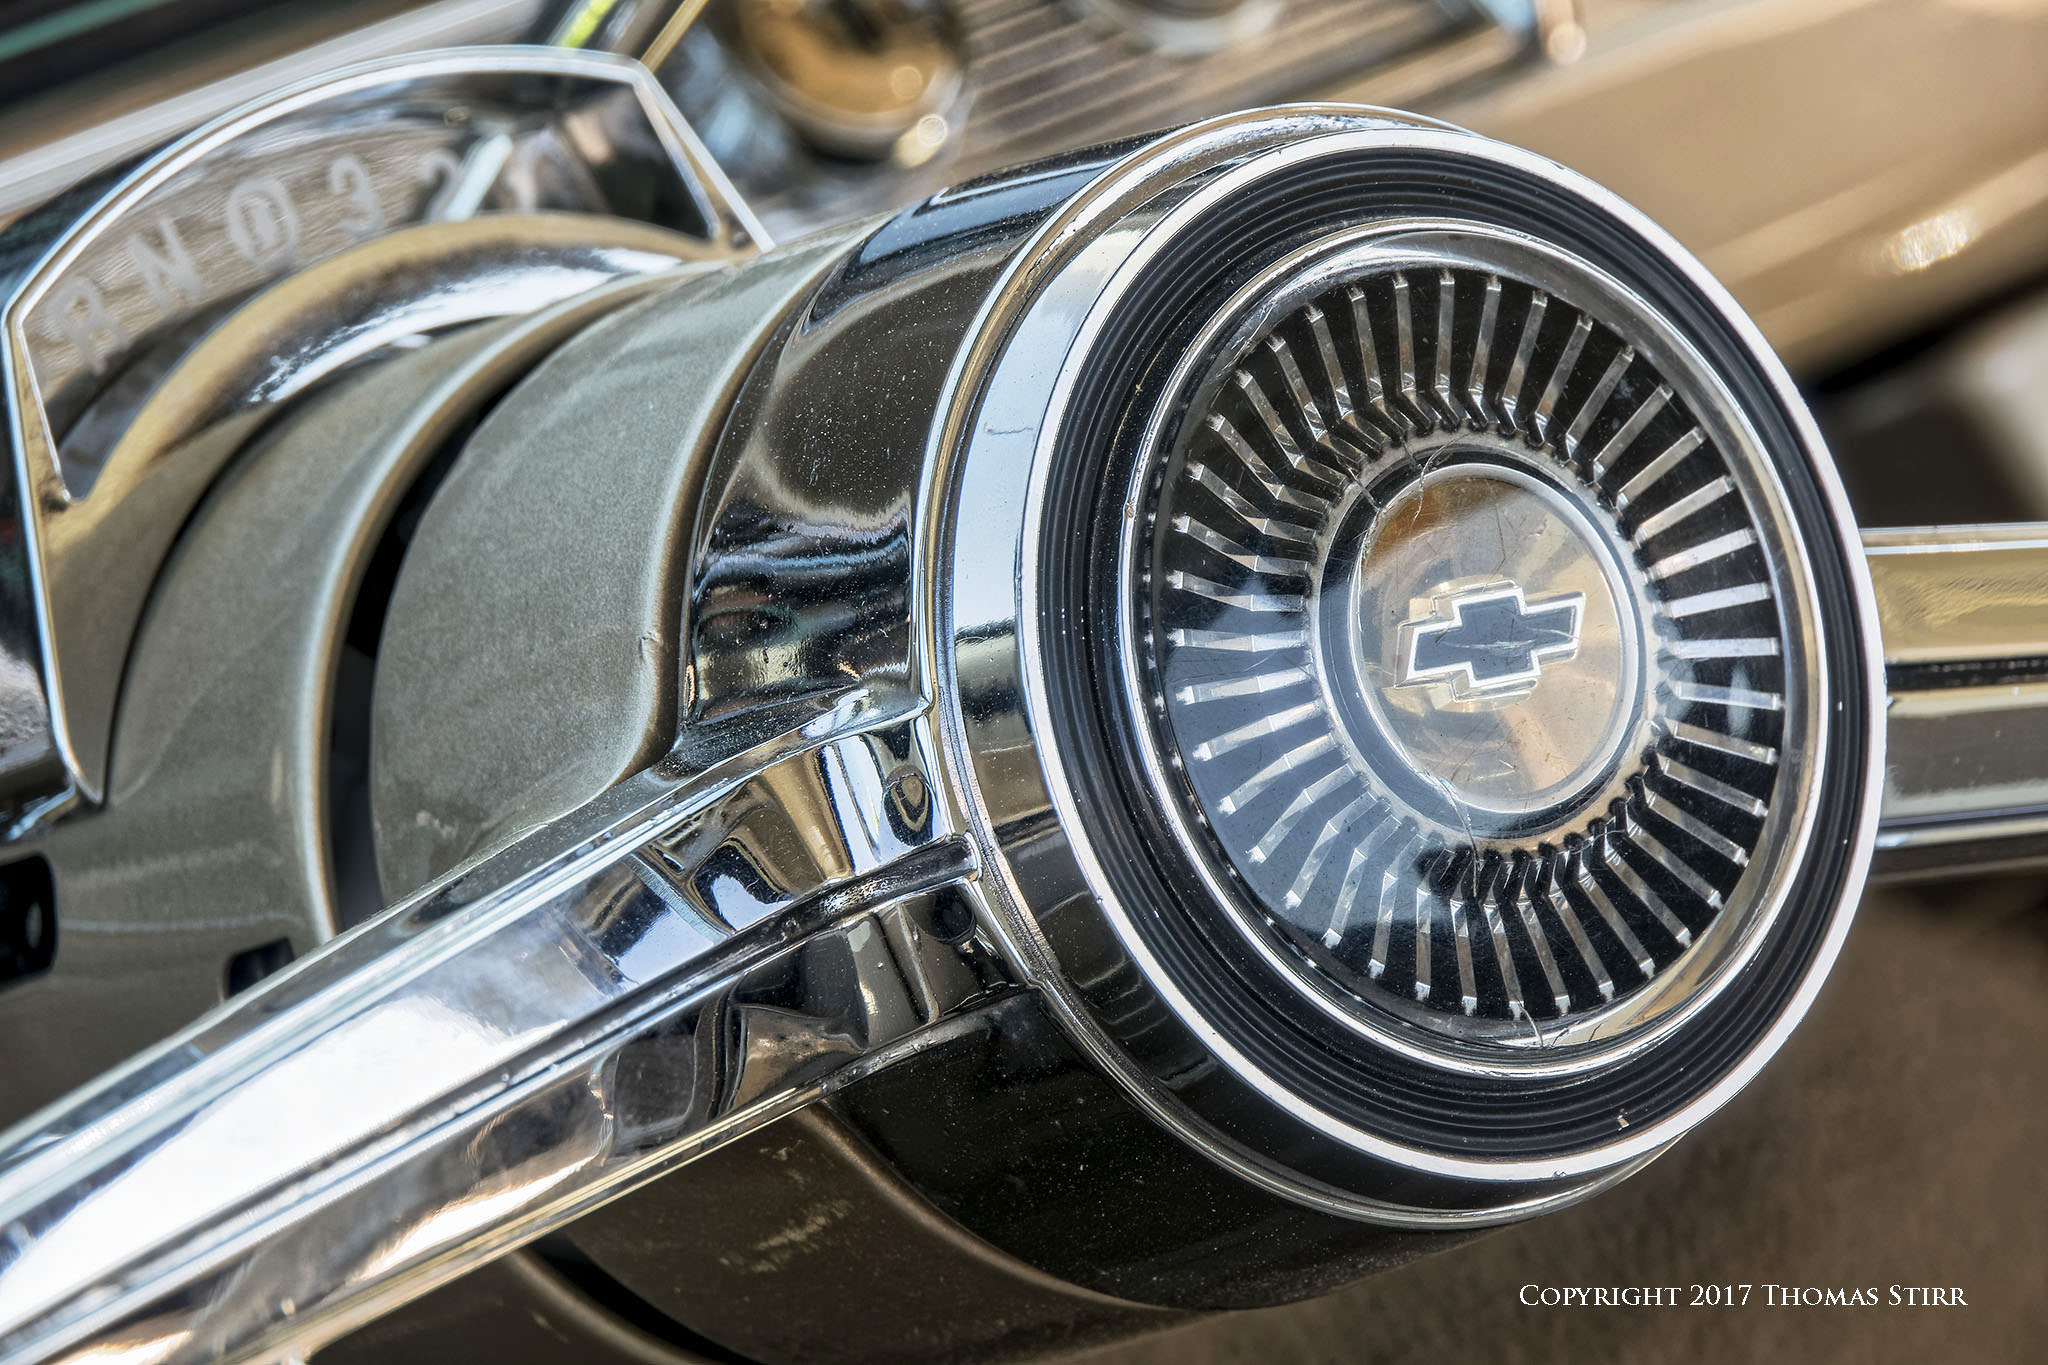
I captured a number of images of antique and custom steering wheels, usually shooting with the sun at my back, or to the side. In order to get some dramatic lighting I often would shoot towards the floor of the vehicle if it was in dark shade.
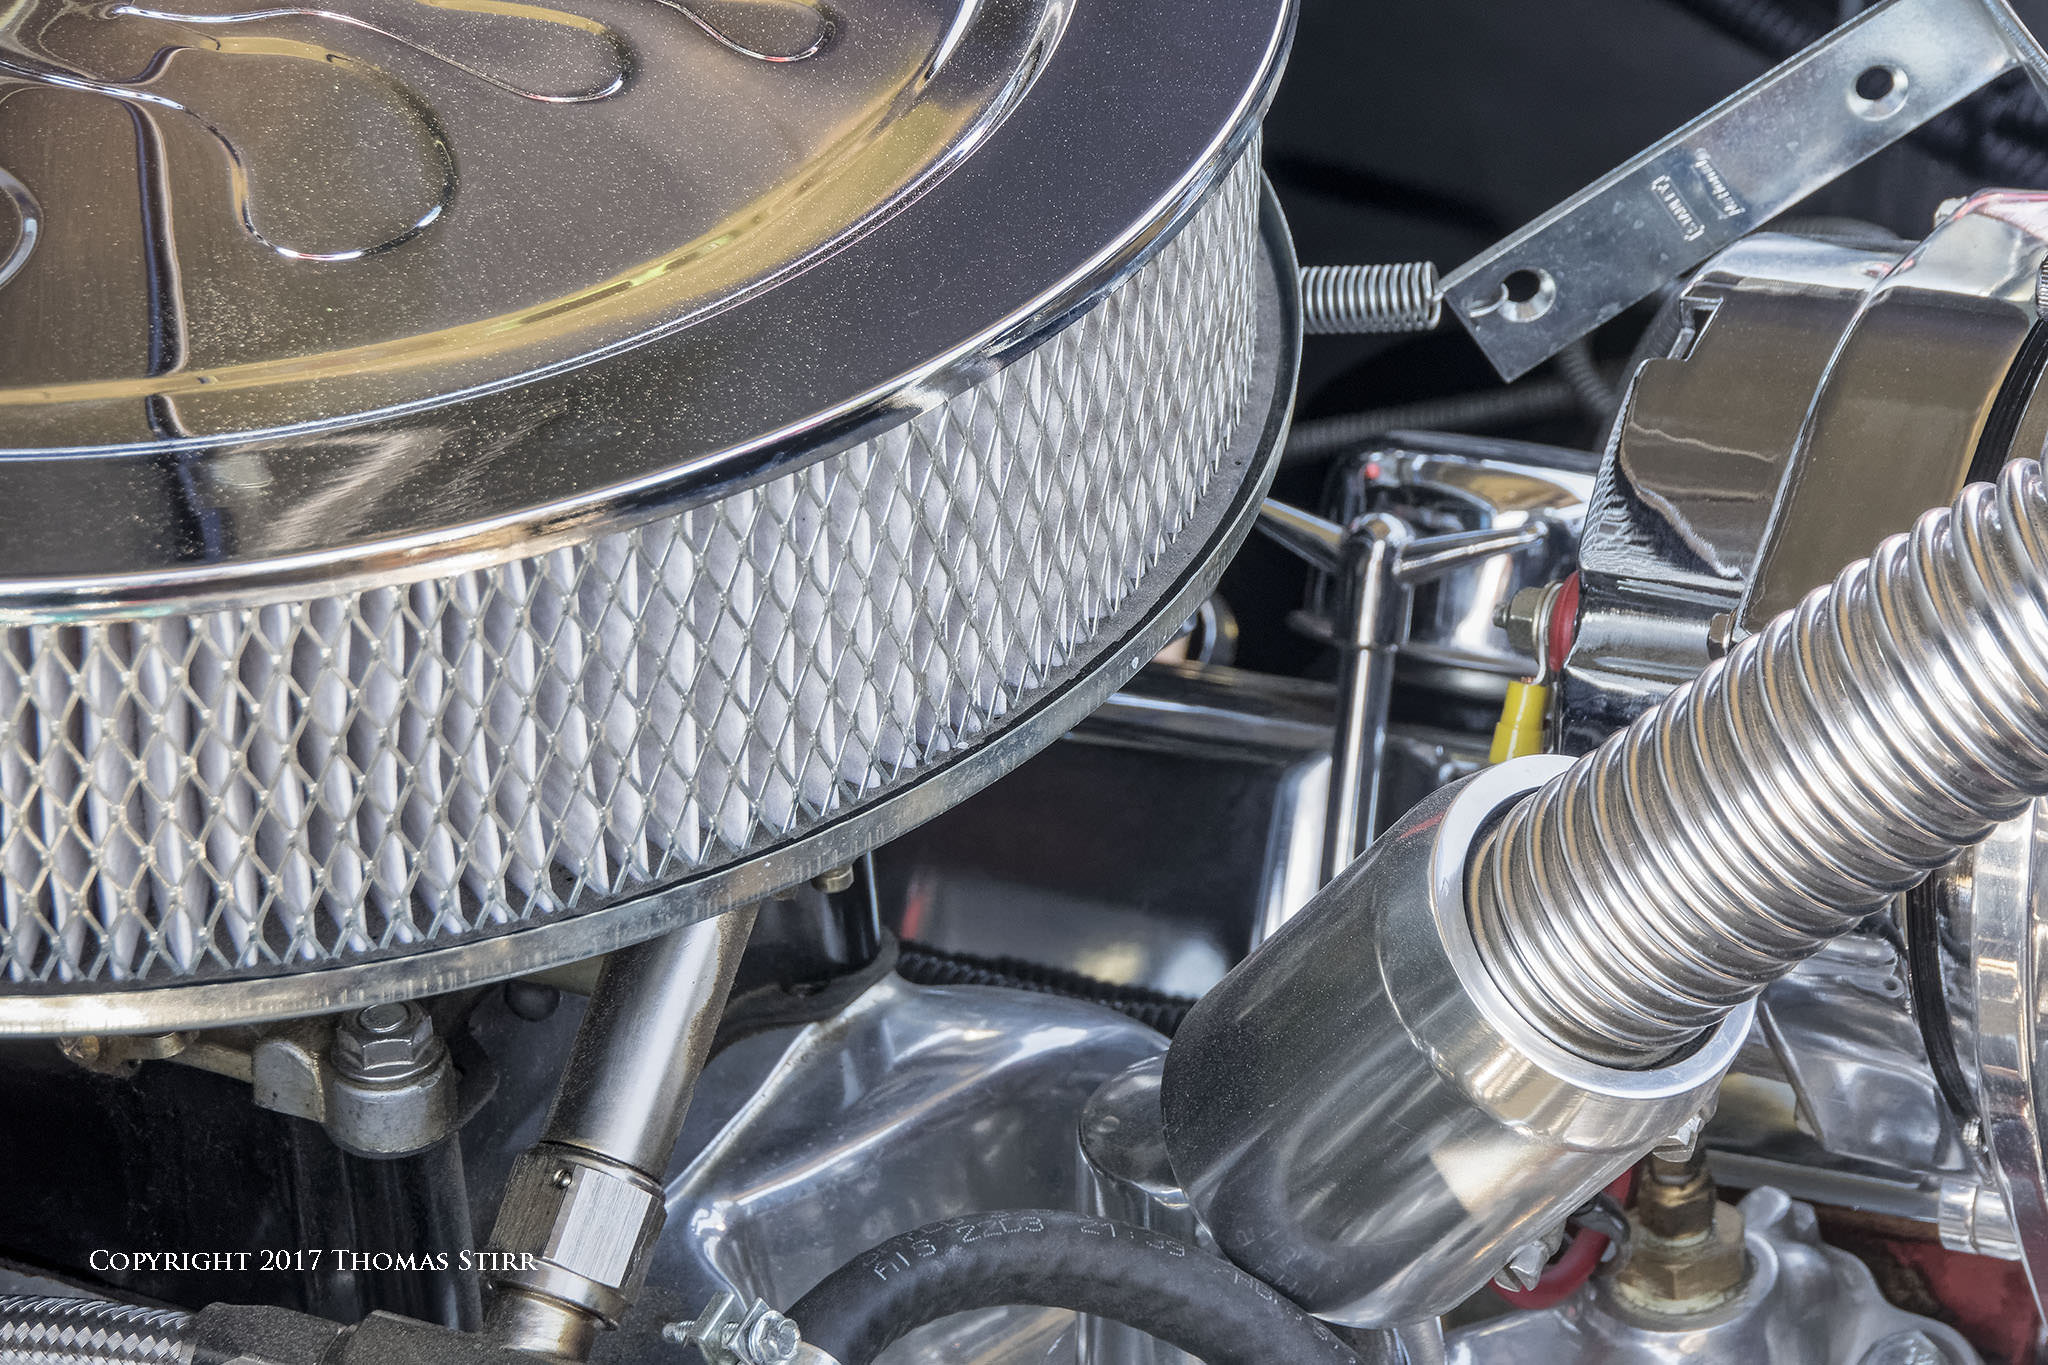
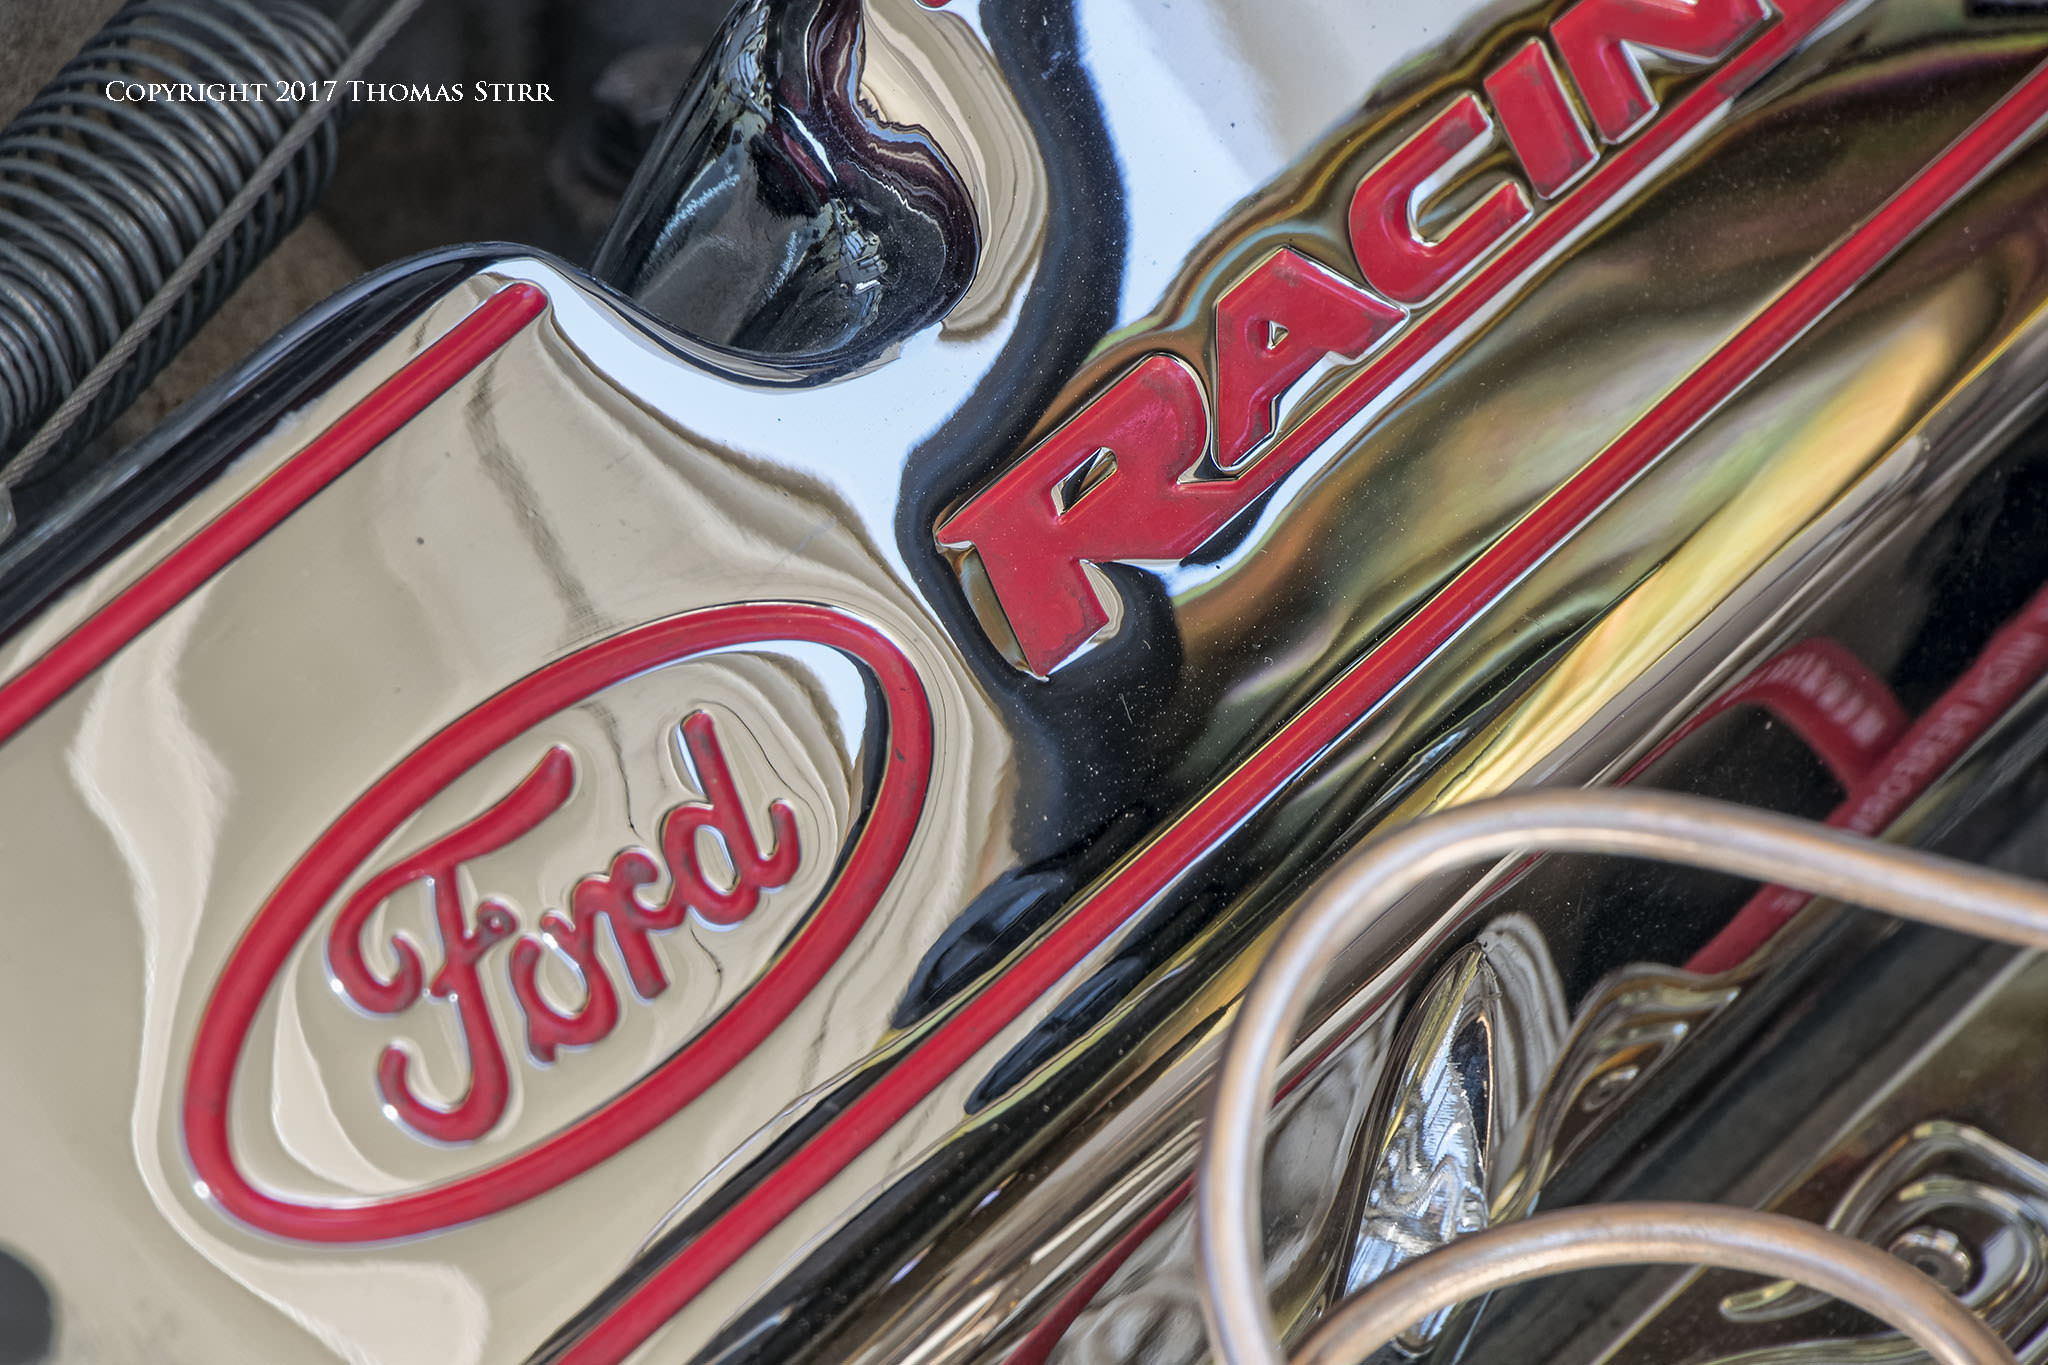
When photographing engine components I would look for opportunities where some side lighting would provide some good definition of the subject. Then I would attempt to compose my images from shooting angles that would give me some nice lighting and create a feeling of balance in the frame. As with other photographic subjects, composition and light are the two most important considerations when photographing automotive details.
I used a Nikon 1 J5 along with a 1 Nikon 10-100mm f/4-5.6 zoom lens for all of the images (except the last one) in this article. I find that the equivalent field of view of 27mm to 270mm provided by the 1 Nikon 10-100mm f/4-5.6 zoom, along with its comparatively short minimum focusing distance are ideal for this type of subject matter.
I also used a 1 Nikon 30-110mm f/3.8-5.6 zoom with a 21mm MOVO extension tube for a number of other automotive detail photographs featured on my photography blog. In all cases, I shot my Nikon 1 J5 in Aperture priority, using single point auto-focus and a dedicated ISO setting.
Technical Note:
All images were captured hand-held in available light using Nikon 1 gear as noted in the EXIF data. All photographs in this article were produced from RAW files using my standard process of DxO OpticsPro 11, CS6 and the Nik Collection.
Article and all images are Copyright 2017 Thomas Stirr. All rights reserved. No use, duplication or reproduction of any kind including electronic or digital is allowed without written permission. Photography Life is the only approved user of this article and if you see it reproduced anywhere else it is an unauthorized and illegal use. Readers who call out offending websites that steal intellectual property by posting comments on those offending websites are always appreciated!
Being a “car guy” I take photos of cars mostly. The design details are where the true artistry is. I can find a studio lit, better framed and composed photo of almost any car as a whole on the internet but you rarely find pictures of heat cracks in tail lamp lenses, stitching, creases and folds in the body lines, etc…
Thanks for adding to the discussion Jarrod! One of the wonderful things about photography is how each of us may be attracted to something entirely different than other folks.
Tom
Thomas,
I just discovered this blog while looking for fireworks photography tips. Your images are superb. I went to an auto show in May and also focused on the smaller things. The auto details made such interesting art shots. My results are here:
coastsideslacking.com/2017/…auto-show/
I take mostly nature photos, so I was concerned about how to come away with anything interesting at the show. Once I got there, the auto detailing entranced me. I was pleasantly surprised at how beautifully the car details create visual interest with frankly very little effort on the part of the photographer — outside of quite a bit of bending and kneeling :). My photos were taken with a Canon EOS Rebel T5 with the standard kit 18-55mm kit lens, so great results can be had inexpensively.
Hi Dawn,
Thanks for sharing your images and experiences photographing automotive details!
Tom
Hi Tom,
I share your passion and predilection for shooting details in lieu of the whole car. Some of your images are like abstract art images; the others reveal interesting patterns (e.g. under the hood shot of the engine filter) and nuances of texture (red leather wheel cover). What I particularly like in this series is that the images compel the viewer to do a double take or take a closer look into the details that make the whole. The more I see your works, the more I’m convinced that you really bring something fresh, inspiring and sometimes, provocative, to the table.
Oggie R
Hi Oggie,
Thanks for your supportive comment and sharing your perspectives on my images!
Tom
Let me suggest something that will make a huge difference in this type of photography – a fisheye lens. The distortion of the fisheye really helps convey the imaging.
Thanks for adding your suggestion to the discussion maghi cat!
Tom
I shoot our local auto show annually and find myself doing exactly like you describe and stick with the details and not the entire cars as the crowds and close proximity just don’t allow for it. I find the trusty 50mm 1.4 works fantastic for this type of shooting and even throw on an ultra wide angle for creativity. I have used a Fisheye for some interesting corner shots but just find them too gimmicky.
One thing I would certainly suggest is a Polarizer. Works wonders as it allows you to get shots you otherwise could not because of the glare. Another thing I take is a small shammy and wipe off the fingerprints etc. The owners never complain! :)
If you are going to do this on a regular basis I would create a “go-to” shot that is the same on all the cars. I try to do the front logo as the first thing on each car, it helps with sorting later and you can create a collection of sorts after you get several hundred in your archive.
Thanks for sharing Thomas, it brings back pleasant memories of shooting car shows.
Hi Monte,
Thanks for adding to the discussion and sharing some of your experiences and suggestions! It is always great to give readers some additional ideas and techniques to consider!
Tom
Hi Thomas,
Great images as always.
Here in Australia it is always a challenge to take shots of cars due to the high fierce sunshine. I tend to take photographs of front grills and mascots, using a polarizing filter. I also like finding rusting relics, no chrome – no shine!!
Your second image reminds me of a WWII fighter, like a Corsair, the steering wheel centre being the prop and the gear indicator being the cockpit.
Did you use a polarize filter for any of the images?
To see such sharp images, many at 1/30 and know that you travel ‘light’, I am tempted to ditch my D810 with it’s excess baggage and get a Nikon 1.
The grass always seems greener on the other side doesn’t it, in reality I just need to become a better photographer with what I have.
Regards
Andy
Hi Andy,
Thanks for your supportive comment – I’m glad you enjoyed the images! Other than using neutral density filters when I need to shoot at very slow shutter speeds I don’t use filters very often. I did not use any filters for the images in this article.
A few years ago I used to shoot with a D800 and it was a superb camera, so I imagine your D810 does a terrific job for you. A smaller sensor camera will never equal the image quality from a full frame body as there are significant differences in dynamic range, colour depth and low light performance. If your current gear is doing the job for you, then I always say ‘stick with it’.
I’ve been shooting with Nikon 1 exclusively for 2 years now and I have never regretted my decision to sell all of my full frame gear. Choice of gear really depends on the specific needs of a photographer, and I would never suggest that other folks do what I did. What works for me may not be the best choice for someone else.
The VR on Nikon 1 zoom lenses is very good and I find I can regularly shoot at pretty slow shutter speeds with good results. There are a few slower shutter speed hand-held images in this article…one captured at 1/15 and another at 1/10.
Tom
Really nice, I’m always amazed at the quality photos you get from that small sensor. I had been away from photography since the film days but after I retired I needed a hobby and decided to try photography again. I decided on an Olympus MFT and sometimes think I may have made a mistake not going with a larger sensor camera. Your photos are always proof that smaller sensor cameras can make great images. Does you find the smaller sensor requires you do a lot more processing for noise?
Rich
Hi Rich,
Dealing with noise is pretty much a non-issue for me in terms of the time I spend in post processing. Regardless of the ISO used, I run all of my Nikon 1 RAW files through PRIME noise reduction and the ‘auto’ corrections in OpticsPro 11.
I have a few OpticsPro 11 presets programmed depending on the subject matter and the Nikon 1 camera used. Most of my Nikon 1 images breeze through post processing. Typically I would only spend about 3-4 minutes working on an image in post…and that would include computer processing time.
Tom
All excellent images, as usual.
I always enjoy looking at your work Thomas, you certainly show the Nikon 1 system at its best.
Regards, John Taylor.
Thanks John – I’m glad you enjoyed the images! I find that the size and weight of my Nikon 1 gear is very well suited to capturing this particular subject matter as I often need to get my cameras inside an engine compartment in very close quarters in order to get my photographs.
Tom