I shoot the vast majority of my work at less than 100mm; my favorite subjects like landscapes, real estate, and aerial scenes all skew towards wide and mid focal lengths. For the recent lunar eclipse, however, I knew I needed a lot of reach. Fortunately, the cosmos aligned (literally in this case) and I had a chance to borrow Nikon’s 500mm PF lens and test it during the eclipse.
This article is going to take a look at the real-world usability of this super-tele, as well as examine some of the techniques for photographing and post-processing a lunar eclipse.
Table of Contents
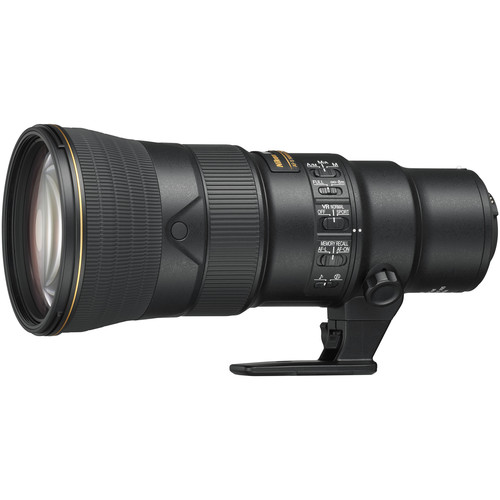
The Lens
I’ve photographed previous eclipses at around 300mm, and while the blood-red moon can loom large to the naked eye, it’s a surprisingly small subject in the camera. Complicating things, the eclipse drastically reduces the luminance of the moon, making it tough to just stack tele-converters on a shorter lens. (Plus, my planned location required a significant hike, which limited my ability to bring long lenses, tracking heads, and other large equipment).
To that end, the Nikon 500mm f/5.6 PF ended up being a great option. It’s a lighter and smaller lens than usual thanks to the phase fresnel element in the lens’s construction. I could hold the 500mm as easily as a 70-200 f/2.8, and with the effective VR, I was getting sharp test shots handheld down to an absurd 1/60th of a second.
VR wouldn’t help with my eclipse shots, since I did still use a tripod. But it opens up the possibilities of using this lens off a tripod or monopod, an important attribute for an expensive prime lens.
Using the Lens on a Tripod
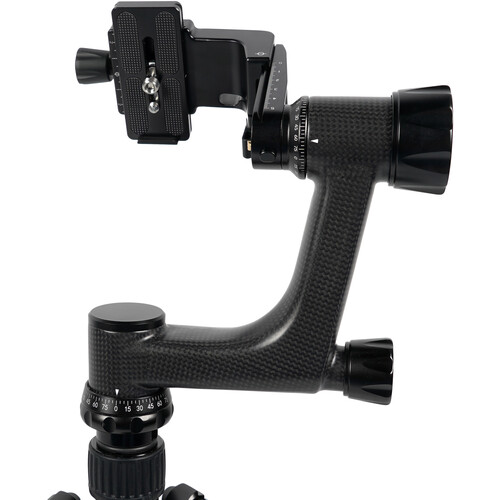
Even with the relatively light weight of the 500mm PF, it’s often impractical to go handheld. As such, the lens includes a rotating tripod collar and foot.
The mistake I made was thinking that I could get away with using my existing ballhead for the shoot. Like I mentioned, I’m not an extensive long-lens photographer, and didn’t want to pick up a gimbal head for just one day of photography. As the date of the eclipse approached, though, I found that my ballhead wasn’t sufficient in test shots, and I ordered a gimbal head last-minute (the Sirui PH-10). It paid off and was helpful for manually tracking the moon – which moves surprisingly fast at 500mm.
Sharpness
As would be expected from a super-telephoto, the 500mm proved to be incredibly sharp. Even wide open, I had zero image quality issues. Stopping down didn’t noticeably increase sharpness in real-world subjects, but did extend the very shallow depth of field, improving the detail on on some nearby subjects.
Focus
I was using the lens on my Nikon Z7, and focus remained fast and steady across all my usage, albeit with a bit of hunting during the darkest phases of the eclipse. I don’t know if the camera or lens was more to blame, but I do think that an f/4 lens would have had an easier time. Not that I wanted to lug along (or pay for) a 500mm f/4 just for a day of shooting.
Beyond autofocus, the 500mm offers a variety of focus controls. You can select between A/M, M/A (which prioritizes manual override), and full time manual. Focus can also be limited to 8m to infinity. Lastly, the lens features a set of function buttons, which can be set memory recall, autofocus lock, or AF-ON functionality
Overall, focus performs well, and is definitely ahead of zoom options like the 80-400 and 200-500mm, although it feels behind the faster aperture super-teles I’ve tested.
Flare and Contrast
Phase Fresnel elements, responsible for the drastic weight and size reduction in this lens, aren’t without drawbacks. Owing to their shape, these elements can perform poorly in strongly backlit subjects or with point light sources, leading to flare and ghosting.
Fortunately, it seems that the 500mm f/5.6 PF was designed with this in mind, since it suppresses these flares quite well. I couldn’t trigger them in my testing in any reasonable situation. I’d imagine the Nano coating is doing a lot of the work with flare suppression here.
In Use
As I’ve mentioned, this lens is portable and easy to shoot handheld, particularly for a 500mm. With an integrated-grip body like the D6 or Z9, I’m sure handheld balance is even better, but I still had no problems using the Z 7 with a Smallrig L-Bracket providing a little extra finger room.
For the extended period of the lunar eclipse, I found that mounting the lens to a tripod and gimbal head made the most sense. For shorter sessions, or shoots where less precise movement is necessary, I think you could get away with a monopod, or a ballhead on a tripod. The lens is light and balanced enough that readjusting on a ballhead was doable, if not perfect.
Despite the impressive weight-trimming properties of the lens’s PF element, the 500mm f/5.6 PF is still pretty lengthy. I made use of the dedicated bag supplied by Nikon for transporting the lens, as I’d otherwise have to rearrange my entire camera bag to accommodate the lens’s length. While it’s not long enough to cause problems with carry-on bags, keep transport in mind if you aren’t used to using long lenses in part of your kit.
The Shoot
To get my desired composition, I was originally planning on hiking a few miles in Sedona, where I intended to line up the rising moon with some of the phenomenal natural rock formations up there. Unfortunately, the forecast the morning of the eclipse called for clouds, which is an absolute no-go for eclipse photography. This led to a last minute change of plans, and left me searching for some alternate options in areas that had clearer forecasts.
The app Photopills proved useful for this, since it has options to visualize and tack the path of the rising moon. After checking different locations from my couch, I found a good alternative location in front of the Superstitions, a prominent mountain range right outside Phoenix. I also have a dedicated astronomic forecast app that told me clear weather was likely in the area.

Setup
While I’ve shot at this location in the past, to get a viable composition at 500mm, I had to be much further back than usual, shooting across the intervening distance. While I was a bit worried about the composition due to rural developments between my location and the mountain, things ended up working out just fine.
The night of, I got into position and double checked my composition using Photopill’s AR view to ensure the path of the moon would work with my view. This AR view is a great way to check compositions in the field, particularly if you’re not used to reading and visualizing things like the azimuth and altitude information that’s typically available for astronomic reference sources.
Lastly, I just dialed in some basic camera settings, making use of the remaining light in the sky to check focus, make sure my tripod was securely situated, and grab a few more test shots with the 500mm.
Camera Settings
While we’ve got a whole guide available on shooting the lunar eclipse available here, I’d like to go over some tips specific to both mirrorless cameras and a very long lens like this.
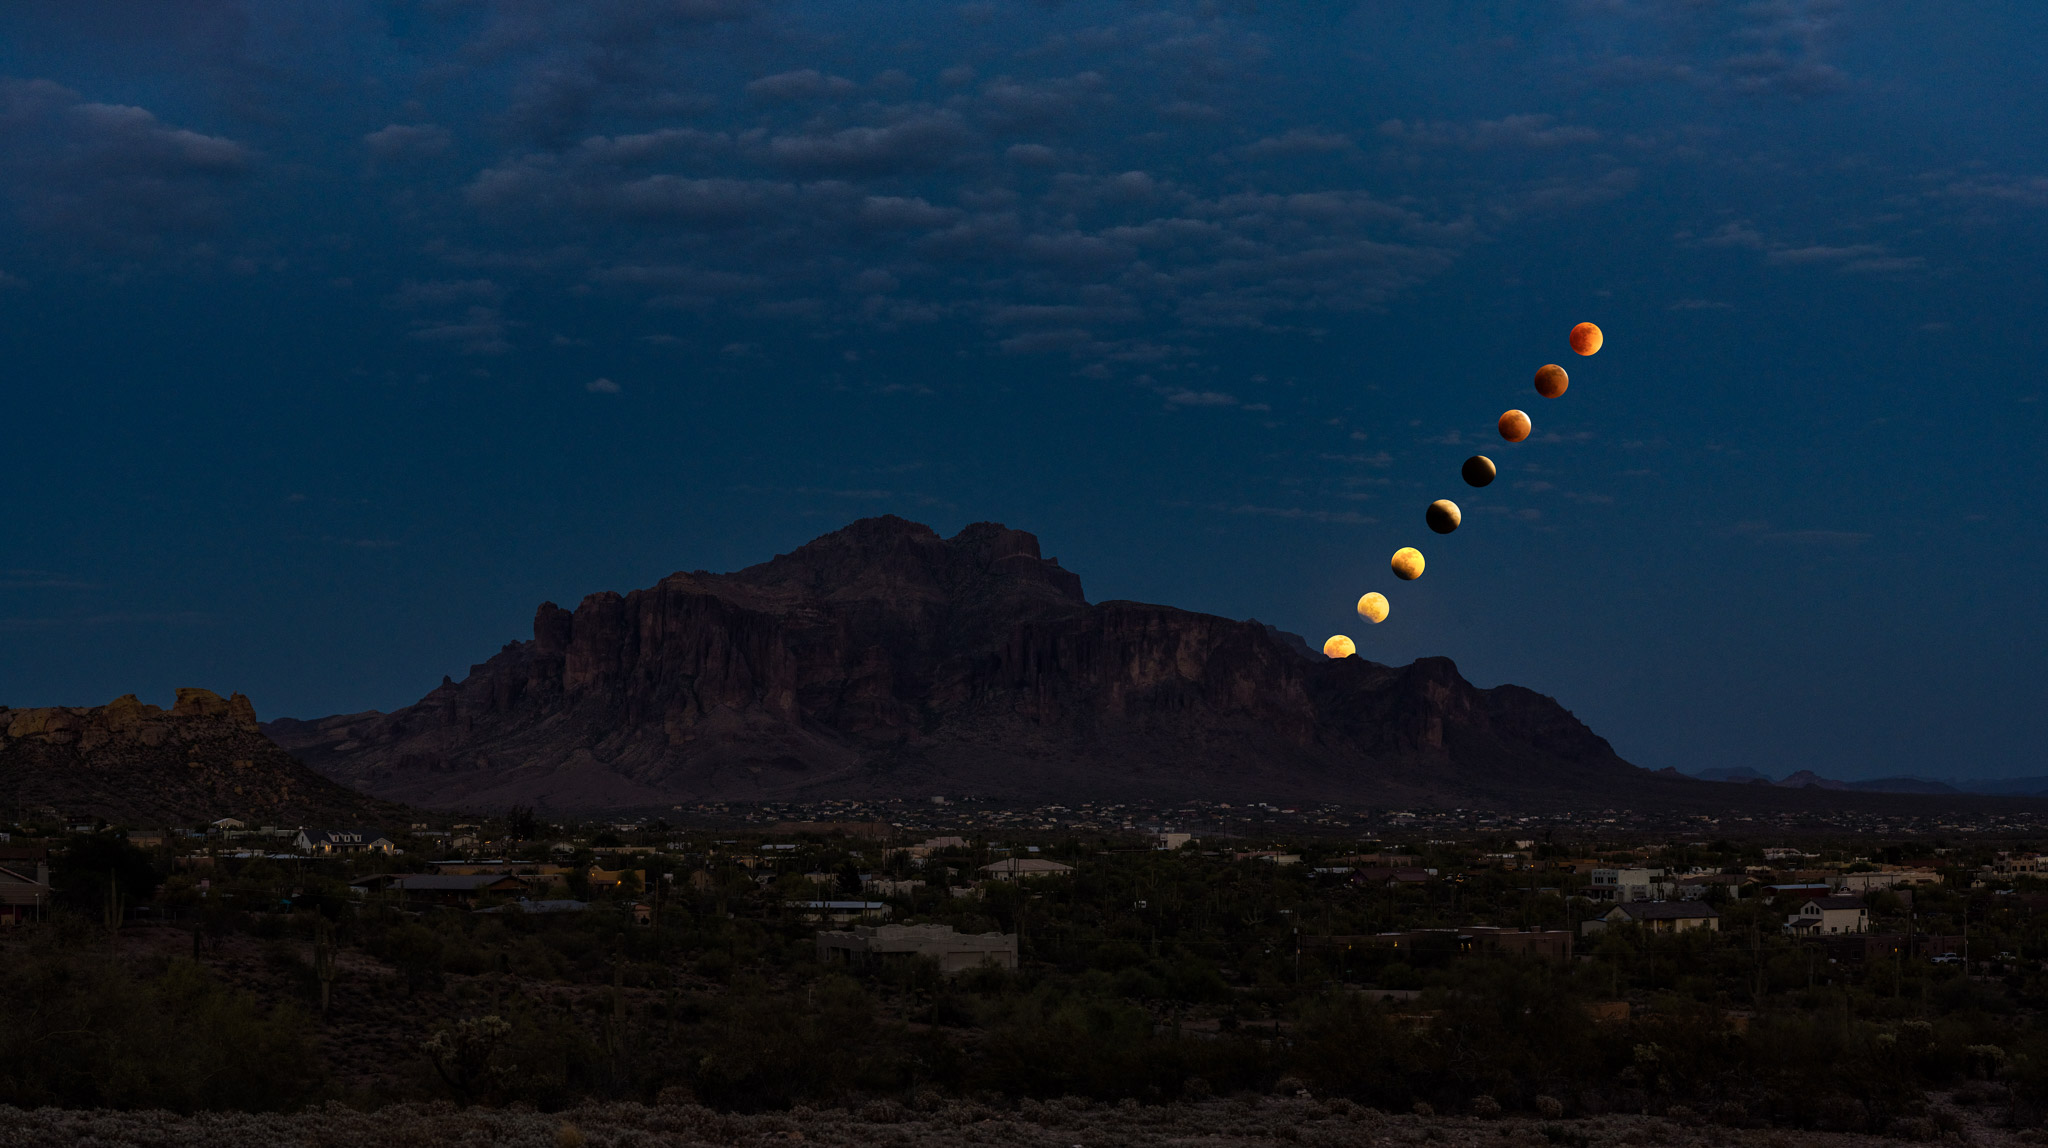
Since I wasn’t shooting with a guided head, I needed to stay pretty involved with the actual shoot, which gave me the opportunity to try plenty of compositions and tweak my settings. For this specific shoot, I had a few shots pre-visualized: a wider view of the mountain range with a composite of the various phases of the eclipse, an extreme closeup of the moon rising behind the mountain, then some classic views of the moon only during totality.
To accomplish those shots, I needed three basic sets of settings. I’ll go through each of them below.
1. The Wider View
One batch of settings needed to work for the wider panorama, and The second set needed to work for the moon and landscape together, which proved to be a difficult balancing act as I had less than a minute before the moon rose too high. The last set, while less technically challenging, still required a balance between capturing enough light from the now significantly darker moon and avoiding camera and subject motion blur.
Photographing this wider-angle shot was relatively easy. For this one, I shot from a separate tripod with a 105mm lens, and I took a six-frame panorama of vertical shots in order to capture more detail.
The only difficulty was finding an exposure value that would work for the entire sweep. Then, I intended to composite the moon into the frame.
Unfortunately, it didn’t work out perfectly for what I had in mind. I shot the panorama in the middle of the shooting session rather than the end, and I think it was too early in blue hour. I darkened the panorama in post-processing before compositing in the moon, but I still think the moon didn’t blend quite right, especially in the later frames of the eclipse.
I intend to return to the location on a new-moon night and just reshooting the panorama. After all, the output is already an artistic composite, rather than a rendition focused on accuracy. Hopefully with a darker sky, I can get a composite that looks more natural.
If you’re planning a similar shot, consider taking your wider shot at a few different times of night – like during the start, middle, and end of your shooting session – so you have more options to choose from later.
2. Rising Behind the Mountain
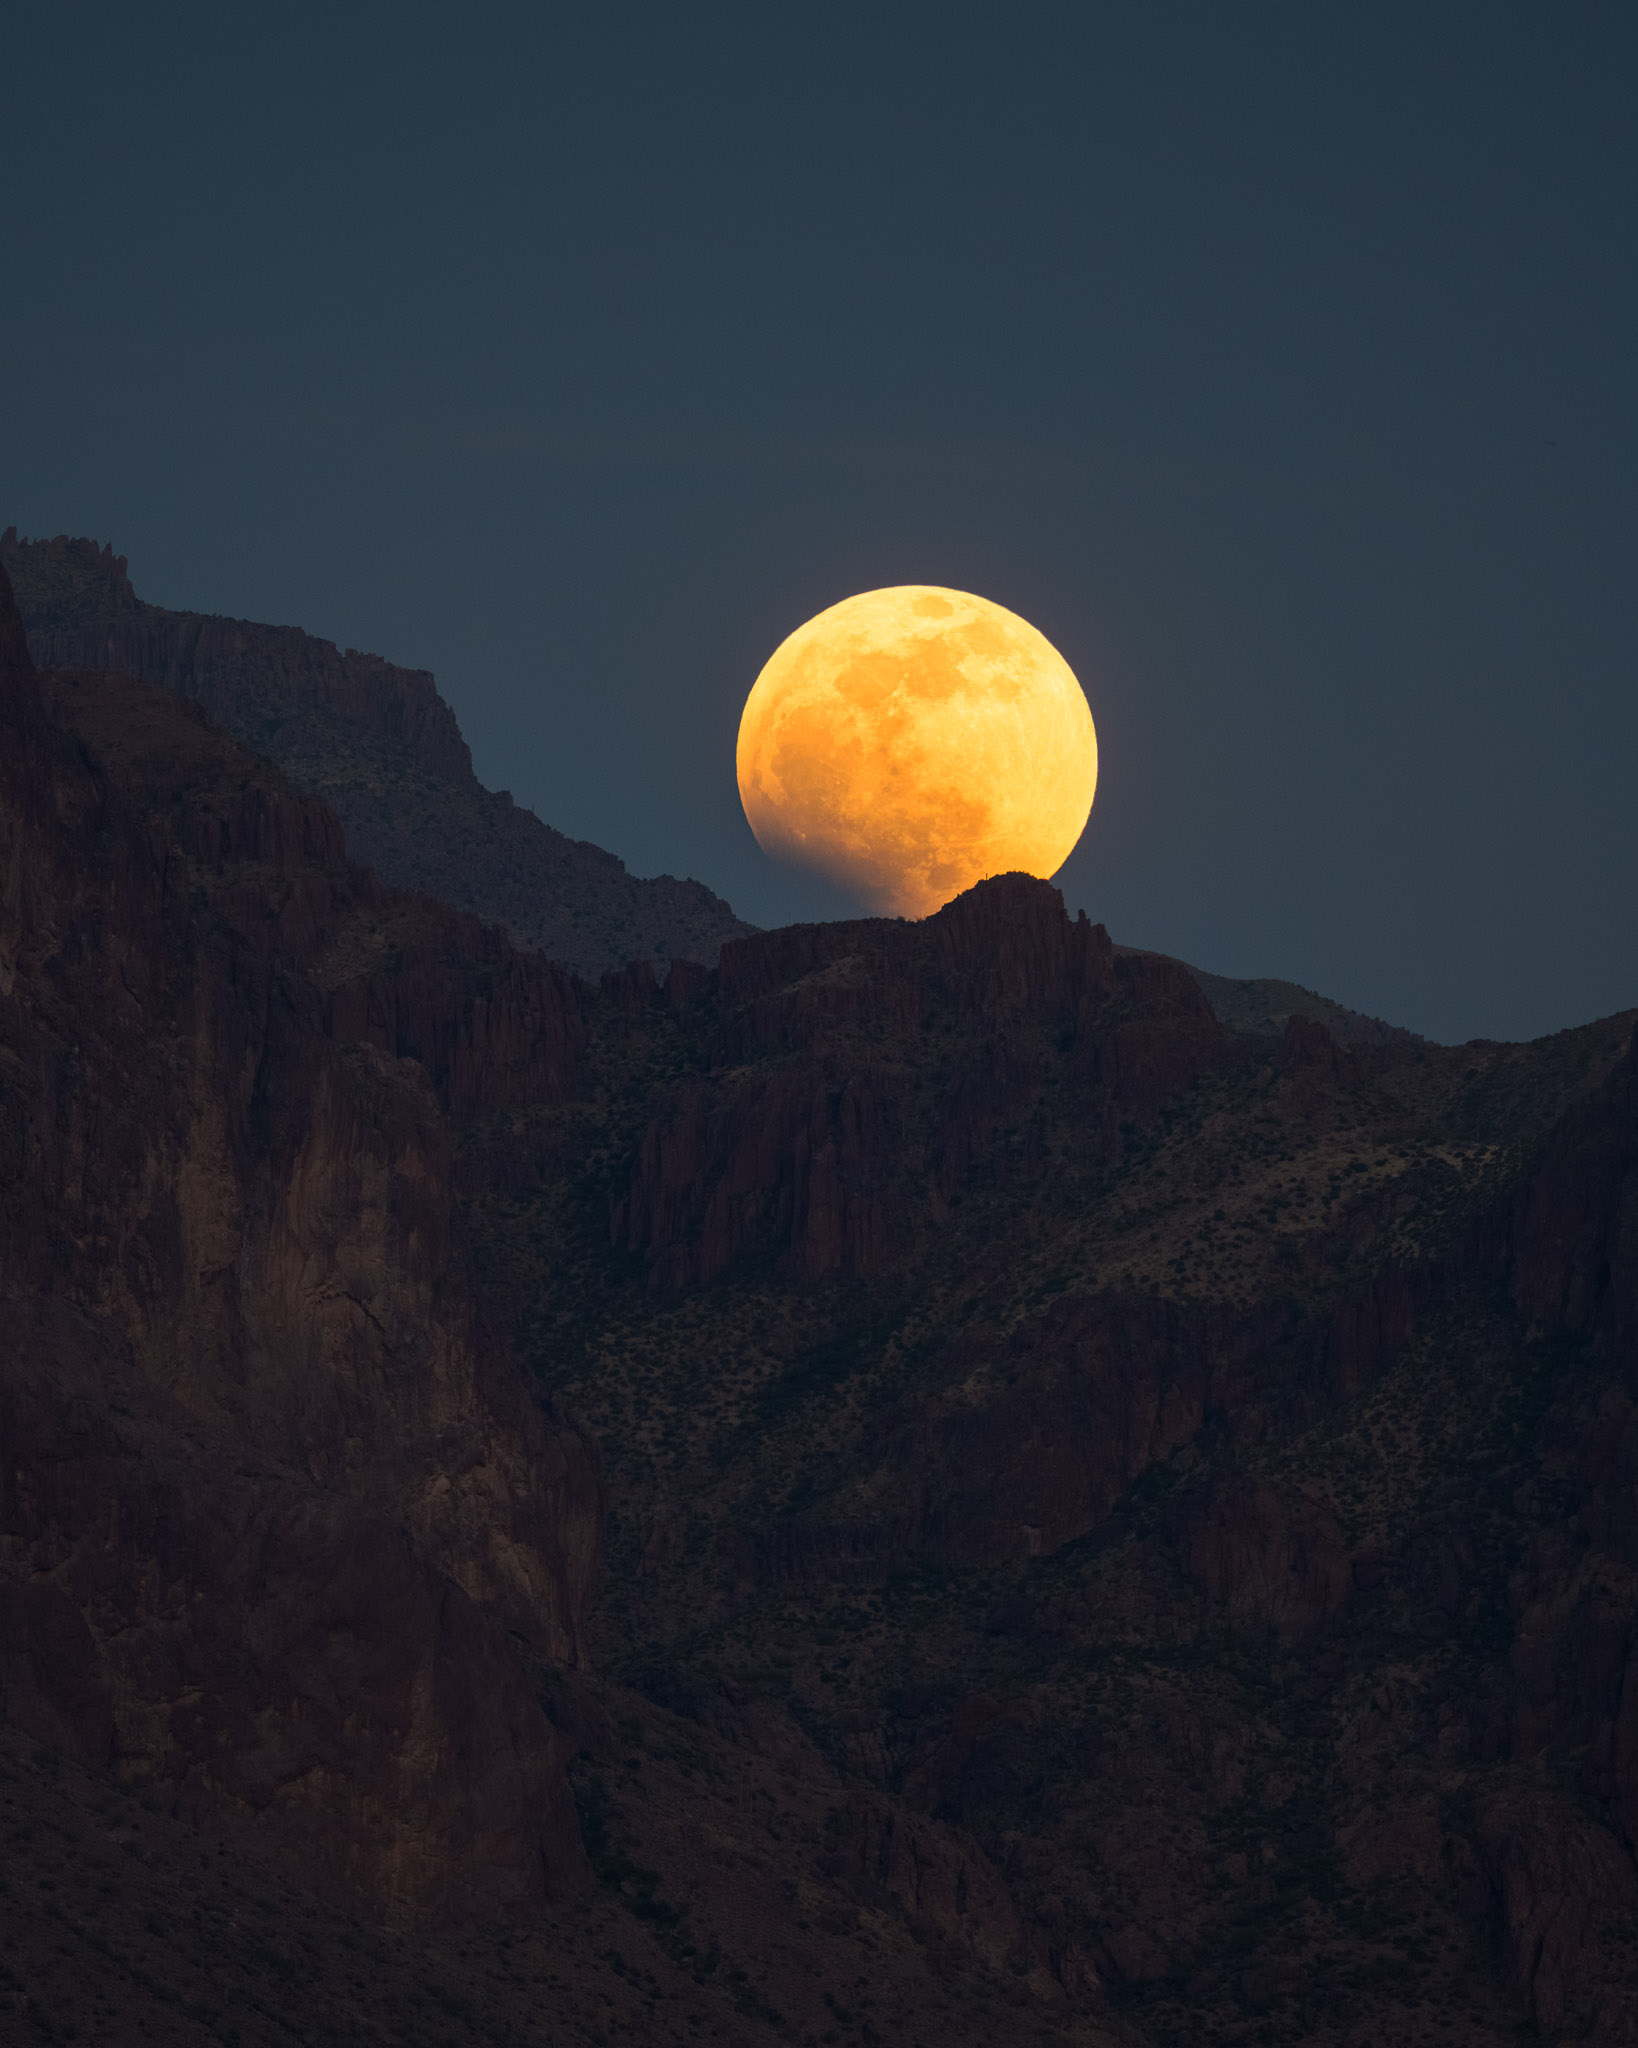
The shot that I was the most excited about was the moon rising behind the mountain. The Superstitions have a great texture, featuring craggy cliff faces hundreds of feet high. To cap it off, there’s even a number of tall saguaro cacti dotting the top of the peak.
Together, these features make for a great foreground to a rising moon. The timing of the eclipse was also perfect, since I was starting to get some great color on the moon just as it became visible over the mountain.
For these shots, I was bracketing my exposures, as I knew it would be difficult to balance the brighter moon and the darker foreground. To give my foreground the best chance, I planned on pre-composing my photo and letting the moon rise through the frame, rather than chasing it.
My favorite detail from this shot is the lone saguaro silhouetted against the rising moon. It’s visible in a large print or if you click to view the image below full-screen on a large monitor. The fact that the lens reproduced the distant saguaro so well is testament to the quality of the 500mm PF (and perhaps a reason to try an even longer lens the next time around).
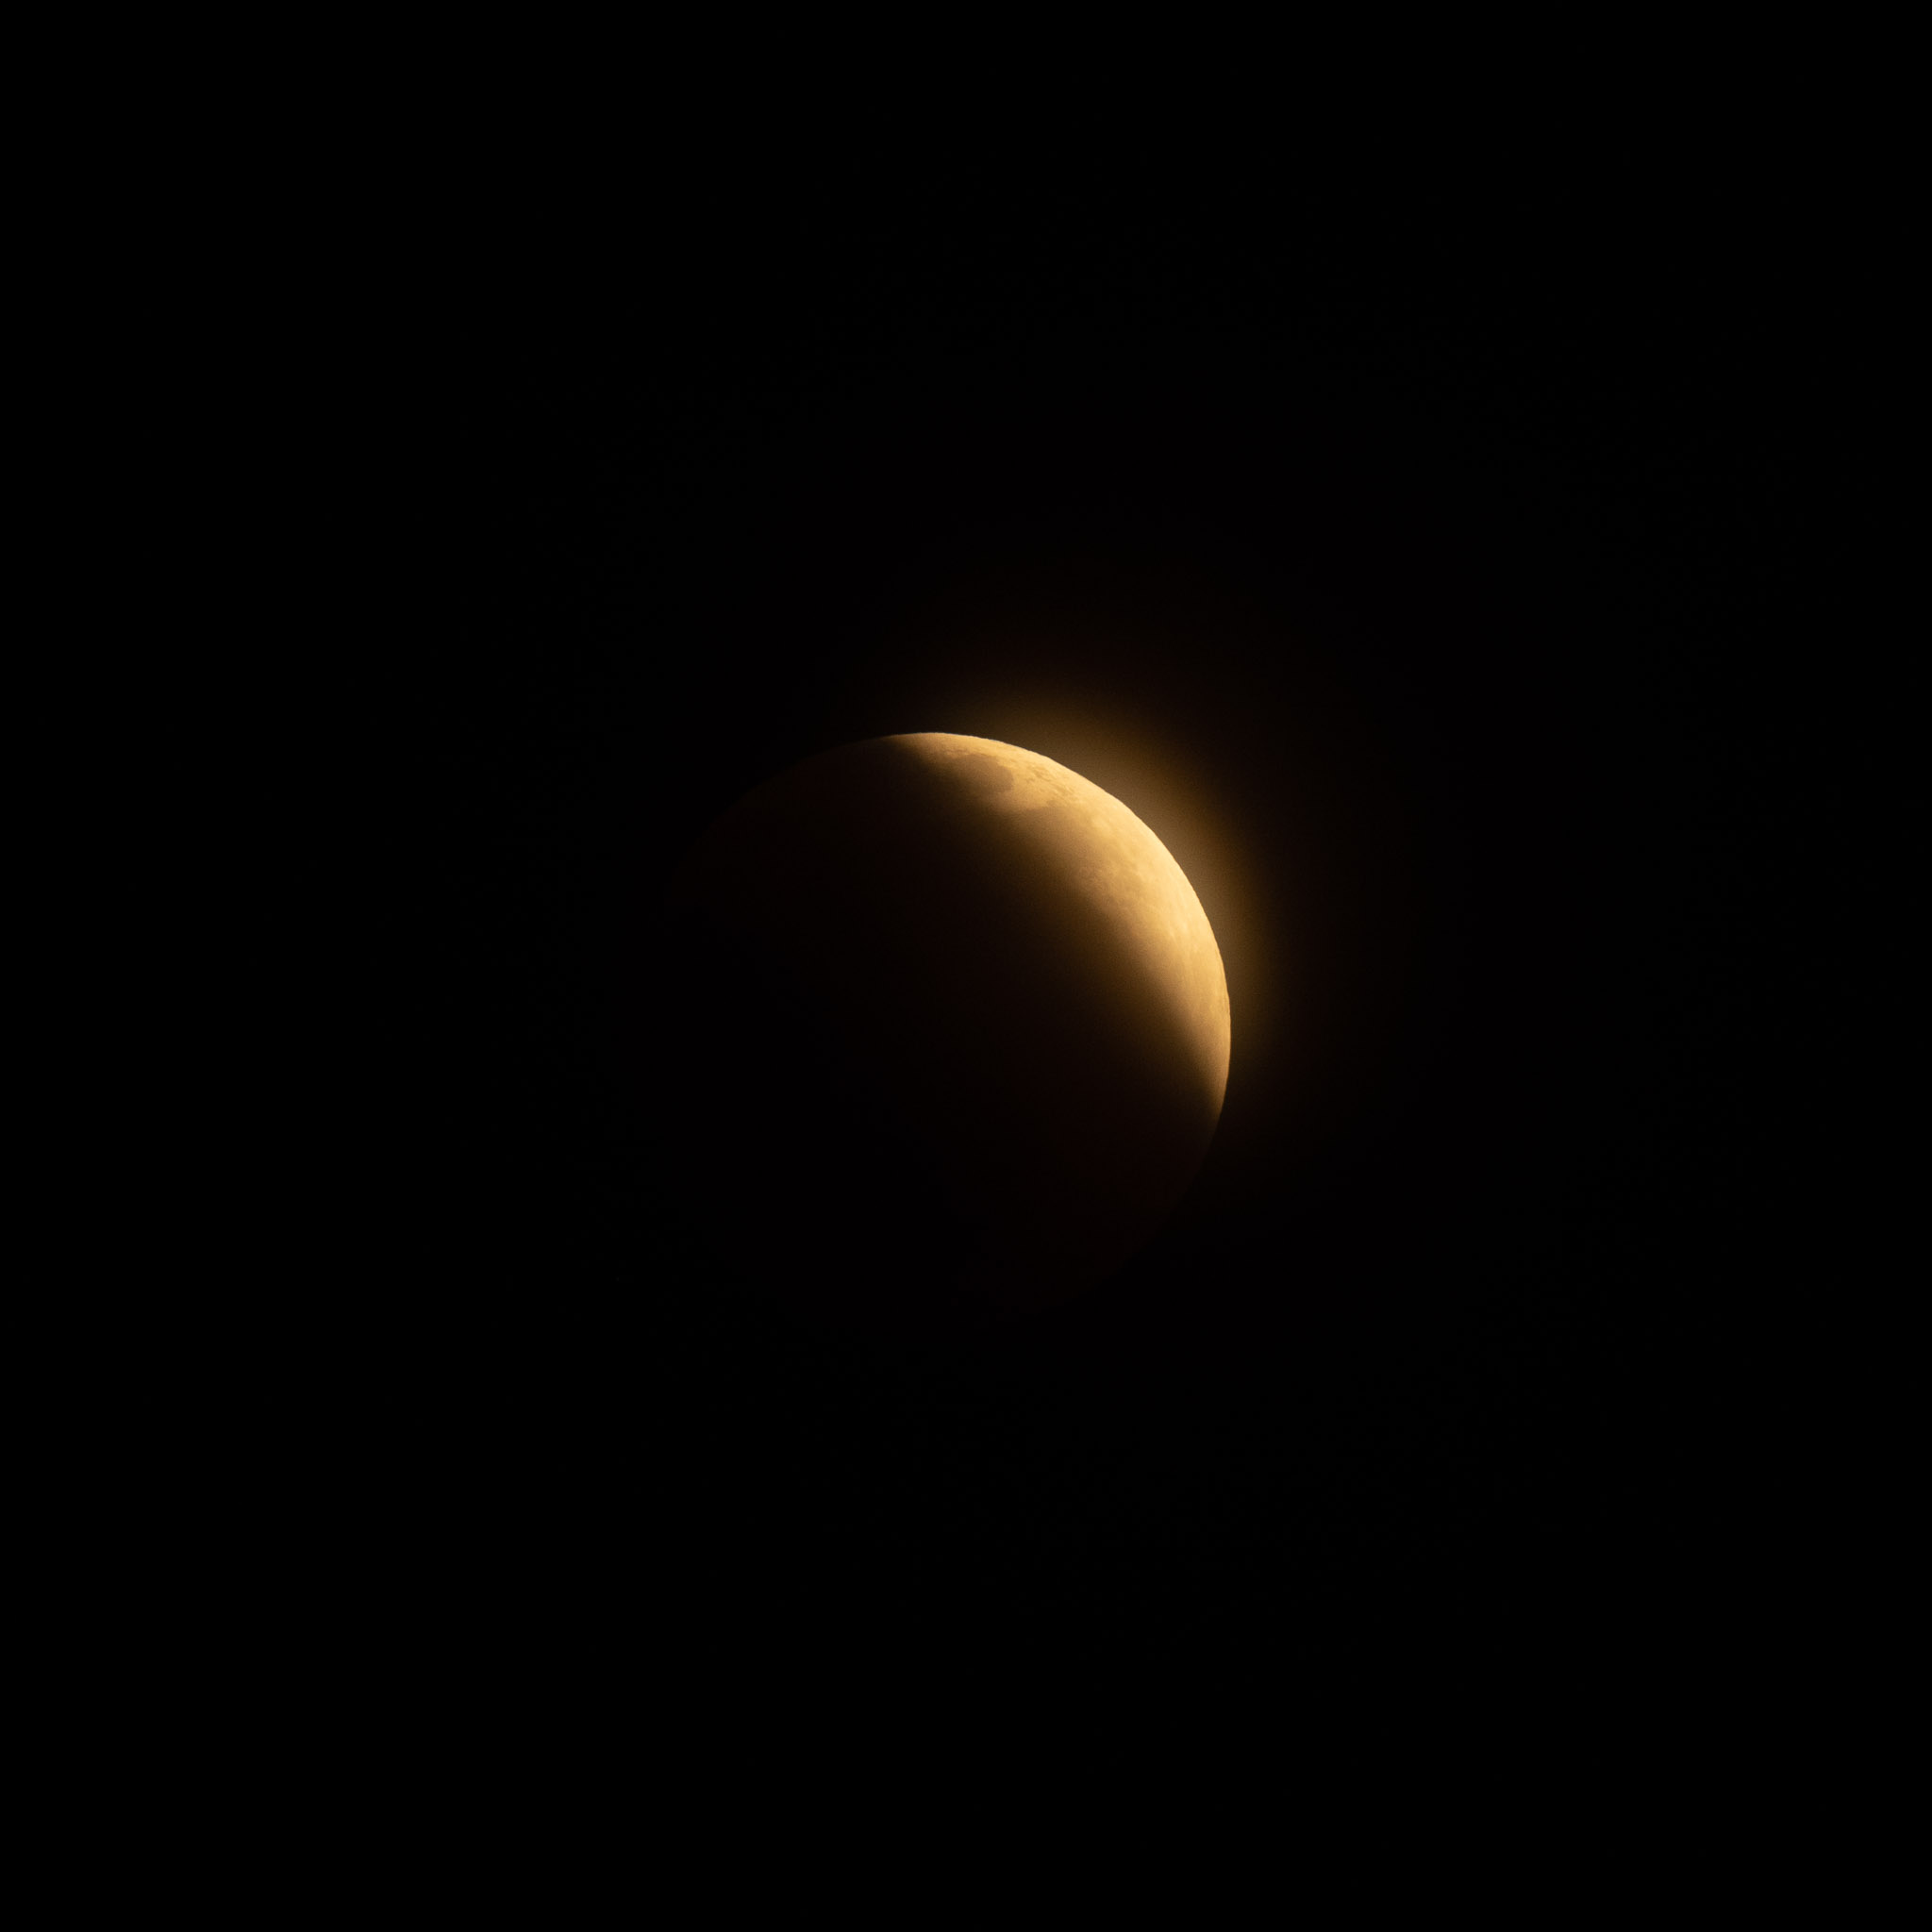
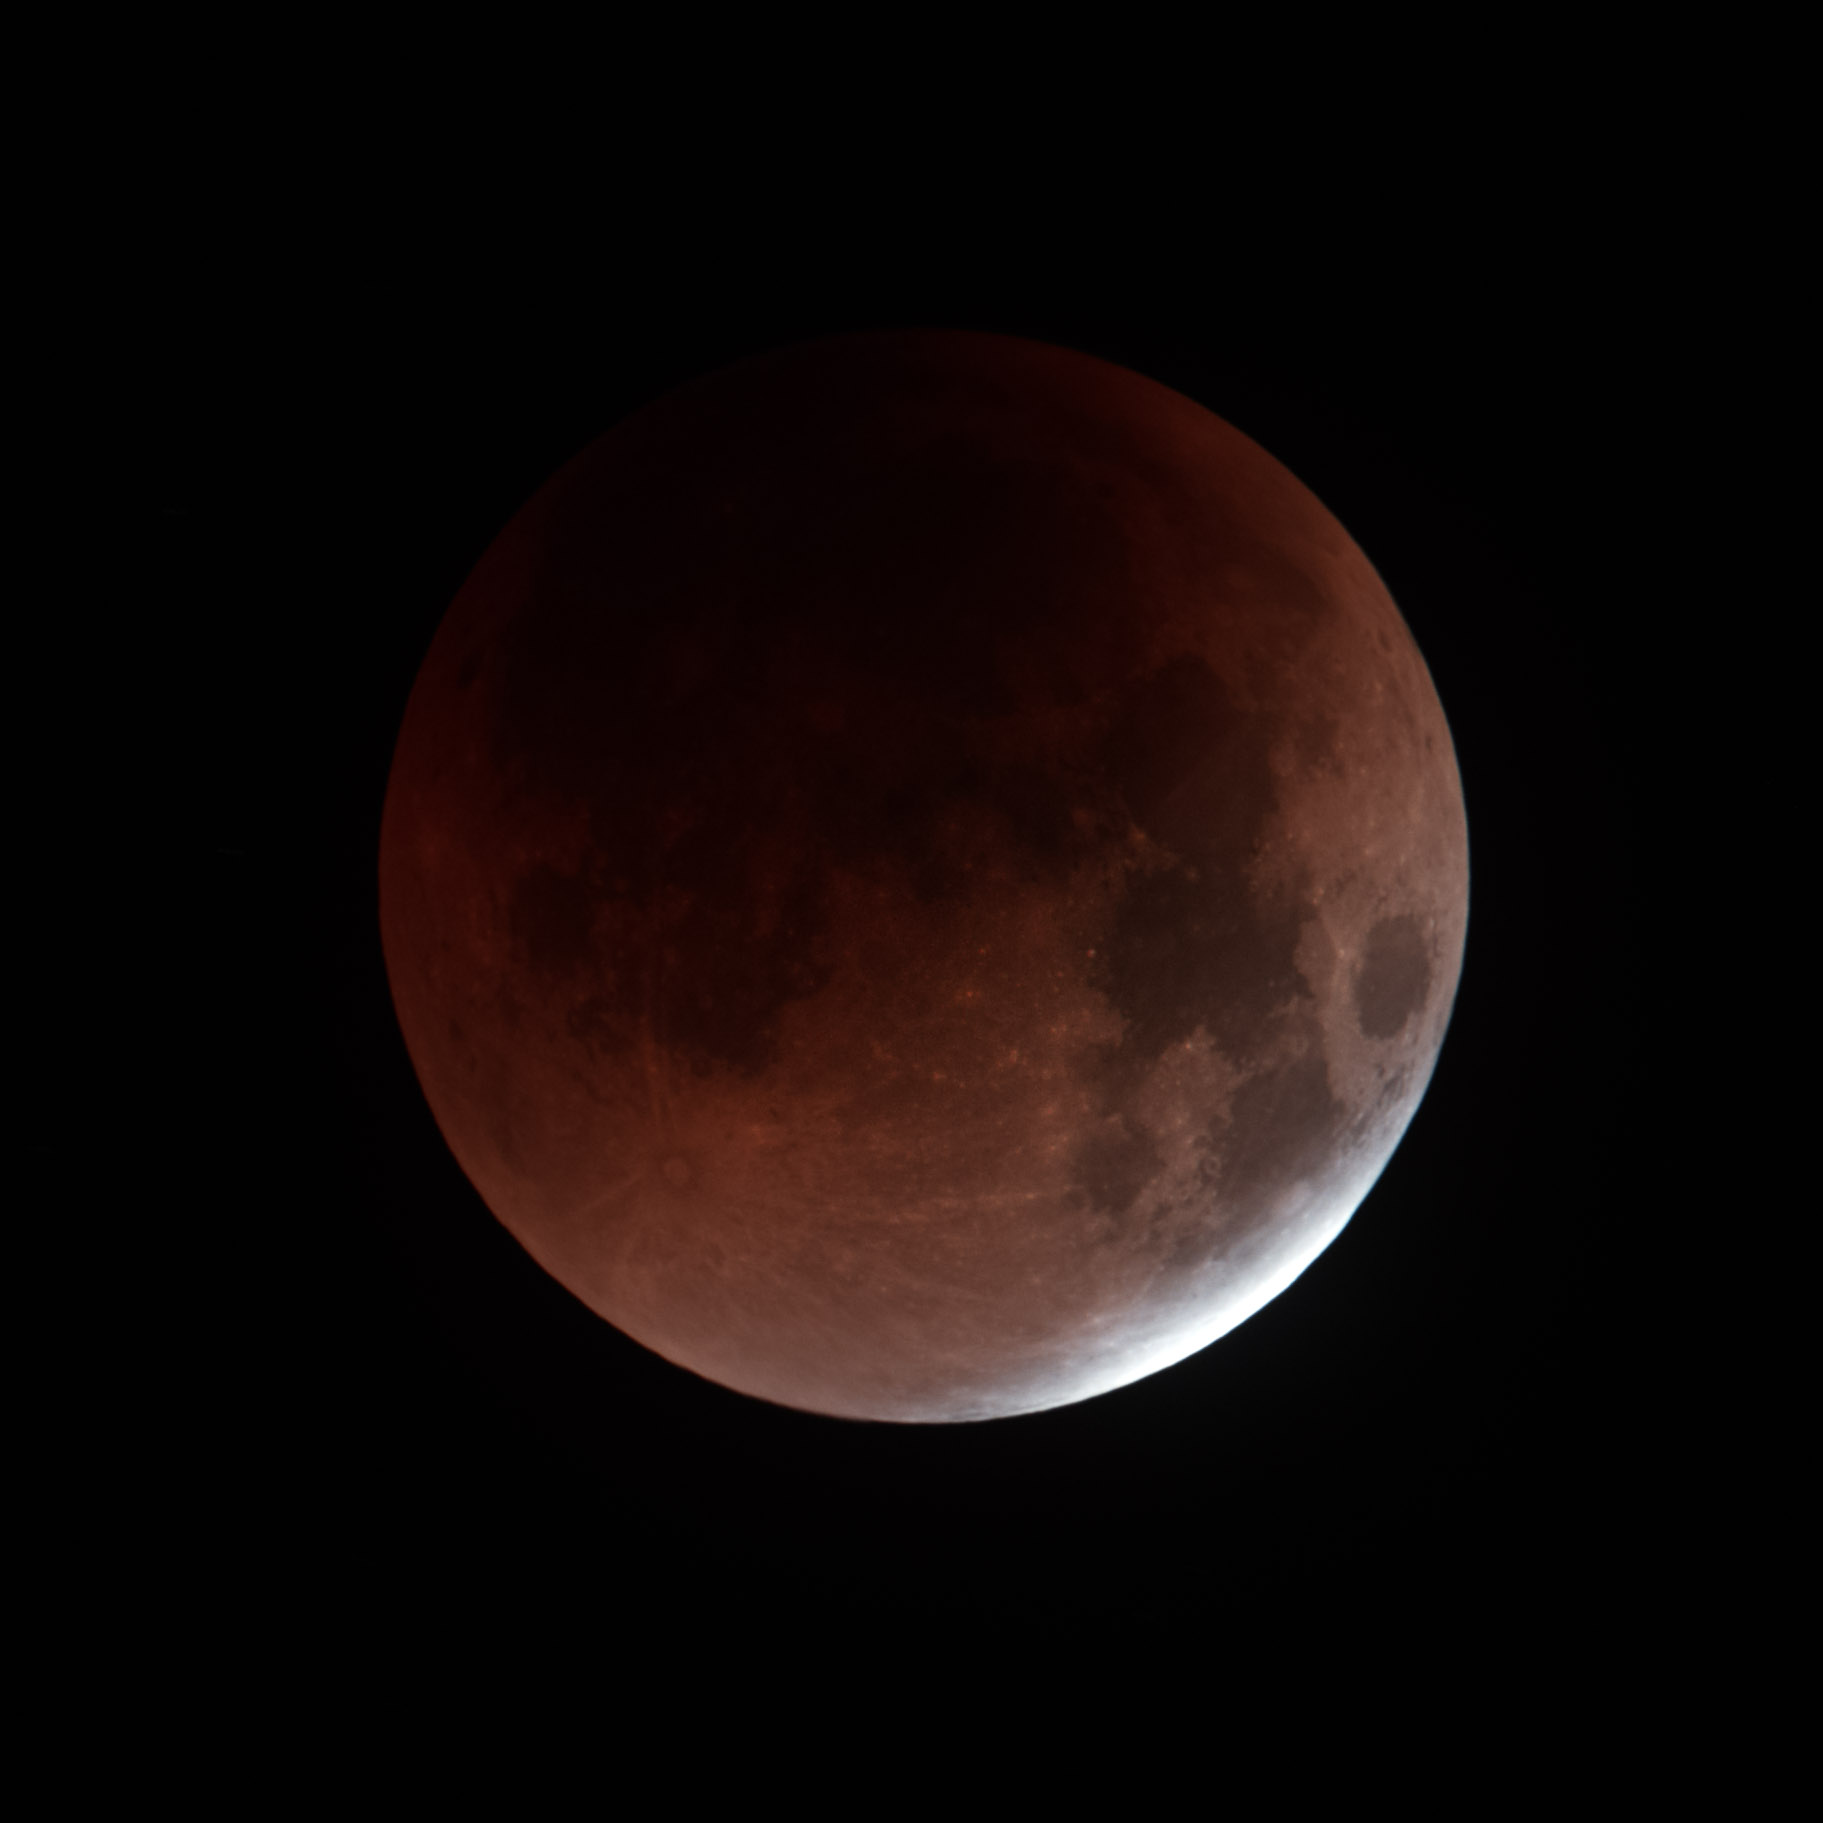
3. The Eclipse in Totality
Capturing the eclipse itself has been extensively covered in our guide, but I would like to mention one specific detail I picked up while shooting. On a dark subject like the lunar eclipse, it can be tricky to focus accurately, and you may need to boost the camera’s ISO to get a bright image preview on the screen. There are a couple of ways around this.
First, you could turn off the camera’s “apply settings to live view” in the menu (might be worded differently on non-Nikon cameras). This will automatically adjust the subject’s brightness on the LCD preview even when your camera settings stay the same. Alternatively, you could toggle between Auto ISO On vs Off.
I found this helpful for focusing quickly when the moon was at its darkest.
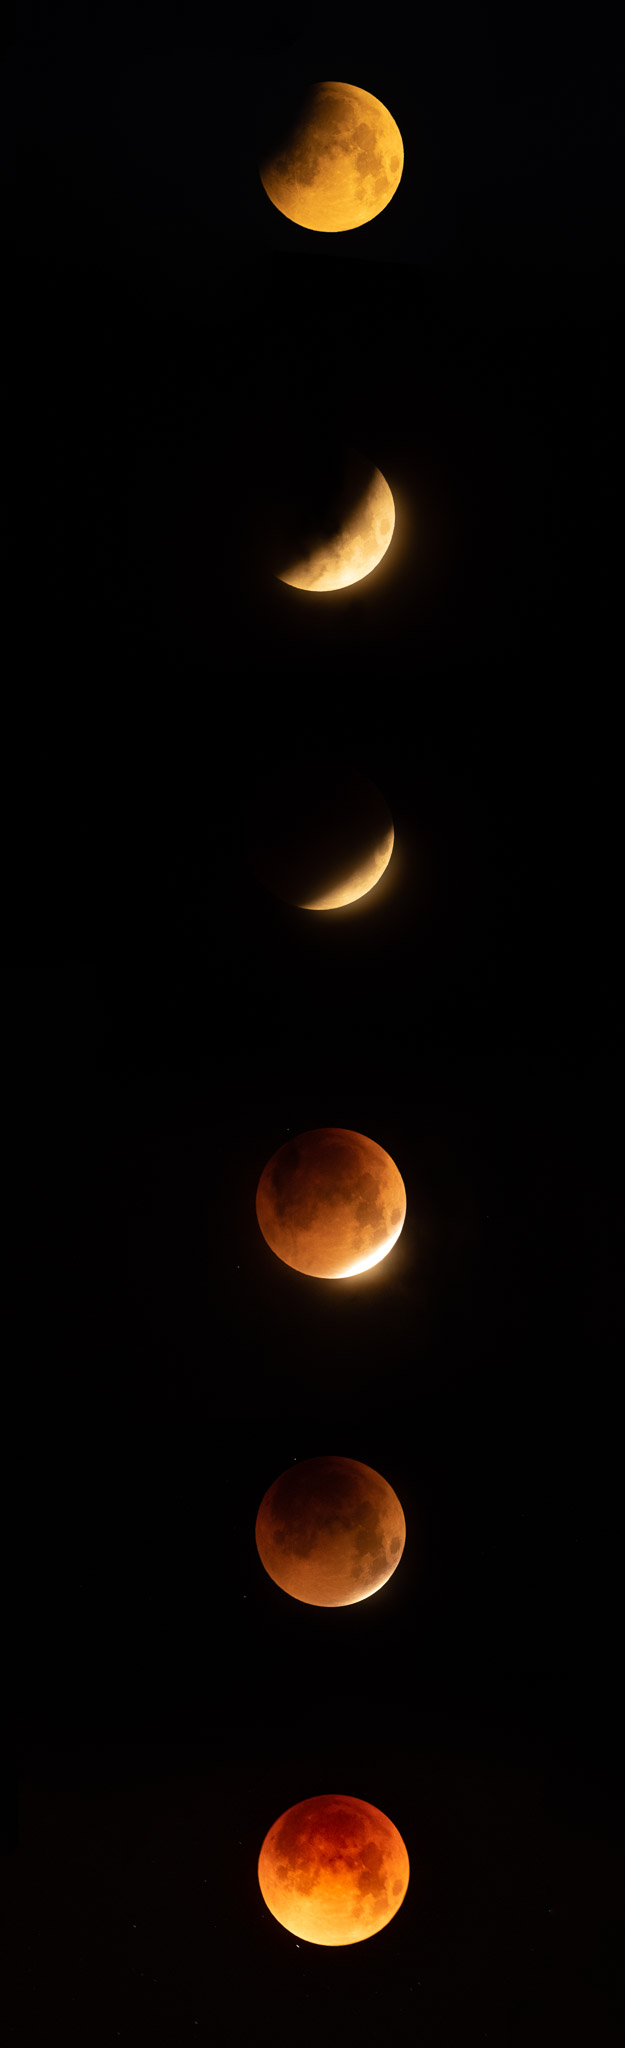
I also made a separate composite showing the changes in the moon through the night.
Conclusion
I always enjoy photographing unique events like this. Not only does it present a great, time-sensitive motivation to go out and shoot, but it can also help you step out of your comfort zone when it comes to equipment. I enjoyed using the 500mm PF more than I had expected, and it’s moved up on my list of lenses to rent or buy when I need more reach in the future.
Photographing new subjects like this also exposes some of your strengths and weaknesses as a photographer. I was able to leverage some of the techniques I’m comfortable with, like making a panorama, while realizing what I need to learn about topics like compositing. Overall, I was really happy with the experience and can’t wait for the next lunar eclipse that’s visible from my home state (November 8 later this year)!
Interesting that you were considering Sedona — until the forecast of clouds.
I, too, considered Sedona and did make the shot in Sedona. I was hoping to get an early shot lower on the eastern horizon where clouds might be less of a problem. It didn’t quite work out that way but I was still satisfied with the result.
www.dblanchard.net/blog/…dral-rock/
Unfortunately clouds have been the bane of many an astro shoot – it’s further complicated by how fast our weather can change out here, especially towards monsoon season. I still like the result you got though. Sedona is great in any weather it seems.
Your other focus option when the moon gets that dim is to focus manually on nearby bright stars in live view
Always a possibility. Without a focus aid, however, I feel that it can be a little tricky to judge if a star is perfectly sharp, as there aren’t any features to refer to.
The other way to deal with focus is to focus before or shortly after the start of the eclipse, when the moon is bright enough that the auto-focus system can acquire focus without difficulty, and then lock the focus. Once you’ve locked focus on the moon, all of your shots will be in focus because the distance between you and the moon won’t change enough during the session to matter.
The official way to lock the focus on this lens is to set the focus function selector switch to AF-L (focus lock) and then press the focus function button. What I would do (because it’s easier to remember and works for all lenses) is to switch to manual focus, which effectively locks the current focus unless you accidentally touch the focus ring.
Always a possibility to lock focus, either with a switch or just some tape. I still think it’s important to be able to find focus, however, just in case you bump the lens or the temperature change pushes you out of critical focus.
Set the focus when the moon is still bright and use the memory set button on the lens to bring the focus back to your original set point. The memory recall switch and set button are used a lot by me with this lens, especially considering I’m shooting with a Z5 and I need to be on top of my technique with autofocus on action type of shots. But that feature works for all sorts of situations, including yours.
Alex wrote “I’d imagine the Nano coating and ED elements are doing a lot of the work with flare suppression here.”
ED elements don’t reduce flare and/or ghosting.
“… individual elements also feature both Nano Crystal and Super Integrated Coatings to suppress flare and ghosting …”
www.bhphotovideo.com/c/pro…l/overview
Thank you, Pete, good spot. Fixed it!
For compositing the moon into a shot, I select it, then feather the edges by 2-3 pixels. This gets rid of the sharp edge, but doesn’t add a halo. Then I copy into a new file, and then increase the file size by anywhere from 25-33%. This will help to make the moon look as big in the shot as it does to your eye when you’re just watching it. I then copy and paste the larger moon into the (differently exposed) foreground shot.
I rented this lens for some reach for my daughter’s high school graduation and was so impressed with it that I ordered it, especially considering it is currently on sale and was in stock when I ordered it. It works great on my Z5 except for birds in flight, but that is mostly because my old D500 was a much faster camera with better tracking autofocus. But that forces me to work on my technique more until I can get a better body in the future.