Photo Spot Summary
Country: United States
Category: Landscape
State: Hawaii
City: Kauai County
GPS Latitude: 22.208740
GPS Longitude: -159.598190
Directions
The Kalalau trailhead is at Kee Beach in Haena State Park at the north end of State Route 56. It’s about an hour and a half drive from Lihue Airport.
Photo Spot Details
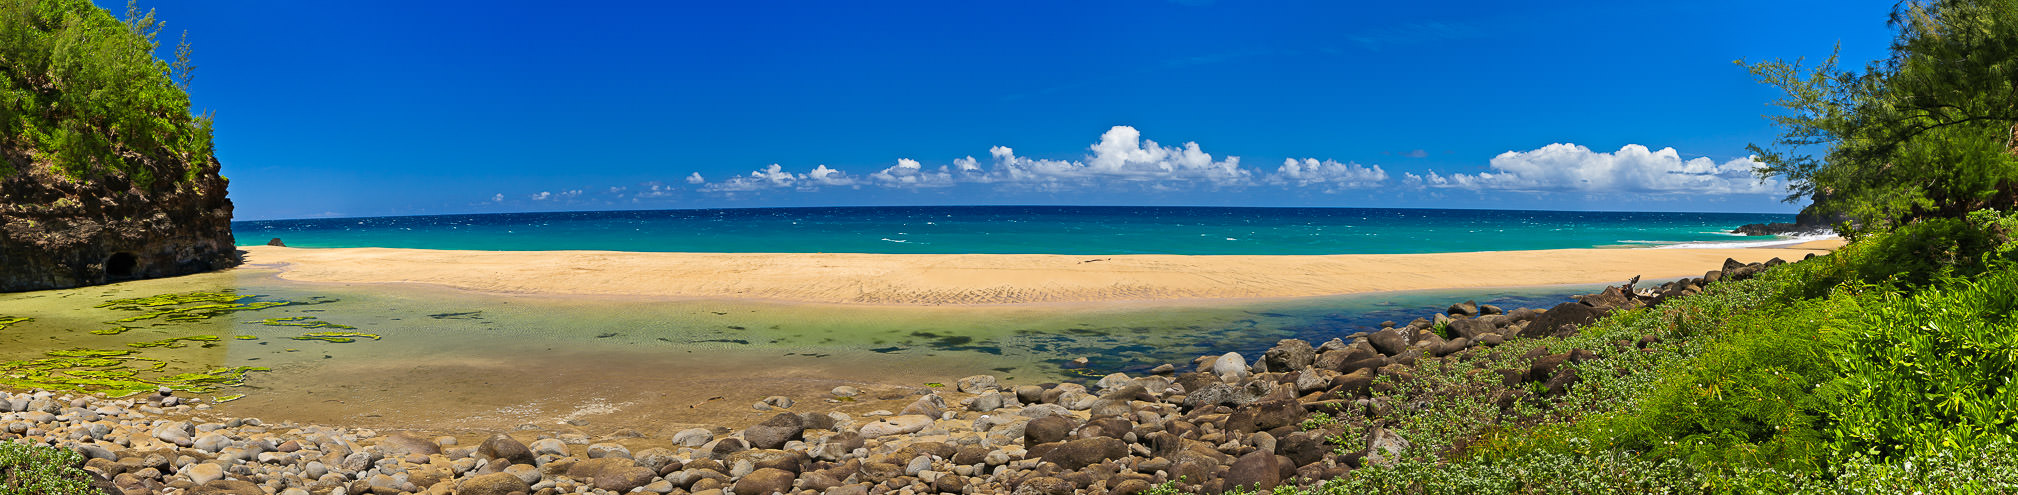
Hanakapiai beach is located on the north shore of Kauai at the two-mile point on the Kalalau Trail. The hike to Hanakapiai beach from Kee Beach is the easiest stretch of the 11 mile Kalalau trail and is the portion most often explored by tourists. The hike runs along the famous Na Pali Coast and offers breathtaking scenery along the way. The beach itself is on the other side of a small river. The only crossing is over a few rocks—there is no pedestrian bridge. As a result, many hikers stop at river and turn around, leaving the beach mostly empty for those who cross.

Travel and Gear Tips
- Hike early in the day before the sun gets too hot. Carry plenty of sunscreen, water, and snacks. The beach is a good spot for a lunch break before hiking back.
- The hike to the beach is two miles. You’ll do a round trip back the same way you came when it’s time to go home.
- Experienced hikers may want to travel another two miles to Hanakapiai falls. The falls is the furthest hikers are allowed without a permit.
- The trail is steep and narrow in places. It can also be muddy after a recent rainfall.
- One normal zoom like a 24-70mm or 24-120mm is probably all you’ll need.
- It’s a good idea to have something waterproof with which to store your camera should a tropical rain storm appear (or should you happen to slip on a wet rock when crossing the river)!

Photography Tips
- A tripod is probably not necessary for photographing the scenery along the trail and at the beach in the bright afternoon sun. (If you continue to the waterfall you may want one, and an ND filter, but just remember you have to hike 8 miles with it!)
- A polarizer would be helpful for cutting reflections off water and wet foliage.
- Landscapes are typically better with a lot of depth: use smaller apertures like f/8 to f/16 depending on the scene and position of foreground objects.
- Consider locking down exposure and focus to take a few hand-held panoramas instead of bringing a dedicated wide-angle lens. Remember to overlap about 20% of the frame per shot so Lightroom or Photoshop have enough data to stitch the results.
- Hand-held HDR can work too if the sun is too bright and the shadows in the foliage are too dark. I find this works even better if your lens has vibration reduction. Set your camera to bracket the exposure while in aperture priority mode (two stops over and two stops under is usually enough). Set the camera to high-speed continuous shooting and carefully press and hold the shutter while all bracketed shots are taken. Do a few takes so you have a few options to work with back home.