As many of you know, a recent project we’ve been publishing for our Members is a monthly photo critique livestream. It’s always nice to see the great work you sending us, and we also get to discuss a lot of the non-technical aspects of photography, like composition, light, and color.
Having had the pleasure of participating in two of these critiques already (and another coming up on Saturday), I’d like to share some of the points that have come up more than once. These tips may sound small, but they can have an outsized impact on your photos. Not to mention that almost every photographer has some photos that can be improved by following these tips.
Table of Contents
#1: Distracting Elements on the Edge of the Photo
It’s obvious that when looking at a scene in front of your camera, you’re going to pay attention to the main subject of the photo. This can result in some tunnel vision, where distractions creep into the photo without you realizing.
When you’re post-processing and cropping a photo, it’s important to look not just at the subject, but at the entire photo. In particular, focus on the edges. These are the regions that you may not have had time to analyze carefully in the field, so they are more likely to have unwanted distractions.
Here’s a photo I took where I didn’t pay too much attention to the edge and missed a small brown spot near the right edge:
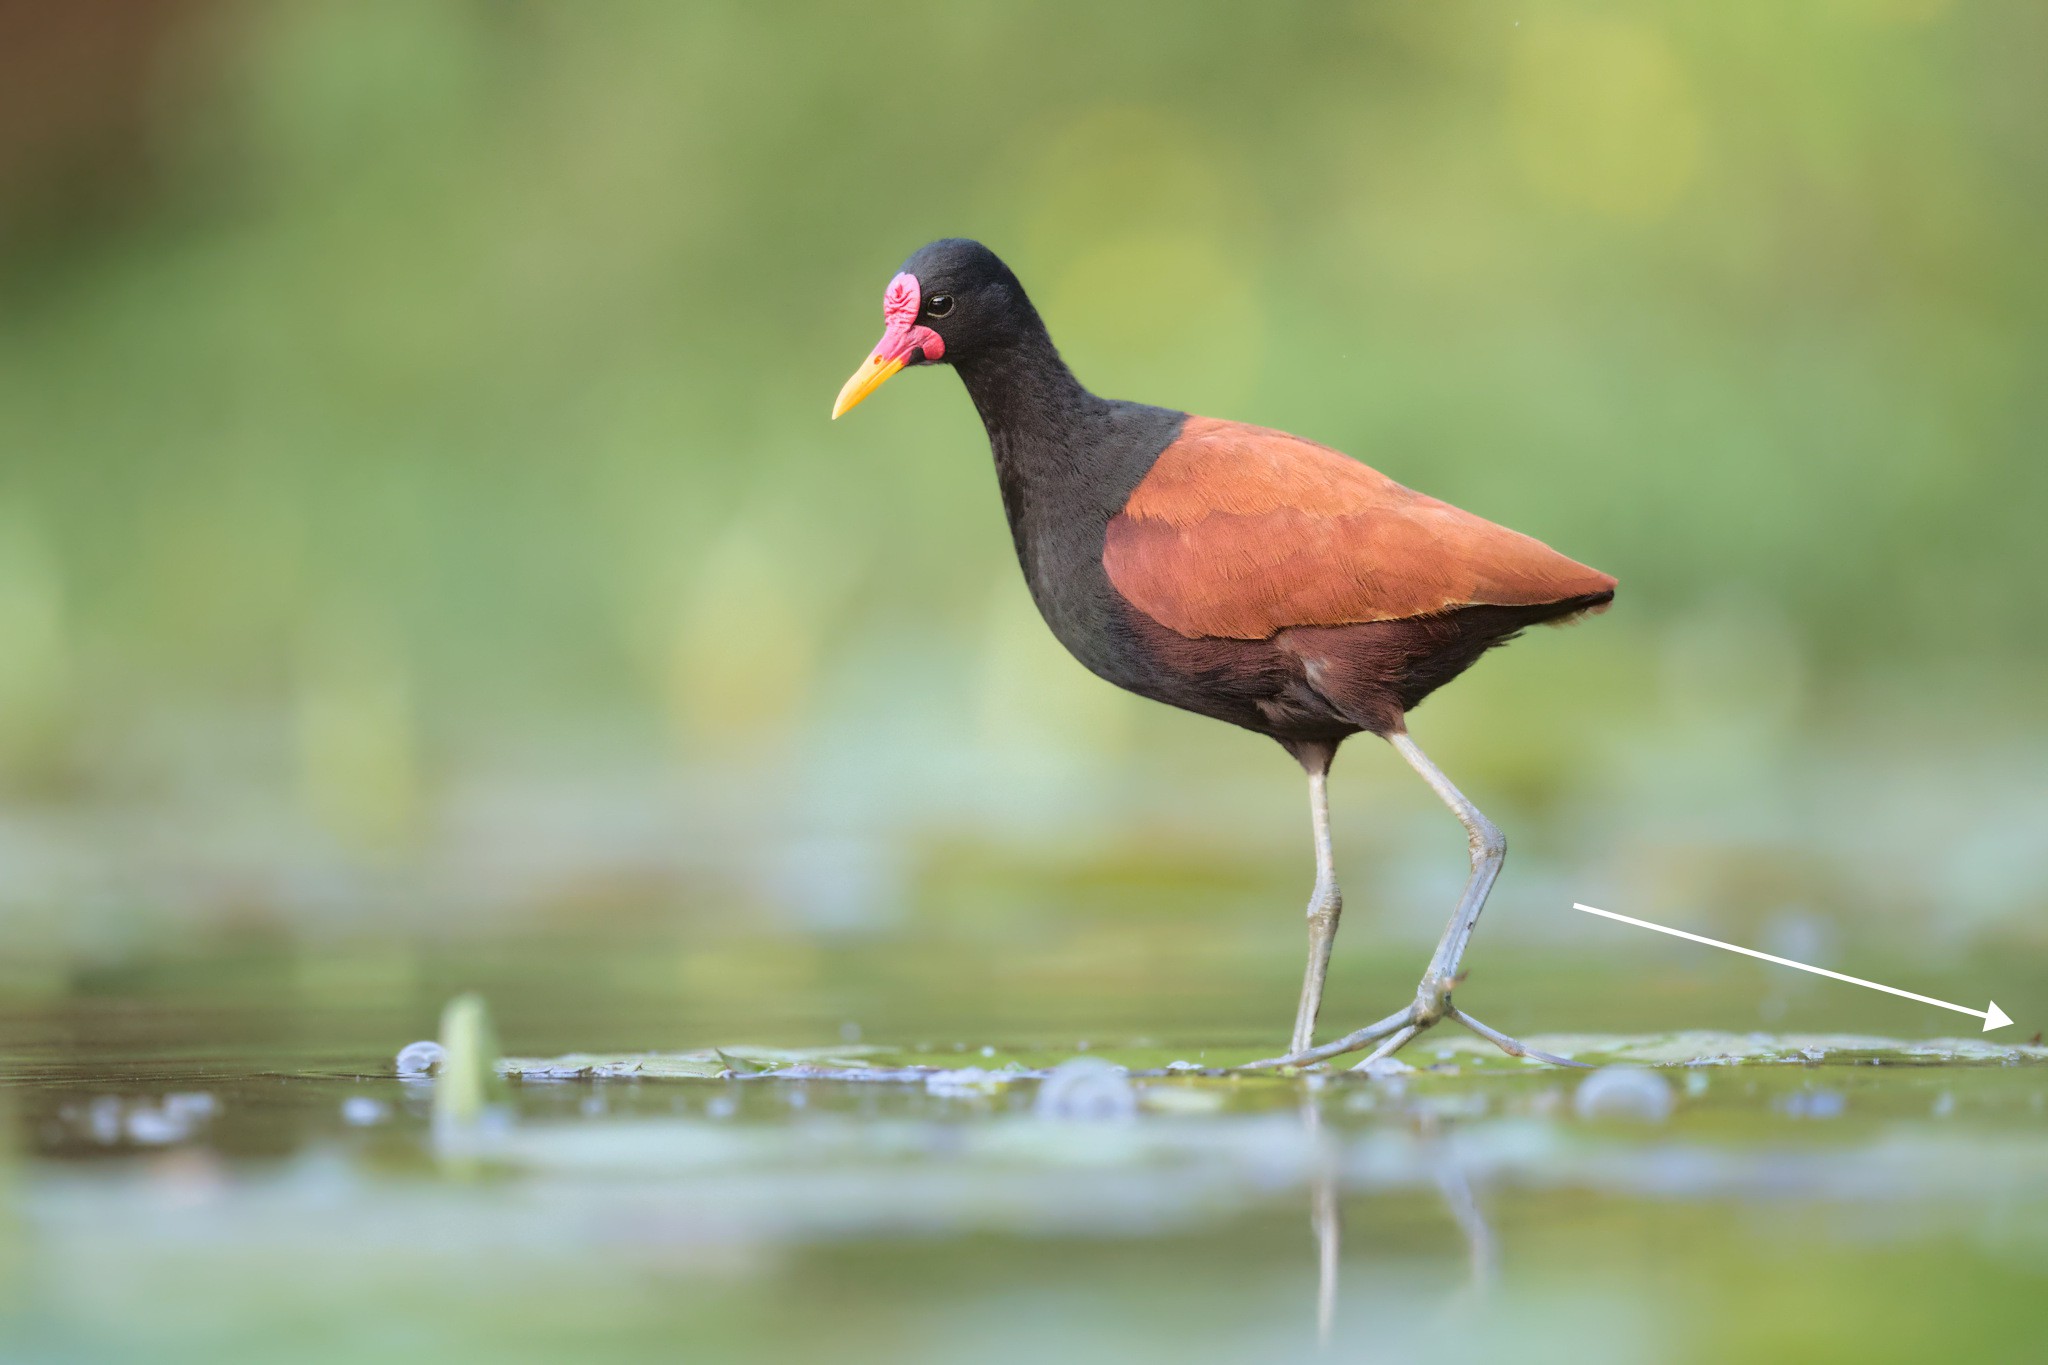
It’s very subtle, almost like a dust speck on the camera sensor. But it doesn’t add anything to the photo, and it’s very easy to crop out.
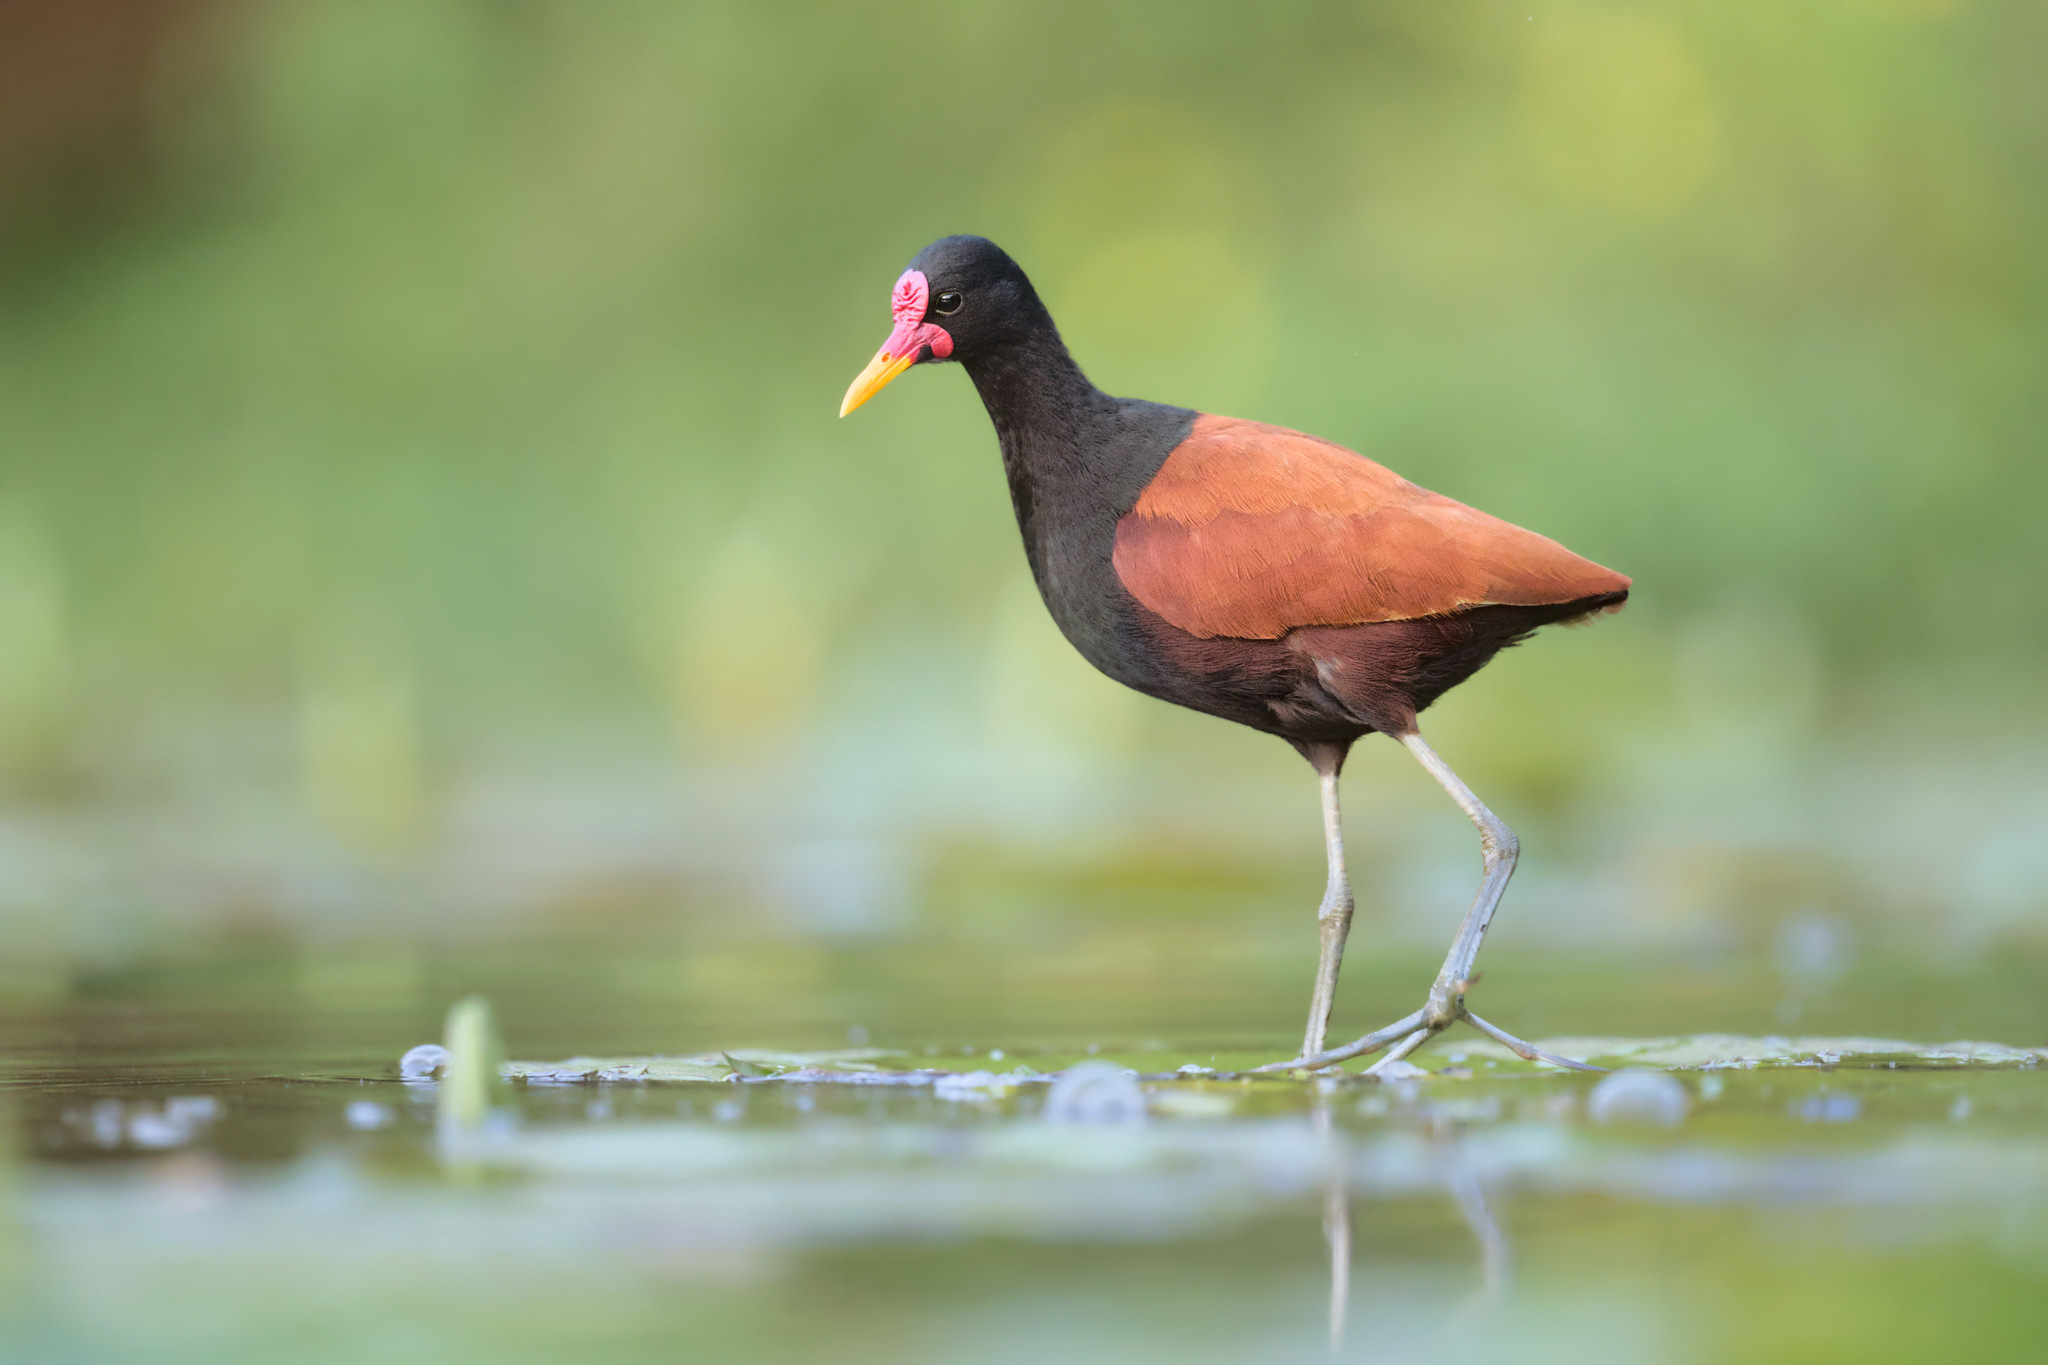
If you notice something like this in the field, it’s simple to move your camera a little. However, small distractions like this will sneak into many photos regardless. At that point, the solution is simply to crop a few pixels off the side of the image:
Many of the photos that are submitted to us for critique are strong images with good compositions. However, those are the images where it is especially important to pay attention to small details! The better a photo is, the more out-of-place a few small distractions can be. You can crop, clone, or soften those distractions in post-processing to make your photo more effective.
#2: Bright and Dark Spots
If you have a very dark or very bright element in your photo – anything with a lot of local contrast – it can distract your viewer’s eye from the main subject of the photo. Unlike the previous example where a more careful crop can fix things, the best solution this time is usually to apply a small brush or local gradient adjustment.
I managed to get some distracting elements in my background with this flying Cattle Egret:
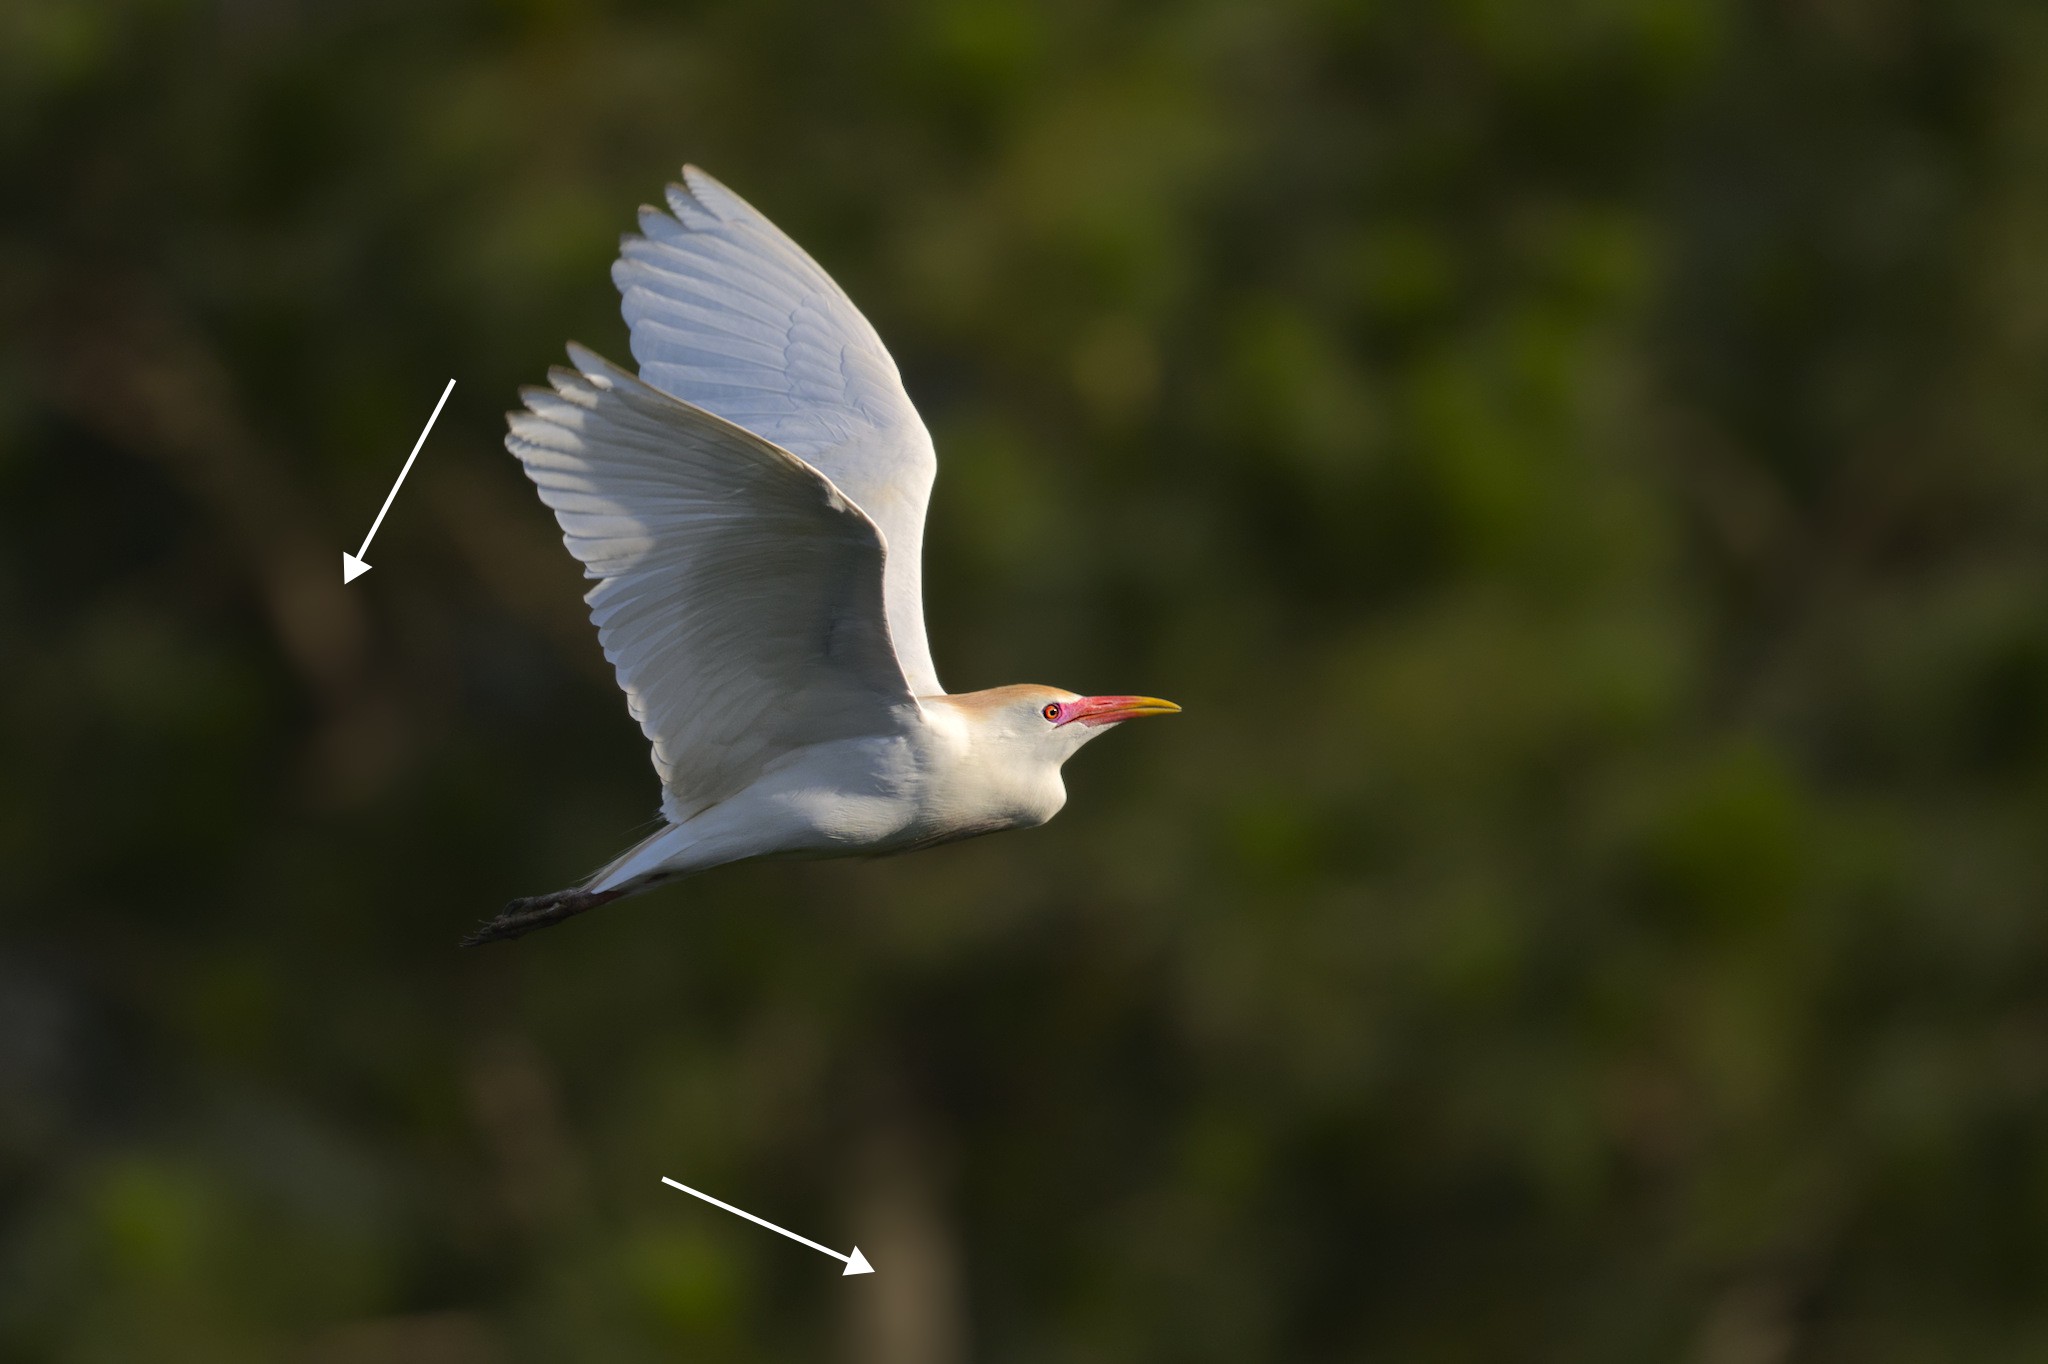
Yes, it would have been better if I could have recomposed, and indeed, that’s a good reason to survey your site before you even start doing photography! Unfortunately, sometimes you are restricted where you can stand, and other times, you may not have noticed the distractions at the time.
But, if I use a luminosity mask on the offending areas, bring down the brightness of them slightly with a gentle tone curve, and further darken the bottom edge just a touch, I can at least reduce the effect:
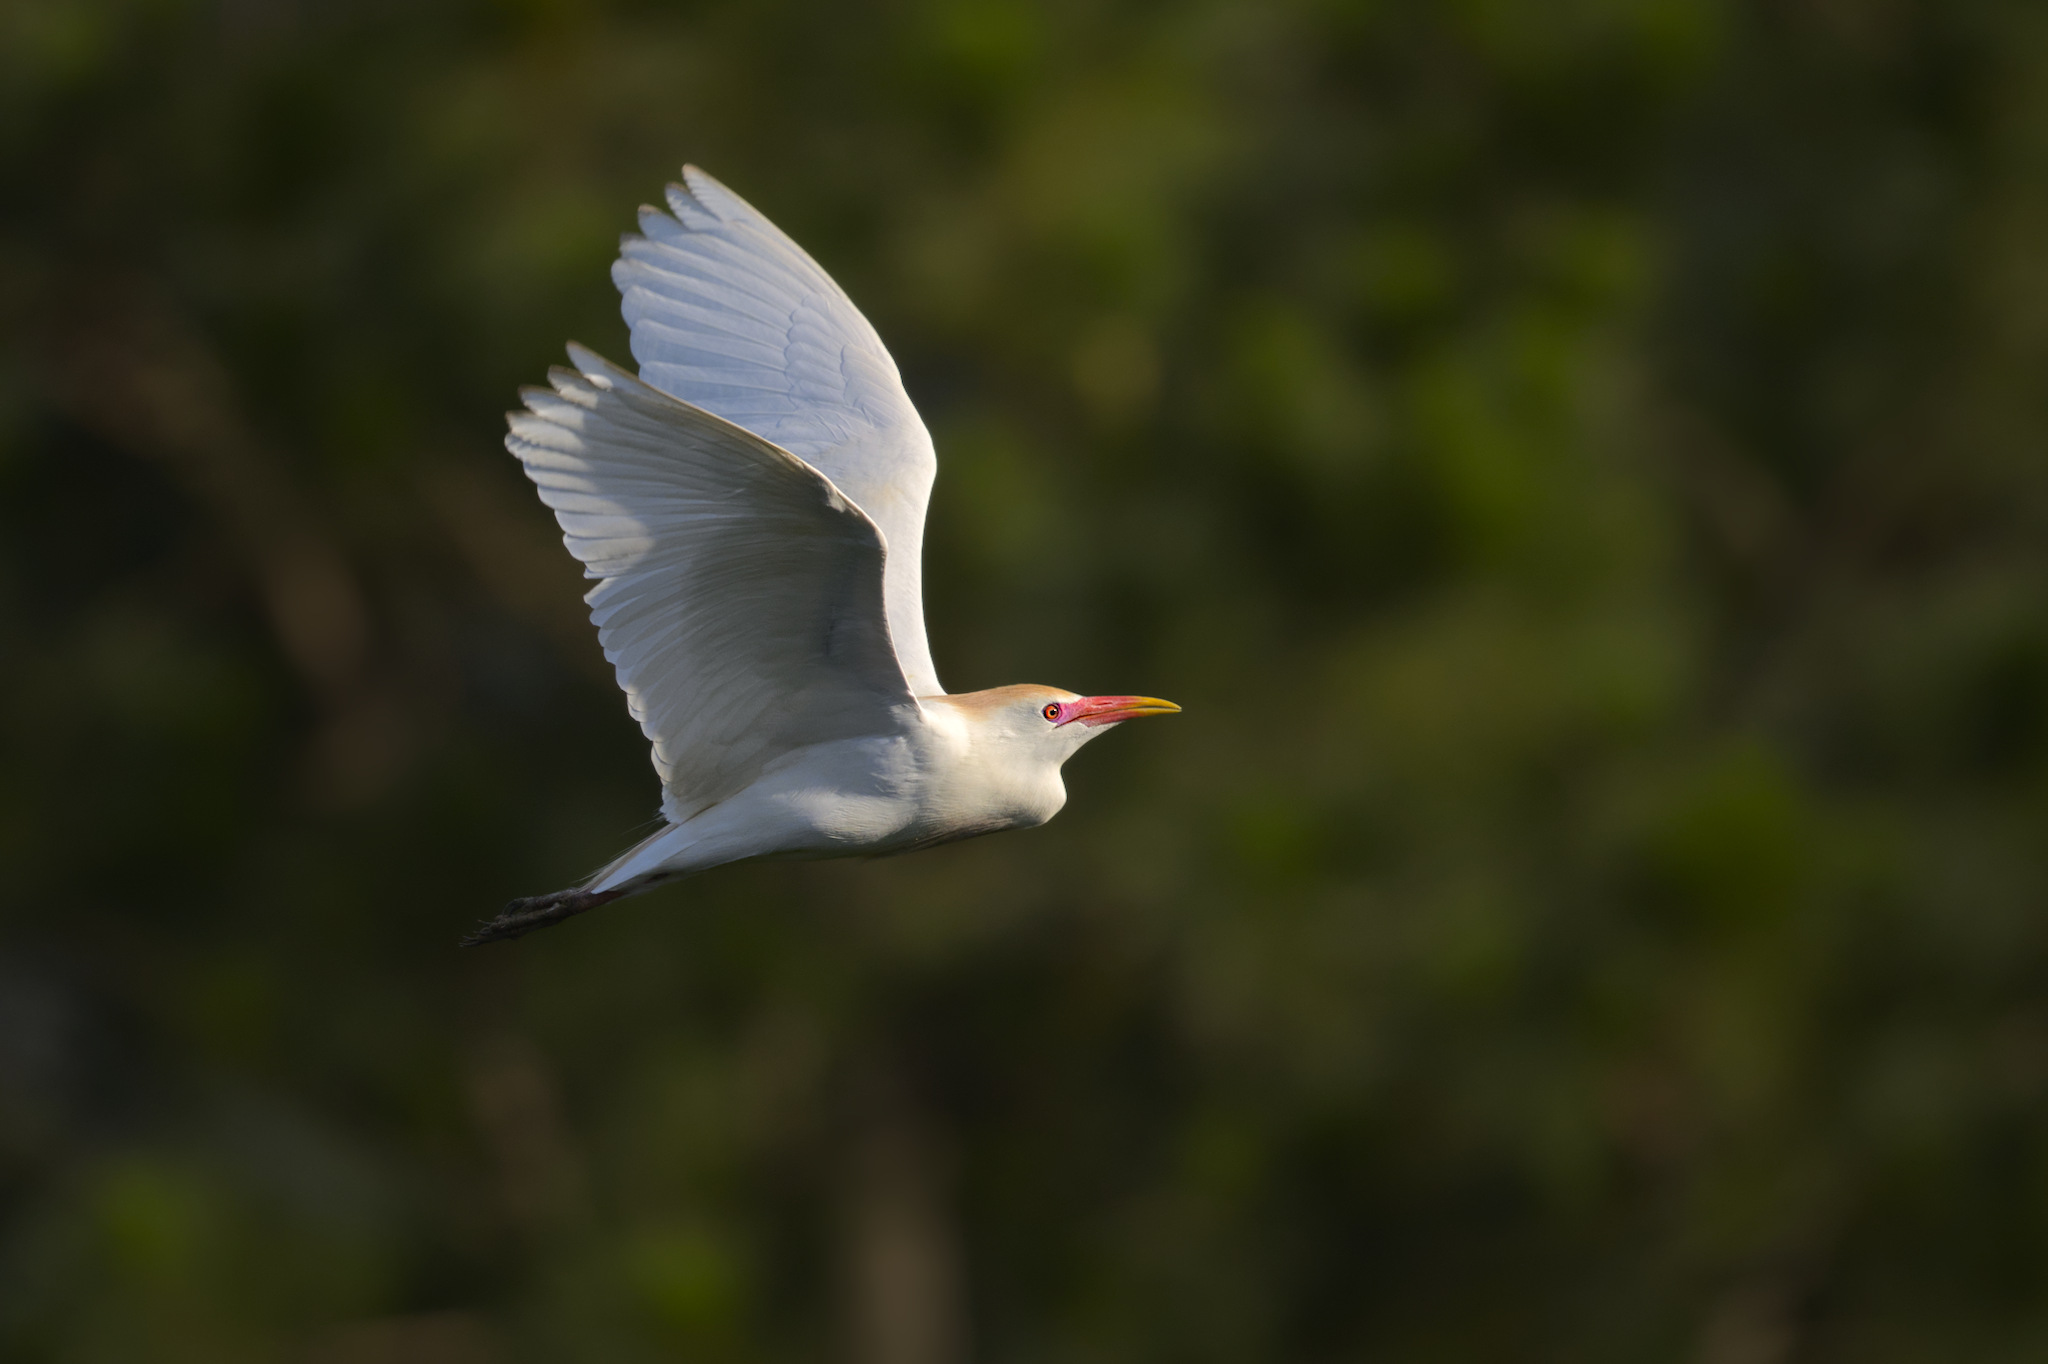
The distraction isn’t completely removed, but now it recedes more into the background, and provides a good compromise between editing and realism.
In some of the photos that are submitted to us for critique, a different camera position would have eliminated some distractions in the background. Don’t default to shooting at eye level from the “obvious” spot to stand. It’s better to consider your available range of camera positions and how they affect a photo. If you have no alternative, using local adjustments in post-processing can tone down some of the remaining distractions.
#3: Color Casts and Haze
Cameras are pretty good at capturing colors, but they won’t always interpret the scene how our eyes see it. Depending on the color temperature of the light, you may get some strange color casts in the image that our brain adjusted for at the time. Other times, the scene itself may have some colors that look fine in person but seem strange when recorded by the camera.
For example, here’s a landscape I took in Arizona, with some haze on the distant mountain that stands out from the rest of the photo:
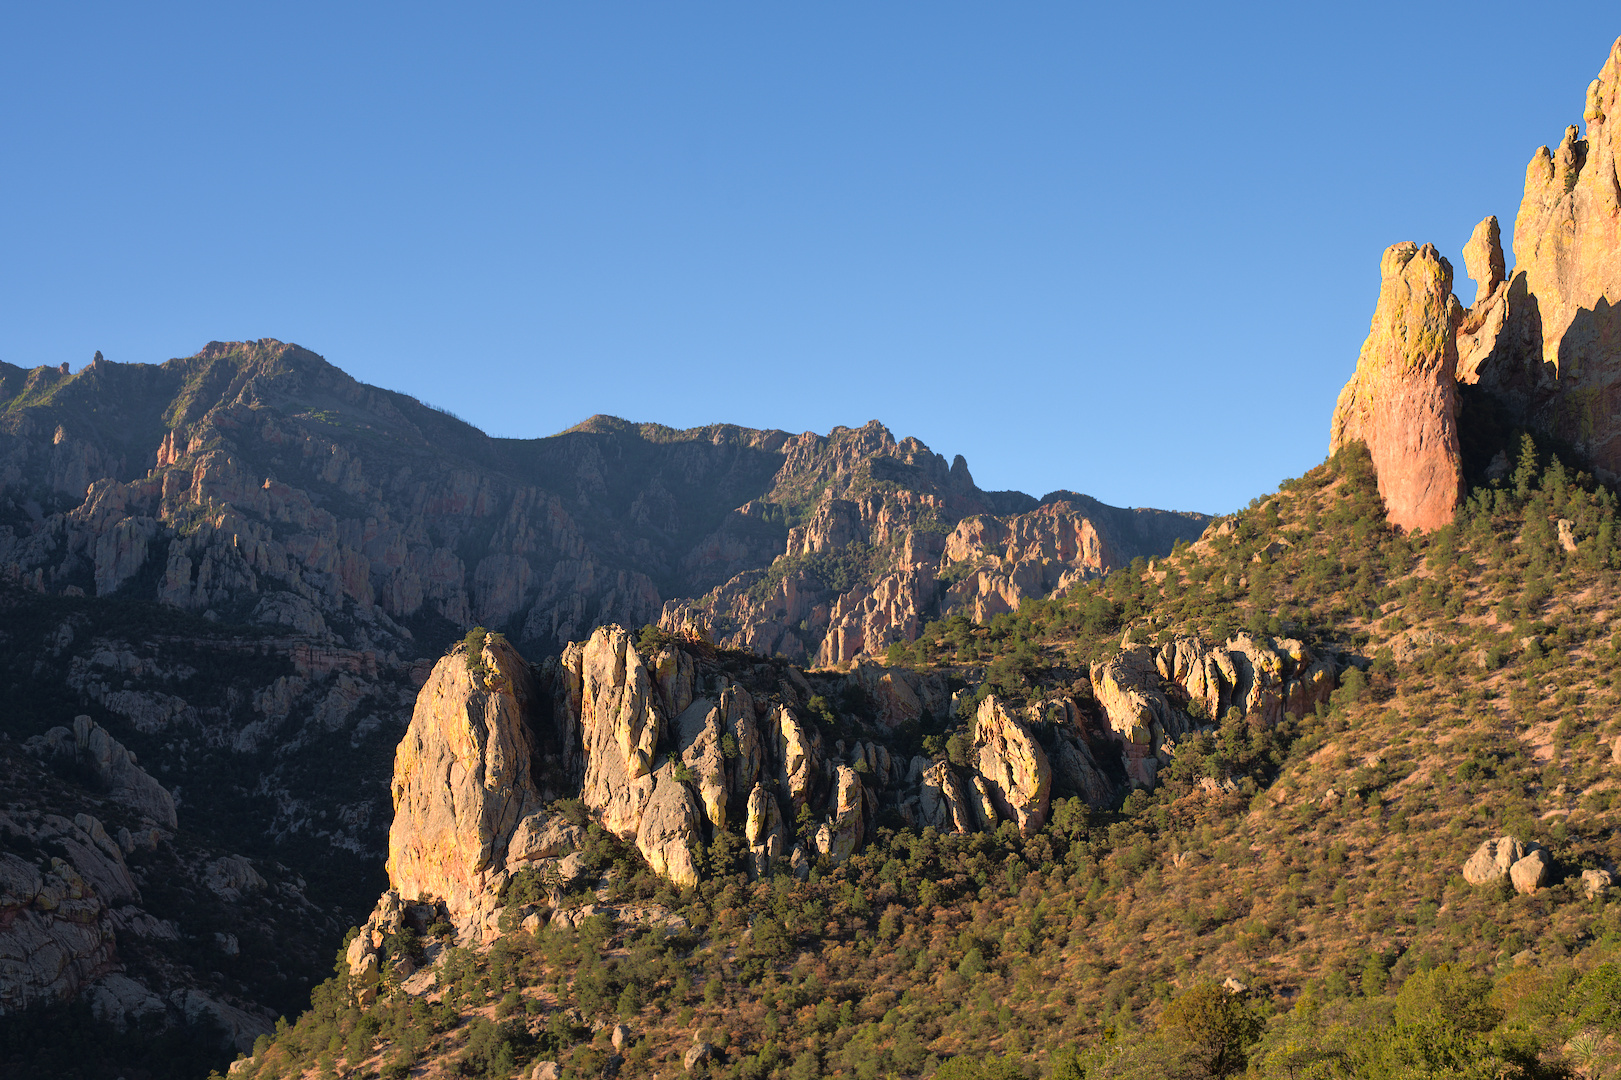
By no means would I say “remove all color casts” or “remove all blue haze.” Actually, blue haze can give a good sense of depth to a landscape. But here, I thought the blue haze was a bit strong, causing the mountains to blend too much into the sky. I used an RGB curve to reduce the blue a little in the shadows and improve the tones in the image:
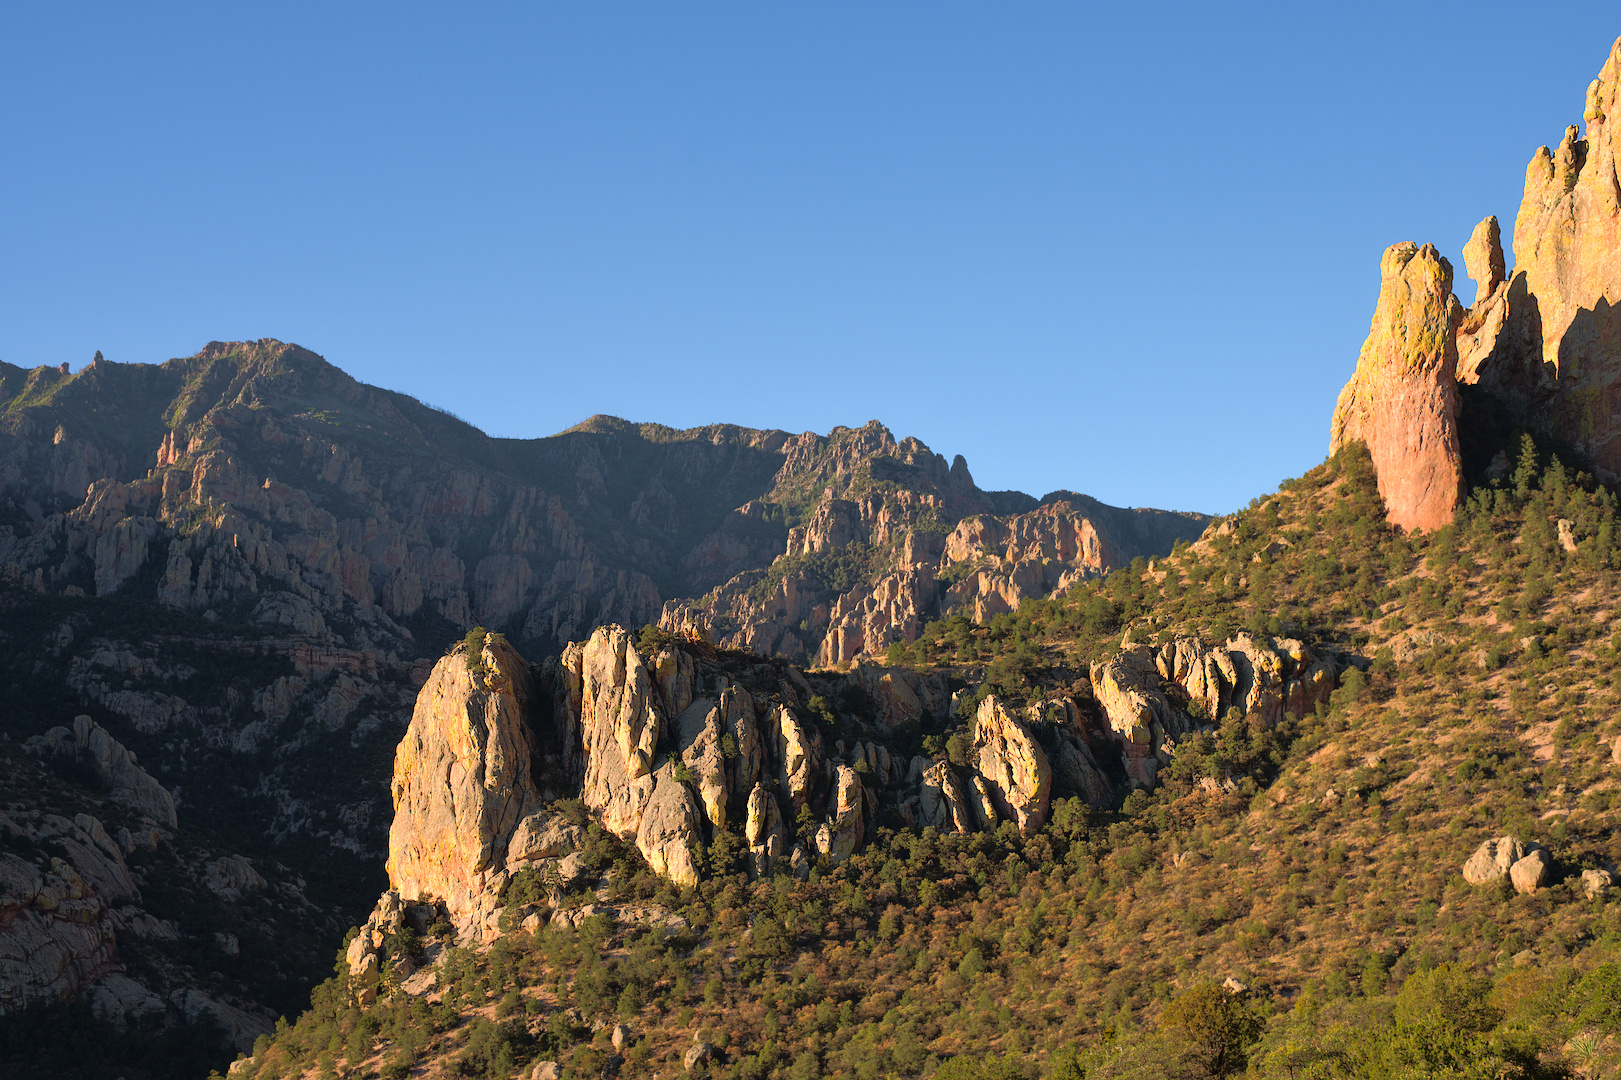
You can see the effect more easily if you click on the image to expand and go back and forth to the previous one. It is true that more could be removed, but when making adjustments, I feel it’s best to be subtle.
Color casts can sometimes be fixed in the field by using a polarizer to reduce distant haze. Other times, waiting for the light to change can give you more of the look that you’re after. But often, color adjustments are down to your post-processing decisions.
Actually, I’ve got a tip to find color casts. Split-tone your shadows red, or add extra red with an RGB curve, and then turn it rapidly on and off. That will give your brain a better idea of what has a blue or green cast. I use this a lot to find unusual colors, especially when there is no real grey in the shot to calibrate the white balance. It works well for bird photography too.
Of course, sometimes the unusual colors you get from the combination of your camera settings and the scene can be quite interesting. There are exceptions to all the tips in this article. Therefore, it’s all a matter of being deliberate! If you keep a particular distraction in the image, just make sure that you are doing so for a reason.
Conclusion
Every month, I really enjoy seeing photos that people send us and offering critiques on them. At least from my personal experience, I think there’s always room to improve and learn because I’m still learning so much about photography myself. Seeing a range of photos and thinking about them deliberately – not from a technical standpoint, but an artistic one – is a good way to exercise that mental muscle.
If you feel like submitting a photo to our critique livestream this month, you still have a couple days. Our Gold Members can do so here – Spencer and I will be doing the critique this month. But even if live critique is not your thing, I encourage you to look at your photos (and those of other photographers) with a careful eye from time to time. You may notice some patterns emerge about things that can be improved. Next time that you’re in the field, those ideas will come back to you. The end result will be a better portfolio of images, no need to spend extra money on gear.
Thanks Jason to you and Spencer for the outstanding critiques each month. I have learned a great deal from both of you as I listen not only to my photos being critiqued, but also others’. This has been a real boost and pushed me to continue to evolve in my photography. Does anyone ever really reach to “final destination”?
Thanks for the comment! I’m happy you are enjoying the critique sessions!
Not sure about others, but I don’t think I’ll ever reach a final destination. I still agonize over editing each one of my photos, sometimes for a very long time and I often just delete all my edits and start from scratch. And there are always things I realize I could have done to improve after a session in the field. Reaction time, catching the best moments, optimizing the camera settings, paying more attention to the background.
The other day I was editing a difficult shot and I felt like a beginner all over again….
Thanks a lot for the advice. Do you plan to write an article explaining your use of curves that do not destroy the reality of the scene?
That is a nice idea. I will put it on the list. It’s a bit tricky because everyone uses a different editor but I think after some experimentation, curves work mostly the same in all editors.
When I started getting interested in photography, critiques – back then by the community at the Nature Photographers Network (NPN) – helped me get started, and the new live-stream format that you and the PL team are offering is incredibly useful. I can highly recommend it to those on the fence.
Also: I wish the issues with my photos were as subtle as those you identified in yours. ;)
Thanks very much for the recommendation! We’re very glad you enjoy the sessions.
There are some good tips in the article. It might have made a good video; especially the part about split-toning to see the colors in the shadow.
That is a good idea!
Wow Jason – thank you for this. A a very telling article and it brings to light, or not, a bit of trepidation I have always had with reviewing and editing my photos particularly with the removal of very subtle appearances of unintended images. I mean very subtle. What does it matter I tell myself after hours of sitting and editing especially birds and animals – is this unnecessary perfection or improvement of the photo or something that really matters to me personally given the intention of the primay subject at hand whether fowl or a landscape. Always a conundrum for me.
Thanks, Ralph. I think it comes down to two things: the first is the striving to make your photo transit your general feeling when looking at the scene. For example, in the first Jacana shot, I never “saw” the dust speck but it’s quite eivdent to me on the screen. All of photography has got to be like that, because the only true ojectivity that exists in art is the transmission of your continuous human experience. So going back to your question, I guess the follow-up question is, are you perfecting something in your photo because it’s the best representation of your experience that you can make, or are you merely perfecting it because it’s following some sort of trend or standard (e.g. “remove as much noise as possible” or “clone out all the branches”).
And the second thing is that in the quest to get that representation as good as it can be to the best of your ability, you just have to accept that part of the struggle is the process of finding yourself so you can express yourself, which inevitably means simply some aimless wandering. I know I do plenty of aimless wandering myself in photography and indeed it’s a complex thing to keep in perspective. Happy shooting!
Indeed to your points Jason. Of course the “best representation” of the photographer’s experience with all of it’s personal qualitative permutations is the art. Thanks again.