
Whether you’re packing for a short photography road trip or a multi-week sojourn, it can be tricky to make sure you have all the necessary camera equipment, without overloading your bags! In this guide, I’ve laid out a list of the equipment that photographers should pack on every trip.
Table of Contents
Cameras
Depending on just how much of an emphasis your trip places on photography versus leisure or family time, you might choose a different camera system. I certainly go on some trips with nothing but my phone, but realistically, if you’re reading Photography Life, that’s probably not enough for you!
Gone are the days when I’d travel with a DSLR kit and multiple heavy zooms. For travel photography, it’s better to go with a lightweight mirrorless camera – potentially APS-C, with Fuji leading the way with their excellent crop-sensor cameras and extensive lens lineup, or Micro Four Thirds. But full-frame mirrorless is also pretty lightweight, and anything like the Canon EOS R6/R6 II, Nikon Z5/Z6/Z7 series, Sony a7 series, etc., would make a great choice for travel. Even the newer DSLRs like the Nikon D780 aren’t too heavy.
You probably already have your camera of choice, so I’ll move on to the next section – lenses.
Lenses
Ultra Wide
For what I shoot, an ultra-wide is indispensable on any trip. Still, each additional lens is more weight and bag space consumed, so choose carefully.
If you’re not planning any astrophotography, the slower aperture ultra-wides are a great choice. I really enjoyed the ultra-portable Nikon Z 14-30mm f/4, as well as Sony’s 12-24mm f/4 and Canon’s 14-35mm f/4 – all great lenses that don’t weigh too much. For APS-C, the same idea holds, plus the 1.5x crop factor of course. Fuji’s 8mm or 10-24mm are good lightweight options, while Sony APS-C users have the great 10-20mm.
For astrophotography if you’re trying to travel lightweight, I actually recommend sticking with any of those lenses I just mentioned, not going with something heavy like a 14-24mm f/2.8. Then, use star stacking to average out the noise and get high-quality results.
But if weight isn’t your #1 consideration, you will certainly have an easier time of Milky Way photography with large-aperture wide-angle lenses like a 14mm f/1.8 or 14-24mm f/2.8, plus a full-frame camera. (APS-C shooters have a more limited range of options here, but it depends on the brand.)
Normal Zoom
While I consider a midrange zoom to be essential, I know some photographers prefer to just go ultra-wide and tele, perhaps leaving the midrange to a 50mm prime. If you’re like me, and prefer a midrange for the versatility and flexibility, there are some great, travel-friendly options.
The Sony 20-70mm is one of my favorites because it’s wide enough that you may not need a dedicated ultra-wide. However, the flip side is that if you pick something like a 24-120mm f/4 instead (or a superzoom that goes to 200mm or beyond), it’s long enough that you may not need a dedicated telephoto! Midrange zooms are extremely versatile for travel photography, especially if they reach outside the standard 24-70mm zoom range.
Telephoto
If you’re going on a trip where telephoto subjects are essential, like a safari or wildlife heavy trip like Alaska, there’s no substitute for reach. But on a more typical trip, you’ll probably be covered with a lightweight 70-200mm f/4 or 70-300mm f/4.5-5.6 type lens. These lenses provide long focal lengths without weighing down your bag, but they certainly don’t have the reach or maximum aperture of something like a 400mm f/2.8.
Your choice of telephoto lens is really going to be dictated by your subject. If you’re a Nikon shooter, we’ve got a full guide to the best telephoto lenses for Nikon that goes into the considerations for different subjects. But if you need an exotic supertelephoto prime, you probably already know. It will make travel more difficult, and you’ll need to be very cautious about airplane size/weight requirements, but it’s hardly impossible.

Primes/Tilt-Shift/Specialty
Just like the longer telephoto lenses, your choice of primes and specialty lenses will be dedicated by what you’re shooting. If you’re planning on astrophotography, a fast wide or ultra wide is essential. Meanwhile, a trip where butterflies and bugs are of interest would call for a macro lens. Got a lot of architectural subjects on your shot list? A tilt-shift lens can provide the best quality possible, but the size and slower pace of shooting could rule it out for most other trips.
As a quick note, a normal prime with a bright maximum aperture can make a great walk-around lens while you travel. A 24mm, 35mm, or 50mm f/1.8 could work great for times where you need the smallest setup possible – the low light capabilities and shallow depth of field would also make this a very useful alternative to a midrange zoom. I like that a lot of these lenses nowadays have close-focus capabilities that allow for macro, or near-macro photography while you travel.
Example Travel Lens Kits
Every trip is going to be different – sometimes you’ll be shooting more architecture, sometimes more wildlife, and sometimes more street photos. There is no perfect do-it-all travel lens kit, but here are some possibilities for Nikon, Sony, Canon, and Fuji:
- Nikon: Z 14-30mm f/4, Z 24-120mm f/4, and Z Nikon 50mm f/2 macro. This gets you very high quality from 14mm to 120mm, plus low-light and macro capabilities with the 50mm f/2. You can substitute the 24-120mm lens for Nikon’s 24-200mm f/4-6.3 if you need longer reach at the expense of a bit of image quality.
- Sony: 20-70mm f/4, 70-200mm f/4 II, and 50mm f/1.8. This kit has great optics from 20mm to 200mm, a bright f/1.8 aperture if you need it, and near-macro capabilities thanks to the 70-200mm f/4 zoom. However, it skips out on the ultra-ultra wide focal lengths, so you may need to add a fourth lens to your bag if you really need that perspective.
- Canon: RF 14-35mm f/4, RF 24-240mm f/4-6.3, and RF 35mm f/1.8 macro. It’s a similar situation where you’re not carrying much weight, while still covering a lot of focal lengths, getting a wide f/1.8 aperture if you need it, and near-macro capabilities. The downside is that the midrange zoom this time is a superzoom (not a bad one, but still).
- Fuji: 10-24mm f/4, 16-55mm f/2.8, and 55-200mm f/3.5-4.8. Great image quality, a bright f/2.8 midrange zoom, and equivalent focal lengths from 15mm to 300mm – what’s not to like? If you want to do lots of low-light photography, you can throw in any of Fuji’s high-quality primes without adding much weight.
Cameras Accessories
Tripod
Even though many places have restrictions on them, tripods can be a very important tool while traveling. I like a basic set of carbon fiber legs and a small ballhead – for travel work, I’m not setting up a very heavy camera, nor do I need support for speciality gear like a star tracker.
Ultra-compact options like the Heipi 3 in 1 that I previously reviewed or the Peak Design Travel Tripod that Libor reviewed could work great.
Tabletop Tripod/Tripod Alternative
Depending on your destination, bringing a compact tripod alternative, like a Gorillapod, Platypod, or tabletop tripod might be worth it. Many areas that disallow full-size tripods aren’t as strict about these miniature supports, and they can still do a lot of work in stabilizing your gear.
Filters
For travel work, I’d consider bringing a couple of filters: circular polarizers and neutral density filters, maybe a UV filter if you’re traveling in harsh conditions with windblown snow or sand.
Circular polarizers are useful for both cityscapes and landscapes, while ND filters can help reduce the appearance of crowds, or create great flowing ribbons of water in nature. Even if you don’t expect to use these filters very often, filters are so small and light that I think it’s not a problem to throw them in your bag while traveling.
Multiple Memory Cards
Having enough memory card capacity is essential. I’d suggest having several smaller-capacity cards, and bringing a number of backups. Smaller cards reduce the total number of shots lost if your card fails, or you lose it/the card gets stolen. And you should always bring a backup set of cards, especially if you’re shooting in the middle of nowhere, or if your camera doesn’t use standard SD cards that can be found at an average gas station. Being stuck in the field with no way to record images would be a nightmare.
If the worst happens, and you need to buy card in the field, be prepared to pay dearly! I’ve seen exorbitant prices for things like simple SD cards, and you’re certainly not getting the capacity or speeds you could from a vendor like B&H. Newer formats like CFExpress are going to be almost impossible to find, unless you’re in a large metropolitan destination like NYC, Tokyo, or London.
Additional Batteries
Just like cards, lithium batteries that fit your camera are equally rare (and expensive) in the wild. A battery could fail at the worst moment, so carry at least a couple of spares. This also allows you to shoot all day without needing to ration your photos.
On some cameras, supplementing the camera’s battery by recharging via a USB-C power bank is an option, but check your manual to see if that applies to you. A USB-C power bank is also going to take up more space than an extra battery, although it has the advantage of being able to charge other devices as well.

Chargers
Speaking of battery life, don’t forget the charger and cords necessary for all your gear. I like to bundle cords with things like BongoTies, and you can make things even easier by labelling them. Frequent travelers might want to consider buying a spare set of chargers and cords, and just leaving them packed in a small bag.
Rain Protection
While most camera gear has some level of weather resistance, it’s not worth testing it yourself! A basic rain cover can make a big difference in keeping your bag or camera dry in a downpour. For the thriftiest option, consider throwing a trash bag or two into the bottom of your bag – you can cover your bag or even make an impromptu camera cover for just a few cents.
Cleaning Materials
When you travel, gear tends to get dirty more quickly than usual. Alongside the usual lens cleaning cloth and spray, I recommend bringing a way to clean your camera sensor if at all possible – whether a swab, brush, or gel stick.
Note that “rocket blowers” that are so popular among photographers are sometimes not going to make it through international security. Yes, they are just a rubber ball, but they must look really suspicious on the x-ray machines – on our Photography Life workshops, we have had numerous participants in the past need to throw out their rocket blowers in airports overseas.
Computer Gear
Laptop
For travel laptops, both the MacBook Air and MacBook Pro 14” are great choices, with long battery life, great processing power to weight and a reasonable choice of ports. You can check out my guide to choosing the best MacBook, and my other guide to laptops in general, but suffice to say you can’t really go wrong with any model from these product lines.
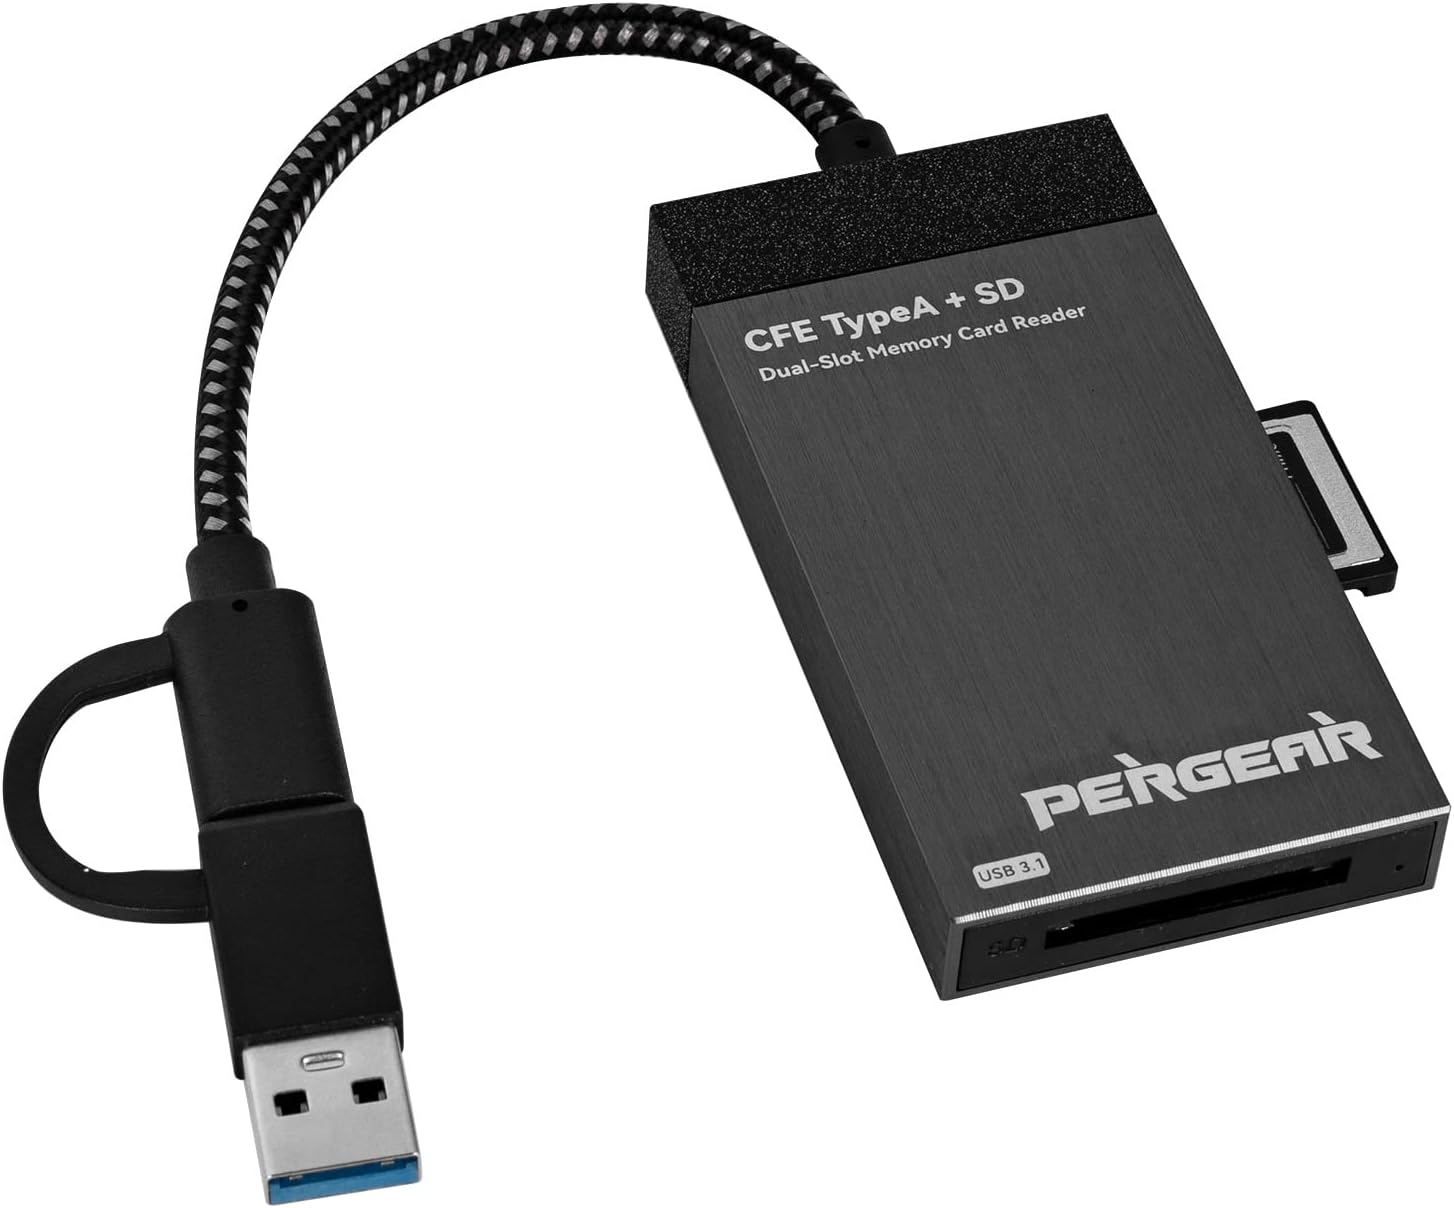
Card reader
While you can always transfer directly from the camera, I prefer a dedicated card reader for faster offloading (and to have two different offload methods in case you have a cord fail or any other issue). They take up a very small amount of space, and you don’t have to run down your camera’s batteries to transfer. I’d suggest looking for a USB-C model, both for standardizing your cords and for speed.
Additional Storage
The one downside of a lot of laptops is a smaller internal memory, usually with just one internal drive and nothing to serve as backup. For traveling, I highly recommend bringing along a pair of external SSDs. I’ve had great experiences with both SanDisk and Samsung’s lines. Again, look for USB-C interfaces to help cut down on cables and adapters.
Charging Brick
Keeping everything charged up is pretty easy these days. I’d recommend looking for a charging brick with GaN technology. GaN, or gallium nitride, replaces some silicon components in the charger with smaller, higher-throughput GaN components. This all adds up to a smaller charger that can put out more power. I really like Anker’s 736 charger for the reasonable price point, 100w capacity, and combo of USB-C and USB-A ports, but there are a variety of GaN options these days.
USB-C Hub
If you’re running a smaller laptop like the MacBook Air, I’d recommend bringing a USB-C hub. The dual USB-C ports aren’t enough if you’re trying to charge, download, and export to external drives while you travel. Look for a hub that supports USB power delivery to ensure you can still charge from the ports, and consider paying a bit more for a more established name, since flaky USB connectivity can be annoying to troubleshoot while you travel.
Cabling
Make sure you have all the cables necessary to connect your devices! Test it beforehand – it’s easy to look in your bag, see a bunch of cables, and think you’re good. Only to spend $50 at the only gas station in the middle of nowhere that has the cable you need.
Power Adapters
If you’re traveling internationally, don’t forget to pack an adapter for the different outlet styles you’ll encounter. Also, make sure to check voltages – while many products can handle both domestic and international voltage ranges, some can’t.
Additional Items
Travel Documents
It’s important to have paper copies of all the travel documents for your trip, including boarding passes, visas, reservations, and more. Don’t rely on the digital copy. Just recently, Southwest’s app went down at boarding, pushing app users to the back of the line. It’s an annoying reminder of how tech doesn’t always work!
Purchase Documentation
If you’re bringing a lot of camera gear with you, consider including a hard copy of your purchase documents. While it’s rare, customs may think you purchased gear internationally, and try to assess taxes or duties on you when bringing it into a country.
PDFs of Manuals
Having a copy of your camera’s manual can be a big benefit when troubleshooting in the field. For this, a PDF will suffice, and should be readily available on your manufacturer’s website.
SIM Card
If you’re traveling to a more exotic place in the world, your SIM card may not work even if you have roaming data. Or if you have roaming data, it might be quite expensive. In such cases, it may be cheaper to get a SIM card like TravelSIM.
I’ve used it myself in South America and it works decently to do things like order an Uber. I once found myself needing to contact a hotel and my phone didn’t work. Since then, I’ve made sure I always have a way to get a working SIM card while I travel.
That’s just about everything I’d consider bringing on a photography trip – obviously things will vary greatly based on your destination and purpose, but hopefully some of the rationale behind gear choices will still be applicable to your situation. Is there anything you’d bring in your gear bag that I left out? Let me know in the comments below!
It really depends on what kind of travel: on my ski trips I take my Z50 with the kit lens. When I’m travelling for photography I take my “full kit”: D850 w 24-70 mm, 70-200 mm and a 20 mm lenses. I also bring my Z6II w the 24-200 mm and FTZ adapter. On city trips I tend to bring my Z50 w 28 mm lens.
What is the bag(s)/pack(s) you typically use for all the gear you’ve listed? I don’t face size/weight issues because I travel only by vehicle, but it seems to me that size/weight really do matter when travelling overseas.
I’ve got a mix of bags. I’ve been using the Tenba Axis 20L recently, but I’ve got an upcoming review of the Nomatic bag line too.
I was taken into a locked room and questioned by security at Sao Tome airport about the hand grenade in my luggage. I managed to convince them that my dust blower was not dangerous! Lesson learnt.
I’ve travelled with my Rocket blower in hand luggage, never a problem but only within Europe. Guess it depends in the stupidity level of the “security” at each airport.. I mean, just look at the damn thing..
I agree with most of the ideas which are very useful. Personally there are two items which I pack: – 1. 35mm Film canister for holding a Spirit Level 2. Memory Cards are kept in a metal container with spaces for each one, 6 in total. It all works for me.
Take ‘Purchase Documentation’ is excellent advice.
I have had my equipment queried in Russia and India. At the time this happened to me I was young and naive, but thankfully I was able to convince the customs officials the equipment was indeed mine and that I hadn’t purchased it whilst in the country. I was able to show wear and tear to the equipment and images taken in other countries before I arrived in the respective places, but it was stressful until the official said I could pass with all my kit!
For the Fuji kit I would grab the 18-55 2.8-4 rather than the 16-55 2.8. They have great relatively light primes for low light and the wide end is covered by the 10-24 F4. You only lose weather resistance.
It’s been a while since I’ve shot Fuji, so I my lens picks might not be meta, but I’d be hesitant to have 28mm be my wide option. I liked 24mm equivalents, and love my 20mm equivalent now. Plus, on APS-C, I feel like f/4 is starting to get a bit slow too.
Timely article, thank you Alex. I leave for a 3 week trip abroad in a few days. I switched from Canon R to Fuji XT cameras and lenses last year to reduce carry weight and the resulting shoulder and back pain. I’m taking a slightly different approach from Alex on this trip. The XT-5, Viltrox 13mm 1.4, Sigma 18-50 2.8, Fuji 70-300 and the cute little Laowa 10mm pancake. And yes, a travel tripod and a small Godox folding flash. I expect, depending on what I am doing at the time, I will only carry some of the gear at any given time. I find the 18-50 perfect for street shooting and if I am out at night, that lens and the 13mm 1.4 (with tripod) will be good for cityscapes.
I often think about downsizing my sensor for portability. But for a given light gathering capability, for example 50 1.8 on full frame vs. 35 1.2 on APS-C, the larger sensors usually come out lighter and more compact!
So downsizing is really only an option if you give up open apertures, which, of course, might be a viable way to go. But even for my type, which is landscape and details, I find myself shooting quite often at 5.6 or 6.3, which is wide open on the 24-200. I think I would miss that aperture range on the olympus 12-100 f4 for example.
I only just checked: the olympus 12-100 is a whopping 9 grams lighter than the 24-200, even though it’s about a stop darker :-)
While that is technically true the Olympus has better stabilization and if you don’t need to freeze the motion you can get away with enough shutter speed to make up for the difference in sensor size. Also the 12-100 is sharper. I have both and for travel/hiking, more often than not, I brought the Olympus kit.
Just s small remark, the Nikon 50mm Macro lens has a Max aperture of f2.8, not f2 unfortunately.
No mention of a remote shutter release?
I don’t find them necessary anymore. The camera’s selftimer or app is usually sufficient.
For me, the self-timer is often not good enough, especially when you need to fire the shutter at an exact time. For example, in landscape long shutter-speed photography, you need to time the shot exactly when the wind momentarily dies down, when leaves & vegetation stop fluttering, etc. A remote is necessary for me.