In my last article on photographing winter landscapes article, I tried to list a few useful tips for capturing the beauty of a winter landscape. Since I promised to elaborate more on my post-processing technique later on, I would like to do that in this article. To get the unique look of some photos, I use a “negative clarity” method that emulates the very well-known Orton effect. For the classical Orton effect, Adobe Photoshop or any other software with layer functionality is needed. How can we achieve something similar in Lightroom that does not require working with layers? Please keep in mind that what I will describe here is not a complete post-processing workflow. The negative clarity method that I developed for myself is rather the finishing step in the editing process, which can give a distinctive atmosphere to your image. So how does it work?
The distinctive look is achieved by dialling a negative number in the clarity slider in Lightroom. Surprised? Well, before you think this cannot work, let me put a small disclaimer here: this post-processing technique is not suitable for all types of photographs. I would recommend it for landscapes with subtle colors and dreamy character. I particularly recommend this technique for photographs with lots of snow or white frost. But even then you need to test it and see whether it works for the particular image you are working on. Once you learn how it works, you can figure out within less than a minute if it is suitable to use or not. Lightroom is a powerful post-processing tool, since you can create virtual copies of your photos with different settings or work with snapshots.
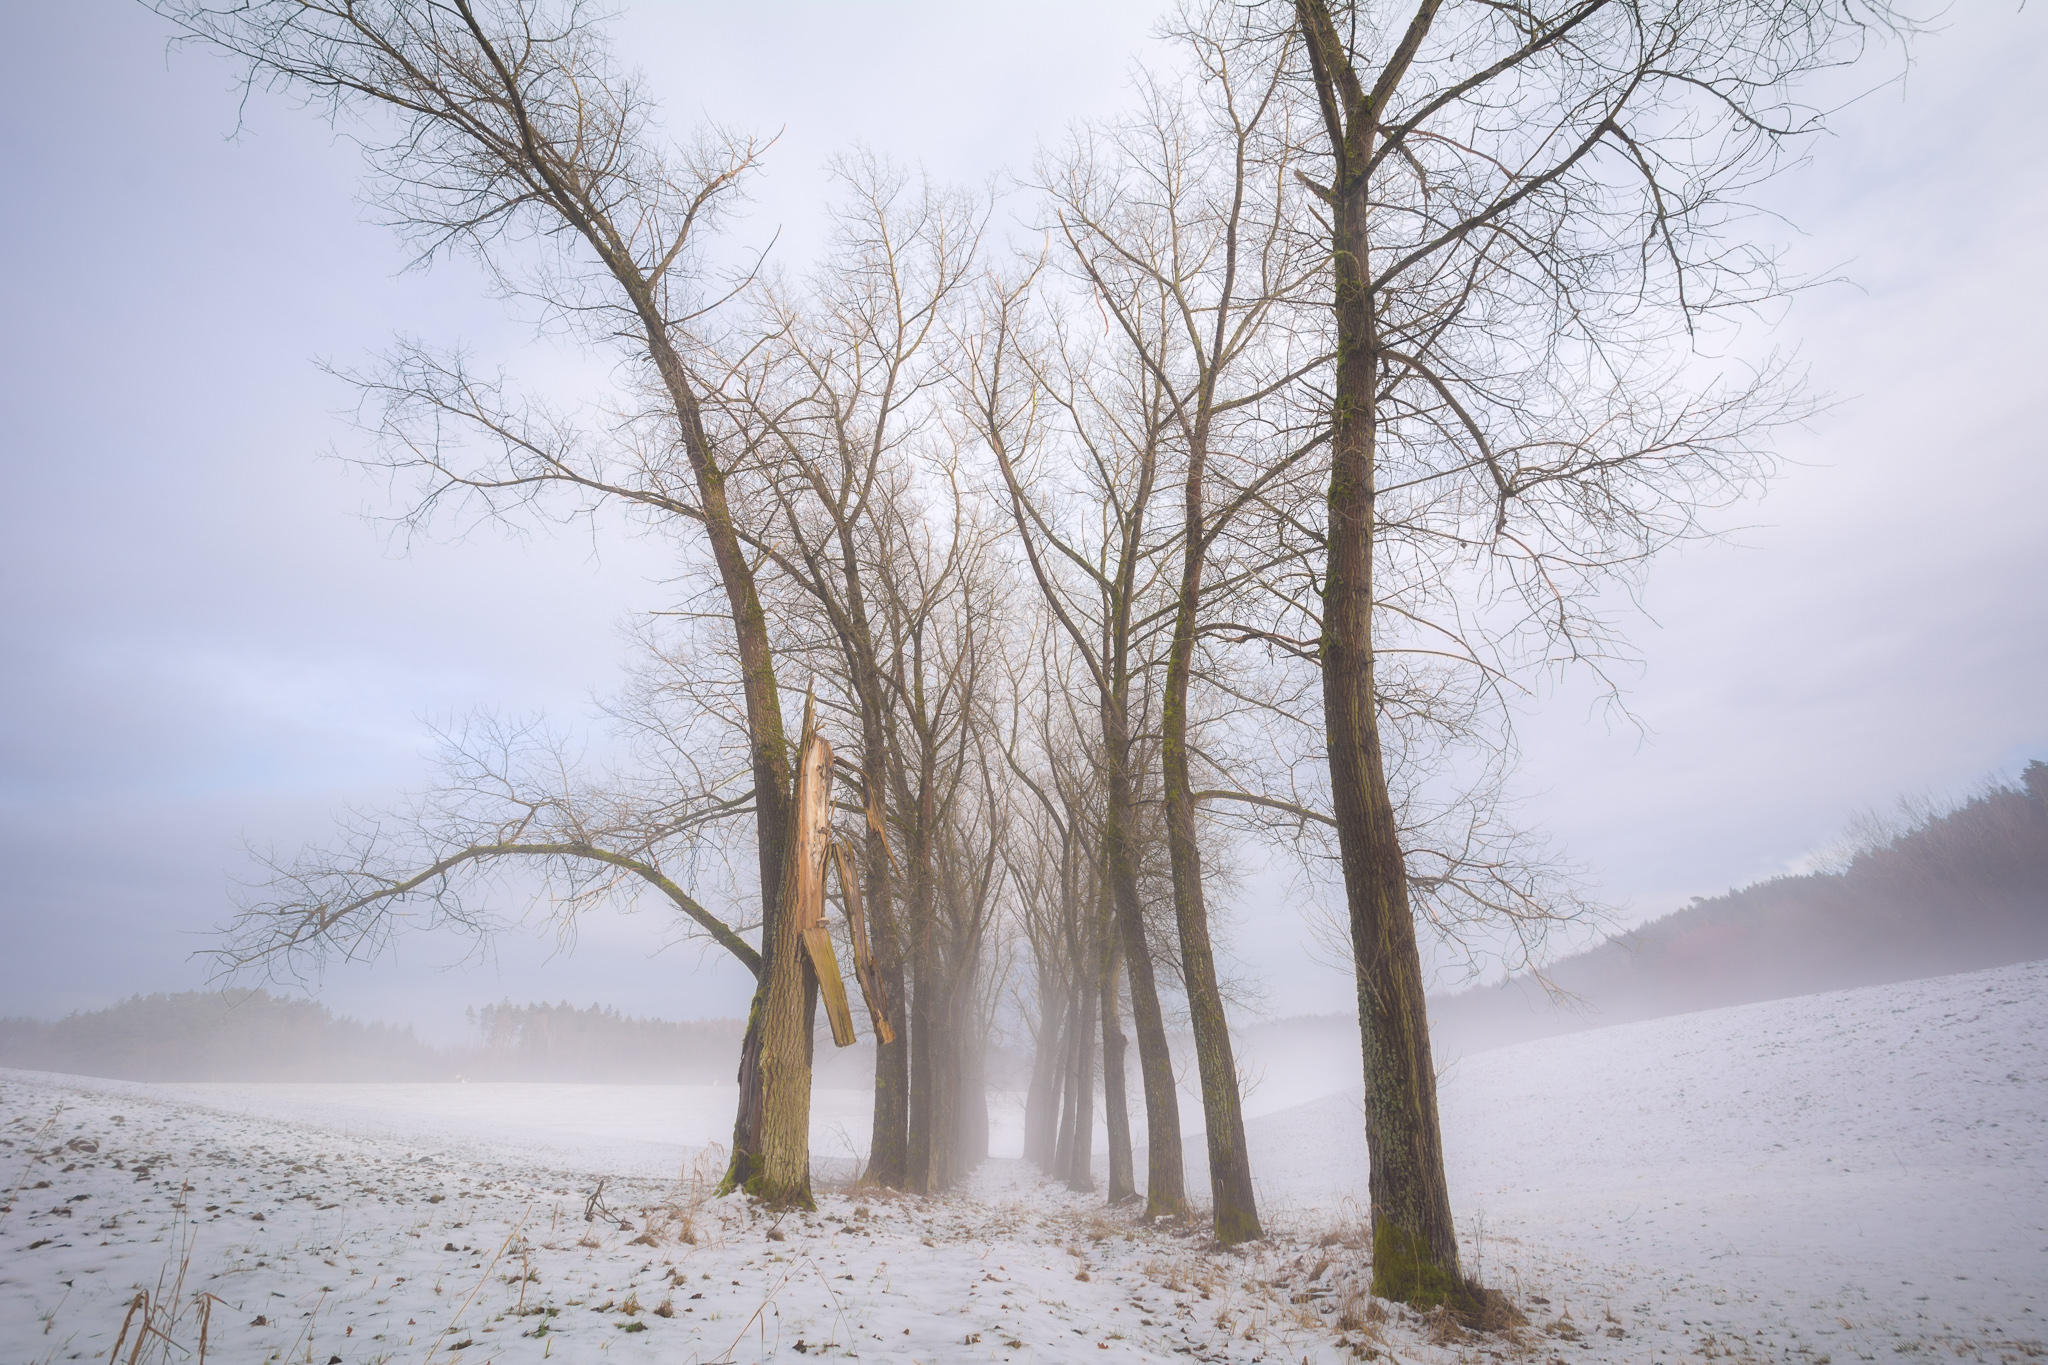
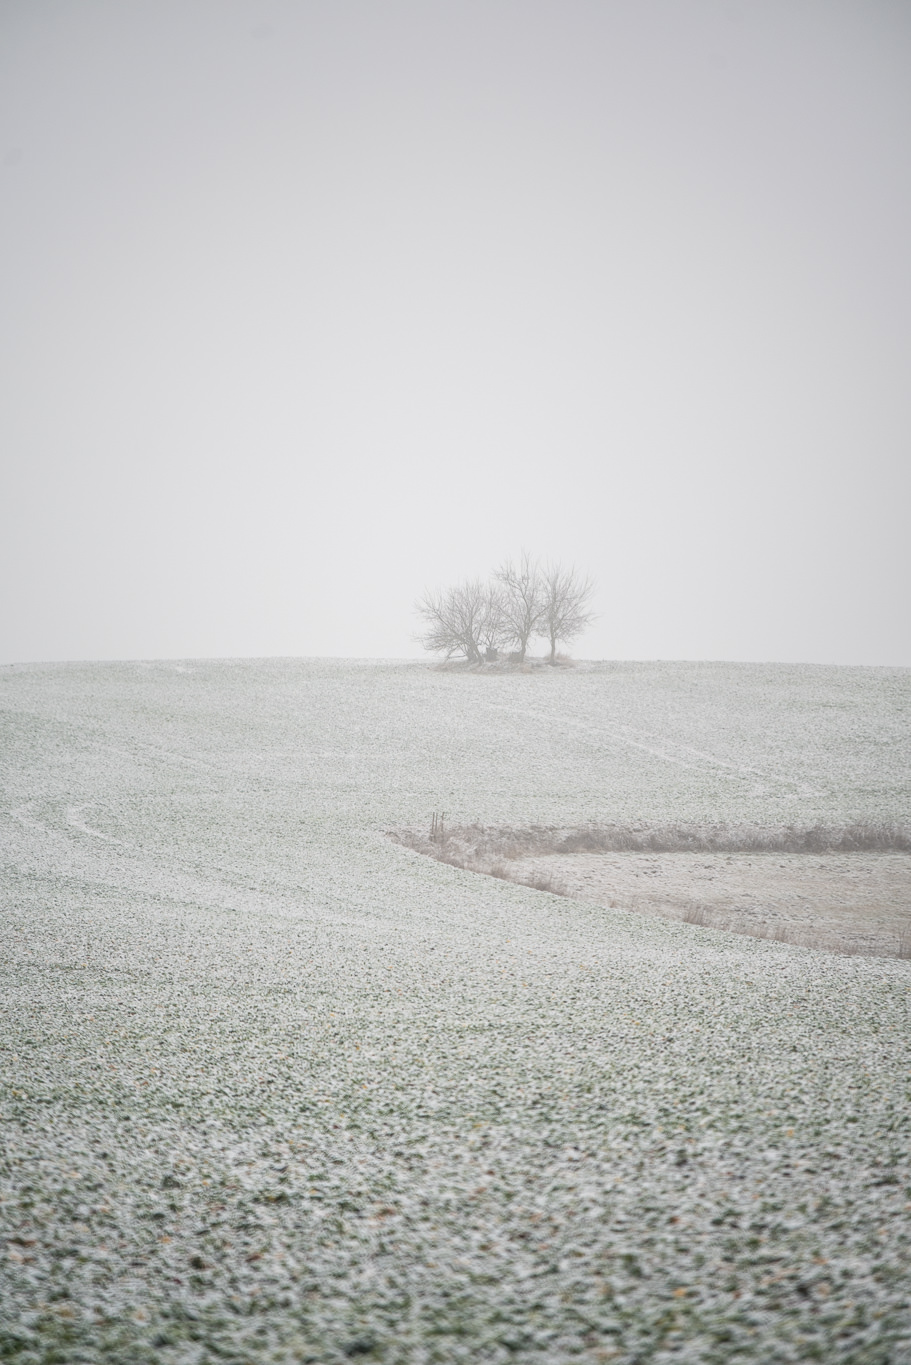
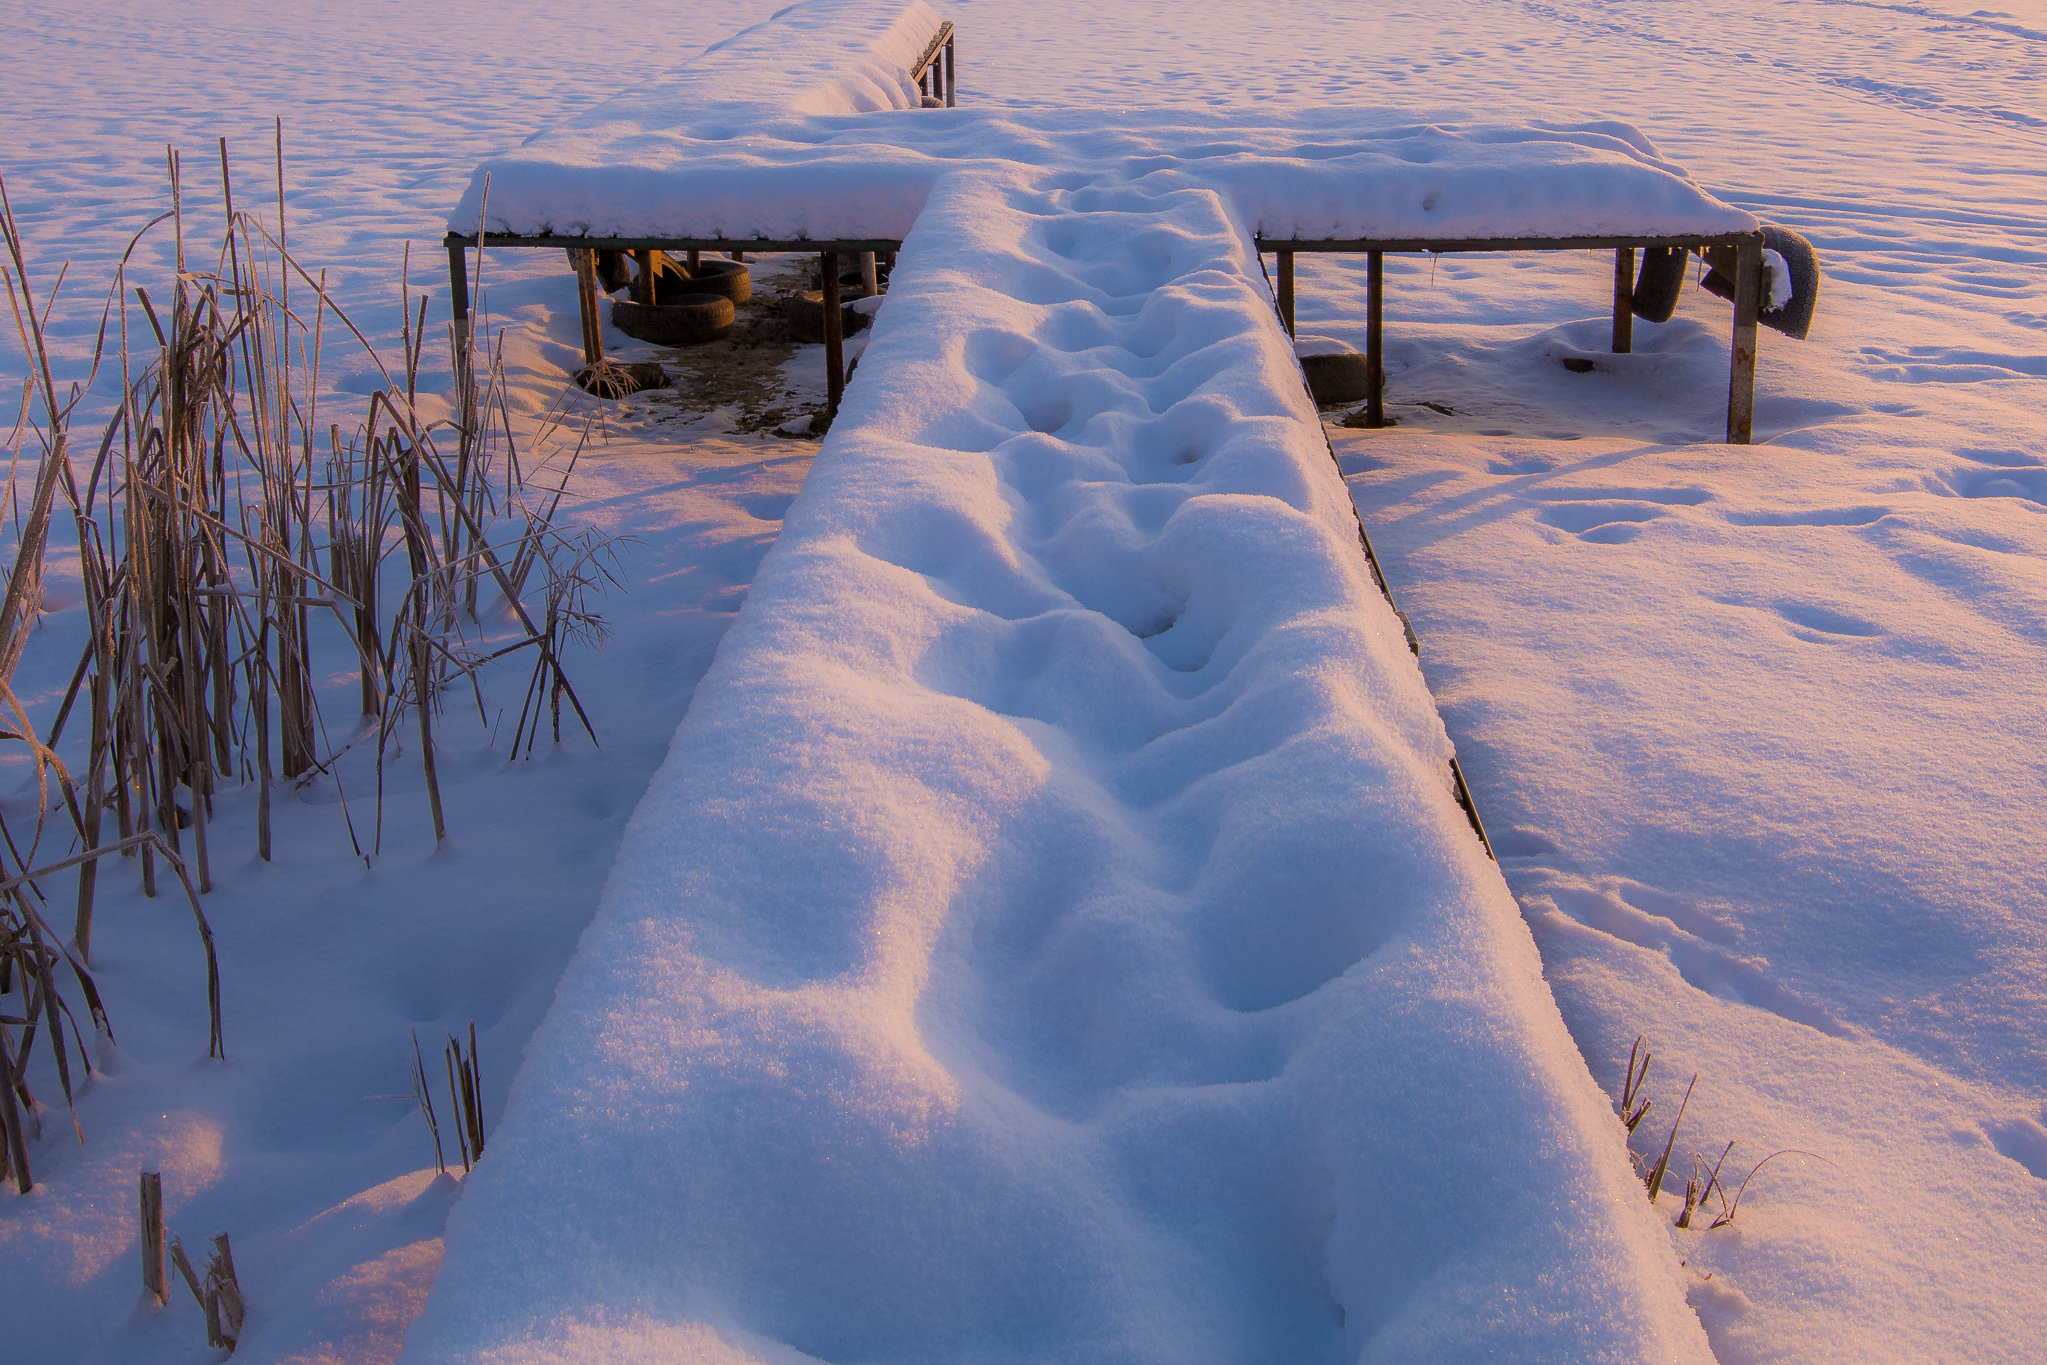
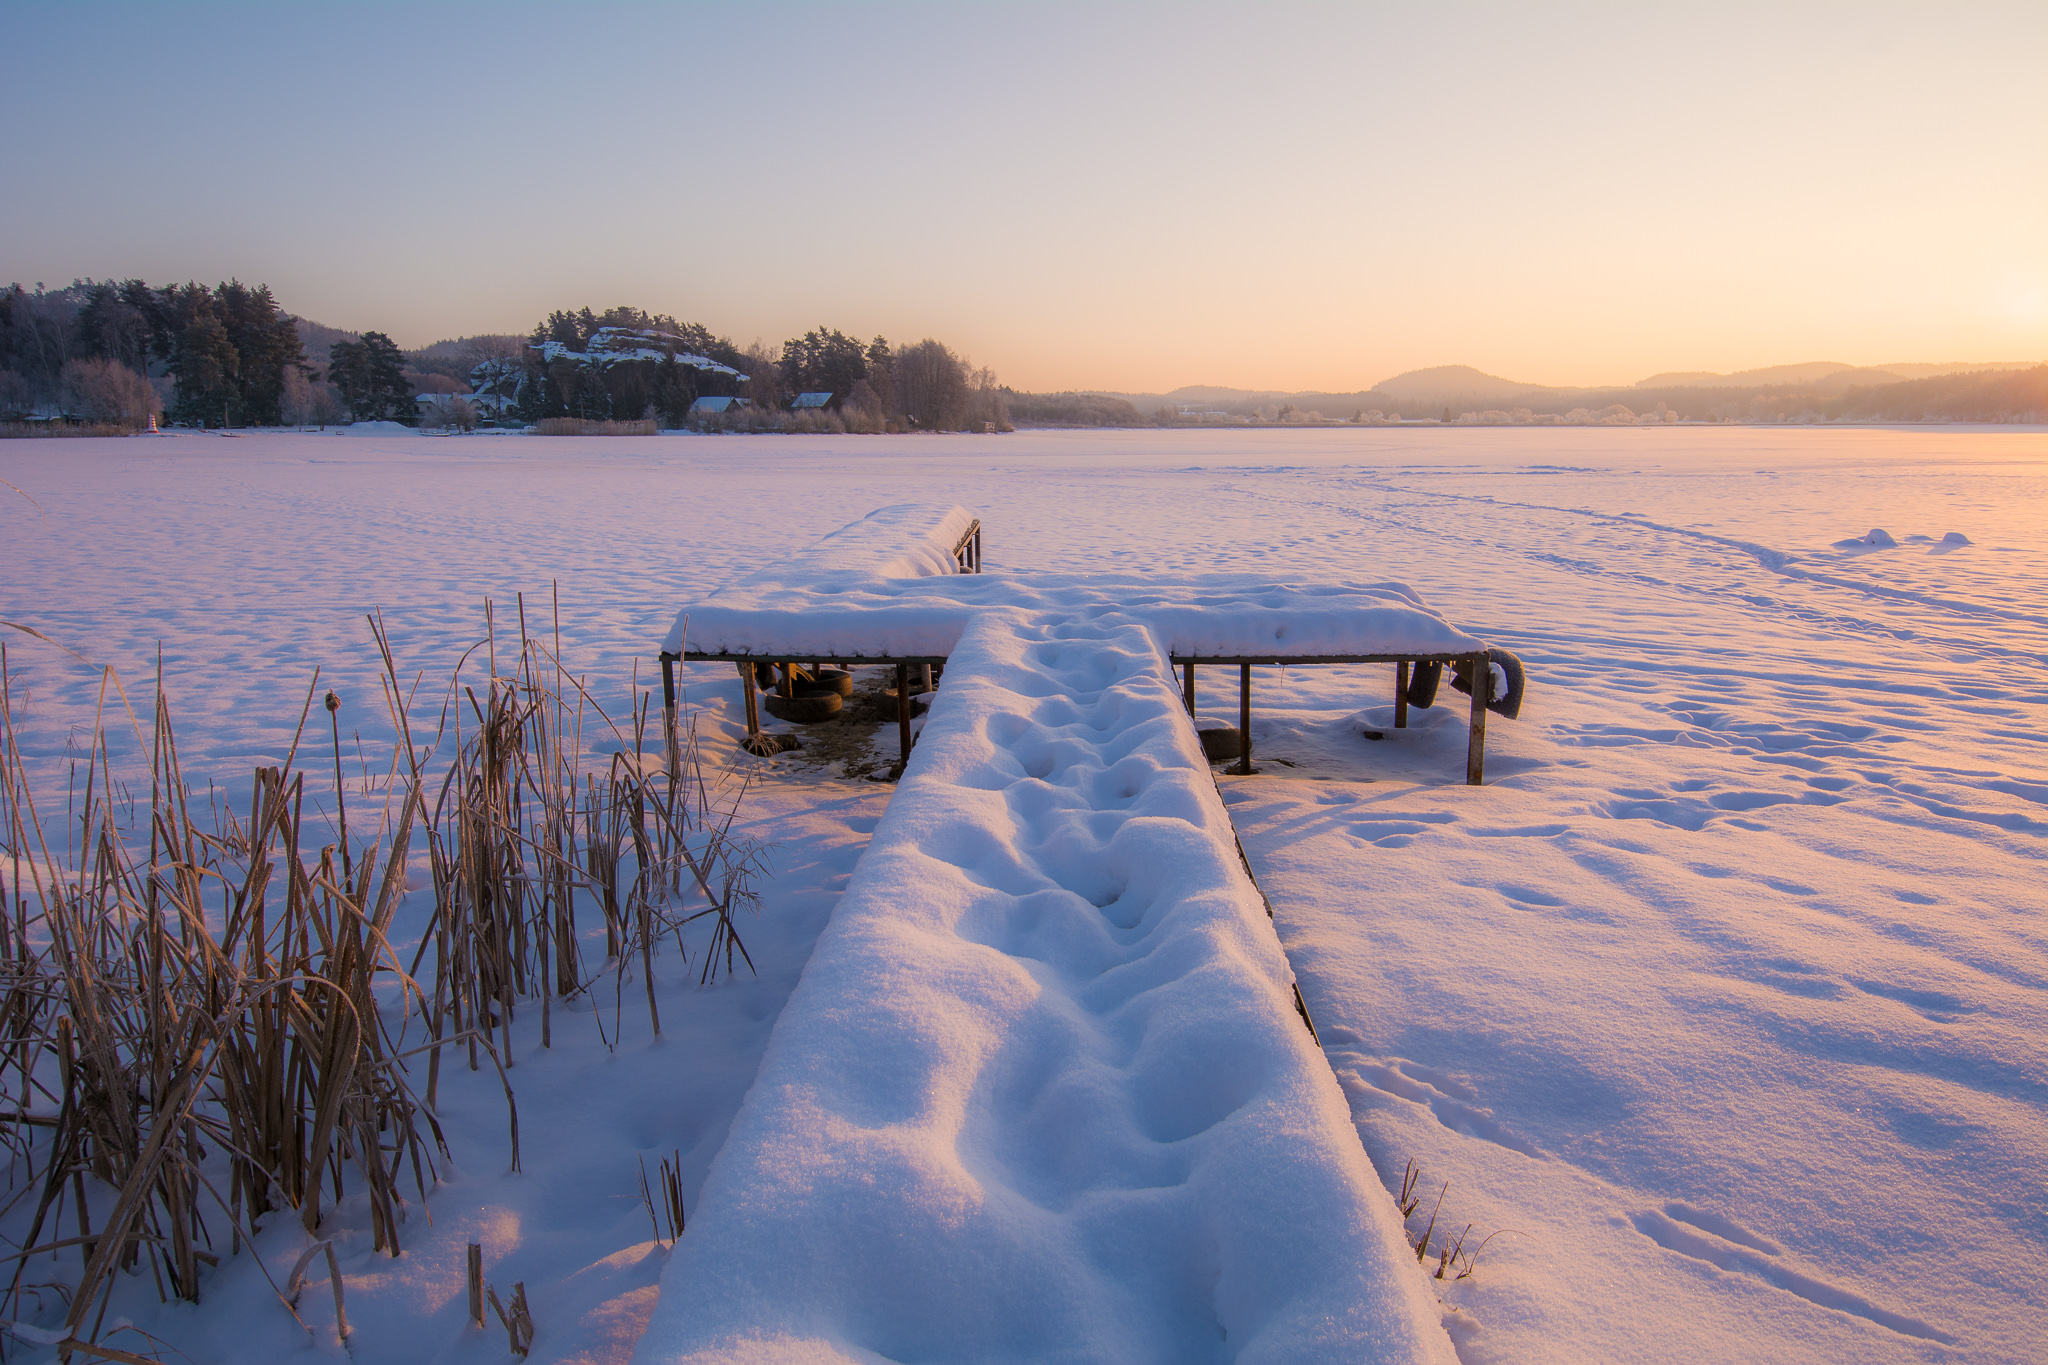
The following two images used different settings for the clarity slider. The first one used the more traditional clarity boost (dialing in a positive number), while the other used the Orton-emulating effect of negative clarity. I will explain how it works in more detail below.
NIKON D750 + 70-200mm f/4 @ 200mm, ISO 200, 1/500, f/4.0

NIKON D7100 + 10-24mm f/3.5-4.5 @ 10mm, ISO 100, 1/160, f/6.3
Table of Contents
A Two-Step Trick
The trick is easy. Instead of boosting clarity to positive values, which is a kind of a no-brainer for many landscape images, we will go in the opposite direction. I recommend applying negative clarity in the range from -5 or -10 (for rather standard landscapes) to up to -40 (for foggy, dreamy landscapes). The minus clarity decreases micro-contrast in mid-tones, which on one hand blurs some of the details in the structures, but on the other hand blends the colors more nicely into each other and gets a cleaner look with pastel tones (when applied to the right type of image). Negative clarity adds white to the mid-tones which may cause some of the structures and edges to look as if they glow. And that is exactly why it partly emulates the Orton effect.
How can we keep some of the glow but also retain more of the details? As step two, we must compensate for the decreased micro-contrast by applying proper sharpening. In the end, we can have nicer cleaner colors and a sharp image.
Applying the Negative Clarity Effect Globally: Case Study #1
Let me demonstrate what I described above with examples. In this example, I will use the negative clarity + sharpening to the whole image. At the end of this article, I will show how to apply it locally.
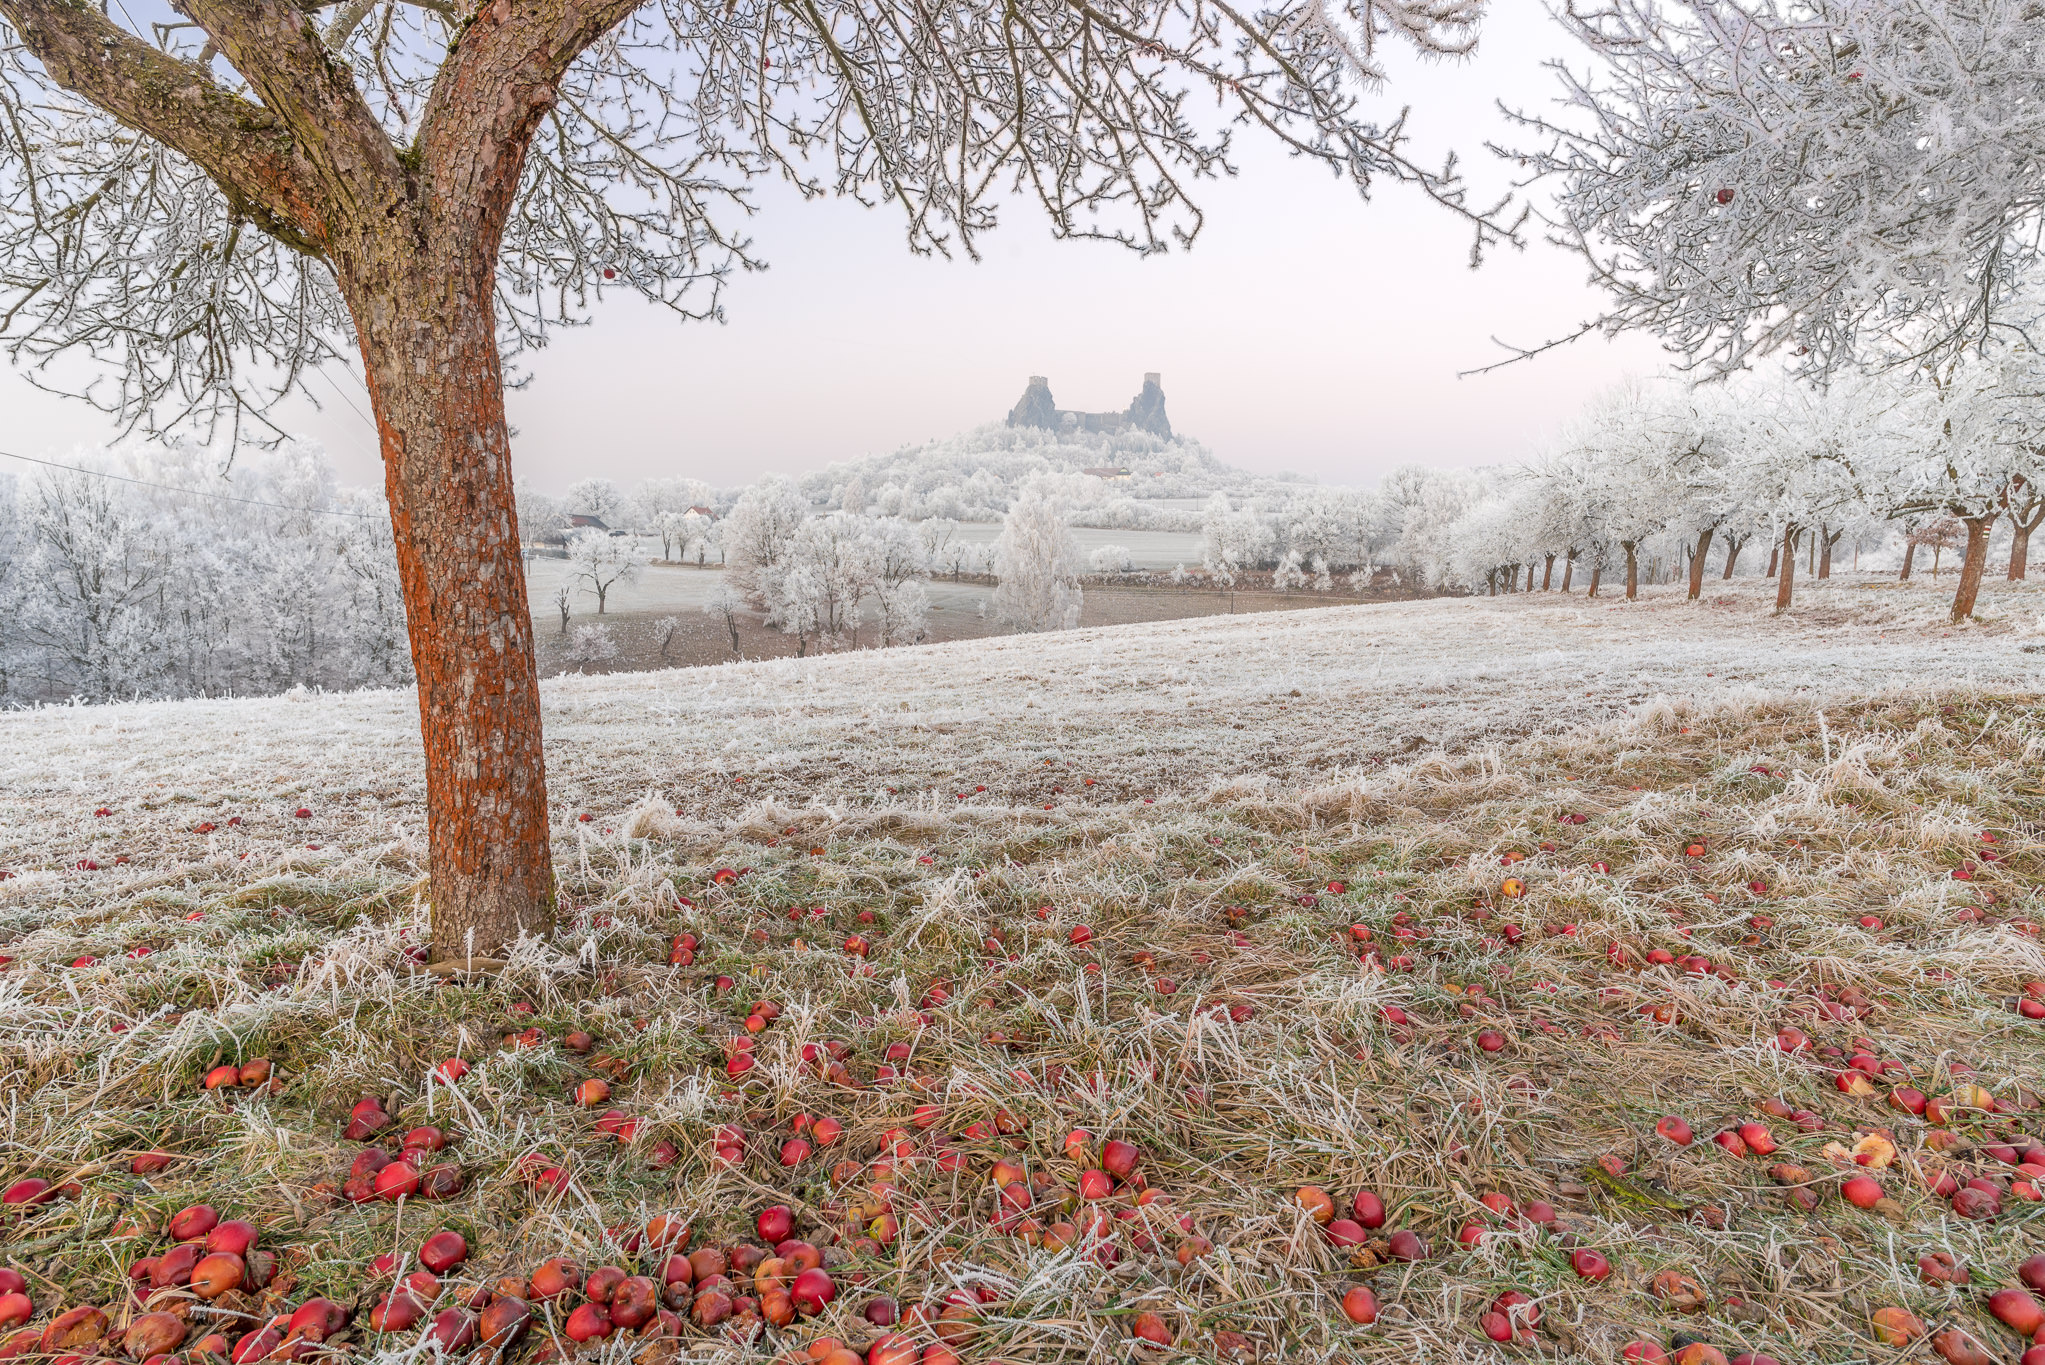
So let us focus on this photograph:
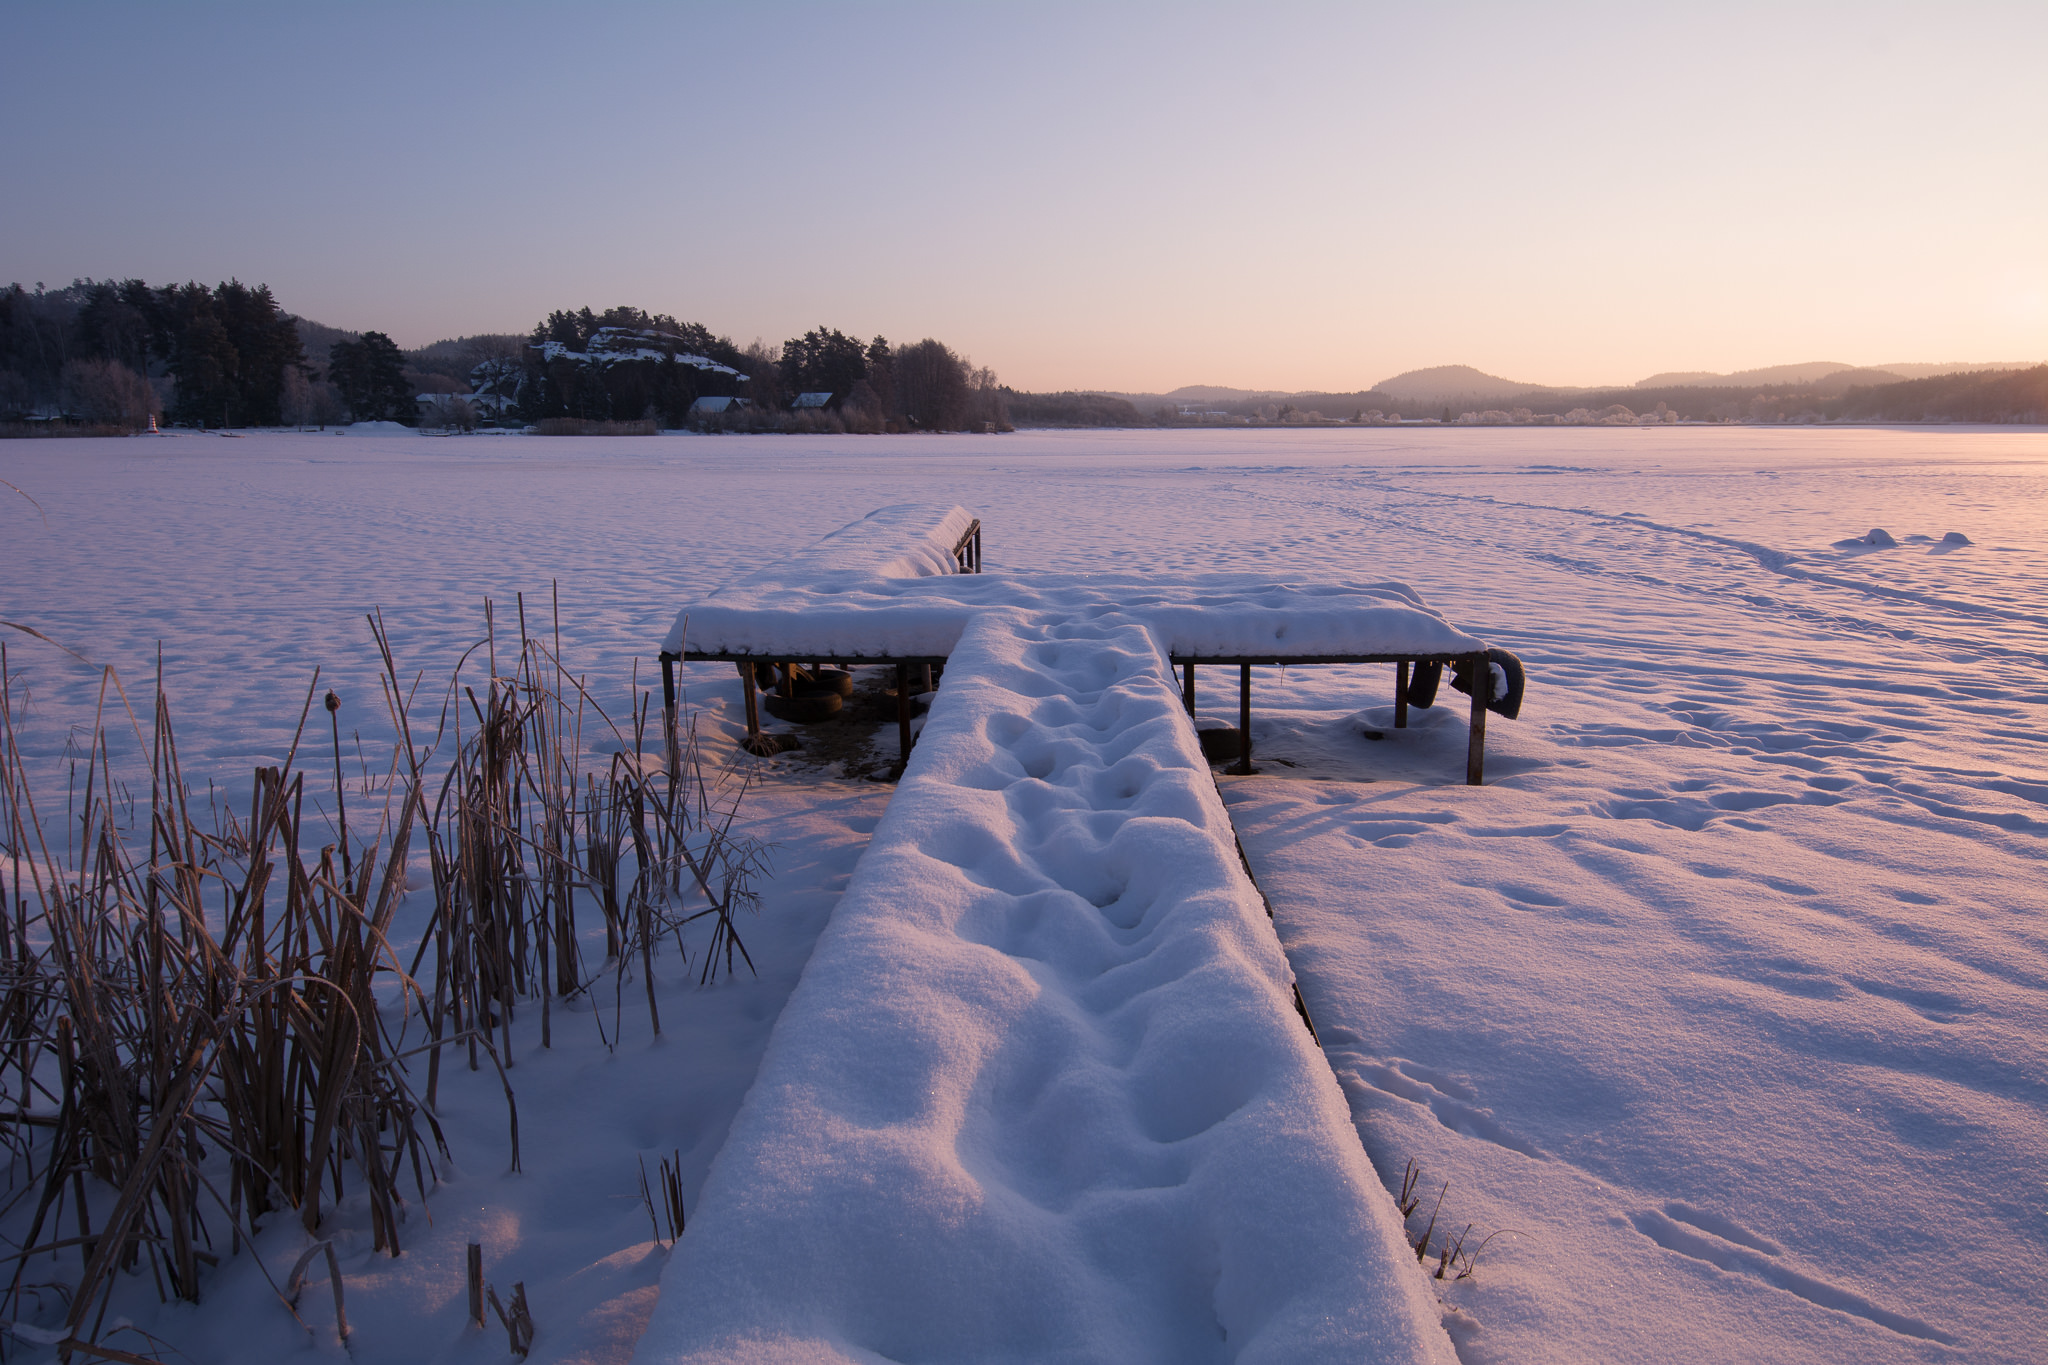
NIKON D7100 + 10-24mm f/3.5-4.5 @ 15mm, ISO 100, 1/125, f/8.0
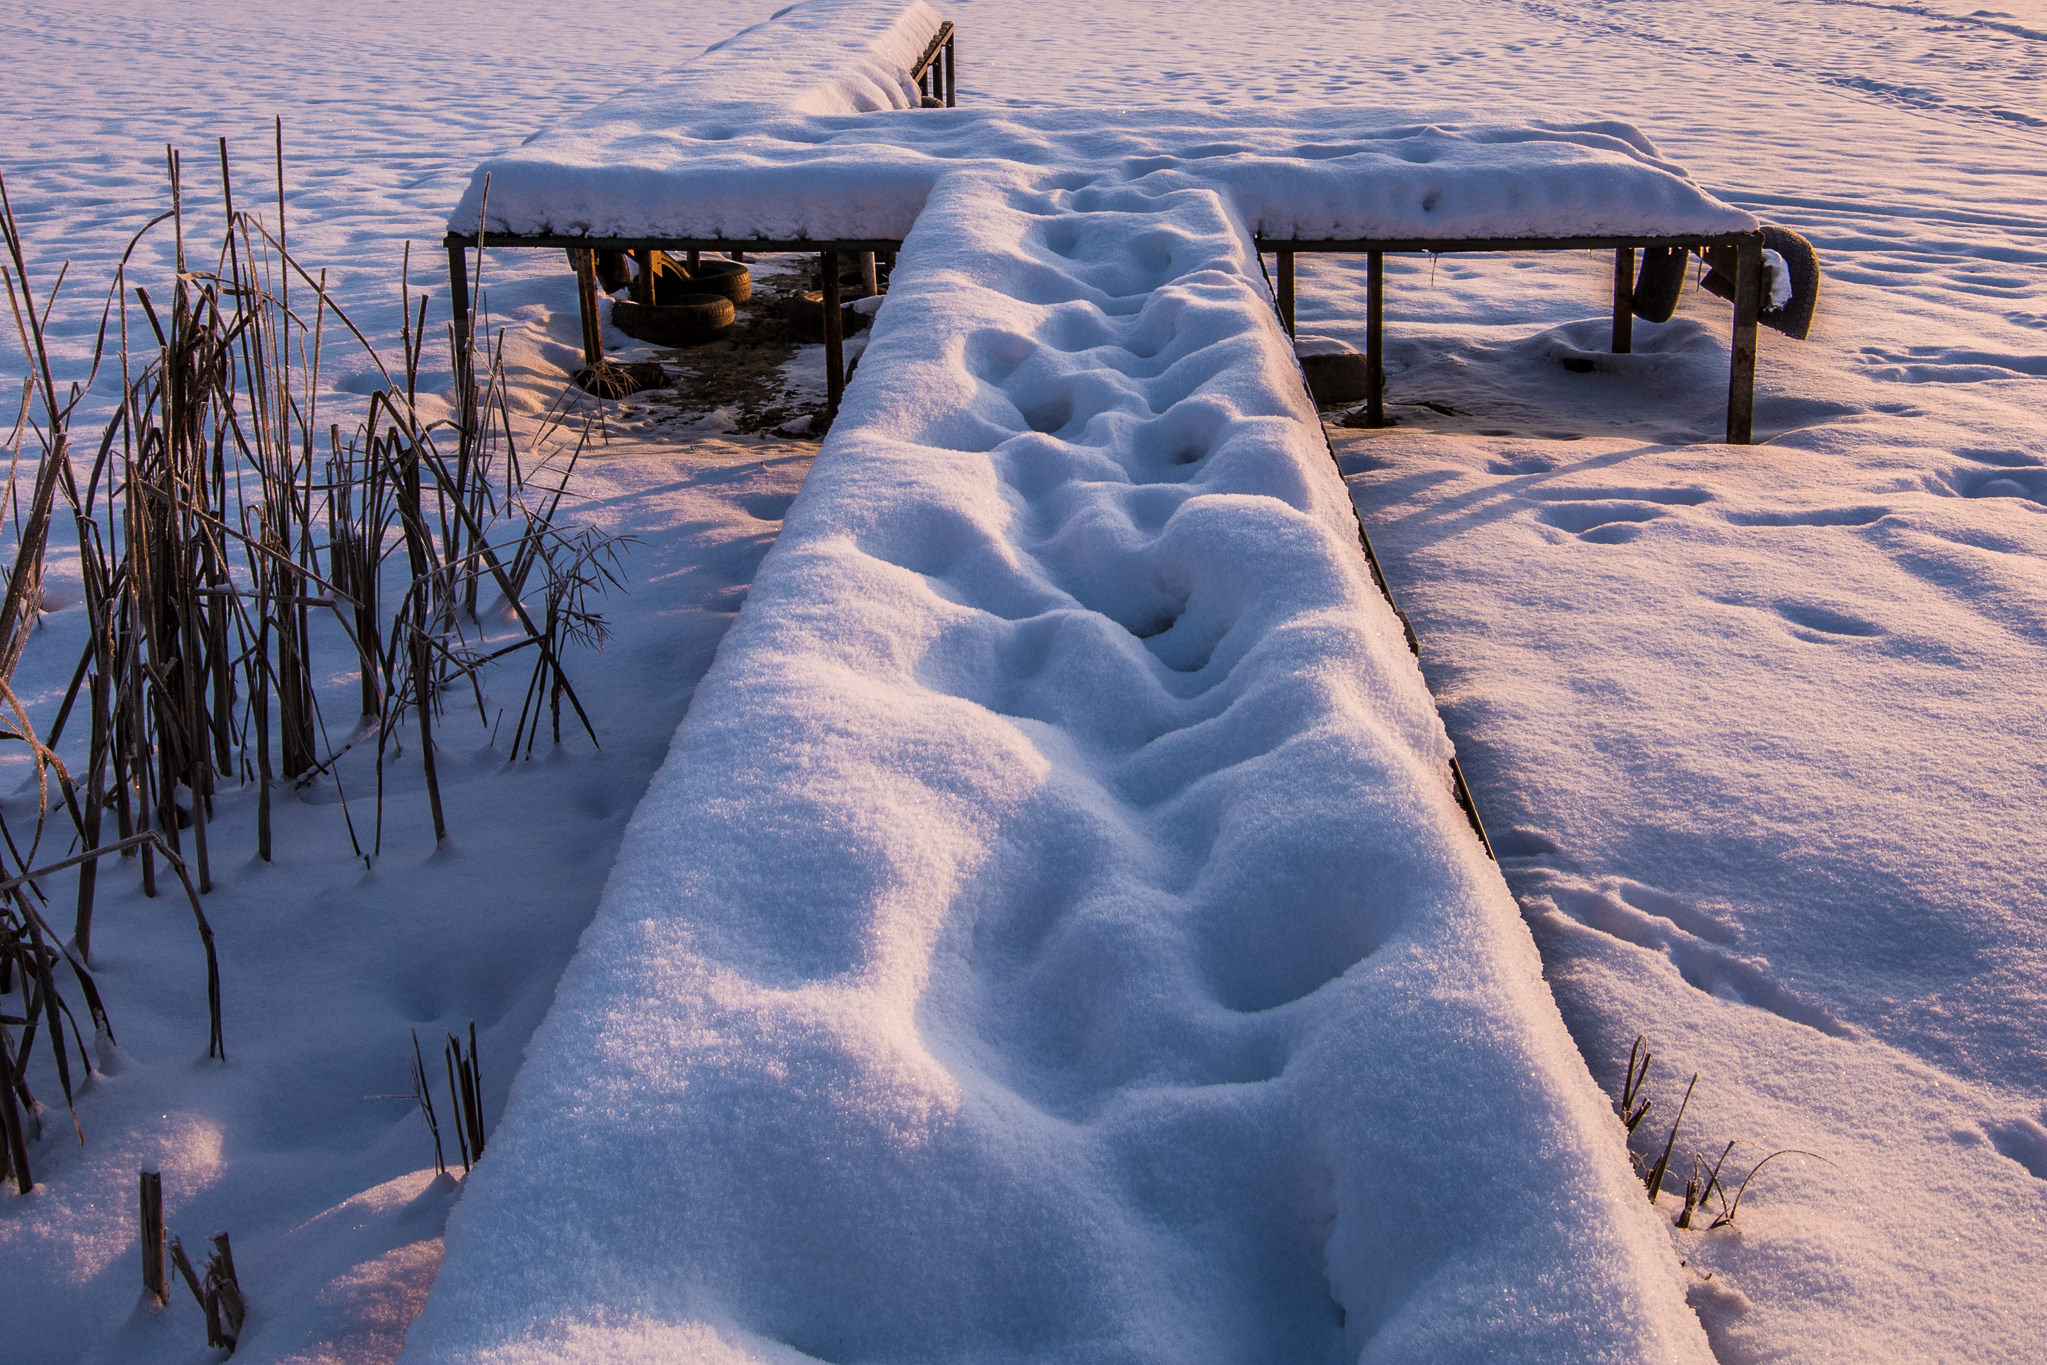
And let’s focus on following bottom crop:

NIKON D7100 + 10-24mm f/3.5-4.5 @ 15mm, ISO 100, 1/125, f/8.0
Why don’t I recommend boosting clarity for photos with snow and nice subtle colors? I like the nice orange-magenta hues. But I also like the structure in the snow. What happens if I boost the clarity to +100 (let me exaggerate for the sake of demonstration of the principle) to accentuate the structure of the traces in the snow?
The structure is now much more pronounced, but look at the colors: we are losing the nice pastel tones. Moreover, the snow looks as if it is dirty!
Let us try the other extreme: I applied the negative clarity quite extremely here, sliding left to -75. The colors are back, and the lighter parts of the image glow, but we lost a great deal of detail and the photograph looks too soft and hazy:

So clearly, one has to use negative clarity decently and make up for the loss of the detail with additional sharpening. Here is the result of the carefully applied minus clarity (-40) with increased sharpening (Amount: 100, Radius: 0.7, Detail: 70, Masking: 60):
And the full image with the above settings applied:
Applying the Negative Clarity Effect Globally – Case Study #2
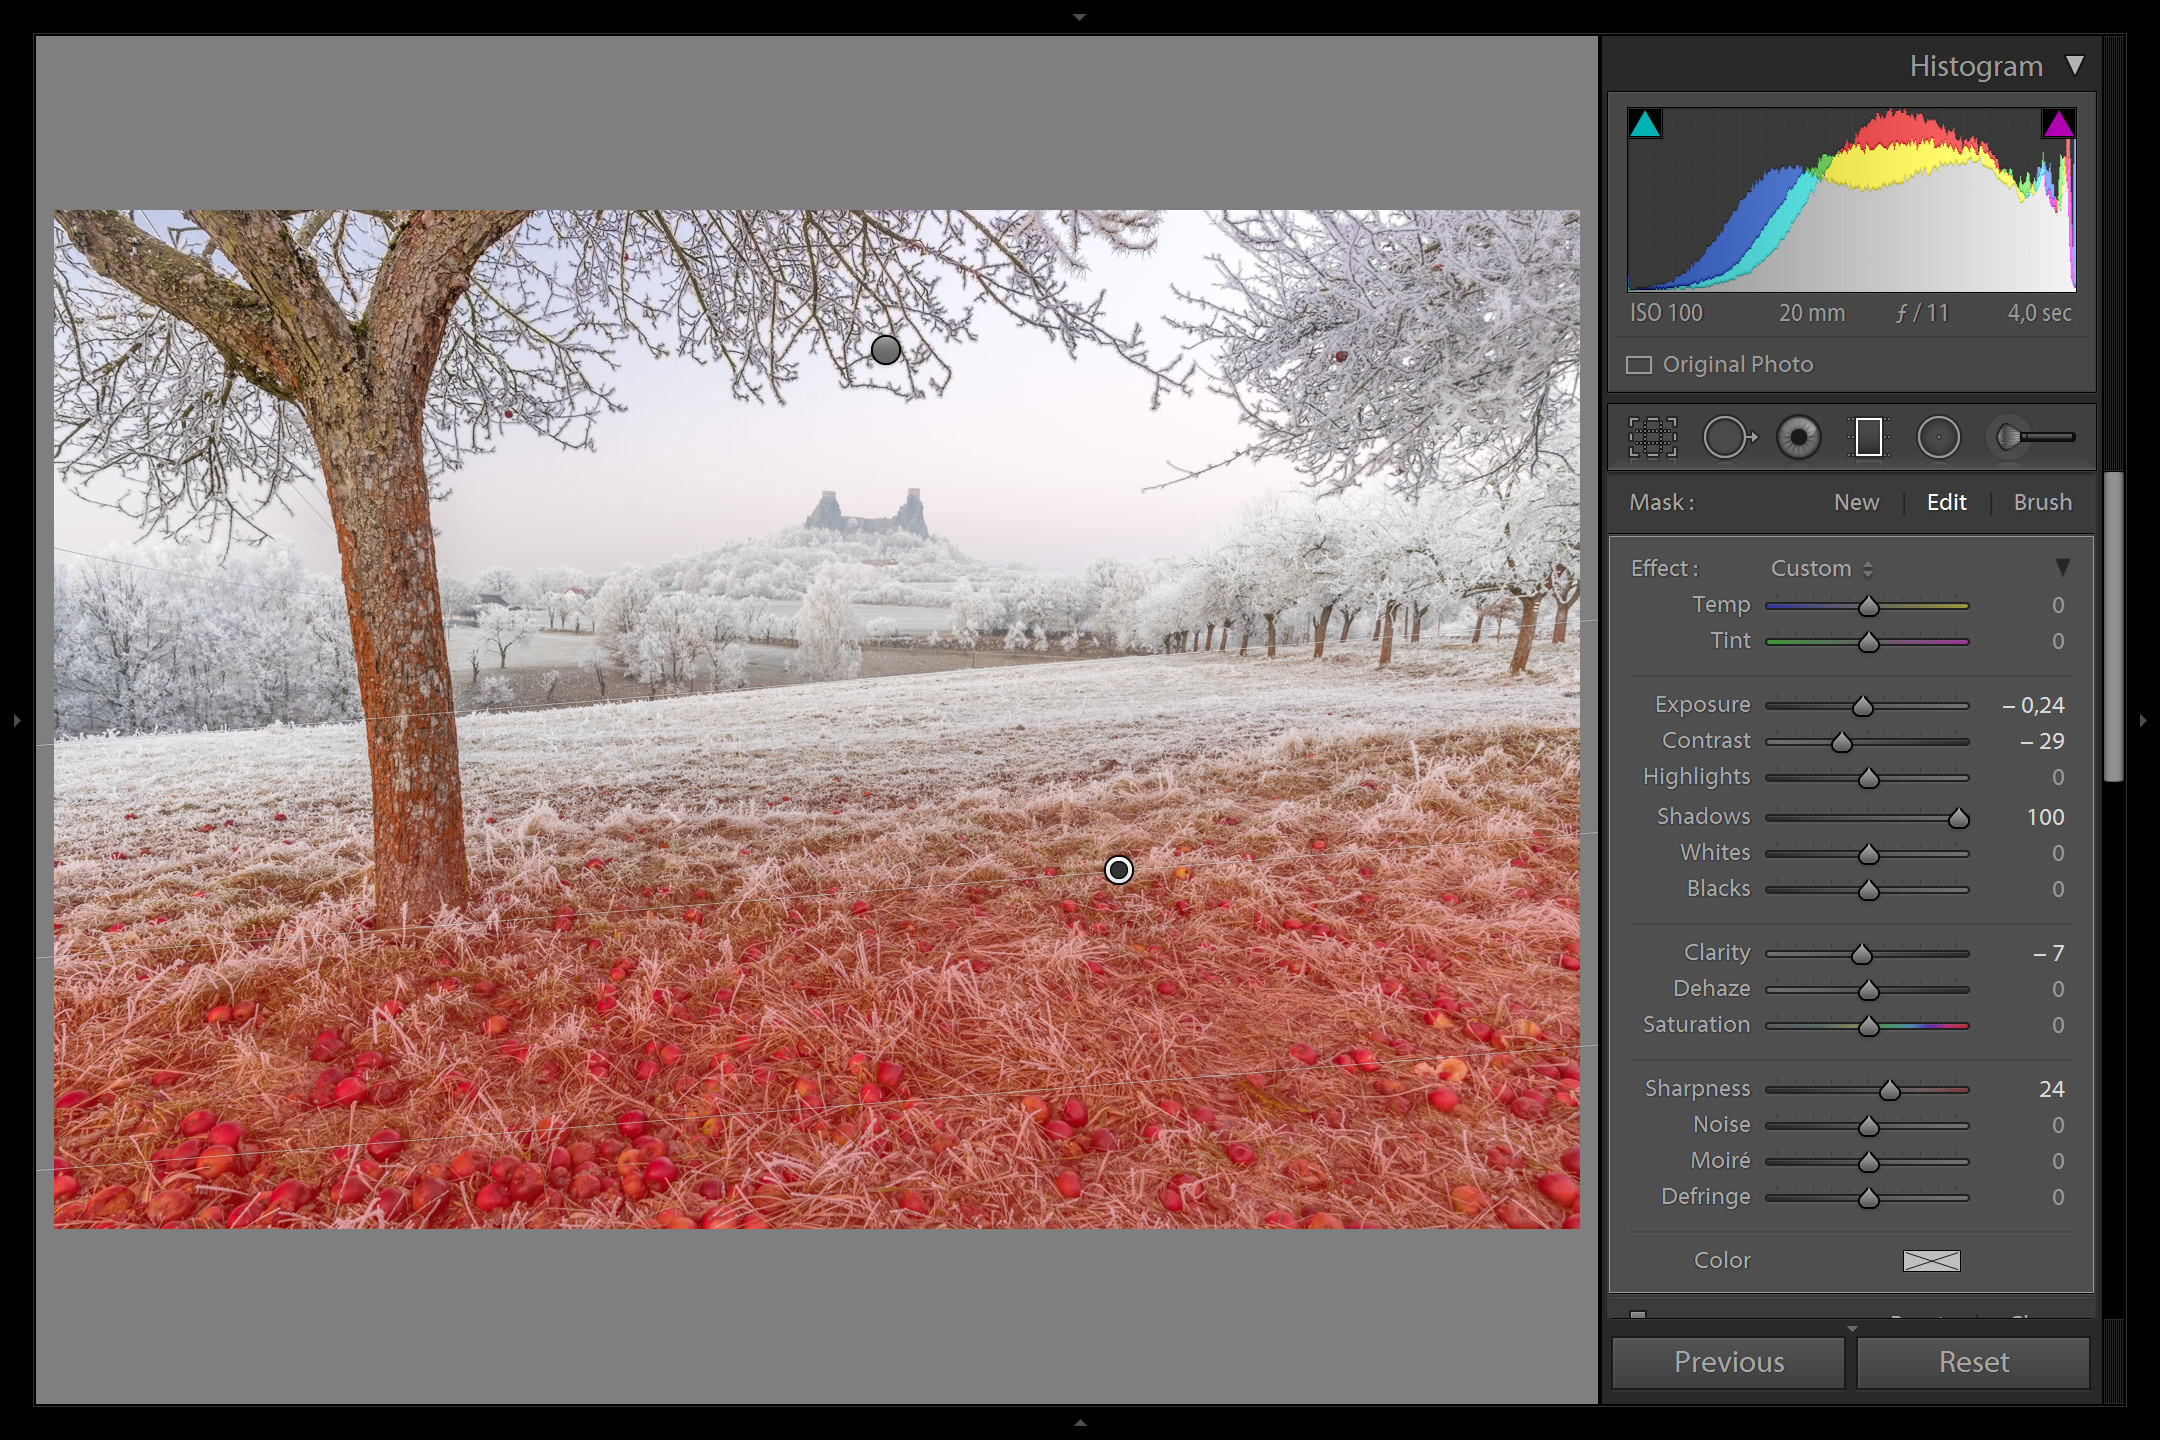
Here are the print screens from Lightroom, to show the process again:

After applying auto-tone and manually adjusting the Highlight slider to -100 to preserve details in the areas where sun was setting I need to decide what to do with microcontrast (Clarity slider). Instead of applying the traditional clarity boost (see the screenshot), let us try something different:
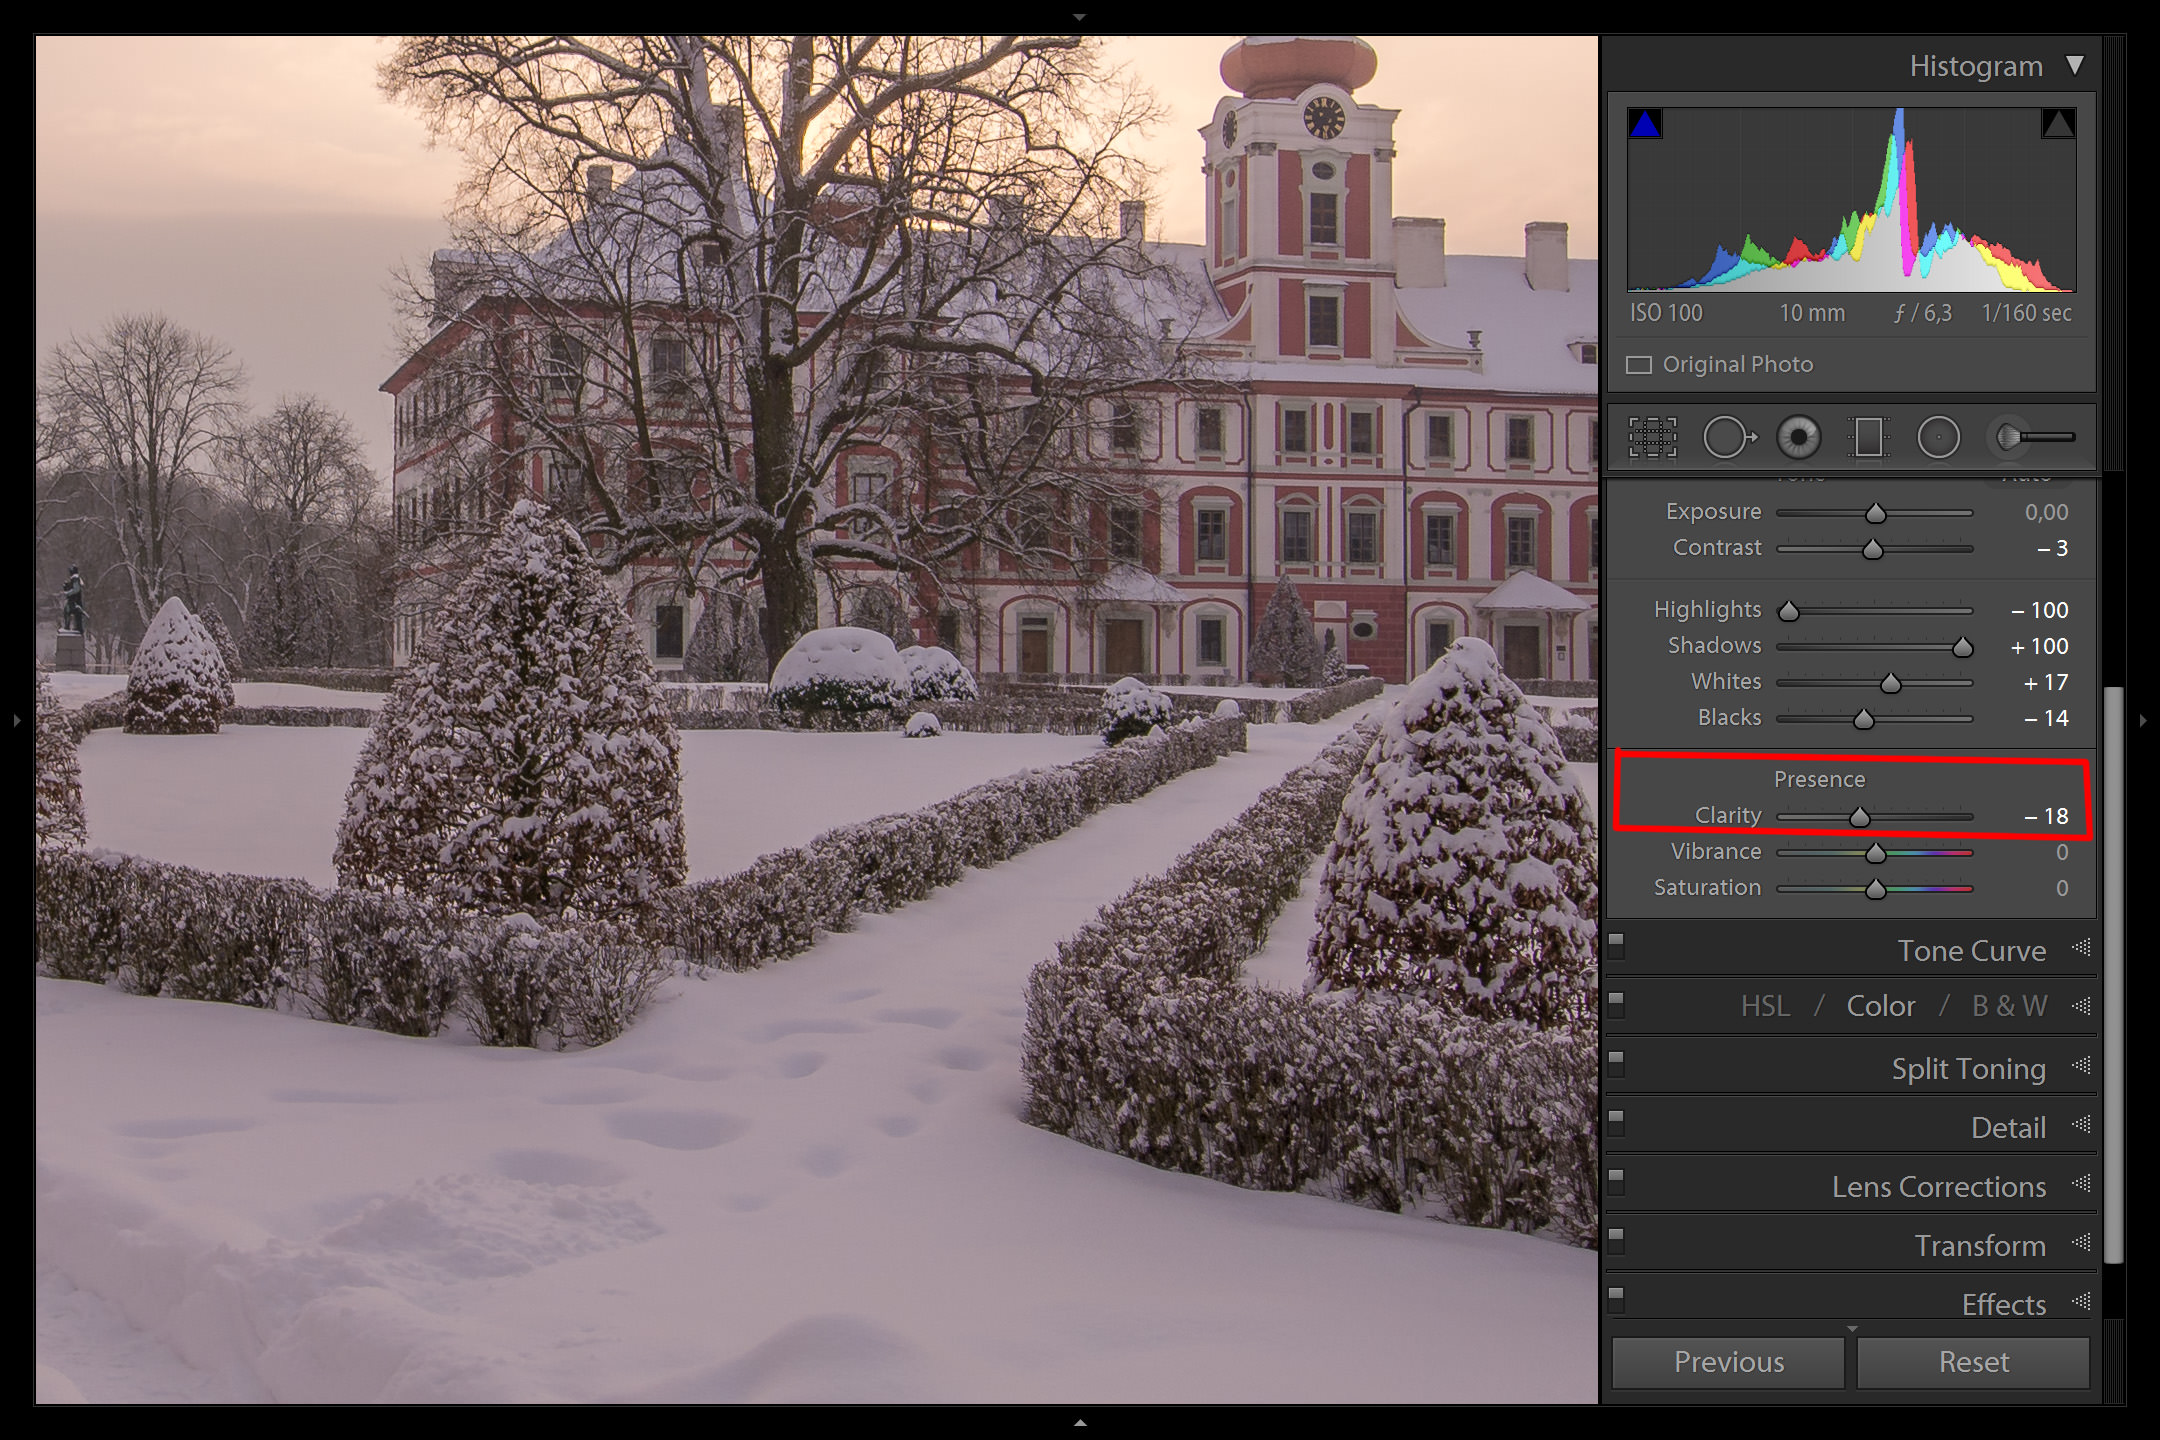
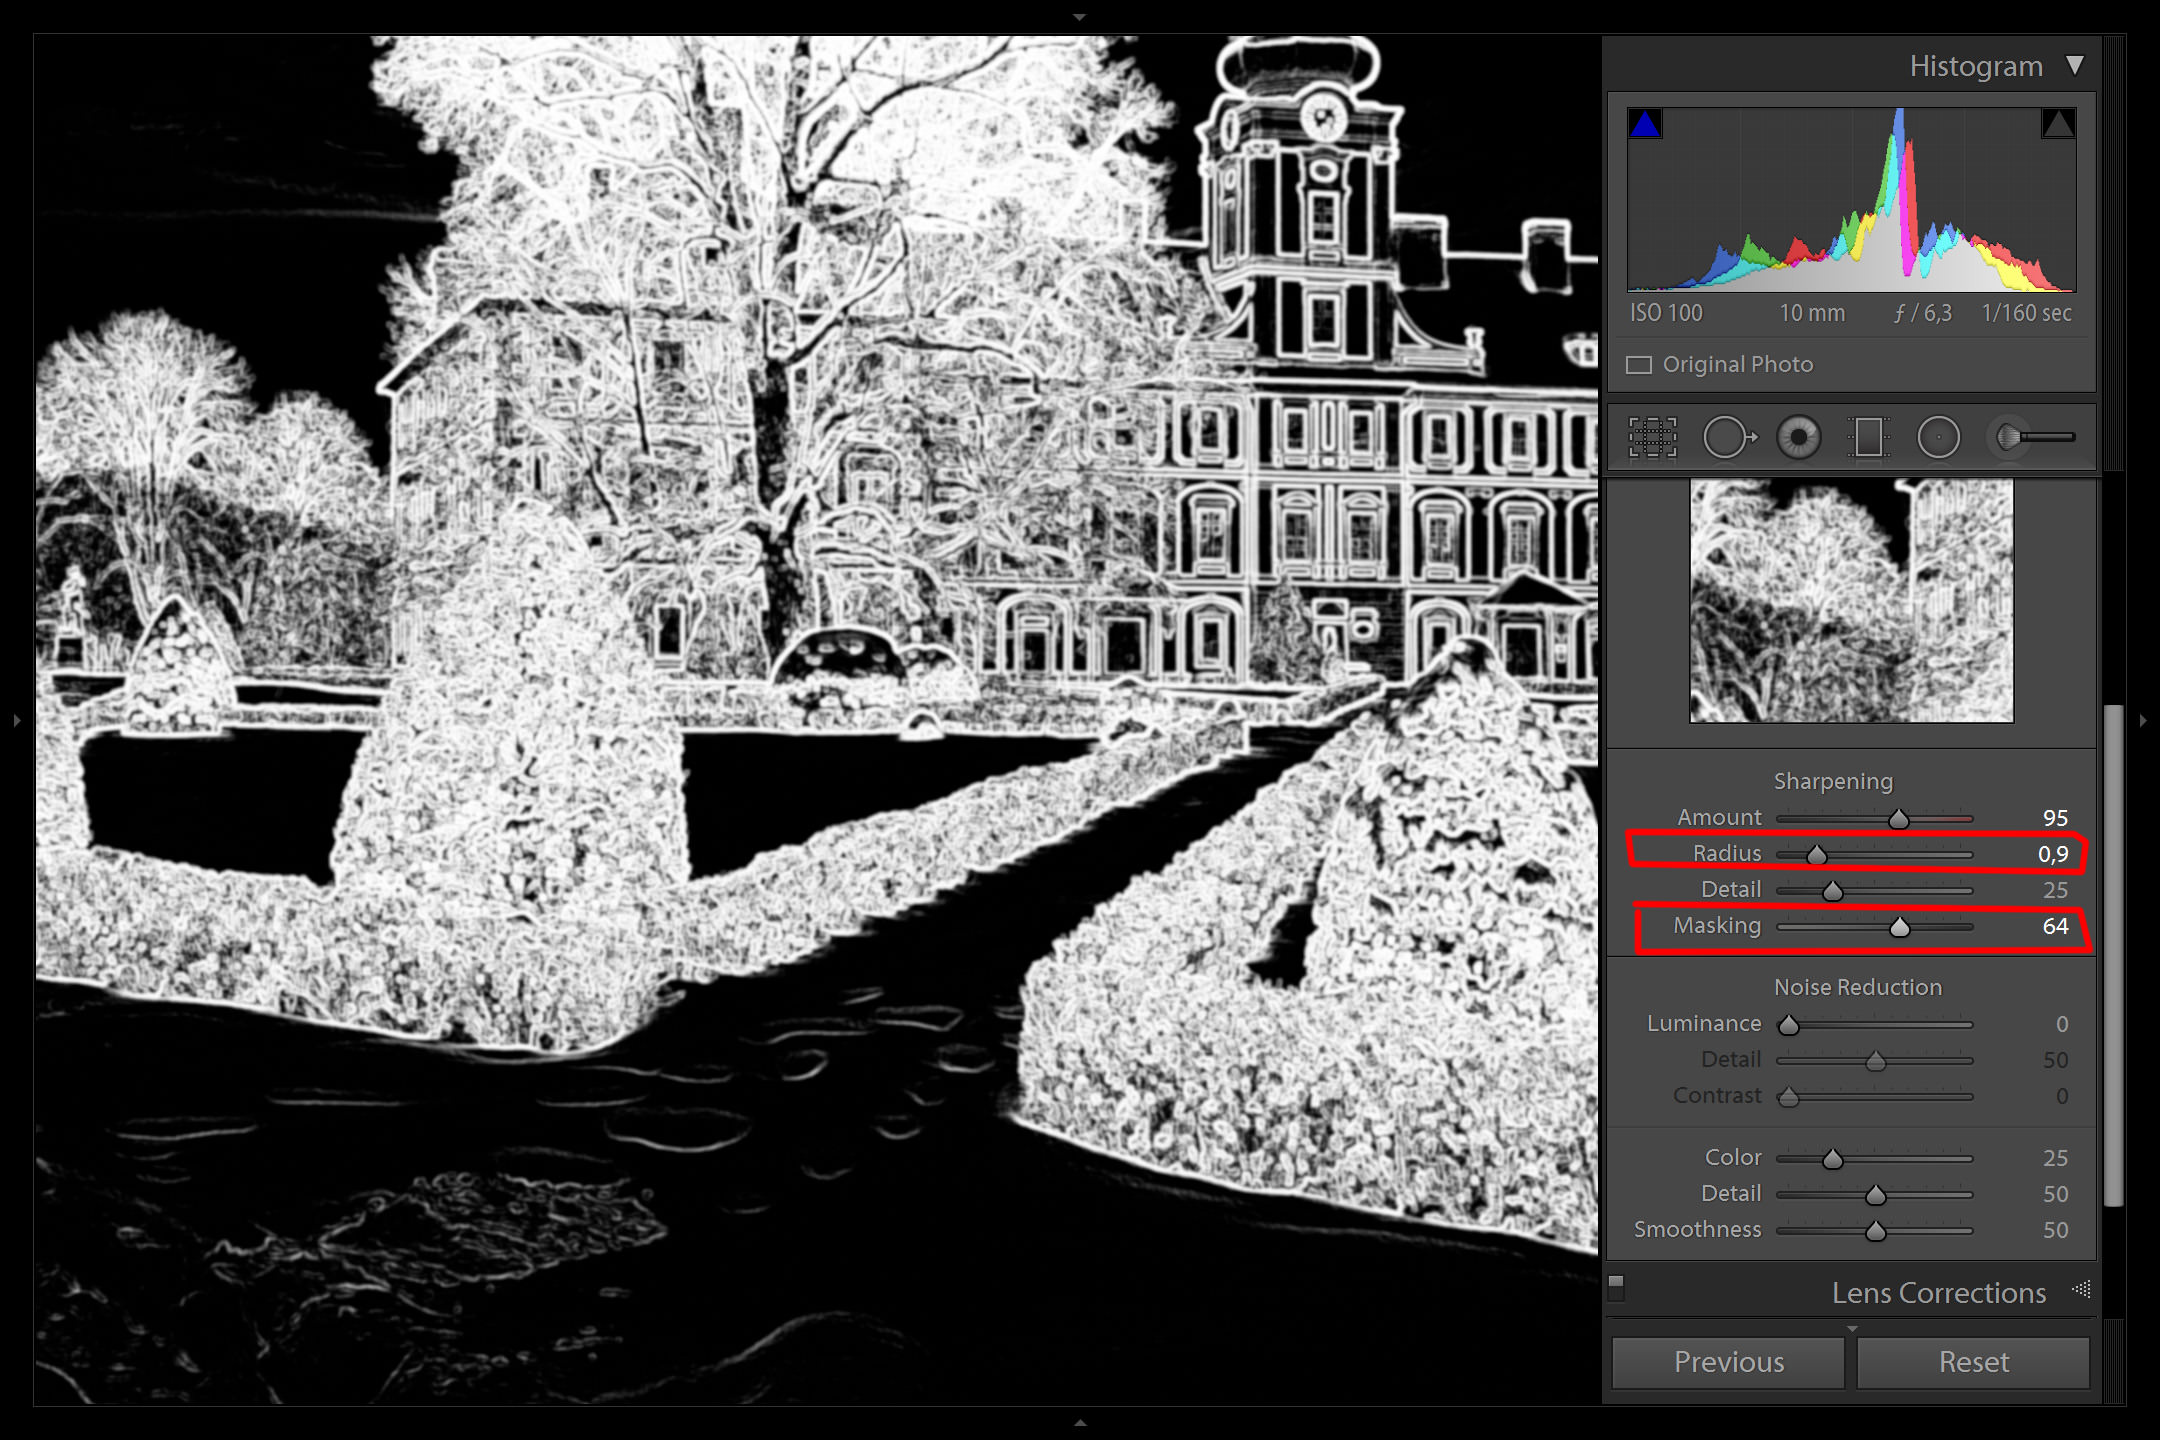
Here, I applied negative clarity of -18. Step two is needed though – sharpening. I apply higher than the standard +50 or +75. I do not fear to go up to +100. But since the image was sharp before applying negative clarity, I do not use a big radius, but rather keep it in the range 0.5 – 0.9. You can also play with the Detail slider (the higher the number, the more details you will see, but also the more artificial edges, so be careful). And last but not least, always apply Masking to make sure that the smooth areas do not get sharpened.
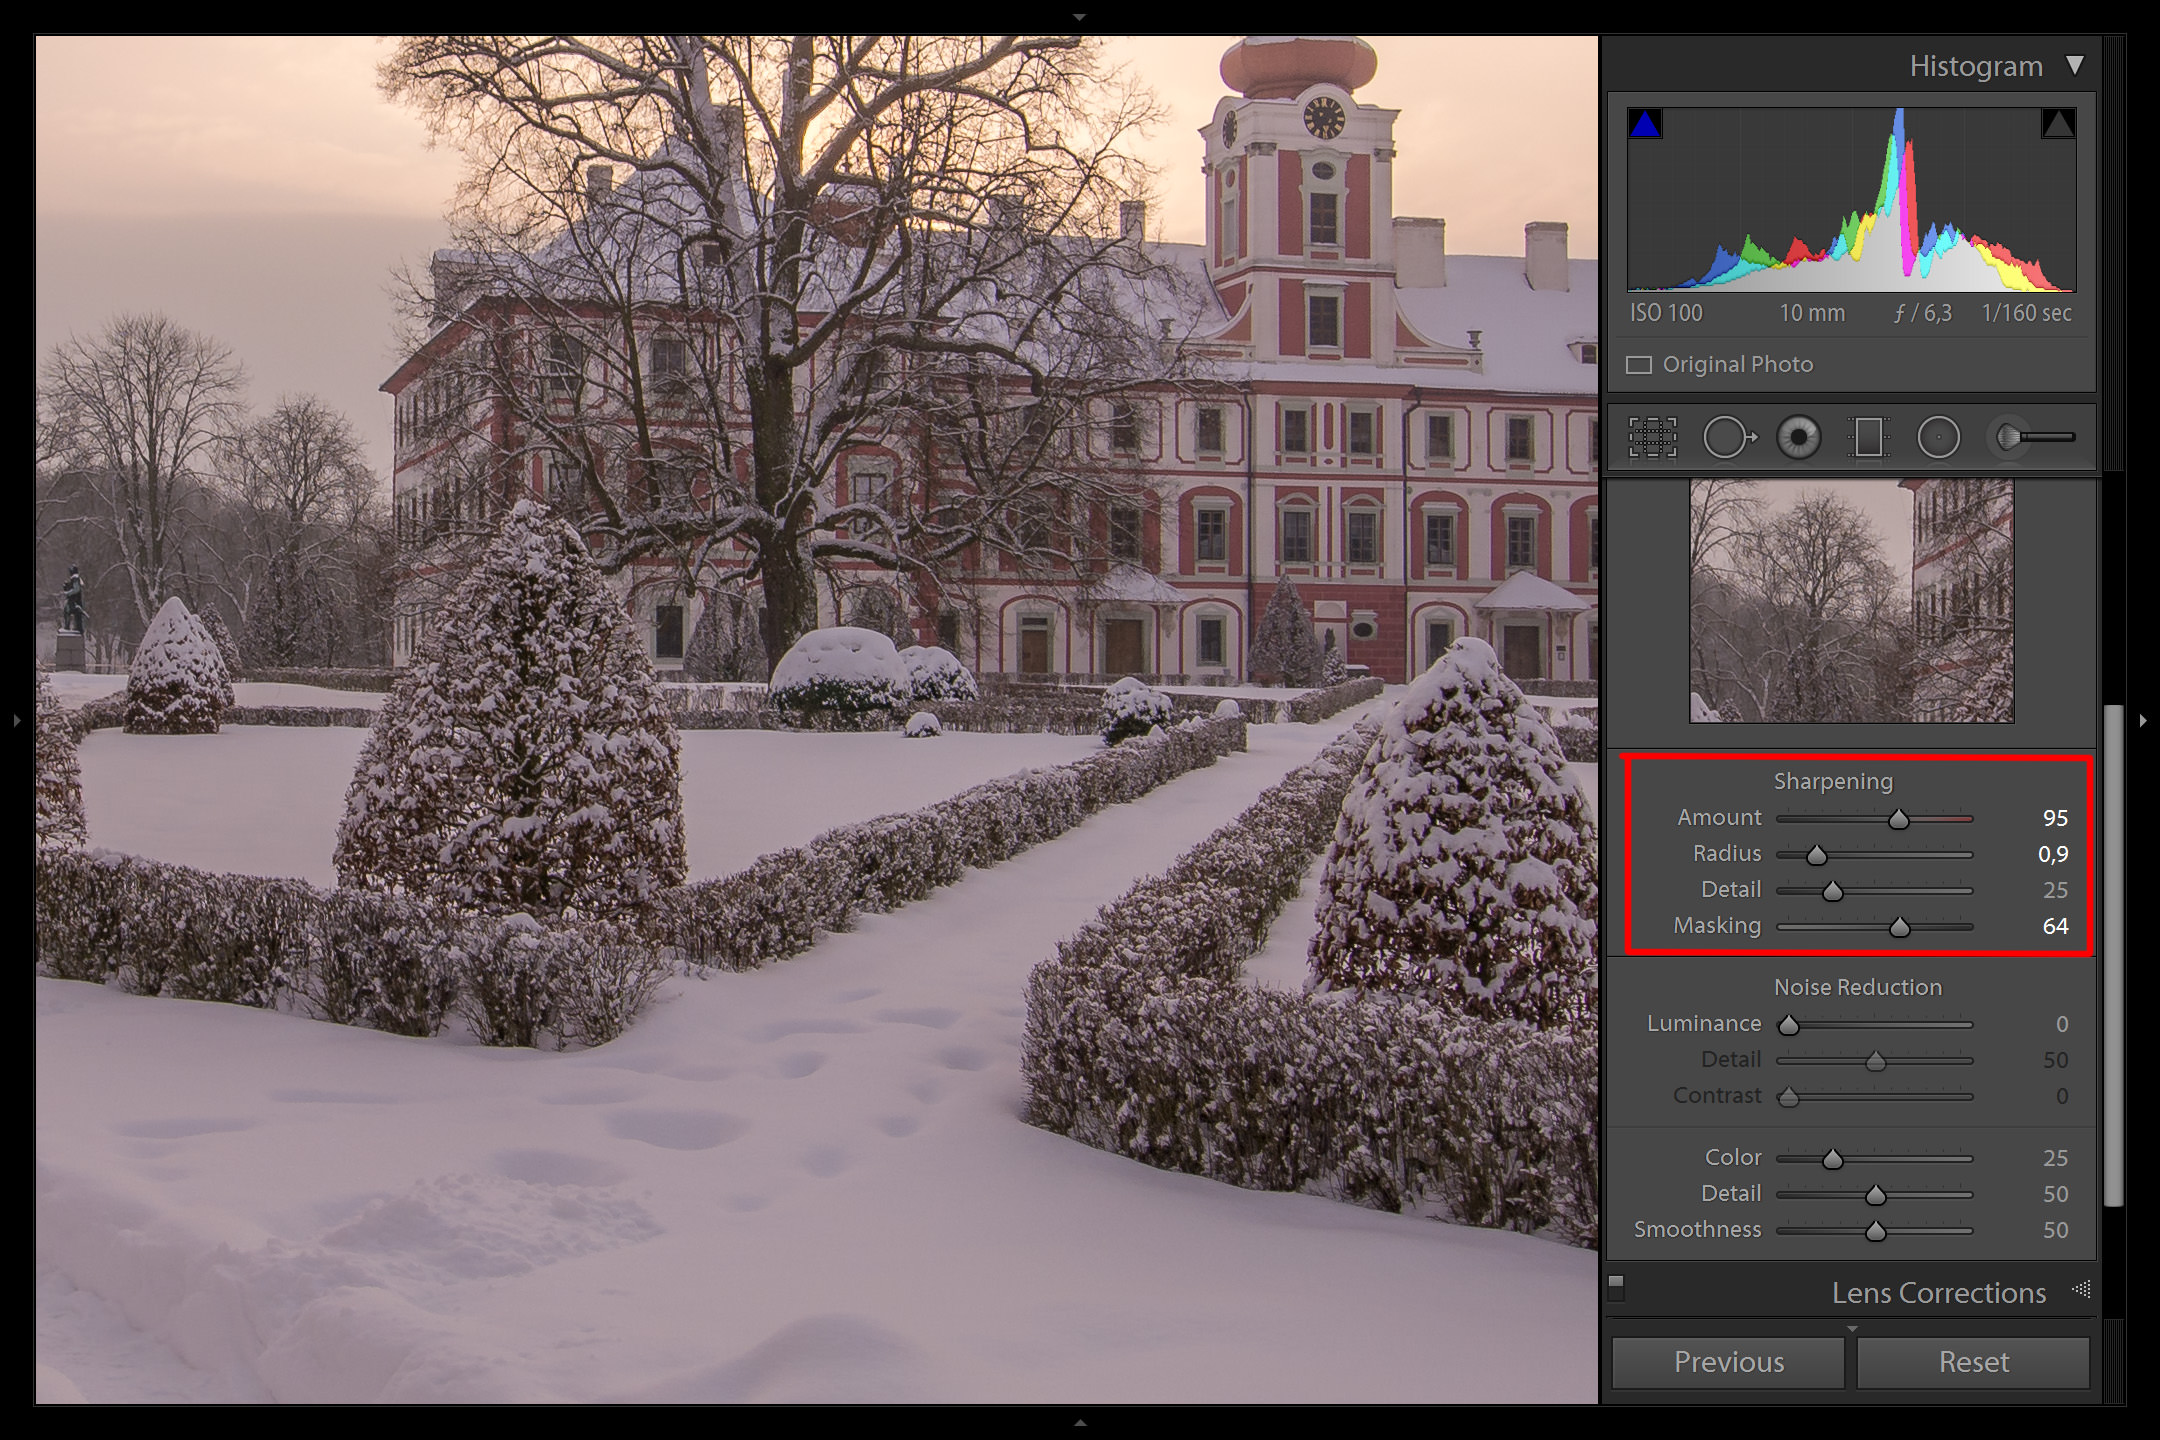
Hold the ALT (PC) or the OPTION (Mac) key when moving the Masking slider to see where sharpening will be applied. Let it affect only the parts of the image with some pronounced structures:
Here is the classic +Clarity on the left (select) and the negative clarity with increased sharpening on the right (Candidate):
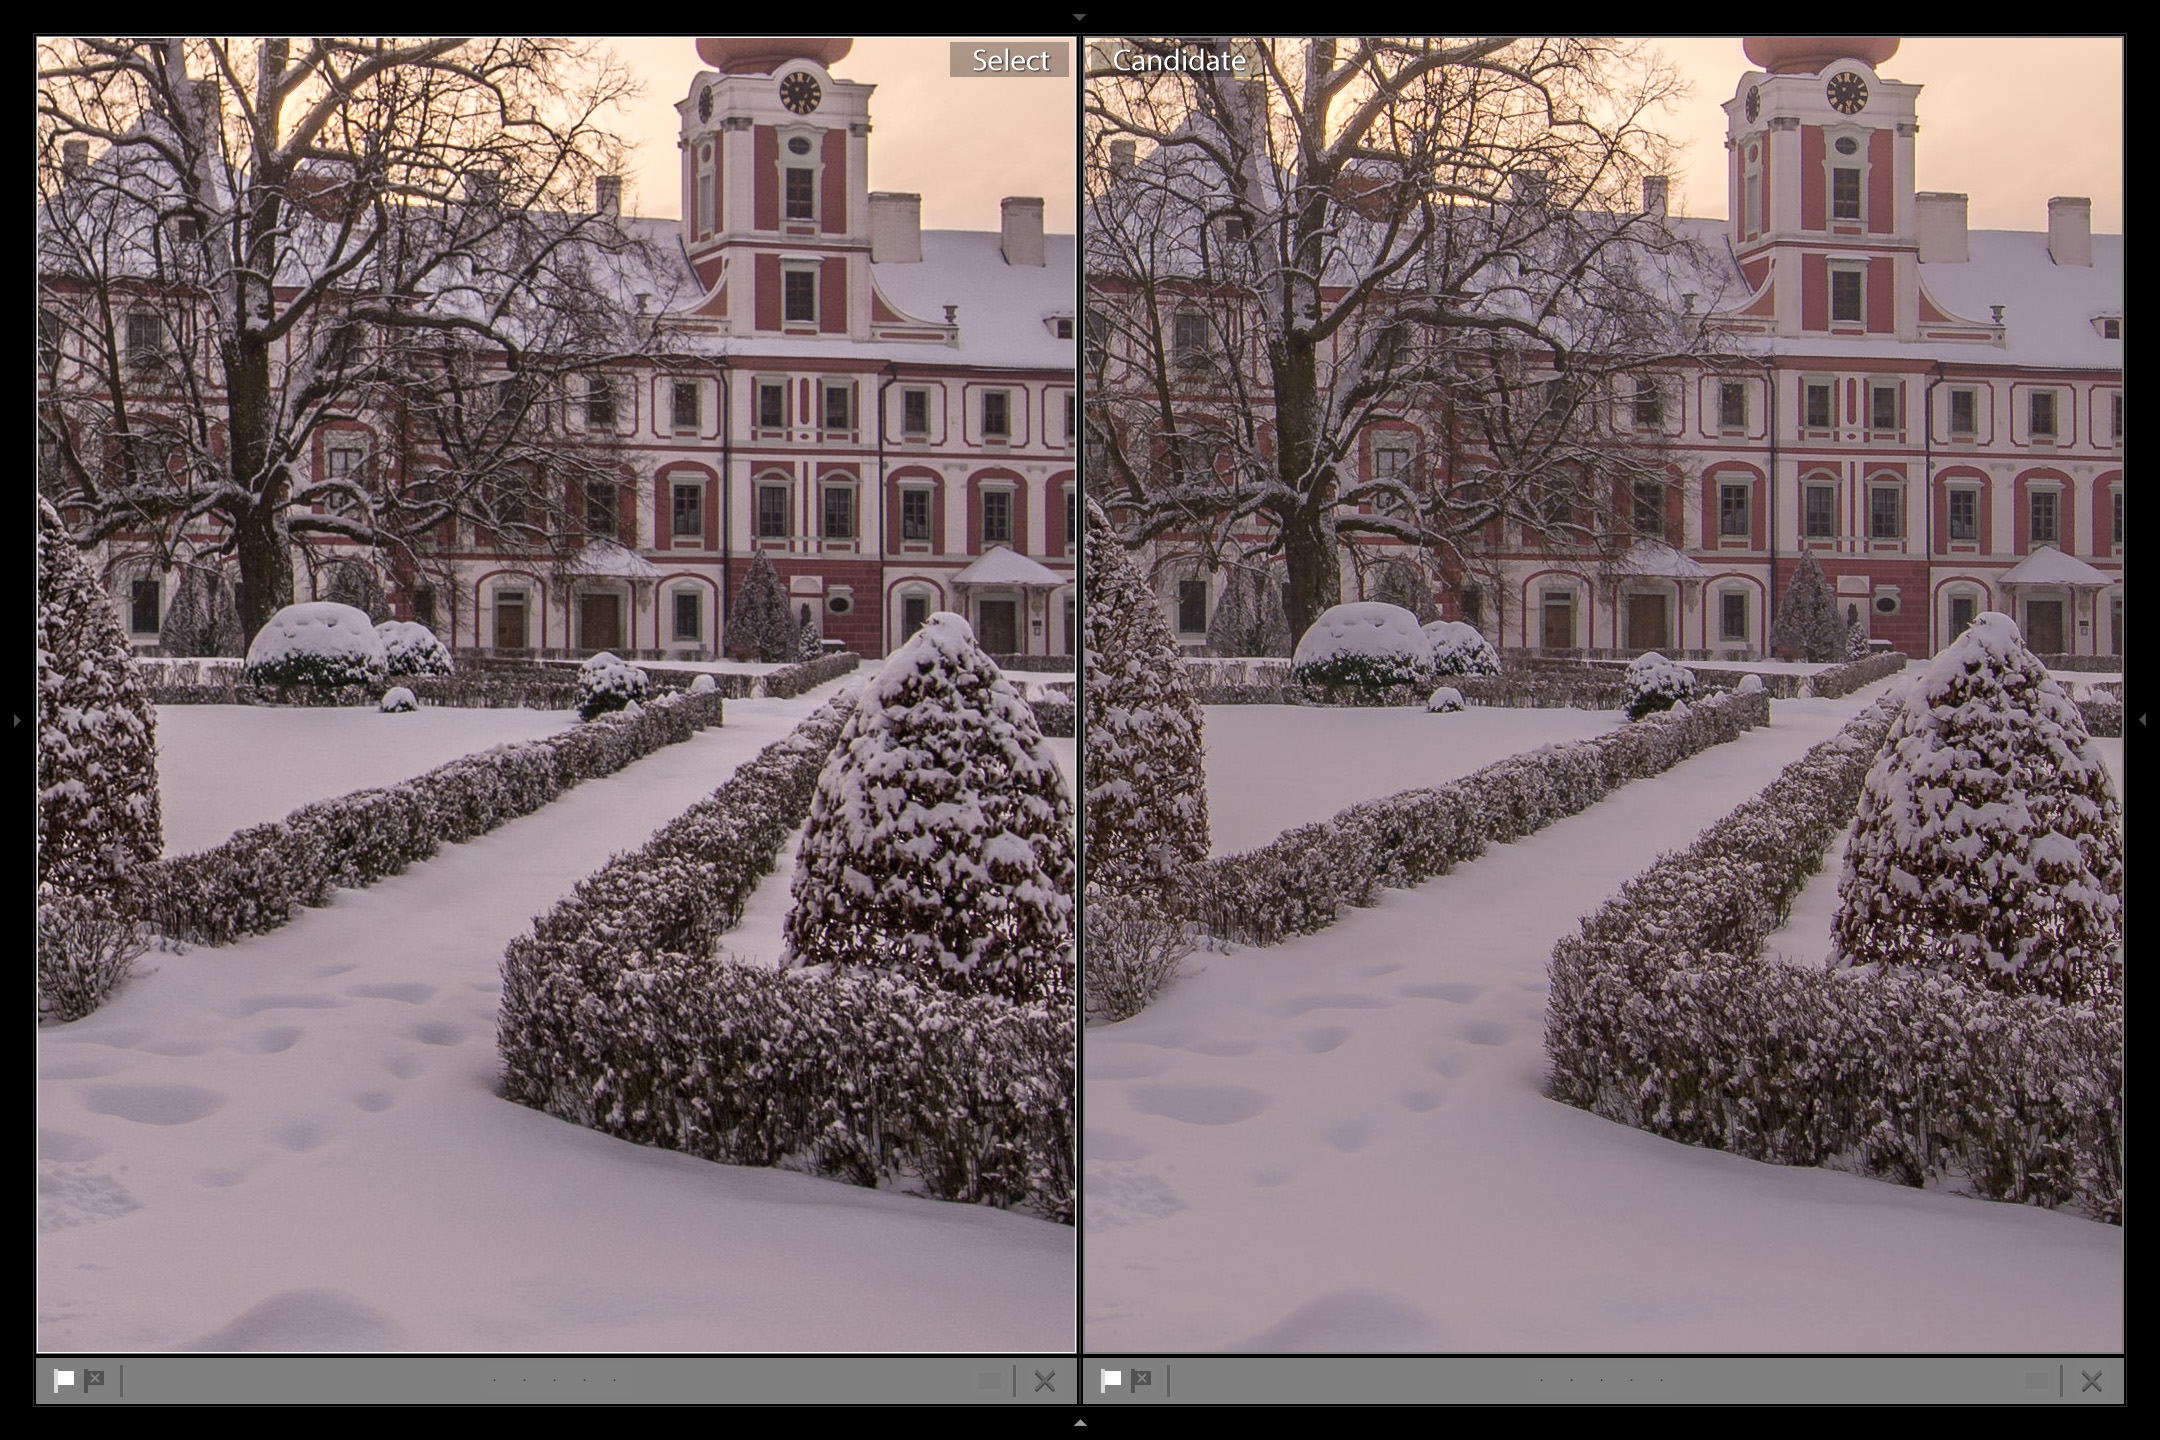
The difference is subtle, but I prefer the cleaner look of the snow-covered parts on the right-hand image:

Applying the Negative Clarity Effect Locally
What I particularly enjoy (and use a lot) is the fact that you can use this effect locally. You can define your brush with negative clarity and positive sharpening and apply the Orton effect only in some parts of your image.
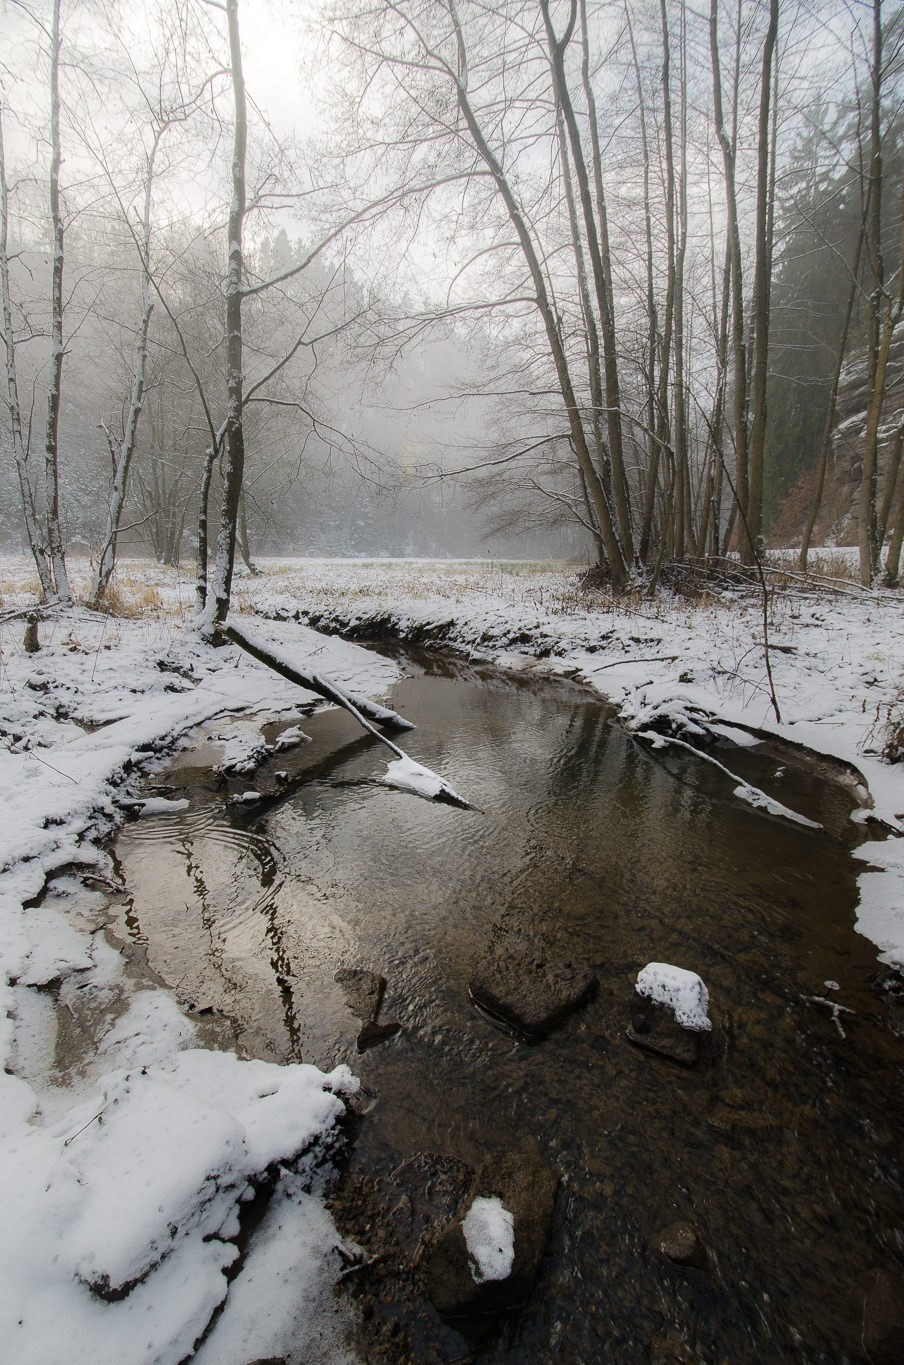
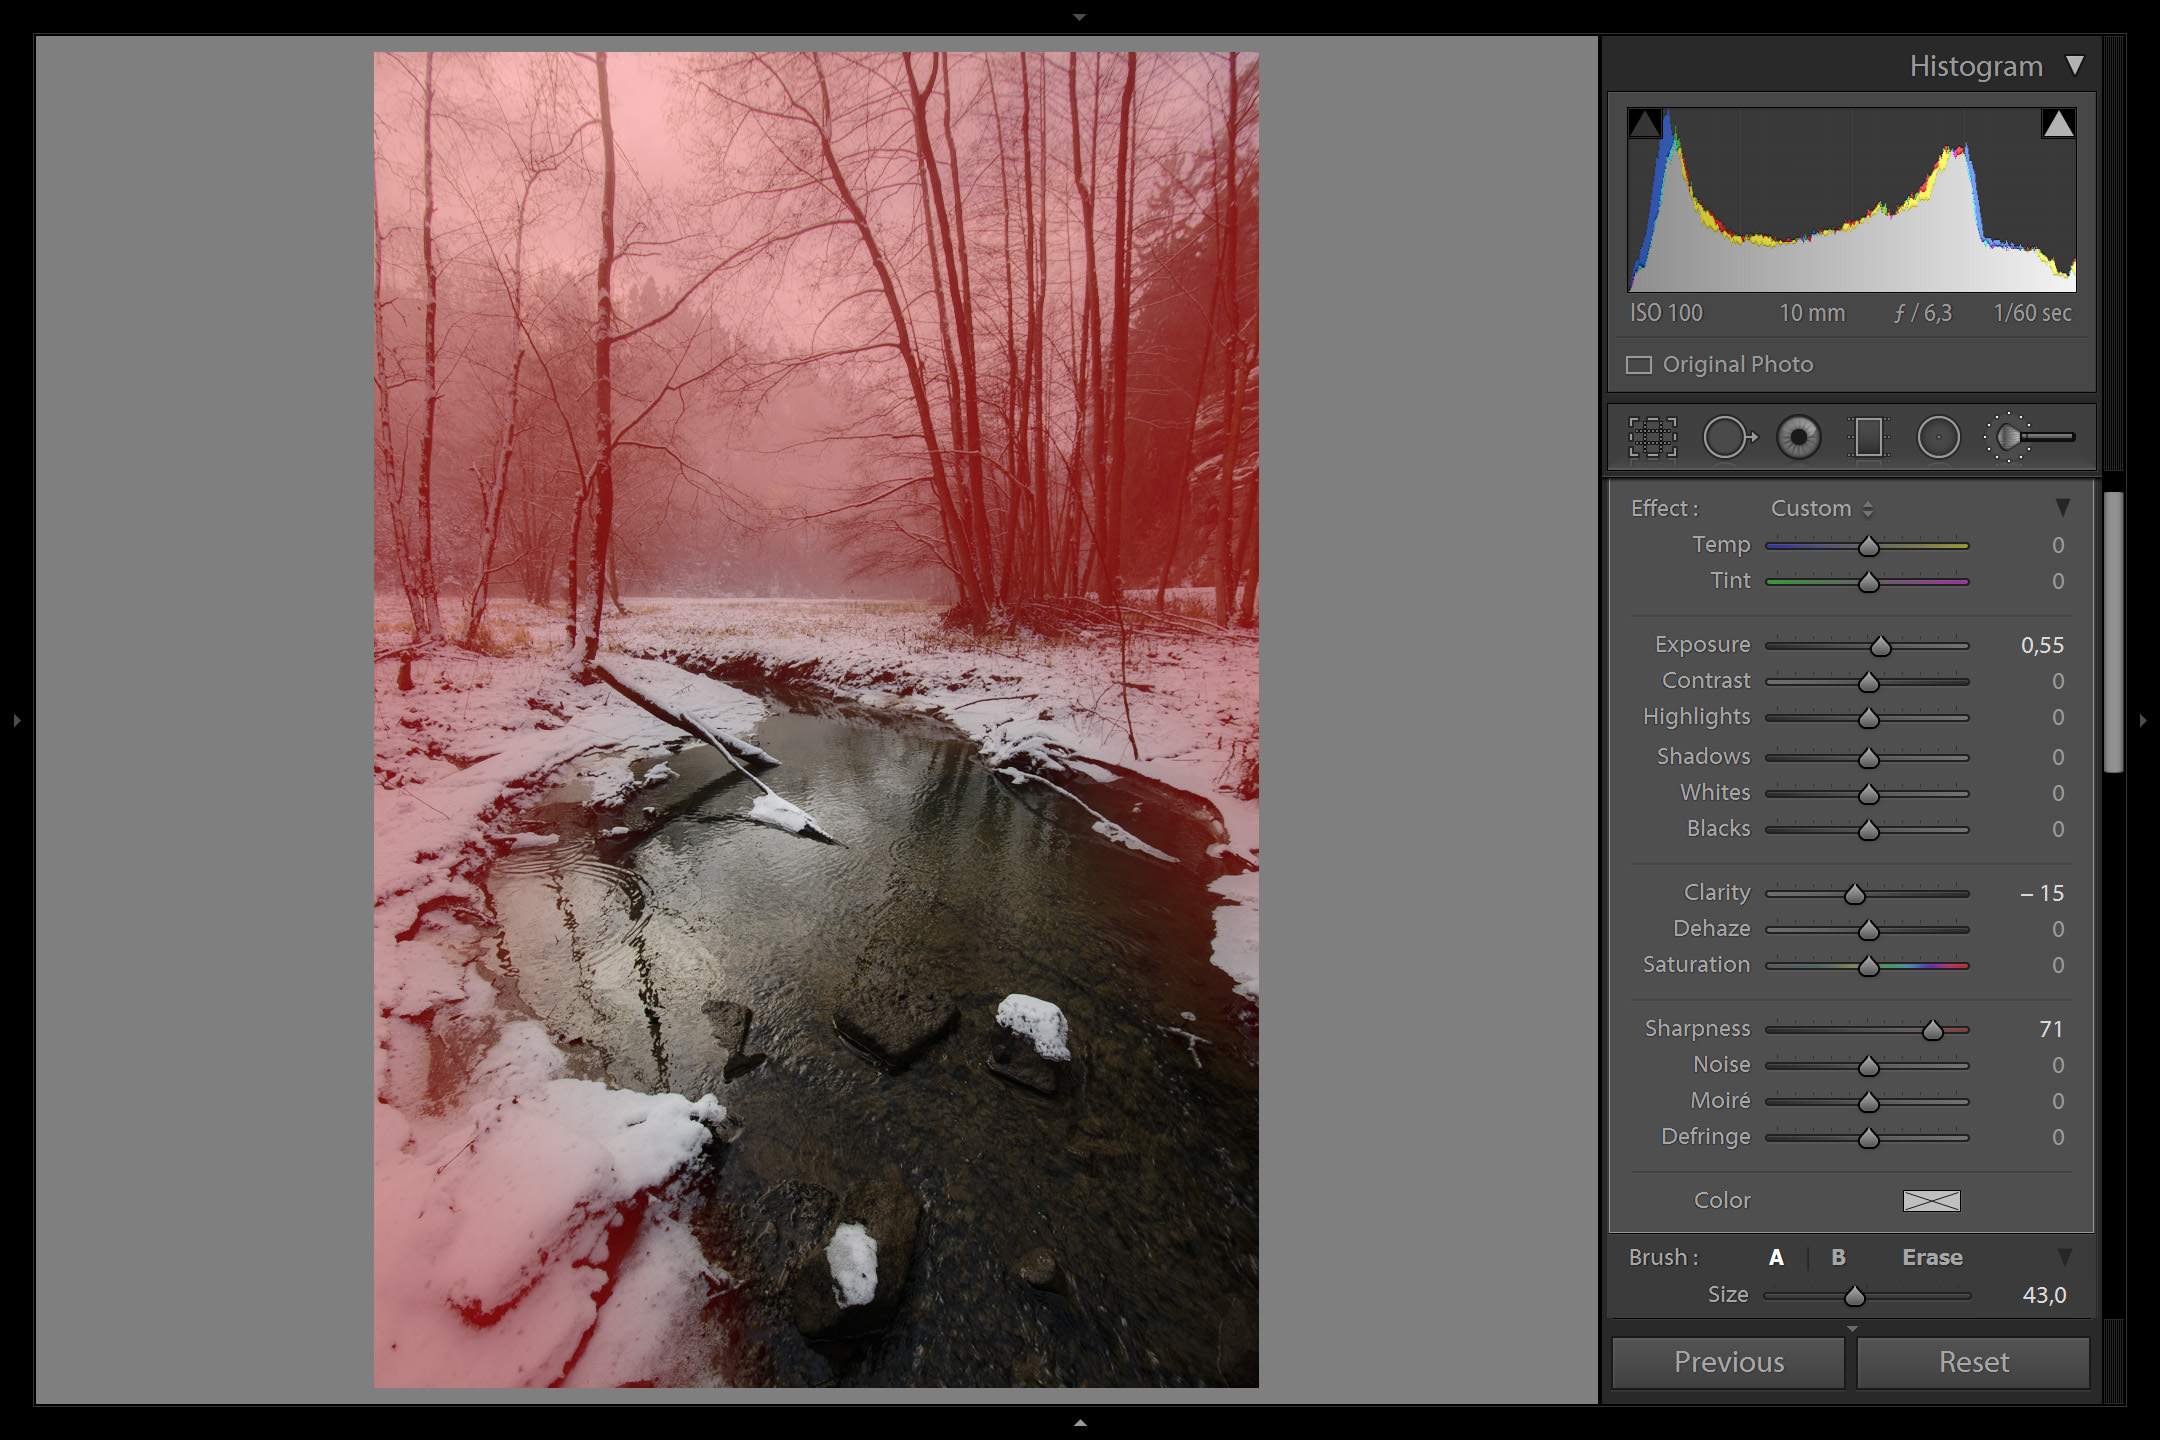
Look at the photo above and the screenshot. In the dark parts, I boosted clarity. In the lighter parts with snow and branches, I used the brush with negative clarity.
The same holds for working with gradients in Lightroom. I recommend evaluating the effect in full-screen mode. I also toggle between the original and developed image. The compare mode, on the contrary, is not very useful for evaluating the global adjustments such as described here. I use it here just for the sake of comparison in this tutorial.

NIKON D7100 + 10-24mm f/3.5-4.5 @ 10mm, ISO 100, 1/80, f/6.3
NIKON D7100 + 10-24mm f/3.5-4.5 @ 10mm, ISO 100, 1/80, f/6.3
And here is the close-up in Lightroom:

How do you process your winter landscapes? Please share below!
In the section “Applying the Negative Clarity Effect Globally: Case Study #1″… in the first sentence… “shapreping” ???? :)
sorry for the typo – I meant to say “sharpening” (I will correct it)
I like a tiny bit of negative Dehaze from the Effects tab on some landscapes too.
One of the negative effects of a sweeping + clarity is that often the whole image becomes contrasty, and the subject isolation is compromised because it no longer stands out – especially obvious when applying heavy clarity to clouds. I like the effect demonstrated here more than the neat orton effect, its subtle enough that the whole photo doesn’t become “an Orton”. As with so many things the balance is the key and its good here. Thanks for sharing.
Exactly, keeping the right balance is crucial in post-processing. That is why I like to review my postprocessing a day or two later to see if I was not pushing things too much…
I’ve been doing something similar for a long while, since the feature was introduced to Lightroom anyway. It works really great on drone shots of snow: roundme.com/tour/…ew/313246/
Aaron, did you start doing drone panoramas? :)
Yup! I bought a Phantom 4 Pro a couple months ago. I’ve rented a few models over the past couple of years for projects, finally figured I should just buy my own and the camera on that model won me over. It’s fantastic for aerial 360s! galleries.aaronpriestphoto.com/Lands…bolBridge/
Thanks, Aaron, for your feeedback. Some really nice panorama images. I envy a little bit since I have not manage to buy my drone yet, I missed my chances to capture some nice shots of snow-covered landscapes here in Central Europe this winter. V.