Modern digital cameras are amazing. They are devices capable of nearly any photographic task thrown at them: high resolution images, eye autofocus, blazing fast frame rates, and much more. I use a Nikon Z9 for my daily work, and it does everything I need it to do without any issue or challenge. With all that being said, however, it’s not a device that brings me joy to use. It’s a tool, and it does its job well. But the reason I got into photography in the first place was not to use a tool, but because I love photography. Film has been making a comeback for the past several years, and I thought that it was something I’d like to try.
I asked a lot of my photographer friends about the whole film vs digital debate (which for many years felt like a closed debate, but as I mentioned, film has been growing again). Those who were all-in on digital said things like “digital has surpassed film in image quality,” “digital is so much easier and less risky,” and “digital is cheaper when you factor in the ongoing costs.” Those who are film fanatics said things like “film has a look that digital can’t replicate,” “large format has a quality that most digital cameras still can’t compete with,” and “very few digital cameras allow you to use movements like large format cameras.”
I think that all of the statements above have some truth to them, but honestly, none of them are a major consideration for me. There was, however, one other thing I heard often from my film-shooting friends that resonated with me far more: “I love the process of shooting with film.”
Last year I was talking to Spencer about this, and I asked him if I could borrow one of his 4×5 large format cameras. He graciously agreed and gave me a tutorial for how to use it. I got really into photography in the digital era, so although I had used a film camera before, my experience with them was extremely limited.
One quick note for those less familiar with film. When I refer to large format film, I am talking about sheets of film instead of rolls of film like you typically see in a 35mm or medium format (120) camera. Sheet film comes in different sizes, but 4×5 is the smallest and most common of the sizes (with the other common ones being 5×7 and 8×10, though you should ask Spencer about his 12×20 camera!) When I say 4×5, that means the sheet of film itself is 4×5 inches in size, significantly larger than any digital sensor made for consumer purposes.
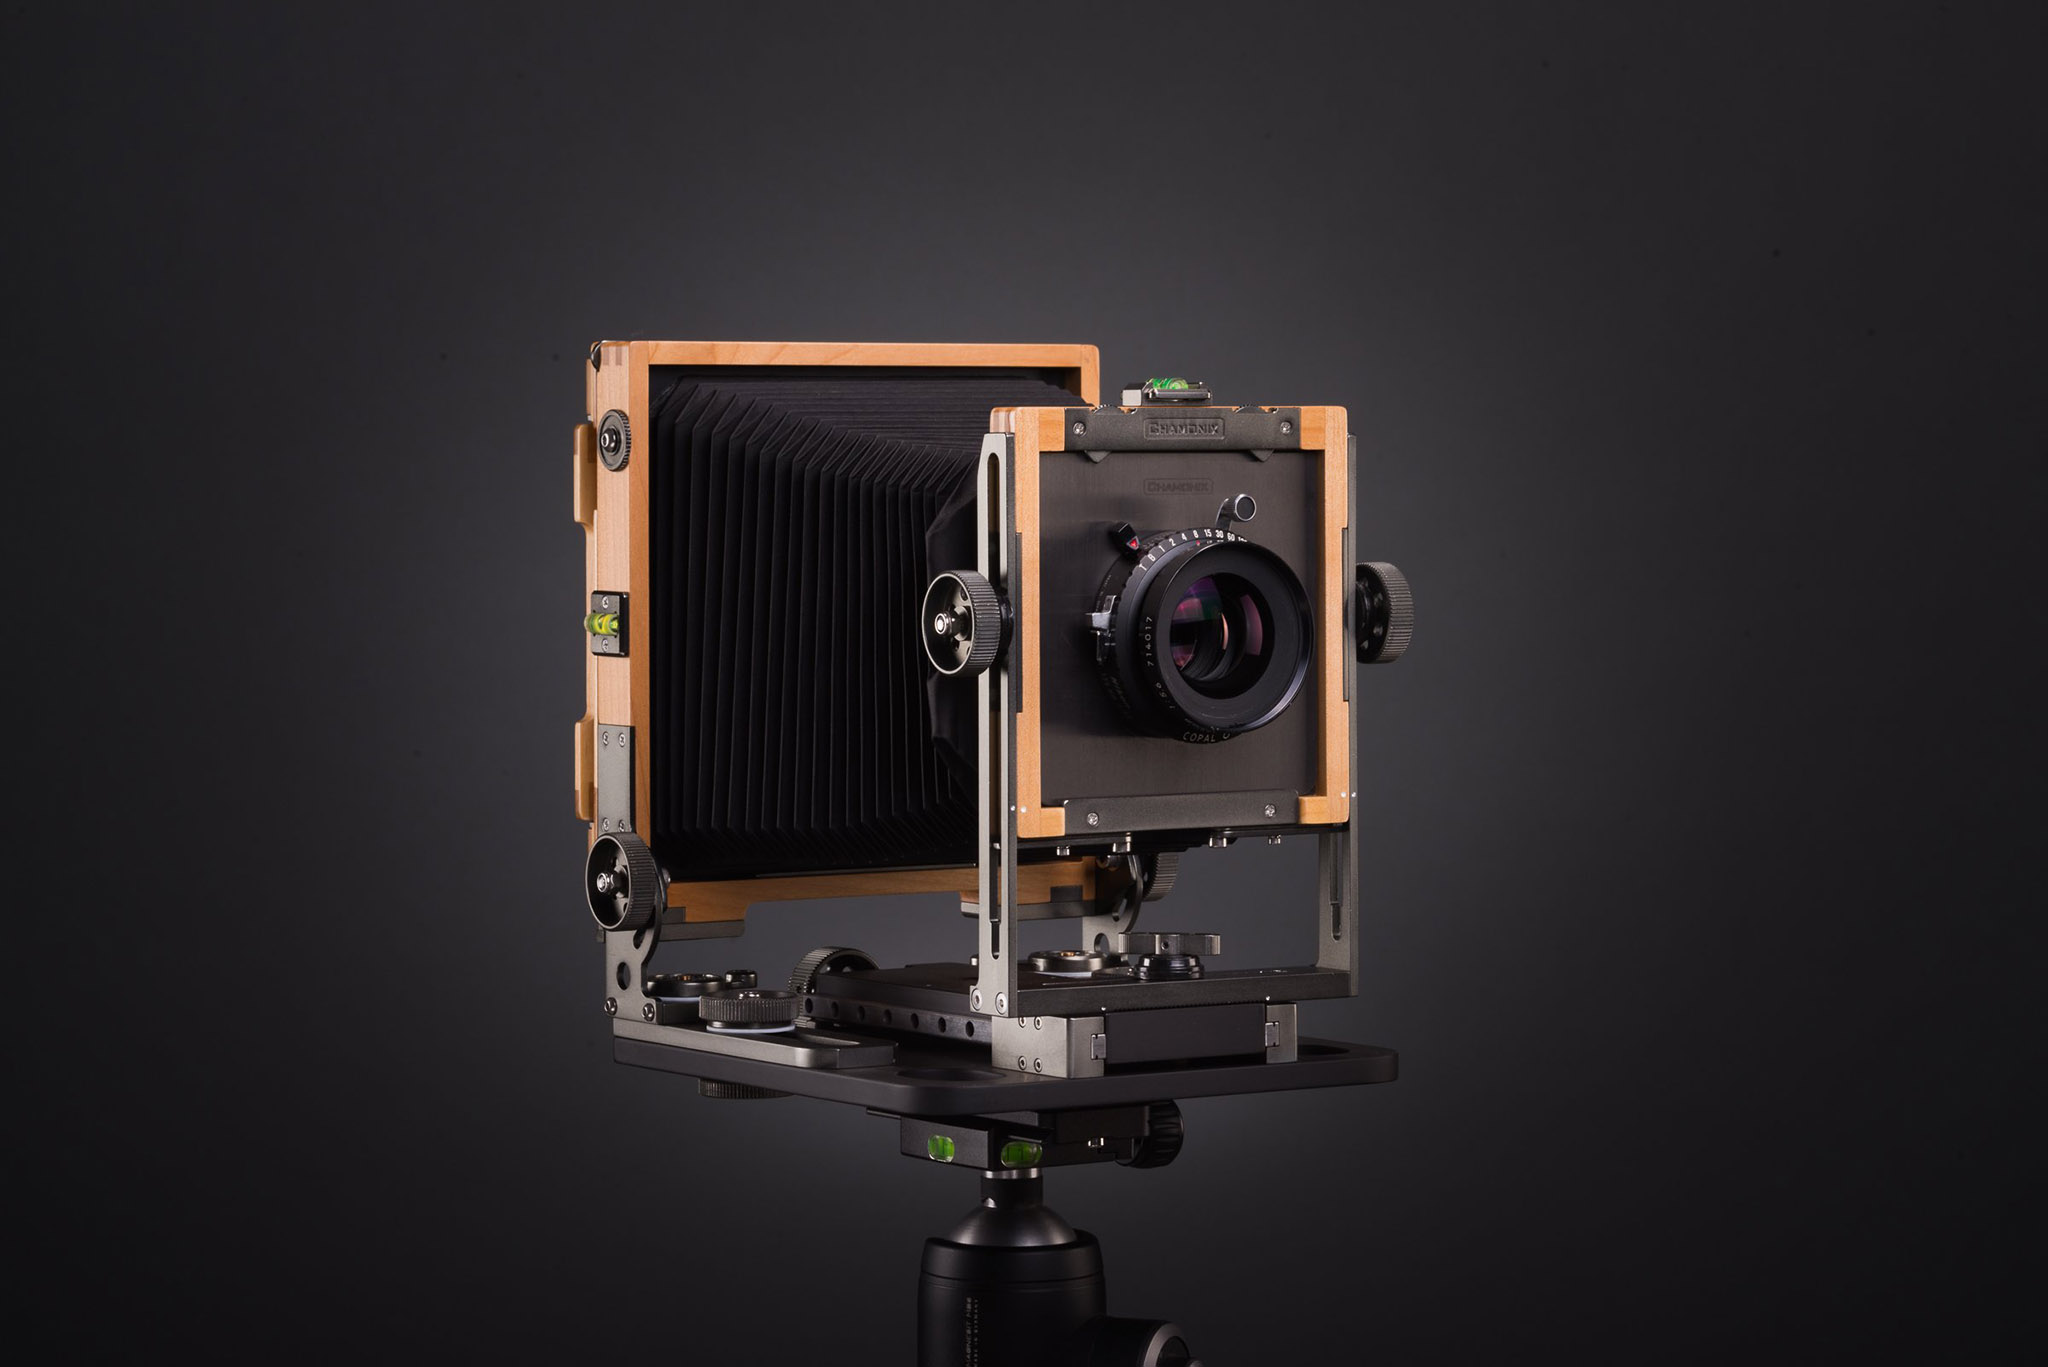
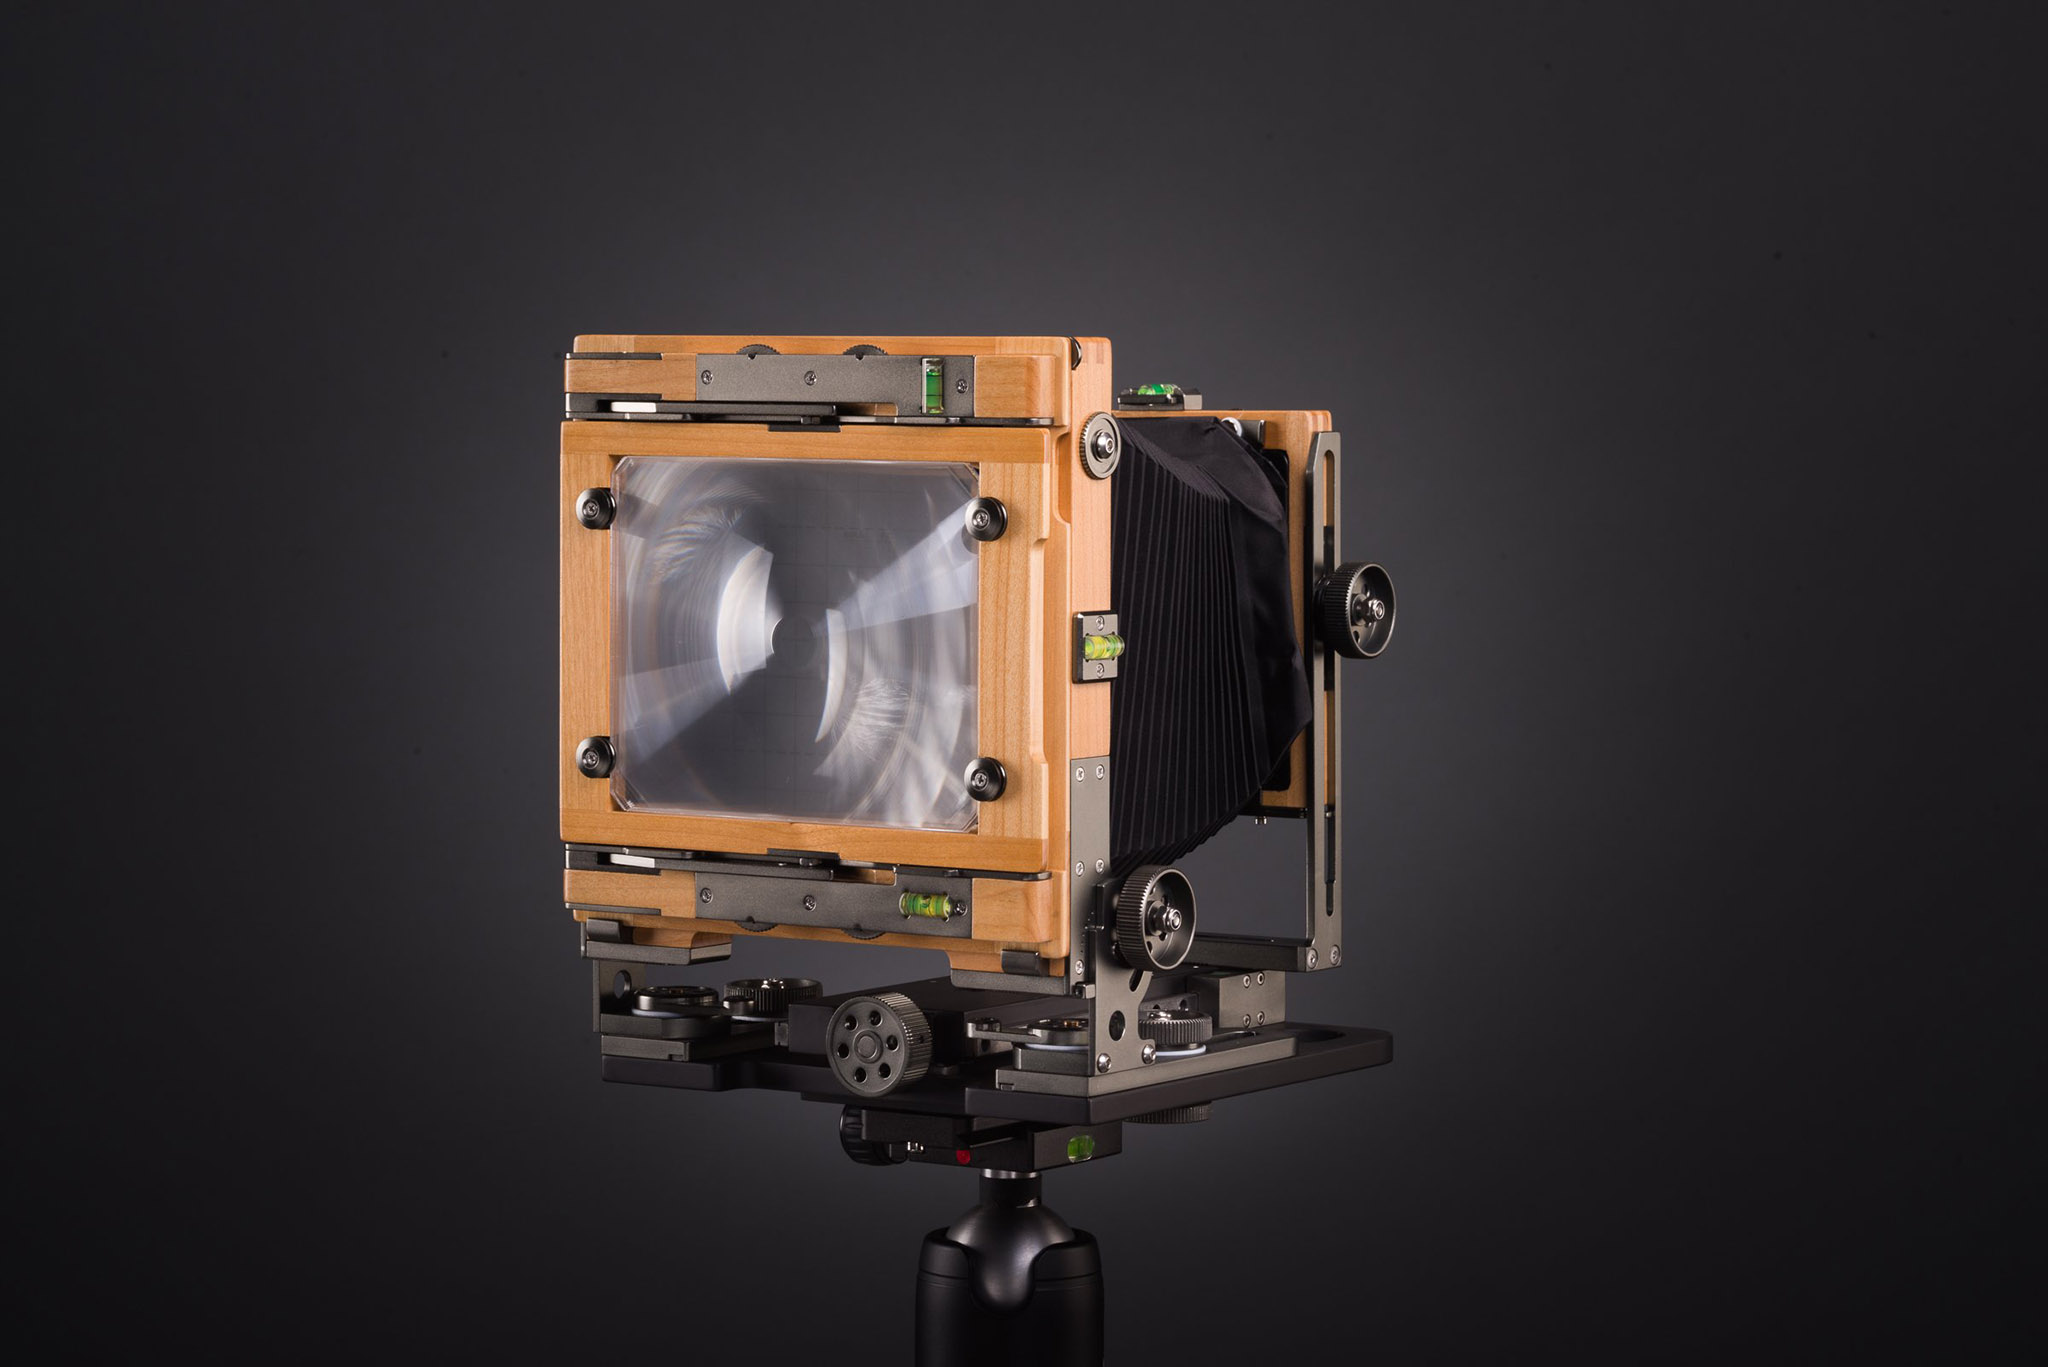
Table of Contents
The Things I Needed
When you first buy a digital camera, you find out that there are other things you need to buy right away (or are extremely helpful). Getting into film, and particularly large format, there are also things you need:
- Film: I wanted to get a variety of the three major types – black and white, color negative, and color positive/slide film
- Film Holders: This is a necessity as the film cannot be exposed to the light outside of the camera at all)
- Lenses: Lenses for LF are limited in focal range, especially on the telephoto end. I ended up selecting three lenses: 90mm, 150mm, and 250mm, which have full frame equivalents of approximately 24mm, 40mm, and 63mm.
- A sturdy tripod: This is not always a needed item when shooting digital, but is absolutely essential with LF film. In addition to a sturdy tripod, a good tripod head is important. I personally prefer a geared head for this type of shooting because it allows for small adjustments along all three axes individually.
- A light meter: This can be done with a digital camera, a smartphone app, or a dedicated light meter.
- A loupe: This one is not strictly required when starting, but good luck getting things perfectly in focus without one!

The Process – Before, During and After the Shot
Below, I’ll go through some of the various steps necessary for large format photography at each stage in the process.

1. Before Taking the Photo
The process of making a large format image begins long before you take the photo. In fact, it begins in pitch darkness.
Loading film in 35mm or medium format cameras is pretty straightforward and can be done in the daylight, but for large format, it is an altogether different experience and must be done in the dark. I used an old piece of 4×5 film to help me practice loading film into the holders – first in the light, second with my eyes closed, and finally in the dark. I think this saved me a lot of headache.
It’s also important to load the film so that the emulsion side is facing out. That sounds obvious, but it is less so in the dark. There are small notches in one corner of the film that allows you to tell which side has the emulsion on it. (These notches also identify the type of film in case you get them mixed up before developing.)

2. While Taking the Photo
One of the many unique things about large format photography is that the camera itself is actually incredibly simple. It’s merely a light-tight box that allows you to mount a lens on the front and a piece of film to the back. Now, when I say it is simple, I don’t mean it is easy. Far from it, in fact. But it is straightforward in a way that modern cameras are not.
Most large format cameras also allow various movements, and this can be one of the biggest benefits of the format. I am not going to go into the movements in this article, but will say that when used correctly, they can allow you to “correct” perspectives and shift the focal plane in ways that are very useful.
Something we often take for granted in the digital era of photography is being able to meter properly. Most modern cameras do a good job of metering, and many allow you to see exposure adjustments in real time. Of course, working with large format is a different situation, and an external light meter is needed for most situations.
There are a few different metering options available. Most phones have apps that can be downloaded to serve as a light meter (some are better than others), you can use a digital camera for the metering, or you can get a dedicated light meter. A dedicated meter – especially a spot meter – is probably the most effective way. In complex scenes with a variety of lighting, it is useful to carefully measure different parts of the scene and ensure that your film will be able to capture all the detail.
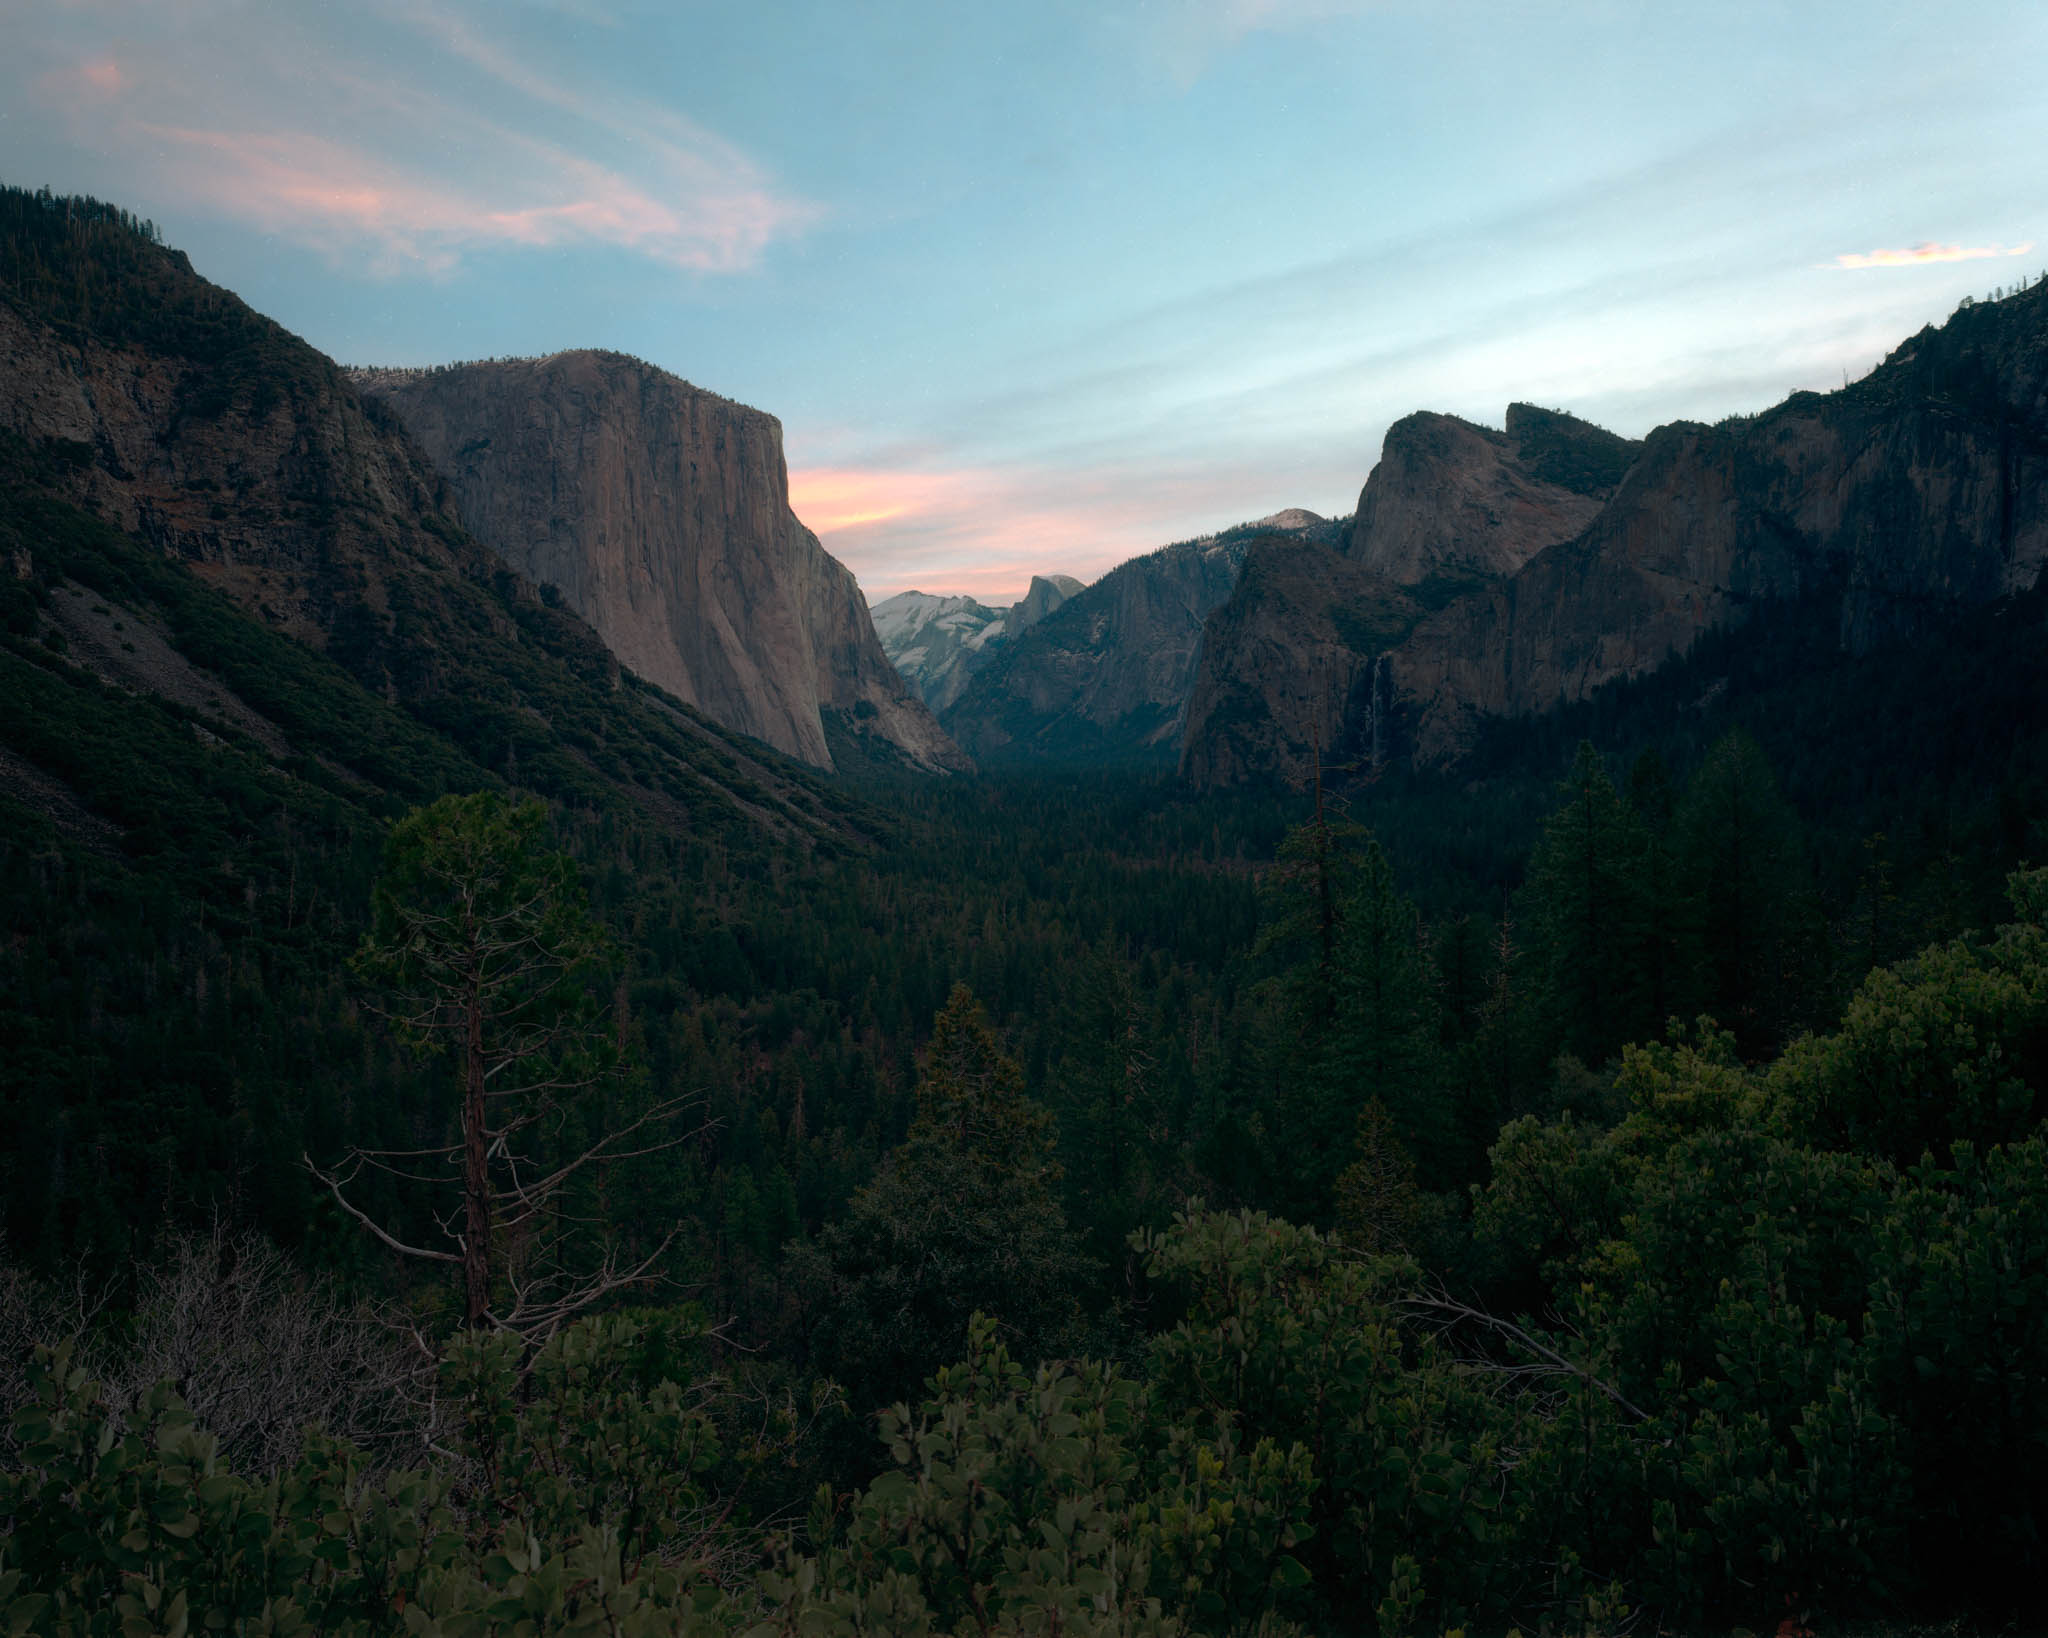
Once you have everything set up, looking at the back of the camera (the ground glass) is a unique viewing experience. Since there is no mirror in a large format camera, the image is upside down and backwards, but it is a beautiful thing to see. Once you have everything set up and focused, you load your film holder into the back of the camera (at which point you can no longer see the preview on the ground glass, so it’s important to have everything 100% how you want it before this), close the shutter, pull out the dark slide, cock the shutter, and take the image.
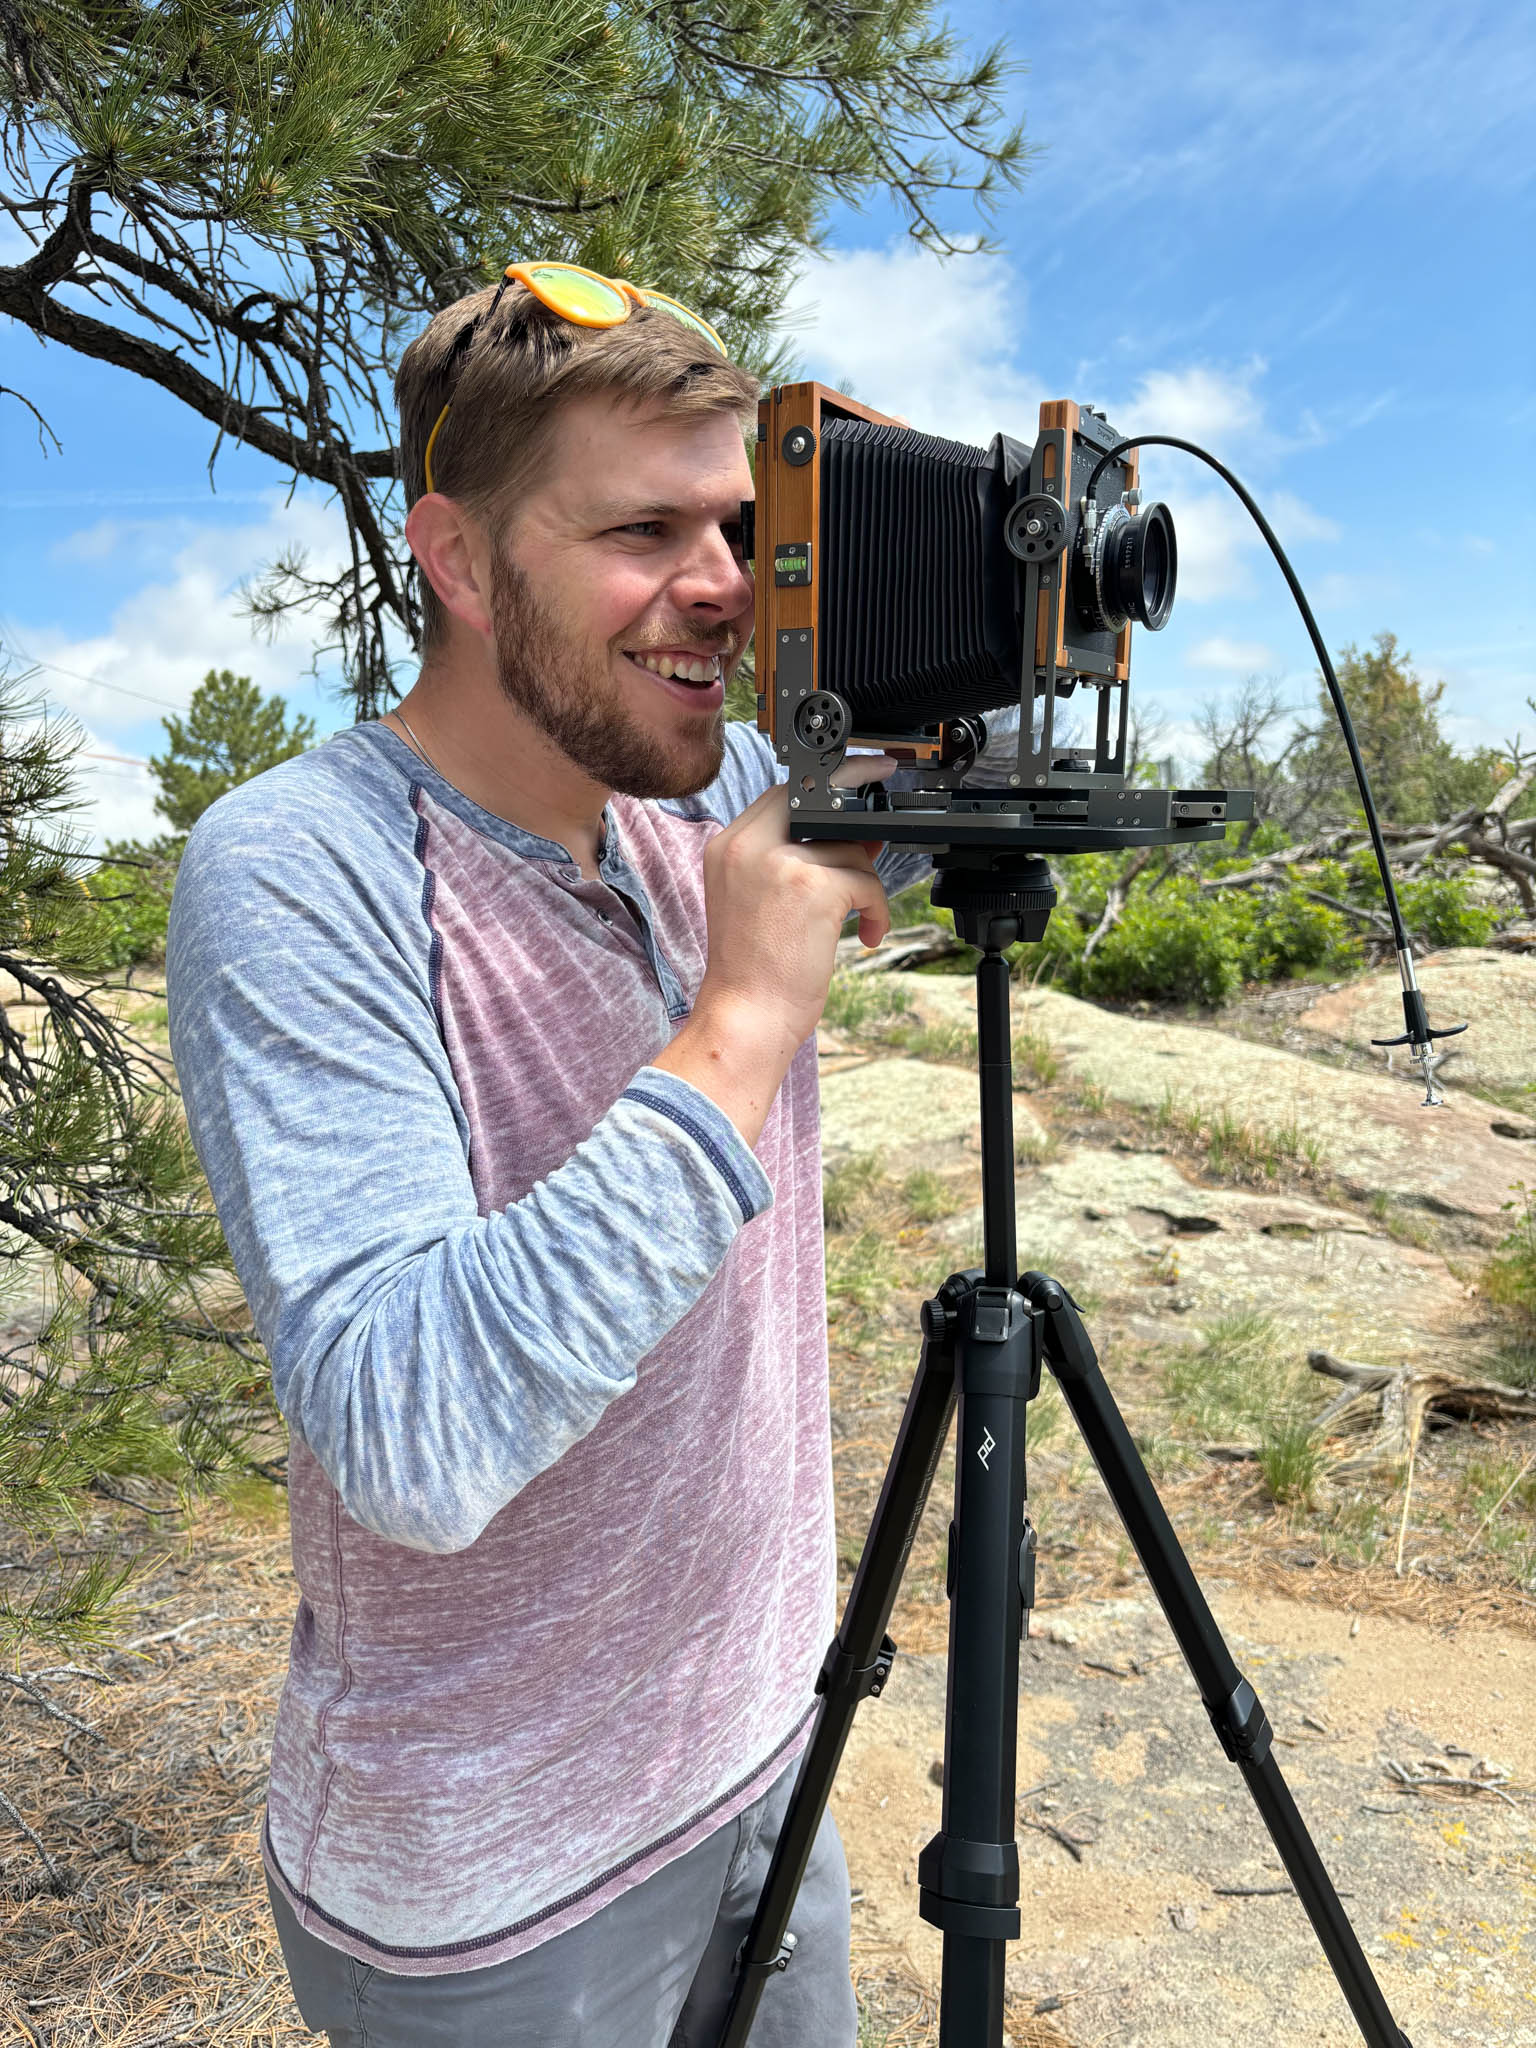
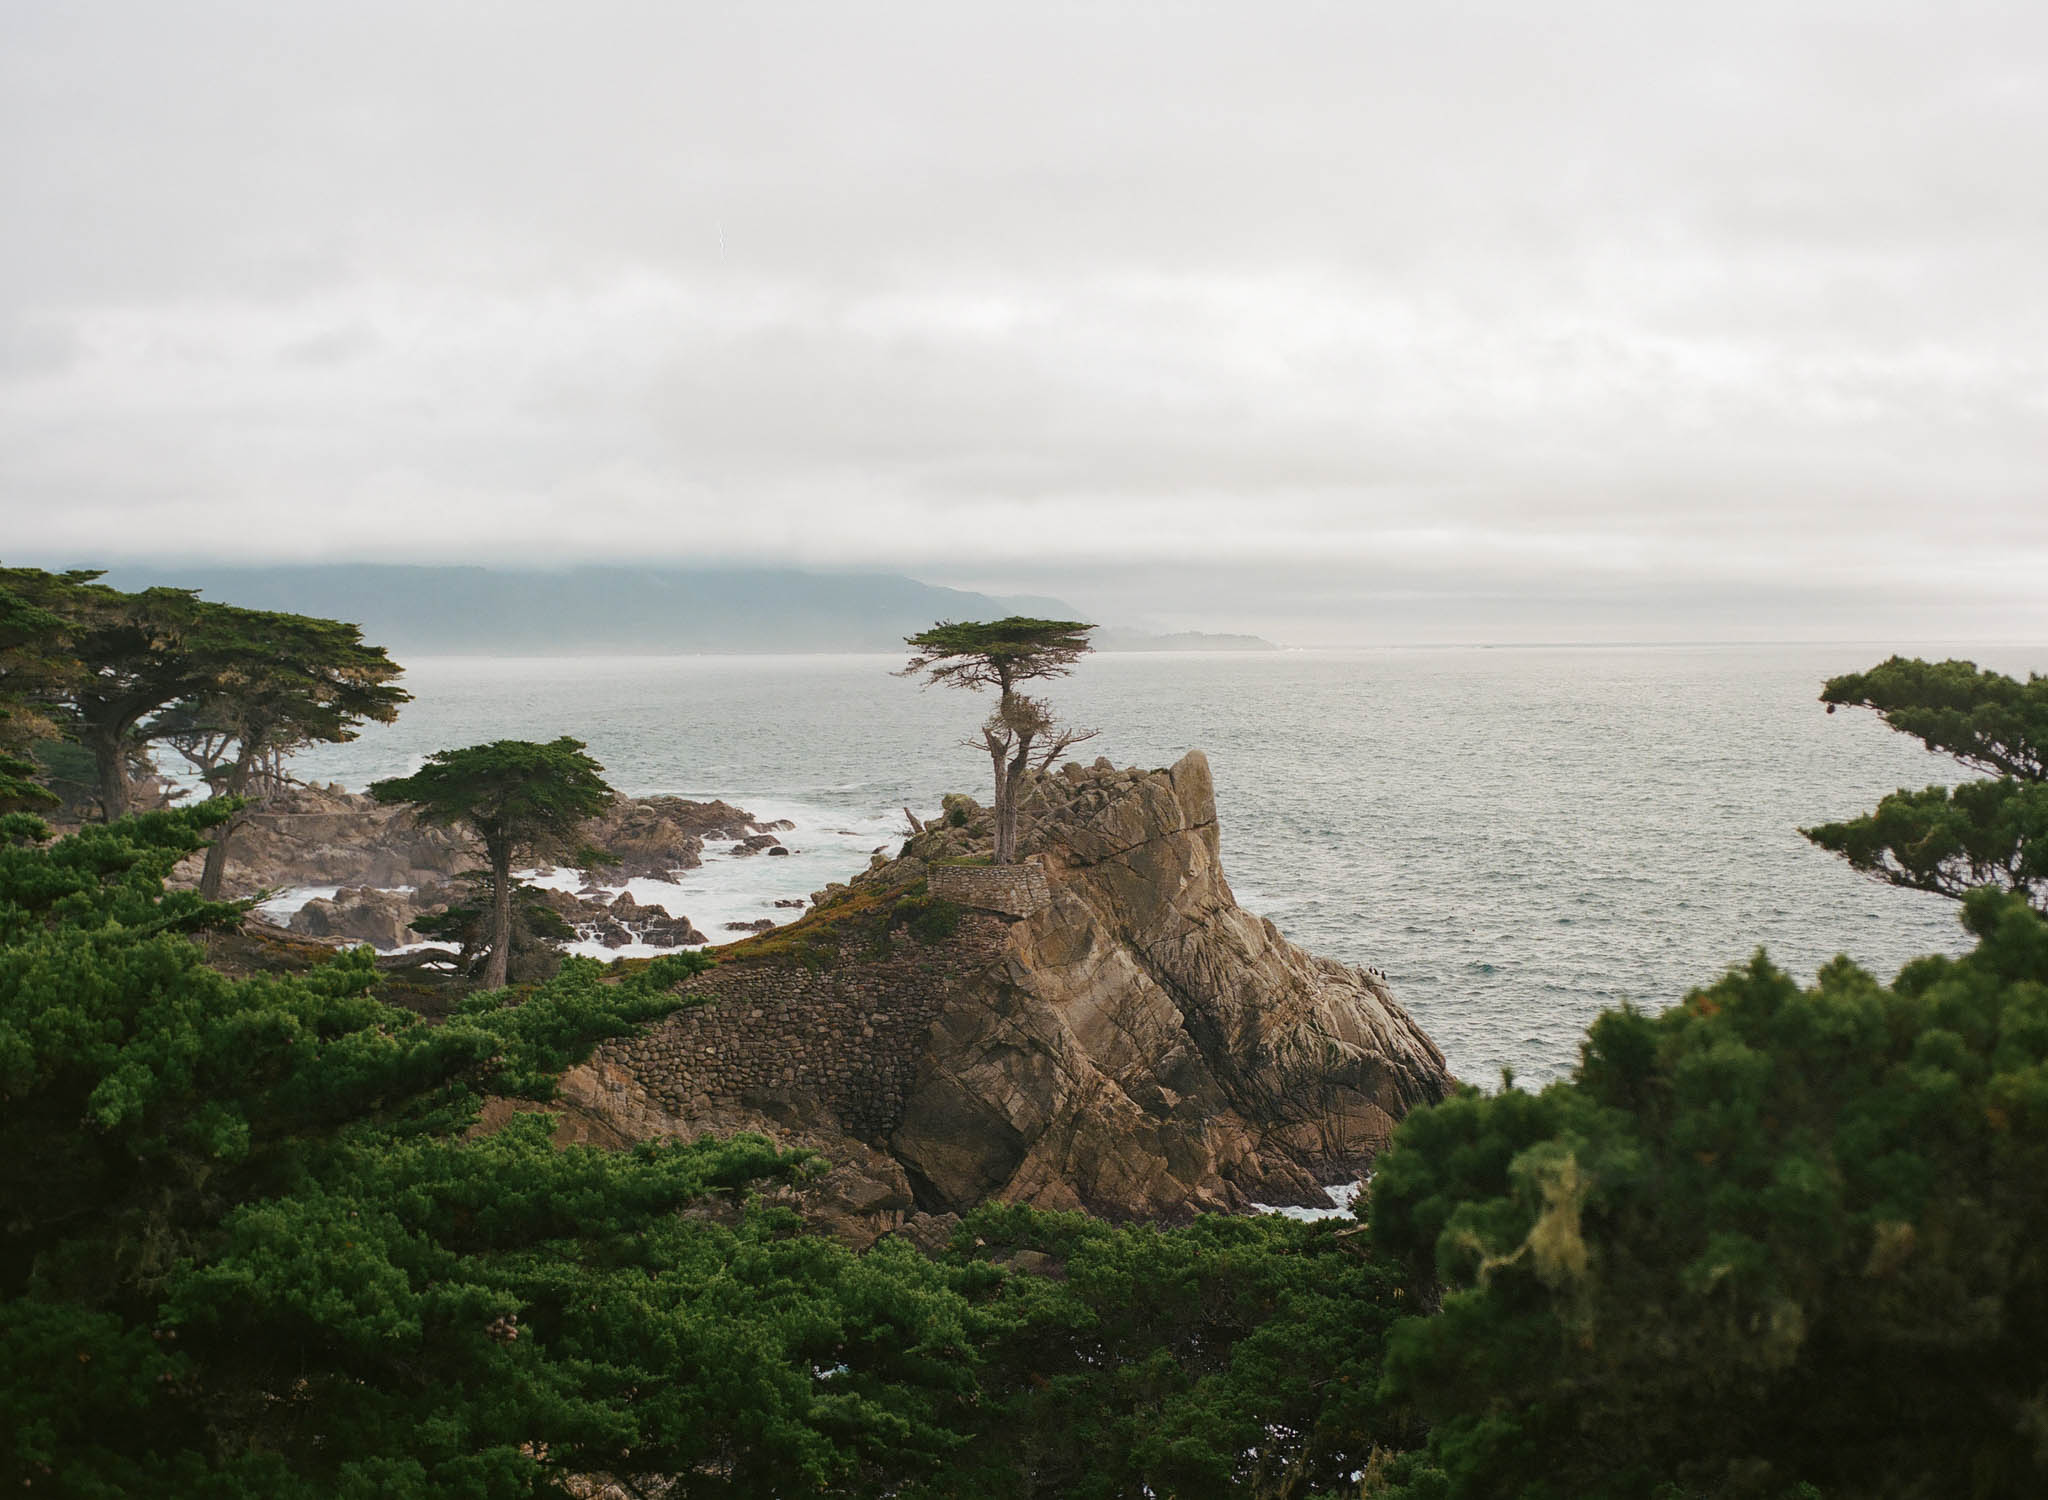
Working with a camera like this in the field is a slow process. What might take a few seconds to capture with a modern digital camera can take several minutes or even longer with the large format. Therefore, being able to anticipate things like light, people, etc., is important. This type of process is not suited for all subjects or types of photography. But being outside and working this way makes me enjoy my personal photography in a way that I candidly haven’t in a long while. It also encourages you to look around with your eyes, rather than with your eyes up to a viewfinder.
3. After Taking the Photo
Once the film has been exposed, it’s time for developing! My first few sheets were developed by my local lab, but as I got more comfortable, I decided to try developing my own black and white. Now I develop my own black and white and color negative films, but still use the local lab for slide film, though I’d like to start doing that myself as well.
Next up is to scan the negatives. Although I’m enjoying doing as much of this process as I can in an analog fashion, I still want to scan the negatives in case they are ever damaged – it also allows me to share them online. I am using an Epson V800 scanner, which works great. Once scanned, the negatives can be “inverted” to positive and then edited in a similar way as a digital image.
Developing and scanning my own film makes the process much, much less expensive. Of course, costs vary considerably the films you choose to use – and where in the world you live – but in my case, developing and scanning myself cuts the total cost of shooting film by more than half. Even more important than that for me, however, is that I like the process. I’ve found that spending the time to develop and scan it myself has furthered that connection to my photography that I’ve been looking for.
Takeaways
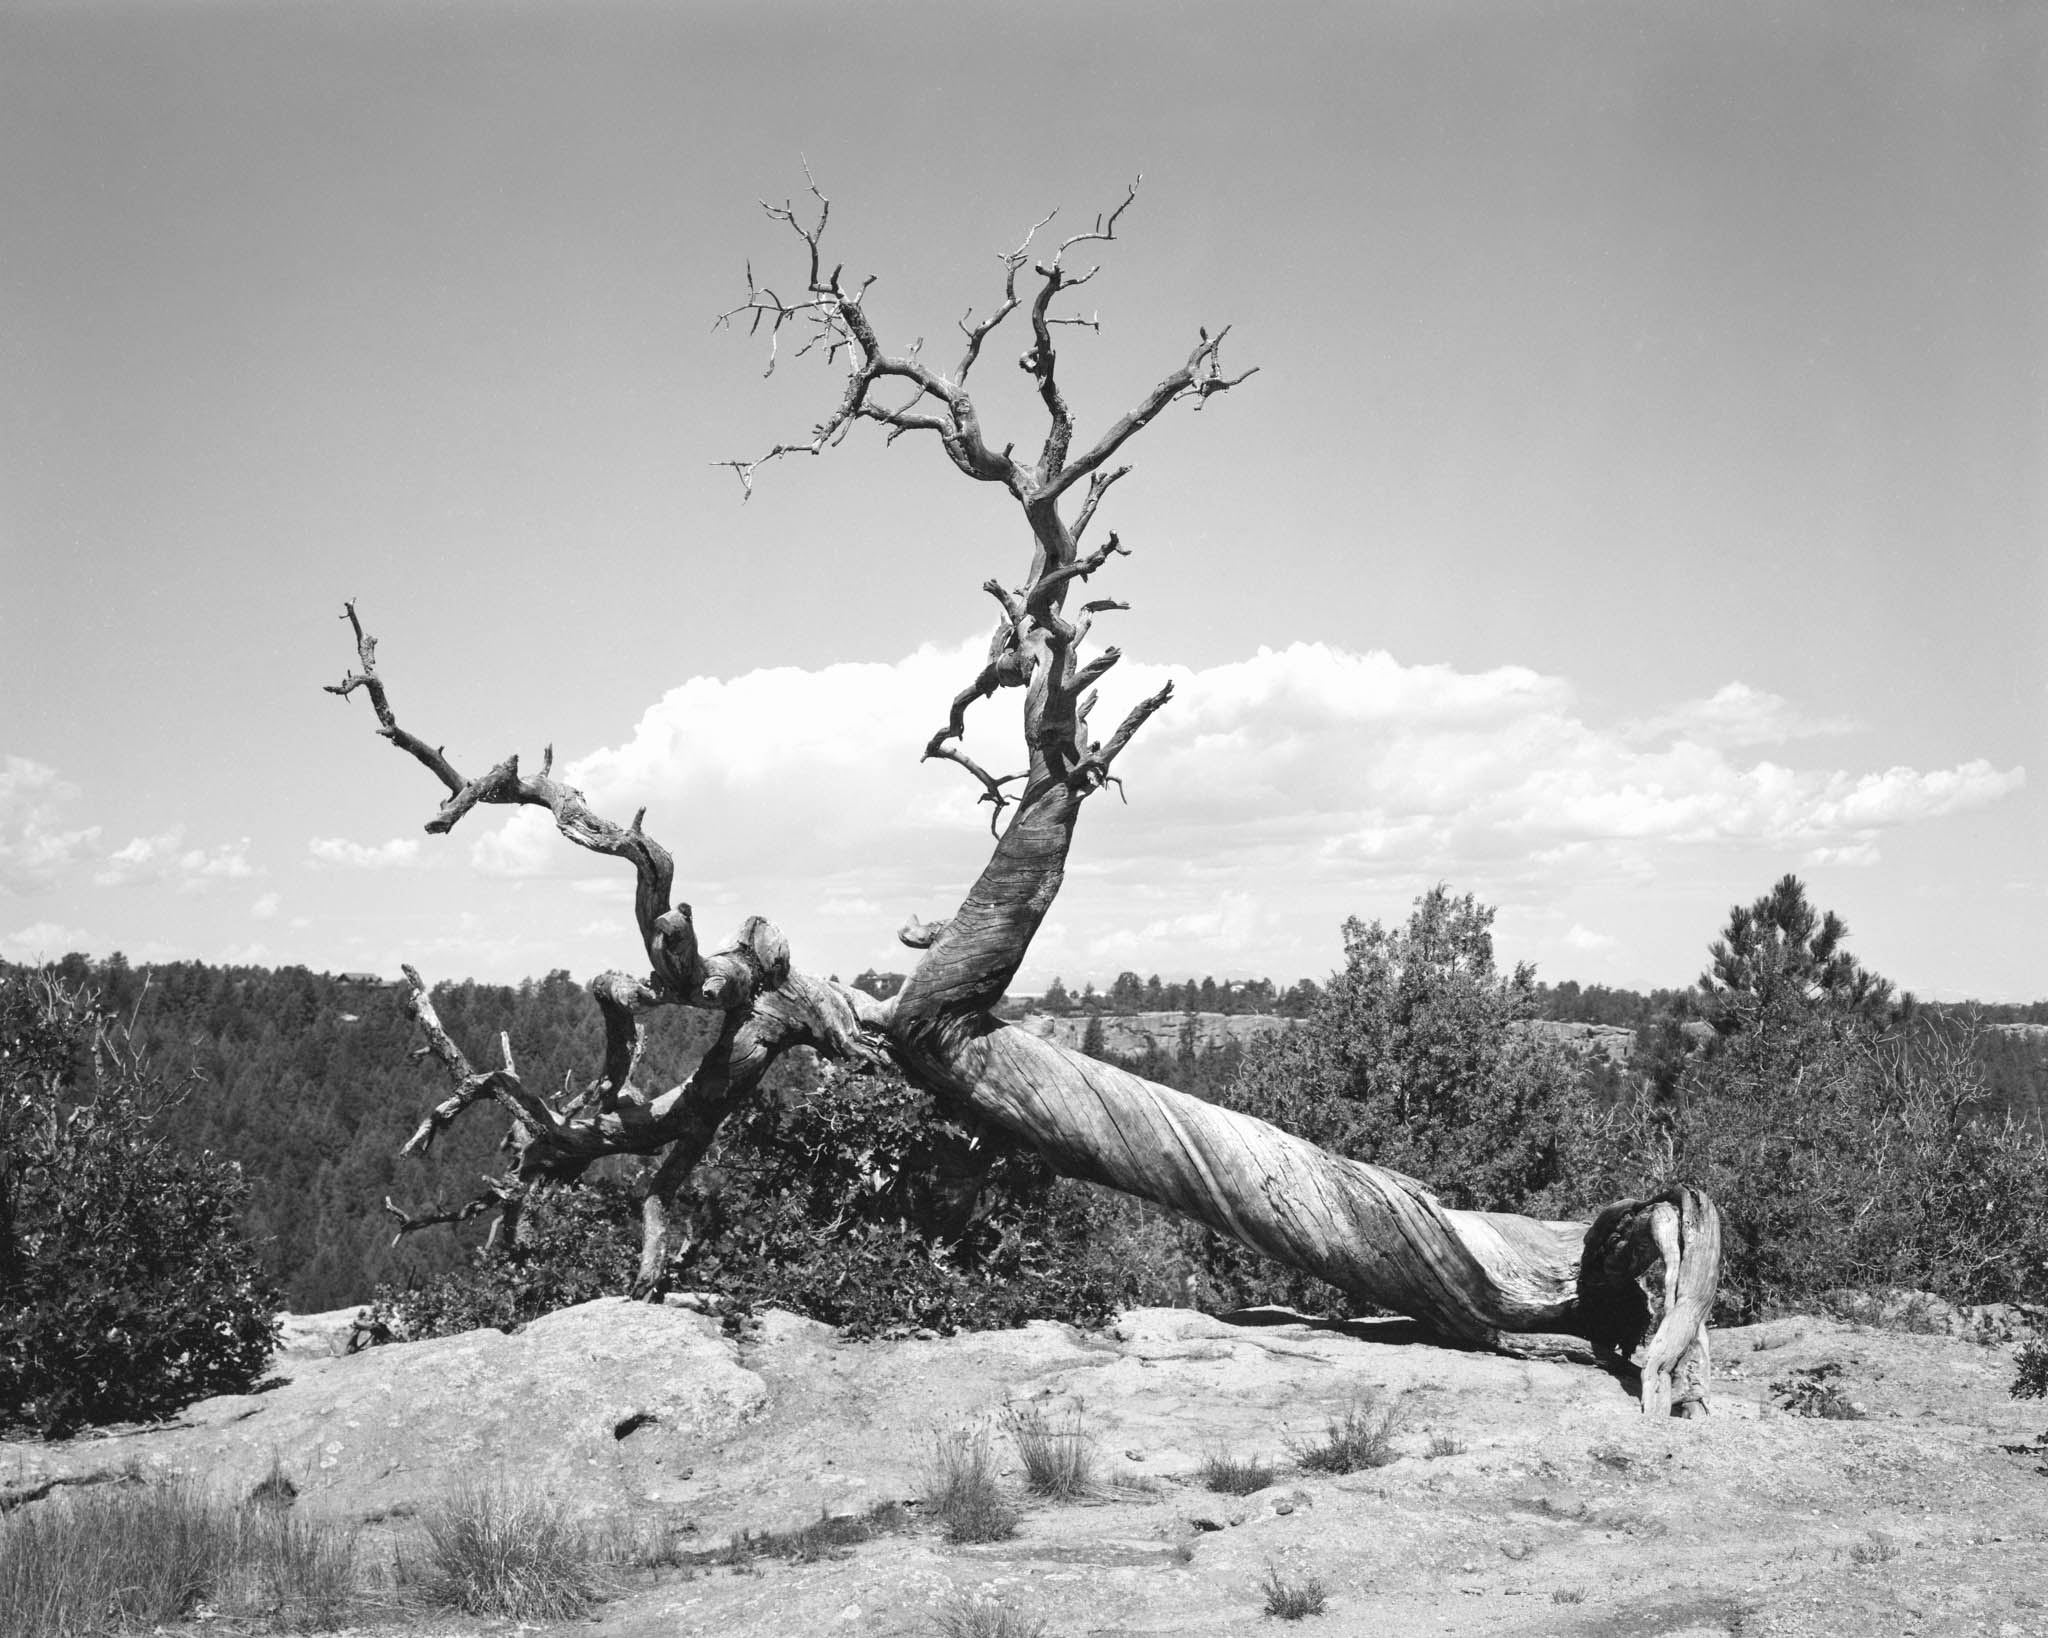
- Yes, film is expensive. However, I found myself slowing down so much that I was taking very few images on the LF camera, so it wasn’t nearly as expensive as I had feared (especially if you like shooting in black and white like I do; B&W film is much less expensive than color).
- I really find myself enjoying the entire photographic process of large format, from loading the film holders, through the shooting process and into the darkroom to develop.
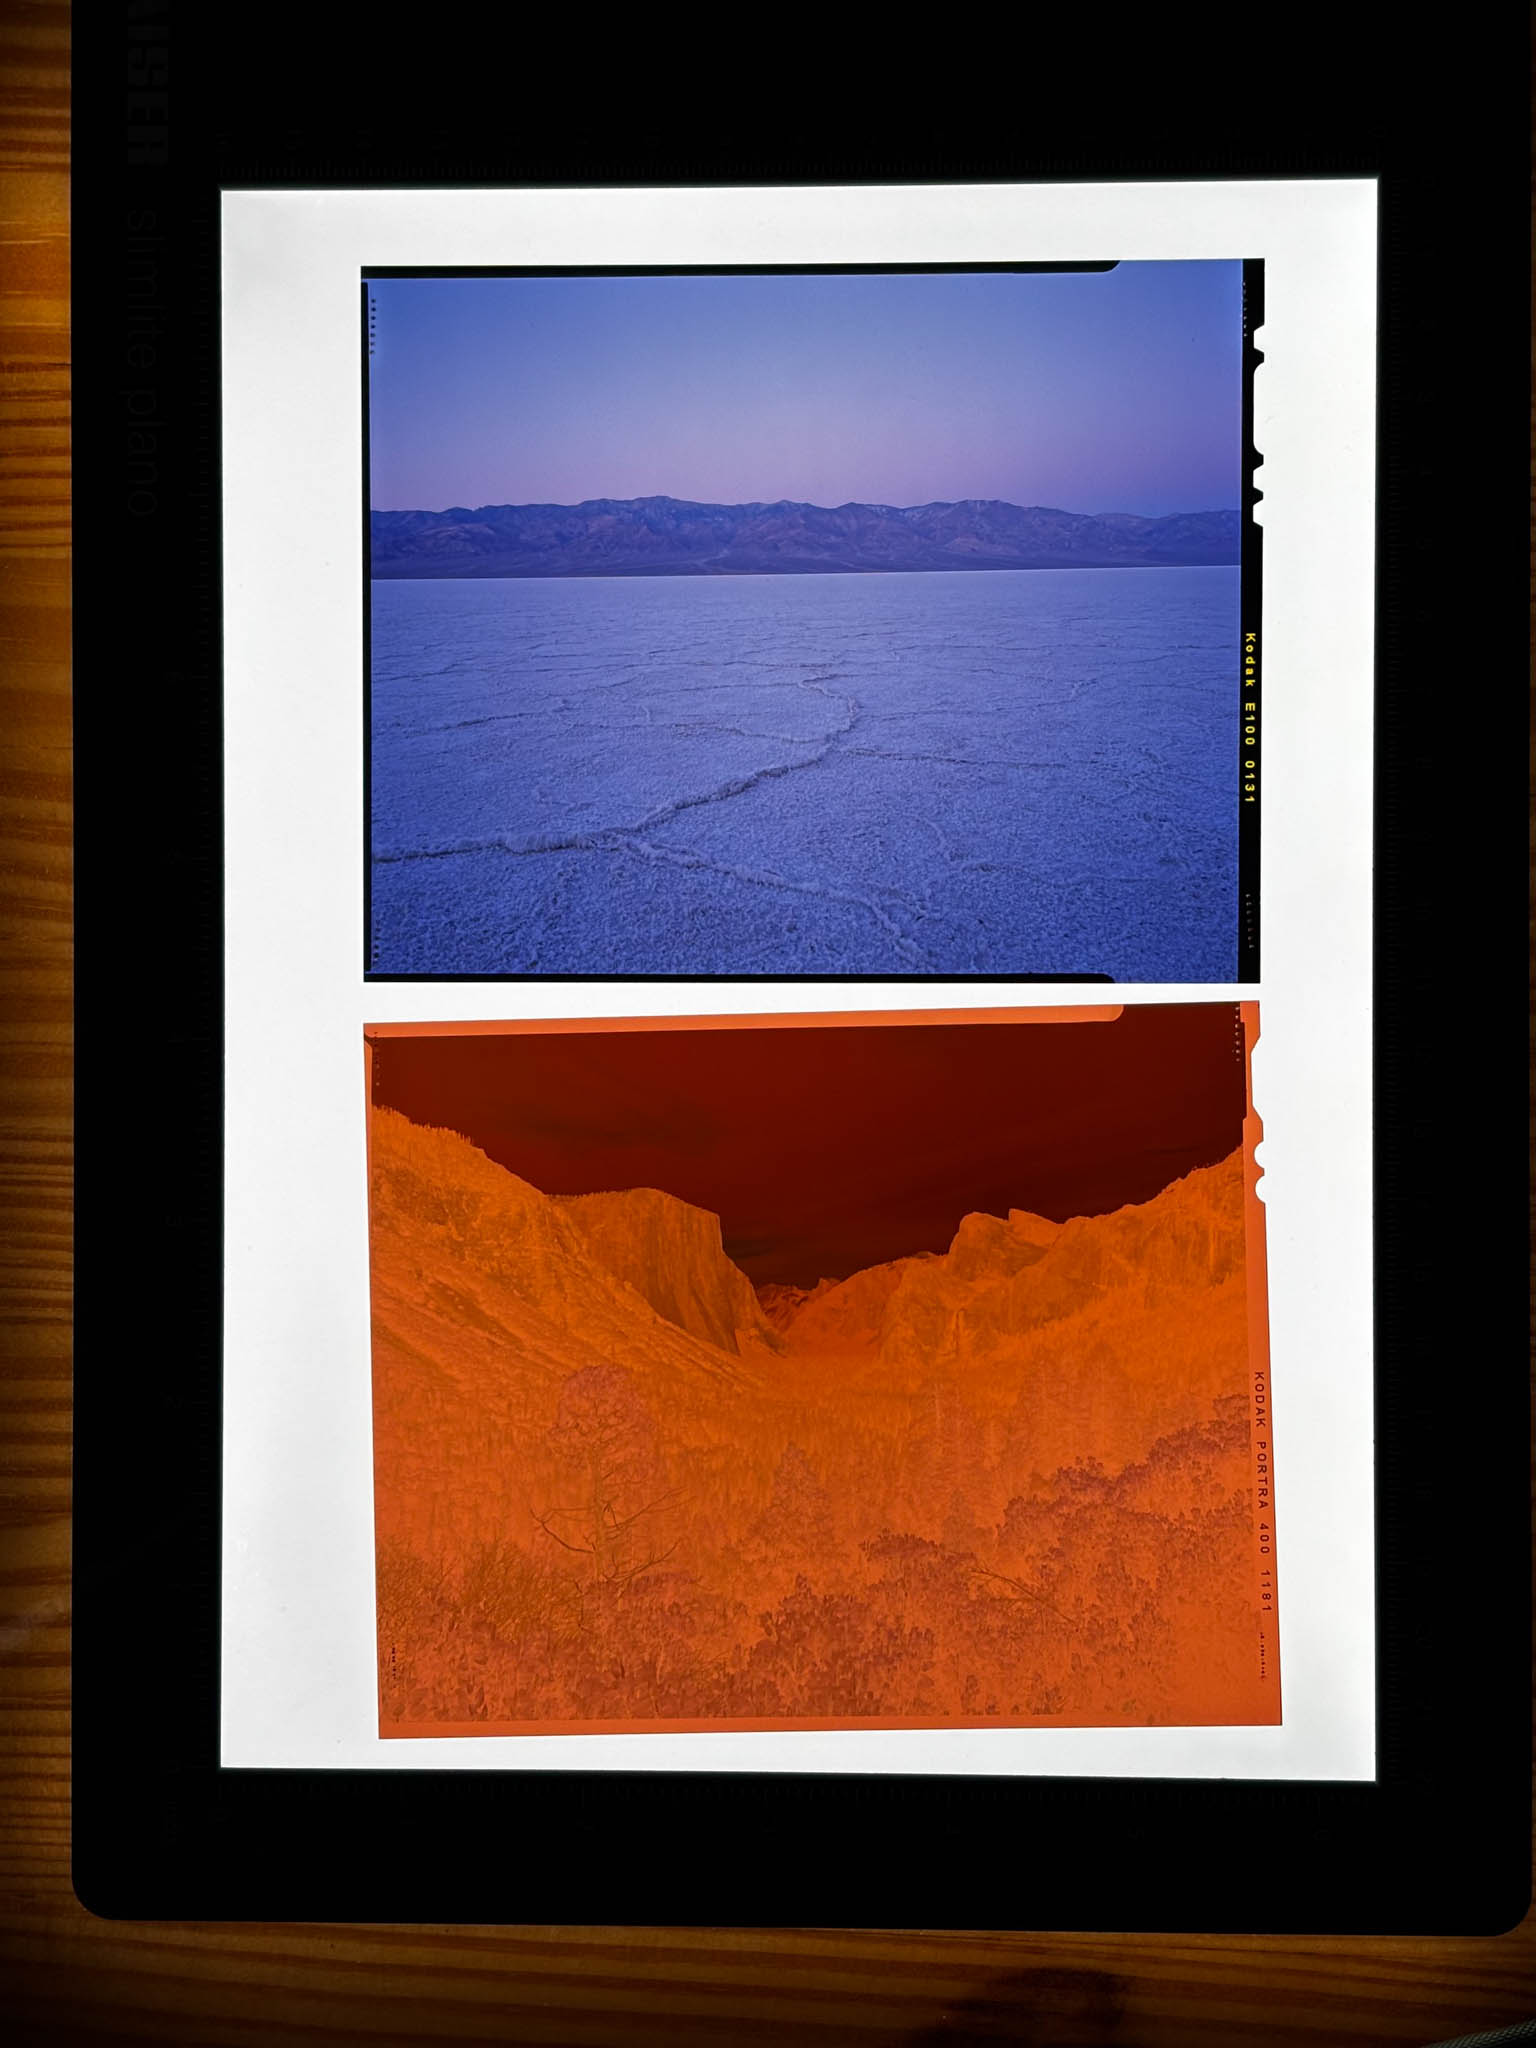
- I experimented with several film types, but three favorites quickly emerged. Ilford HP5+ for black and white, Kodak Portra 400 for color negative, and Kodak E100 for slide film. I would put Fujifilm Velvia 50 up there for slide film, but unfortunately that was discontinued in 4×5 format, so I will treasure my final shots of it.
- Seeing film, and slide film in particular, on a light table is incredibly satisfying – see image below.
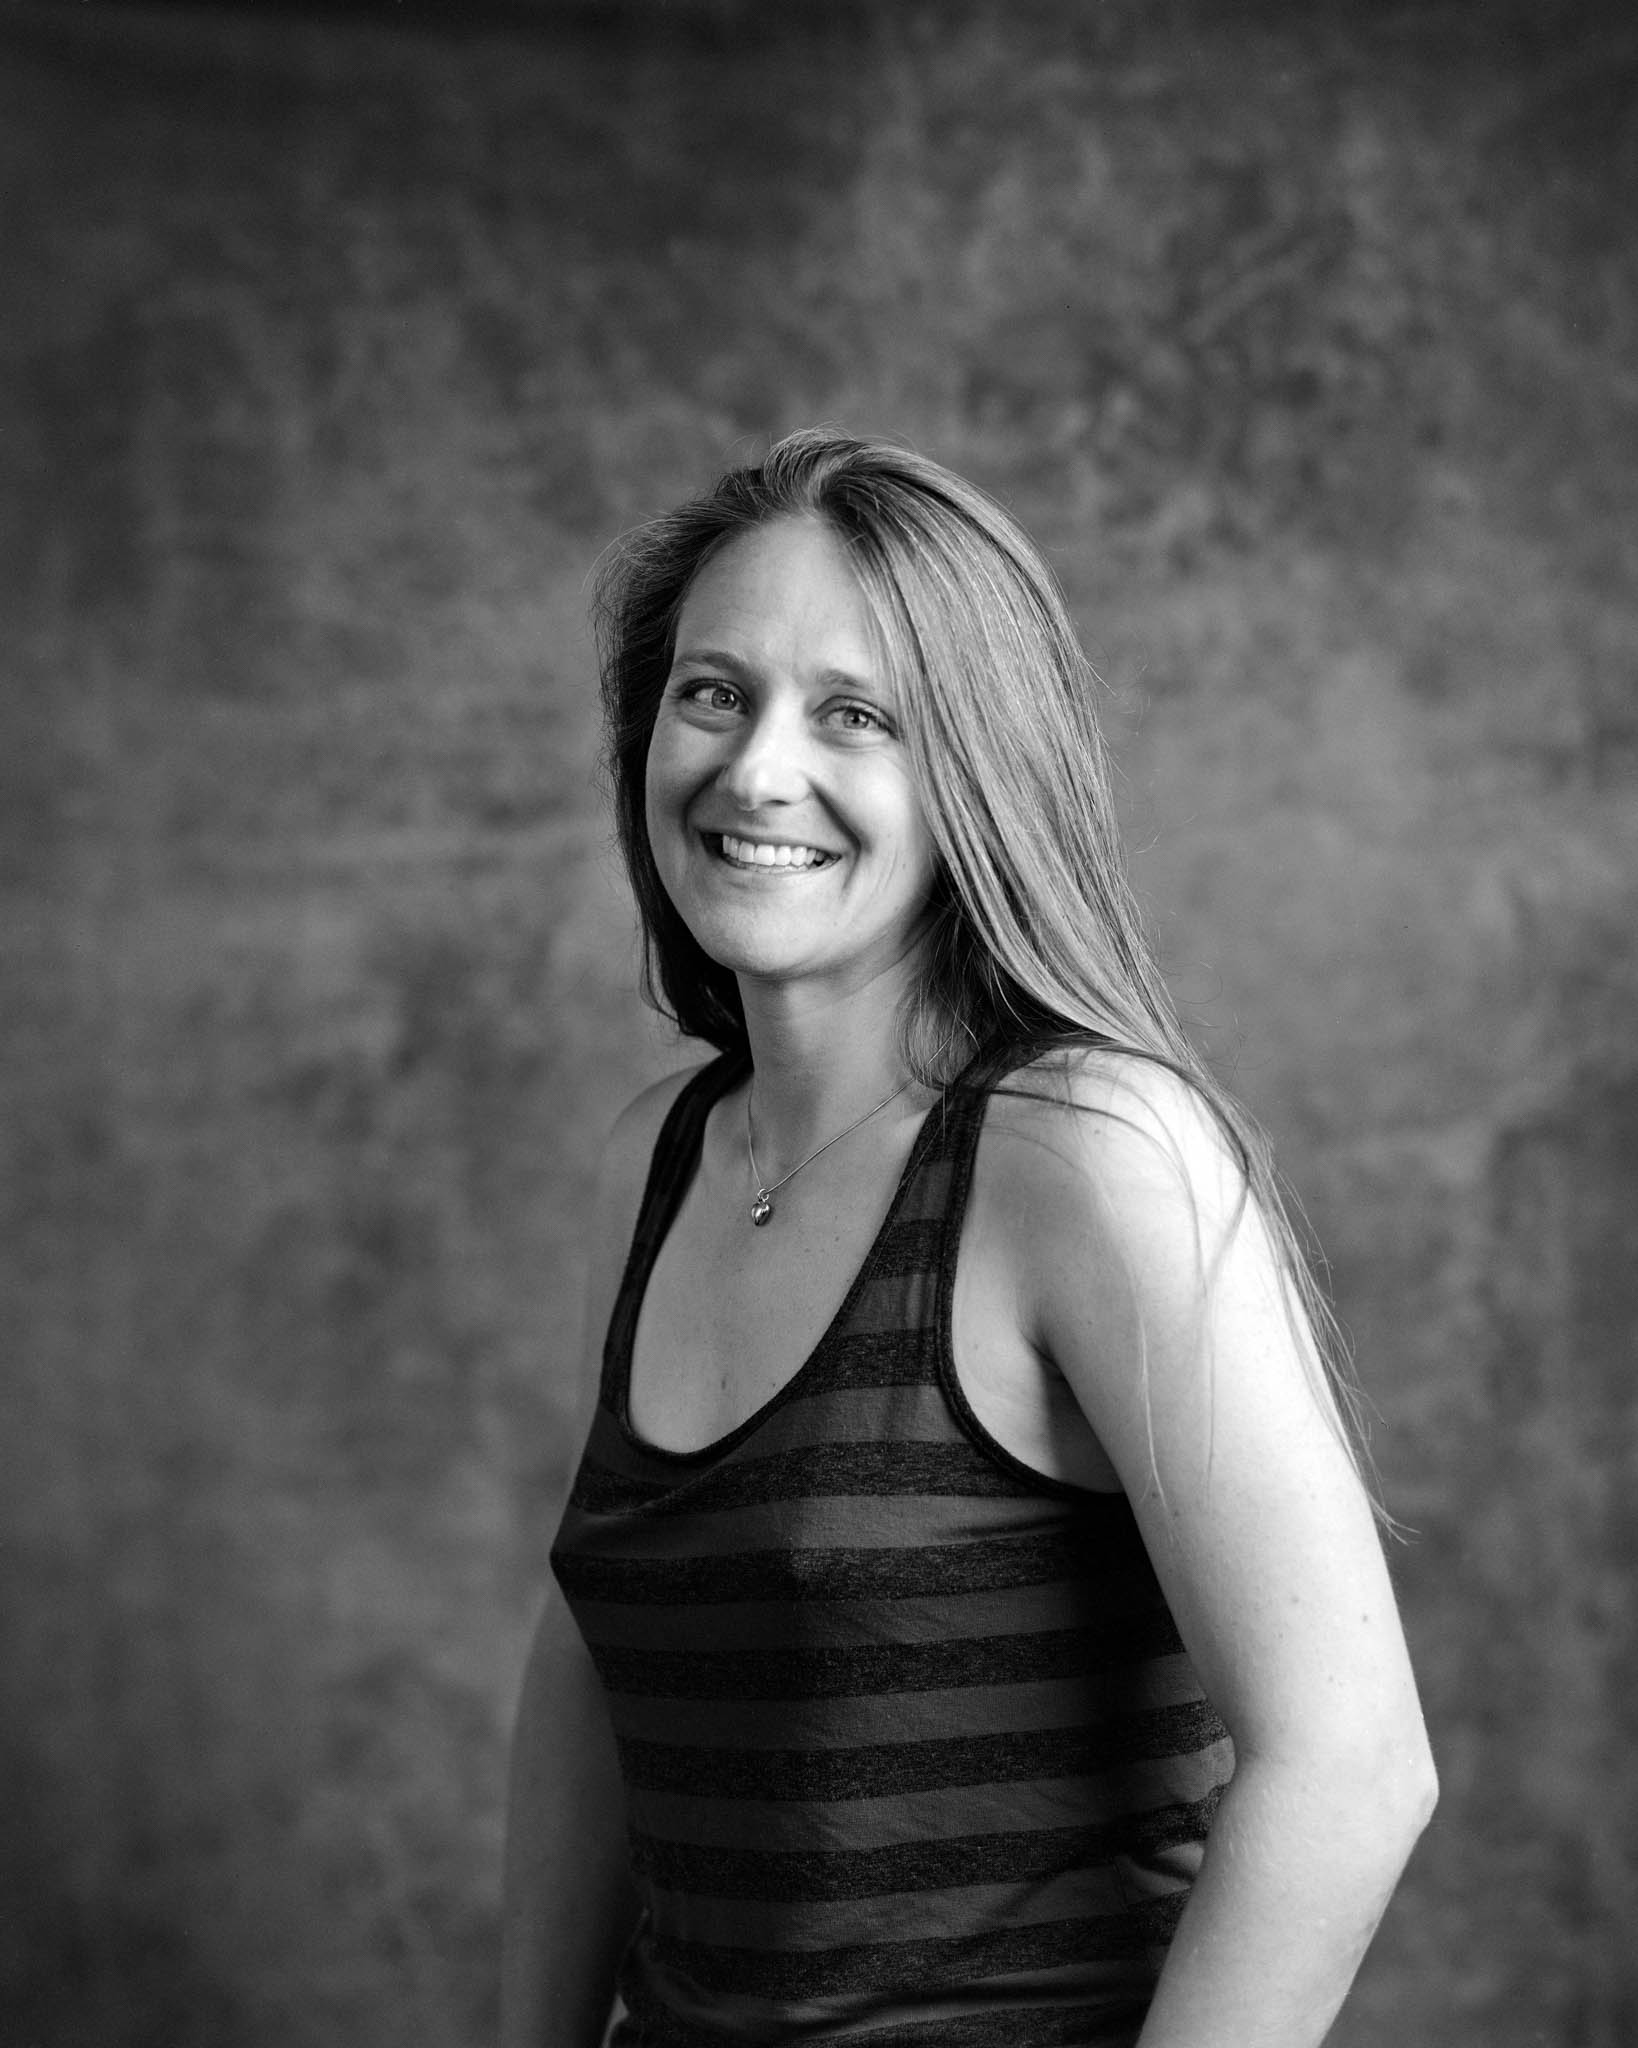
- For portraits, a different technique is needed from my usual one. Depth of field can be extremely shallow on large format, and given the amount of time between focusing and actually taking the picture, it can be difficult to know if they are still in focus, as people naturally move a small amount.
- Shutter speeds tend to be much longer with LF than with other types of photography, due to the narrower apertures that are necessary. This is both limiting and can open the door to different creative options.
- The analog nature of the process really helps me feel more connected and engaged with it.
Many of the biggest challenges of using a format like this are also some of its biggest benefits, so everyone will view these differently, but here’s the Pros and Cons list for large format film in my case:
Pros:
- A process and connection to image-making that has rekindled my love of photography
- The ability to control every aspect of taking, developing, and printing a photo in a way that feels more immersive than digital
- Incredible resolution (when you do everything correctly)
- Though unforgiving of mistakes, this forces you to become more of a master of your craft
Cons:
- Expensive (though this is largely mitigated by developing and scanning my own film)
- Large and heavy (though my full frame Nikon Z setup is not any lighter)
- Impractical to use on most moving subjects
- So much dust
- Mistakes can be both frustrating and expensive
What’s Next?
I am working on building out a darkroom setup that will allow me to do darkroom printing, with the end goal of doing complete, start to finish prints made in an analog process. I’ll still scan my film as both a backup and so that I can share it more easily in the future, but am looking forward to doing more hands-on print making.
I’ve also picked up a medium format film camera (a Mamiya 645), which has been fun to experiment with when I want/need to work a little faster, but still much slower and more deliberate than digital. I tried 35mm film as well, a Nikon FM2, which was a fantastic camera, but the process was a little too close to digital for me personally and the image quality is just not what I’m looking for. So for the foreseeable future, my kit will be a simple digital combo (Nikon Z8 with 24-120 f/4) plus either the medium or large format film camera, depending on space, weight, and subject matter considerations.
Summary
There are many reasons not to shoot film. Compared to digital, it is (usually) more expensive, it is more difficult, and it is a less reliable way to capture a good image. Things can go wrong at any step in the process that can ruin the image. And yet, when it all comes together correctly… I haven’t had this much fun with photography in a long time.
At the end of the day, though, most of these pros and cons are not really that important to me. The reason I began this experiment was to see if I loved the process of it, with all of its quirks. The answer is a definitive “yes,” and it has in many ways reignited my love of photography, and that’s why it will continue to be something I use moving forward for much of my personal work.
I hope that my journey into film photography has been interesting to hear about. If there are any parts to the process you would be interested in more in-depth articles about in the future, or any questions you have, please let me know! I am not the expert on all things film and large format, but I’m happy to share my learnings along the way.

For the portrait, her hair should have been cleaned off her shoulder. Also, it’s too bad that Adobe has created all of this AI that enables extensive changes to images. Even though these are film images, AI can still remove or create content that alters the image so whether it’s film or digital, either one can contain misleading edits. It’s a very sad state of affairs in the photography world.
I personally prefer the hair on the shoulder, but everyone can have a different opinion!
And yes, AI can alter film images as well. It is one of the reasons that I’m currently building out a darkroom to do analog prints. No AI there (although of course image manipulation has been around long before computers).
If the Z9 brings you no joy you should get rid of it.
Does photography give you joy?
If it does and the Z9 is your tool as you stated, then the Z9 does give you joy.
Just because a camera or a car or a computer is utterly reliable and does what it was designed to do doesn’t make it boring.
That’s fair – and I wouldn’t say that the Z9 gives me zero joy, but not as much as I’d like. Another aspect that I think is relevant is I use my Z9 for work, so it’s nice to have a camera that is for “me photography”. But I agree with you that something reliable and does what it should do doesn’t make it boring.