Whether you are using a DSLR or a mirrorless camera, the might be a special button on the back of it labeled “AEL” or “AE-L / AF-L” (in the case of Nikon) that can be quite useful in many situations. In this article, I will explain what the AE-L / AF-L button does, when it should be used, and how it can be combined with different autofocus modes. I will also demonstrate how I personally use this button on my cameras when I set them up.
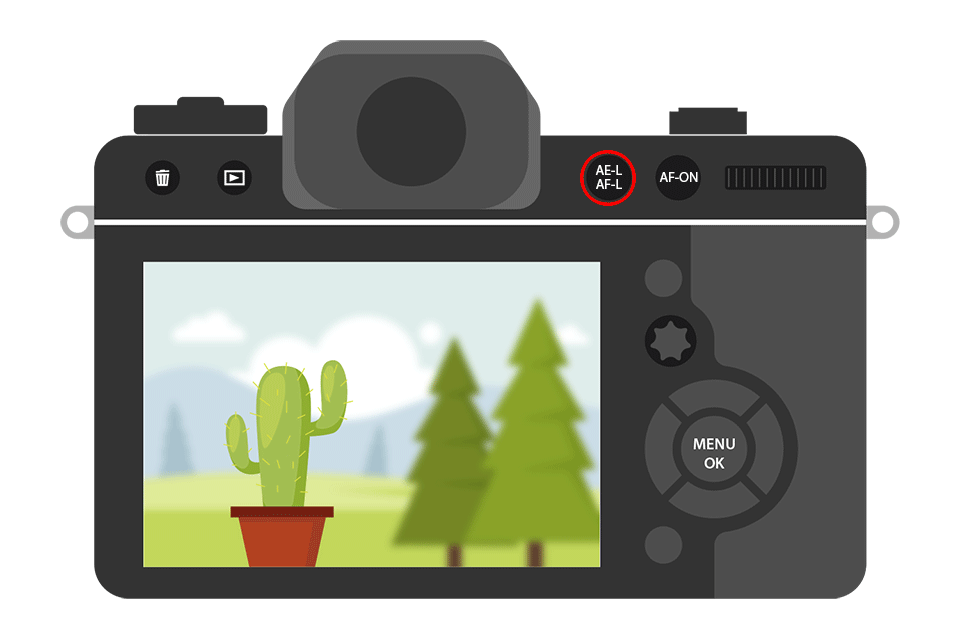
Table of Contents
AutoExposure-Lock / AutoFocus-Lock
The AE-L / AF-L button stands for “AutoExposure-Lock and AutoFocus-Lock” and its primary function is to lock camera exposure and/or focus. What does this exactly mean? If you are using any of the camera modes like Program, Aperture Priority, Shutter Priority, or other scene modes, the button could be used to force the camera to use a certain value for shutter speed, aperture, ISO, and white balance. Since in any of the automatic modes the camera uses its metering sensor to determine the optimal exposure, instead of having your camera re-evaluate the light every time you recompose, you could lock the exposure to a value you are comfortable with – hence the term “AutoExposure-Lock”. There are many cases where using this feature is very helpful.
One example is when you photograph panoramas. It is extremely important to use exactly the same exposure from frame to frame in panoramic photography. If one exposure differs from another, it is practically impossible for panoramic software to stitch images together in a consistent, continuous form. Another good example is if you are photographing a subject with a constantly changing background and you want to expose the subject exactly the same way from shot to shot. Basically, any time consistency of exposure is required and you do not want to switch to a full manual mode, the AE-L button can be very useful.
What about AutoFocus-Lock (AF-L)? Similar to exposure lock, autofocus lock can be used to stop the camera from making the lens reacquire focus when you recompose. For example, if you are photographing indoors in a dim environment, you will find that using the center focus point is going to give you the most accurate results. This is because the center focus point is always the most accurate, especially on entry-level DSLRs that only have one cross-type sensor. So if you want to use the center focus point to acquire focus, it does not always mean that you want to position your subject in the center. As soon as you recompose your shot and half-press the shutter button again, the camera will be forced to reacquire focus. If you shoot in “AF-S” or “Single Area Focus Mode“, you could continue half-pressing the shutter button without releasing it when recomposing your shot, which would not force the camera to reacquire focus.
However, if the camera is set to “AF-C” or “Continuous Focus Mode”, then the camera will always continuously reacquire focus when you half-press the shutter button and recompose your shot. So if you do not want to deal with these situations, you could use the AutoFocus-Lock feature of the camera to lock the focus on your subject, then you could recompose the shot and take a picture. The focus will remain on your subject and will not change, as long as you continue to hold the button. Please note that you have to be careful when recomposing shots like this because the focus plane that is parallel to the camera sensor changes, which will often result in bad focus when using large apertures.
Default AE-L / AF-L Behavior
The default behavior of the AE-L / AF-L button is typically set to lock both camera exposure and focus. Entry-level DSLRs typically have limited control over this button’s functionality, while pro-level DSLRs have many ways to control the behavior of the AE-L / AF-L button. For example, the Nikon D3400 only has 5 options for this button: AF / AE lock, AE lock only, AF lock only, AE lock (hold), and AF-ON (see more on these below), while Nikon D500 has all of these, plus 12 more ways to control the button’s behavior. So the number of ways to customize the AE-L / AF-L button will depend on the camera model.
Types of AutoExposure and AutoFocus Lock Modes
You might be confused when you see the different types of AE and AF options in the camera menu. Which one does what and what should you set yours to? Let’s go over each one, but first, go to your camera menu and Navigate “Custom Setting Menu”->”Controls”->”Assign AE-L/AF-L button” or to “Setup Menu”->”Buttons” on some entry-level Nikon DSLRs:

You should see some or all of the below:
- AE/AF lock – the default behavior of the AE-L/AF-L button. Will lock both camera exposure (shutter speed, aperture, ISO, and white balance) and lens focus. The feature will only be active while you hold down the button. Once you release it, the lock will be released as well.
- AE lock only – will only lock the camera exposure, so focus will be reacquired if you recompose the shot. Also only works while you hold down the AE-L/AF-L button.
- AE lock (Reset on release) – exposure will be locked once you press the AE-L/AF-L button and will stay locked until you take a picture, even if you release it.
- AE lock (Hold) – exposure will be locked when the button is pressed and will stay locked even if you take multiple pictures. The lock will be automatically removed if the camera is inactive for a time period set in the “Auto meter-off delay” menu setting, or can be also removed by pressing the AE-L/AF-L button again.
- AF lock only – only focus will be locked while the button is depressed. The lock is removed as soon as you release the button.
Please note that when the AE-L / AF-L is depressed and the camera is set to any of the AE modes, you will see an “AE-L” indicator in your viewfinder. If you set it to “AF lock only”, the indicator will not light up.
You might also find many other options under “Assign AE-L/AF-L button” such as “FV Lock”, “Live View”, etc. I won’t go over these, since these options depend on your camera and will also change the functionality of the AE-L / AF-L button. The only option I will mention, is “AF-ON”, because it is a very useful feature on entry-level DSLRs like Nikon D3x00 and D5x00-series cameras. Since entry-level DSLRs do not have a dedicated autofocus “AF-ON” button, you can set the AE-L / AF-L button to acquire focus instead (which will de-activate focus acquisition when you half-press the shutter release). That way, you can acquire focus with the AE-L / AF-L button and take pictures with the shutter release. Then, you don’t have to worry about locking your focus when you recompose, since half-pressing the shutter release button will do nothing.
So, which lock mode do I personally use and why? When I use an entry-level DSLR, I either choose “AE/AF lock”, so that both exposure and focus stay locked together, or I set the button to “AF-ON” and use manual mode to keep my exposure consistent. On higher-end DSLRs with a dedicated “AF-ON” button, I always choose “AE lock (Hold)”, so that only the exposure is locked – the camera will not automatically reacquire focus when the “AF-ON” button is activated. I use this feature quite a bit when taking panoramic shots and I like the fact that the exposure stays locked while I take pictures. Once I am done, I either press the button again or let the lock time out. Turning the camera off also releases the lock. Oh, and if you happen to change your camera mode from say Aperture Priority to Shutter Priority or to Program, the exposure values will stay locked.
Exposure Lock and Metering
You might wonder about how to properly meter your camera before even locking the exposure. If you are confused about metering, I highly recommend checking out my “understanding metering modes” article, where I go through different types of camera metering modes in detail. Determining the correct exposure is relatively easy nowadays with modern DSLRs, because cameras are equipped with complex metering systems that use various algorithms and preloaded templates to accurately set exposure values. On top of that, plenty of options to control and fine-tune the exposure are provided to end-users – different metering modes can control the way exposure is evaluated by the camera, while exposure compensation can be used to override the calculated exposure.
Let me give you an example of how you can combine camera modes, metering modes, autofocus modes, and autoexposure lock to take a picture. Say I am photographing my son at sunset on a beach, with the sun behind him and me in front of him. I am in Aperture Priority mode, where I set the aperture and my camera automatically calculates the shutter speed. I normally use Matrix Metering” mode, so the camera most likely would expose the background correctly, while my son becomes a silhouette (because the background is much brighter):

So if I wanted to expose my son correctly without worrying about blowing out the background, I would switch to Spot Metering mode and position the focus point on his face. The camera would then meter off his face instead, exposing him properly and not paying attention to the background. If I take a picture and he is still underexposed, I would dial positive exposure compensation to further brighten him up or if he is overexposed, I would dial negative exposure compensation. Once my exposure looks good, I would press the “AE-L / AF-L” button on the camera (which is set to “AE lock hold”) to lock the exposure and continue taking pictures without worrying about setting the exposure again. If he constantly moves while I take pictures, I would pick Continuous Autofocus Mode (AF-C) to track his movement.
Remember, all these tools are given to us to simplify our photography so that we can concentrate more on capturing great images, rather than worrying about properly calculating the exposure. Once you learn how to use these different modes and features, you will be able to capture images the way you want to with ease.
Hope you find the above article useful. Let me know if you have any questions!
So I try this button on my D810 and the ONLY assignable option for PRESS is Playback. Any input on that?
I can make the Dial+Button function lock and unlock the Aperture and Shutter Speed, but there are no options for focus…
Just found that the Custom Menu Bank A had these functions removed. I just reset ALL my custom menu banks so should be good now.
This is so awesome. So glad to have found this. Can’t wait to read more articles.
Many thanks Nasim…. very nice explanation… thanks a ton :)
Thanks. Very nice guidance. I may seek help when I experience any doubt.
Great explanation, superb article
Great description and easy to understand
New to this was so lost thanks u articles are very gd give me a better understanding
Thanks so much for the article. I have just tried back button focusing with great success but am still confused about where to focus when I need two people either side of frame in focus if they are not on the same plane. Any ideas please?
A well detailed article explaining the question I typed out on Google. I have learnt alot from your site and I will just like to say, Thank you, much appreciated and well done.
Please keep up the awesome work.
If you use ‘AE lock hold’, as you described in your final example, so that it locks in the exposure after letting go of the AE-L/AF-L button, do you then have to focus by pressing the shutter half way down?
I have an entry level D3300 and having focus issues. I did have it set to AF-ON but just changed it to AE/AF lock to see if I will get better results. My subject is my almost 1 year old who moves around a lot. Do I need to hold down the AE-L/AF-L button while following my subject all the way through hitting the shutter button? Thanks!