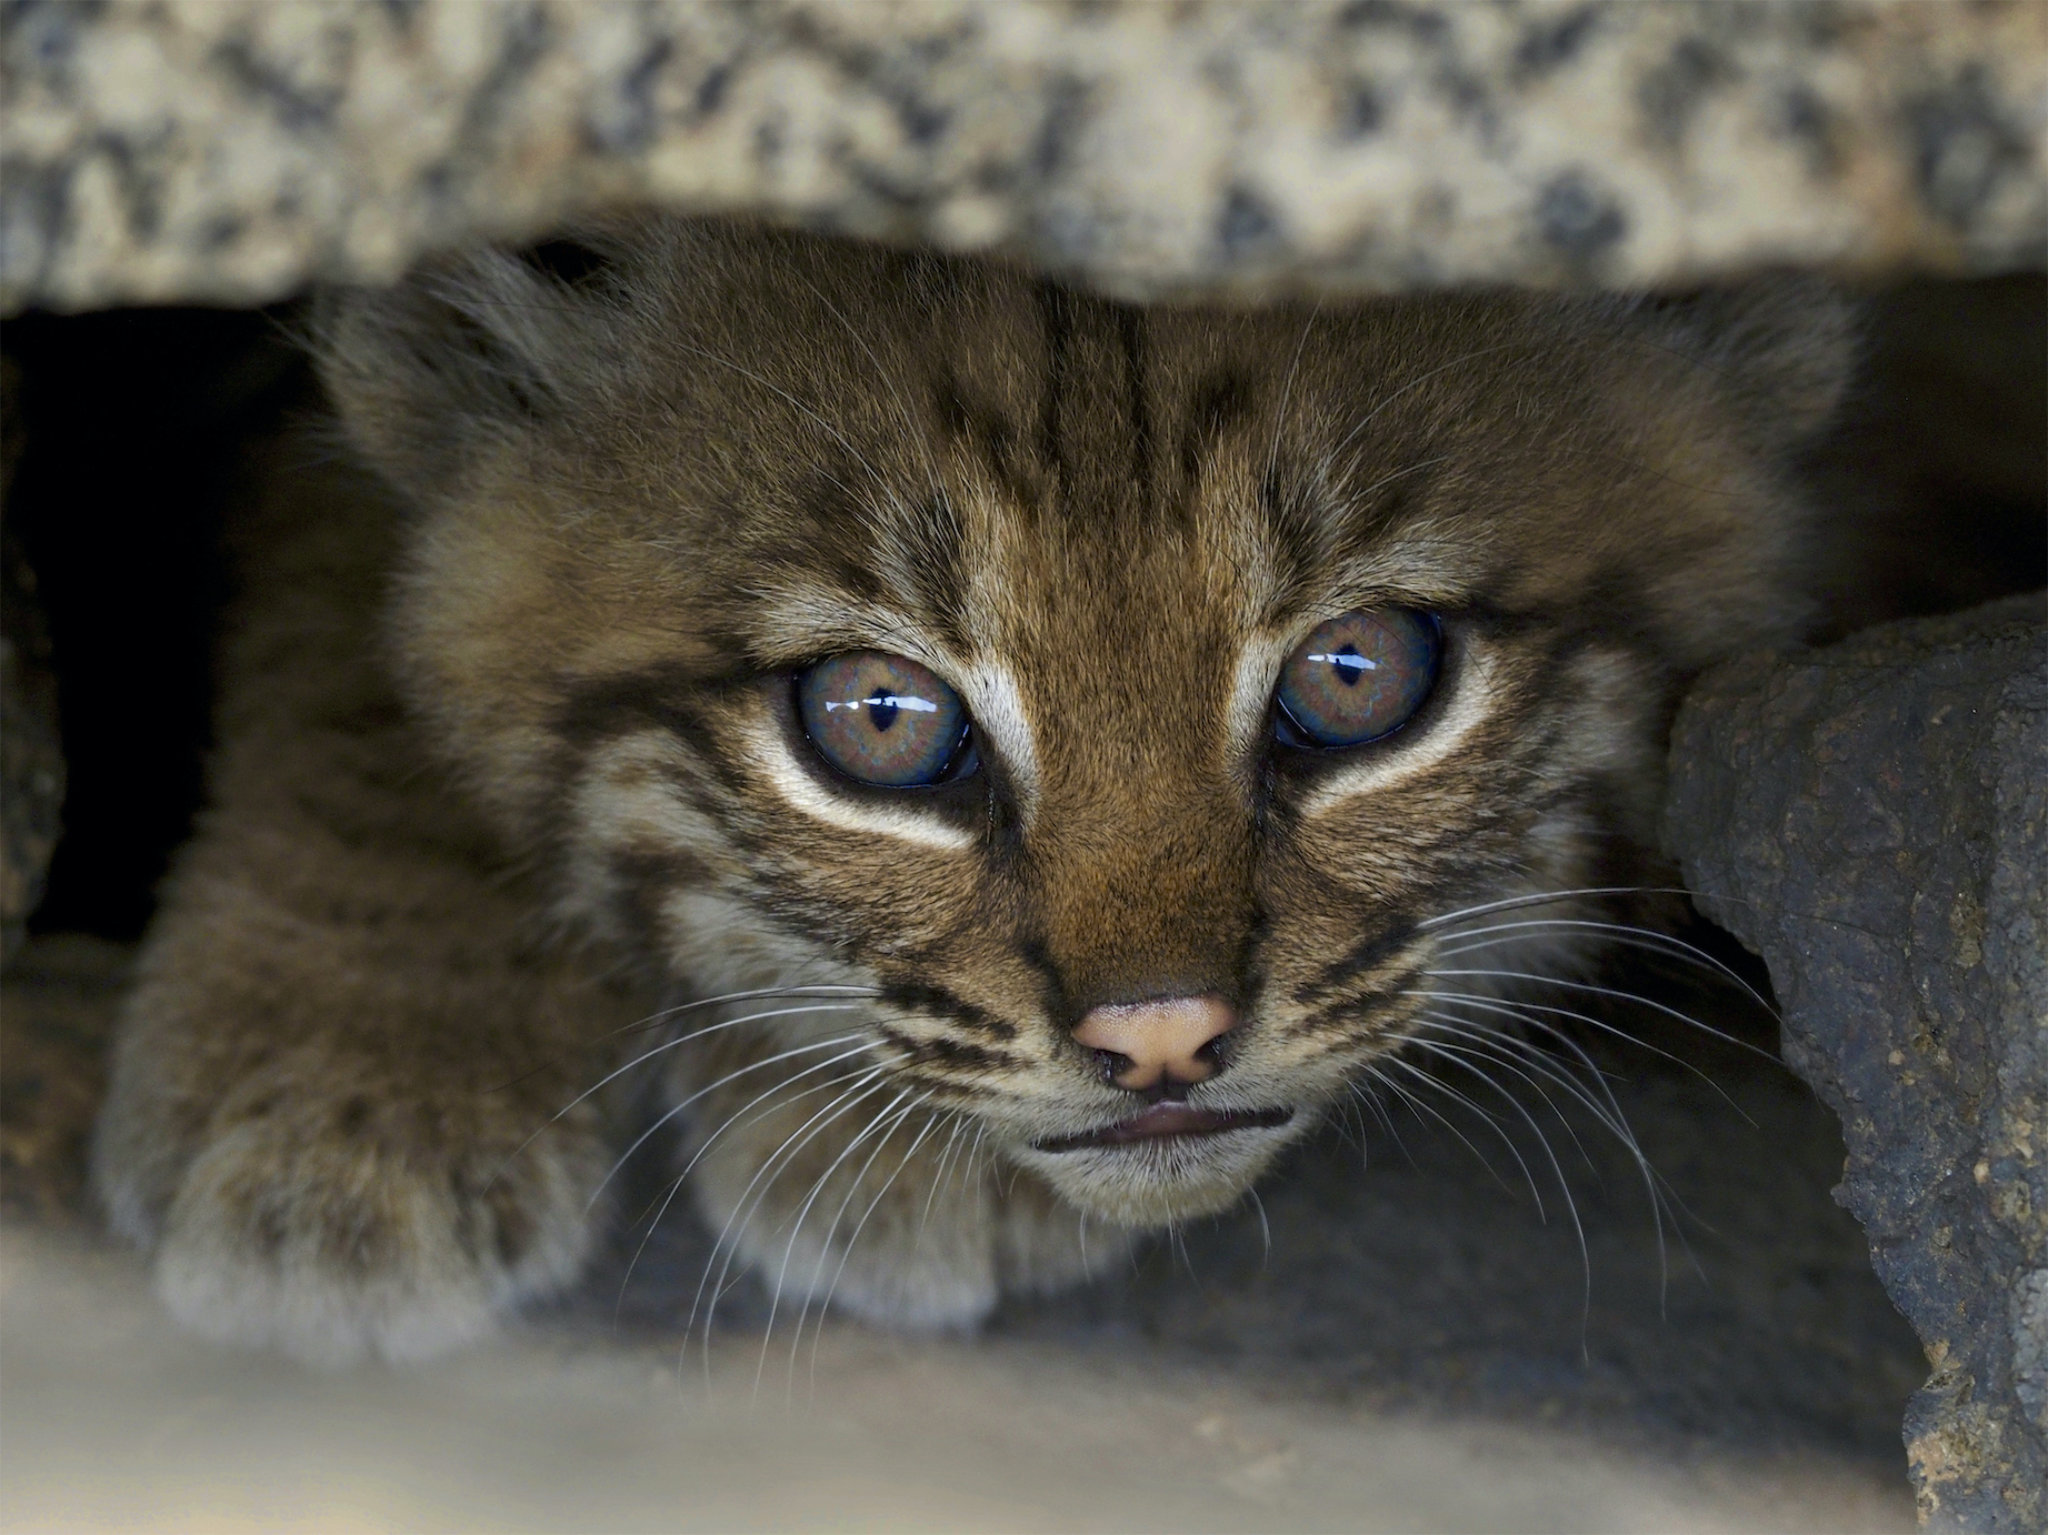
Will today be the day I see a mountain lion? Or will I find some aquatic creature to photograph instead? Even if I have one particular species in mind, I never know for sure what I’ll see when I set foot into nature. Instead, I try to be prepared to photograph any subject I may encounter. However, that requires careful planning with my camera gear. Today, let’s take a dive into my bag to see how I make the most of a limited budget to make myself ready for anything.
Table of Contents
My Intentions as a Photographer
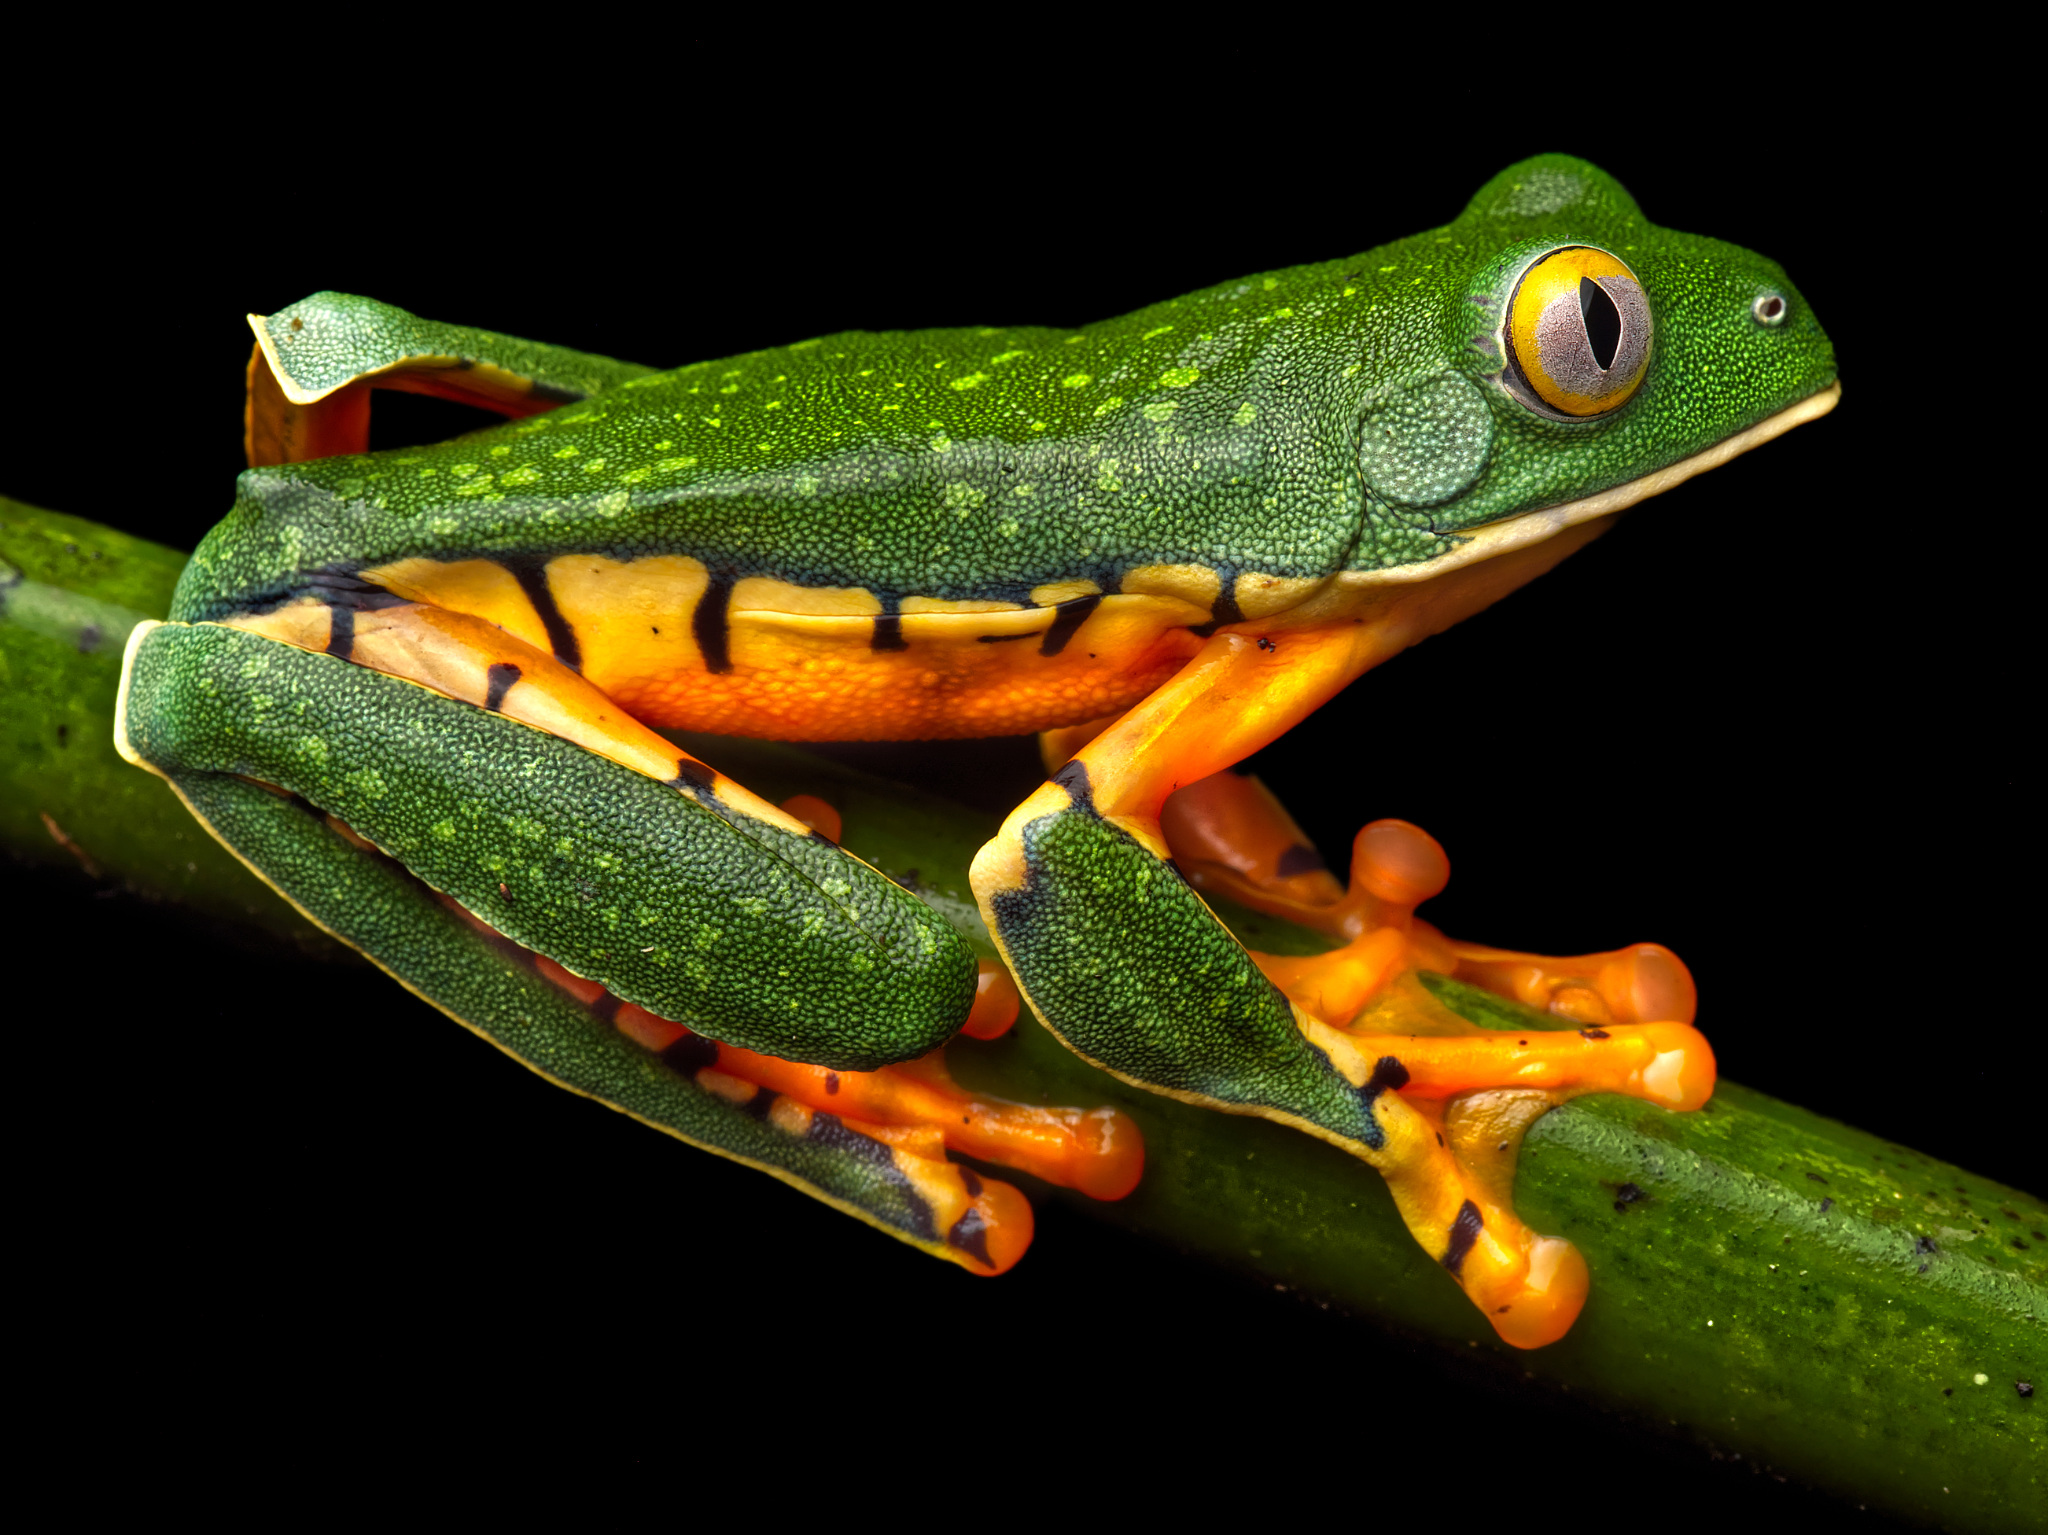
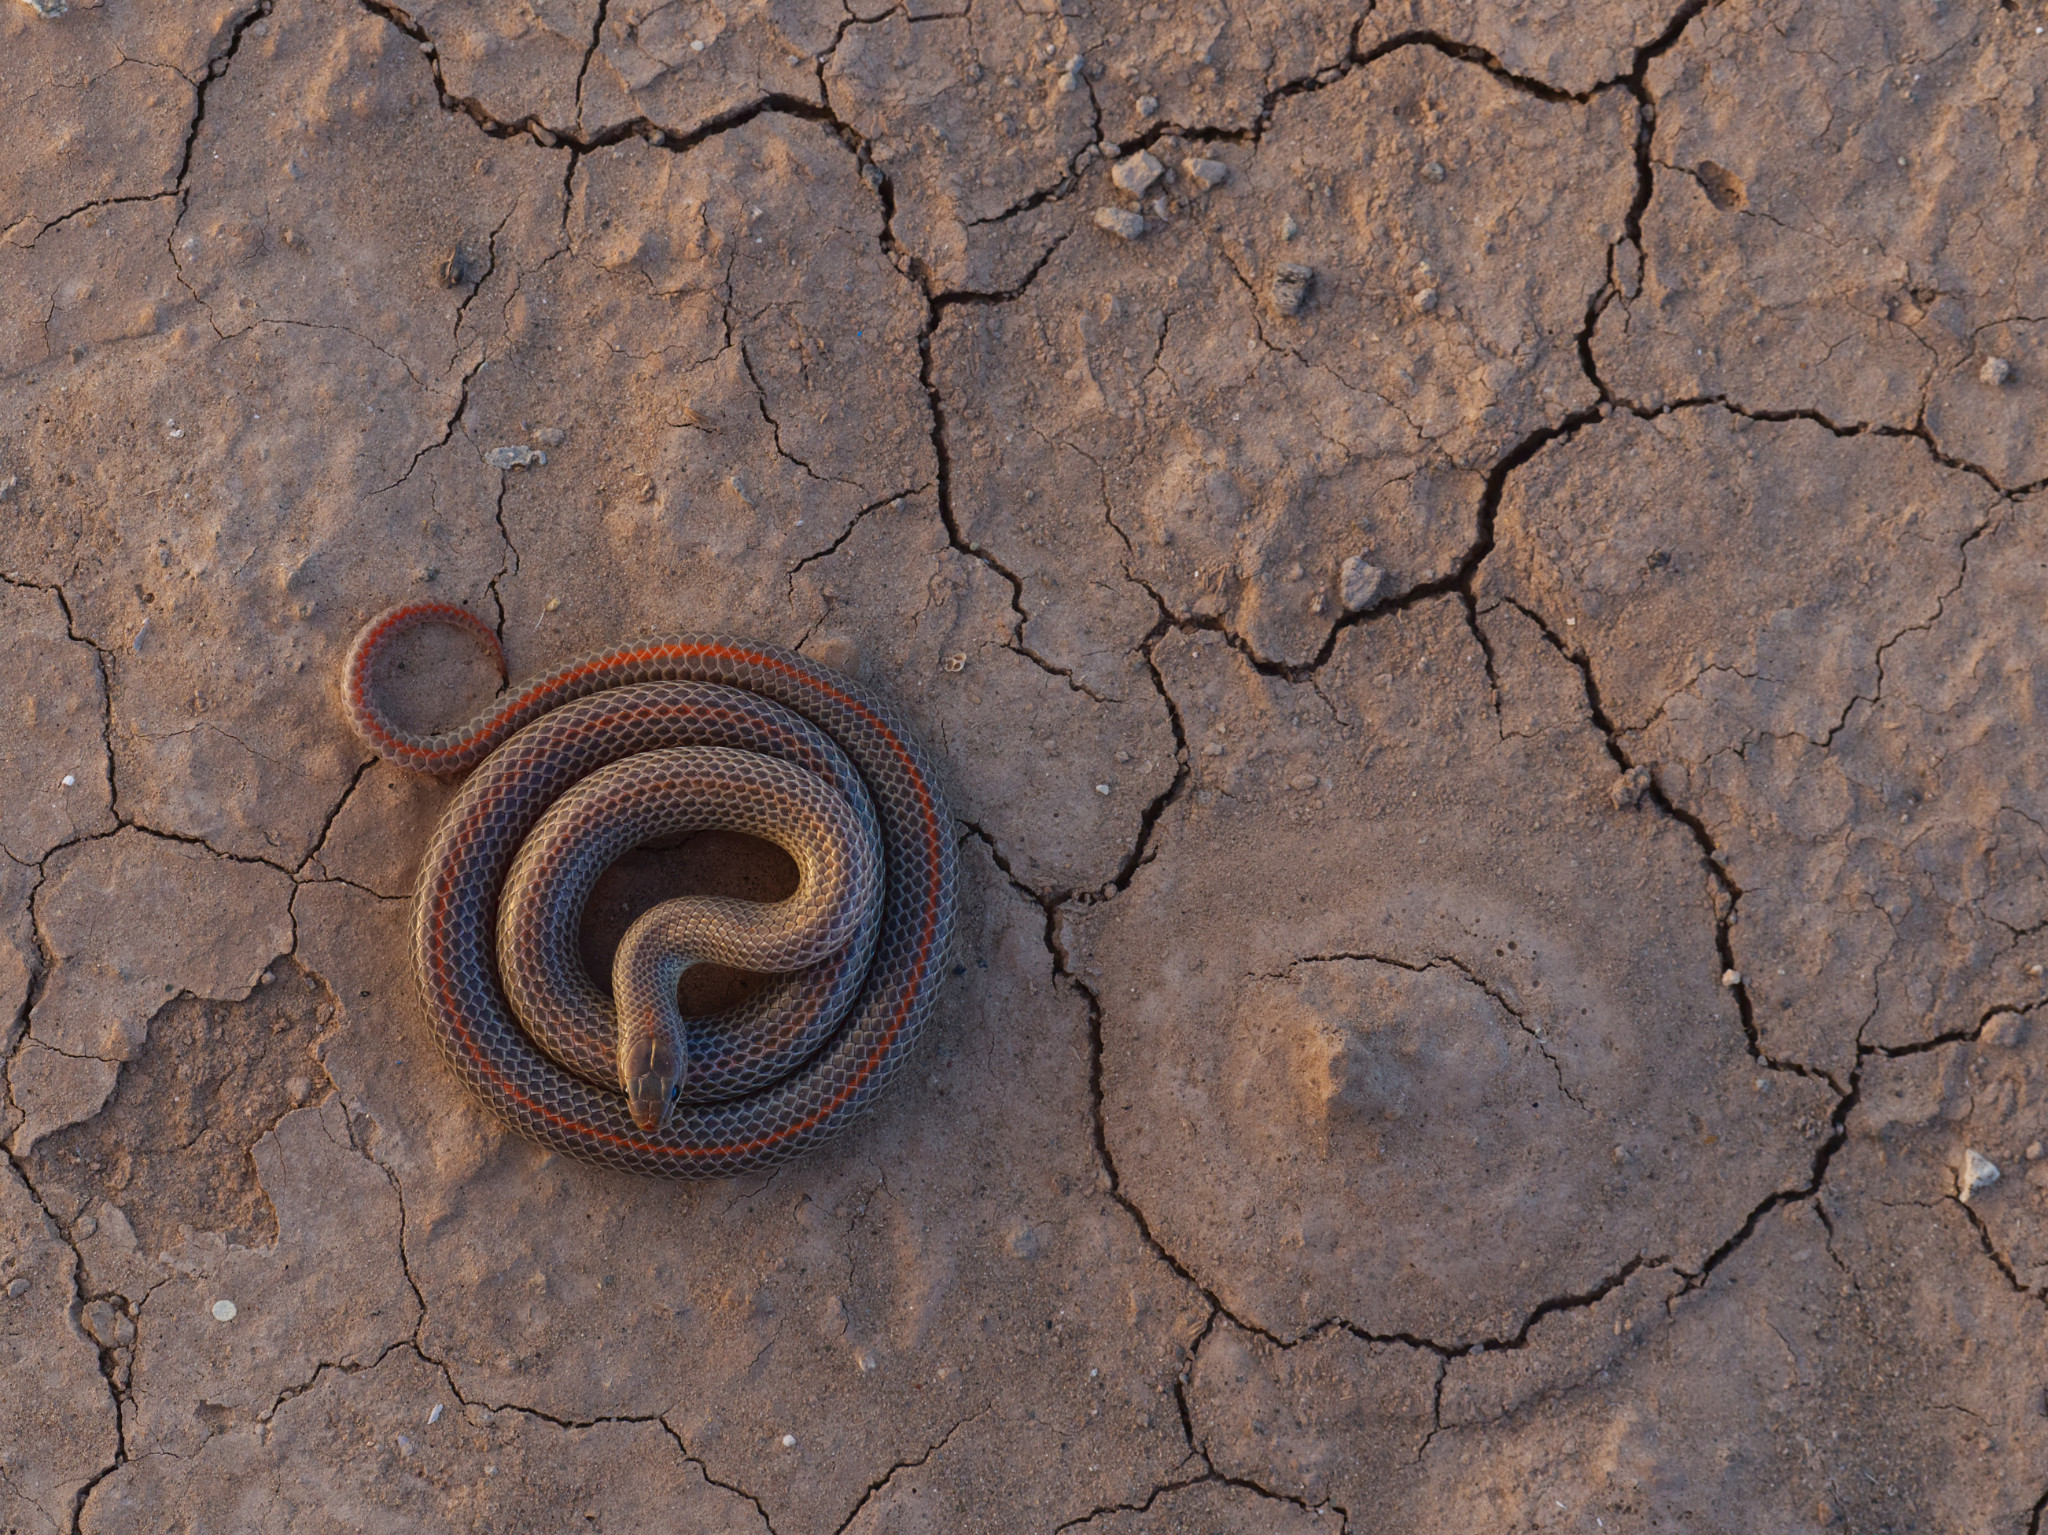
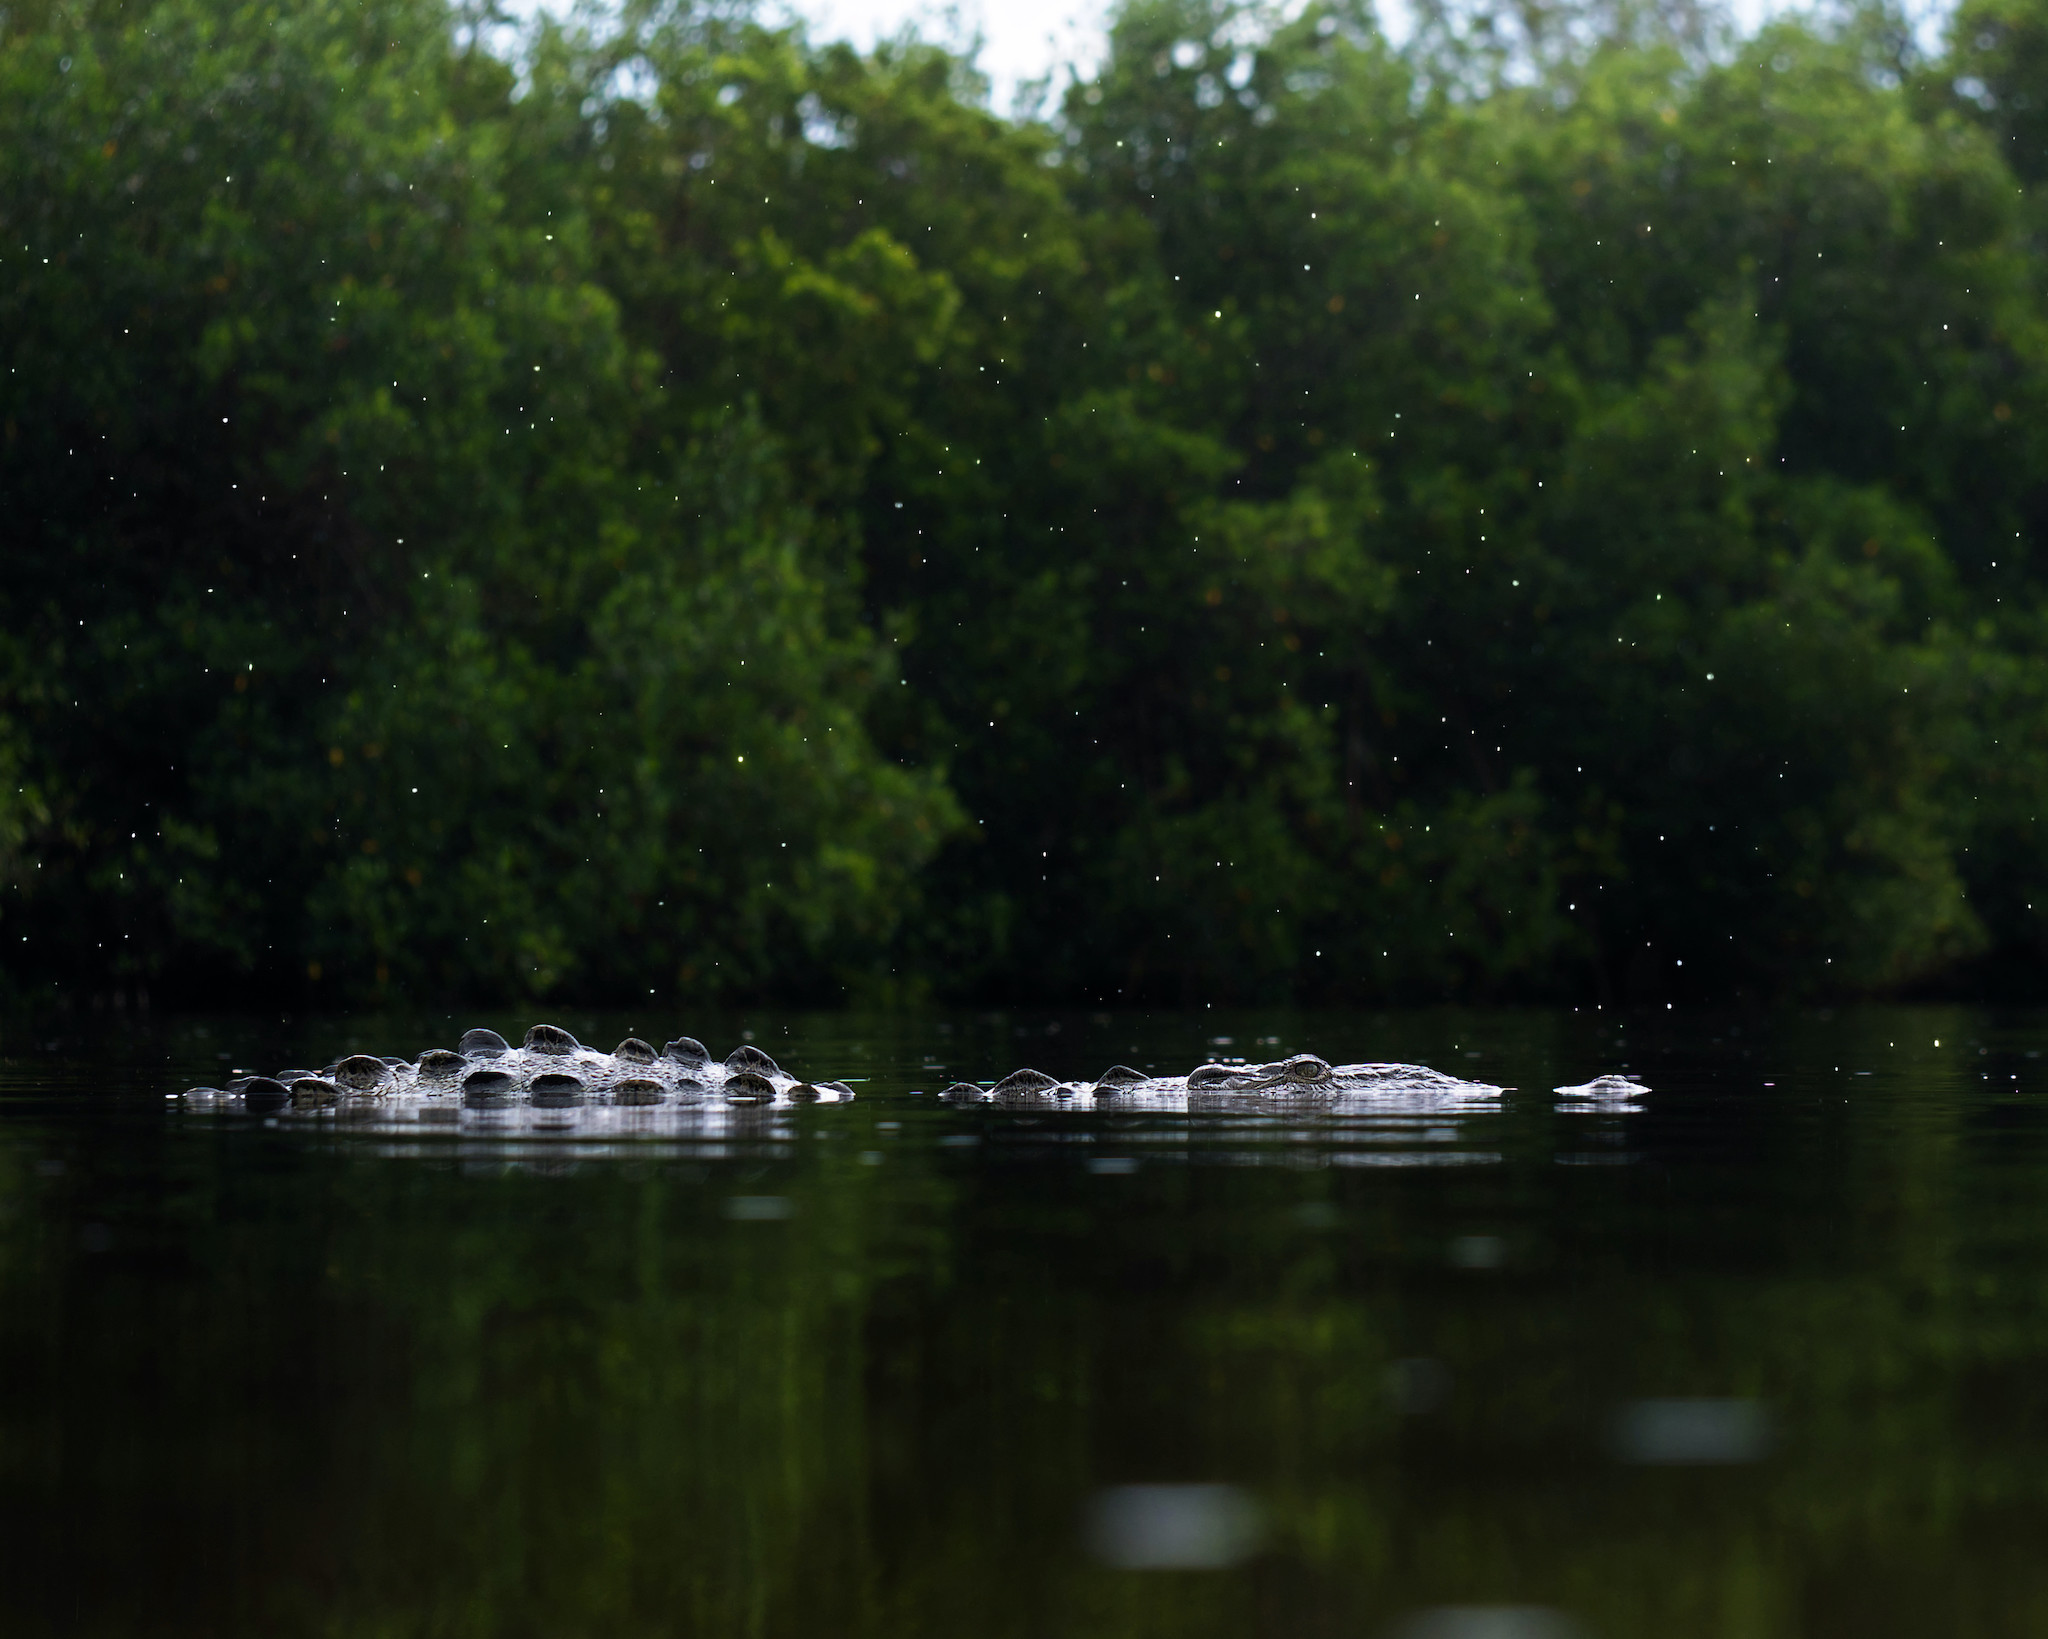
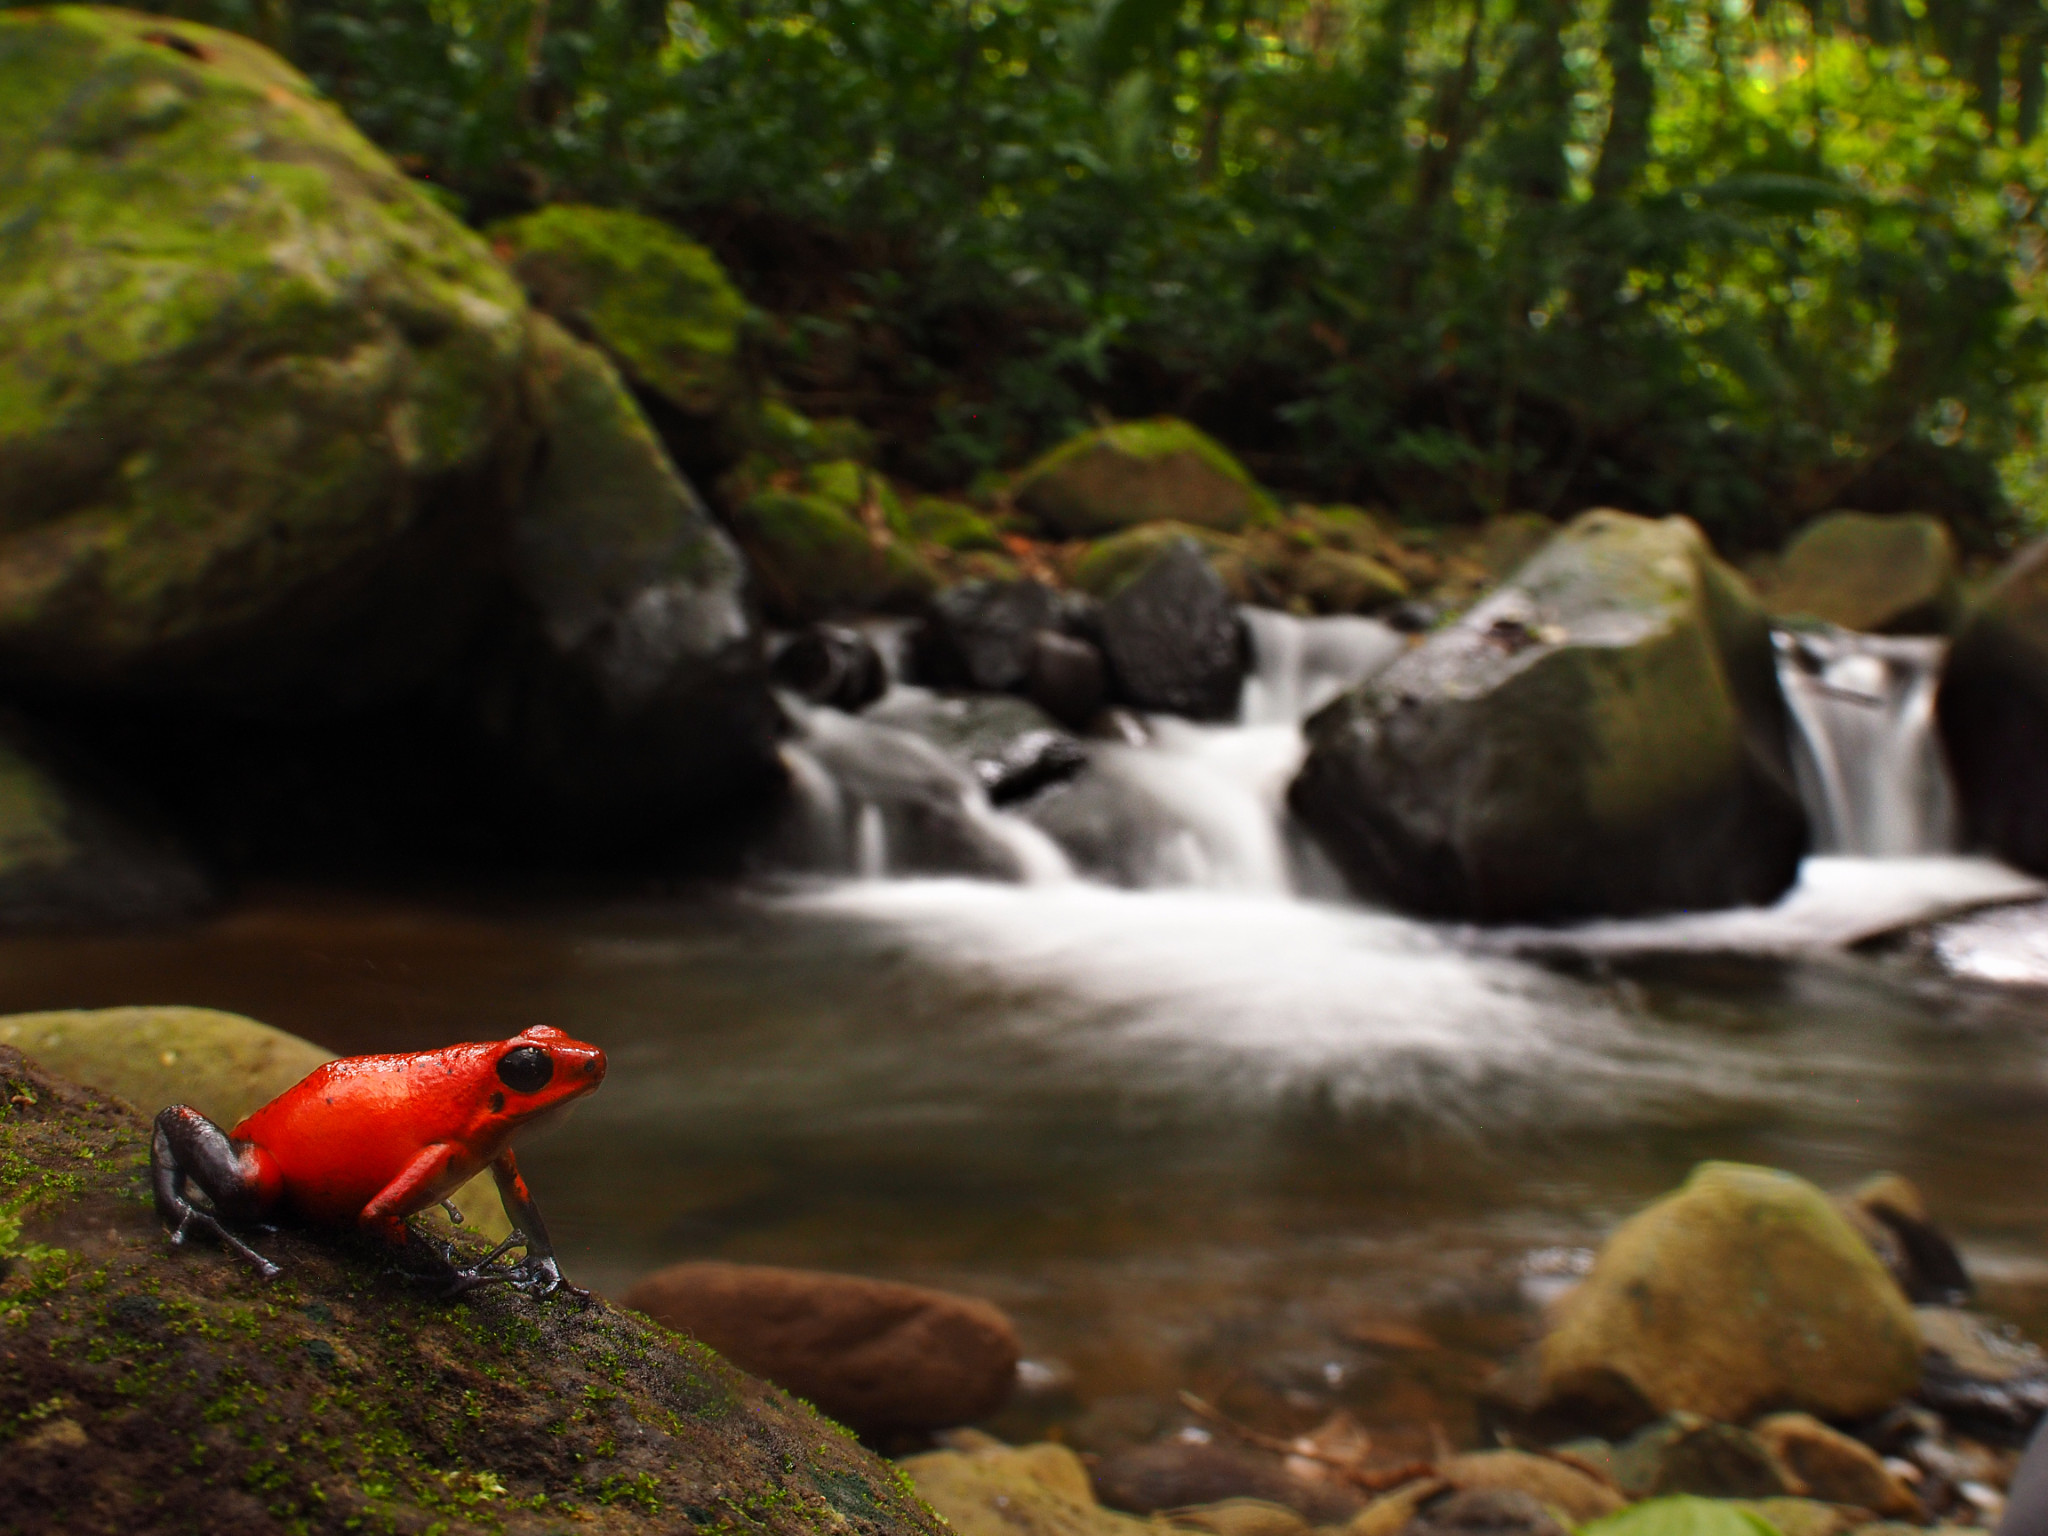
Although I’m a wildlife photographer, my focus usually is not charismatic megafauna – instead, it’s reptiles and amphibians. So, my gear is specialized for images taken at close range, due to my small subjects. That said, I’m happy to photograph any animal I see. And if I don’t see anything, I’ll settle with a landscape.
Typically when I set out, I have a species or two in mind. Sometimes it’s large vipers, sometimes tiny frogs. Regardless, they usually require putting in several miles on foot to locate, so I try to keep my kit light. And because anything can happen when I’m out, I usually carry my entire kit with me at once.
I don’t want to make this article much of a review for each of my items, but more to share my thought process behind each piece of equipment and how they fit my needs.
The Bag
My camera bag is the Lowepro Flipside Trek BP 350 AW, which is perfectly suited for my style of photography. Most importantly, it’s lightweight. There’s also a comfortable waist strap which takes the weight off my shoulders and allows me to hike effortlessly with 10-20 pounds loaded (AKA up to about 10 kilos).
The quick access feature allows me to reach all my gear without taking off my bag. This is key when I’m under time pressure, or when I’m in muddy/sandy areas and don’t want to set down my equipment.
The bag also has a rain cover that I use in order to protect my gear from downpours. Super useful in the tropics!
And of course, there is lots and lots of space. Enough for all five of my lenses, camera body, external flash, jacket, and lunch.
The Camera
The camera I currently shoot with is the Panasonic Lumix DMC G-9, a micro four thirds camera. Micro four thirds is an excellent lightweight and compact format. As such, my gear is small, and I can carry it with ease.
The G-9 is not my first micro four thirds camera. Previously, I shot with the G-2 and OMD EM-1. I have always been comfortable shooting with micro four thirds cameras because of how lightweight they are.
My G-9 is fairly weatherproof and sturdy. I feel comfortable taking it into rugged terrain and bad weather. My poor camera has experienced it all – falls, sand, mud, rain (sometimes all at once) and still runs smoothly.
The Lenses
I carry five lenses with me in the field, each with its own function.
1. Panasonic G Vario 100-300mm f/4-5.6 telephoto
The lens that is mounted to my camera by default is my 100-300mm telephoto lens. This way I am always ready for any wildlife that may not stick around long.
I’ve had this lens with me (usually mounted on the camera and around my neck) for almost the past 10 years. I’d be lying if I said it hasn’t degraded. At this point, there is a considerable amount of dust inside the lens, and the autofocus near infinity often searches.
I can’t speak too critically of my trusty companion; it has been exposed to the elements more than any of the rest of my gear, and it still works. Considering the environments where I operate, that’s not a small feat.
2. Olympus M.zuiko 60mm f/2.8 macro
My favorite lens, the Olympus 60mm f/2.8 macro, is my go-to when photographing reptiles and amphibians. Most of my subjects are small, so a macro lens is the obvious choice to capture details of small critters. Portable and compact, it weighs only 185g and requires just a small compartment in my camera bag.
I’ve owned this lens for close to 10 years as well. Unlike my 100-300mm, this macro lens has not degraded in performance at all (knock on wood). It is my sharpest lens and consistently captures all the details I desire in my macro photos. It’s also weather sealed on my G-9, which is nice reassurance when taking photos in the rain – when a lot of amphibians are active.

3. Olympus M.zuiko 9-18mm (RIP)
Until very recently, this lens always had a home in my bag. Although I do not consider myself a landscape photographer, sometimes I just have to take a landscape photo of the beautiful places I visit.
Some of my favorite types of photos are where the animal is smaller in the foreground, and a lot of habitat is included in the background. (See my article Introduction to the niche hobby of herp photography for much more insight on the different types of compositions I use with reptiles and amphibians.)
The rectilinear 9-18mm lens was great for these types of wide field of view shots. That is, until one of the flex cables likely broke. Now I get a lens attachment error immediately.
I’m probably going to replace it with the Panasonic 9mm f/1.7 at some point.

4. Laowa 15mm f4.0 wide angle macro
For a while, the Laowa 15mm f/4 macro was my favorite lens. Certainly some of my favorite shots have been taken with this lens. What makes the Laowa 15mm so unique is that it has a fairly wide field of view while still providing 1:1 macro capabilities. This makes for unique perspectives when photographing small animals in interesting habitats.
This lens does not come in a micro four thirds mount, so I use an adapter. The 2x crop factor of the micro four thirds format means the resulting images are equivalent to a 30mm lens on a full frame. I find this lens adapts well and remains sharp despite being made for larger sensors.
I first fell in love with this lens because I could make my subject huge in the frame while still capturing a lot of background. My preferences have shifted a little since, as now I prefer an even wider field of view, with the tradeoff being a smaller subject in the frame.
The Laowa 15mm does come with its quirks. It is a fully-manual lens, which always makes things trickier. It is also a shift lens, though I don’t utilize that capability out in nature. Unlike my other micro four thirds lenses, this one is heavy. The build is not the most assuring; when I shake it, I can hear something knocking back and forth.
5. Laowa 24mm f/14 2X macro probe
No other piece of equipment of mine do I have such a tense relationship with. Certainly no other gets as many weird looks from passersby than the Laowa 24mm f/14 probe lens.
Just by the name, you can tell it’s a weird lens. For those unfamiliar, this is what the lens looks like:
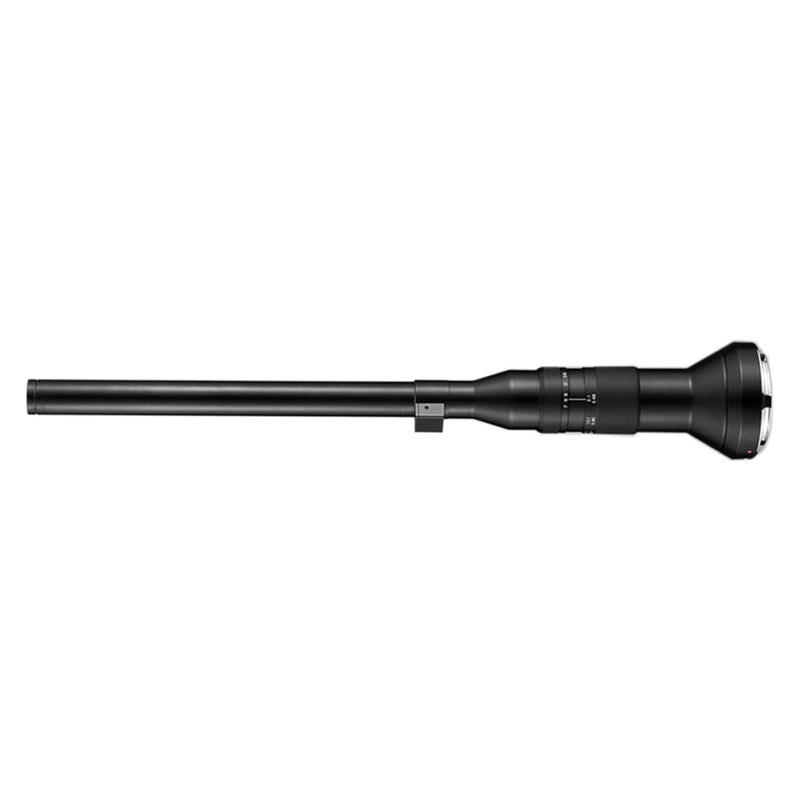
Yes, that’s the lens mount on the right. The lens itself is 16 inches / 40 cm long.
Since I was already familiar with Venus Optics’ niche array of lenses after using their 15mm macro, I had high hopes for the probe lens. Immediately I thought of all the unique perspectives that would be possible with this lens, especially considering the tip would be waterproof.
So, I made the investment thinking this ‘impossible’ lens would function as it did in my mind. As with the 15mm macro, I needed an adapter to mount it to my camera, but it’s an all-manual lens anyway, so that’s of little concern. (I do wish I could get the full 24mm perspective, but that’s not possible with my 2x crop-factor camera.)
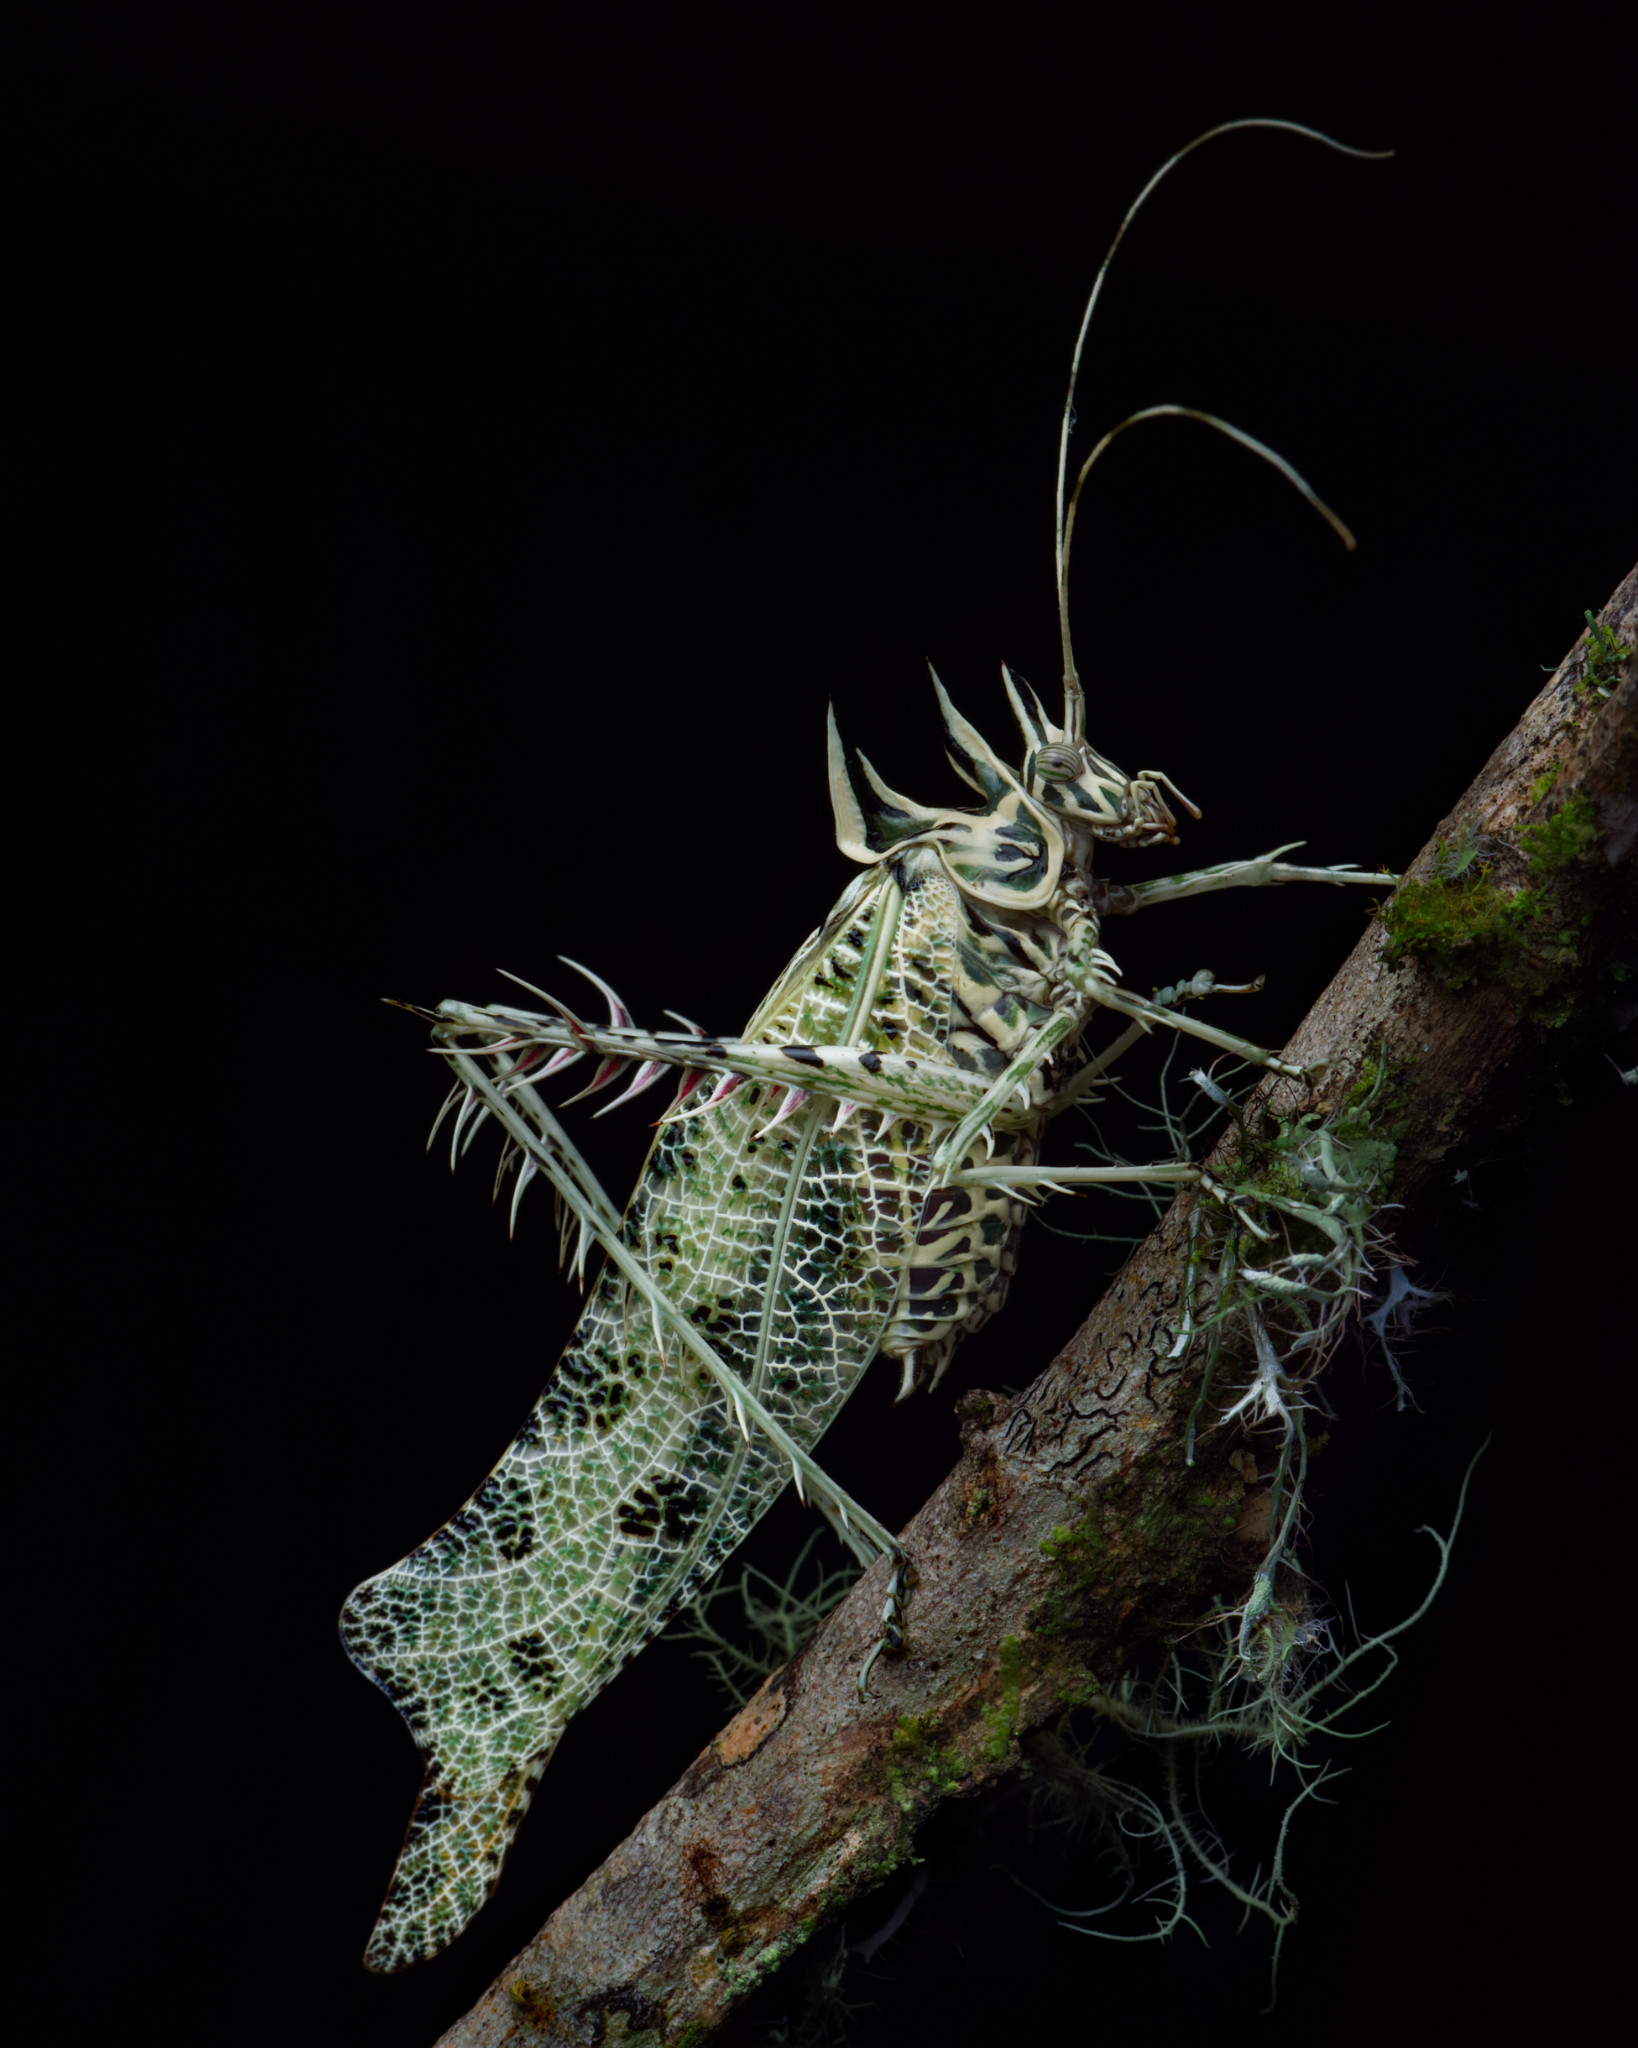
On one hand, this lens takes photos that no other lens possibly could. I’ve taken some of my very favorite images with this lens. It also provides a window into the world of aquatic invertebrates. But it definitely does come with its issues.
First, the widest aperture is f/14, meaning it allows little light to hit the sensor. This means a longer shutter speed and/or higher ISO are necessary, making it hard to capture great images quality. Also, one thing I hadn’t considered is that because it is an extreme macro lens (capable of 2:1 magnification), and the lens is so long, the tiniest camera movement is enough to entirely alter the composition and induce terrible motion blur. This means it is always necessary to use something to completely stabilize the camera, and makes photographing moving subjects near impossible. The last unfortunate tidbit about this lens is that it is my least sharp of all my lenses. I am pretty nitpicky when it comes to the clarity of my images, so this was another disappointment. But I keep it anyway, because there’s no other way to do some of the unique things it can do.

That wraps up the lenses in my camera bag, but there are a few other key items I use frequently.
Lighting Equipment
Most of my subjects look the best when illuminated by artificial light. I usually use a diffused external flash because that gives my photos a really evenly lit look.
I’ve blown out a couple flashes by now. At the moment I use a Godox v860ii. My photography does not require the most advanced flash on the market. What I look for in a flash is good battery life and a fast recharge time, so I don’t miss any shots.
I attach my flash to the camera using a cable. I’m often asked why I don’t just use a remote trigger so that the flash is completely detached from the camera. There are a few nice advantages of the cable. First, it is extremely reliable; I have never ever had triggering issues with the cable, or any malfunctions. Next, it doesn’t require any batteries – which doesn’t sound like a big deal, but when in the jungle with limited access to electricity, it makes things much easier. Lastly, it is a cheaper alternative.
The most important parts of my lighting setup are my diffusers. My go-to is a large SMDV Speedbox-50. This diffuser is perfect for me because it collapses and fits into my camera bag with ease. A diffuser ensures there are no harsh shadows or specular highlights in my shots.
I also like to strap a $5 photography umbrella to the outside of my bag. I sometimes fire my flash through the umbrella, reflect my flash in it, or use it to shade or reflect the sun. I like the versatility of my cheap little umbrella.
An important aspect of my photography is that I try not to always use the same lighting setup for every photo. I prefer having a diverse range of lighting methods under my belt to keep my portfolio varied.
Conclusion
That’s all that’s in my bag, beside some extra cards and batteries! I hope this article was enjoyable and gave you a good look into the kit of a wildlife photographer, specifically a herp photographer. There’s no perfect kit out there, but mine works well for my needs and is a good balance of weight, price, and performance. Let me know in the comments if you have any questions or gear recommendations of your own.
I have a Nikon DSLR600 and would like your opinion re an appropriate lens to shoot objects such as small butterflies from a distance not to scare them, such as 3 to 6 feet. Thanks.
A classic choice for you would be the Nikon 300mm f/4 D lens. It has great close focusing (not quite 1:1 macro but close) and gives you a huge working distance. Pretty great prices used too. Hope this helps!
Enjoyable and interesting narrative and photos. Do you hand-hold the Speedbox-50 diffuser when you’re taking pictures in the jungle?
Hi George,
Thank you for the kind words! I do hand-hold the diffuser. Sometimes I will have other people to help, but usually the angle needs to be so precise it is easier to do it myself. Similarly, tripods do not allow me as much flexibility to adjust the angle very precisely. Hand-holding is far from ideal and leads to many complications and frustrations, though I find it the most effective for nice light!