The purpose of this article is to share my initial impressions of the DxO ClearView anti-haze function which is contained in the Elite Version of DxO OpticsPro 10 software. As many Photography Life readers know, I’ve been using DxO OpticsPro as my main RAW processor for some time. I started out using DxO OpticsPro 8, then upgraded to 9 in order to get the PRIME noise reduction function, then upgraded again to OpticsPro 10 in order to get speed improvements with PRIME, some enhanced Smart Lighting presets, and the new ClearView anti-haze function. With each upgrade I felt my money was well spent.
To address haze issues the DxO ClearView function is designed to recover and reconstitute the black point within the elements of an image. It then uses that to help improve contrast, details and hues in the image. The results can be quite dramatic as you can see in the following before and after comparison of an image I took at Bryce Canyon National Park.
First, here is an out-of-camera jpeg.

Next is the final image processed from the RAW file using DxO OpticsPro 10 with its new DxO ClearView anti-haze function.

I’ve been using the new DxO ClearView function for a couple of months now and I’ve found it to be a very useful feature, primarily for landscape and cityscape images where haze is present. This powerful function is controlled by one slider in DxO OpticsPro 10 and when used it makes a number of coordinated adjustments. As a result it needs to be applied with some care, and in my view should not be considered to be ‘standard’ adjustment that a photographer would apply to all images.

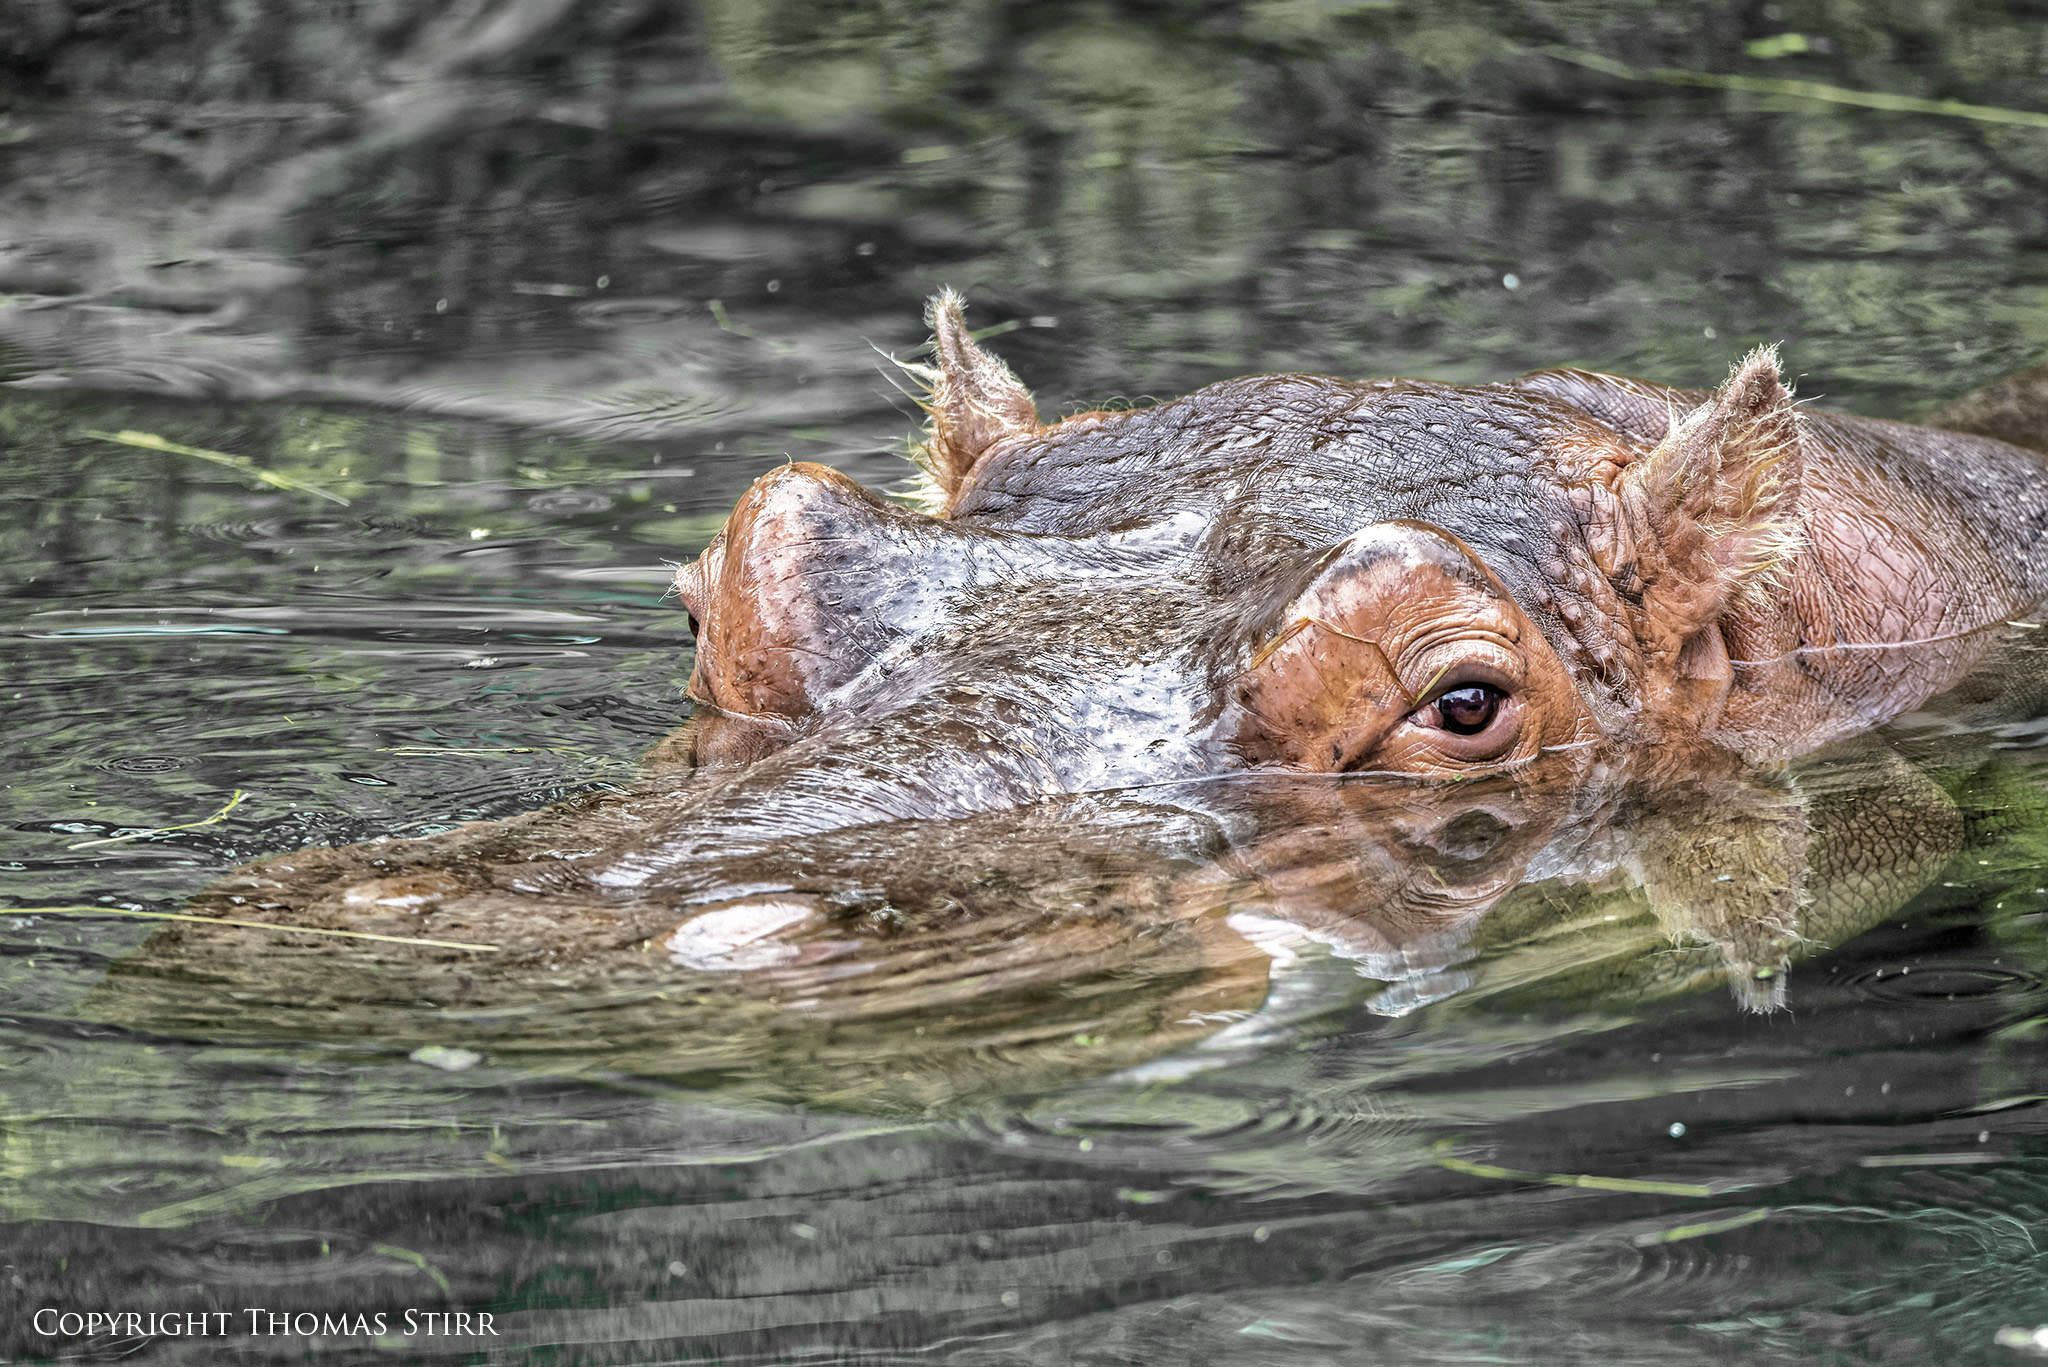
I’ve found it can be a very helpful tool when processing more than just landscape images. Almost any image that is suffering from a haze-like appearance in terms of weak blacks, low contrast, poorly defined details and weak colour saturation can benefit from the use of this function. For example, I’ve had some good results with bird and animal images. The two rhinoceros in this out-of-camera jpeg is a typical image to which I would apply the DxO ClearView adjustment when processing a RAW file.

The results below were achieved after running the corresponding RAW file through my standard process of OpticsPro 10 (this time using the DxO ClearView function), then exporting a DNG file into CS6 and Nik Suite for some final tweaks.

A closer examination and comparison of 100% crops helps to demonstrate the effects of DxO ClearView. Here is a crop of the original OOC jpeg.

And, here is a 100% crop of the finished image produced using the RAW file and using the DxO ClearView function.

What I like about DxO ClearView is that it allows me to make dramatic improvements to images suffering from haze-like problems with one simple slider adjustment. That also helps reduce my time in making adjustments to try to rid an image of haze.
When a RAW file is opened up in DxO OpticsPro 10 the program makes some automatic adjustments including tone (DxO Smart Lighting), noise reduction, and the protection of saturated colours. If the lens used to produce the image is covered by the DxO Lens Softness function then some automatic adjustments will also be made in that area.
Since DxO ClearView can apply some very dramatic enhancements to an image it is important that the adjustments noted above are made before applying DxO ClearView. This can be done either manually or by using the Auto function. My preference is to always run my RAW files through Auto mode as I find it quick and easy.

The DxO ClearView slider is found in the right hand control column. This bank of adjustment options opens up in DxO OpticsPro 10 when the ‘Customize’ tab is clicked. As noted in the following screenshot above the default setting for DxO ClearView is ‘50’. When using this adjustment I always move the slider over to the far left and drop it, then start making some incremental adjustments by moving the slider to the right. Since a number of images attributes are being adjusted on a simultaneous basis I find it helpful to zoom in and out and inspect various areas of my image before finalizing my DxO ClearView adjustment value.

After setting DxO ClearView I usually set the value of the DxO Smart Lighting function as well, often by using one of the presets. I’ve found that this pair of functions can be very helpful to create my ‘foundation’ look.
Algorithms for the DxO Smart Lighting adjustment have changed from one version of OpticsPro software to the next. When using OpticsPro 10 you can choose from 3 presets (Slight, Medium and Strong) of the current algorithms. There are also options to choose the versions used in OpticsPro 7 or 9. Custom adjustment of DxO Smart Lighting is also possible.
After setting DxO ClearView and Smart Lighting I usually make some additional adjustments to Tone and Lens Softness to fine tune my image in DxO OpticsPro 10. Adjustments to other aspects like Contrast, Lens Softness, Sharpening, Saturation, Vibrance etc. should only be done after you have set DxO ClearView. I then export a DNG file into CS6, and into Nik for final tweaks.
The following three images help to demonstrate the effects of the DxO ClearView and Smart Lighting functions. First, let’s look at an out-of-camera jpeg of the entire image.

Now, let’s look at a 100% crop of the OCC jpeg…

The following image is the same 100% cop of a partially processed RAW file. I’ve set DxO ClearView to ‘70’ and DxO Smart Lighting to the ‘Strong’ preset.

You can see in the image above that just these two slider adjustments have made a significant impact on the image.
Below is a 100% crop the finished image after all DxO OpticsPro 10 adjustments were made and final tweaks were done to the DNG file in CS6 and Nik.

Here is a full frame view of the finished image. (Note: based on reader feedback I made one additional adjustment to the final image and have inserted a revised image in its place. I made a quick hue adjustment in CS6 and removed most of the green hue. I should have done this with the original image.)
Using the DxO ClearView function does come with some additional processing considerations. The digital noise in your image can increase quite a bit when using DxO ClearView and any dust specs on your camera’s sensor can become much more noticeable. As a result I always use the DxO PRIME noise reduction function for any images on which I’ve used DxO ClearView, regardless of the ISO at which they were originally shot. It is also a good idea to give your images a once over looking for dust specs that may not have been visible previously.
I’ve also noticed that if the DxO ClearView adjustment is done too aggressively some unusual circular banding can occur.
I certainly do not consider myself an expert in the use of DxO OpticsPro 10 and interested readers can find additional information and a number of tutorials on the DxO website. At the time of writing this article a free trial download was available on the DxO website.
Readers can also use the links provided to view more of my Images of Bryce Canyon National Park that were processed using the DxO ClearView function, or to get some additional details on using DxO ClearView when processing images of animals.
Technical Note: All images were shot hand-held. Images of rhinoceros and hippopotamus were shot with a Nikon D800 and Tamron 150-600 f/5-6.3 VC at the Metro Toronto Zoo. Images of Bryce Canyon National Park were shot with a Nikon D7000 and Nikkor 70-300 f/4.5-5.6 VR.
Article and all images Copyright Thomas Stirr. All rights reserved. No use, duplication, copying or adaptation of any kind is allowed without written consent.
Hi Thomas,
I recently took another spin with DXO Optics Pro 10.5x ClearView feature along with Prime. Earlier, I commented that I didn’t think it did a better job then Topaz Clarity. I still think that is true, but want to update my comments. I was already in DXO to remove noise from a landscape image and decided, since I was already there, to use ClearView. With a push of the slider along with Prime, I got results that would have taken much longer then working with the contrast sliders in Clarity. Literally, I was done in seconds instead of minutes.
I think that part of the reason I was less satisfied with it before is because I wasn’t consistently using it with Prime. I know you suggested doing this but I really think I was using them separately and getting a little annoyed with the results. So, now that I am doing it correctly, I think it is much better then I originally thought in terms of results. Of course, it always had the advantage of speed.
Hi sceptical1,
Thanks for adding to the discussion and sharing your most recent experiences! I think the choice of software is similar to camera selection, i.e. it really comes down to personal preference. There are many roads to the same destination and folks should use whatever works best for them. I still use Clearview on occasion…and I also use the Curve function in CS6 and some of the adjustments in Nik to get to where I want with individual images.
I don’t think that a ‘perfect’ camera exists, nor does a ‘perfect’ software program. I recently discovered that when shooting with my Nikon 1 32mm f/1.2 prime and using some exposure compensation to my images that the PRIME noise reduction function in OpticsPro 10 failed to give me the results I wanted. Even at ISO-800 my files looked quite grainy. Luckily the images were just part of one of my random tests and not involved with any client work. There’s always something new to learn when it comes to photography!
Tom
I was initially looking for an answer – difference between DxO ClearView vs micro-contrast.
And stumbled upon.
Unfortunately, I do not share your happiness with DxO products.
I started with DxO 6 (Win 7 64b) because it was auto-SW. I rather photograph than explore Wallgraphers features of SW. Stability was nightmare but performance on quad-core CPU was great.
I switched to Apple…well first versions of DxO on Apple were nightmare. More stable than Win version but performance was very poor.
Then DxO 7, 8, 9 and 10. On Apple computer was most stable version 8.5 – 9.5; DxO Labs went Windows way…sell quantity with useless features and sluggish/bugged core of program (at least on Apple; unsure about Win because I don’t use it since 2011 and guess what it works 99% times without any maintenance ;-)
DxO 9.5 is great on Mac OS X but slow despite all fancy GPU acceleration and SMP, SMT (multi CPU/cores, Multi Thread processing).
DxO 10 was blast – fast, stable a dream after years of misery. Then came 10.1 version…well it is slower than 9.5 now, unstable and it eats lots of resources (Apple MBP 2011 HR I – 512GB SSD, 16GB RAM, i7 2.3GHz). I was so pissed off that I demanded refund of money and never went back.
DxO 10.5.1 – a year later or so I thought myself I try what has changed…SADLY NOTHING.
It is final goodbye to DxO products. Already bought Adobe Lightroom 5 and going to buy film emulation presets.
I used DxO for film emulation and simplicity. Thos features are no longer useful by DxO. Adobe Lr is stable, fast and industry standard and they keep integrity.
DxO started to satisfy HDR photographers and Wallgraphers – end of the great tool.
Hello Hajes,
Sorry to hear that your experience with DxO OpticsPro has not been as positive as mine has been. I’m a windows user and I’ve not had any issues with it. It is a core element in my processing flow and I like it so much that I would not even consider a camera if it wasn’t supported by OpticsPro.
Tom
I know your feeling, I was same. But until you try more systems and you get used to speed, it is hard to go backwards.
Somewhere around DxO 8.5 – Mac OS X version substantially exceeded performance of Windows.
There is quite large difference on Mac OS X vs Win (compared on same machine with two OS installed – just to clear confusion, Apple has got better drivers for Windows than other manufacturers)
Hi David,
My computer system is really custom built around my needs for client video work. Since I’m not the least bit tech-savvy I leave the custom build specs up to my youngest son. So far I have no complaints.
Tom
A bit late to this conversation but as a user of both DxO Optics 10 Pro and LR CC I must say that LR is a far better tool at half the price. I regret my Dx0 purchase and use it only if I have a noisy image now as the Prime feature is worthy. For anything else LR is better by a wide margin. With the new Dehaze feature in LR it makes it even that much better.
I think the hippo and rhino images are way over-done in this article and look more HDRish than anything else. I do not think this is DxO’s intended application of clearview to be honest but rather for subtle enhancements and adjustments.
Hi Monte,
Thanks, as always, for your sharing your observations! Using the ClearView function with the zoo images was an experiment…and as you point out is not subject matter for which the ClearView function was intended. I agree with your point that ClearView is best used for subtle adjustments.
Tom
Before and after just using DXO Clearview
Thanks for sharing Robert!
Tom
Hi Thomas, I’m a new user of DxO and think it’s a great bit of software, however, have you or any of your contributors noticed a ripple effect from the center of the image moving out to the extremities. Unfortunately I’m not an IT wiz to send a screen shot, but if you import an image back into Lightroom from DxO, go into Develop mode and click on spot removal (moving the slider to the far right) you should see these rings. I’ve tried the default settings just in case I’ve moved the sliders too much, but they can still be seen. Is it me and if so what have I done to create these……?
Hi Fowlesy,
Some of the OpticsPro adjustments are quite sensitive and if you overdo some of them you may get some circular type artifacts. I’d suggest you go back on those images that have the artifacts and back off on some of your OpticPro adjustments. Things like ClearView and even Smart Lighting (depending on the image) need to be done carefully. If you redo the images and back-off on those two things to start with, you may find that those circular patterns disappear. Another hint that you have overdone an adjustment is if you suddenly see a lot more sensor dust showing up on your images that wasn’t visible before the adjustments were made.
Tom
how do i do this, remove haze, in photoshop?
Hi Gregory,
If you look above, Andres Rozo posted his suggestion on how to remove haze using Photoshop. Perhaps that will be helpful for you.
Other PS and LR users may also have some suggestions…?
Tom
thanks
Thomas,
I just started a trial of DXO 10 yesterday, and I have to agree with you that it is quite powerful,
if used correctly and sparingly (to taste, of course).
Just curious, what would be your suggested “adjustment flow”. I think you have alluded to it above,
but wanted to make sure.
My thoughts:
1) Smart Lighting Slider
2) Selective Tone Adjustments (as needed)
3) DXO Clearview
4) Prime denoising
(If the photo is pretty close to ideal, then I’d say you may be able to get away with 1) and 3).
I think steps 3) and 4) are almost always done last…)
A little movement is slider may go along way, so those concerned about “over baking” can make
smaller adjustments, which may look more natural.
Appreciate your thoughts and suggestions.
In any case, good article!
Eric
Hi Eric,
Since the ClearView adjustment impacts quite a few other adjustments I would not do any Selective Tone Adjustments until after adjusting ClearView. Also, I’d suggest stopping ClearView short of what you envision in your mind, then use the other adjustments to get to the final image you want.
I’m still working with ClearView to see how best to apply it based on the subject image. On the DxO site they recommend applying it immediately after OpticsPro 10 has done all of its auto corrections. This would mean that you also would not adjust Smart Lighting until after ClearView.
I think many users may find adjusting ClearView and Smart Lighting may be all they need with many images. As you suggested, moderation in use of ClearView is a good idea.
As far as PRIME goes, I apply it with any image where I’ve made ClearView adjustments.
Tom
Thomas; Thanks for your exploration of Clear View. I see it as another tool to use as and when I see fit. Also thanks to the Mark Finney for reminding me about the Tonal Contrast Nik Plugin I do like how this can be applied selectively. We have so many tools at our disposal it is easy to forget some and simply keep using the ones we have always used. It is good to have our memories jogged now and then.
For those interested in integrating DxO or other applications with Aperture or Lightroom, check out brushedpixel.com
Hi Bert,
Thanks very much for your comment! As is often said there are many roads leading to the same destination and I agree that it can be helpful for all of us to be reminded of functions in our software that we may be forgetting to use.
Tom
Hi Tom,
Thank you for your review. I guess most of us don’t have the time to review the functionality of software and stick to ‘what we know best’ so your review is welcomed, although on a single feature of DXO.
It would be nice if you could have posted pictures with your ‘other’ adjustments to the raw file (I assume there were some) and then just added the ‘ClearView’ adjustment so one could have compared ‘with’ and without’ directly (not sure if the comparisons are JPEG vs. Raw or not as the first comparison is?)
Agree with your synopsis that ClearView works better with scenery than it does with animals :-)
As software and PP is an integral part of digital photography these days and any software review is appreciated (a not so subtle hint to Nasim as well for more along the same lines :-) )
Hi FredBear,
Thank you for your positive comment. There are a few additional interim image steps shown on a related article on my blog. I’m certainly not an expert with the use of DxO OpticsPro 10 so I try and keep my articles on this software to very specific topics where I have some experience. I would not want to set an unrealistic expectations about my level of expertise with readers.
In terms of when to apply the ClearView function in the post process, DxO recommends doing it after the auto adjustments have been made, and before anything else is done in OpticsPro 10. Since this adjustment impacts a number of image attributes a user can quickly get into a heap of trouble applying this function at the wrong stage.
Tom
Hey Thomas,
I agree with Spy Black. To me it seems the landscapes benefited more from DxO ClearView than the orange hippo swimming in green goo. Also highlights seem really blown. Just my humble opinion .
Hi Michael,
I agree with Spy Black that the ClearView function does work better for landscape images…it makes logical sense that it would since that is what DxO designed it to do! Using it on animal images is just another example of my habit of pushing things into new or different uses to see what happens. Sometimes it works better than others. I do think that this function has the potential to be very useful for animal and bird images. I’m better using it with landscape images and I’d be the first to admit that I’m not proficient at it yet. I’ll be continuing to play around with it though as I do think it has some interesting potential with these other images as well as with landscapes.
Tom