As, photographers we often struggle with a lack of light, necessitating uncomfortably high ISOs or dangerously long shutter speeds. But there are occasions with the opposite problem: too much light. In these moments, neutral density filters are invaluable.
What Are Neutral Density Filters?
Neutral density (ND) filters are simply dark filters which reduce the light that reaches your camera sensor. These filters have been given the name “neutral,” because they are intended to have no effect on the colors of your photograph.
Neutral density filters come in a variety of densities. The densest can block so much light that you would need an hour-long exposure even in the midday sun. But which density should you choose for your ND filter? And under what circumstances do you need to use these filters in the first place? In this article, I will answer those questions and explain what you need to know about neutral density filters as a photographer. Who knows, even if you already have a bag full of ND filters, maybe you’ll learn something new!
Typical Scenarios for Using ND Filters in Photography
As a general rule, neutral density filters are used so that you can set a longer-than-usual shutter speed. There are multiple reasons why you may want such longer exposures, which I will detail below.
Dynamic rendering of moving subjects
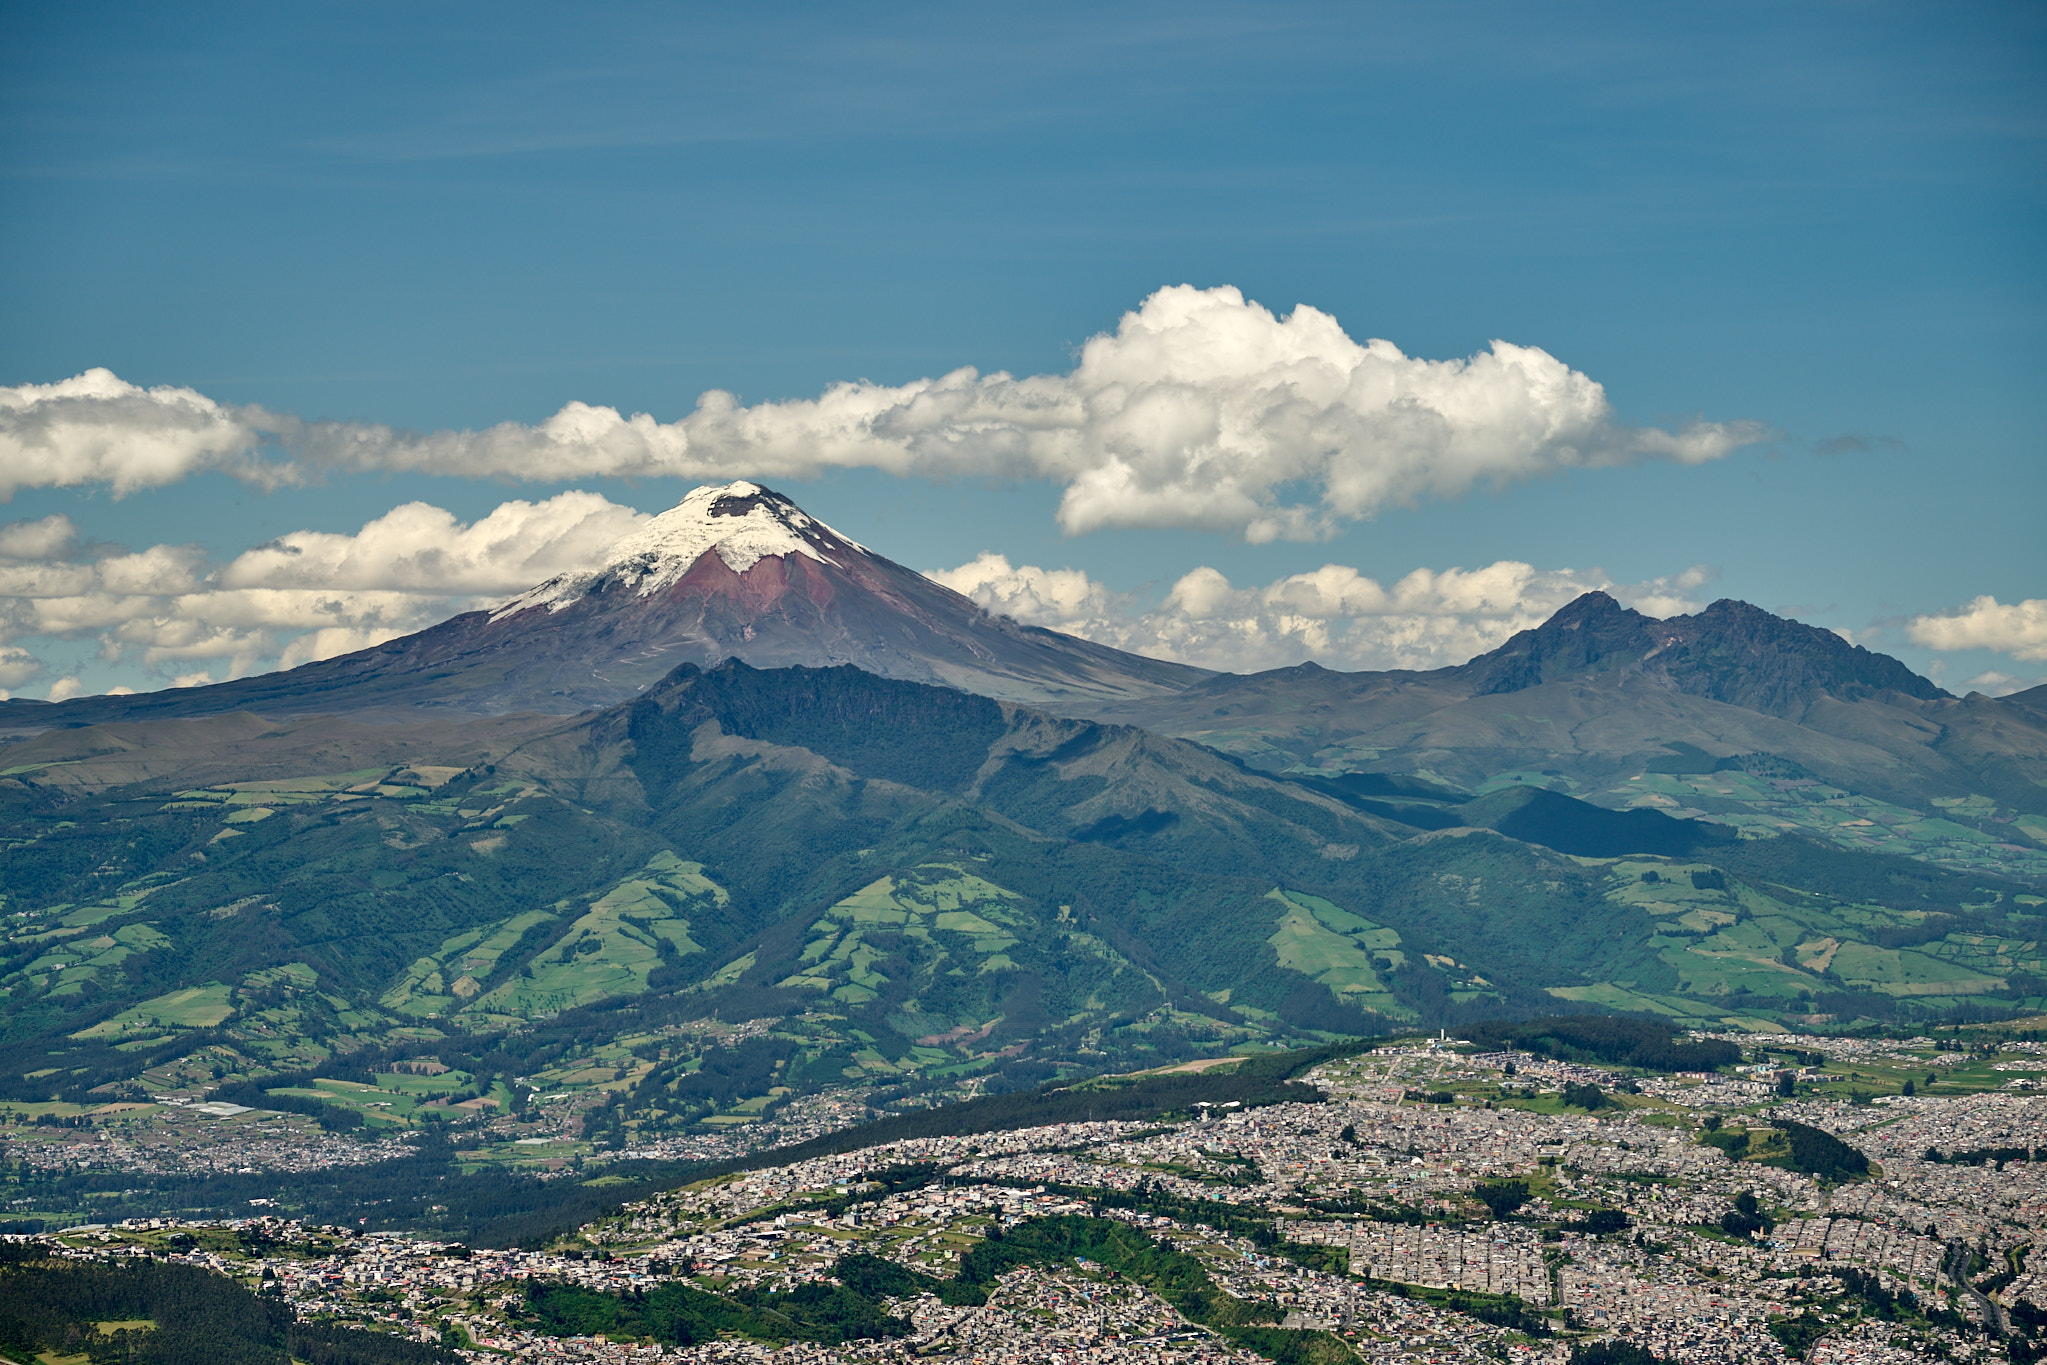
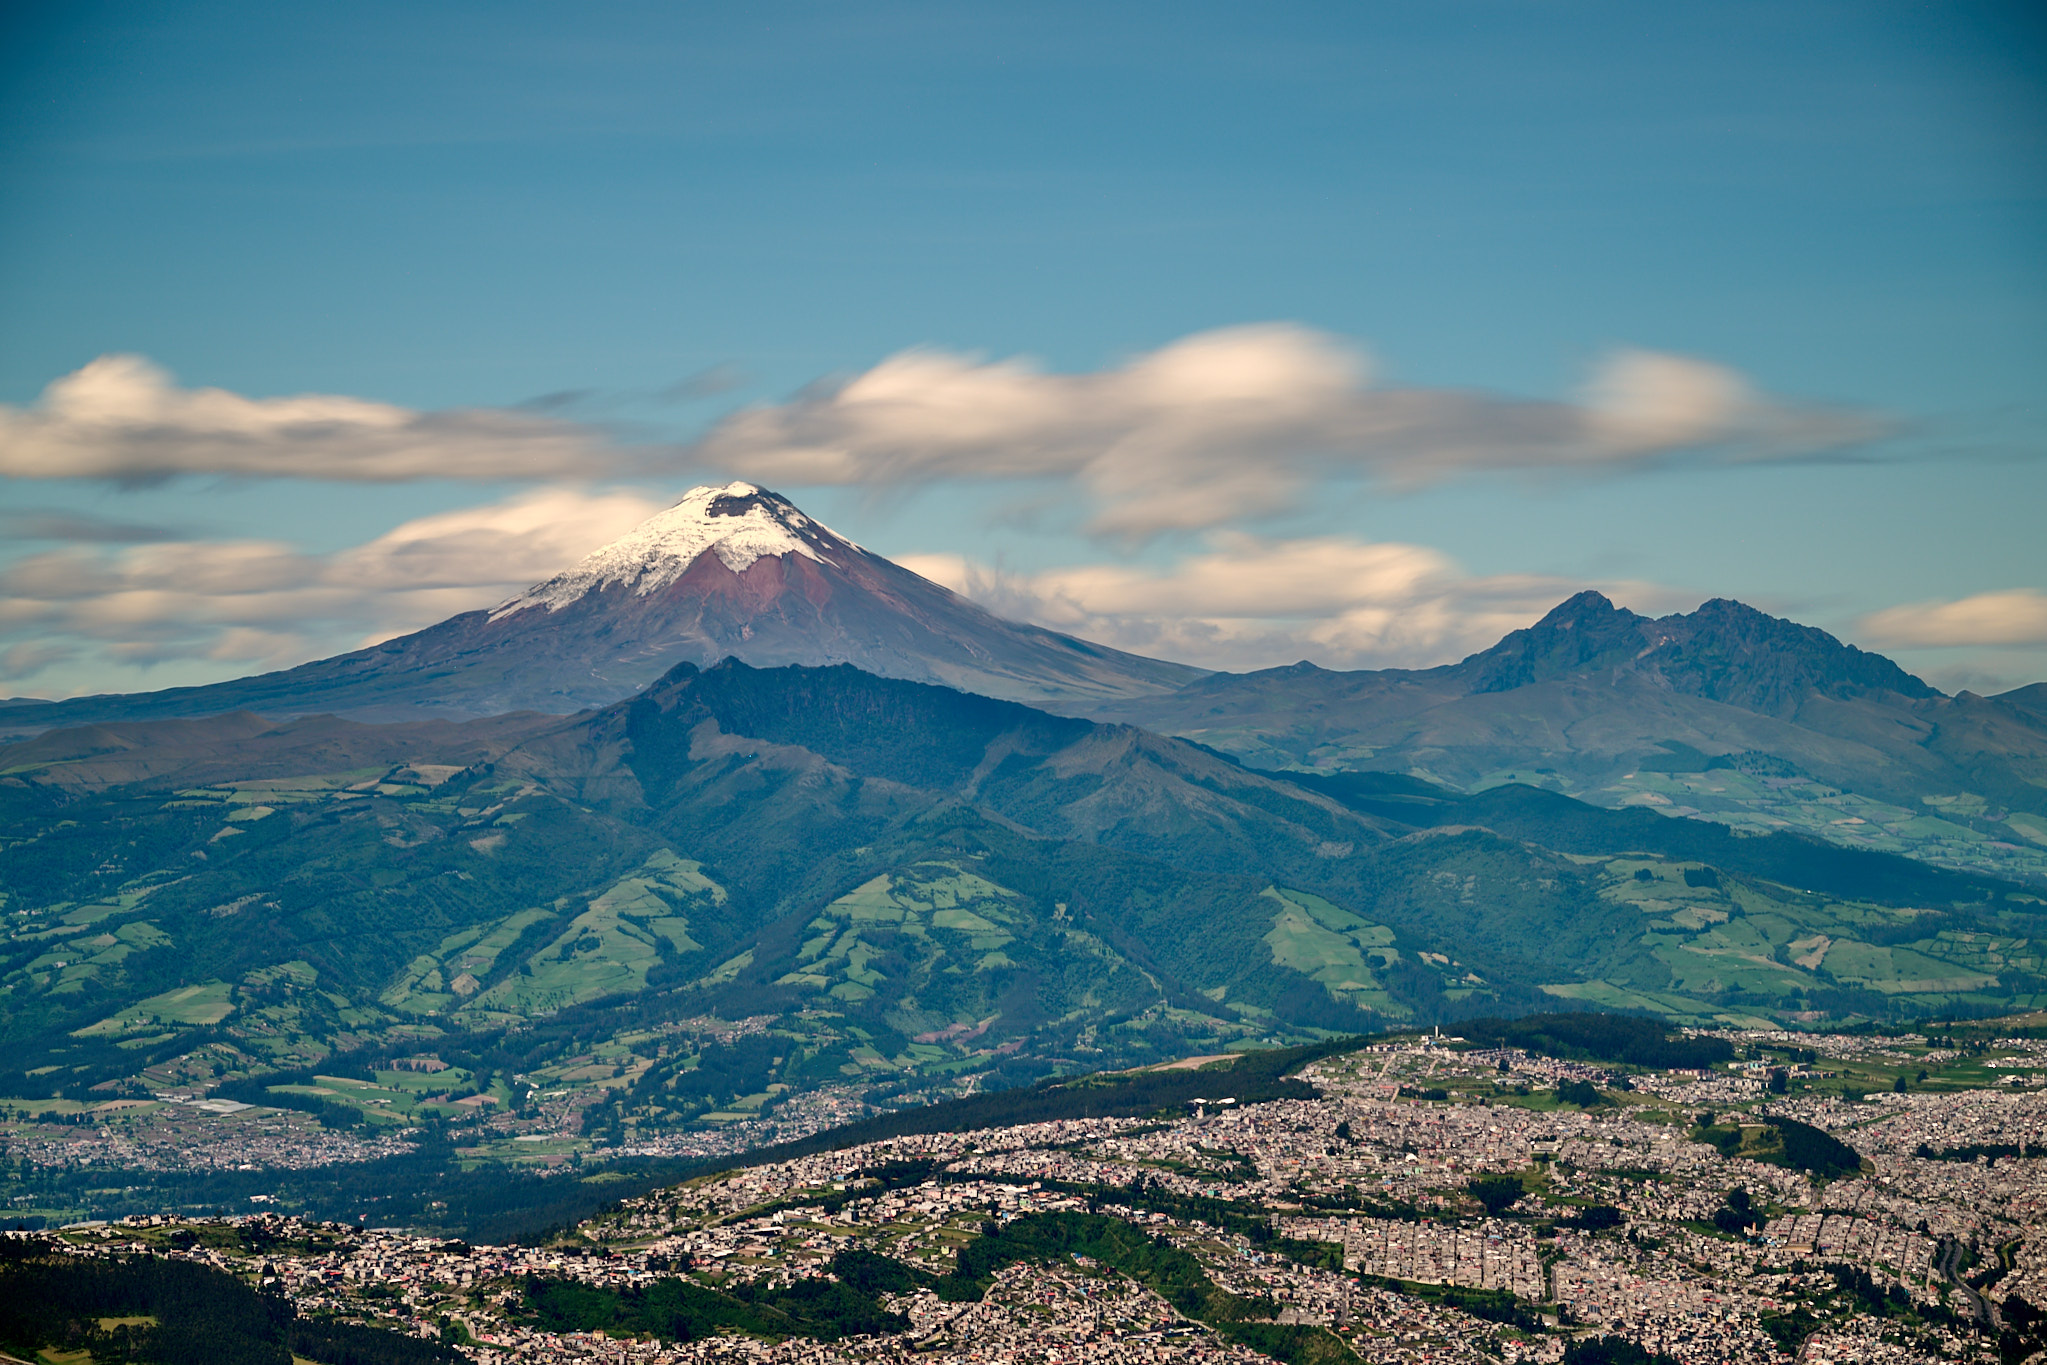
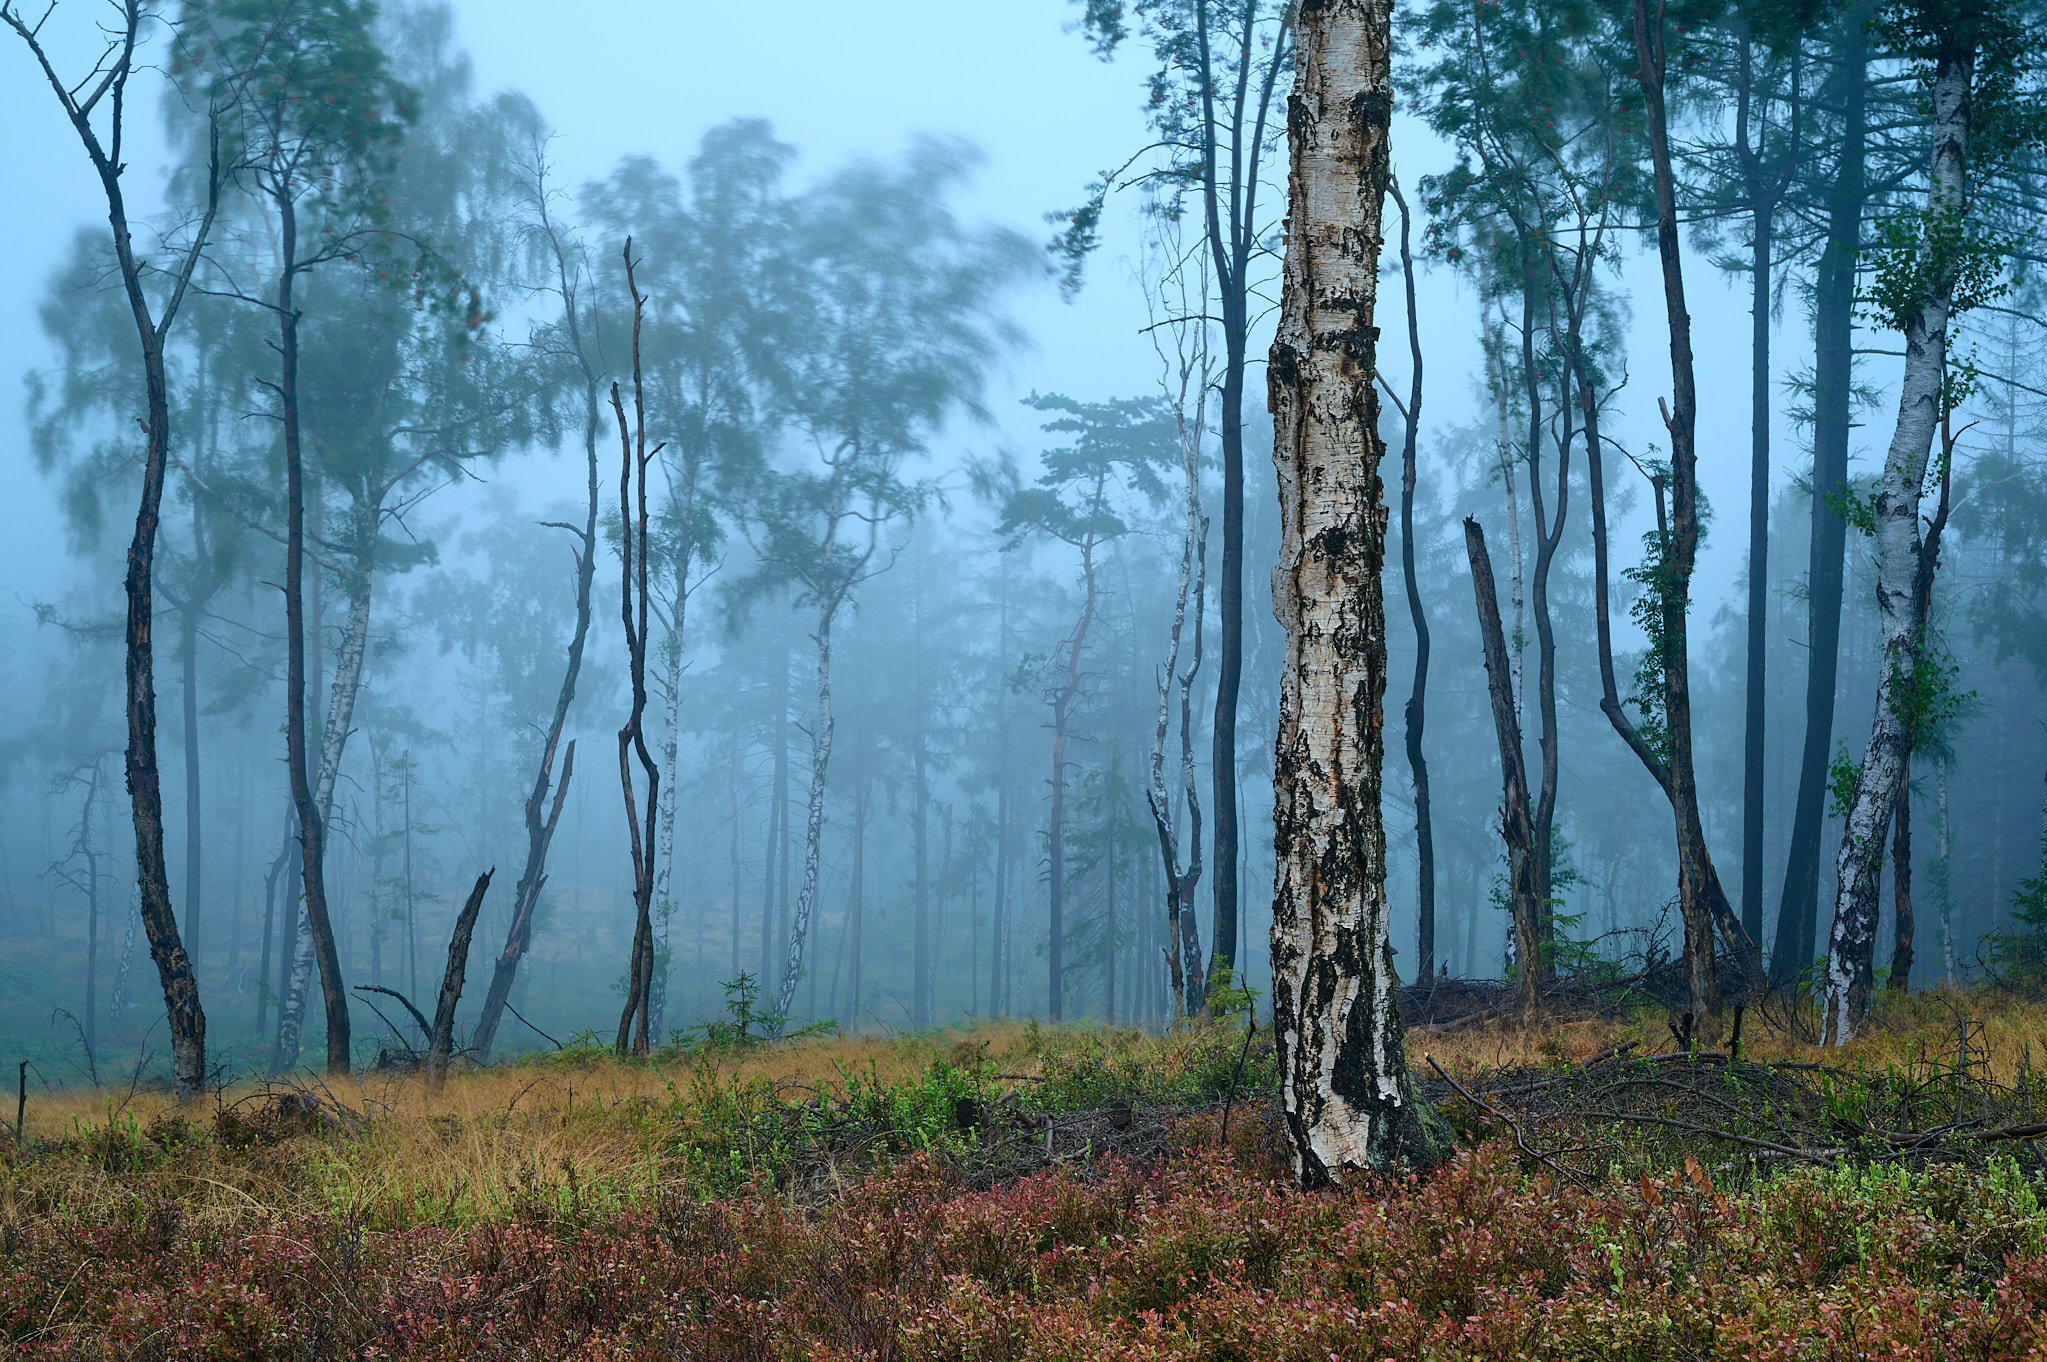
How would you photograph the motion of leaves in the breeze? What about clouds galloping across the sky like stampeding horses? Or a slithering snail that you want to look like a Formula 1 car?
It’s easy. Just attach an ND filter of sufficient density, and set however long of a shutter speed you want. Even slow-moving subjects will show motion blur when you do.
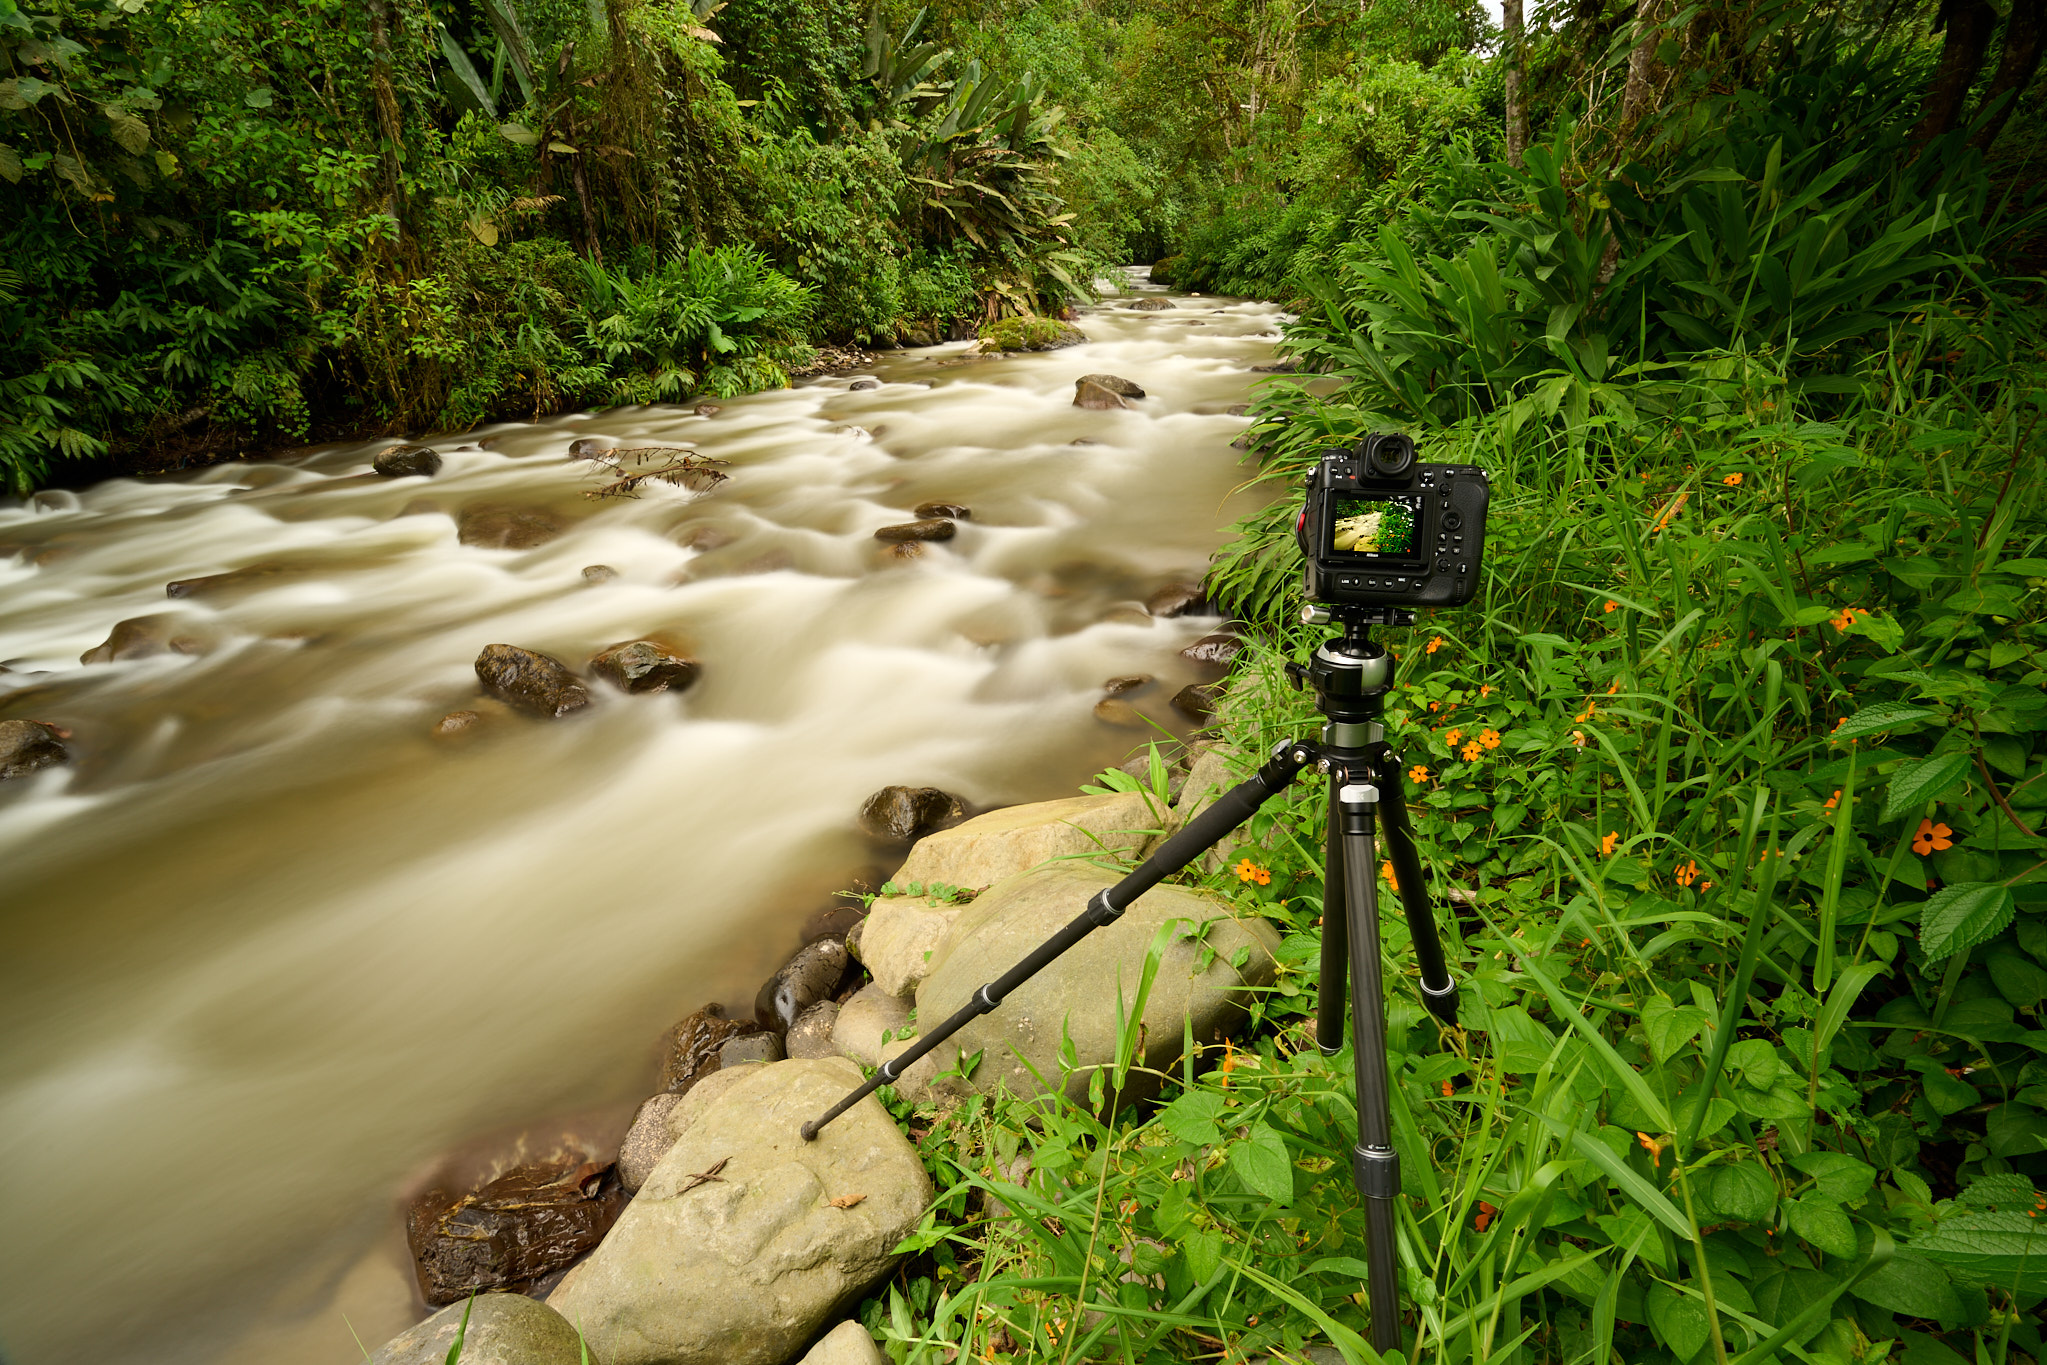
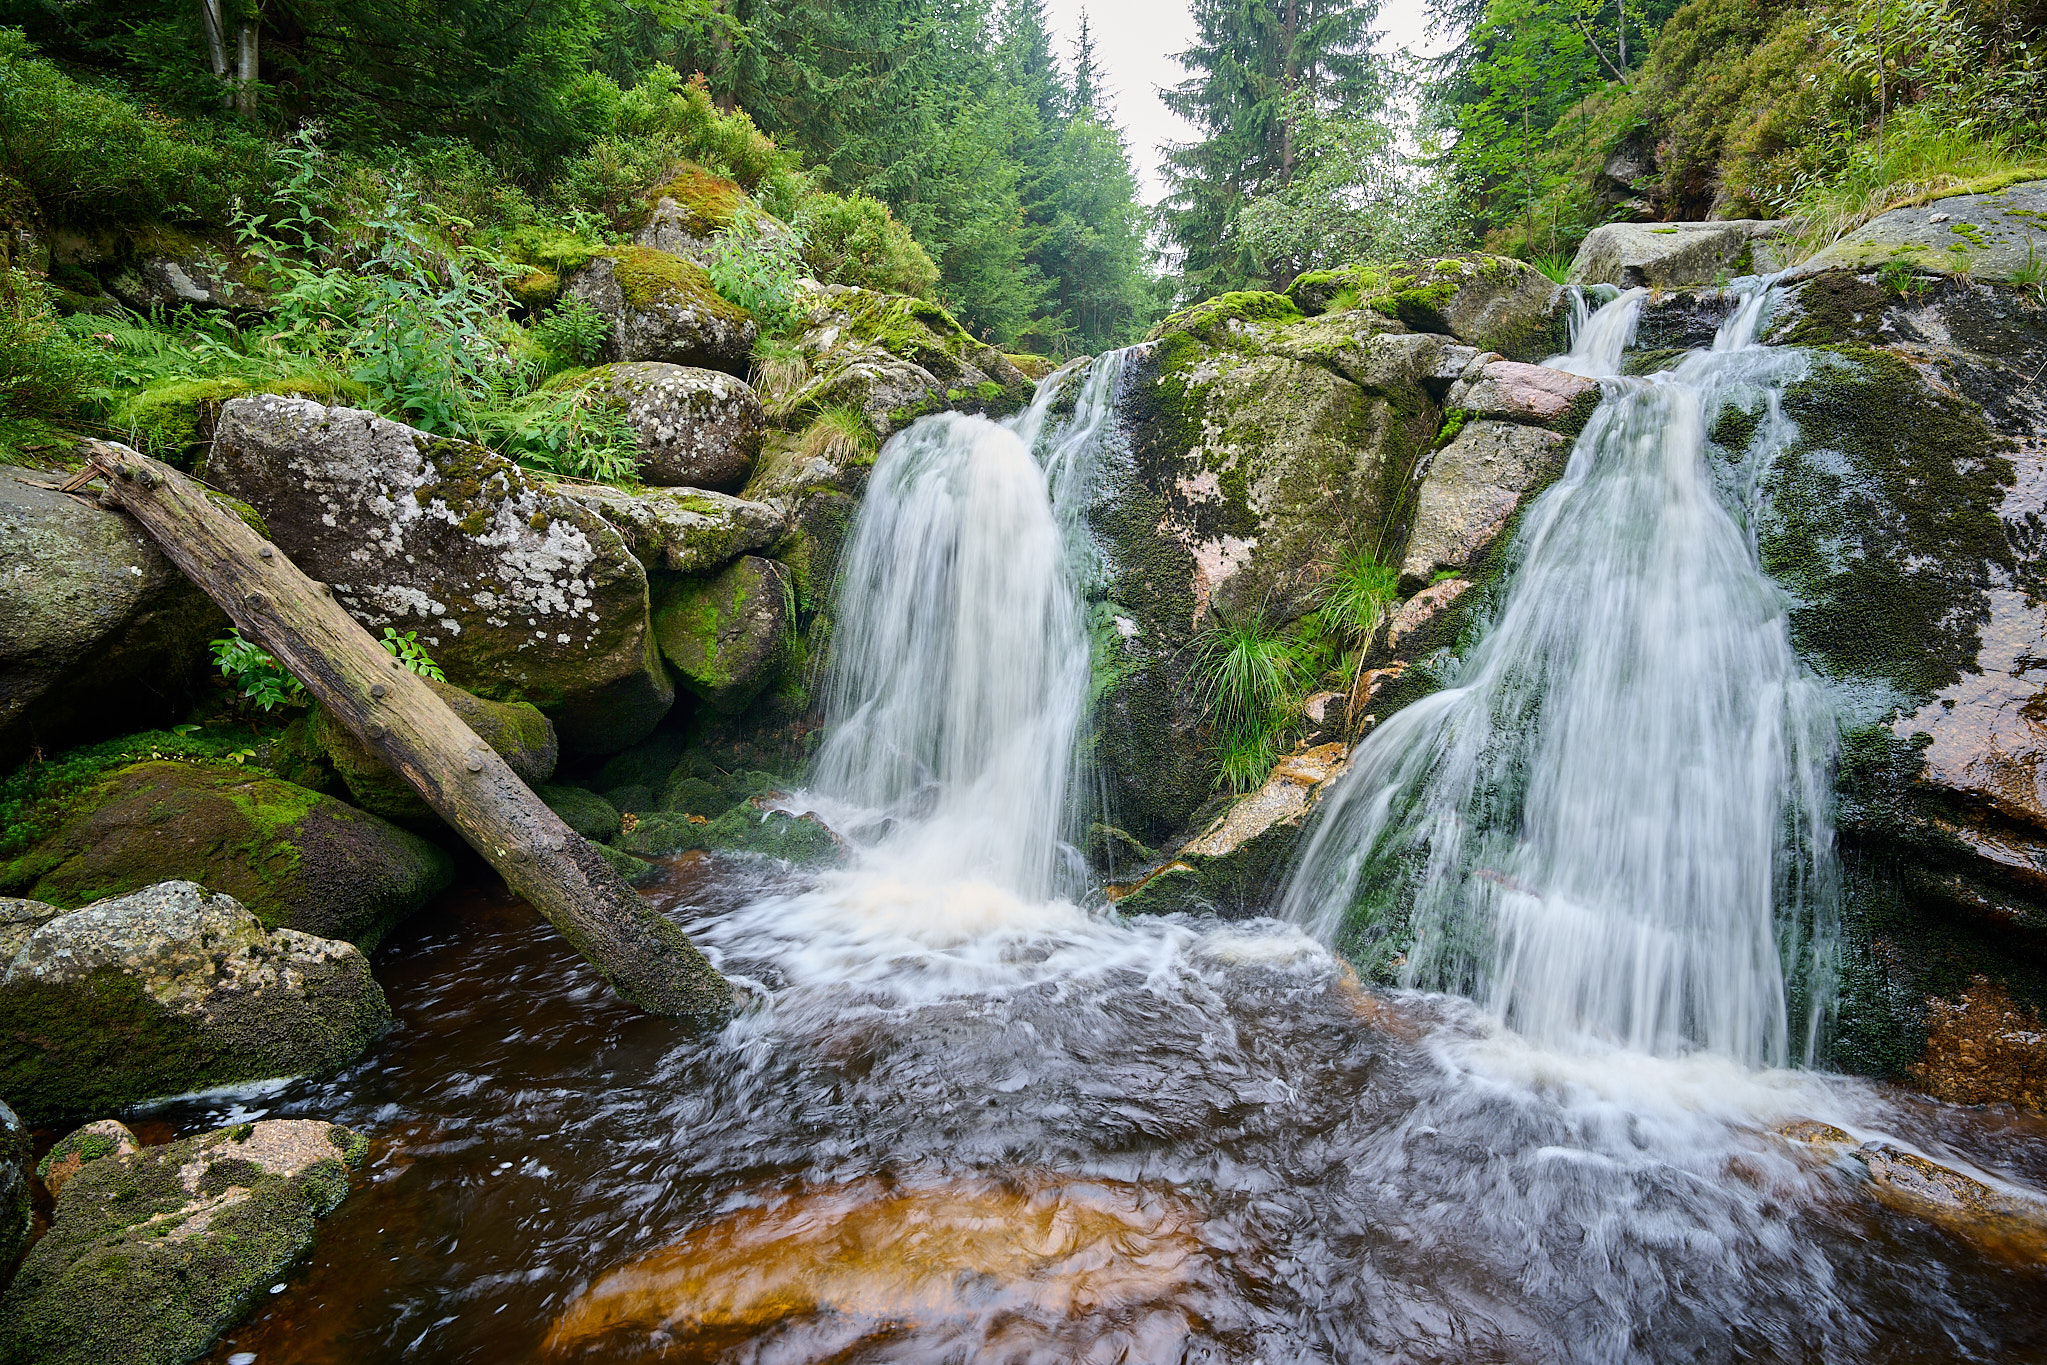
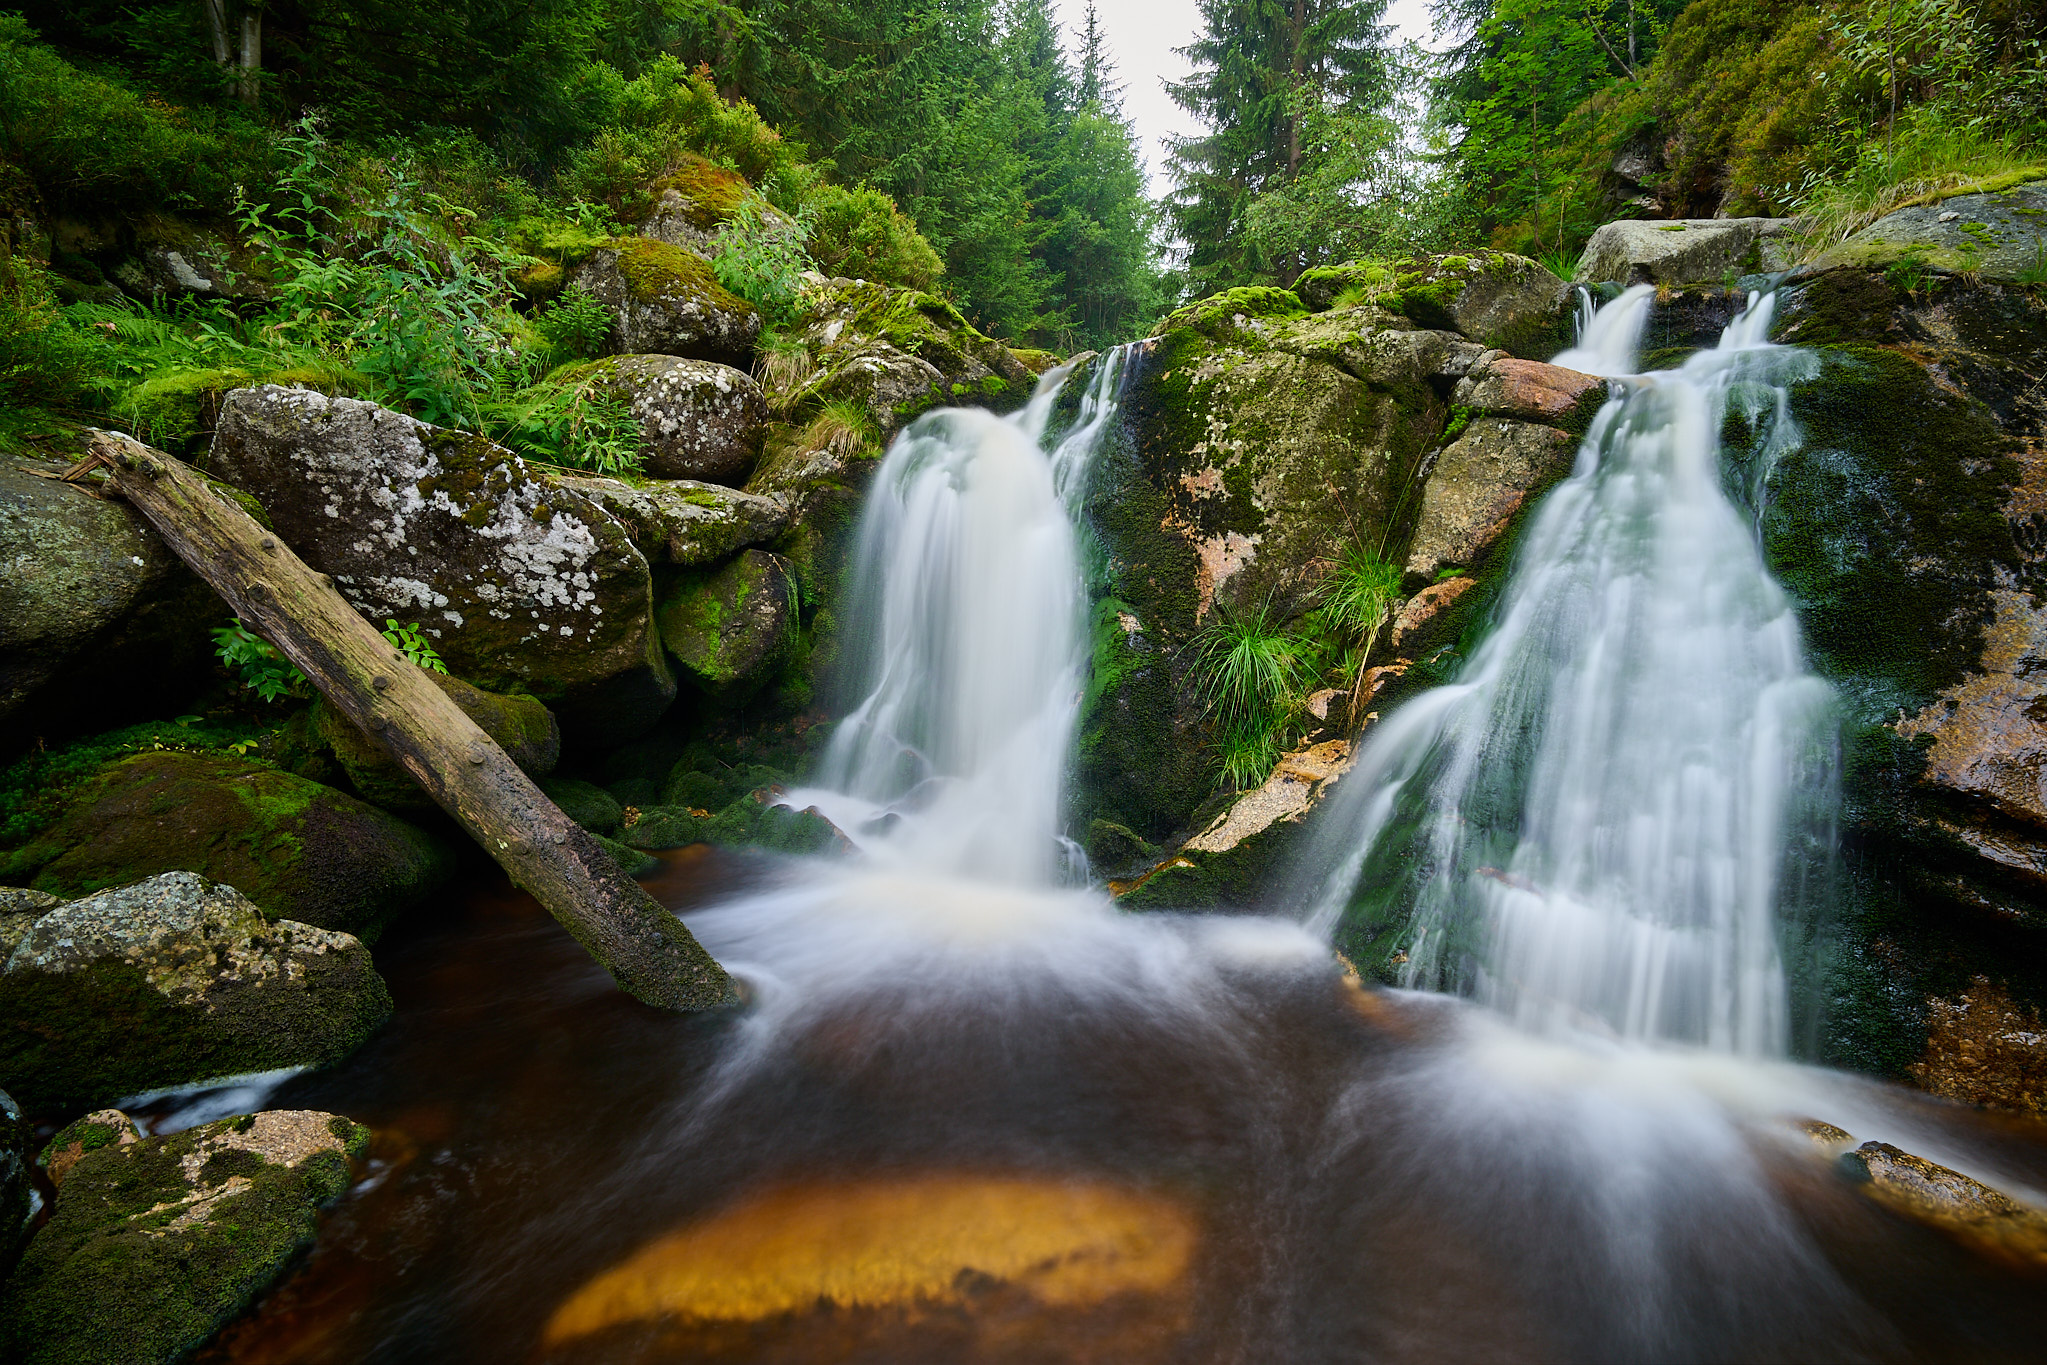
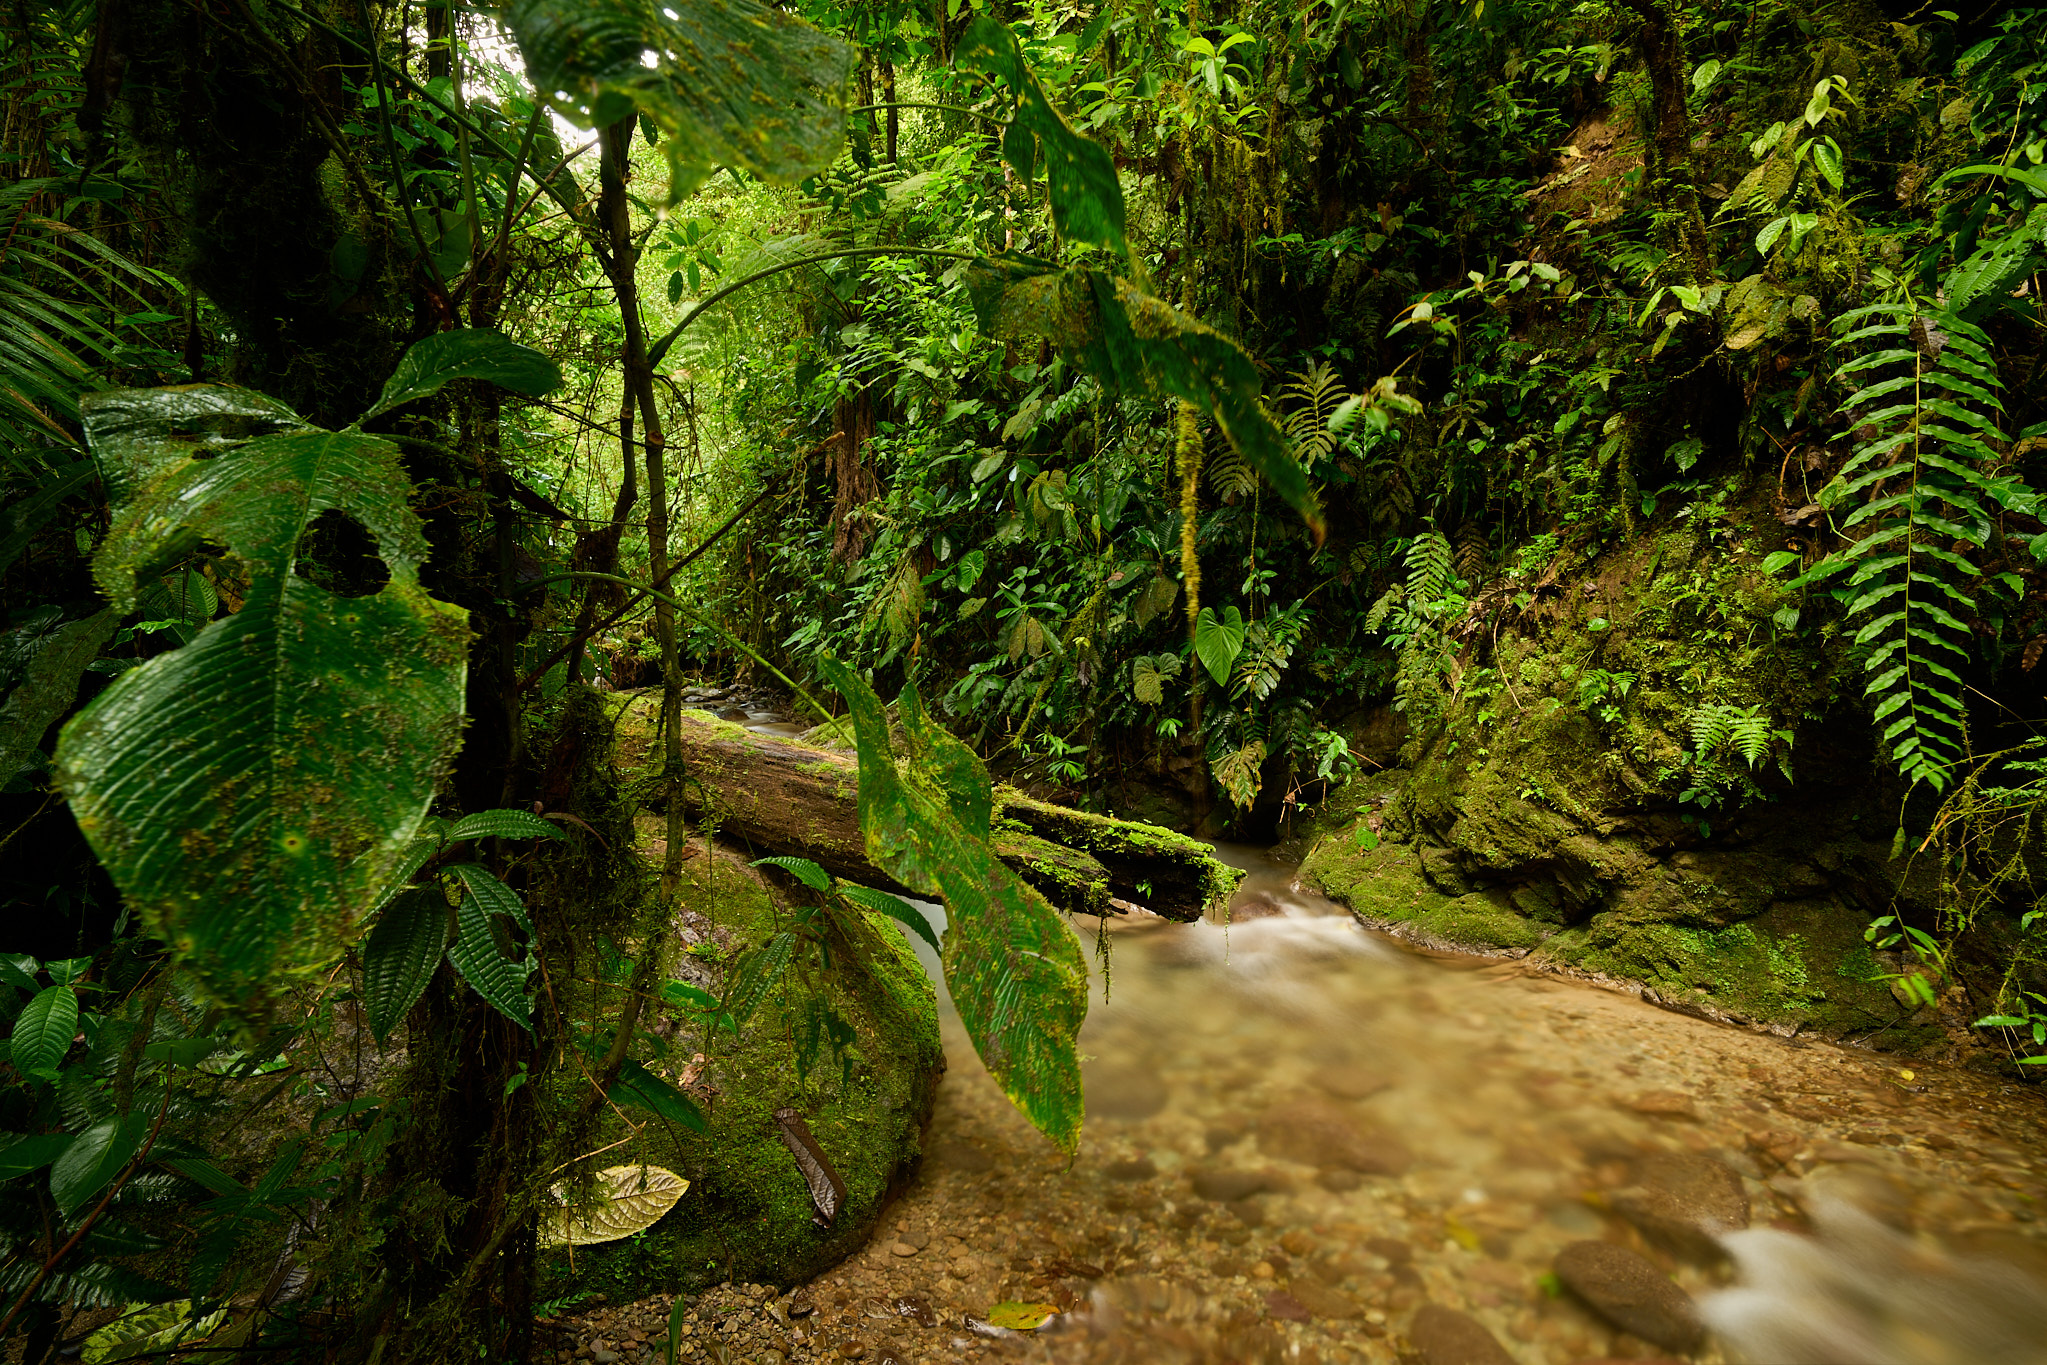
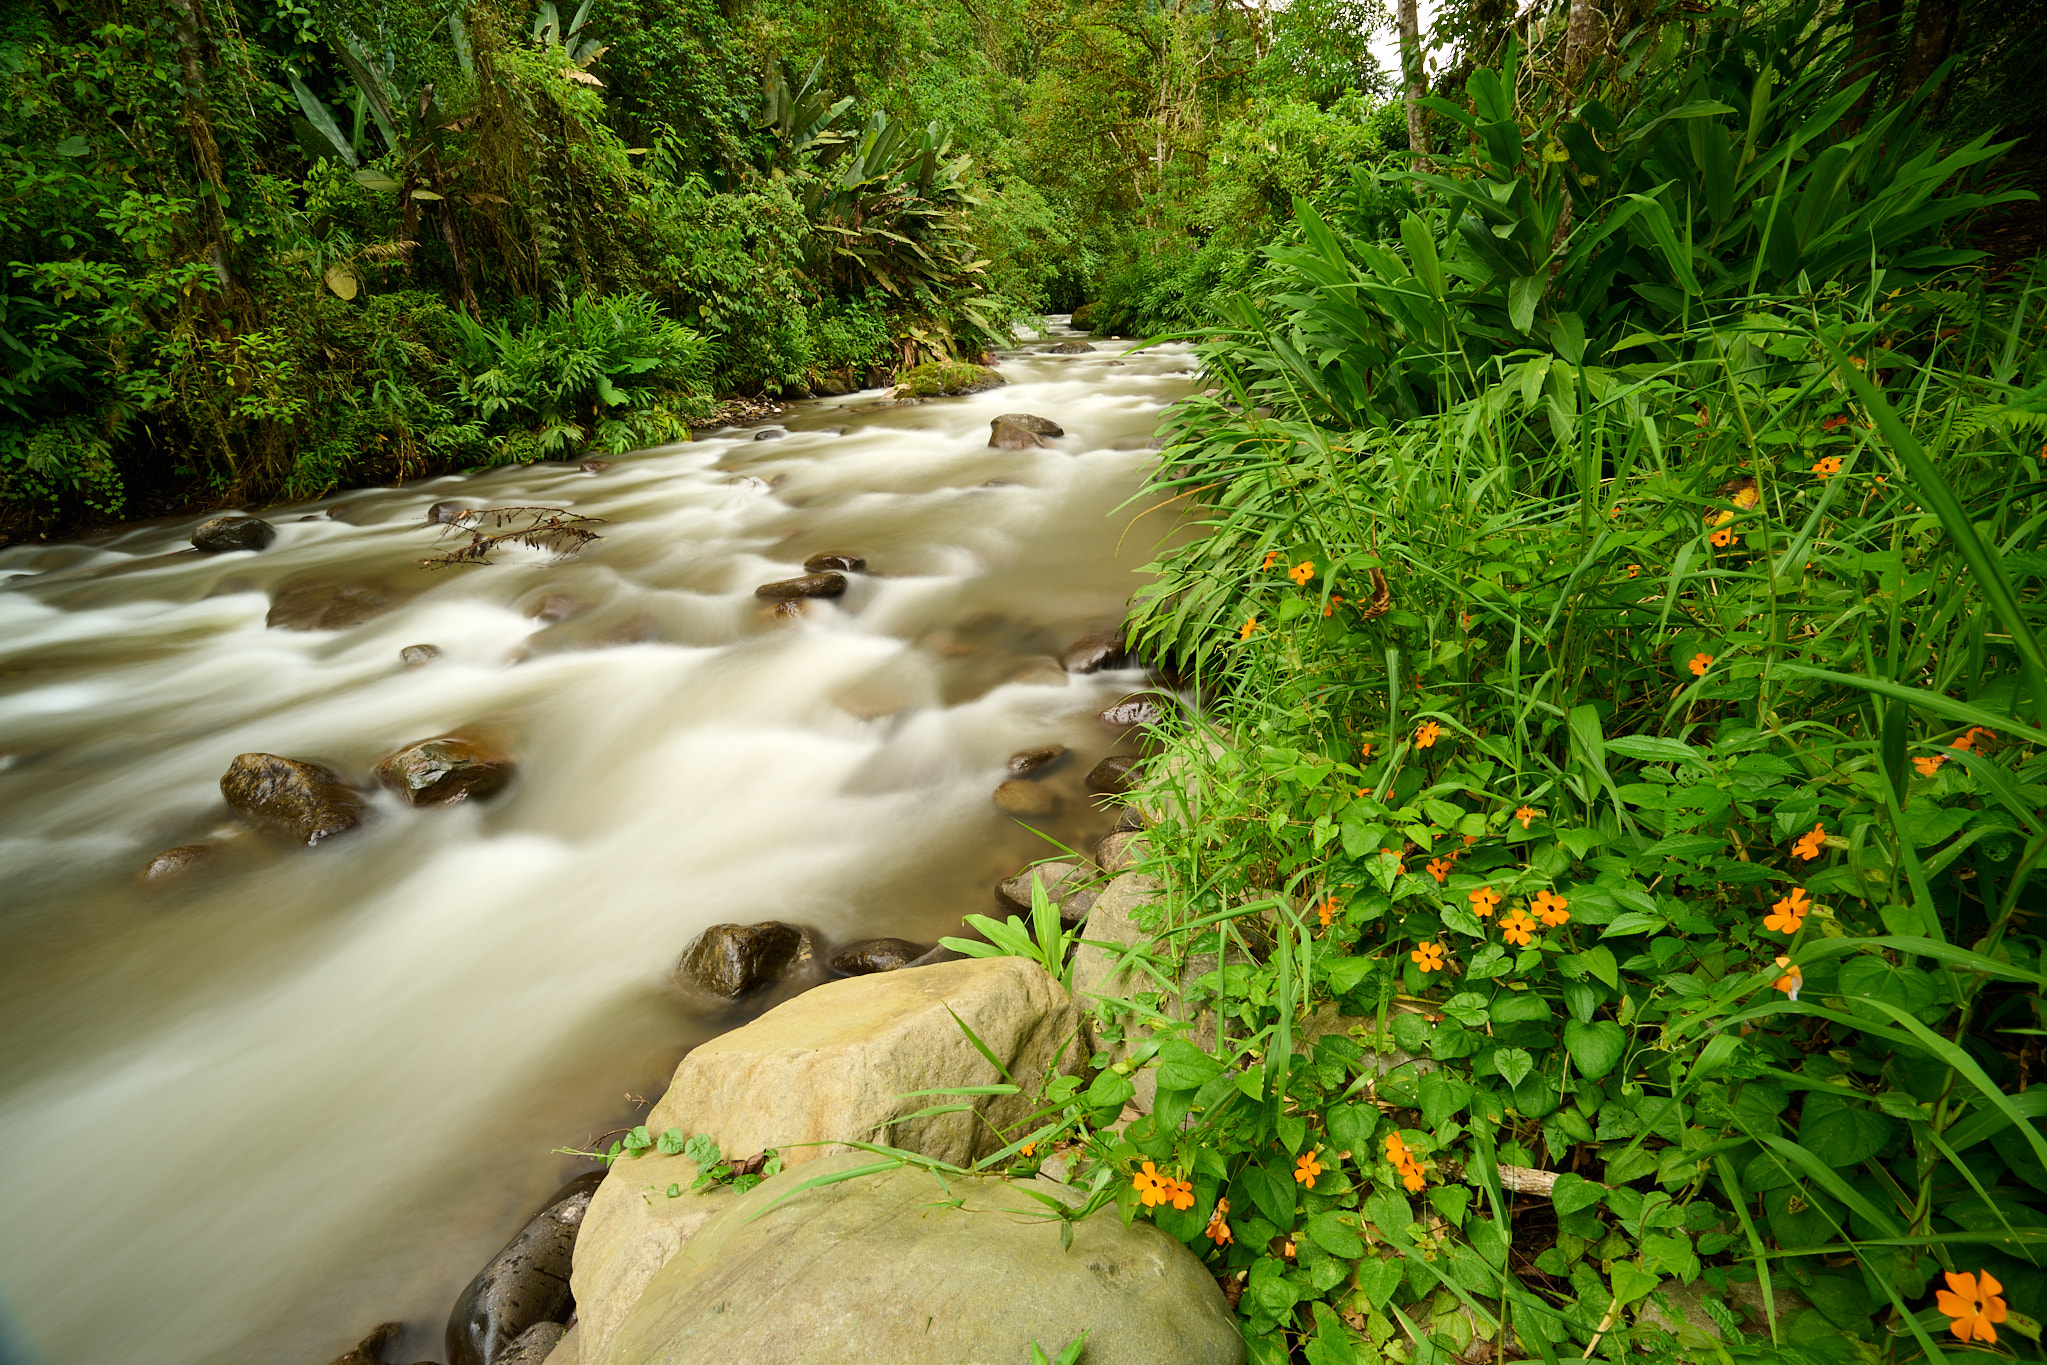
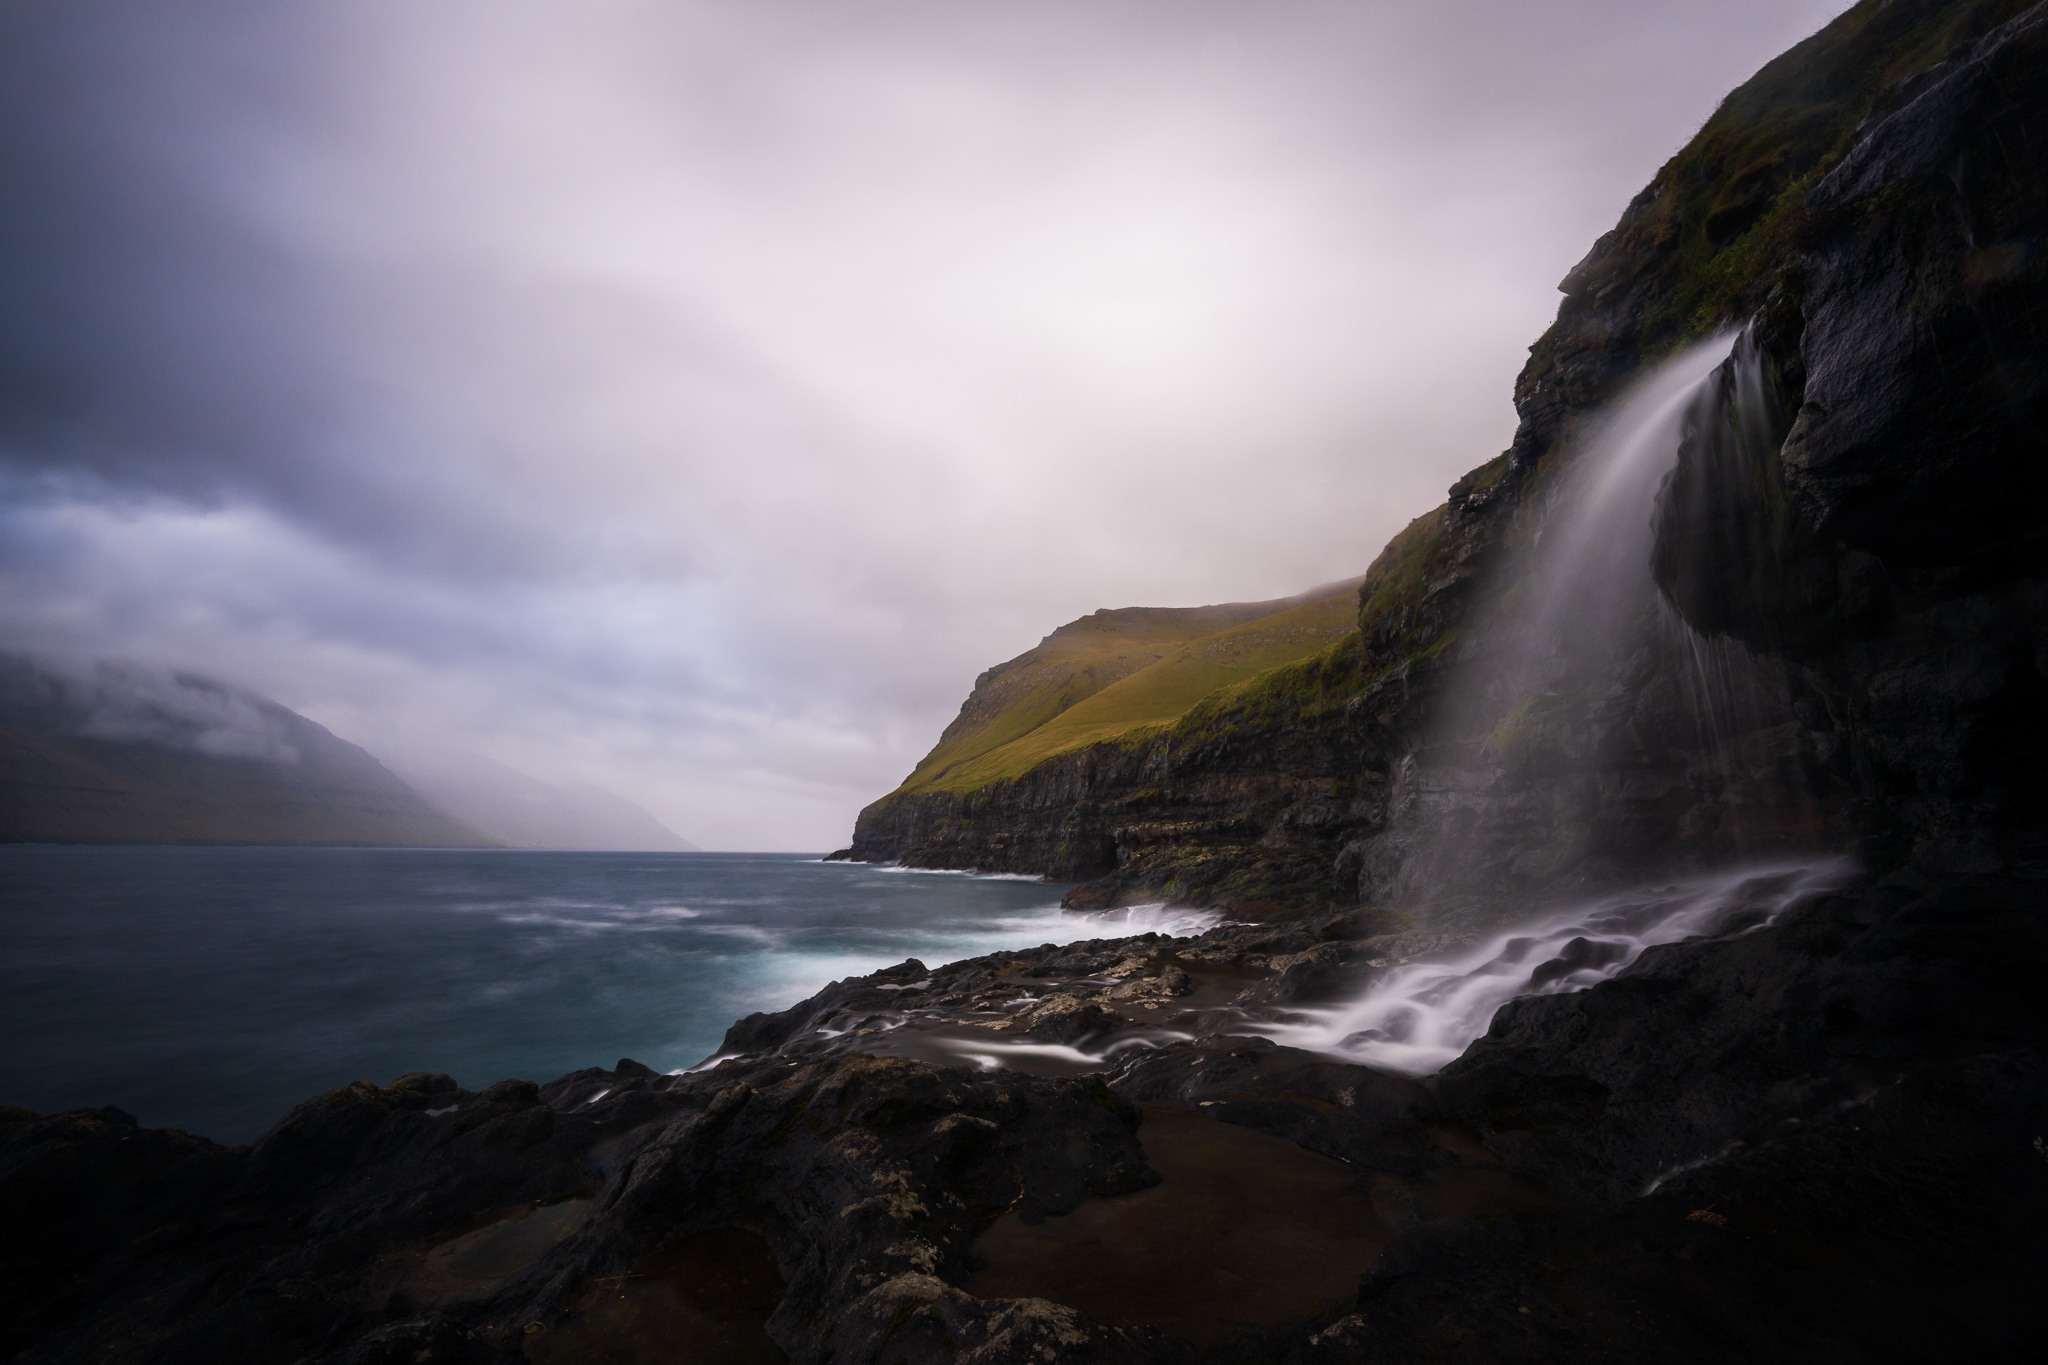
The movement of water
This is just another example of a moving subject, like I just discussed. However, moving water is the most common use of ND filters, so I have dedicated a special category to it.
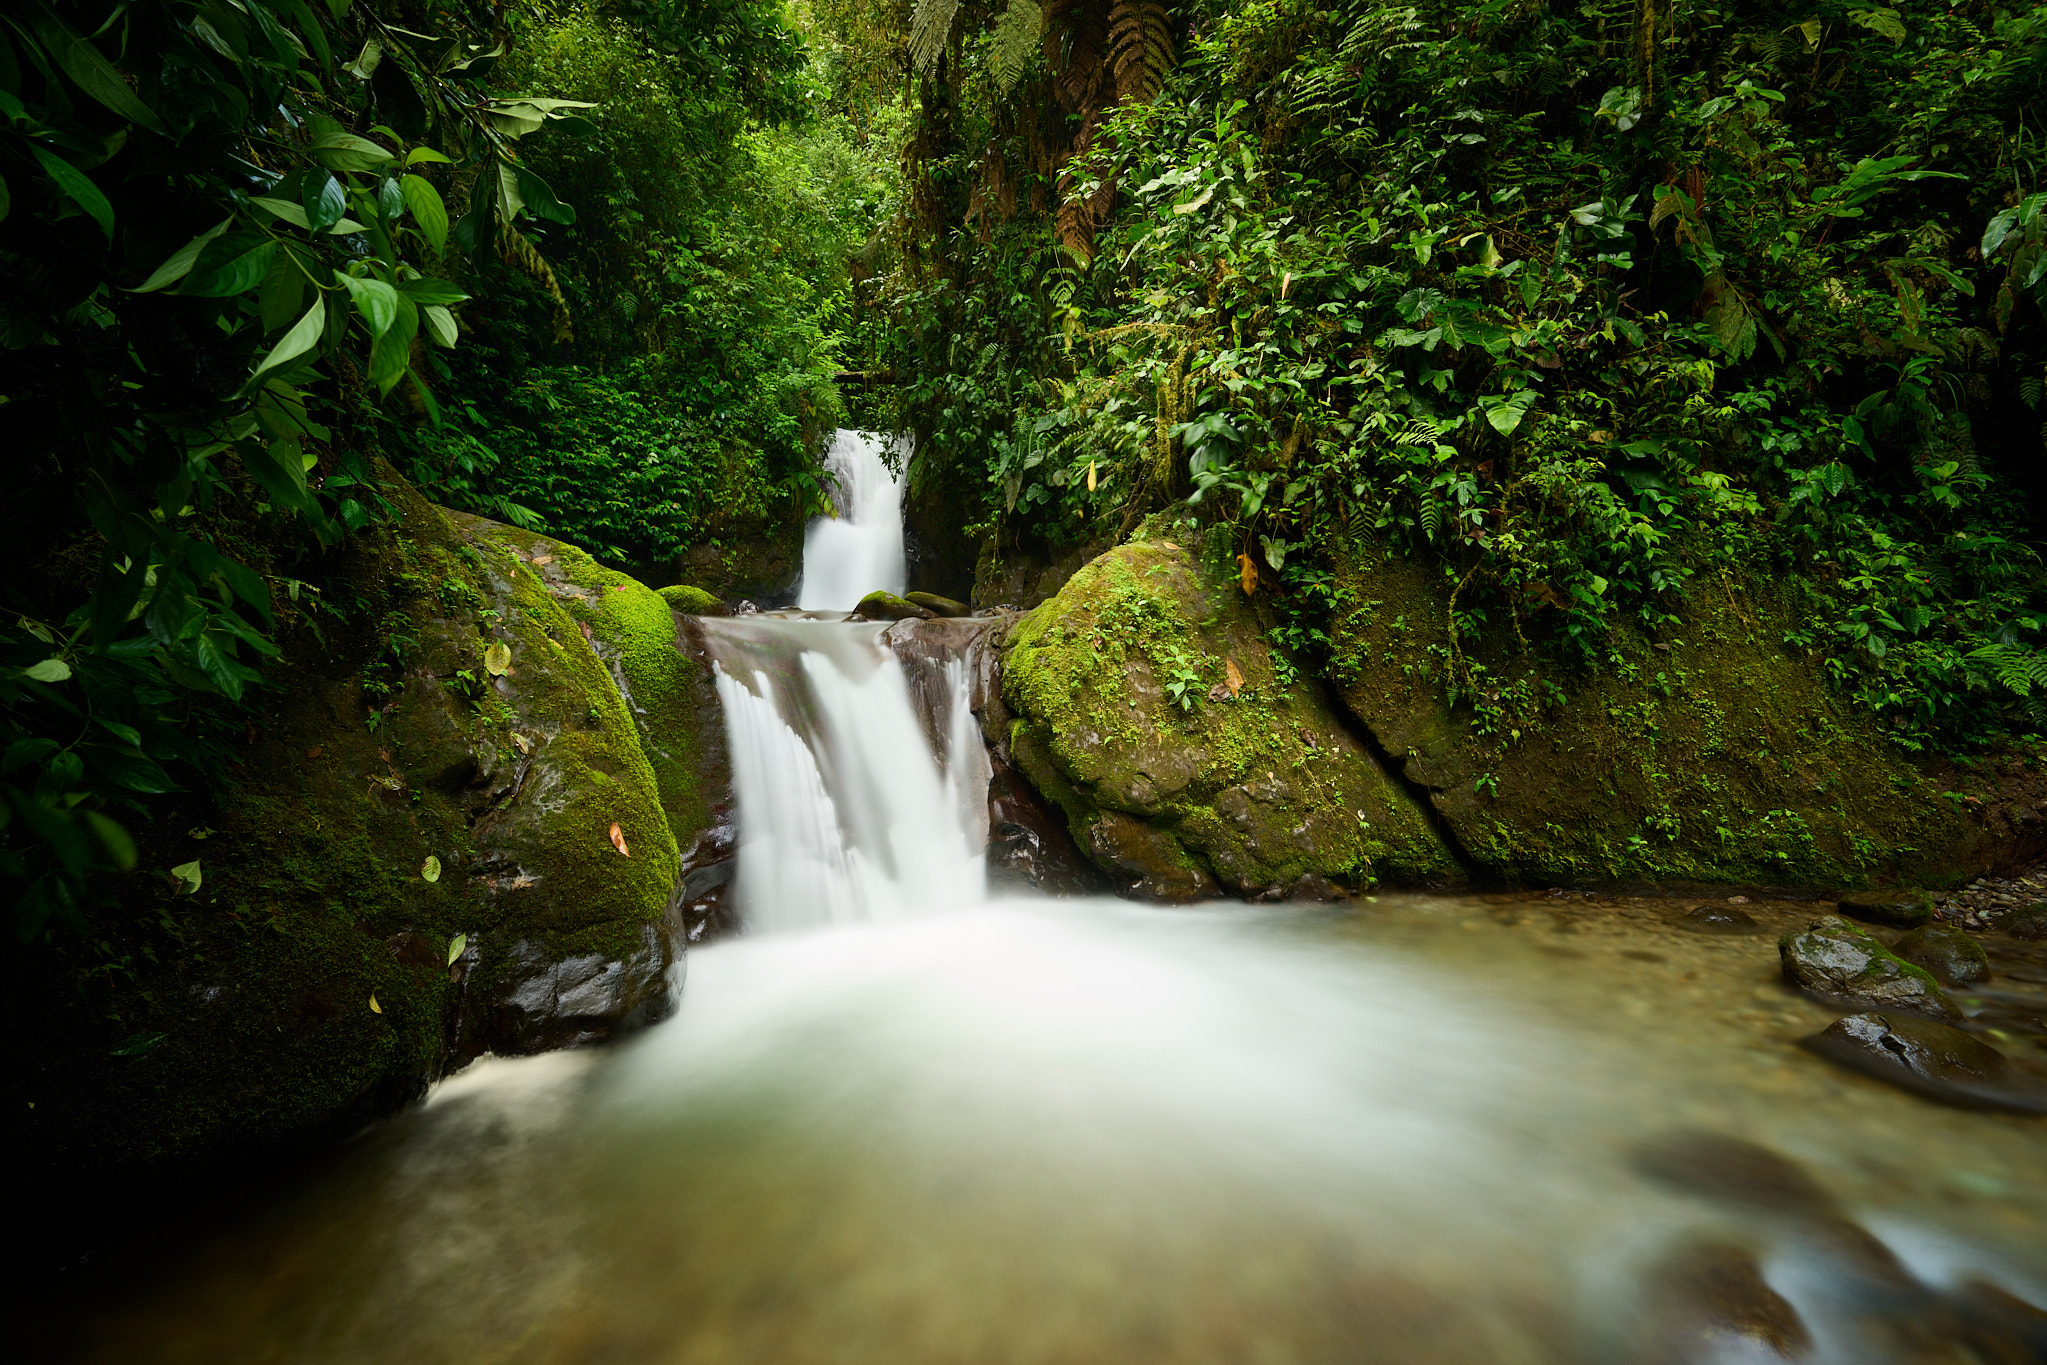
The most classic use is when photographing waterfalls or mountain streams running over rocks. The rippled surface of a mountain stream can be smoothed by an ND filter like combing the silky hair of a water nymph.
In autumn, temperate streams carry not only water but also colorful leaves falling from the trees. An occasional leaf flicking across the surface of the water doesn’t do much. However, if you get more of them in the shot thanks to the long shutter speed, they can decorate the river with colorful ribbons.
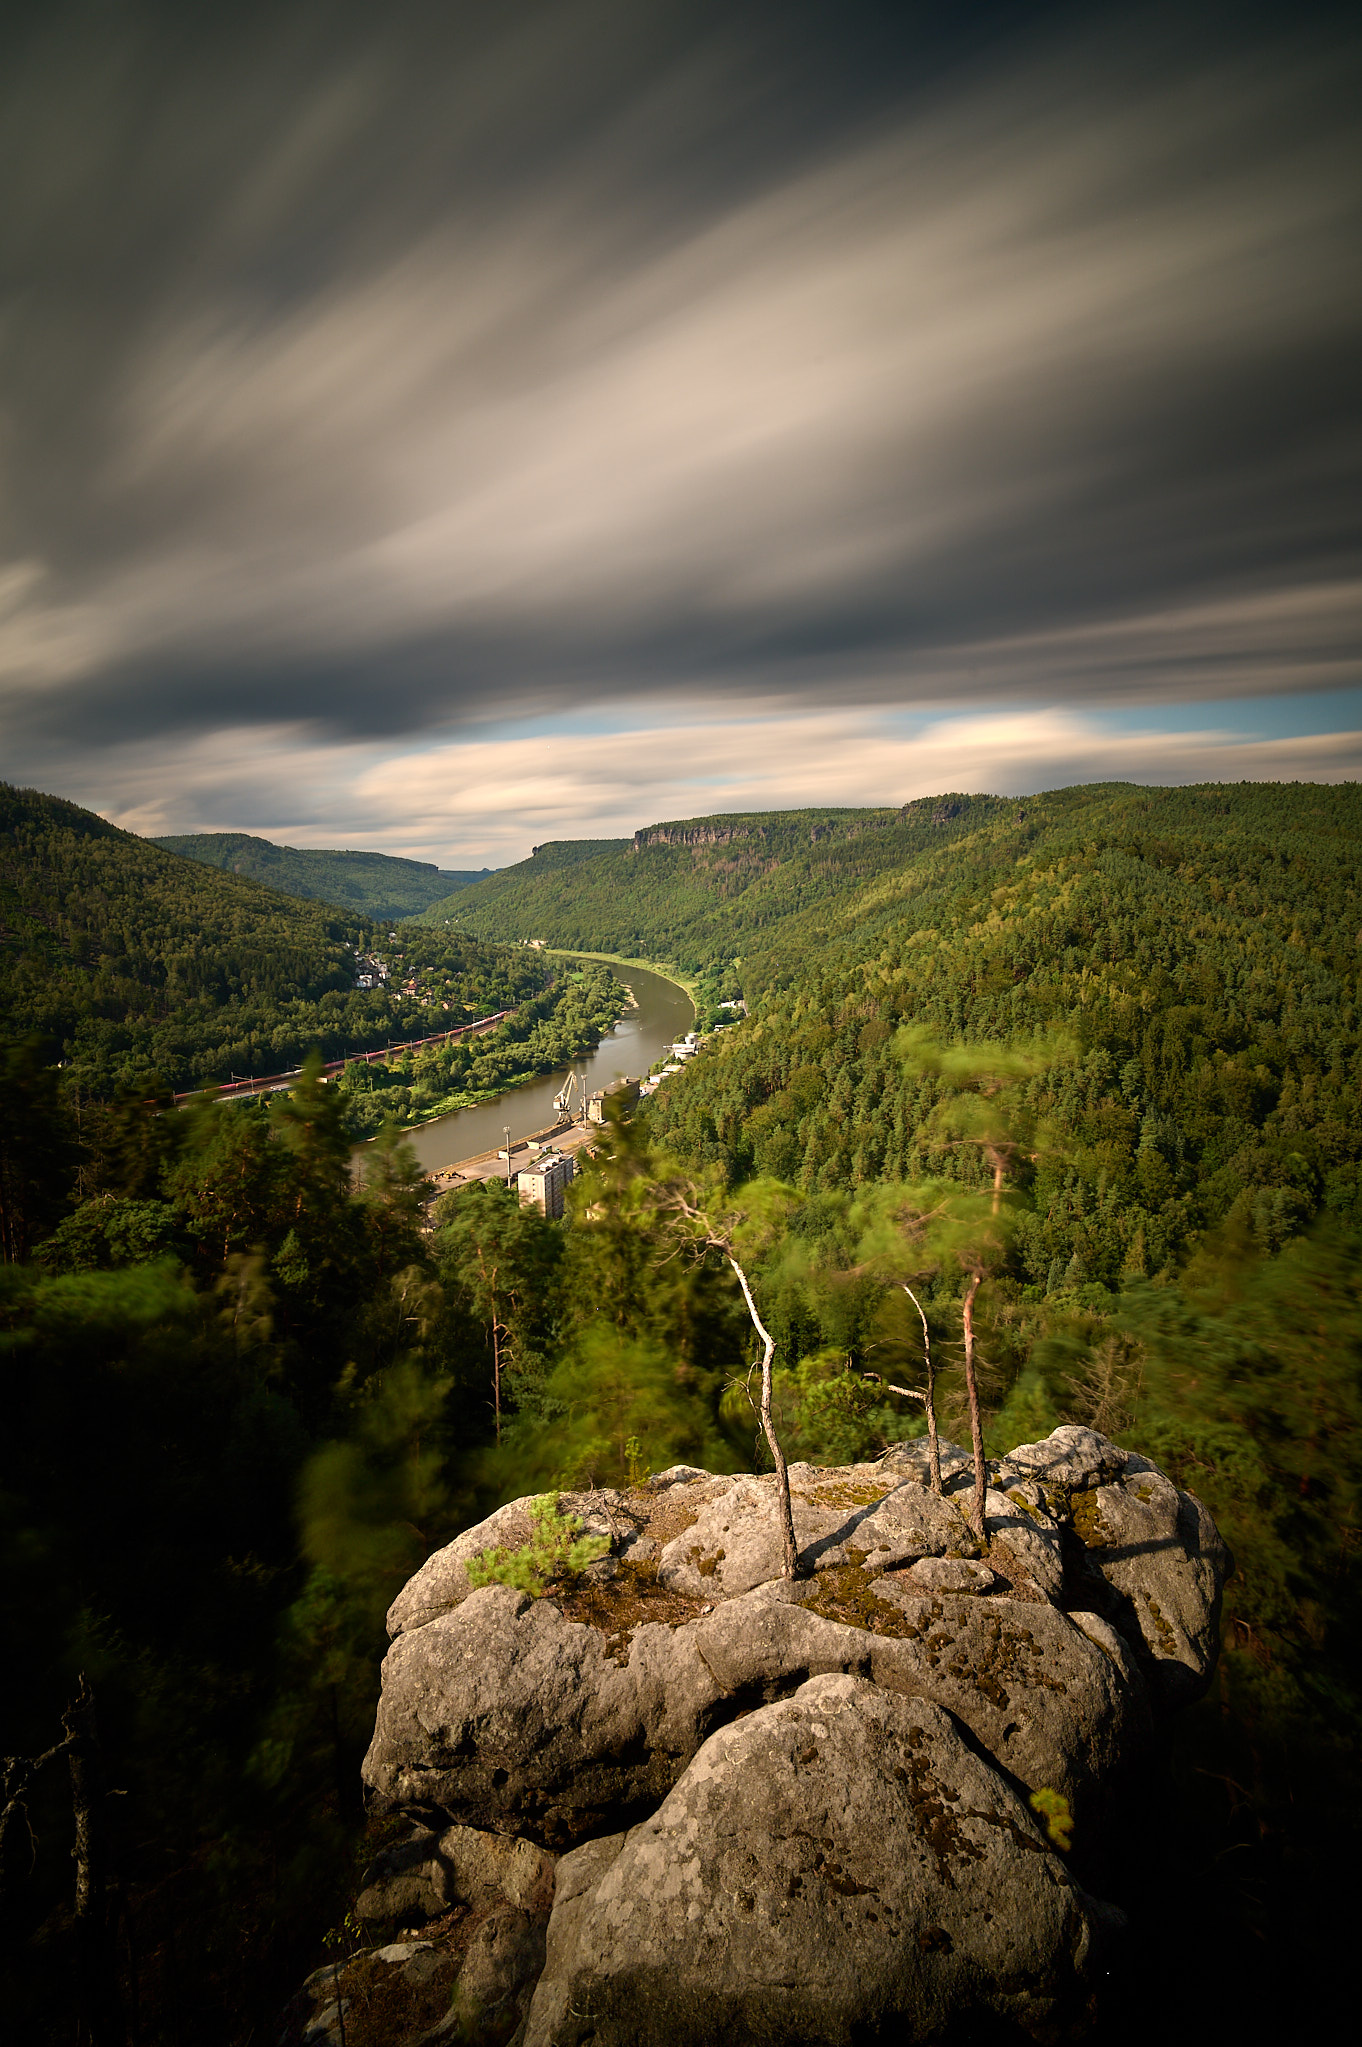
ND filters also create interesting effects with the undulating surface of seas and oceans. Especially when combined with a stationary object, such as a cliff, a lighthouse, or a Sri Lankan fisherman catching fish from a pole sticking out of the seabed. The sea photographed with a long shutter speed looks as if it is boiling, or as if mist is rolling on the calm surface. The degree of “misty” feel depends on the density of the applied filter (and specifically the length of your exposure that results).
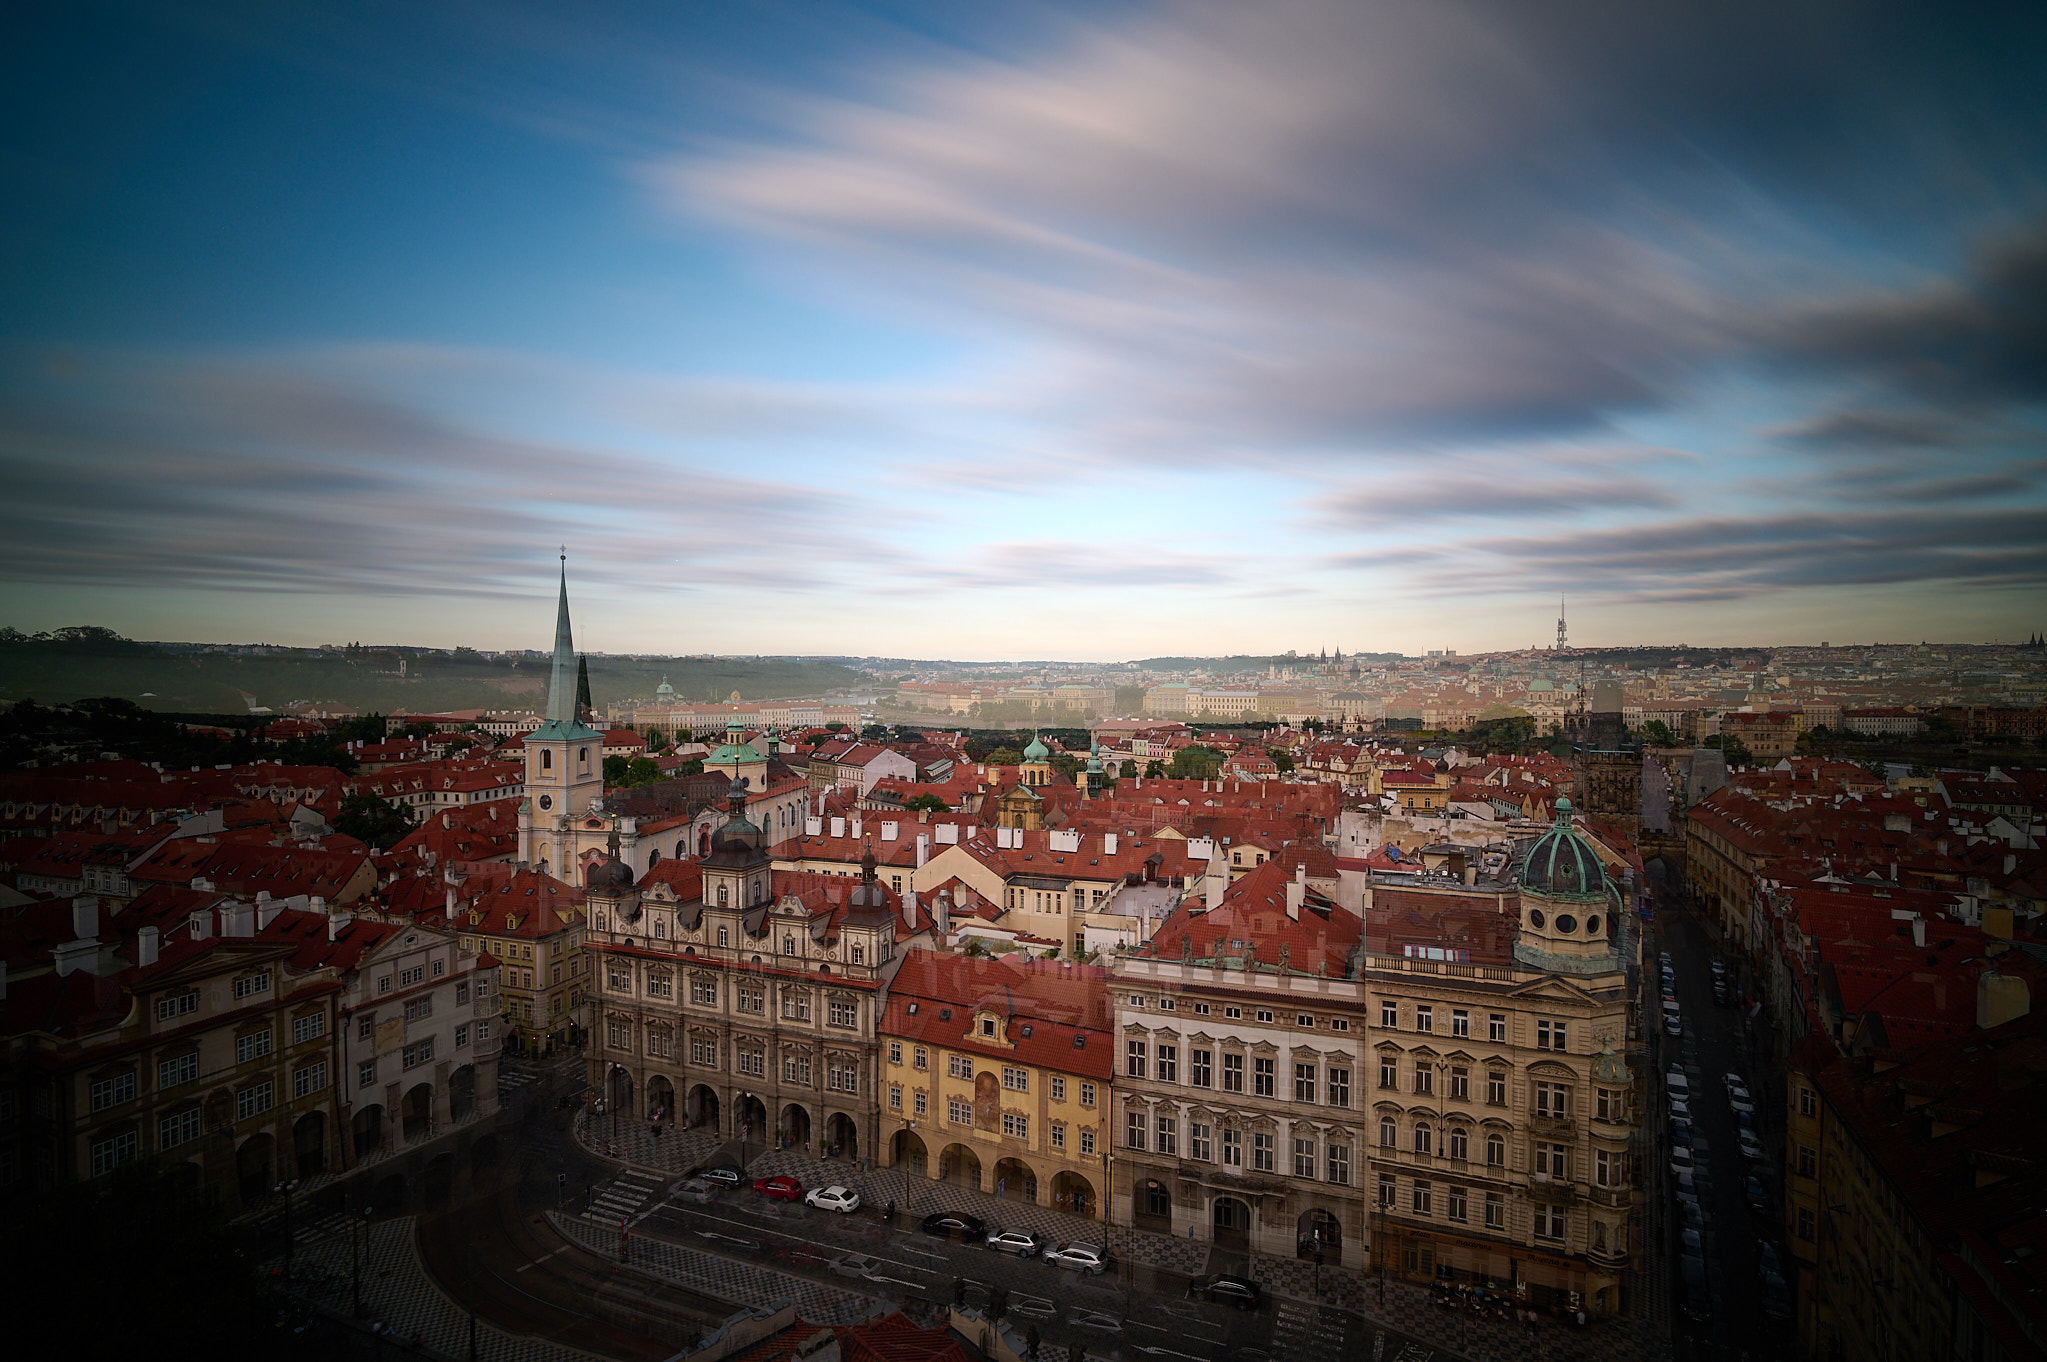
Removing crowds from busy places
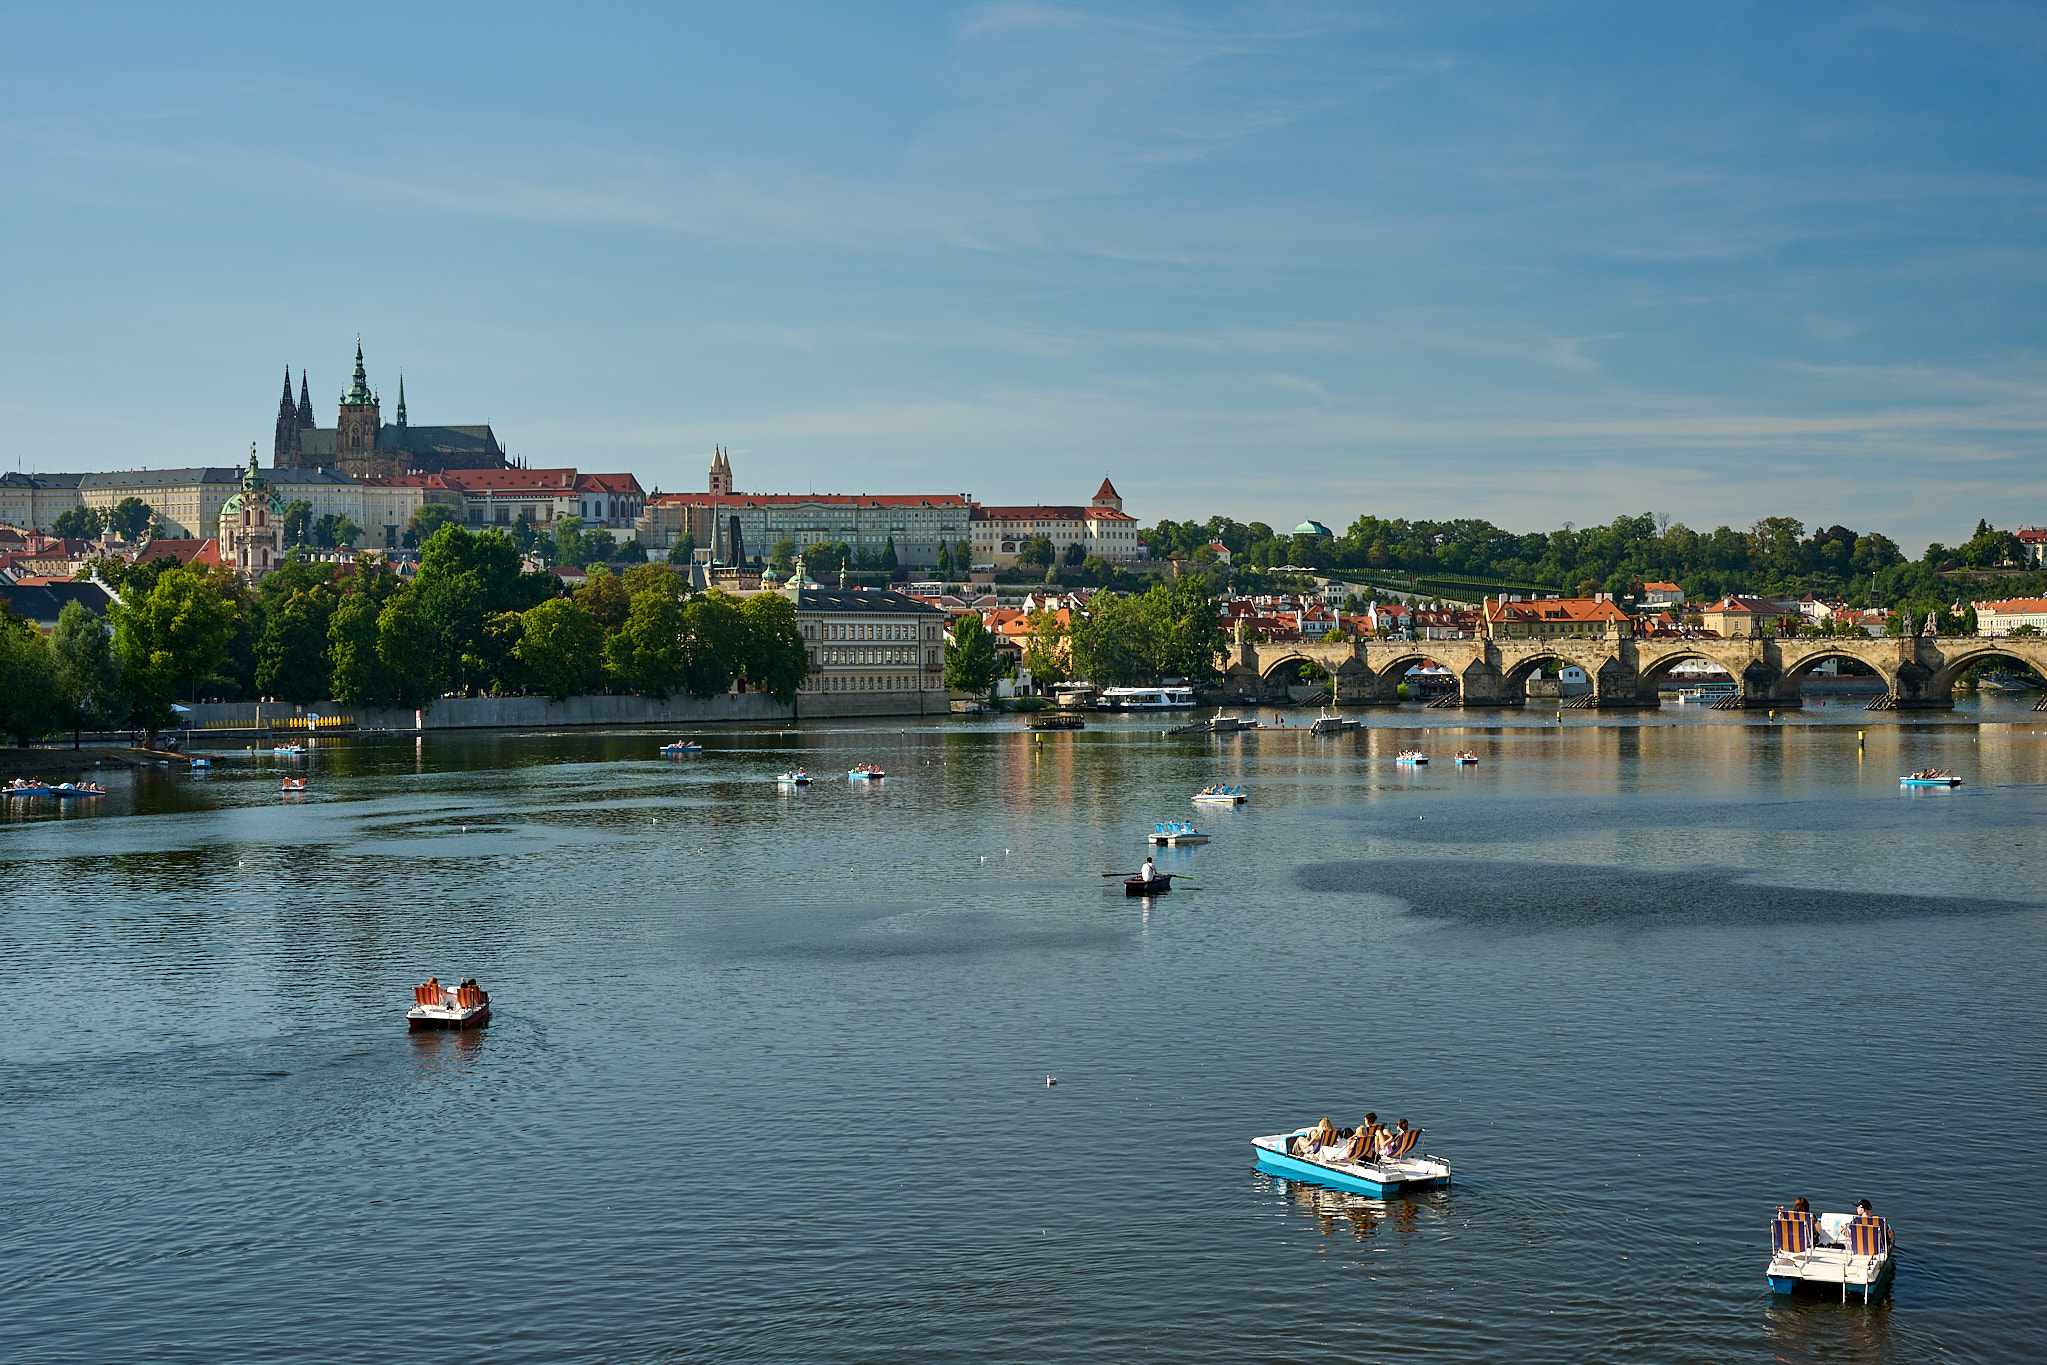
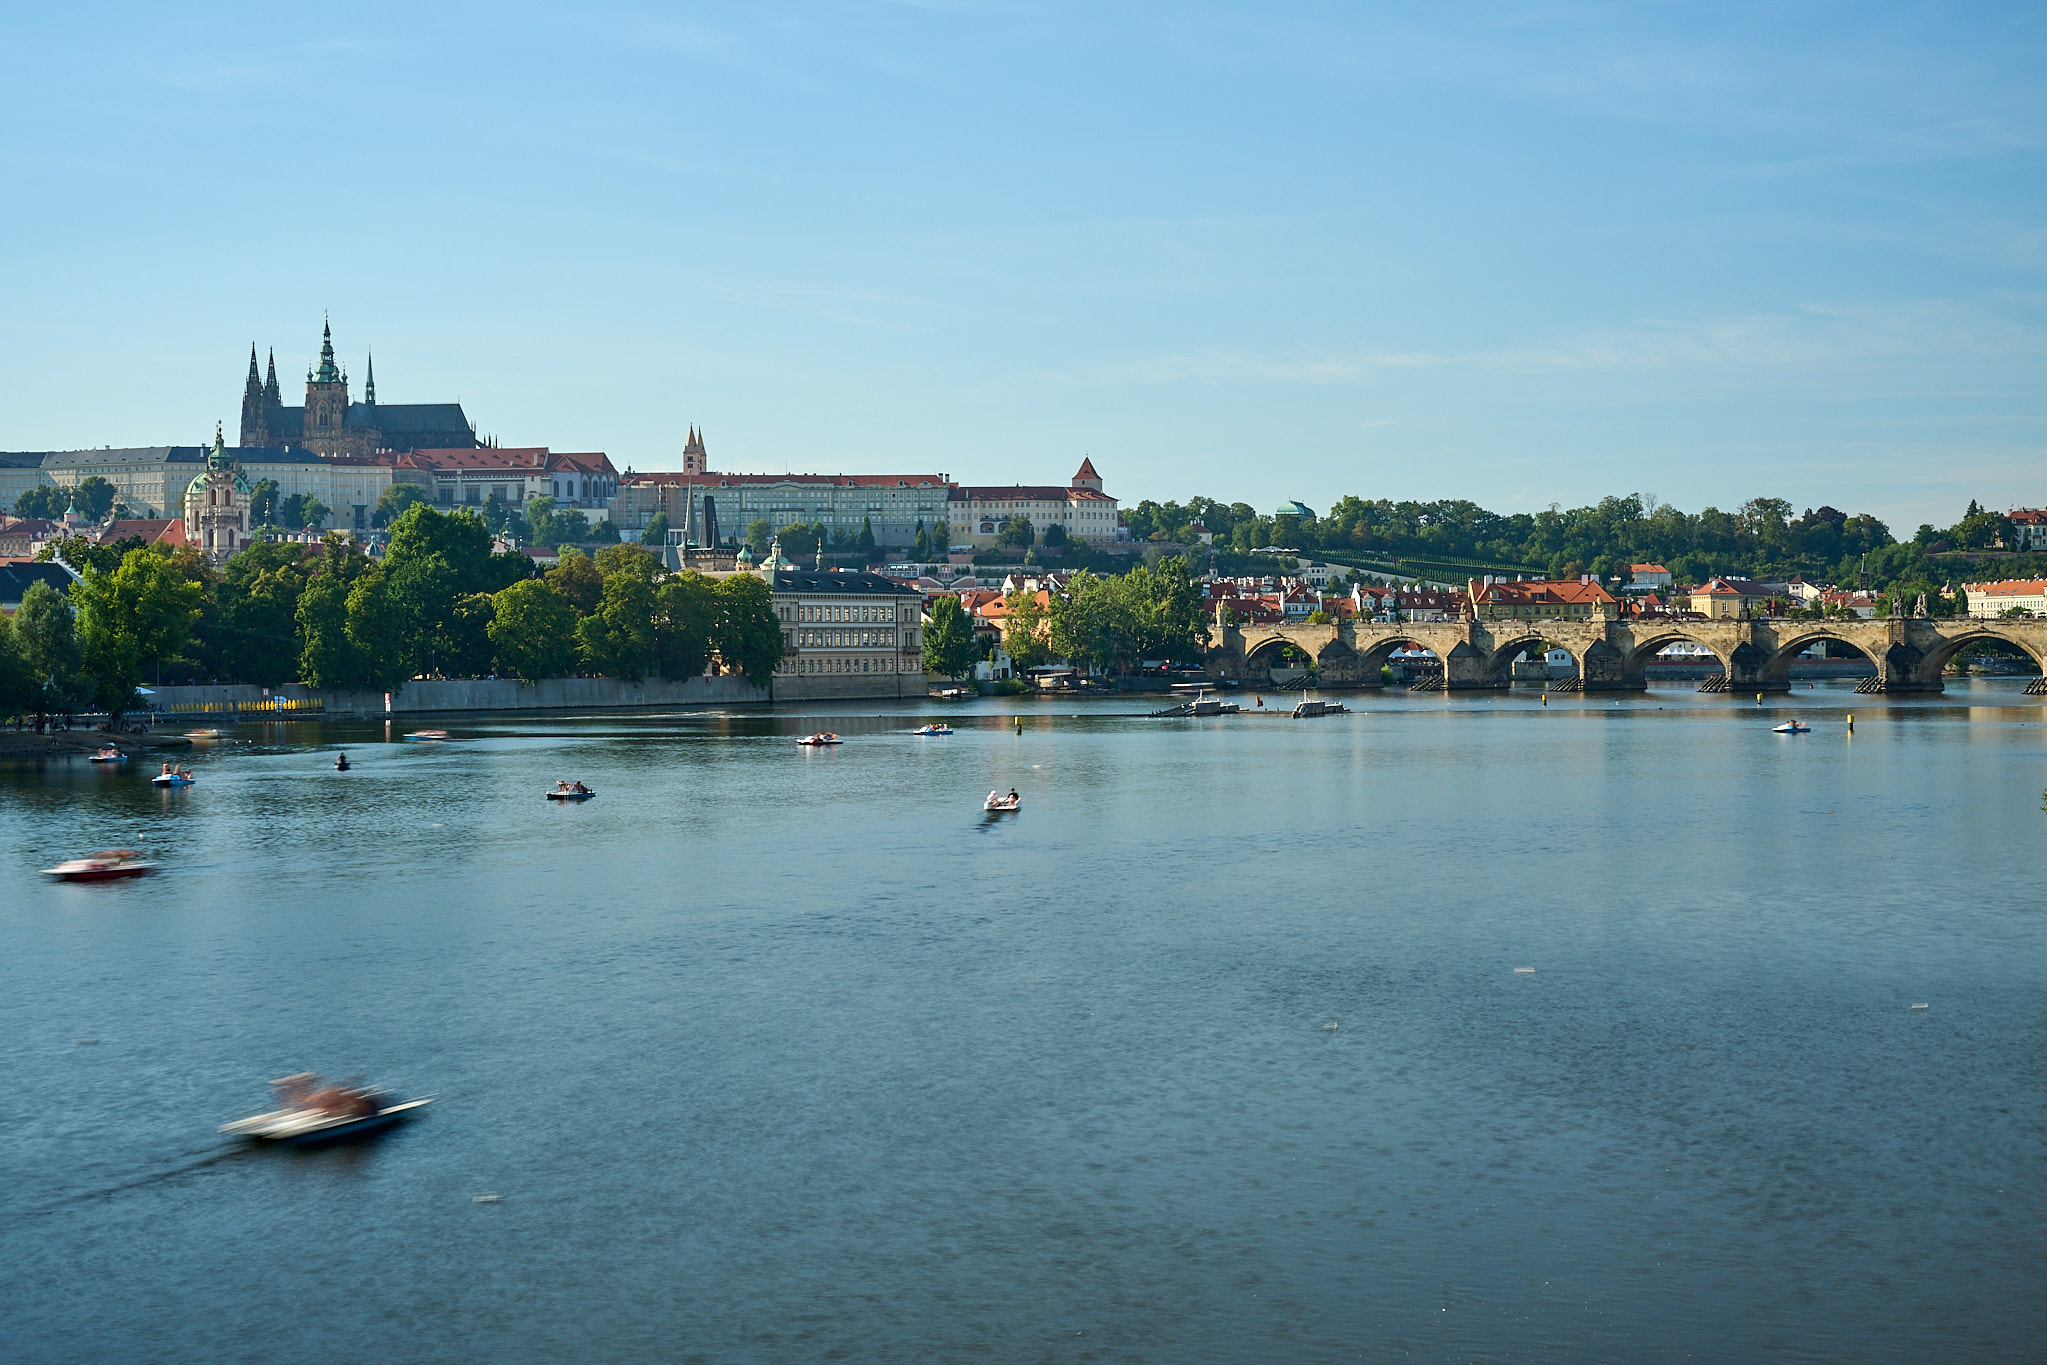
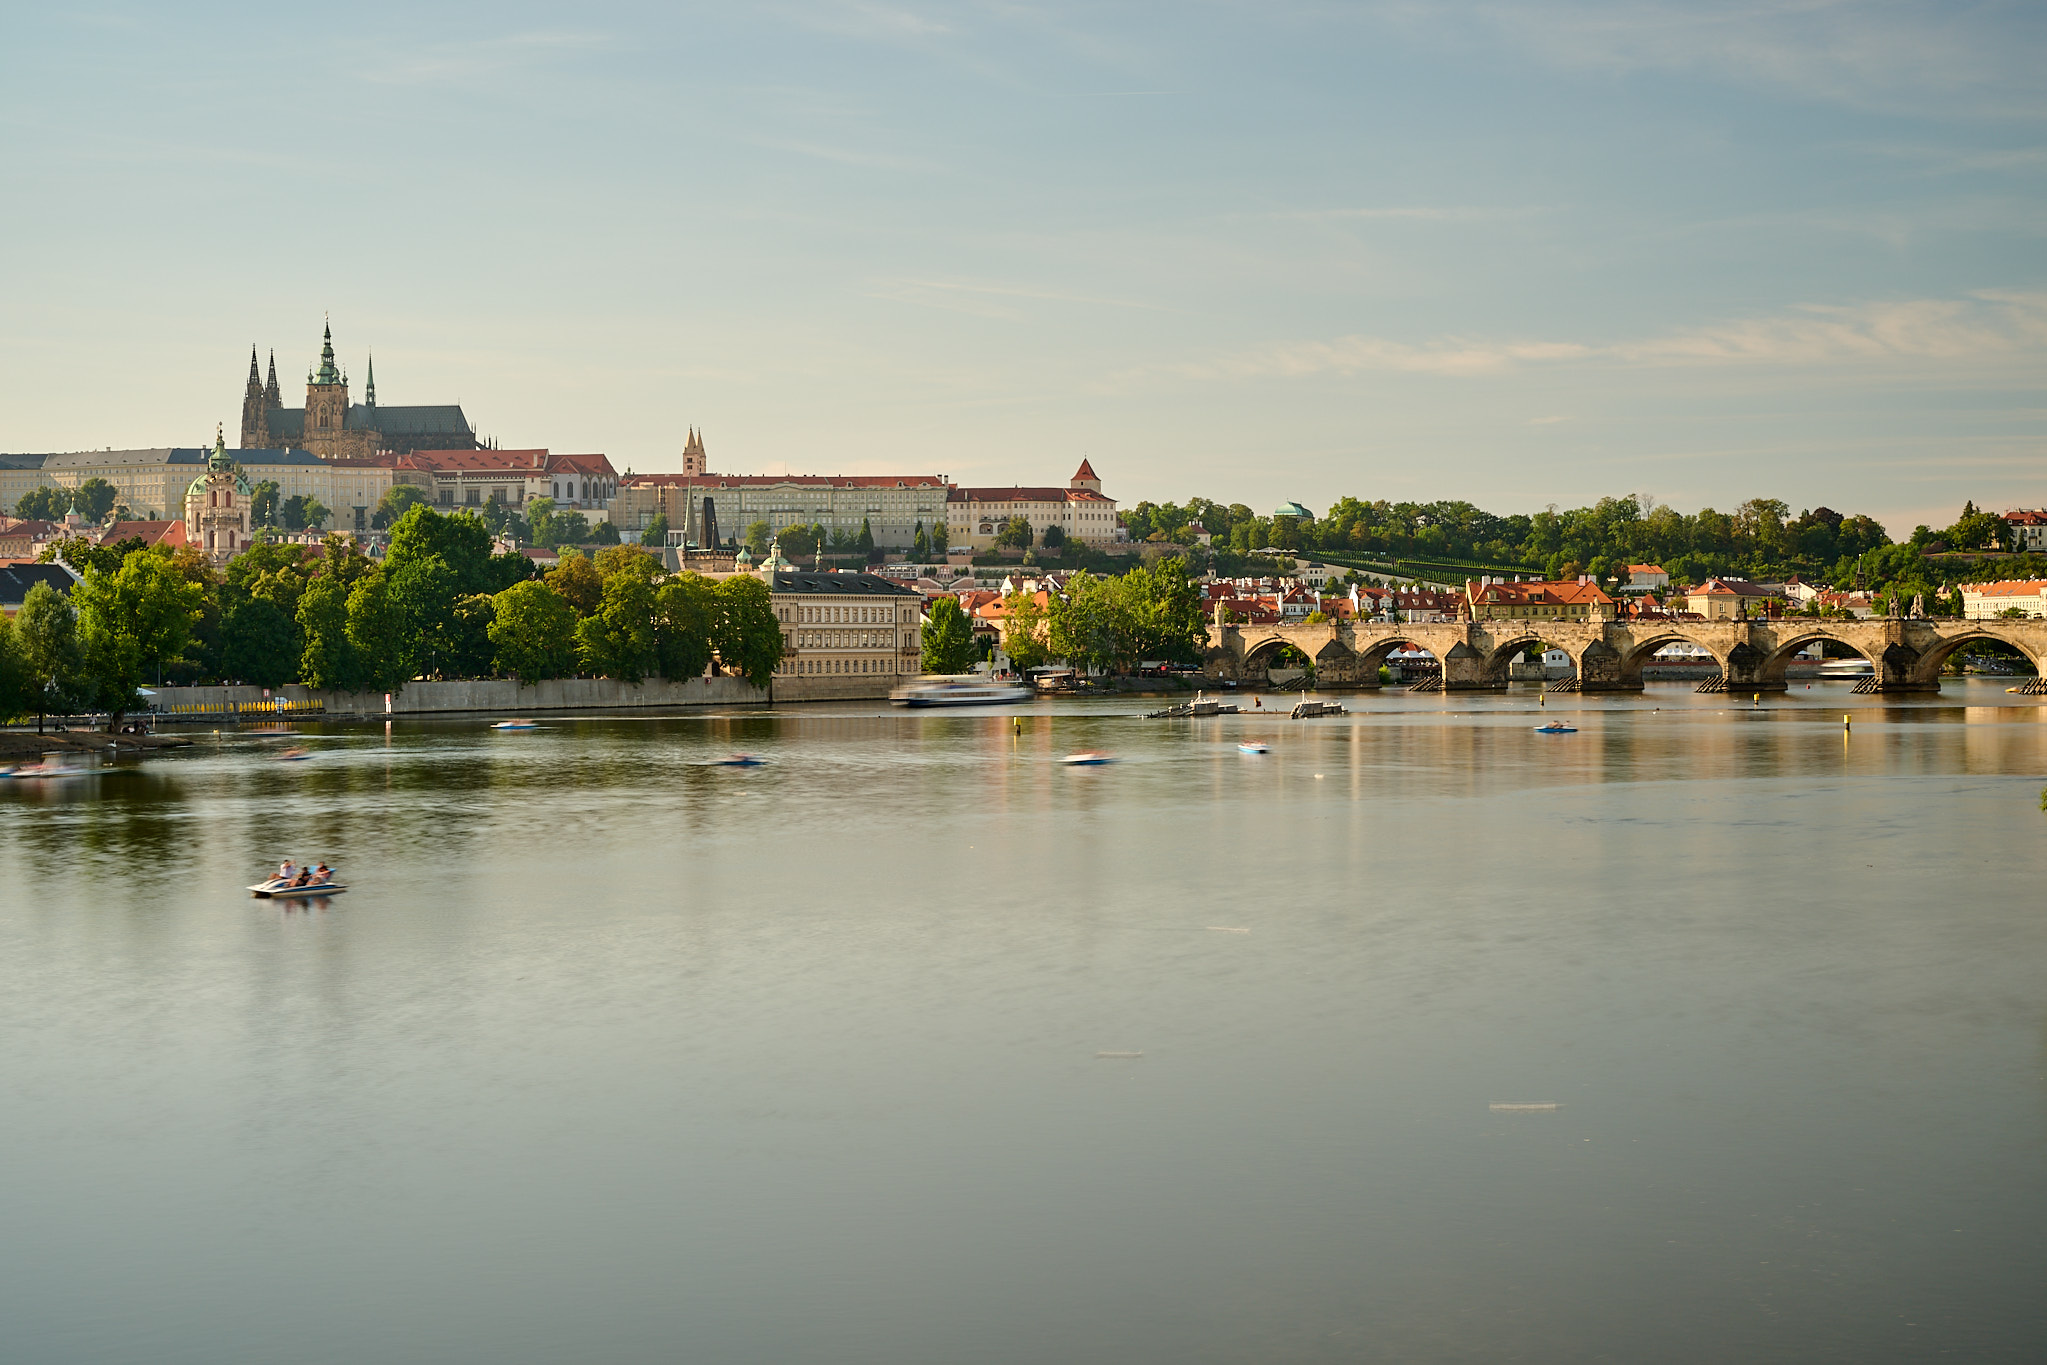
Some places are unimaginable without the rushing stream of tourists. Only the Covid-19 pandemic showed me what the Prague Astronomical Clock on the Old Town Square or the Charles Bridge looks like without people. So that we don’t have to rely on such events, which (hopefully) won’t happen again any time soon, we can use very dense ND filters.
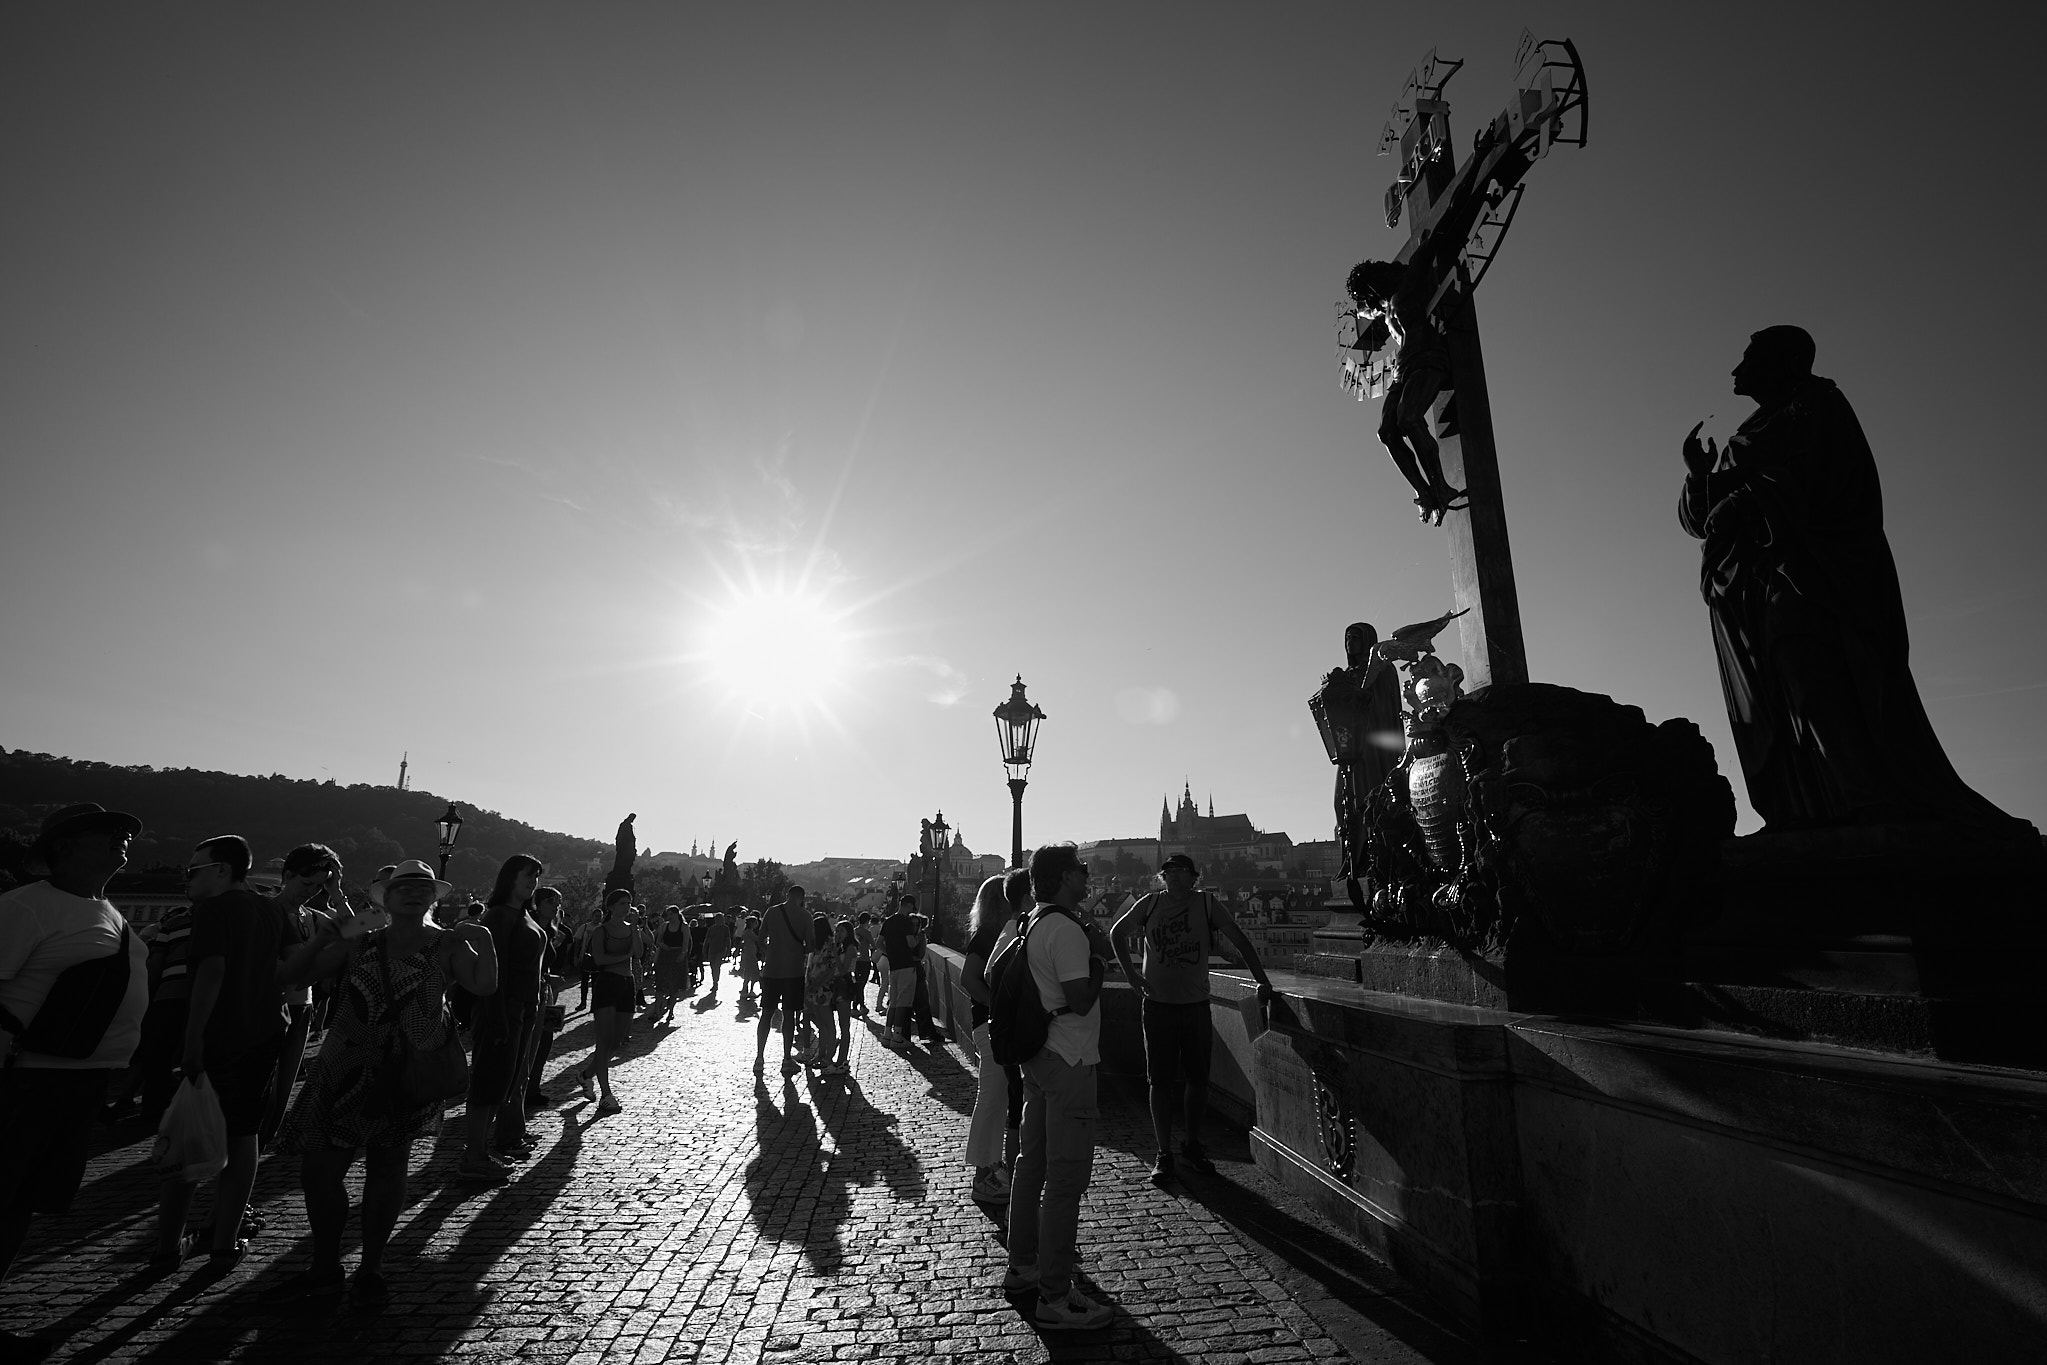
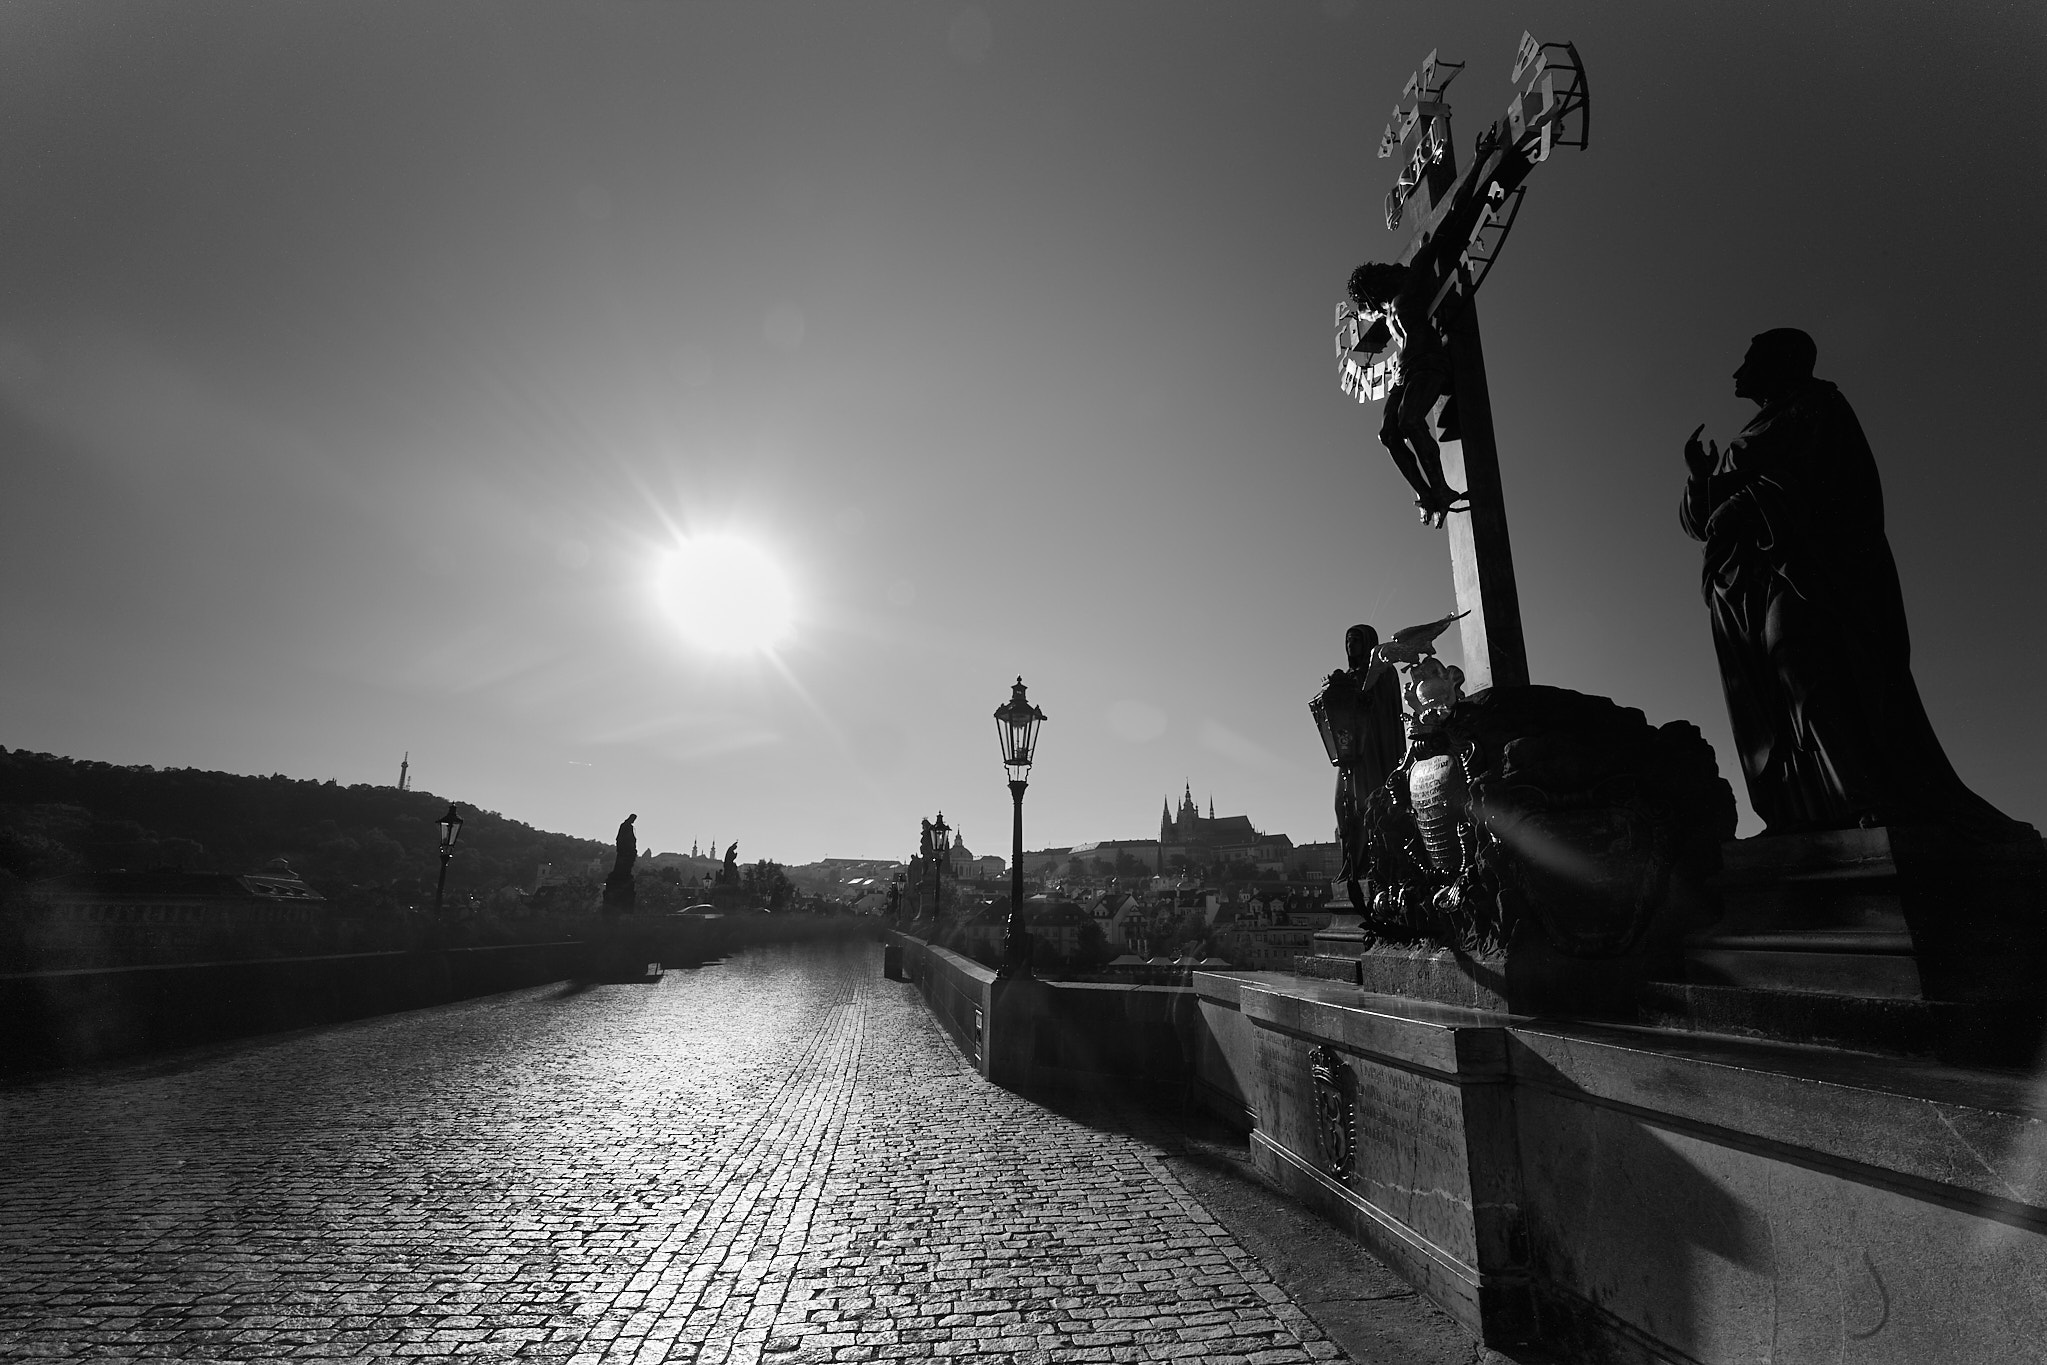
When the crowds move, which is likely with exposure times over 10 minutes, the ND filter will turn them into mere fog. If a pedestrian passes in front of the lens now and then during that time, the people will disappear from your photo virtually without a trace. Thus, for architectural photography, ND filters are a godsend.
Portraits in bright light
The harsh daylight sun can result in overexposure even at the camera’s base ISO and fastest shutter speed – especially with very bright apertures of f/1.2 or f/1.4. And if you’re using a flash in broad daylight? The pedestrian 1/200-second flash sync speed on most cameras is a quick recipe for overexposure. However, even a relatively weak ND filter is enough to bring the shutter speed down to playable values.

Intentional motion blur
Landscapes, people, and animals can be freed from photographic descriptiveness by blurring them. With an exposure time of just a few seconds, you can reveal new worlds in your photos. With neutral density filters, the lens becomes a brush and the camera sensor a canvas on which you can “paint” individual parts of the image, layer upon layer.
Videography
Unlike most photos, videos are very sensitive to your specific choice of shutter speed. Footage shot at 1/60 second feels a lot smoother than footage shot at 1/500 second! Videographers often carry a suite of ND filters to allow them to film at exactly the right shutter speed for the shot at hand.
Use ND Filters or Stop Down?
The classic way to reduce the amount of light falling on the camera sensor is to stop down your aperture, not resort to an ND filter right away. Let’s say we have a lens with a maximum aperture of f/1.4. If the lens’s minimum aperture is f/22, that’s a difference of 8 full stops of light. Lots of room to prevent overexposure!
But we must not forget that the aperture is not only a technical device for reducing light, but above all, a creative tool. Each new aperture step increases the depth of field – sometimes a desirable thing, but not always, such as many portrait photos. In addition, narrow apertures are accompanied by a loss of pixel-level sharpness due to diffraction– so even landscape photographers will tend to avoid apertures as narrow as f/22
Therefore, use the aperture as a pure “light intensity control” only when you hit a wall in the variables of shutter speed and ISO first. In fact, at the point where you’re considering a narrower aperture to reduce excess light, it is usually time for the appropriate ND filter instead.
Types of ND filters
Magnetic filters
At first glance, these filters look like conventional screw-in filters. They are attached to the lens with a magnetic adapter that looks like a step-up ring. After screwing the adapter into the lens thread, you simply attach the magnetic filter. It’s easy and fast.
Advantages:
- Much faster and potentially safer handling than screw-on filters.
- Easy layering of multiple filters (e.g. polarizing, graduated and ND).
- Easier focusing with higher density filters (over ND 64x). Focus first, then attach filter quickly.
Disadvantages:
- The combination of adapter and ND filter can cause vignetting on very wide angle lenses (20mm and wider). This can often be avoided by using a step-up ring.
- The filters must be removed from the lens before putting the camera in the bag. Compared to screw-on filters, they hold less strongly and are at risk of falling off and being destroyed.
- Often prevents the use of a lens hood (and lens hoods are especially important when doing long exposures on sunny days).
Circular screw-in filters
Glass filters in a threaded metal frame. A classic that has been in use for decades.
Advantages:
- Even without the step-up ring, the slim filters are suitable for wide-angle lenses (sometimes even ultra-wides).
- Once screwed on, they hold tight (sometimes too tight). They can therefore be safely stored in a bag attached to the lens.
Disadvantages:
- More difficult and fiddly handling associated with screwing them in (especially in more challenging conditions with wet or frozen hands). Risk of the filter getting stuck in the thread.
- Increased risk of dropping and breaking the filter.
- Takes more time to swap the same filter between different lenses.
- More difficult to focus the darkest ND filters. After focusing, the filter must be screwed onto the lens without bumping the focusing ring.
Square or rectangular flat filters
These are glass or resin plates that are inserted into the grooves of a special holder that is attached to the threads of the lens.
Advantages:
- Because of their size, they can usually be used on any lens, including ultra-wide angle lenses.
- Quick to swap the same filter between lenses or stack multiple filters.
Disadvantages:
- The whole filter system is larger. It therefore takes up more space in your bag than previous alternatives.
- Inability to mount a standard lens hood.
- The filters themselves are often more fragile due to size and lack of metal frame.
- Flat ND filters tend to be more expensive than similar quality magnetic or screw-on options.
Summing up the pros and cons of all three concepts, I find magnetic filters to be the ideal option for shooting with ND filters. Especially for the very addictive ease and speed of handling, which is on a whole other level compared to conventional screw-on filters. However, if you are already using a filter holding system instead, getting a rectangular ND filter would be a very logical alternative.
Which ND filter to choose?
The most important parameter of any ND filter is its ND factor. It tells us how much light the filter absorbs, or how much light it lets into the lens. Manufacturers basically specify it in two ways. For example, a filter labeled ND 64x lets in 64 times less light than a naked lens. This is a bit of an abstract idea for many people. That’s why it’s sometimes expressed in terms of how much the shutter speed is increased. In this case, it’s 6 stops of light.
Which filter you choose depends on what you want to use it for. To extend the shutter speed for portrait photography with a fast lens, filters with an ND factor of about ND8x (-3 EV) are sufficient. For a romantically blurred waterfall or river, choose a stronger filter. Usually an ND factor of 64x (-6 EV) is sufficient. The resulting shutter speed should be about 15 to 30 seconds. If you want to emphasize cloud movement, turn the ocean to mist, or remove people from the image, you’ll need even stronger filters, up to ND 20,000 (-11 EV) or more. There are also filters with variable ND factors. However, their optical complexity makes them more suitable for video, where sharpness is not as critical.
If you go with magnetic filters, select a filter diameter that matches the lens of yours with the biggest thread. Smaller lenses can be easily accommodated with a step-up ring. If you are going to use the filter on a lens wider than 20mm, it is better to choose a slightly larger diameter to avoid vignetting, in combination with a step-up ring for that lens as well.
The filters we are talking about are called neutral density filters. They should therefore transmit all wavelengths of light to the sensor in the same proportion as a lens without a filter. However, reality is a bit different. Especially for filters with a higher ND factor, you should expect that the colors will not exactly match the image without the filter. With high quality filters, the difference may only be a few hundred Kelvin, but it can be as much as thousands of Kelvin. Judge for yourself how different the color rendering is between KF Concept and B+W filters.
Since ND filters are often used without a lens hood, high-quality anti-reflective coatings play an important role as well. High quality optical glass is also very important. I wouldn’t shoot with resin filters most of the time anyway, but especially not for ND filters. You don’t want to compromise the sharpness and contrast of your expensive lens.
My favorite magnetic ND filters are the K&F Concept ones here — this is a general affiliate link to Amazon, but I have no relationship with K&F specifically and am not being asked to promote their filters. I also trust the quality of the brands NiSi, B+W (except for my ancient one :) and many others, although most of them don’t make magnetic filters. I haven’t tested Maven’s magnetic filters but have heard good things about them as well. Let me know in the comments if you have recommendations!
A Quick Guide to Using the ND Filter
- Try to imagine what the scene will look like when you “animate” it with the ND filter.
- Find a main subject in the scene that remains stationary (tree, rock, building). Focus on it, turn off the autofocus, and be careful not to accidentally move the focus ring.
- With the camera on a solid tripod, take a test shot without the ND filter.
- Check the exposure and remember the shutter speed you used.
- Choose the appropriate ND filter for the situation – think about how long of a shutter speed you want and how dense of an ND filter will be necessary. This is something you can calculate, or simply know by practicing.
- With the camera in manual mode, set the shutter speed (from step 4) extended by the ND factor. For example, if you have a six-stop ND filter and your shutter speed dial progresses 1/3 of a stop per click, then increase the shutter speed 18 clicks of the wheel. You could also use a smartphone app to tell you what shutter speed to set for your ND filter. I have found the free VF Foto app to be a good choice (I also have no relationship with them).
- Some Nikon cameras allow you to set shutter speeds up to 900 seconds, but most cameras only allow 30 seconds. If you need longer shutter speeds than your camera’s range allows, set the shutter speed dial to “T.” In this case, the exposure will begin when you first press the shutter button and end when you press it again. If your camera doesn’t have a “T” mode, you will need to use a remote (cable) shutter release and “Bulb” mode instead.
- Attach the ND filter and press the shutter release button. If you also press the start button on the above mentioned smartphone app, it will also work as a timer.
- If all went well, you should have a nice, properly exposed photo. If you think the photo is too dark (especially with strong ND filters this happens), increase the shutter speed by 10-15% and make another exposure variation.
Conclusion
Neutral density filters, along with polarizing filters, are among the types of filters whose results are difficult to replicate in post-production. Of course, not everyone likes blurred water, smudged clouds rolling across the sky, or leaves tossed about by gusts of wind. After all, like any other effect, this one should be considered more of a spice, and spice should be used sparingly.
Nevertheless, I believe there are many situations where the use of ND filters is very appropriate and many photographs would be unthinkable without them. For example, the crowded Piazza San Pietro in the Vatican or the Charles Bridge in Prague. Or, at an even simpler level, portraits with very fast lenses. In those cases, the effect of the ND filter does not draw attention to itself – it just allows you to take the photo you have in mind.
Excellent article Libor!
Had no idea one can make objects disappear with a long exposure and ND filters.
I have purchased a ND filter from Breakthrough Filters and find they are of high quality.
A big advantage of rectangular filters that you failed to mention is that GND filters can be positioned with the transition anywhere on the image.
I read the article as being about ‘straight’ ND filters, mainly used for water and cloud blur, as opposed to grads, used mainly to overexposing part of the image.
I think the main issue with NDs used to be the blue colour cast, which I had with a Lee 6 stop. Other manufacturers such as Kase and Nisi seem to avoid this.
Nisi do a 6 stop CPL screw-in filter that’s pretty useful, as this article shows. The CPL element provides its own form of ND, so it’s not far off a 10 stop.
Yes, we have an article on GND filters already! photographylife.com/gradu…ty-filters
“I read the article as being about ‘straight’ ND filters, mainly used for water and cloud blur, as opposed to grads, used mainly to overexposing part of the image.”
Yes, but it is bog standard to use a GND along with an ND filter in landscapes. For that matter, it is common to use CPLs with NDs. If there is a limitation that applies to using any of those filters, it is a limitation in using the system. I found the idea of magnetic filters quite attractive from an ease-of-use standpoint, but passed on them because of the inability to accommodate GND use, either with or without other NDs. That is why I posted my remark.
Nice article, Libor. I liked the way you used the filters to make the treetops blur. It’s quite an interesting idea. I don’t use ND filters too often but this article makes me want to try them again!
Did someone had some experience with Urth magnetic filters?