As a busy photographer who travels quite a bit both within the USA and overseas, I have gone through many types of gear in my camera bag. While some of the gear and accessories are absolute necessities I will not leave my home without, others can be very useful in particular situations or when traveling to other countries. In this article, I would like to go over my top must-have gear for travel and discuss why you might consider including them in your arsenal in the future.
Table of Contents
Must-Have Gear
First, let’s go through the gear you cannot leave your home without. These are the most essential items such as your camera, lenses, laptop, memory cards, and a camera bag.
Camera
When traveling, I prefer to take a lightweight DSLR or a mirrorless camera, so that I don’t have too much weight on my shoulders. Something like the Nikon D780 or a Nikon Z6 would be the ideal choice for going light.
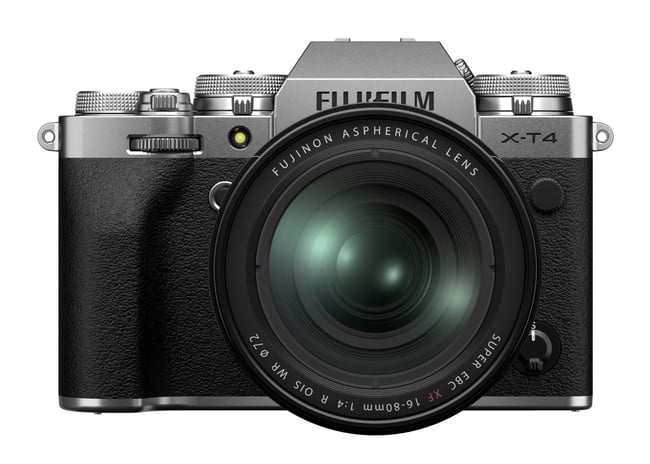
When I know that I will be carrying a lot of other weight, I prefer to go even lighter with an APS-C mirrorless camera and my choice for that would be something like the Fuji X-T4. I never take a battery grip with me when traveling, since it adds too much extra weight and takes up space in my bag. If it is an important trip overseas, I always carry a backup camera body.
Lenses
The number and types of lenses will vary greatly depending on what I am planning to shoot. For landscapes, if I go with my full-frame Nikon cameras, my typical choice is the following:
- Nikkor 20mm f/1.8G (Nikkor 20mm f/1.8G Review)
- Nikkor 24-120mm f/4G VR (Nikkor 24-120mm f/4G VR Review)
- Nikkor 70-200mm f/4G VR (Nikkor 70-200mm f/4G VR Review)
The 20mm f/1.8G is for astrophotography and when I need to go ultra-wide. The 24-120mm f/4G VR is what I have mounted on my camera 90% of the time, since it covers most situations. The 70-200mm f/4G VR is for situations where I need to zoom in on a particular subject or part of the scene. All three are lightweight lenses and cover most of my travel needs.
The mirrorless equivalents for the above kit would be Nikon Z 20mm f/1.8 S, Nikon Z 24-70mm f/4 S and Nikon Z 70-200mm f/2.8 S (the f/4 version has not been announced yet, so the Z 24-200mm might be the preferable choice to go light at this time).
When using Fuji mirrorless cameras, my choice is usually the following:
If I plan to do astrophotography, I would also grab something like the Fuji 16mm f/1.4 WR.
Lightweight Laptop or Tablet
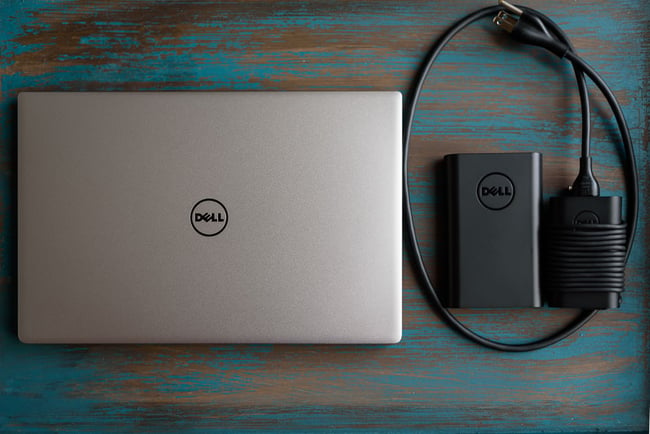
When traveling, I prefer taking a very lightweight laptop or a tablet that I can use for photo backup and light processing. This means that it is either going to be a laptop like the Dell XPS 13 or a lightweight tablet like the iPad Pro.
Spare Camera Batteries + Charger
This one is a given – I usually take 3-4 batteries with me and at least one charger. When traveling light, I will take 2 batteries, plus a single charger for space and weight savings.
Memory Cards + SD Memory Card Case
Most of the cameras I shoot with either have XQD / CFexpress, or SD card slots. When traveling with cameras with SD card slots, I make sure to bring enough of them to use for the whole trip, so that I don’t have to format them. Once they fill up, I flip them (to indicate that the card has been used) and store in a memory card case. This way, if my backup device fails, I still have the original memory card with all the images in it. See my detailed article understanding memory cards for more information.
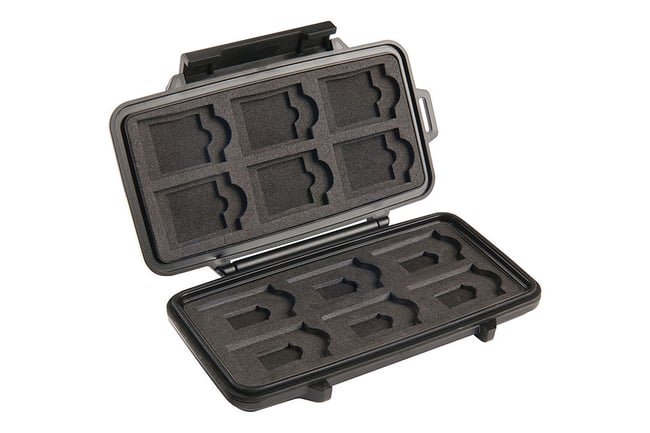
Since I use the Pelican SD memory card case for storage, I make sure to load it up with a bunch of SanDisk Extreme Pro 64 GB and 128 GB memory cards. They are very reliable memory cards and have fast read and write speeds. For XQD and CFexpress cards, the equivalent would be the ProMaster case.
Travel Camera Backpack
While a shoulder bag might be convenient for shooting locally, you do not want one when doing heavy traveling. First, most shoulder bags cannot accommodate a lot of gear and second, once you load it all up, it will be too much weight to bear on a single shoulder.
A rolling bag might be convenient to transport your gear, but it is very inconvenient when you are on your feet, especially if you need to hike. Your best bet is going to be a lightweight backpack – and you can trust me on this one since I have tried them all.
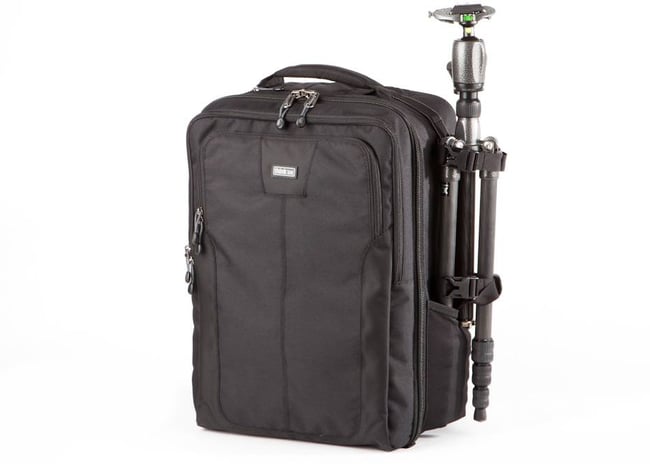
I personally went through perhaps a dozen different backpacks and I always keep coming back to the ThinkTank Airport Commuter (see our ThinkTank Airport Commuter Review), the most versatile and the most comfortable backpack out there in my opinion. I can easily fit two camera bodies, a few lenses, a laptop, chargers, cables and other accessories listed below into this bag and it just works. It has the shoulder and belt support for comfort and long travel, and I can easily keep my travel tripod on its side as well, if necessary.
Once I arrive at my location, I usually off-load all the chargers, laptop, and other accessories to my hotel room or car and I only keep the gear I intend to use in the bag. This shaves a lot of weight off my shoulders and makes the backpack easy to hike with.
Watch with GPS Capabilities
After getting almost lost in a very remote area of New Mexico a few years back, I told myself that I will never leave on a trip without a GPS tracking device. It was a very scary experience and not something I wanted to go through ever again. When I got home, I bought the Garmin Fenix watch, which has the capability to start navigation at the beginning of a hike, then guide me back to where I started when I want to get back.
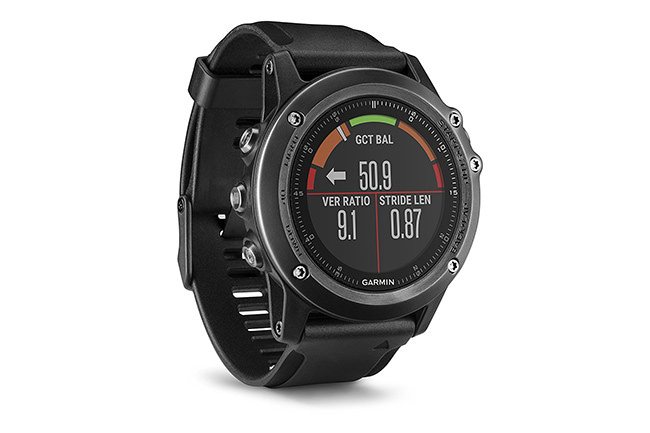
Its battery life is amazing – I usually don’t have to charge it for 2-3 weeks of lightweight use and when using the GPS, it easily lasts a week. It is a bit heavy, bulky and not very convenient to use on a daily basis (I normally don’t like wearing watches), but I bought it for the sake of safety when traveling.
It has all kinds of built-in features such as a compass, altimeter, barometer, etc., and has the capability to install apps, so I can install everything from tracking to weather apps. The Garmin Fenix is one of the most versatile watches on the market and it’s worth every penny, especially when using its GPS tracking capabilities.
I have used this watch numerous times when hiking and its accuracy is superb – exactly what I need it for. Make sure that you get the one with Sapphire glass that does not easily scratch.
Must-Have Accessories / Always In Bag
Now that we’ve gone over the essentials, let’s talk about other accessories I will always have in my camera bag when traveling.
USB Car Charger
When traveling, I will most likely be renting a car or traveling in my own car. Since I have a boatload of equipment that needs to be constantly charged, whether it is my phone, my camera batteries or other equipment, I need to make sure that I have a reliable power source. Every car has a cigarette lighter receptacle, but not every car is going to have a USB port that can provide sufficient power or a built-in power inverter. For this reason, I always have a multi-slot USB charger with me when traveling.
I went through a number of cheap USB chargers in the past and none of them lasted long enough for me to recommend them. Many of them did not provide sufficient power to my devices, often taking too long to charge, or overloading when more than one device was plugged in. I ended up settling on the RAVPower 4-Port USB car charger, which has been very solid so far, providing plenty of power for up to 4 devices at a time.
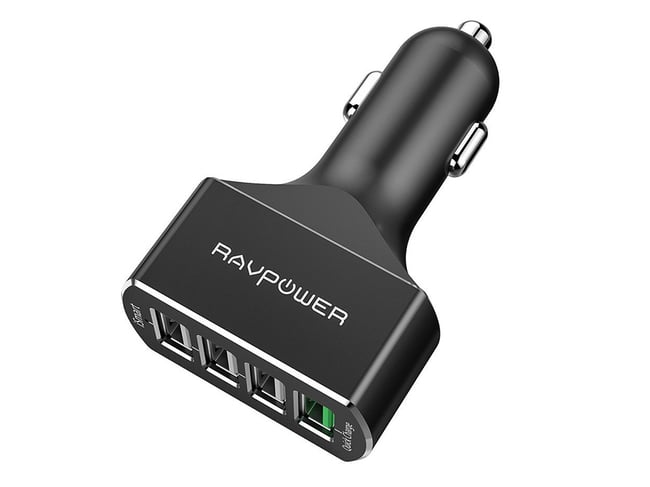
This guy is a little beast, having a single Quick Charge 3.0 port (marked green in the picture) and 3 regular charging ports. When traveling, I can simultaneously power a GPS unit, charge my iPhone, charge one or two camera batteries (more on this below) and have a free slot for something else. It has built-in safeguards to protect devices from overheating and excessive current, which is nice.
Battery Pack
For traveling to remote areas without power, I also make sure to grab a charger/battery pack. If I don’t have a car to charge my devices with, a powerful battery pack can be very useful in the field to provide power to several devices such as a cellphone, camera and GPS watch. While there are many inexpensive battery packs out there, I would recommend getting a reliable battery pack with solar panels, so that if you are left out without power, you can still take advantage of sunlight to recharge the battery pack.
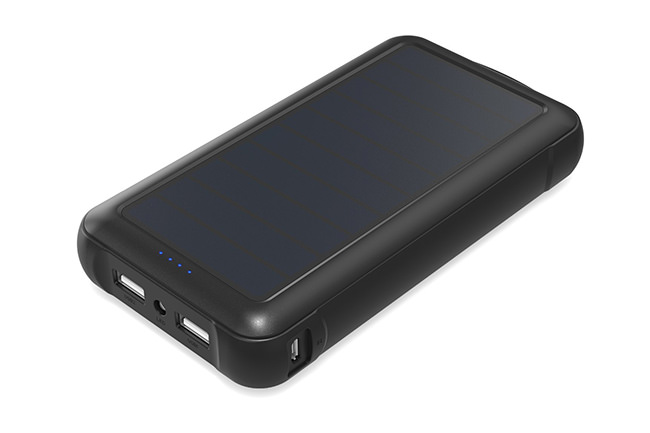
Please note that you cannot put any battery packs in your checked luggage, so you will need to take it on the plane with you. Lastly, please keep in mind the FAA travel restrictions for large capacity batteries. See this link for more information.
Nikon EN-EL 15 Dual Battery Micro USB Charger
If you shoot with a Nikon DSLR that takes EN-EL 15 batteries, and you want to charge those batteries via Micro USB power, this is a must-have accessory! The RAVPower Nikon EN-EL 15 Dual Battery Micro USB Charger was introduced to me by my friend Tunc, who used it during our New Zealand trip. It was a life-saver because it allowed us to charge two batteries at a time via a car USB charger. And when we were in a remote area without power, we were able to charge batteries with battery packs, which is awesome!
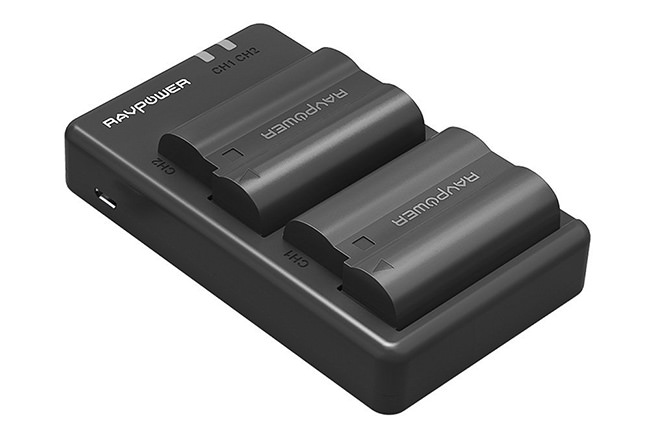
For just $33 bucks, you get this awesome charger and 2 extra EN-EL15 batteries. While the EN-EL15 batteries are from a third-party brand, that’s still pretty awesome value considering that a single Nikon-branded EN-EL15 costs $50. They work just fine on my Nikon DSLR and mirrorless cameras, so I was very happy with this purchase.
Portable SSD Drive
As we have stated in our Photography Backup article, it is always a good idea to have a solid backup workflow to prevent the potential for data loss. It becomes even more critical to have a good backup plan when traveling because losing images from an expensive trip is simply not an option. Since SSD storage has gotten much more affordable in the past few years, I no longer recommend taking heavy and unreliable (especially when dropped) hard drives when traveling. My choice has been the Samsung T5 portable SSD drives, specifically the Samsung T5 1 TB Portable SSD.
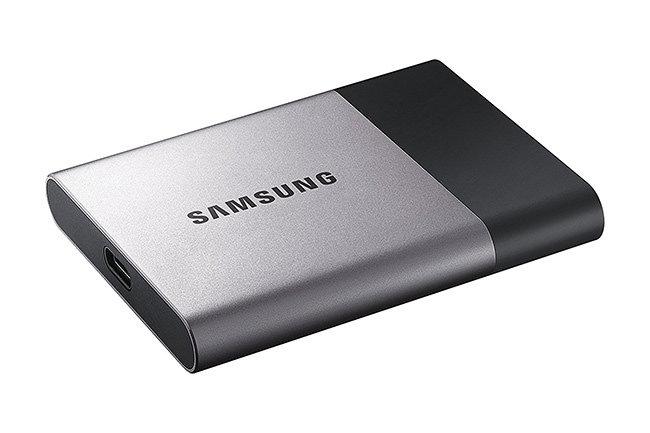
These things are super fast, small, lightweight and reliable. I have been using mine for a few years now and it has always performed. I keep it in one of the inner compartments of my camera bag, and it is the storage I backup all the images to when traveling.
Compact LED Flashlight
A flashlight is another must-have item in your camera bag when traveling. You do not want a large and heavy flashlight, so a compact, but a powerful flashlight is ideal. While there are plenty of great options out there, I personally use the fairly cheap flashlight – the J5 Tactical V1-Pro. It is very small, lightweight and packs 300 lumens of LED brightness. You will need a single AA battery to power the flashlight and you can even use a rechargeable battery if you have one. At $14 bucks, it is a cheap flashlight that just works.
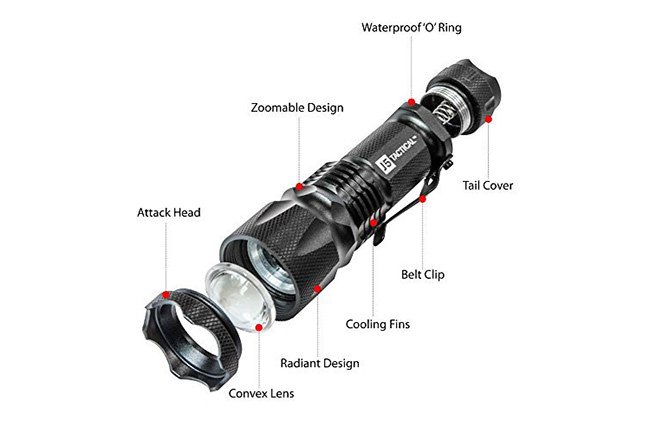
If you want a brighter and fancier flashlight, there are other options out there. Some flashlights can emit over 1000 lumens and have all kinds of focusing features, but they are generally heavier and larger in comparison. Unless you are into light painting, I would not bother with something like that and stick with a small and compact flashlight.
LED Headlight
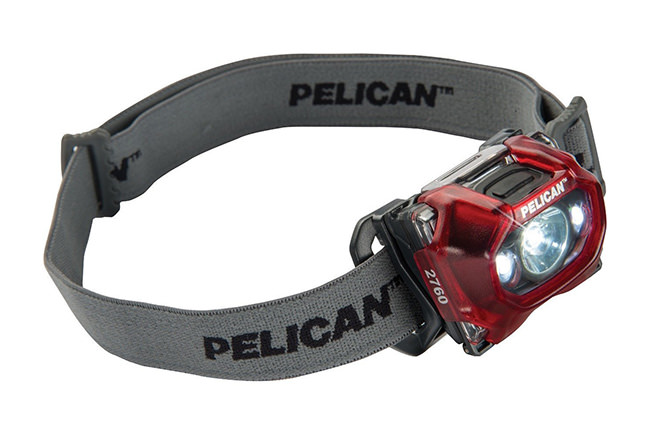
When hiking at night, I personally prefer to use an LED headlight, since it is much more convenient and it frees up my hands. While there are lots of great options for headlights out there, you always want to make sure that you get a headlight that has the capability to switch to night vision LED (red light), so that you are not distracting other photographers or destroying your long exposure images. Again, I prefer to go for simple, relatively inexpensive and reliable headlights like the Pelican Progear 2760. It is very compact, which is ideal for travel photography. You will need 3 AAA batteries to power the Pelican Progear 2760, and the batteries last for a long time.
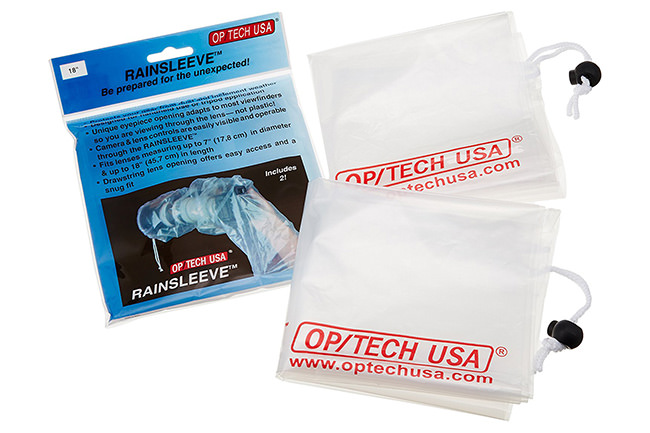
Rainsleeve
While it is nice to heave a weatherproof camera and lenses, sometimes it is necessary to protect camera gear when shooting in wet conditions. I prefer to have simple rain sleeves in my camera bag. The OP/TECH Rainsleeves are ideal – they are very compact and lightweight, taking practically no space in my camera bag. Best of all, they are cheap – you can get a pack of two 18″ rain sleeves for just $7 bucks.
Rocket Blower
When you need to quickly blow off the dust from your camera gear or your camera sensor, nothing beats the good old Giottos Rocket blower. Make sure you get the large version, since it pushes a lot more air compared to the smaller ones. It only costs $17, so make sure you don’t cheap out and get something even cheaper that will rip in a couple of years. I bought mine 10 years ago and it is still as good as new.
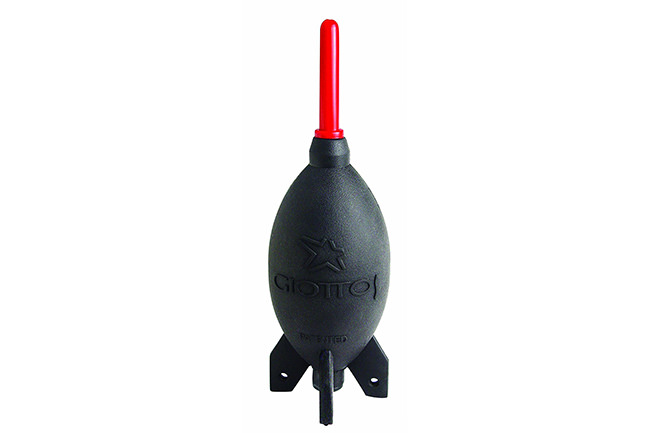
When you have dust on your sensor, the rocket should be the very first cleaning tool you pull out. If it does not remove all the dust, you will need to move to more drastic measures such as the Sensor Gel Stick or wet cleaning.
Sensor Gel Stick
Speaking of which, if you have never heard of the Sensor Gel Stick, it is time for you to check one out. If you are frustrated with all the residue and specks left by the wet cleaning method, or you are too scared to clean your own sensor, the Sensor Gel Stick can be a life-saver.
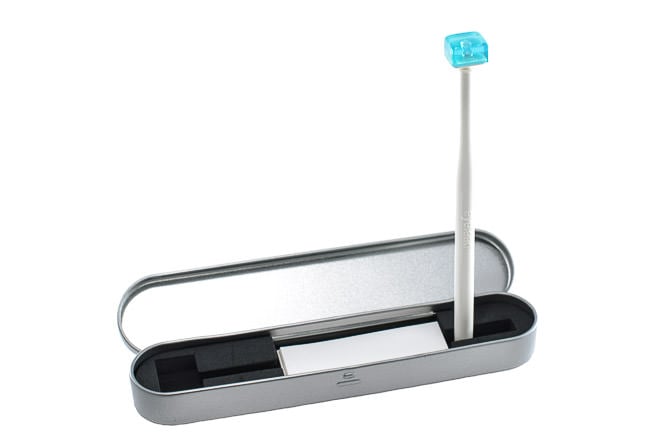
Tens of thousands of photographers are using this product and for a good reason – it is the best sensor cleaning product on the market.
Microfiber Cloth and Lens Cleaner
When traveling, you will need a good-quality microfiber cloth and a liquid solution to properly clean your lenses and filters. My personal choice is the Zeiss Jumbo Microfiber Cloth + 2 Ounce Zeiss Optical Lens Spray Cleaner. Make sure to place the lens spray in a plastic container when going through airports.
Optional Accessories / Overseas Travel
Lastly, let’s take a look at some optional accessories and other items that might be needed when traveling overseas.
USB Solar Charger Panel
If you are planning to go to remote areas with no power, you have to get yourself a USB solar charger panel. Thankfully, there are plenty of options on the market. I personally use the Anker 21W Dual USB Solar Charger and it has worked out pretty well for me. When opened up, the unit has a total of 3 large panels that can provide up to 2.1A output on each of its two USB ports when under direct sunlight. That’s enough power to be able to quickly charge my smartphone, in addition to a battery pack. It is water and weather resistant and it can take quite a bit of beating.
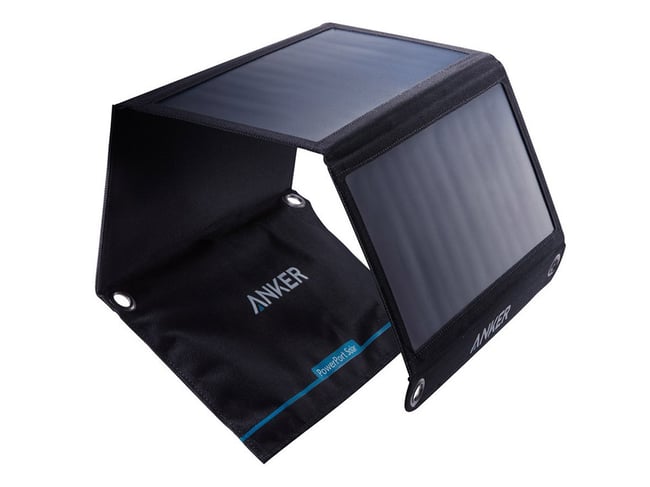
Best of all, you can literally open it up and tie it or clamp it to your backpack while hiking (the unit comes with 4x carabiners), allowing it to continuously charge your devices.
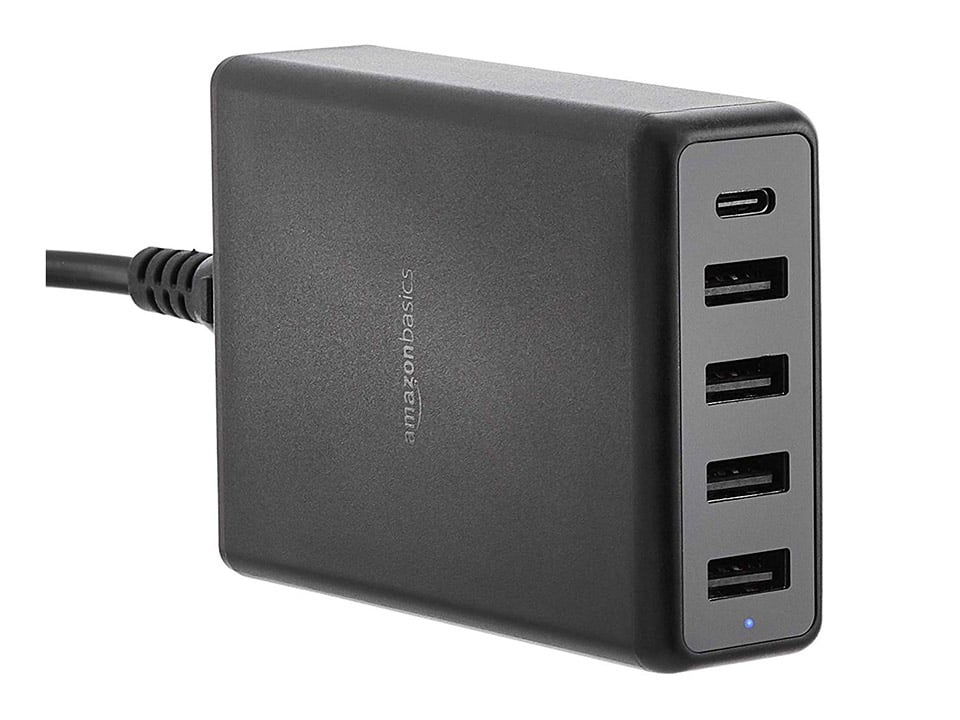
Multi-Port USB / USB C Port Charger
When I know that I will be staying in a hotel or traveling in my compact trailer, I also make sure to grab the AmazonBasics 5-Port Adapter with 4 USB-A and 1 USB-C Port. It is very compact and has enough power to charge pretty much anything I throw at it, including a USB-C compatible device such as a MacBook / MacBook Pro.
Universal Travel Adapter
When traveling overseas, you always want to make sure that you have a power plug adapter, so that you can plug in your chargers and your power cables into outlets. While there are lots of different adapters out there, the one I can recommend is the Epicka Universal Travel Adapter. It is good to use in most countries of the world and it has a pretty simple design that allows you to push any power connector out of the unit.
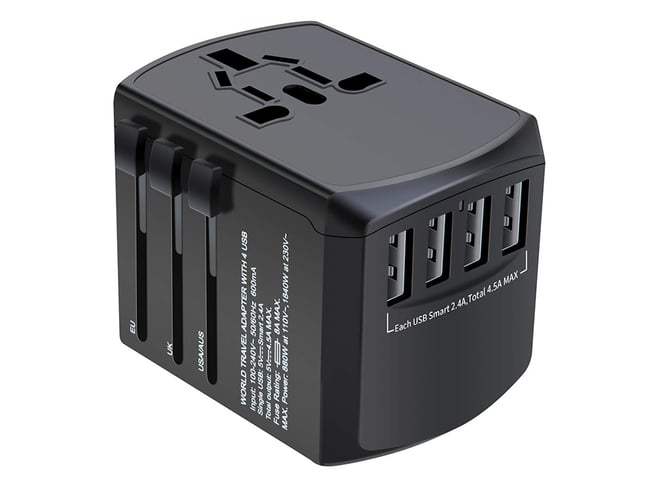
In addition, it has a built-in dual USB charger that can provide up to 2.4A of power, so you can charge up your mobile phone together with a battery pack.
Memory Card Reader
For many years, I was a big fan of the Lexar Professional USB 3.0 Dual-Slot Reader. But ever since I started using high-end Nikon cameras with XQD card slots, I have been looking at other memory card reader options that incorporate both XQD and SD memory card slots. After doing some research, I found the Gnarbox Memory Card Reader. It is capable of reading XQD cards, SD and microSD cards, and these slots are UHS-II compatible.
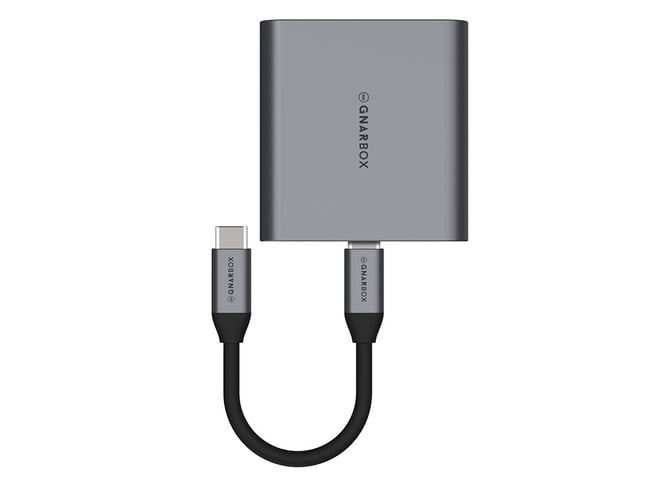
It may seem pricey at $50, but if you look at other options, they are even more expensive in comparison!
Unfortunately, there are no similar card readers on the market that support both CFexpress and SD cards yet. Doing a brief search online only revealed card readers with a single CFexpress slot, and they are all very expensive.
Filter Set
We have written quite a bit about lens filters and why you need filters for landscape photography, so there is no need to add more to the subject. In short, if you are serious about landscape photography, you need to get yourself a reliable filter set that you can use in the field. I personally bring two types of filters on every trip, whenever possible – a circular polarizing filter, and a circular ND filter.
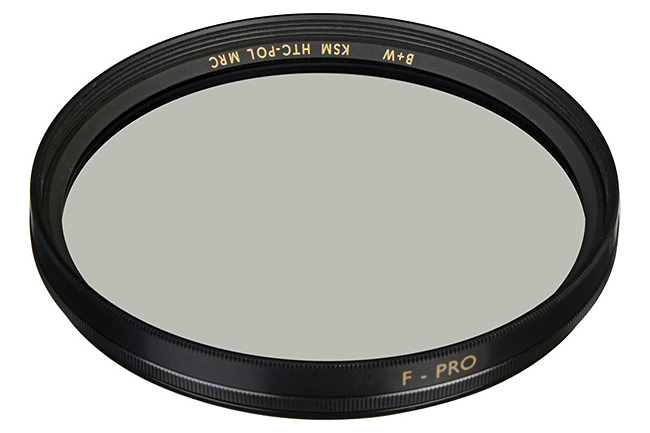
The two filters I always take with me are B+W 77mm XS-Pro Circular Nano Polarizer and B+W 10-Stop ND Filter. The circular polarizer is a must-have for landscape and architecture photography (see how to use polarizing filters) and a 10 stop ND filter is needed when I want to do long exposure photography. When using filters of different sizes, I often bring the Fotodiox step up ring pack, which allows me to use the above-mentioned filters with pretty much any lens.
I used to carry large filter holders for square graduated ND (GND) filters, but I don’t use them anymore. Partly because of their size / weight, and party because they are not needed anymore. With HDR and Luminosity Masking post-processing techniques, I haven’t used GND filters for a while now.
Travel Tripod
For many years now, my favorite travel tripod has been the Gitzo Traveler Series 1 – it is a small, super lightweight (1 kg) and versatile tripod that is pretty close to being an ideal travel companion. However, its biggest issue is its thin legs, which can get shaky when putting heavier loads. It is also a pretty low tripod, which can make it a bit painful to use for extended periods of time. Still, when I need to travel super light and compact, I usually end up taking my Gitzo Traveler with me. Mine has been discontinued and replaced with the Gitzo GT1545TUS, which is as light and as small as mine but has better overall construction.

If you want something even more suitable for heavier loads when traveling, another great option is the Really Right Stuff TVC-24. It is slightly heavier than the Gitzo Traveler (1.5 kg) and larger, but it can take a lot more load – up to 18 kg of total weight. The RRS TVC-24 is pretty expensive though – just the legs will set you back at $1,000! For this reason, it is definitely not for everyone.
If the above tripods are out of your budget, another potential choice would be the MeFOTO Carbon Fiber Globetrotter kit. At $350, it is a pretty good travel tripod that is fairly compact. It might not have the Gitzo or the RRS name on it, but for its price and its load capacity of 12 kg, it is of great value. It is a bit heavier than the RRS and especially the Gitzo traveler, but keep in mind that it comes with an Arca-Swiss compatible ball head. Personally, I am not a fan of the MeFOTO ball heads, but I will take one for free.
While at it, if you do get yourself solid tripod legs, you want to make sure to get a good tripod head as well. When using my Gitzo Traveler, the ball head that permanently sits on it is the FLM CB-32. At $250, it is not a cheap ball head, but it is very solid and reliable.
I know that some of our readers might be pretty unhappy about me including such expensive tripods and ball heads in this list of gear and accessories for travel. However, as I have stated in my article on buying a tripod, don’t fool yourself into thinking that you can get a cheap and reliable tripod – there is no such thing. You pretty much always get what you pay for.
If the tripod you are looking at costs less than $300, you will most likely end up replacing it in the future, and you can trust me on this one. You want a solid and lightweight carbon fiber legs, with a construction made for abuse in the field. Cheap tripods can’t provide that and they will start collapsing over time. Get yourself a solid tripod that will last you a lifetime and never look back!
Tabletop Tripod
While traveling, you will come across stunning places that prohibit the use of a full-size tripod. In such cases, a very compact tabletop tripod could save the day, since it does not get in the way and you can safely use it in most environments.
Last year I acquired the Really Right Stuff TFA-01 tabletop tripod with BH-25 ballhead and I must say, this is a very impressive mini tripod that can easily fit in your camera bag or your pocket. It can support quite a bit of weight for its size (the tripod head can support up to 4 kg and the legs can support up to 6.8 kg of total weight), so you can even mount a full-size DSLR with a long lens on it!
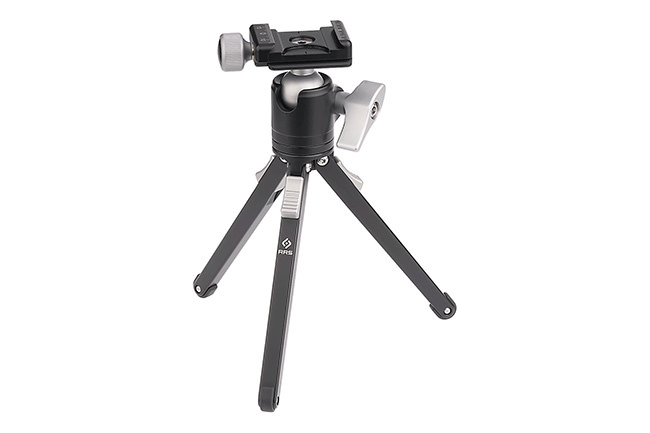
If you have an L-Bracket on your camera, I would suggest to get the more compact and lighter RRS TFA-01 with the BC-18 Microball. If you have regular plates, I would get the kit with the BH-25 as pictured above.
Multi-Clamp Kit
Another amazing accessory that I take with me when traveling abroad is the RRS Multi-Clamp Kit with BC-18 Micro Ball. When I do not have a surface to put the tabletop tripod on, there is usually something I can attach a clamp to – whether it is a tree, a window frame or a fence. And that’s where the Multi-Clamp is most useful!
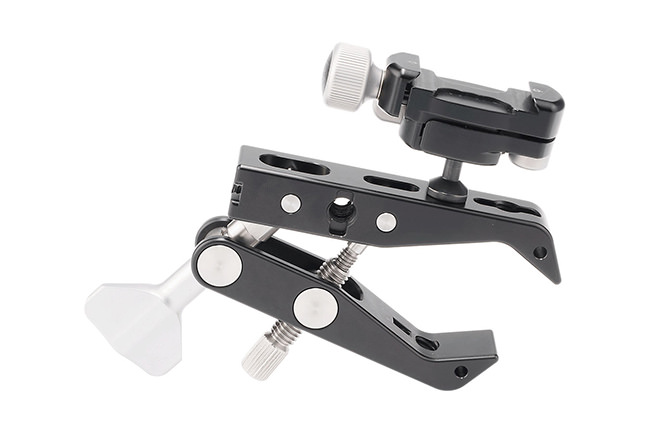
Just like the RRS tabletop tripod, the clamp takes very little space in my bag, so whether I end up using it or not, it is now always with me when I am abroad.
AA Rechargeable Batteries
When traveling locally, I usually take a 12-pack of rechargeable batteries with me. I can use them with my flashlight, headlight and if I am planning to use speedlights or other gear, they are very useful and less wasteful than alkaline batteries.
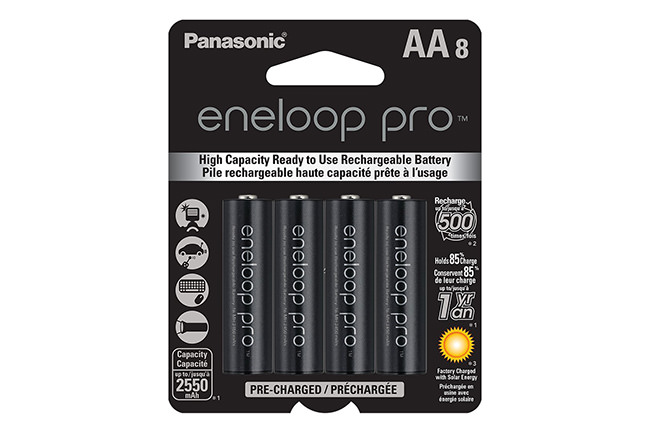
If you want something simple and cheap, get the AmazonBasics AA High-Capacity Rechargeable Batteries. If you want the best of the best, especially if you are planning to use batteries in a speedlight, get the Panasonic Eneloop Pro Rechargeable Batteries. They are expensive but worth the high price tag when it comes to fast recycle times and longevity.
While at it, don’t forget the AA 12-Pack Battery Caddy. I place my batteries in the caddy when traveling. When a battery is used, I turn it the other way around and slide it right back. This way, I know which batteries are full and which ones need to be charged.
To make charging very quick, I also use the EBL 12-Bay LCD AA / AAA Battery charger. This bad boy can charge all 12 batteries at a time very quickly, so I never have to worry about batteries running out.
I normally don’t take any of this with me when traveling overseas due to weight and it is usually easier to grab Alkaline batteries in any country if I need them.
Unlocked Smartphone
I always make sure that I travel with an unlocked smartphone so that I can buy a SIM card and use my phone for calls and the Internet. Sometimes it is useful to travel with a small router like the TP-Link N300 that can take SIM cards since not every carrier in other countries is going to allow you to share data from your smartphone.
When traveling overseas, don’t forget to add / consider other items such as passport, travel insurance, etc.
I hope you found this article useful. Let me know if I missed out on anything in the comments section below!
Another thing to keep in mind is that the backpacks designed for photography are not as comfortable as the ones for hiking. I use an Osprey for day hikes. It is very comfortable and well ventilates. The drawback is that it opens from the top so your photography gear may be harder to get at. regarding photography gear, I travel light when on a day hike so that is not a big issue to me.
One way to pare down size is to use your smart phone to drive image retrieval and storage. On a recent trip I used a SanDisk portable 500GB SSD which came with the right cord to connect to my android phone. Then bring your card reader and its cord. Using a free file transfer utility app I loaded images into the phone’s main memory and then from there to the SSD. It helps if every day or two you start a new storage directory on your in camera memory card so you can keep track of what has already transferred. In my case I could review raw images on the smart phone but did not need to edit them before returning home. Most of us travel with our phones anyway but forget they are really little computers.
One thing I might add for people that have cameras with different batteries would be the Watson dual battery charger from B&H. My wife and I took a two week RV trip through Alaska and this product worked very well. It comes with a 12 volt adapter that will charge two batteries as fast as the regular power cord and it will function on 120v and 220v AC. They sell inexpensive adapter plates for virtually any camera battery and the unit has a USB charging port as well.
Bill, there is a section in the article for that, but not for Watson. I like the RAVpower adapter – it is very light and small, no need for adapters, since it charges via USB.
Great collection, thank you. I’d definitely add some tools, a multi tool or a swiss army knife, at least a small screwdriver set. And some cleaning wipe, cord, tape, needle and solid thread. Cheers!
Nasim, your article is very timely. I have a ten day road trip to SE Utah planned for mid-April. Because of an intestinal issue I have to take my own food so my car will have a few coolers in it which will limit space. this article has been very helpful. Thanks.
Your kit bag is exactly the reason I went to a Nikon Z7 and Z series lenses (currently I carry 4, but adding the 70-200 this year).
Yep, you’re right, before I bought the D850, I thought long and hard about going mirrorLess , but I have so much glass from the Nikon F mount and I would’ve taken a real loss on it, in reality, I was thinking about moving over to Sounni, but you were right the mirrors would’ve been a lot less bulk and weight
Please tell us a bit more on travel insurance you use? Have you ever had to make a claim and how easy or pain free was it?
Wow! That’s a lot of stuff. Do you always travel by lorry?
E-M1+Zuiko 12-40 with a couple of cards and couple of charged batteries does it for me (and lets me make the prints that sell very well). The whole lot can go into my jacket pockets.
Ali, no, I don’t take everything in the list – it depends on the trip. When doing local trips, I will take more stuff than when going international.
Nasim, thank you for updating this article, very timely, leaving for my 1st trip to Africa in 3 weeks and I am so frustrated…I was advised that since we will be flying from Nairobi To Masai Mara I am limited to a total of 15kg, I had no idea that this is 33lb’s! I will be gone for 13 days, my 1st attempt to plan my gear and I was over that, I have have paired it down considerably and I am still at 18lb. d850, d810, Tamron 150-600mm, Nikon 24-120mm, Tamron 1.4 tele-convertor, Cir-pol filter, 4 batteries/2 chargers, cleaning supplies, small carbon fiber monopod, 15″MacBook and the lightest bag I could find Lowepro 400AW. Then there is the cloths in a 24″ duffle bag, only 3 changes, hats, rain coat, flip flops, toiletries, medication and charger for phone and macbook-18 lb total bare minimum. Trying to find out if they will sell me 10lb more luggage but I can’t get an answer. Trip of a lifetime and I’m counting oz, don’t even have a flash going in the bag…..
I’ve been in the same situation before. The trick is to wear a multi-pocket photo vest and put as many as possible smaller items like short lenses, extra body, batteries etc in the pockets of the vest. The weight limit is on the luggage not on the passenger.
Get yourself some clothing, jacket, pants, etc., from ScotteVest. They have tons of pockets, the jacket has pocket big enough to carry a smaller lens in it.
My wife and I made a similar trip a couple of years ago. We did not fly from Nairobi to the Masai Mara but we did make the return trip and I certainly had bags that exceeded the 33 lbs limit. Attempting to convince the wife to travel for a week and a half on under 33 lbs proved particularly futile. I was quite concerned but our guide told us they never check. Sure enough, the copilot deplaned, checked his list, asked us our names, shoved the bags in the hold, and away we went (after a guy in a truck chased the wildebeest off the “runway”). I also recall an option to purchase an excess weight option. It was not à la carte. It was a set weight limit increase, you couldn’t buy just the extra ten pounds you mentioned.
Jim, looks like you got some great answers. My recommendation is very similar – try to get some of the heavier stuff in your pockets (batteries, tripod head, etc), so that your bag weight is reduced. I found that in most cases the airline bag limits don’t matter for camera bags that you take on airplanes, but it really depends on the size of the plane. Smaller planes have to measure everything correctly, and they might not allow heavy bags, so you have to watch out for that.
Since majority of my photography travel is within US and by car, I have the luxury of taking everything that I need.
Nice list Nasim, and here are my 2 cents…
1. Sure, the Nikon 24-120mm lens is a good all around lens, but I thought it falls short of resolving 36mp sensors like the one in Z6.
2. For charging the batteries, especially from battery pack, I like the following from Nitecore. It can charge 2 batteries at the same time and the some versions can charge a mix of old and new Nikon batteries too…And it has digital display too..
www.bhphotovideo.com/c/sea…038;sts=ma