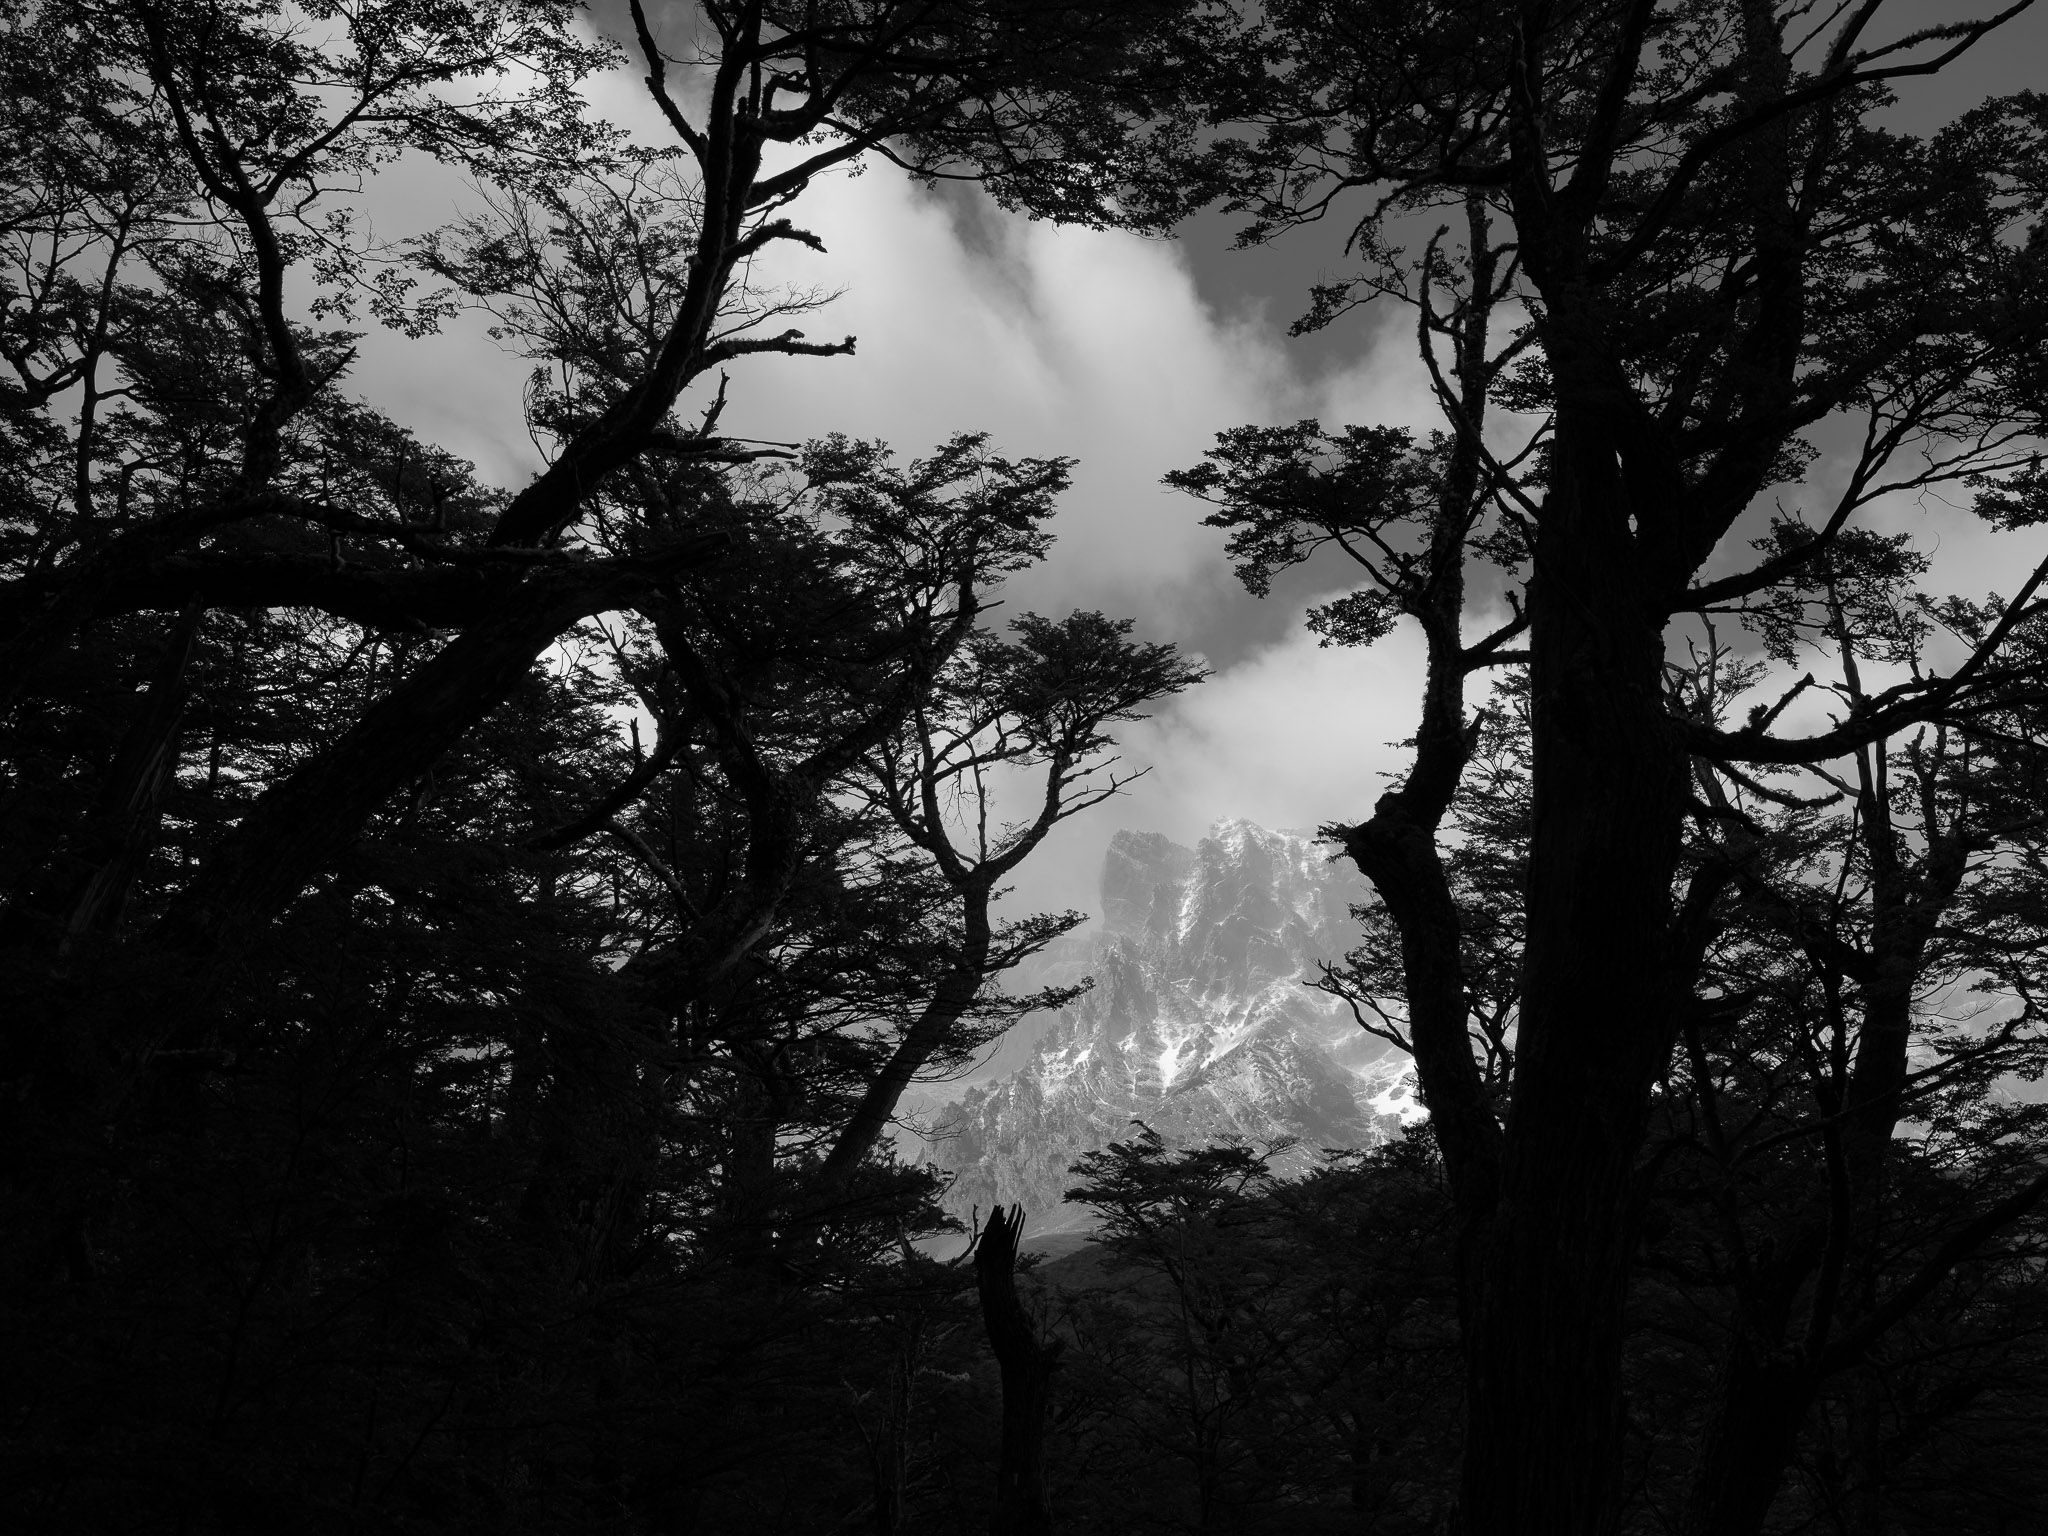
I just returned from one of the longest hikes I’ve ever done, the famous O Circuit in Chile’s Torres del Paine National Park! This eight-day hike goes around the Paine massif itself, circumnavigating these magnificent peaks and showcasing them from every angle. For landscape photography, it’s hard to think of a more exciting hike.
But planning for photography during a trek like this can be quite daunting, especially given the weight considerations. Should you bring a tripod? What focal lengths are necessary, and what can you get away with leaving at home? In today’s article, I’ll go through some of the main considerations and tips that I find useful for multi-day hikes like this one.
Although this article is based on my experiences in Patagonia specifically, I think that the lessons here will apply for almost any multi-day hiking.
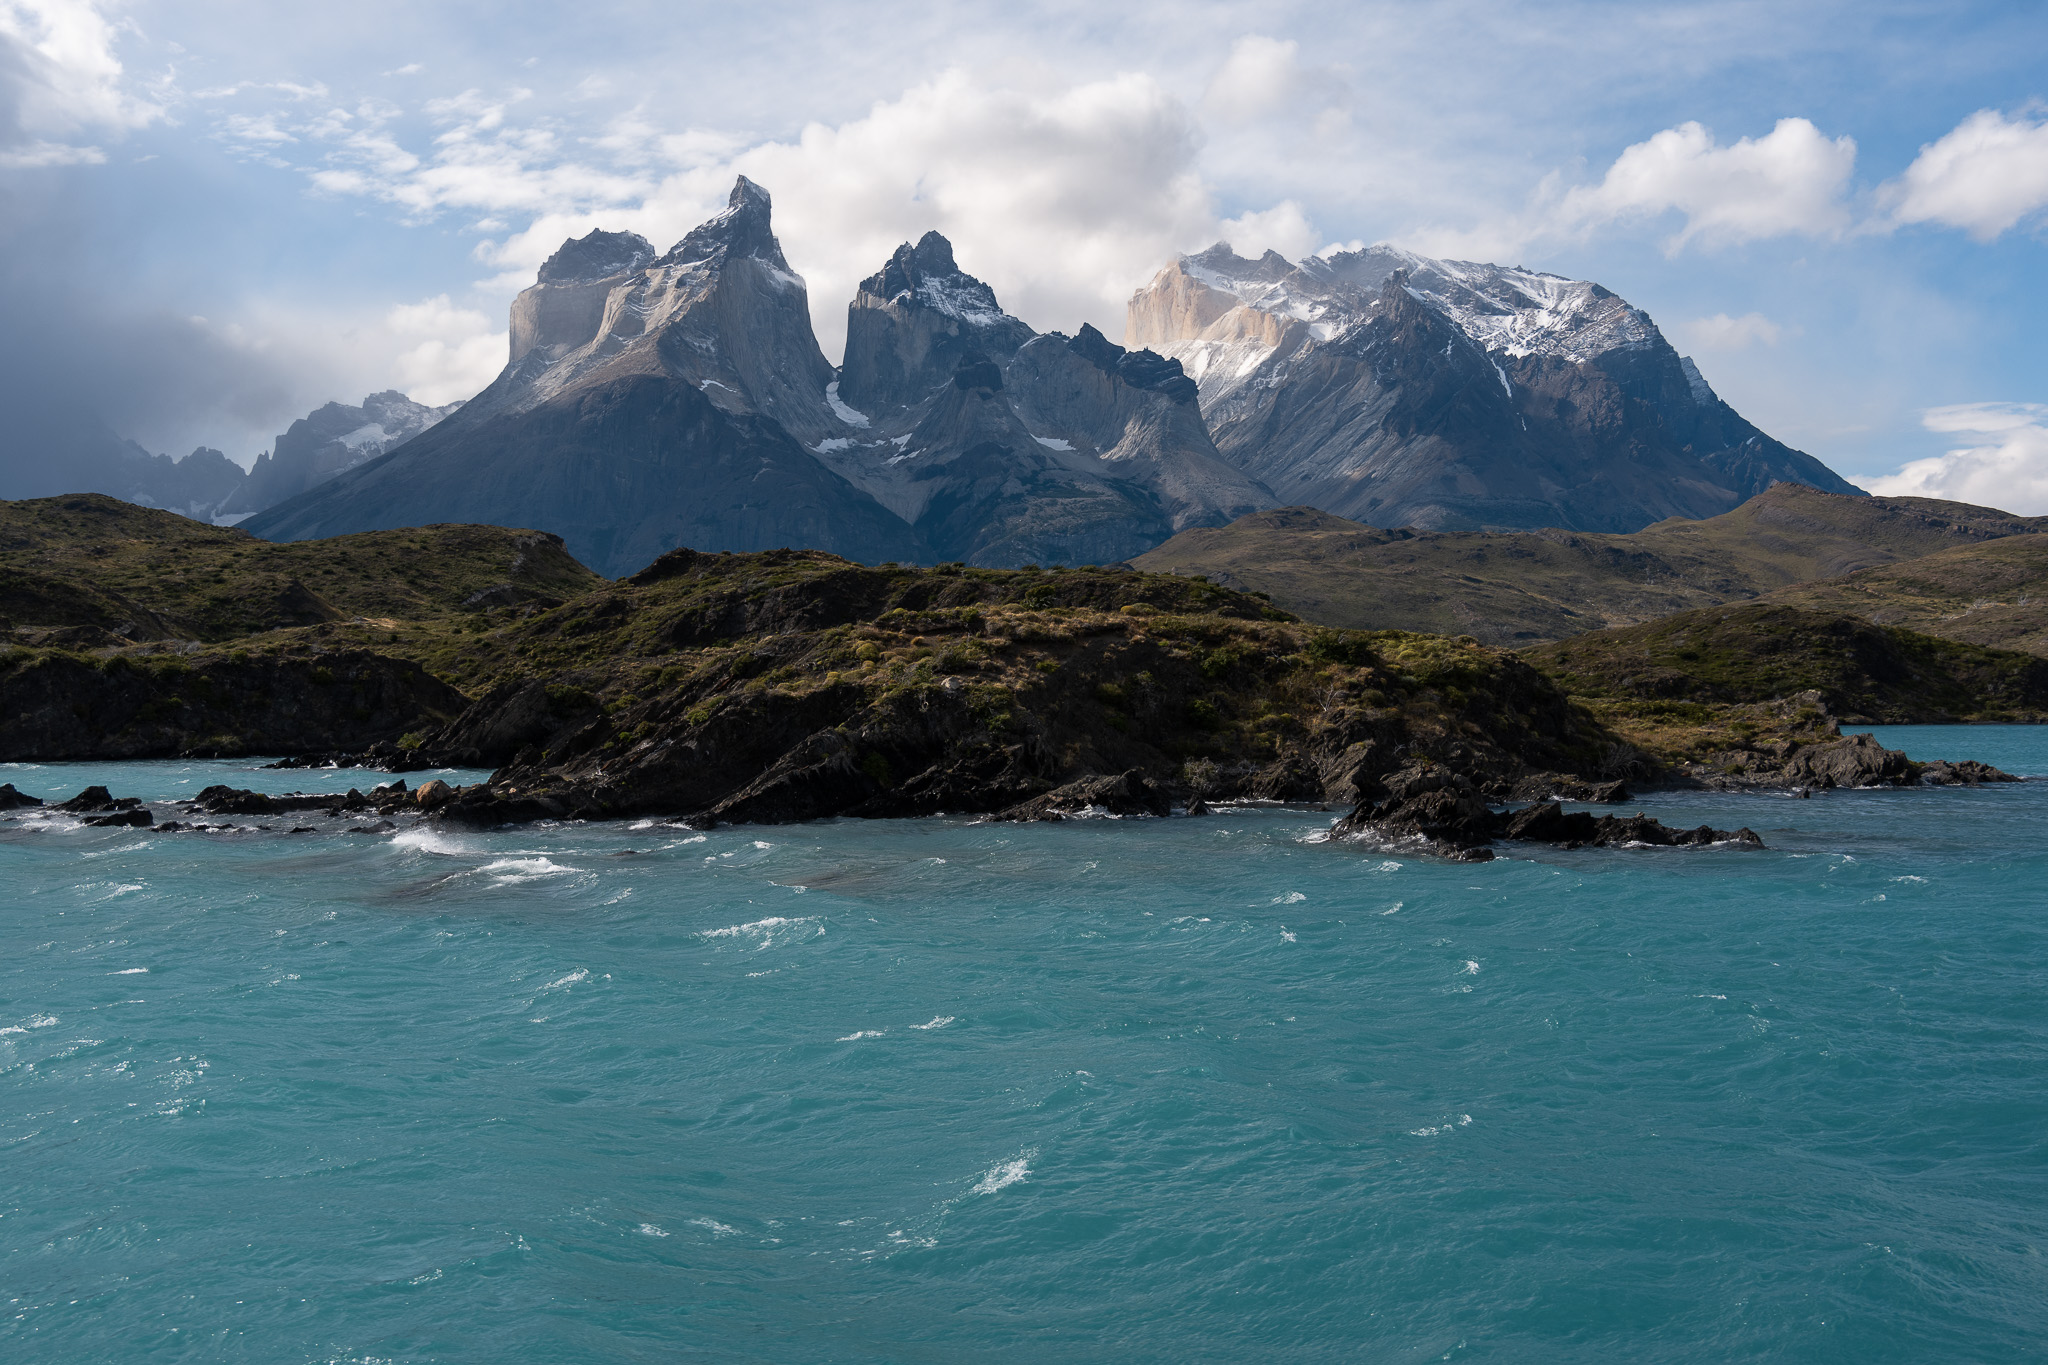
NIKON Z 7 + NIKKOR Z 28-400mm f/4-8 VR @ 32mm, ISO 64, 1/250, f/8.0
The Camera Gear I Brought
The camera kit that I brought with me on the O Circuit was far from optimal – I deliberately overpacked so that I could test as many lenses as possible for upcoming reviews on Photography Life. This meant two cameras, seven lenses, and my regular tripod. You can see what I do for our reviews!
That said, I’ll leave the list here for reference, and to answer any questions you may have about what I brought. My kit looked like this:
- Nikon Z7 (675g with battery and card)
- Hasselblad X2D (895g with battery and card)
- Voigtlander 15mm f/4.5 Heliar (294g)
- Voigtlander 50mm f/2 APO-Lanthar (370g)
- Voigtlander 75mm f/1.5 Nokton (530g)
- Nikon Z 28-400mm f/4-8 VR (725g)
- Hasselblad 28mm f/4 P (245g)
- Hasselblad 55mm f/2.5 V (372g)
- Hasselblad 35-75mm f/3.5-4.5 (1115g)
- RRS TVC-24 tripod (1500g)
- Markins Q3i-Tr ballhead (374g)
- Arca-Swiss Quick Link set for tripod and head (139g)
- Total weight: 7234 grams or 15.9 pounds
I also brought along some other accessories, consisting of:
- RRS L-bracket for Nikon Z7
- Arca-Swiss style base plate for Hasselblad X2D
- A small Allen wrench to tighten tripod plates
- USB-C charging cord and adapter
- Extra Nikon EN-EL15 battery
- Small microfiber lens cloth
- Sensor gel stick
- F-Stop Gear large internal camera unit
Here, the main source of weight was the F-Stop Gear internal camera unit, which held all the gear and kept it safe and accessible during the hike. I measure it as weighting 752 grams. The other accessories were very light individually but add up to an extra ~200 grams or so. This puts the total weight of camera equipment around 8.2 kilos / 18 pounds.
It should go without saying that you can, and almost certainly should, pack much lighter than that for multi-day hikes.
Tips for Multi-Day Photography Hikes
1. Distribute the Weight
I didn’t pack light at all for this hike. Yet my bag wasn’t really uncomfortable, and I was able to keep my hiking speed reasonable without being miserable the whole time.
Part of that is because of how I distributed the weight of the items in my pack. My advice is to keep the heaviest (or really, the densest) items in your backpack as close as possible to your body. That way, they don’t drag you backwards and feel heavier than they really are. Also, don’t put the densest items at the very bottom of the backpack or the very top, but instead, near the middle or a little higher.
As a photographer, this is likely to include your camera, lenses, and batteries. Unfortunately, the best spot for weight distribution is also going to be a little harder to access quickly, so there’s a bit of a tradeoff. But I find that it’s worth distributing the weight better regardless – you probably don’t want to make the whole hike more difficult in exchange for slightly quicker camera access.
There’s also the matter of balancing the weight from left to right. If you bring along a tripod, it’s common to strap it to the side of your pack. But if you don’t counterbalance it with something on the other side, you’ll end up putting more weight on either your left or right shoulder, which can grow into a big problem over the course of many days. The easiest way to balance it is with a water bottle on the opposite side – although it works best when the bottle is relatively full. Personally, I also shifted the internal contents of the backpack a little to compensate.
2. Every Ounce Matters
The little decisions that you make really add up when doing such a long hike. It might feel crazy to cut your toothbrush in half, pour all your trail mix into the same plastic bag, re-use as much clothing as possible, and spend $50 more for a sleeping bag that’s one ounce lighter. But if you do all these things, suddenly your pack is noticeably lighter.
This applies to camera gear as well. Go with just a base plate instead of an L-bracket. Leave your UV filters and your camera strap at home. Bring just 1-2 extra batteries instead of 3-4 (it’s amazing how far judicious battery usage can get you). Congratulations – you’ve now reduced the weight of your bag significantly!
In fact, one thing I’d do differently on a future multi-day hike is to leave my F-Stop Gear internal camera unit behind. It made some sense to carry it on the O Circuit given my excess of camera equipment, but if you only have one camera and 2-3 lenses, you can protect them just fine using the clothing in your backpack instead of a dedicated camera unit.
Finally, depending on the trek, there may be huts along the way with snacks, meals, and even beds. These are likely to be quite expensive, and it’s tempting to save money by bringing your own gear instead. However, I would say that for photographers, it’s better to take advantage of these creature comforts if at all possible. Your bag is already going to weigh more than that of most hikers; if you can reduce the weight substantially by spending more money during the hike, think of it as a necessary evil.
Minimizing weight isn’t my primary goal on multi-day hikes; getting good landscape photos is. But for a variety of reasons, a lighter bag does lead to better photos!
3. Stop Frequently for Photos
It’s easy to get in your own head a little bit when doing a multi-day hike. Especially on some of the later days of the trek, it can feel like your main focus is far away from photography – it’s on things like food, sleep, and where to place your next footstep. Also, I find that new scenery can feel less and less “new” as the hike goes on. You can lose the motivation to stop and pull out your camera again.
But I encourage you to try not to fall into this mindset. Day seven of the trek may feel similar to days 1-6, but I suspect it’s still very different from what you normally see in your daily life. Don’t be satisfied by pulling out your phone and taking a snapshot, or only taking pictures at the most dramatic spots. If you were willing to carry all your heavy camera gear this far, stop and use it often.
If you’re even slightly on the fence about stopping, stop! Take some proper photos, even if it slows you down a bit. Unless you go out of your way to do the entire multi-day hike again, there’s a good chance you’ll never be back to this spot, and you don’t want to regret missing out on taking a photo.
4. Do You Need a Tripod?
I’m a huge proponent of tripods. And I don’t think that just any tripod can do the job, especially in windy conditions. I knew how windy the O Circuit can get, so I ultimately brought my middleweight tripod (the RRS TVC-24) instead of my lightest travel tripod.
This ended up being the wrong choice. I could have saved about 800 grams / 1.76 pounds by bringing my lighter tripod kit instead (the Gitzo GIGT1545T with the RRS BH-25 head). It’s not that I totally regret bringing the sturdier tripod, but I think I would do it differently in hindsight. Granted, that’s partly because it ended up being less windy than expected, which isn’t something that can be predicted ahead of time.
But aside from the unique conditions of my particular hike, it’s simply possible to push your gear further these days without a tripod, or with a lighter tripod. You can go a long way through a combination of higher ISOs, image stabilization, and careful depth of field placement.
In fact, for one day during the hike (the hardest day, an out-and-back climb totaling 18 miles / 29 km), I left my tripod and various gear at one of the huts to lighten my pack. I was trepidatious about it, since I knew there would be some interesting waterfall photos that day, and I expected a tripod to come in handy. But it ended up being just fine. In-body image stabilization, along with taking a burst of photos to select the sharpest later, worked flawlessly. I managed to take a lot of sharp handheld photos around 1/15 second, which even allowed me to use base ISO 64.
Again, I’m still glad I brought a tripod, but I’m probably going to use the lighter one next time. And other photographers aren’t as religious about tripod usage as I am, so you’ll need to make that decision for yourself. It hurts a little to admit it, but I think that multi-day hikes are one of the rare times when the cons might outweigh the pros – at least depending on the level of image quality that you’re willing to accept, and how much low-light photography you’re planning to do.
5. Don’t Compromise on Focal Lengths
It’s not a bad idea to make some compromises on camera equipment for a multi-day hike. The tripod situation is one example; so is your choice of lens. For instance, choosing something like a variable-aperture zoom instead of an f/2.8 or f/4 zoom is reasonable, even if it comes with some image quality drawbacks. I think it’s okay to lower your image quality standards somewhat on a multi-day hike.
What I don’t think you should compromise on, however, is focal length. I consider it vital to carry along the full range of focal lengths that you expect to be useful for the trip. You definitely don’t need the sharpest or brightest lens at a given focal length, but leaving big gaps in your kit is another matter.
Of the seven lenses that I brought with me to the O Circuit, I was only reviewing six of them. My seventh lens – the Nikon Z 28-400mm f/4-8 – covered focal lengths that the others missed, especially on the telephoto end. I’ve already reviewed this lens and didn’t need any sample photos from it during the hike. But I carried it with me anyway, since I didn’t want to be left without a telephoto during a once-in-a-lifetime trek. The decision paid off, and I took some of my favorite photos during the O Circuit in the 300-400mm range.

Conclusion
I hope these tips gave you some ideas and inspiration if you’re planning a long hike as a photographer. I’ll have a lot more photos and articles to share from my trip to Patagonia soon, but in the meantime, let me know in the comments if you have any questions! This article only scratches the surface of multi-day hiking as a photographer, but in the comment section, I’d be happy to answer any questions about the O Circuit specifically or backpacking in general.
first of all — congrats on your trip. it sounds like you had a fabulous adventure. i just have one comment to make wrt the following statement:
“Again, I’m still glad I brought a tripod, but I’m probably going to use the lighter one next time.”
tripods — are a form of insurance. one can over insure, under insure, or get lucky and walk the knife’s edge. IME, technique is more important than gear, and regardless of which tripod you decide to bring, you’d be able to get more keepers with optimized technique.
cheers to you and keep sharing.
When I go to the forest I carry only 14-30mm f4, when I go to the mountains 24-70mm f4 and 70-200mm f4. My spine and joints thank me…
7,234 gm is massive, but I understand your reasons. The most useful thing for me is a small camera pouch (eg Lowepro Adventura TLZ 30 III or whatever suits you) attached to the front of the pack (eg a shoulder strap, the sternum strap and somewhere near where the bottom of the shoulder strap ends. You need to experiment. I use 2 small carabiners and a short length of nylon cord. You need 3 attachment points to stop it swinging annoyingly. That way the camera and one attached lens are ready all the time, regardless of whether your pack is on, and it balances the weight on your back, so better ergonomics. If the size is right it will also fit a CP lens and a shower cap for rain. This works for both day trips and multi day trips, both cross country skiing and walking. Having the camera so handy has increased my rate of usage hugely.
CP filter I should have said.
Thank you for sharing your journey Spencer. Did you bring a power bank to recharge your batteries? I ask, because there are many days of walking and not all places can have energy to recharge their batteries.
Thanks Rogério! On this particular hike, I didn’t need to bring a power bank, because I knew there were charging stations at most of the huts along the way. Normally I would have brought one, though.
Spencer, it was a one-in-a-lifetime trek adventure!
Your willingness to take so much gear with you proves your commitment to photography and, ultimately, to making and sharing your experiences with us.
Honestly, I’m surprised at how much you liked the 28-400, but I understand that a lesser lens at any given focal length is better than no lens. Maybe I’ll try it in the future (even if I’m currently thinking of pairing the Tamron 70-300 with my beloved 24-120 and replacing the trusted but heavy 100-400 when I’m just after landscapes).
So, thank you!
Thank you, Massimo! That was my goal, and having survived the trip in one piece, I’m glad I tried it :)
The Tamron 70-300mm is a better lens optically than the 28-400mm. Since you already have the 24-120mm, I think it doesn’t make sense to get the 28-400mm as well.
Why both and not just one system. Especially it is just landscape? 400mm?
I have both z9 and 907x … I dream of carrying my hasselblad film one even if it is just 38 single Ken’s one. so I can swap … end up never.
Just z and thinking about getting a f6 now I just got my fm&fe then f70&f75. Even downgrade to z50ii so share the lens and less weight.
Iceland trip coming … I guess I am f mount instead …
I only brought both systems because I was testing those lenses for upcoming reviews. It wasn’t meant to be the optimal kit for a hike like this.
Great photos and thanks for your usual informative writing, Spencer.
Any recommendations on how to book the Refugios and meals in advance?
It sounds as if it worked smoothly for you, but I have heard from friends it doesn’t always work so well.
Thanks!
Tim
Thank you, Tim! I booked the Refugios through the two companies directly – Vertice and Las Torres. Their websites are a little hard to navigate, and it’s important to make sure your chosen dates are available at all campsites before booking. For that, I used the site torreshike.com for research on available dates (but did not actually book through them – I seem to recall they charge extra).
Two recommendations. First, book everything VERY far in advance, or you won’t get the dates you want. Second, do not try to outsmart the system and skip any Refugios or follow a non-standard itinerary. Most of the distances listed online are significant underestimations. (Also, if you want to do the Base Las Torres, your hike will be much easier if you start from Camp Chileno rather than Central that day, even though most people start from Central.)
In hindsight, I think I good itinerary would be: Take a bus to Central and hike to Camp Chileno > do the Base Torres hike the next day, ending the day in Central (or Chileno) > night at Serón > night at Dickson > night at Perros > night at Grey > night at Paine Grande > night at Frances > backtrack a little and do the Mirador Britanico hike, with a night in Frances or Cuernos > finally hike back to Central and take the bus back that evening.
Also — if you don’t pay for a particular meal ahead of time, don’t assume that you can buy a replacement meal on location. At some camps, it is possible in theory (and cheaper) to buy pizza / burgers / sandwiches on site. But these are usually offered only between 3-6pm, and even then, there’s a chance they don’t have availability. Every Refugio did at least have some candy bars available for sale. Only a couple had fresh fruit or other healthier options.
Many thanks for this and your earlier note! Super helpful!
Great gear chronicle Spencer! What struck me personally was the sensor sticky tool and the z7. The z7 has always been a magnet for dust for me while in windy conditions, especially in Iceland changing lenses! So enjoy the sensor curtain in the z9 which has come in handy this week with 60-70, mph wind gusts, yes again in Iceland!
As soon as you said 60-70 mph gusts, I was already thinking – Iceland, Faroe Islands, or Patagonia! I really wish that my Z7 had a sensor dust curtain, but the gel stick is light enough that I don’t mind carrying it along. I used it twice during the hike, once on each camera.
Ahhh the Faroe Islands, my all-time favorite! Question for you, do you use the gel stick prophylactically or only when you notice sensor dust? I was out on the windy Gardur peninsula today in Iceland changing lenses on my z9 and I suspect even with the dust curtain
probably should use the sticky as a preventive measure.
Only when I notice significant sensor dust, more than just a speck or two.
Wow, I’m impressed by that load, in addition to food, cloths, tent, etc. I’ve never done a multi-day hike but it is intriguing to me.
To date my longest and toughest hike was the Paintbrush Canyon – Cascade Canyon loop in Grand Teton. I did it as a day hike and carried only my Z8, 24-70 f4 and 100-400. I did not carry a tripod but I carried all my water and of course bear spray.
Thanks Mark! I didn’t bring a tent and stayed in the huts instead. It was more expensive but helped me save enough weight to pack all the camera gear. I think I’d have left the Hasselblad kit behind if I were to pack a tent.
Paintbrush/Cascade is a serious hike (and a beautiful one, although I’ve only done part of it)! That’s as far as I’d be willing to go in a single day. To do it with the Z8 + 24-70mm f/4 + 100-400mm says to me that you’d have no trouble doing a multi-day trip if you wanted. None of the days on the O Circuit are as tough as Paintbrush/Cascade.
I’ve done a lot of L-D hikes and this is what I learned –
1. An extra body that works with the same lenses – one of my bodies got wet and stopped working.
2. 1 large aperture, wide angle for the night shots.
3. A short tripod that you can perch on a rock or on the ground. Saves a lot of weight!
4. F4 holy trinity set…and thats it. I usually forgo the 70-200 and go for a light 400-500mm like the Nikkor 500PZ. And a 1.4X teleconverter. Lots of wildlife sightings when hiking on these paths.
5. Lots pof lens cleaners / blowers to keep the dust off! Its amazing how dusty many of these treks are.
6. Strip your camera bag of all extraneous stuff, including removable straps, and cut any long leads off if you do not need them. Or just use a regular backpack and use your clothing to wrap. Camera bags tend to be bulkier and heavier.
7. Peak Design camera clip so your camera is always handy, and offset the weight of the tripod.
I think you neglected to mention you had access to electricity so could recharge nightly? Your packing will change considerably if you do not have access to electricity!
Great points, thank you, Richard! I don’t love miniature tabletop tripods for obvious reasons, but on long hikes, it’s definitely better than nothing. There’s often a rock or tree you can use to set up.
I should have mentioned in the article, but I would highly recommend against using a standard camera backpack for trips like this. They just aren’t designed to carry weight well or for a long time. A dedicated hiking backpack is pretty much mandatory in my opinion. Even a hiking-style camera backpack like from F-Stop or Shimoda wouldn’t be a great fit for these sorts of trips.