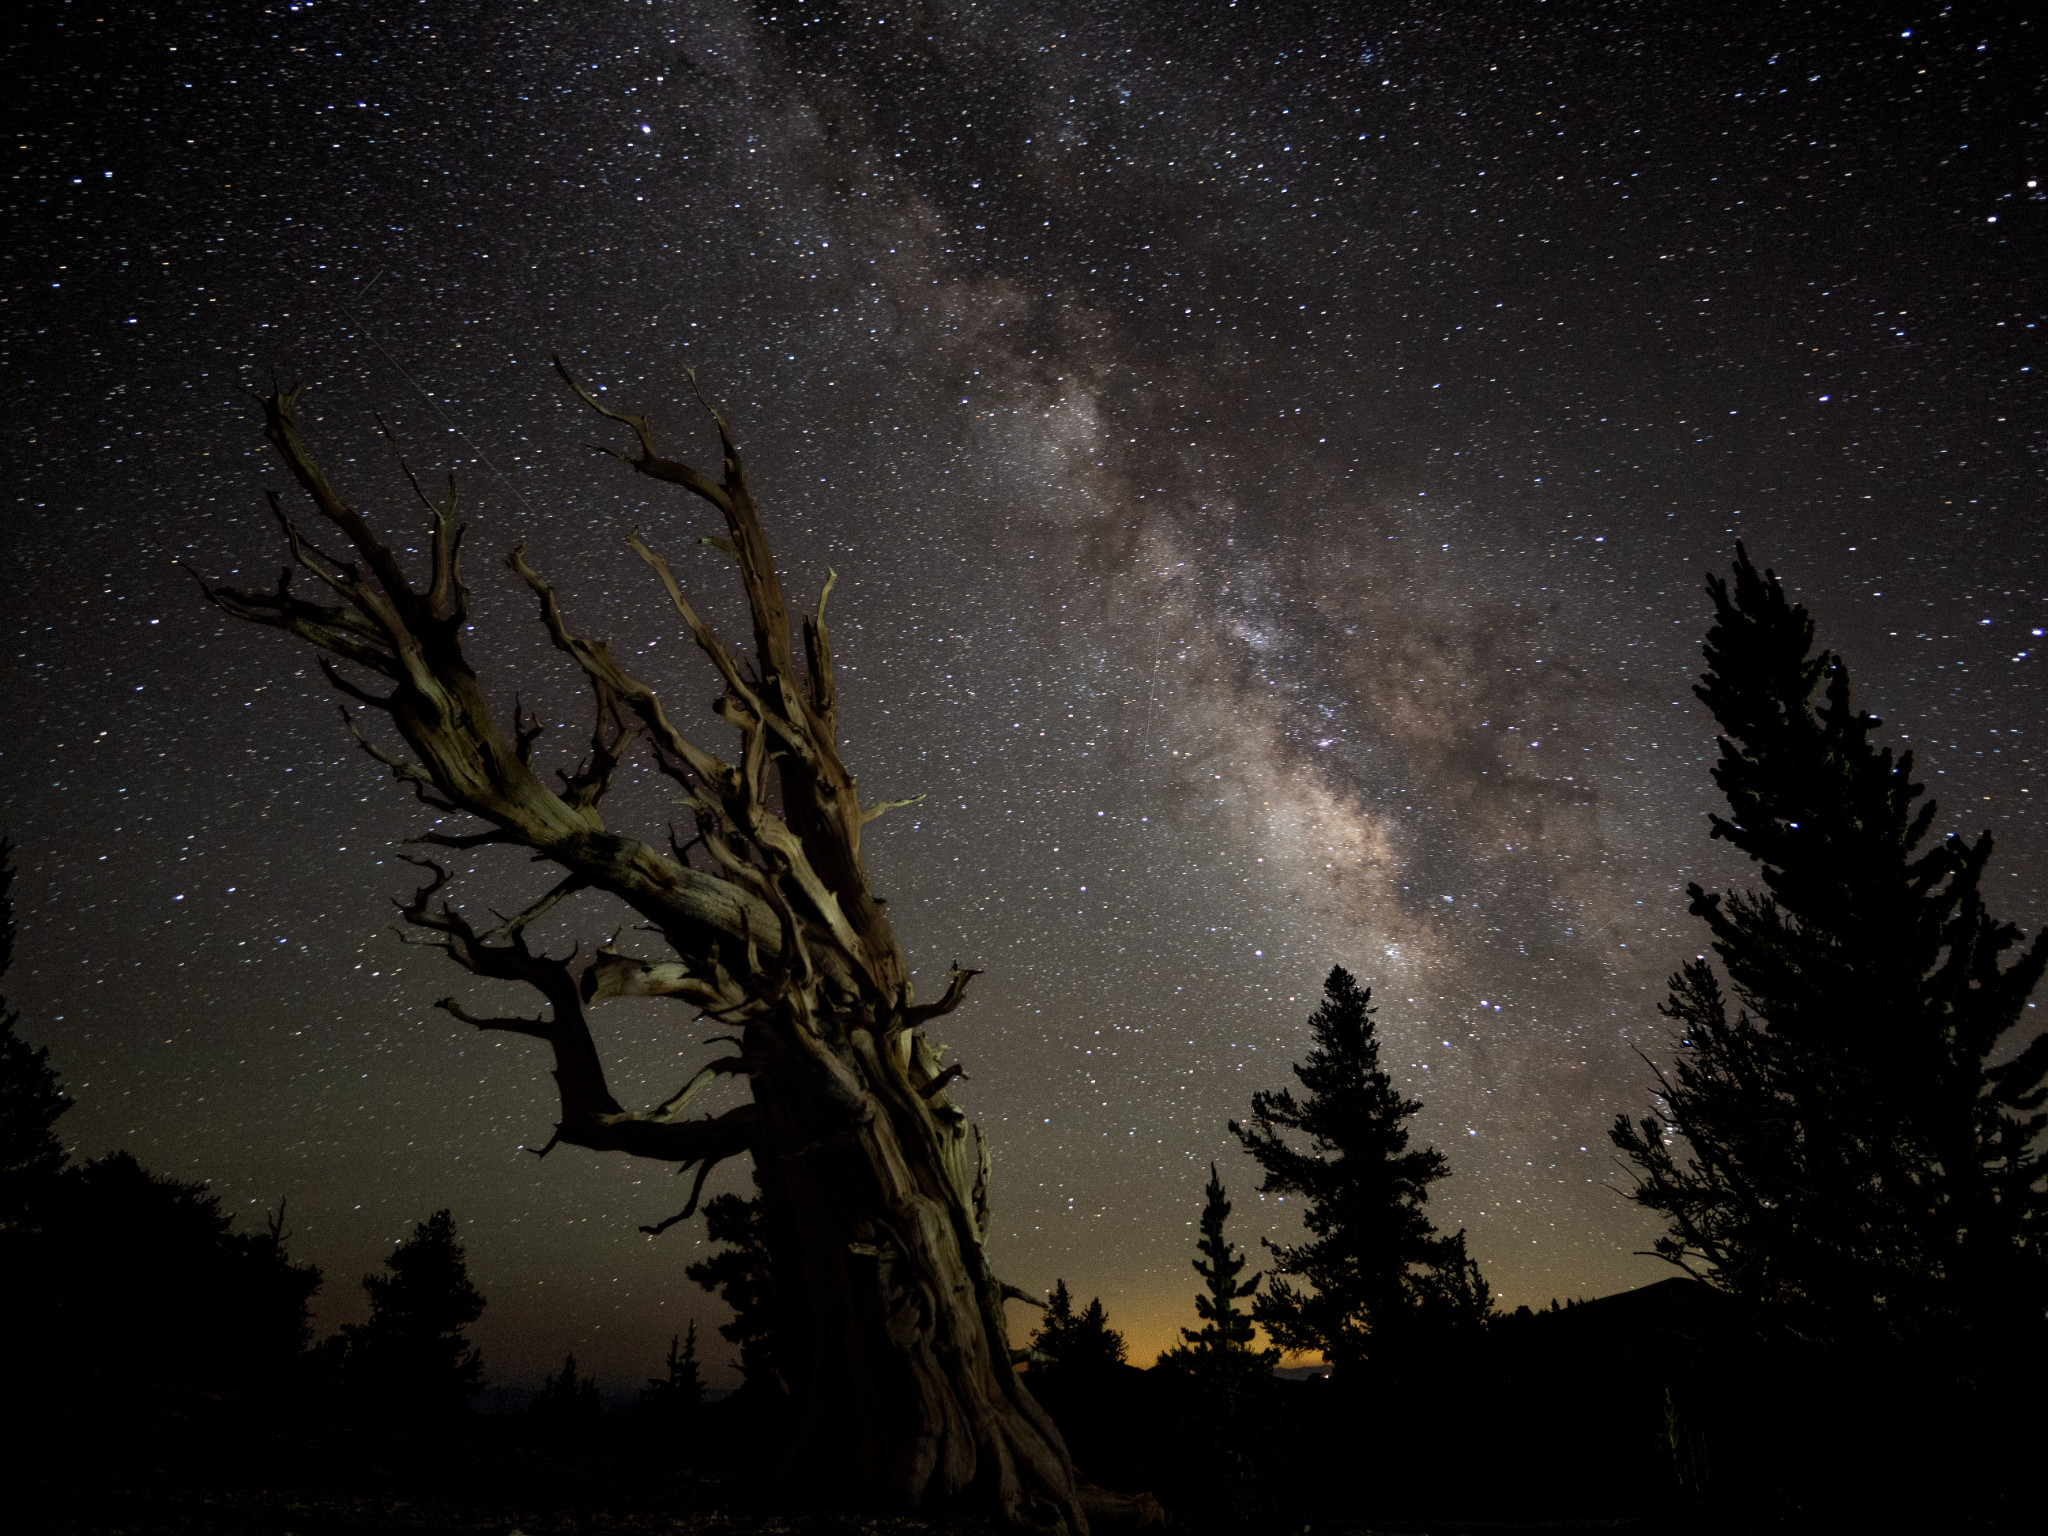
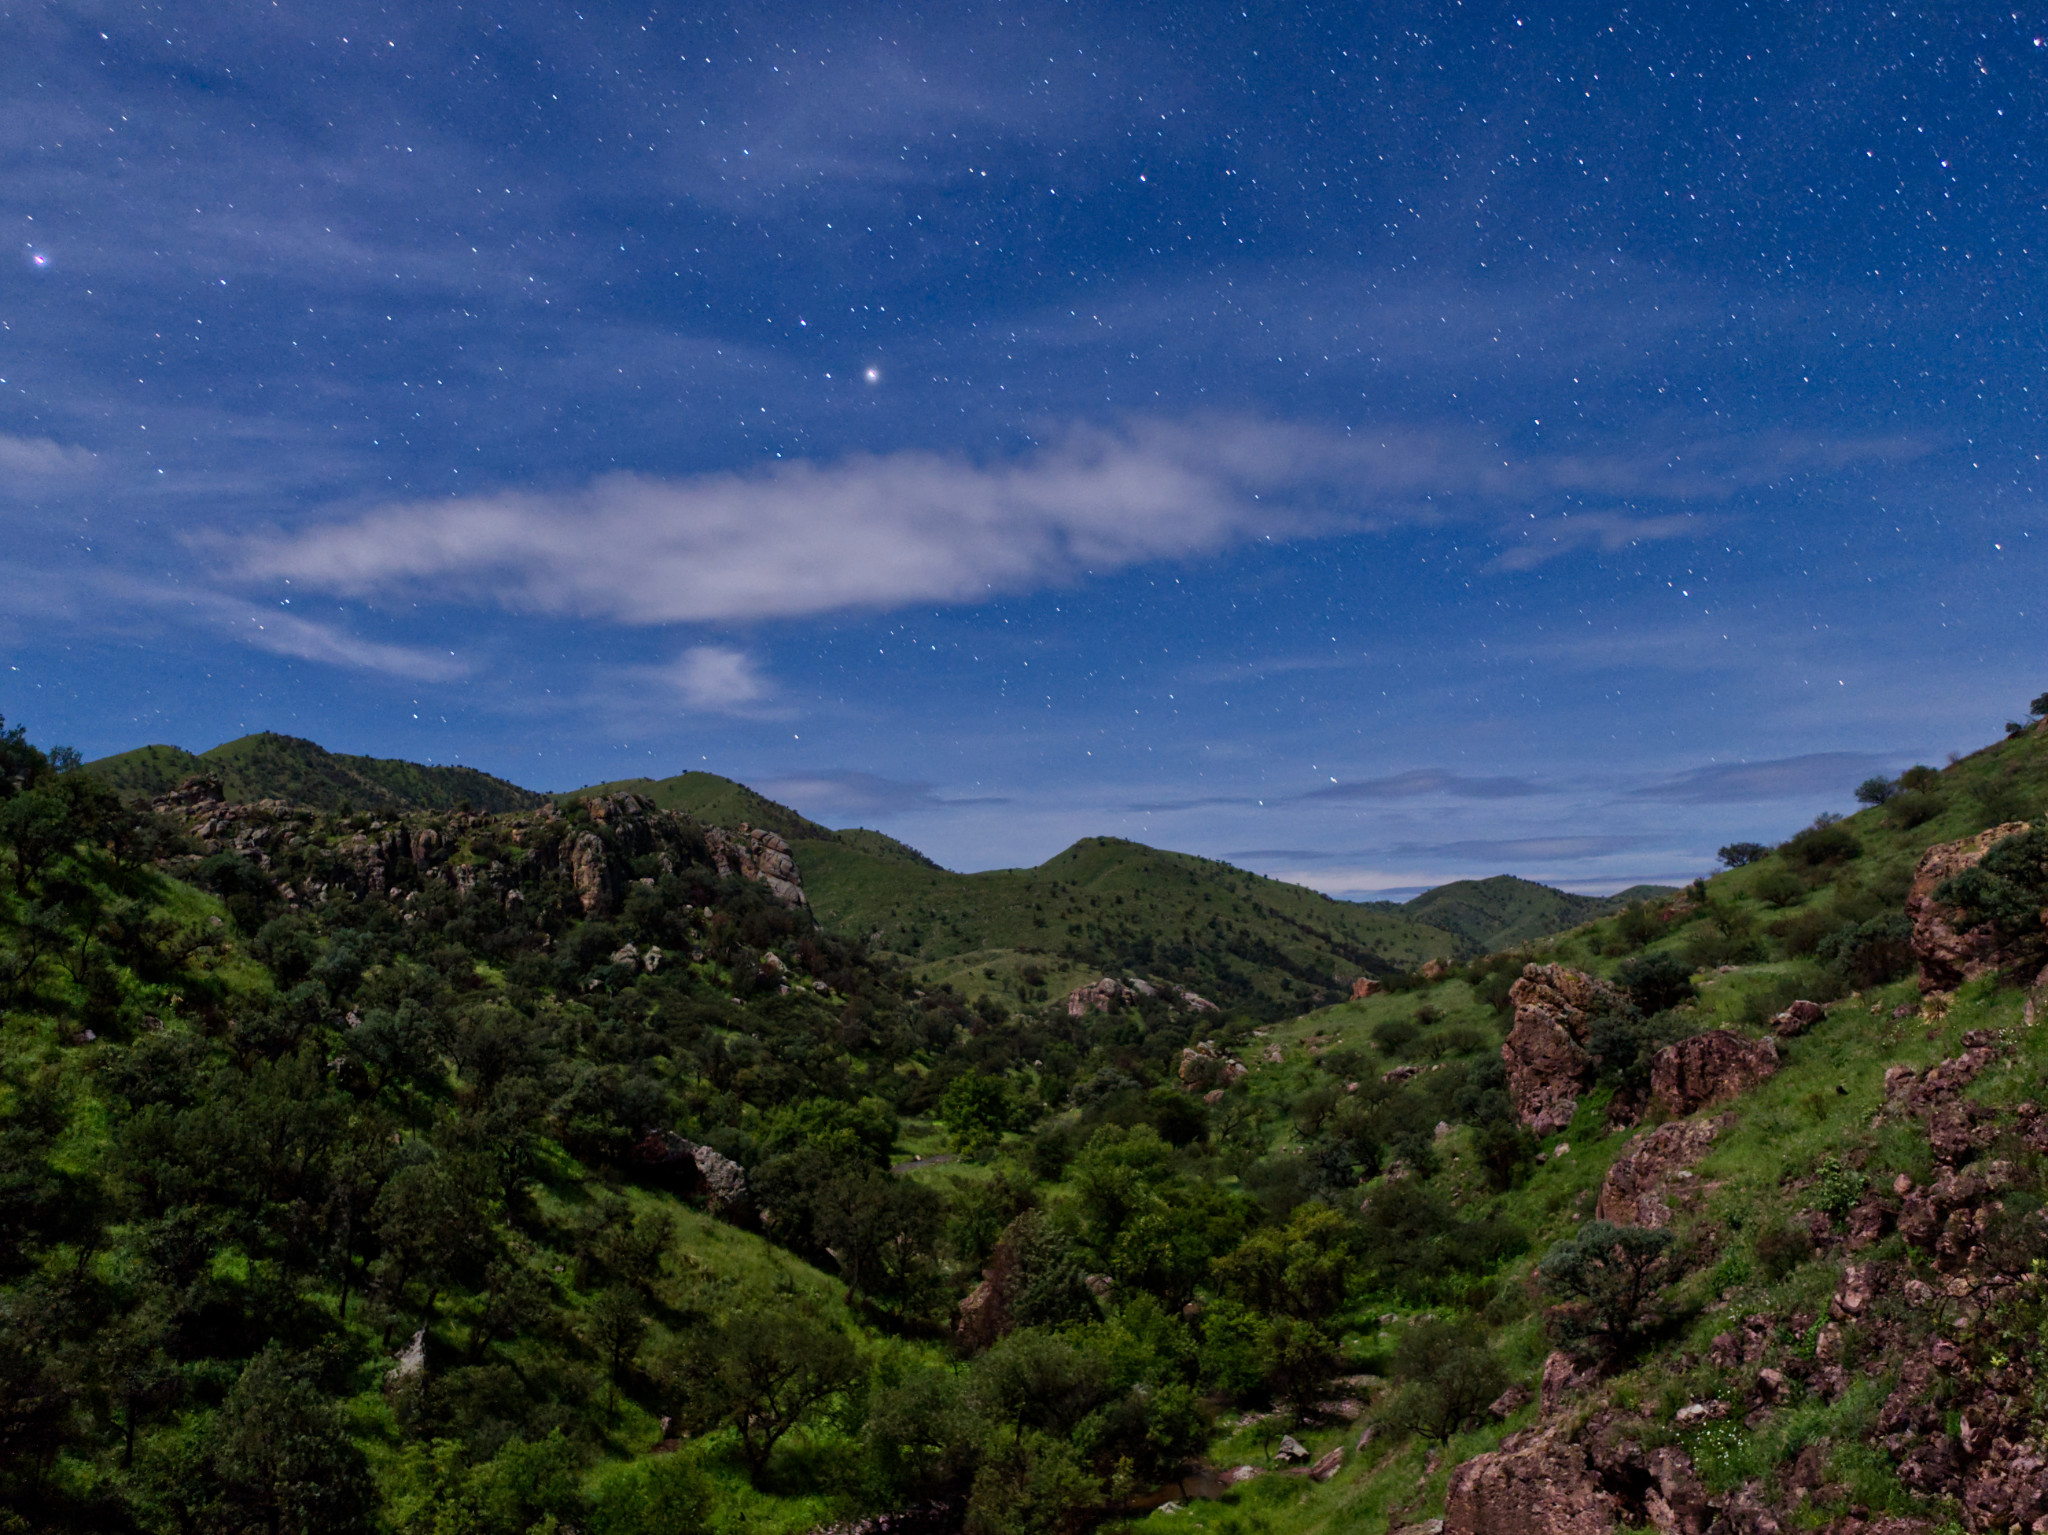
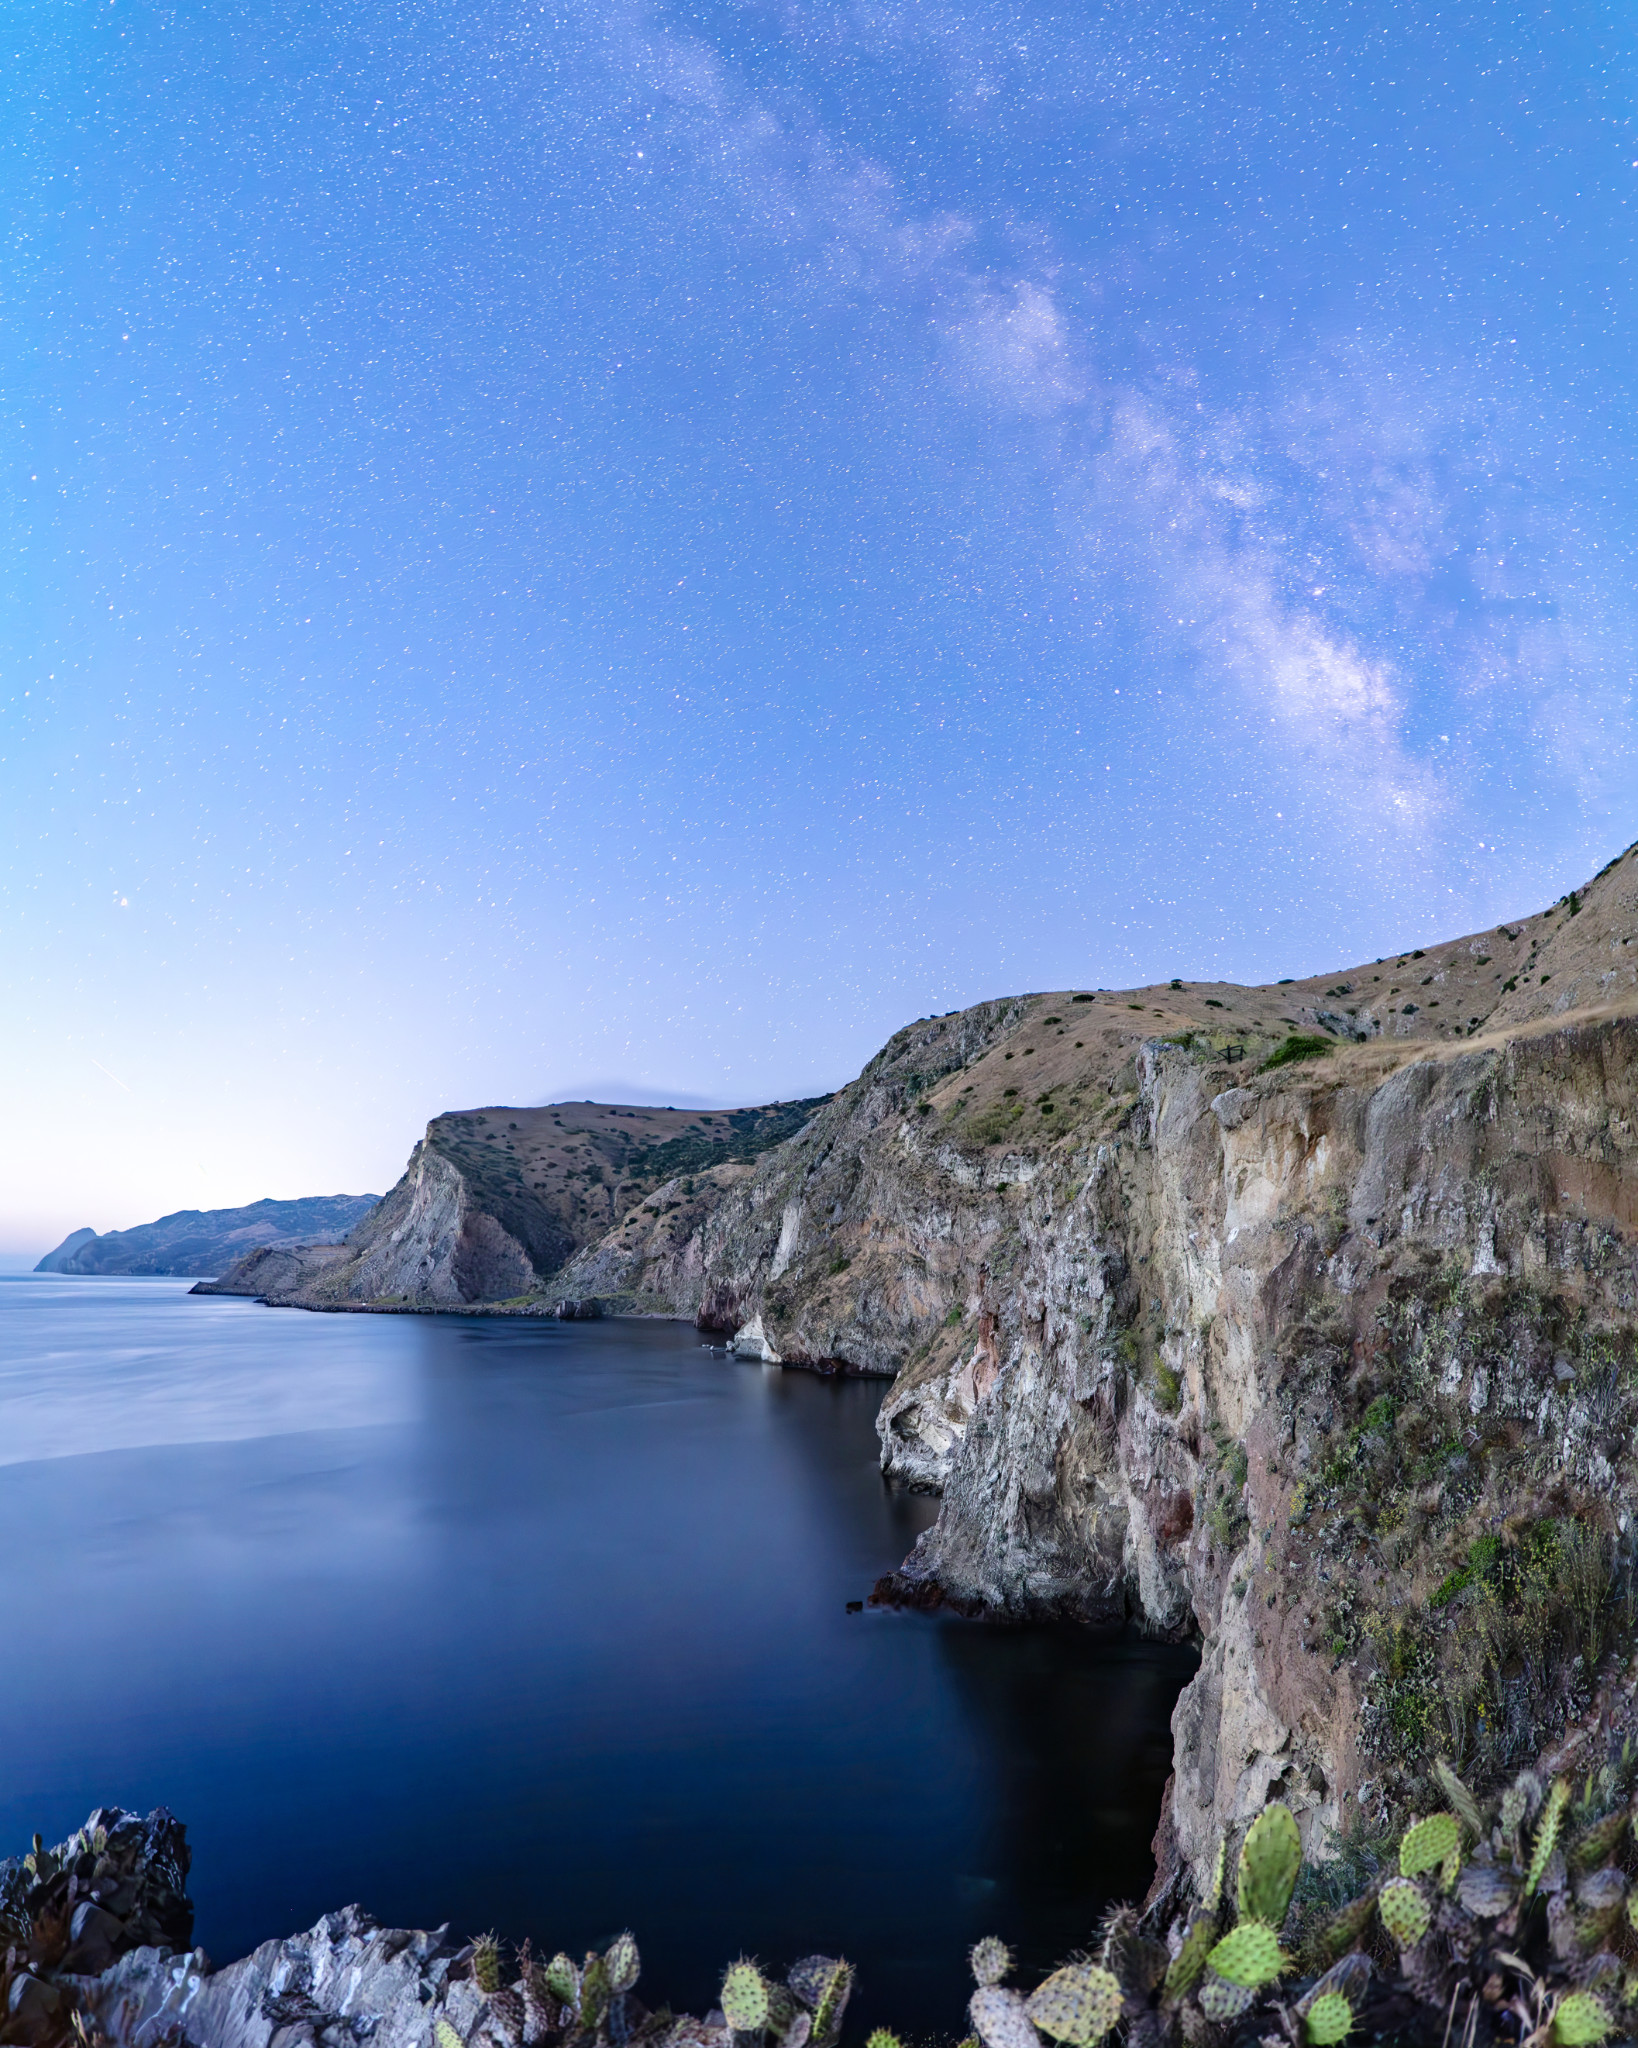
Is Milky Way photography possible with a Micro Four Thirds camera? I can confidently say yes – it is absolutely doable with a Micro Four Thirds camera. Is it ideal, or is it better than other formats? No, I definitely wouldn’t say so. However, it is absolutely worth shooting the Milky Way if you have a Micro Four Thirds camera! In this tutorial, I’ll show you how it’s done, from choosing your lens to making the most of post-processing software.
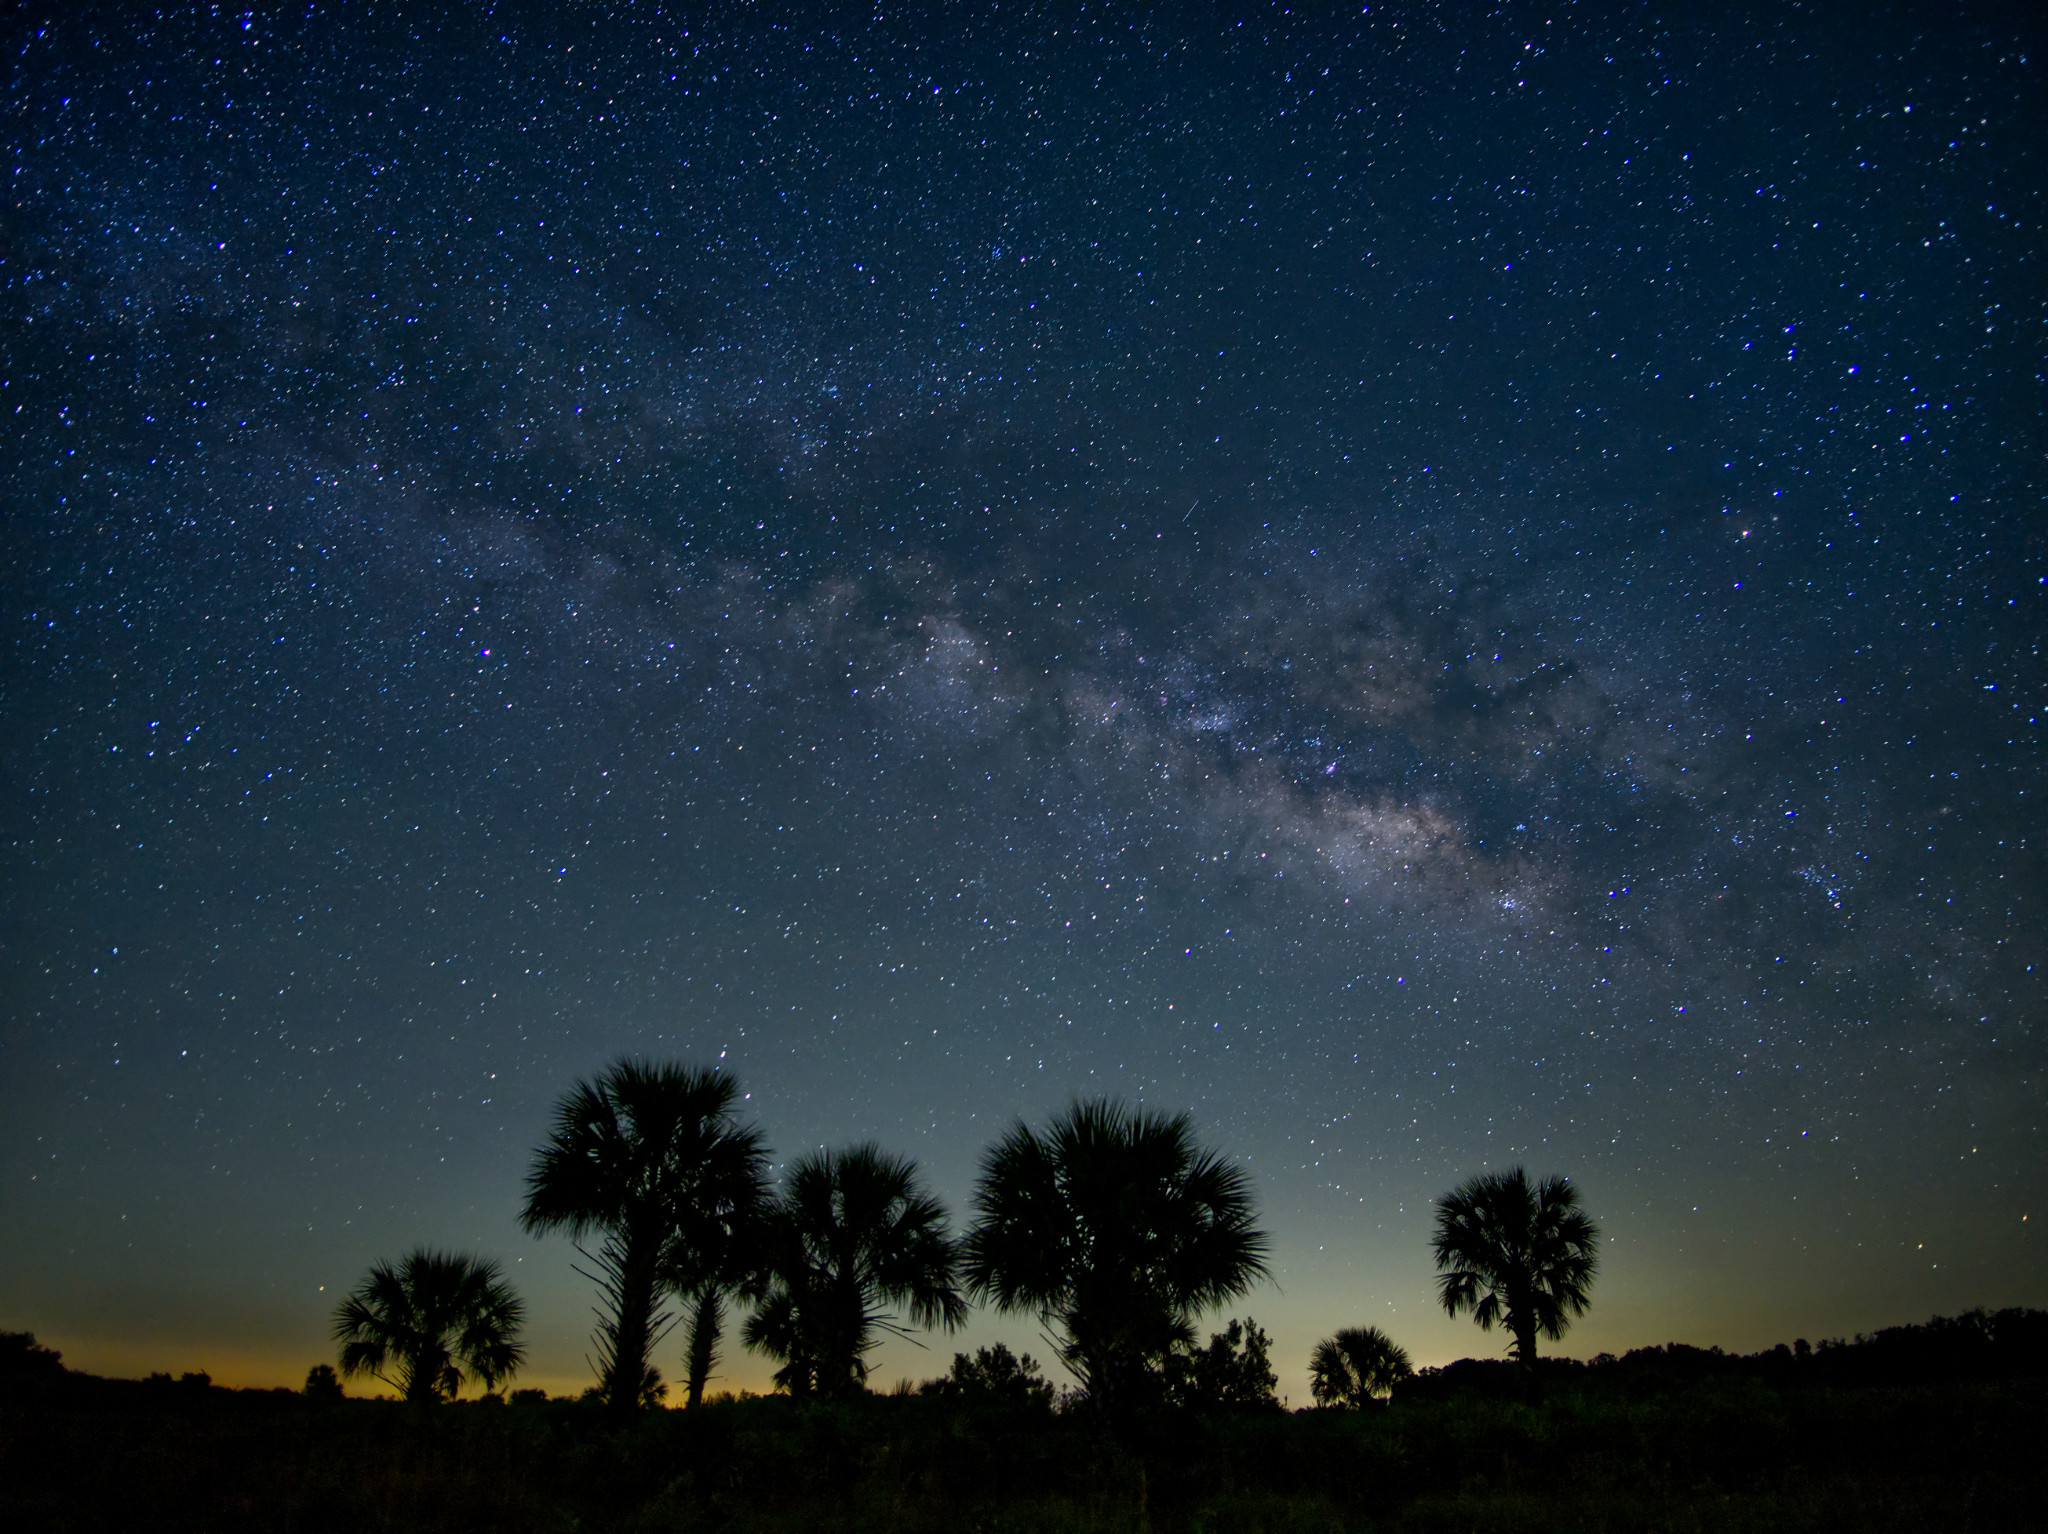
Table of Contents
What is Micro Four Thirds?
Micro Four Thirds is a camera format characterized by its smaller 17.3mm x 13mm sensor size with an aspect ratio of 4:3. The sensor is a quarter of the area of a full frame sensor, and about half the area of an APS-C sensor.
Micro Four Thirds cameras have a crop factor of 2x, which is extremely relevant for astrophotography because it affects both the focal length and the aperture that you’ll need when looking for lenses to optimize the format.
I love Micro Four Thirds for lots of reasons. However, ultra-low light photography is not its strongest point. The Micro Four Thirds format is at an inherent disadvantage to larger sensor sizes like APS-C and full frame, and you’ll see more noise at any given ISO.
Does that mean you can’t get high-quality Milky Way photos with Micro Four Thirds? Absolutely not!
What you need to do in order to get photos like that is simply choose your lens more carefully. Let me give you an example. On full-frame cameras, it’s popular to shoot Milky Way photos with a 14mm f/2.8 lens at ISO values like 3200. But to get the same image quality and perspective on Micro Four Thirds, you would need to shoot a 7mm lens at f/1.4 and ISO 800.
Sadly, there is no such Micro Four Thirds lens. However, you can get close. There’s a Leica 9mm f/1.7, which is what I used for many of the photos in this article. There’s also a 12mm f/1.4, an 8mm f/1.8 fisheye, and a few other lenses that I will list in detail in just a moment.
None of these lenses are quite at the level of a 14mm f/2.8 on full-frame, let alone something like a 14mm f/1.4 on full-frame, but they are close. With modern noise reduction techniques, you can easily use Micro Four Thirds for good Milky Way photos so long as you use an appropriate lens (or so long as you use an image-blending technique, but I’ll discuss that later in this article).
Best Micro Four Thirds Lenses for Astrophotography
At some level, the considerations for a Micro Four Thirds lens are the same as any lens for Milky Way photography. The wider the focal length, the more of the Milky Way band you’ll capture. The wider the maximum aperture, the more light it can gather. For that reason, a wide-angle, wide-aperture lens is usually ideal for shooting the Milky Way.
Below, I’ve compiled a list of the best lenses for astrophotography based on these considerations. In no particular order, these are the best lenses for Micro Four Thirds astrophotography based on my personal experience and research.
Panasonic Leica 9mm f/1.7
Starting with the lens that never leaves my camera bag, the Panasonic Leica 9mm f/1.7 is a great choice for astrophotography because it is both wide and fast. It’s also reasonably priced and has autofocus. Most newer Micro Four Thirds cameras have “starry night AF,” which can automatically focus on the stars. This feature has made my life so much easier, and now it would be hard to go back!
Although it struggles mildly with chromatic aberration and sharpness when completely wide open, it quickly improves when stopped down to f/2.0, which is still quite fast and comfortably sharp. Even shooting it at f/1.8 is enough of an improvement that I will usually do that for Milky Way work.
At 9mm (18mm full-frame equivalent), the focal length is wide enough to capture a comfortable amount of the Milky Way on the horizon, although it’s not the widest lens on this list. On balance, though, this is probably the top Micro Four Thirds lens for photographing the Milky Way.
Pros:
- Good combination of wide and fast
- Autofocus
- Reasonably priced at $500 (check current price)
Cons:
- Struggles a bit in corner sharpness at f/1.7
Panasonic Leica Summilux 12mm f/1.4
The Panasonic Leica Summilux 12mm f/1.4 is an ultra-fast, ultra-sharp, and pricy lens for the Micro Four Thirds system. It’s sharp at f/1.4, which makes it a tempting choice for astrophotography.
However, in my experience at 12mm (24mm equivalent), it was simply too narrow of a lens for general-purpose Milky Way photography. If you’re willing to make panoramas, it is definitely workable. However, I’d want a wider lens for frequent Milky Way photography.
Pros:
- Very fast lens
- Sharp even at maximum aperture
- Autofocuses
Cons:
- Narrow field of view
- Pricy at $1300
Panasonic Leica Summilux 15mm f/1.7
The Panasonic Leica Summilux 15mm f/1.7 is another fast lens, though even narrower and not quite as sharp as the 12mm f/1.4 that I just mentioned. However, it’s less expensive at about $600 new.
Since this price is similar to the Panasonic 9mm f/1.7 (actually a bit more expensive), I see little reason to go for this if you’re buying a Milky Way lens from scratch. However, if you already own the 15mm f/1.7, you can still use it for Milky Way photography – especially if you make some panoramas to get a wider field of view.
Pros:
- Fast
- Reasonable price
- Autofocus
Cons:
- Too narrow of a field of view
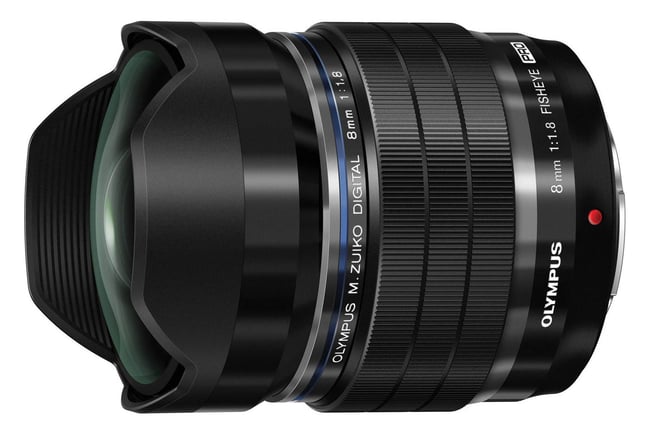
Olympus 8mm f/1.8 PRO Fisheye Lens
This is a lens I’ve had my eye on for a while because of its very wide field of view and fast aperture combination. As a fisheye lens, it may not fit everyone’s style. This lens is even wider than the Panasonic Leica 9mm f/1.7, and is has nearly the same maximum aperture.
As an Olympus PRO lens I have little concern about its optical performance. It is also an autofocusing lens, so you can work with Starry Night AF. As a fisheye lens, it comes with a stylistic choice that won’t be right for everyone, however. And at $1000-1100 depending on sales, it’s pretty pricy.
Pros:
- Good combo of fast and wide
- Autofocus
Cons:
- Fisheye (if you don’t like warping)
- Fairly expensive
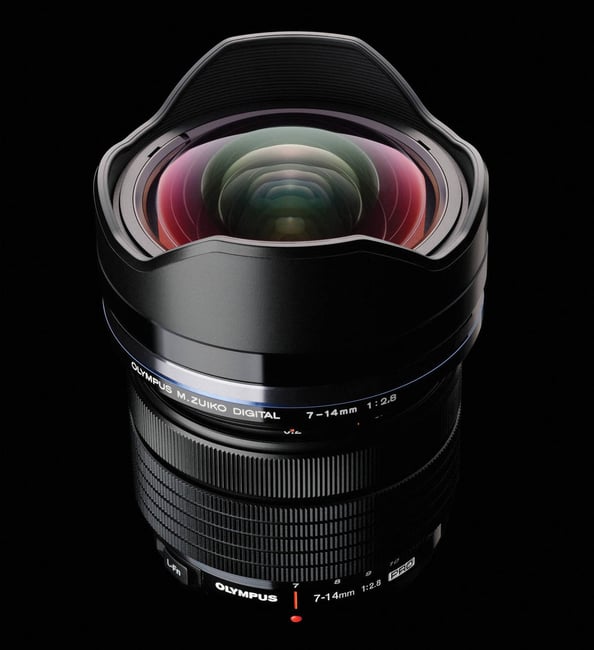
Olympus 7-14mm f/2.8 PRO
You sacrifice some light here for an ultra-wide angle lens. Shooting the Milky Way at f/2.8 isn’t ideal on Micro Four Thirds – it will necessitate higher ISOs like 1600 or 3200, where the image quality leaves something to be desired.
That said, the ultra-wide angle of this lens could be worth it. On one hand, it has major implications for capturing star trails with Olympus Live Composite, which doesn’t require nearly as wide an aperture. Additionally, if you don’t mind using the star stacking technique I discuss in a minute, you can get excellent low-light image quality even without an f/1.4 or f/1.8 lens.
Pros:
- Very wide field of view (widest on the list)
- Zoom lens for versatility
- Autofocus
Cons:
- Slowest aperture on this list
- Expensive at $1200-1400 depending on sales
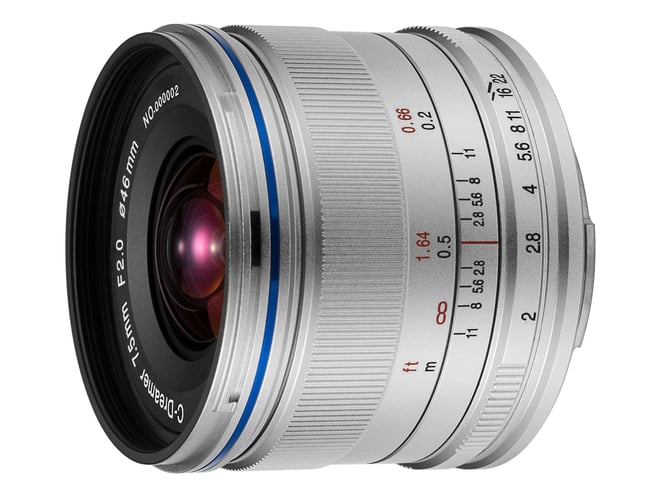
Laowa 7.5mm f/2.0
This is one of the most popular choices for Micro Four Thirds shooters who enjoy astrophotography. With a 15mm equivalent focal length, it offers a 100-degree field of view. Not to mention that the f/2 maximum aperture is nice and bright – not quite as good as f/1.4, f/1.7, or f/1.8, but very usable. At $400-500 depending on sales, it’s also one of the cheapest lenses on this list!
The big box it doesn’t tick is that it’s a fully-manual lens. Also, in terms of image quality, its reputation is mixed. In particular, at f/2, it has some heavy vignetting and some coma issues that could impact Milky Way photos. It’s not a fatal flaw, especially for an inexpensive lens, but that’s part of why I lean toward the similarly-priced Panasonic Leica 9mm f/1.7 if you’re choosing between them.
Pros:
- Both wide and fast
- Budget friendly
Cons:
- All manual lens
- Some vignetting and coma issues at f/2
Let me know in the comments if I missed any other Micro Four Thirds Lenses that are good choices for Milky Way photography, but these are the ones that stand out to me the most.
Advanced Milky Way Photography Techniques
The following techniques will help you get more out of your Micro Four Thirds setup and remove some of the image quality limitations. They are by no means unique to M43, but because Milky Way photography is pushing the limitations of the system, it’s especially worth learning them.
1. Panoramas
I often find myself not capturing as much of the Milky Way as I’d like to with my Micro Four Thirds camera, mainly because my preferred lens is “only” 9mm (18mm full-frame equivalent). It’s wide, but not ultra-ultra-wide.
To get around this, I’ve gotten into the habit of stitching together multi-image panoramas to capture more of a scene. Making these panoramas also yields a final image with a higher resolution – and at a given print size, you don’t need to enlarge the photo as much, so it also hides some of the image noise. (If you haven’t read Nasim Mansurov’s guide to making a panorama, you should do so!)
When shooting the Milky Way, I find shooting a vertical panorama is easiest. My method is to compose and focus how I want the bottom half of my shot to look. Then I switch to manual focus and manual mode to keep all the settings the same for every shot. I take a photo, tilt the camera upwards, and take another photo. I usually repeat this one more time, for three total photos. I make sure that each image overlaps by at least 1/3 in order to stitch them easily later.
If I want my final photo to be in landscape orientation instead of portrait, I use the same method but rotated 90 degrees. In other words, I take my three individual shots vertically, moving left to right to ultimately make a landscape image.
I suggest working quickly so that the Milky Way and any clouds don’t move position too much between photos, which can make the stitching look funky. Finally, I also recommend leaving some extra breathing room around the edge of your composition, since you will likely need to crop the stitched panorama to remove blank areas around the edge of the canvas.
2. Star Stacking to Improve Low-Light Performance
An advanced night sky photography technique involves taking several images of the Milky Way from the same tripod position, then using software that combines them to “average them out” which can eliminate a lot of noise, and boost the amount of detail in the stars.
With this technique, it’s even possible to get photos from point-and-shoot cameras or even smartphones that have high-quality stars. It’s an excellent technique to pair with Micro Four Thirds, especially if your lens has an f/2.8 maximum aperture or narrower.
Read Spencer Cox’s article on star stacking and image averaging for a detailed description of the process.
3. Using a Star Tracker
In theory, you can get extremely high image quality with any camera system by using a star tracker to follow the movement of the stars across the night sky. Combine that with very long exposures (several minutes long), and you can use low ISO values without a problem.
However, star trackers are heavy and expensive. They go against many of the reasons to shoot Micro Four Thirds in the first place. If you have the budget for a star tracker, I would spend it on a better lens or on image-averaging software instead… or even on a full-frame camera, even though it pains me to say it!
4. Modern Noise Reduction Software
Post-processing software today has gotten so good that high ISO values are more usable than ever before. I still try to keep my ISO low whenever possible, but shooting at ISO 800 or 1600, if not higher, no longer worries me like it used to.
Jason Polak wrote an article on the most modern noise reduction tools today, including some machine-learning tools that do a much better job than classic noise reduction algorithms. If you use Adobe Lightroom, their relatively new “Denoise” dialog has these incredible algorithms built in. If you don’t use Lightroom, you can find separate, paid noise reduction software from DxO and Topaz that are similarly good.
Micro Four Thirds Computational Photography Modes
One big selling point of the Micro Four Thirds format is the abundant computational photography modes the cameras offer. Most notably for Milky Way photography, Olympus has a live composite and high resolution mode.
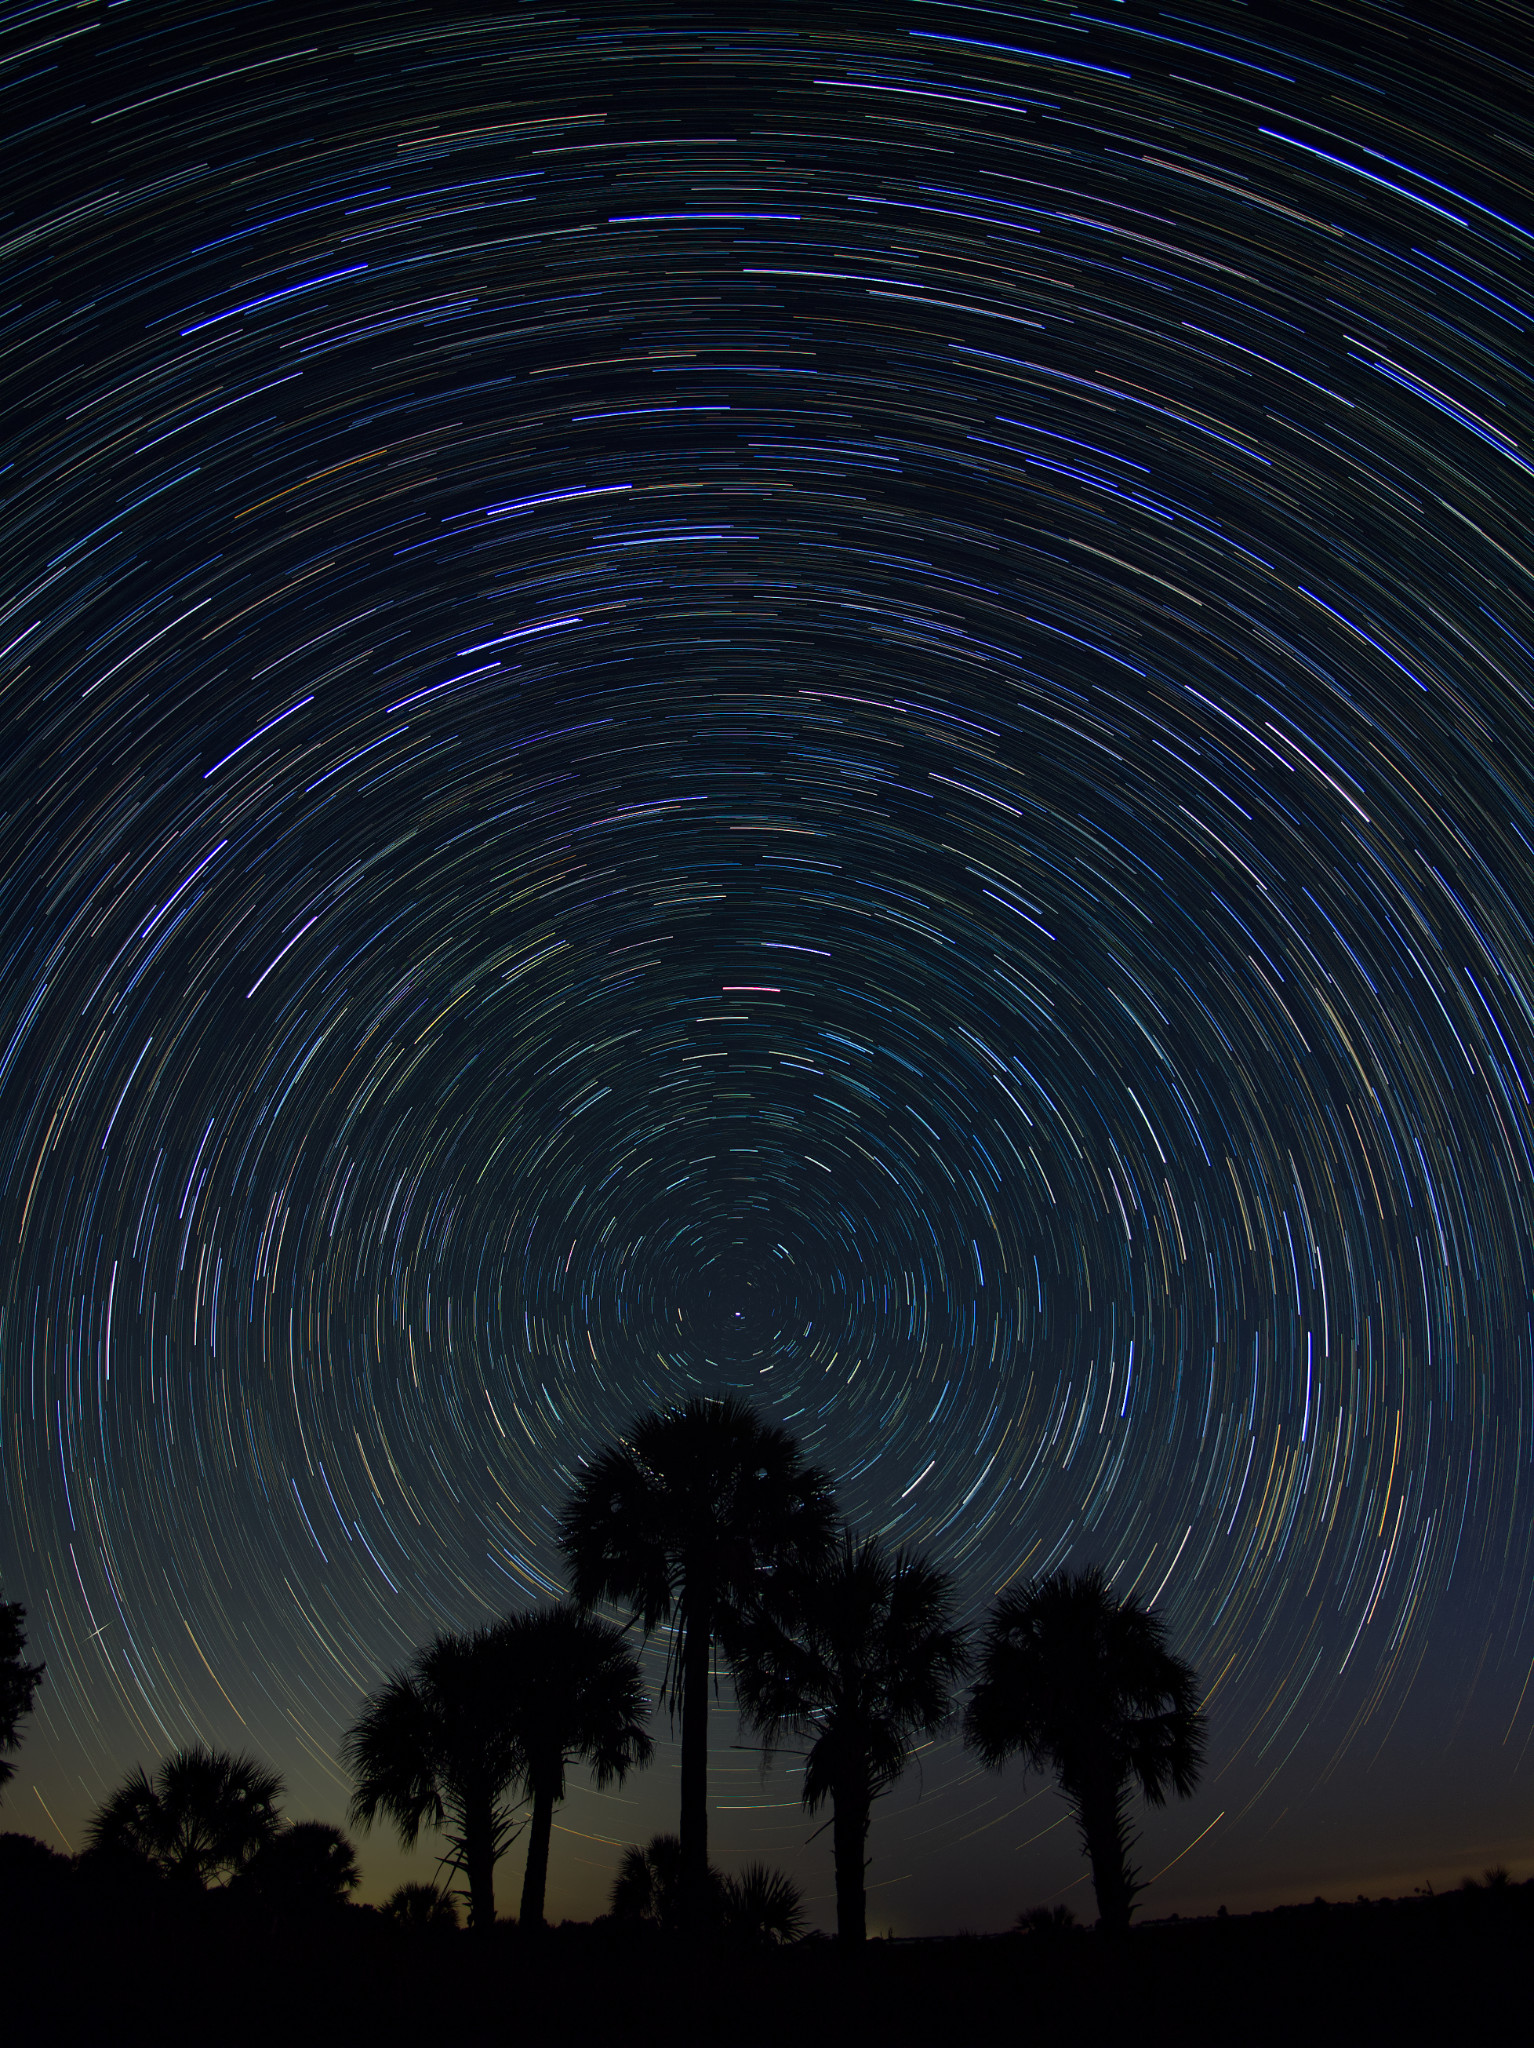
Star Trails with Olympus Live Composite
One major advantage Olympus/OM System cameras have over others is the Live Composite feature that makes star trail photography nice and easy. Essentially, Live Composite is a computational photography mode that captures great long-exposure images by combining multiple exposures in real time.
By continuously capturing long exposures and blending the brighter parts of each image, Olympus Live Composite allows you to capture the dynamic change in light of a prolonged long exposure, without overexposing the image. It also lets you see the image forming on the camera’s LCD screen as it progressively builds up over time.
The time limit for Live Composite is 3 hours, which is enough for extremely long star trails. It’s all in camera, no post-processing necessary. I think this makes Micro Four Thirds one of the best systems out there for star trail photography, so long as your camera has the Live Composite feature.
High Resolution Mode for Astrophotography
Another computational photography mode available in some Micro Four Thirds cameras is High Resolution mode. This mode takes several images in rapid succession while shifting the sensor slightly, then blends them together to create a massive 80MP image. In most cases, high res mode is beneficial because it increases detail and performance in low light by reducing noise.
The issue for astrophotography is that because it combines up to 8 images, if each exposure is 30s, then you’re dealing with a 4 minute exposure time. As a result the stars will appear streaky, taking away from the shot.
I explored by shortening the exposure length of the individual shots (so that in total they add up to 30s) and boosting the ISO to make up for the shorter shutterspeed. My hope was that even though I was shooting at a much higher ISO, that the beauty of high res mode would kick in and reduce the noise so much that it surpassed the regular shot. I found that foreground detail was improved, however the sky looked sharper in the normal shot.
Future Possibilities
I wonder if OM system will implement some type of star tracking stabilization in the future. This would be especially helpful if combined with the High Resolution mode. For example, they could analyze the position of the stars and combining them in software (basically, in-camera star stacking), or it could be done by physically moving the sensor.
I have no idea what I’m talking about technology wise, but it seems feasible, and we’ve already seen something similar from Pentax. This would have the potential to seriously improve the astrophotography experience for Micro Four Thirds shooters.
We did find out recently that OM System patented star tracking sensor shifting technology, so it looks like we may very well see something like this down the line.
Conclusion
I hope this article assures any Micro Four Thirds photographer that Milky Way photography is still possible! All it takes is the right lens and/or some finesse with post-processing. Despite the smaller sensor and all the disadvantages that come with it, there is no reason to refrain from doing night sky photography on Micro Four Thirds. Never let your camera limit you – just work around the limitations in any way you can!
You forgot the Laowa 6mm f2. Optically superior to the 7.5mm and around the same price.
Very good article to provide an in-depth overview, especially for those who are planning their first steps into Milky Way photography!
Besides the 8mm Fisheye I have used the 7-14mm f2.8 and the Laowa 6mm f2.0 on my OM-1. Even with image stacking (~10-20 images) my clear favorite is the fisheye lens. Its huge FoV, very good corner to corner sharpness even wide open (the other lenses tend to distort towards the corners) and overall clarity clearly makes it my top choice of these three lenses. Unwarping fisheye curvatures is a bit fiddly if you do it for the first time, but you’ll quickly get an idea where to drag and pull the grid points to make the foregound look rectangular.
Definitely possible and worthwhile, and I’ve been doing it for a while. For the doubters, there is a dedicated M43 Astro group on Facebook for inspiration. I went to a rural Australian observatory with my photography club last week and took two Nikon bodies plus two Olympus M43 bodies. One Nikon is full spectrum (with an external H-Alpha filter), and one of my Olympus bodies is Astro-converted (also sensitive to H-Alpha). Honestly, I got great shots on all of them.
For the M43 I used two of the lenses you reviewed namely the Laowa 7.5mm f2 on the Astro-converted Oly (had no vignetting issues), and the Panasonic 12mm f1.4 on the non-Astro Oly. I have also tried my Panasonic 12-35mm f2.8.
I haven’t tried my Laowa 4mm Fisheye or my Olympus 7-14mm zoom, maybe next time. In theory the Oly zoom should be better than the Panny zoom, but filtering is a problem with the Oly zoom (eg if you need H-Alpha, noise pollution or special effect filters).
For me, the biggest problem is focusing in the dark, but I am getting the hang of it. I use DxO to kill the noise, and some Photoshop plugins to pull out the detail and modify the colours.
Hi !
If you have trouble focusing
During the night photo
That is, two solutions:
1. Lenses with manual focus, for example: Samyang 12mm/f2 or Laowa 6mm/f2
they have normal distance scale.
2. Can be used Fuji X cameras
they have normal distance scale on the screen (including infinity mark)
@Vital I am using manual everything anyways. :) I wouldn’t trust AF or auto exposure with Astro. The problem is in the eyesight, making sure the little lights are sharp :( But I have figured out a trick.
With converted cameras it is even harder, because focus has been calibrated during conversion, so infinity is NOT at the infinity mark, it is somewhere else.
For readers who are interested, Wikipedia has an article about H‑alpha (Hα). See especially the section entitled Filter:
en.m.wikipedia.org/wiki/H-alpha
I am still working on better ways of post-processing with H-Alpha, haven’t got it perfect yet. But I like the way my Photoshop plugins render the colour.
I have not tried this myself, but I recently saw a post on Facebook where the photographer made a 15-second exposure using *handheld* high-res on the Olympus, *but with a tripod.* The idea was that the in-camera processing used for handheld high-res would align the stars, while the multiple exposures inherent in the high-res mode would lessen the noise. His results, at least on Facebook, looked impressive.
Yes, this definitely can work! There are many references on YouTube, et al.
You can, but unless you only can get a, or have only a micro 4/3 camera why? I have shot the milky way in Bortle 7 skies just to prove I COULD do it, but it will never look as good as my shots from Bortle 2 skies. Same for the 4/3’s. Sure, it CAN be done, but if you can swing a FF camera and reasonably fast wide angle lens your images will be way nicer.
The other day, someone asked me what I recommend as a cheap but top-quality entry into Milky Way photography. I suggested the Canon RF 16mm f/2.8 with a used EOS R full-frame camera, with the EOS RP being the cheapest – total of about $1000 for the combo. An even cheaper option would be a used full-frame DSLR like the Nikon D600 with a cheap lens like a Samyang 14mm f/2.8 (not a great lens, though) – maybe $600 in total for the combo.
Even the DSLR kit I just mentioned is still expensive if you’re on a budget and don’t expect to do Milky Way photography all the time. I think a lot of Micro Four Thirds shooters should just stick with what they have and use techniques like image averaging to get high image quality, then later buy into full-frame if Milky Way becomes a more common subject for them.
I agree, to a point. Basically you are advocating using the wrong tool for the job in this article. Yes, I can use a screw driver as a pry bar but in the end it won’t do a great job and will take more work. The techniques you describe are used even with FF mill way photography. I appreciate the idea, and willingness to try. As I said, I tried getting MW shots in Botle 7 area and did. It CAN be done, doesn’t mean it is a greta way to do it.
I don’t think Nicholas was advocating for it, as he even starts the article by saying “Is [Micro Four Thirds for astrophotography] ideal, or is it better than other formats? No, I definitely wouldn’t say so.”
Mainly, he was showing how to do it and what equipment helps if this is the tool you have.
I take your point that full-frame is preferable if you have access to it, and of course I agree :)
“Basically you are advocating using the wrong tool for the job in this article.”
As I’ve mentioned before, the right tools for the job are terrestrial telescopes and space telescopes.
“way nicer” is strong statement, I would say technically little better – if you know how to use advantages of m43 of course
If you’re backpacking, every pound matters. There are times I regret getting into a full-frame-first ecosystem, and usually that’s when I’ve got 15 pounds of camera gear on top of another 20+ pounds of gear, food, and water.
Micro-four-thirds has a place. Small size is useful. And the IBIS they can get away with for that tiny sensor is impressive. It overall tends to be much less expensive than their larger, heavier counterparts.
Or why not just go large format for the better quality?
Hi !
Not bad, although tracking and artifacts are visible everywhere.
I’m sure you can shoot better with a micro :)
I used to shoot a lot with this system.
www.astrobin.com/users/Vital/
Hey Nicholas! You got some very nice images with your micro four thirds gear! It just goes to show that if you put in the effort you can get great results with any camera. Nice…I think I’ll try this myself soon.
Jason, you and Nicholas have clearly demonstrated via your articles that the Micro Four Thirds system is more than adequate for the vast majority of photographic needs. If I was still able to use cameras, I would retire my full-frame gear and buy an OM System OM‑1 with some nice lenses.
Many thanks to you both for your educational and enjoyable articles.
I appreciate that very much, Pete!
Much appreciated, Pete!